Abstract Window ToolKit
Java AWT is an API that contains large number of classes and methods to create
and manage graphical user interface ( GUI ) applications.
The AWT was designed to provide a common set of tools for GUI design that
could work on a variety of platforms.
AWT was Java’s first GUI Framework.
AWT is the foundation upon which Swing is made i.e Swing is a improved GUI
API that extends the AWT.
3.
AWT
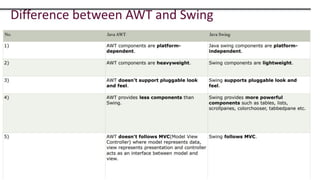
Java AWTcomponents are platform-dependent i.e. components are displayed according to
the view of operating system.
AWT is heavy weight i.e. its components are using the resources of underlying operating
system (OS)
Java AWT components are platform-dependent i.e. components are displayed according to
the view of operating system.
The java.awt package provides classes for AWT API such as TextField, Label, TextArea,
RadioButton, CheckBox, Choice, List etc.
Components
All theelements like the button, text fields, scroll bars, etc. are called
components.
In Java AWT, there are classes for each component as shown in
above diagram.
In order to place every component in a particular position on a
screen, we need to add them to a container.
6.
Container
The Containeris a component in AWT that can contain another components like buttons,
textfields, labels etc.
The classes that extends Container class are known as container such as Frame, Dialog and
Panel.
It is basically a screen where the components are placed at their specific locations.
Thus it contains and controls the layout of components.
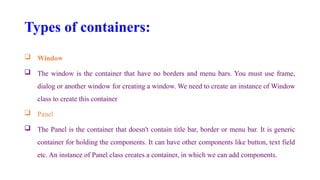
Types of containers:
Window
The window is the container that have no borders and menu bars. You must use frame,
dialog or another window for creating a window. We need to create an instance of Window
class to create this container
Panel
The Panel is the container that doesn't contain title bar, border or menu bar. It is generic
container for holding the components. It can have other components like button, text field
etc. An instance of Panel class creates a container, in which we can add components.
9.
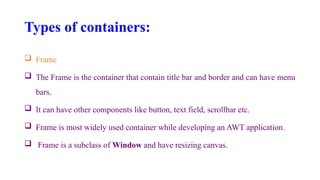
Types of containers:
Frame
The Frame is the container that contain title bar and border and can have menu
bars.
It can have other components like button, text field, scrollbar etc.
Frame is most widely used container while developing an AWT application.
Frame is a subclass of Window and have resizing canvas.
10.
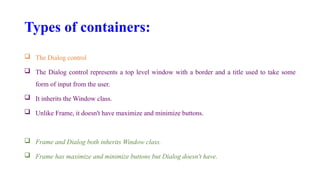
Types of containers:
The Dialog control
The Dialog control represents a top level window with a border and a title used to take some
form of input from the user.
It inherits the Window class.
Unlike Frame, it doesn't have maximize and minimize buttons.
Frame and Dialog both inherits Window class.
Frame has maximize and minimize buttons but Dialog doesn't have.
11.
Creating a Frame
Thereare two ways to create a Frame. They are,
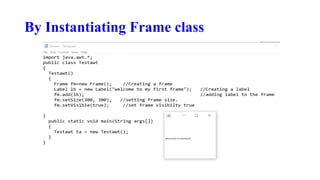
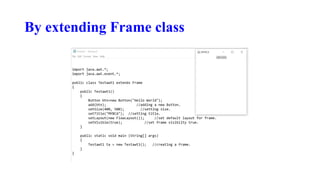
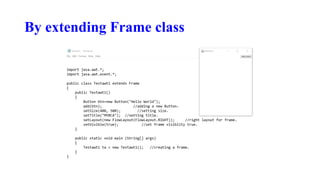
By Instantiating Frame class
By extending Frame class
12.
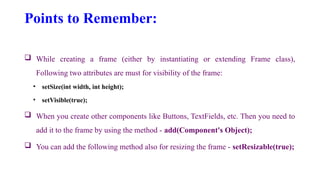
Points to Remember:
While creating a frame (either by instantiating or extending Frame class),
Following two attributes are must for visibility of the frame:
• setSize(int width, int height);
• setVisible(true);
When you create other components like Buttons, TextFields, etc. Then you need to
add it to the frame by using the method - add(Component's Object);
You can add the following method also for resizing the frame - setResizable(true);
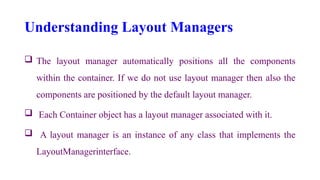
Understanding Layout Managers
The layout manager automatically positions all the components
within the container. If we do not use layout manager then also the
components are positioned by the default layout manager.
Each Container object has a layout manager associated with it.
A layout manager is an instance of any class that implements the
LayoutManagerinterface.
17.
Understanding Layout Managers
The layout manager is set by the setLayout( ) method.
If no call to setLayout( ) is made,then the default layout manager is used.
Whenever a container is resized (or sized for the first time), the layout
manager is used to position each of the components within it.
The setLayout( ) method has the following general form:
void setLayout(LayoutManager layoutObj)
18.
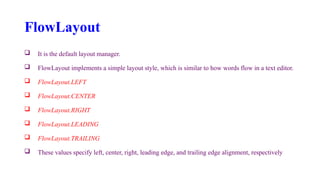
FlowLayout
It isthe default layout manager.
FlowLayout implements a simple layout style, which is similar to how words flow in a text editor.
FlowLayout.LEFT
FlowLayout.CENTER
FlowLayout.RIGHT
FlowLayout.LEADING
FlowLayout.TRAILING
These values specify left, center, right, leading edge, and trailing edge alignment, respectively
19.
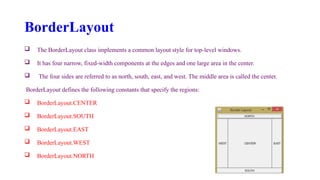
BorderLayout
The BorderLayoutclass implements a common layout style for top-level windows.
It has four narrow, fixed-width components at the edges and one large area in the center.
The four sides are referred to as north, south, east, and west. The middle area is called the center.
BorderLayout defines the following constants that specify the regions:
BorderLayout.CENTER
BorderLayout.SOUTH
BorderLayout.EAST
BorderLayout.WEST
BorderLayout.NORTH
20.
AWT Control Fundamentals
The AWT supports the following types of controls:
These controls are subclasses of Component.
• Labels
• Buttons
• Check boxes
• Check box groups
• Choice control
• Lists
• Scroll bar
• Text field
• Text area
21.
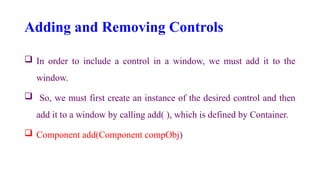
Adding and RemovingControls
In order to include a control in a window, we must add it to the
window.
So, we must first create an instance of the desired control and then
add it to a window by calling add( ), which is defined by Container.
Component add(Component compObj)
22.
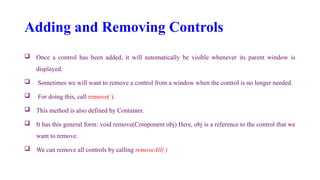
Adding and RemovingControls
Once a control has been added, it will automatically be visible whenever its parent window is
displayed.
Sometimes we will want to remove a control from a window when the control is no longer needed.
For doing this, call remove( ).
This method is also defined by Container.
It has this general form: void remove(Component obj) Here, obj is a reference to the control that we
want to remove.
We can remove all controls by calling removeAll( )
23.
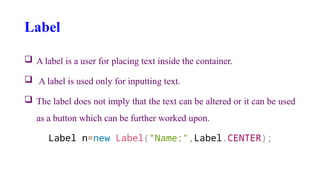
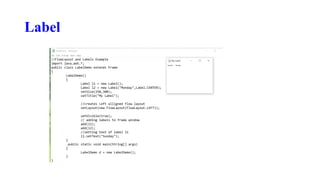
Label
A labelis a user for placing text inside the container.
A label is used only for inputting text.
The label does not imply that the text can be altered or it can be used
as a button which can be further worked upon.
Label n=new Label("Name:",Label.CENTER);
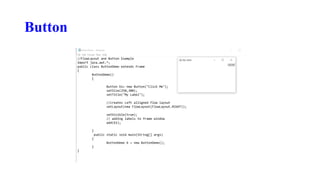
Button
This commandgenerates a button in the User Interface.
Clicking on the button would move the command to another page or
another web server which is used to show several other outputs in the
user interface page.
a1=new Button("submit");
a2=new Button("cancel");
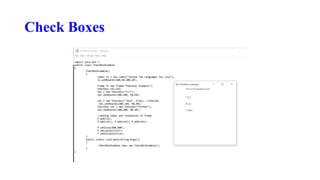
Check Boxes
Acheck box is a control that is used to turn an option on or off. It consists of a small box
that can either contain a check mark or not.
There is a label associated with each check box that describes what option the box
represents.
We change the state of a check box by clicking on it. Check boxes can be used individually
or as part of a group.
Check boxes are objects of the Checkbox class
Checkbox checkbox1 = new Checkbox("Hello World");
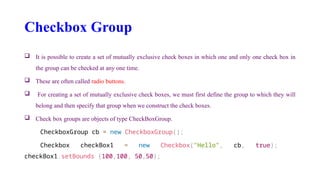
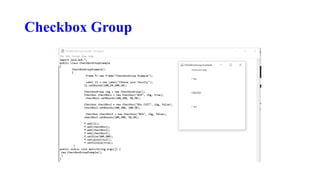
Checkbox Group
Itis possible to create a set of mutually exclusive check boxes in which one and only one check box in
the group can be checked at any one time.
These are often called radio buttons.
For creating a set of mutually exclusive check boxes, we must first define the group to which they will
belong and then specify that group when we construct the check boxes.
Check box groups are objects of type CheckBoxGroup.
CheckboxGroup cb = new CheckboxGroup();
Checkbox checkBox1 = new Checkbox("Hello", cb, true);
checkBox1.setBounds (100,100, 50,50);
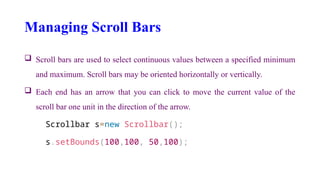
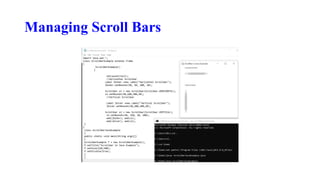
Managing Scroll Bars
Scroll bars are used to select continuous values between a specified minimum
and maximum. Scroll bars may be oriented horizontally or vertically.
Each end has an arrow that you can click to move the current value of the
scroll bar one unit in the direction of the arrow.
Scrollbar s=new Scrollbar();
s.setBounds(100,100, 50,100);
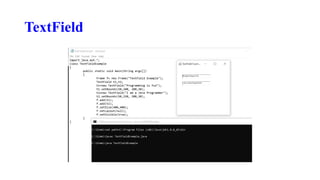
TextField
The TextFieldclass implements a single-line text-entry area, usually
called an edit control.
Text fields allow the user to enter strings and to edit the text using
the arrow keys, cut and paste keys, and mouse selections.
na=new TextField(“my name”);
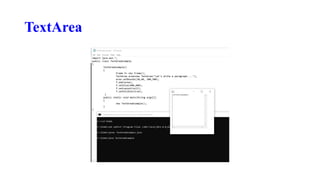
TextArea
Sometimes asingle line of text input is not enough for a given task.
To handle these situations, the AWT includes a simple multiline
editor called TextArea.
TextArea area=new TextArea("Welcome to the
universe");
area.setBounds(10,30, 300,300);
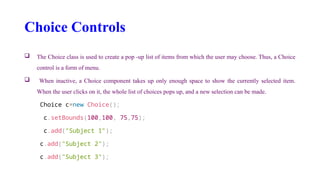
Choice Controls
TheChoice class is used to create a pop -up list of items from which the user may choose. Thus, a Choice
control is a form of menu.
When inactive, a Choice component takes up only enough space to show the currently selected item.
When the user clicks on it, the whole list of choices pops up, and a new selection can be made.
Choice c=new Choice();
c.setBounds(100,100, 75,75);
c.add("Subject 1");
c.add("Subject 2");
c.add("Subject 3");
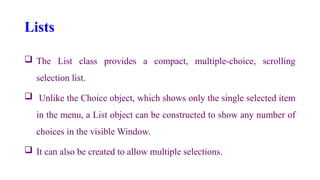
Lists
The Listclass provides a compact, multiple-choice, scrolling
selection list.
Unlike the Choice object, which shows only the single selected item
in the menu, a List object can be constructed to show any number of
choices in the visible Window.
It can also be created to allow multiple selections.
Menu Bars andMenus
A top-level window can have a menu bar associated with it.
A menu bar displays a list of top-level menu choices.
Each choice is associated with a drop-down menu.
This concept is implemented in the AWT by the following classes:
MenuBar, Menu,and MenuItem.
42.
Menu Bars andMenus
In general, a menu bar contains one or more Menu objects. Each Menu object contains a
list of MenuItem objects.
Each MenuItem object represents something that can be selected by the user.
Since Menu is a subclass of MenuItem, a hierarchy of nested submenus can be created.
It is also possible to include checkable menu items.
These are menu options of type CheckboxMenuItem and will have a check mark next to
them when they are selected.
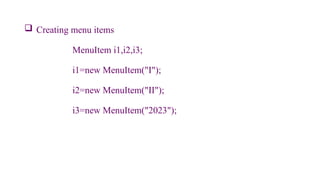
Creating Menubar
MenuBarmb=new MenuBar();
Menu a creation
Menu mnu1=new Menu("BCA");
Menu mnu2=new Menu("BBA");
46.
sm1 andsm2 will be treated as submenus
Menu sm1=new Menu("Semester");
Menu sm2=new Menu("Year");
adding items and submenus to menu
mnu1.add(sm1);
mnu1.add(sm2);
47.
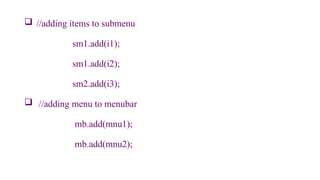
//adding itemsto submenu
sm1.add(i1);
sm1.add(i2);
sm2.add(i3);
//adding menu to menubar
mb.add(mnu1);
mb.add(mnu2);
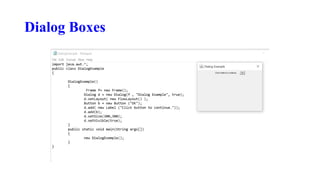
Dialog Boxes
Dialogboxes are primarily used to obtain user input and are often child
windows of a top-level window.
Dialog boxes don’t have menu bars, but in other respects, they function like
frame windows. (You can add controls to them, for example, in the same
way that you add controls to a frame window.)
When a modal dialog box is active, all input is directed to it until it is closed.
50.
Dialog Boxes
Thismeans that you cannot access other parts of your program until
you have closed the dialog box.
When a modeless dialog box is active, input focus can be directed to
another window in your program.
Thus, other parts of your program remain active and accessible. In
the AWT, dialog boxes are of type Dialog
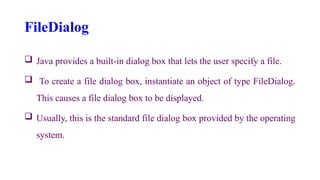
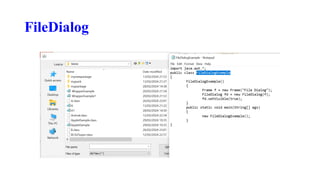
FileDialog
Java providesa built-in dialog box that lets the user specify a file.
To create a file dialog box, instantiate an object of type FileDialog.
This causes a file dialog box to be displayed.
Usually, this is the standard file dialog box provided by the operating
system.
Handling Events byExtending AWT
Components
Handling events by extending AWT components.
The delegation event model was introduced in Event handling, and all of the programs
in this book so far have used that design. But Java also allows you to handle events by
subclassing AWT components.
Doing so allows you to handle events in much the same way as they were handled
under the original 1.0 version of Java. Of course, this technique is discouraged, because
it has the same disadvantages of the Java 1.0 event model, the main one being
inefficiency.
55.
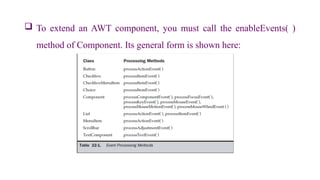
To extendan AWT component, you must call the enableEvents( )
method of Component. Its general form is shown here:
Swing
Java Swingis a popular and powerful Graphical User Interface (GUI)
toolkit that is used for developing desktop applications.
It is a part of the Java Foundation Classes (JFC) and provides a rich set
of components and layout managers for creating a variety of GUIs.
Java Swing is platform-independent and can be used on any operating
system that supports Java.
58.
Swing
It providesa set of lightweight components that are not only easy to use but also
customizable.
Some of the commonly used components in Swing are buttons, text fields, labels, menus,
and many more.
It also provides a robust event-handling mechanism that allows developers to handle
events generated by the graphical components.
Some of the commonly used layout managers in Java Swing are BorderLayout,
FlowLayout, GridLayout, CardLayout, and BoxLayout.
59.
Features of JavaSwing
Platform Independence: Platform independence is one of Java Swing’s most
remarkable features. It can run on any platform that supports Java. Thus, Swing-
based applications can run on Windows, Mac, Linux, or any other Java-compatible
operating system.
Lightweight Components: Java Swing provides a set of lightweight components that
are easy to use and customizable. These components are designed to consume less
memory and use less processing power, making Swing-based applications run
efficiently.
60.
Features of JavaSwing
Layout Managers: Java Swing provides a set of layout managers that can be used to
organize the graphical components in a GUI. These layout managers enable
developers to create flexible and responsive GUIs that adapt to different screen sizes
and resolutions.
Robust Event Handling Mechanism: Java Swing provides a robust event handling
mechanism that allows developers to handle events generated by the graphical
components. Developers can register event listeners to detect and respond to user
interactions with the GUI.
61.
Features of JavaSwing
Pluggable Look and Feel: Java Swing provides a pluggable look
and feels that allows developers to customize the appearance of the
GUI according to the user’s preferences. Developers can choose
from several pre-built looks and feel themes or create their own
custom themes.
62.
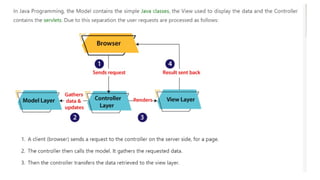
The Model-View-Controller Architecture
Swing uses the model-view-controller architecture (MVC) as the
fundamental design behind each of its components. Essentially,
MVC breaks GUI components into three elements.
Each of these elements plays a crucial role in how the component
behaves.
63.
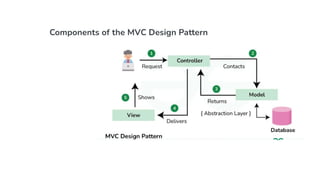
The MVC patternarchitecture consists of three layers:
Model: It represents the business layer of application. It is an object to carry
the data that can also contain the logic to update controller if data is changed.
View: It represents the presentation layer of application. It is used to visualize
the data that the model contains.
Controller: It works on both the model and view. It is used to manage the
flow of application, i.e. data flow in the model object and to update the view
whenever data is changed.
65.
Advantages ofMVC Architecture
The advantages of MVC architecture are as follows:
MVC has the feature of scalability that in turn helps the growth of application.
The components are easy to maintain because there is less dependency.
A model can be reused by multiple views that provides reusability of code.
The developers can work with the three layers (Model, View, and Controller) simultaneously.
Using MVC, the application becomes more understandable.
Using MVC, each layer is maintained separately therefore we do not require to deal with massive code.
The extending and testing of application is easier.
67.
Swing Applets
Sofar, we have created the applets based on AWT(Abstract Window
Toolkit) by extending the Applet class of the awt package.
We can even create applets based on the Swing package. In order to
create such applets, we must extend JApplet class of the swing package
JApplet is a top-level container class and you should never draw on it
directly, instead you should draw on the component class like JPanel
and then add this JPanel to the JApplet
68.
Creating a swingapplet
In the upcoming code, first, we have created a swing applet by
extending JApplet class and we have added a JPanel to it.
Next, we have created a class B, which has extended JPanel class of
Swing package and have also implemented ActionListener interace
to listen to the button click event generated when buttons added
to JPanel are clicked.