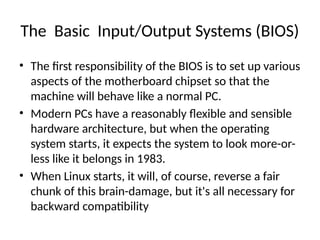
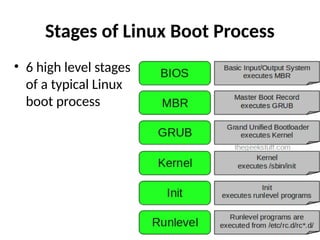
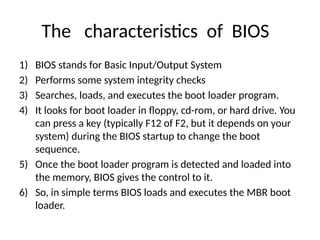
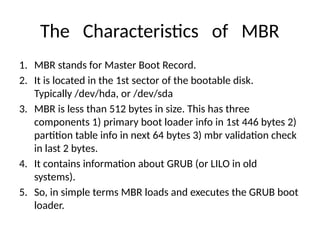
The document discusses Linux system architecture with a focus on hardware configuration, including components such as the BIOS, hardware abstraction layer (HAL), D-Bus, Udev, Sysfs, and boot processes. It outlines how these elements manage hardware communication, device management, and the stages of booting Linux, along with an explanation of different runlevels and shutdown procedures. Key tools and commands related to hardware management, such as lsmod, lspci, and shutdown, are also covered.


![Configuring the Default Run Level
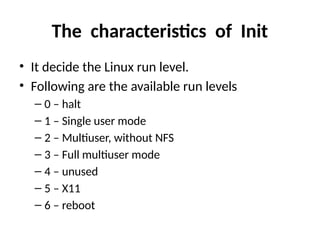
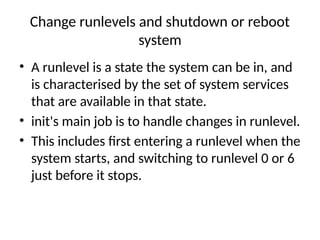
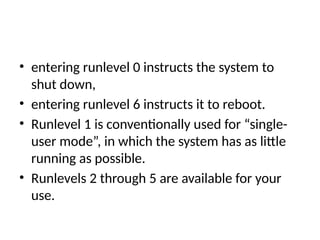
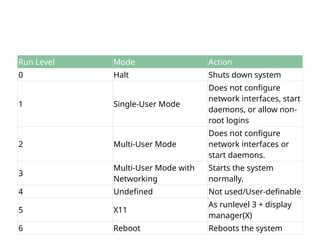
• A runlevel is a state, or mode, defined by services that are meant
to be run when this runlevel is selected. Seven numbered runlevels
exist (indexed from 0):
• To check in which runlevel you are operating, type the following:
~]$ runlevel
N 5
• The runlevel command displays previous and current runlevel.
• In this case it is number 5, which means the system is running in a
full multi-user mode with a graphical user interface.
• .](https://image.slidesharecdn.com/linuxchapter2-241031115458-5a19dd89/85/introduction-to-computer-Linux-essential-pptx-40-320.jpg)