Download as PDF, PPTX


![26
Image Systems with Terraform
● Build Plan File
● vi image.tf
provider "drp" {
api_user = "rocketskates"
api_password = "r0cketsk8ts"
api_url = "https://127.0.0.1:8092"
}
resource "drp_machine" "image_one_node" {
count = 1
Workflow = "image"
Description = "Terraform controller linux image node"
add_profiles = [ "centos-linux" ]
}
● Or cheat: curl -O http://pkt.tuna.org:8091/files/itx/image.tf](https://image.slidesharecdn.com/althausimmutabledeploymentstaking-180502162046/85/Immutable-Deployment-Hands-On-Lab-Interop-ITX-26-320.jpg)


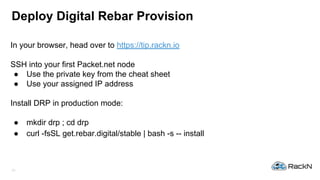
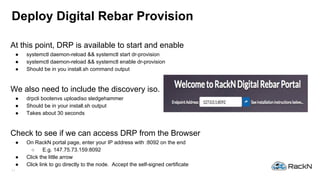
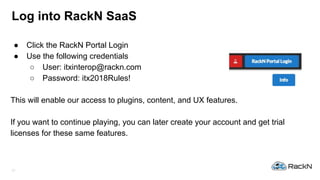
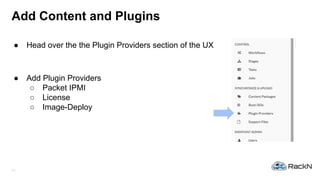
The document outlines the deployment process and features of RackN's Digital Rebar Provision (DRP), focusing on modern provisioning and automation of physical infrastructure. It includes steps for setting up and configuring DRP, managing images and workflows, and integrating with Terraform for infrastructure management. Key capabilities highlighted include support for bare metal and cloud deployments, an extensible architecture, and the ability to control and image systems using a clean interface.