This document provides a two-part tutorial to build an app called "I Have a Dream" using App Inventor. Part 1 guides the user to build an app with one button that plays a clip of Martin Luther King Jr.'s famous speech when clicked. Part 2 expands the app to include a second button that plays a clip of Malcolm X's speech, and programs the buttons so that clicking one pauses the other speech. The tutorial is meant to introduce users to building apps and basic programming concepts like conditional statements.
The document discusses recommendations for designing launch screens for iPhone apps. It suggests that the launch screen should create the illusion that the app has already started by matching the background of the app's first screen without any populated data. It notes that in presentation mode, the launch screen will display for 2 seconds to simulate app loading.
This document provides tutorials for creating simple apps with AppyBuilder. It includes 4 tutorials:
1. TalkToMe: Creating an app with a button that speaks a hardcoded phrase when clicked.
2. TalkToMe Part 2: Extending the TalkToMe app to respond to shaking and allow user input text to be spoken.
3. BallBounce: Creating a simple game app.
4. DigitalDoodle: Creating a drawing app.
The document provides step-by-step instructions and screenshots to guide users through each tutorial.
This document contains summaries of 4 tutorials for creating simple apps using App Inventor:
1. TalkToMe: A tutorial to build an app with a button that speaks text out loud. It is extended to also respond to shaking and allow user input text.
2. BallBounce: A tutorial to create a simple game app where a ball sprite bounces around on a canvas screen when flung by the user or hitting screen edges.
3. DigitalDoodle: A tutorial to build a drawing app that draws a line on the screen as the user drags a finger.
4. The document provides high-level descriptions and step-by-step instructions for completing each tutorial app in App
App Inventor is a program that allows users to build Android apps using a web browser. It provides two main interfaces - the Designer for selecting and arranging app components, and the Blocks Editor for programming the app's behavior visually by snapping blocks together. Users can test apps as they build them on a connected phone or emulator. App Inventor supports building many types of apps from simple games to more complex apps using phone features and services. Programming in App Inventor is intended to be approachable for non-professionals through its visual block-based programming.
I built an application and made this presentation for a class of mine. I wanted to demonstrate how easy Google App Inventor can be to use in building personal apps as well as introducing others to the world of application programing. Your comments and questions are very welcome!
This document provides an overview of rapid Android app development using App Inventor. It discusses why App Inventor is useful for observing programming structures and creating workable Android apps. It also outlines the steps for setting up the App Inventor environment and includes brief descriptions of common components like layout, buttons, screens, and sensors.
- The document is a production log for a student's creative media project creating an advertisement for Apple.
- The student created visual assets like backgrounds, icons and logos in Photoshop and brought them into After Effects to animate and assemble the ad.
- Over multiple dates, the student added elements to the ad like hand icons and screen shots, animated the hands interacting with the phone, and added text and graphics until the 30 second video was complete.
This production log documents the creation of an Apple advertisement by Clayton Skorski over several weeks. Key steps included:
1. Creating graphic elements like backgrounds, logos, and icons in Photoshop and importing them into After Effects for animation.
2. Adding hand icons to simulate touching and interacting with an iPhone screen and setting timers to make the hand movements look realistic.
3. Importing screenshots of an iPhone into Photoshop and After Effects to display changing content on the simulated screen.
4. Spending multiple days fine-tuning the timing of graphic elements, hand movements, and screen content to sync perfectly with audio.
The document provides instructions for using the iMovie app on iPad to create video projects. It describes how to import and edit video clips, photos, and audio; customize transitions and clip properties; and export finished projects for sharing. The app allows users to easily string together media into a video that can be shared online or with a computer.
App Inventor is an open source web application powered by Google.This tool helps us to develop android applications in just a few steps. It has its own server all your work gets stored on the Google App Inventor Servers.
The document discusses the use of new media technologies throughout the stages of planning, producing, and evaluating a media project. A wide range of technologies were used, including Apple and Windows computers, the internet for research, YouTube for analyzing trailers, Photoshop and InDesign for image editing, iMovie for video editing, and social media sites for sharing work and gathering feedback. The use of these technologies helped improve the quality of the project and allowed for multimedia presentations and collaboration at different stages of the process.
Google released the Android operating system as open source software under the Apache License. Android is a mobile operating system based on the Linux kernel that is developed by Google and the Open Handset Alliance. It allows developers to write managed code using the Java programming language and includes features like GPS, accelerometers, touchscreens, and more to develop powerful mobile applications.
Android software development – the first few hourssjmarsh
My challenge for this year is to learn a new programming language or software development technology. While I don’t intend adopting the suggestion of The Pragmatic Programmer and learning one new language each year, I do think that there is much to be gained by seeing what else is out there. With the booming popularity of the Android platform for mobile devices I thought what better place to start? Over the past few weeks I have taken the first few steps in learning about Android application development.
The document discusses various technologies used during the process of constructing a product. These include:
- Blogger and Slideshare for research and planning to organize work and embed presentations
- Final Cut Pro, anchor points, and color correction for video editing during construction
- Powtoon and Emaze for creating interactive presentations for evaluation
The student learned how to use these technologies and apply various functions and skills like fading, text effects, and presentation design. Overall the document reflects on the technologies used and what was learned from using each tool.
This document outlines screens and flows for a mock McDelivery app. It includes descriptions of the home screen, launch screen, registration screens, menu screens, order screens, and a help screen. The launch screen is described as a static image to simulate app loading before the first real screen appears. Registration screens request user information and terms agreement. Menu and order screens allow viewing items and placing/viewing a bill.
The document provides a test report for a mobile game summarizing test results from testing the game on various Android and iOS devices. It includes:
- An overview of the tested functionalities and environments, listing the Android and iOS devices tested and their specifications.
- A list of the functionalities that were checked during testing, such as installation, screen rotation, user interface, game saving, and localization.
- A list of 10 bugs found during testing, describing the bug, steps to reproduce it, actual result, and expected result for each bug related to issues like text alignment, map saving, crashing, and language display.
The document provides instructions for creating mockups of iPhone home screens and apps. It explains that the red button on the home screen should link to a loading screen on the next slide. It also notes that the launch screen should create the illusion that the app has already started before any data is populated. Finally, it indicates that the app home screen is where developers can start adding UI elements from the provided library.
This document provides instructions for using Microsoft Movie Maker to create videos. It outlines the basic steps of importing images and adding text titles, background music, and animations. It also discusses saving the finished video in different file formats. The instructions are broken into three tasks - inserting images and text, adding audio, and including animations and saving the final video. Learners are prompted to complete activities at each step and assess their understanding with multiple choice or fill-in-the-blank questions.
This document provides step-by-step instructions for creating a basic talking app called "TalkToMe" using App Inventor. It describes how to set up an App Inventor account, start a new project, add a button and text-to-speech component, and program the button to trigger the phone to speak a message when clicked. The instructions are broken into sections with accompanying screenshots to guide the reader through designing a user interface, connecting to a device, and using blocks to define the app's interactive behavior.
This document provides instructions for creating a simple Android application using Adobe Flash CS6. It describes how to publish a Flash (.fla) file as an Android application package (apk) file. The main steps are to open the Flash file, configure Android application settings, add a developer certificate, and publish the file. Instructions are also provided for customizing aspects like the application name, icon, and navigation buttons. Templates are included for common application elements like menus, content pages, and quizzes. Overall the document aims to demonstrate how Flash animations can be packaged into a mobile app for Android devices.
This is the simple guide which helps even the beginners to develop an android app which gets the attention of the market. Build your basic app in few steps
This is the second version of Build an AR app presentation. It gives a detailed step by step guide on building a complete AR app from scratch using Vuforia
This document provides instructions for creating an app using App Inventor that plays a sound when a picture is touched on a mobile phone. It describes how to drag a button and upload an image and audio file, then program the button to play the audio using blocks. It also explains how to download the app to a phone, sync it to a computer, and open the app to either write or scan the QR code for the program. Possible improvements discussed are adding questions and voice recognition.
This document discusses the application bar in Windows Phone 8. It begins with an overview of what an application bar is and how to add one to a project. It then covers making the buttons on the application bar functional by adding click event handlers. The document also discusses text-based menu items, other properties that can be set for the application bar, and where to find best practices for application bars.
The document discusses various computer applications and image editing programs, including Photoshop, Snapseed, and FaceApp. It also describes activities related to using these applications, such as creating artwork in Photoshop, developing a software application, and making a picture collage or infographic with images. Mobile photography and computer art applications are also mentioned.
This document provides steps to build an augmented reality book using an online platform. It outlines registering for an account, selecting images and audio files to augment, uploading the media through the platform's book creator tool, exporting the augmented book file and downloading it to view on a mobile device using an AR browser. Focusing the camera on the images will trigger the associated audio files to play, allowing the user to experience an augmented reality interaction.
- This is a summary of an iPhone application called Meetirvine, which is a social networking app for residents of Irvine, California.
- Users must register for the app by selecting a community category. Once logged in, users can view profiles of other members, post updates, and communicate through private messages or public forums.
- The app allows residents to build connections in their local community through sharing information and discussions within the Meetirvine social network that is specific to Irvine.
This document introduces Microsoft Small Basic, a simple programming language designed for beginners. It discusses the Small Basic environment and how to write basic programs. The first program shows how to display "Hello World" by using the TextWindow object. Subsequent programs demonstrate how to get user input, store values in variables, perform math operations, add colors, and use conditional statements to change the output based on the time of day. The goal is to explain programming concepts in a simple, approachable way for new programmers.
This tutorial shows how to extend the TalkToMe app from the previous tutorial to respond to shaking and allow the user to input text to be spoken. It instructs the user to add an accelerometer sensor to detect shaking, program it to speak when shaken, add a text box for user input, and program the button click to speak the text from the box. Finally, it provides ideas for additional features the app could include.
The document provides instructions for creating a simple slot machine game called "Lucky Seven" using Microsoft Visual Basic, including how to set up the user interface with buttons and labels, write code to generate random numbers and display a picture if 7 is rolled, and run the finished program. The instructions break the project into steps like designing the interface, setting control properties, writing event handlers for buttons, and adding a random number seed to make the rolls truly random each time.
This document provides instructions for installing Android Studio and creating a basic "Hello World" Android application. It includes 10 sections that cover installing Android Studio, creating an Android Virtual Device (AVD), developing a Hello World app, running the app on a phone or emulator, and creating an app that takes user input from a text box and displays a greeting. The document contains code snippets and screenshots to illustrate the steps for setting up an Android development environment and building a simple app.
The document provides instructions on using various computer art applications like Photoshop, Snapseed, and Stencyl to create digital artworks and videos. It describes the tools and features of different programs and includes activities for students to make collages and manipulated photos. The goal is for students to learn digital art skills through hands-on experience with application tools and sharing their creations online.
This document provides an introduction to the Small Basic programming language environment and teaches the basics of programming through examples. It discusses that Small Basic was created to make programming easy for beginners. It then describes the Small Basic programming environment user interface and walks through a first "Hello World" program. It explains how the program works by breaking it down into statements and objects. The document continues by having the reader modify the program to print in yellow and introduces the concept of variables by having the user input their name and printing it back.
This document provides an introduction to the Small Basic programming language environment and teaches the basics of programming through examples. It discusses that Small Basic was created to make programming easy for beginners. It then describes the Small Basic programming environment and walks through a first "Hello World" program. It explains how the program works by breaking it down into statements and objects. The document introduces variables by having a program ask the user's name and store it in a variable to personalize the output. It teaches how variables allow storing values that can be reused and changed in a program.
This session is presented by Bess Ho at Silicon Valley Code Camp (SVCC) at Foothill College in 2009 Fall. This session covers the Apple review and submission procession and requirements. It reviews the image requirements, mockup and templates for iphone app.
This document provides an introduction to making a first mobile app. It discusses resources for prototyping, design, and coding apps. It explains basic app development concepts like objects, data types, loops, and if statements. It then guides the reader through setting up an Xcode project to build a simple iOS app with a button that outputs random text when pressed. Code examples are provided to connect interfaces to code, add a background image, and dismiss the keyboard. The overall summary is an introductory tutorial for complete beginners on planning, designing, and building a simple random text output app as a first coding project.
Andreas Schleicher presents PISA 2022 Volume III - Creative Thinking - 18 Jun...EduSkills OECD
Andreas Schleicher, Director of Education and Skills at the OECD presents at the launch of PISA 2022 Volume III - Creative Minds, Creative Schools on 18 June 2024.
Brand Guideline of Bashundhara A4 Paper - 2024khabri85
It outlines the basic identity elements such as symbol, logotype, colors, and typefaces. It provides examples of applying the identity to materials like letterhead, business cards, reports, folders, and websites.
How to Manage Reception Report in Odoo 17Celine George
A business may deal with both sales and purchases occasionally. They buy things from vendors and then sell them to their customers. Such dealings can be confusing at times. Because multiple clients may inquire about the same product at the same time, after purchasing those products, customers must be assigned to them. Odoo has a tool called Reception Report that can be used to complete this assignment. By enabling this, a reception report comes automatically after confirming a receipt, from which we can assign products to orders.
CapTechTalks Webinar Slides June 2024 Donovan Wright.pptxCapitolTechU
Slides from a Capitol Technology University webinar held June 20, 2024. The webinar featured Dr. Donovan Wright, presenting on the Department of Defense Digital Transformation.
CapTechTalks Webinar Slides June 2024 Donovan Wright.pptx
I have adream
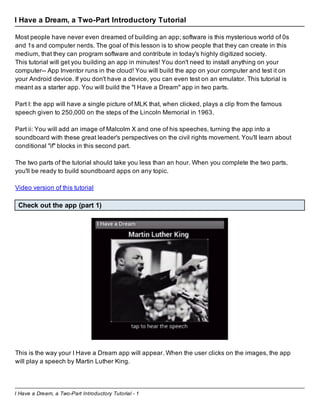
1. I Have a Dream, a Two-Part Introductory Tutorial - 1
I Have a Dream, a Two-Part Introductory Tutorial
Most people have never even dreamed of building an app; software is this mysterious world of 0s
and 1s and computer nerds. The goal of this lesson is to show people that they can create in this
medium, that they can program software and contribute in today's highly digitized society.
This tutorial will get you building an app in minutes! You don't need to install anything on your
computer-- App Inventor runs in the cloud! You will build the app on your computer and test it on
your Android device. If you don't have a device, you can even test on an emulator. This tutorial is
meant as a starter app. You will build the "I Have a Dream" app in two parts.
Part I: the app will have a single picture of MLK that, when clicked, plays a clip from the famous
speech given to 250,000 on the steps of the Lincoln Memorial in 1963.
Part ii: You will add an image of Malcolm X and one of his speeches, turning the app into a
soundboard with these great leader's perspectives on the civil rights movement. You'll learn about
conditional "if" blocks in this second part.
The two parts of the tutorial should take you less than an hour. When you complete the two parts,
you'll be ready to build soundboard apps on any topic.
Video version of this tutorial
Check out the app (part 1)
This is the way your I Have a Dream app will appear. When the user clicks on the images, the app
will play a speech by Martin Luther King.
2. I Have a Dream, a Two-Part Introductory Tutorial - 2
Begin by opening a browser window to App Inventor: ai2.appinventor.mit.edu.
If you have WiFi and an Android device, you can build apps with App Inventor completely "in the
cloud", i.e., without downloading any software to your computer. You login to the system with a
Google account. If you were going to start an app from scratch, you would begin from here. But
we'll use a "starter" app (see below).
For this tutorial, you'll begin with a "starter app" from the App Inventor Gallery
App Inventor has a gallery for sharing apps. Click this link
http://ai2.appinventor.mit.edu/?galleryId=5753789846913024 and App Inventor will open to the I
Have a Dream Starter app. The starter app has no code-- it just contains the image files and sound
clips you need for the app. Its provided so you can learn the coding without spending time finding
media files on the Internet. Later, you can build your own soundboard app with your own images
and sound clips.
3. I Have a Dream, a Two-Part Introductory Tutorial - 3
Open the starter app
Click "Open the App" to open the starter app. You'll be prompted to name your app. Name it
something like "IHaveADream", e.g., remove the "Starter" from the name. Note that app names
cannot have spaces or other punctuation.
Check out the Designer and align the screen
You'll specify how the app should look, and all the components you'll use, in the App Inventor
Designer, which is shown above. As you can see, the screen starts out as blank, but the starer app
has some media files preloaded to help you get going. Note that you can add your own media files
4. I Have a Dream, a Two-Part Introductory Tutorial - 4
as well, you're just not doing that in this tutorial.
To get things started, set the Screen's AlignHorizontal property to "Center". When we add the
pictures of the app, they'll automatically be centered within the screen.
Drag a button onto the screen
Next, add a Button to the screen. Click down on the Button in the palette, then drag one out and
into the screen. The button will appear with some default text. In the next step, you'll change it so it
shows a picture.
Set the button's image property so that it shows MLK
5. I Have a Dream, a Two-Part Introductory Tutorial - 5
Remove the default text from the button
When you set the Image property for the button, the picture appears but the default text for the
button is still there. Click on the Text property and set it to blank (backspace to beginning).
Add two labels above and below the button.
Drag two labels onto the screen, one above the button and one below. Set the Text property of the
labels as shown. For the top label, check the FontBold property and change the FontSize to 20.0.
6. I Have a Dream, a Two-Part Introductory Tutorial - 6
Add a Player component for playing the speech
Open the Media drawer (1) and drag a Player component into the app (2). A Player component
knows how to play sound clips and is considered a "non-visible" component because it doesn't
show up in the user interface of the app. After dragging in the Player component, set its Source
property to king.mpg (the sound clip of MLK's speech).
Open the Blocks Editor to program the interactive behavior
Thus far, you have completed the design of part 1 of the app, but you still need to code the
interactive behavior of the app. In the right top-corner, you can switch between the Design view
and the Blocks view. Click on "Blocks" and open the empty Blocks view.
7. I Have a Dream, a Two-Part Introductory Tutorial - 7
Drag out a Button.Click event handler
In the Blocks editor, click on Button1 (1) and then drag out a Button1.Click event handler (2). You
are preparing to show that when the button is clicked, the speech will be played.
Place a Player1.Start block within the Button1.Click event handler.
Click on the Player1 drawer (1) and then drag out a "call Player1.Start" block and place it in the
event handler. You are specifying that when the button is clicked, the speech should be played.
Remember, the Player1.Source property is set to the king.mpg file, so that will play.
8. I Have a Dream, a Two-Part Introductory Tutorial - 8
Install the MIT AI2 Companion on your phone.
To test your app, you first need to install an app on your Android device (not your computer). On
your device, open the Android Play Store and search for the MIT AI2 companion. Then install it.
Connect your device for live testing
When you start the Companion on your phone, it will look like (1). Back in App Inventor, choose
"Connect" (2) then "AI Companion. This will cause a QR code to appear (3) You can then scan the
QR code (4) with your phone to see your app live.
NOTE: for live testing to work, both your computer and phone/tablet must be connected to the
same WiFi station. Using WiFi is the
easiest way to connect, but if you're at school/work you may have firewall issues. If so, you can
9. I Have a Dream, a Two-Part Introductory Tutorial - 9
connect using a USB cable. If you don't have an Android device, you can connect your app to an
emulator that runs on your computer. For any setup issues, please see
http://appinventor.mit.edu/explore/ai2/setup.html
Test your app!
When you scan the QR code, your app should appear on your device. If you've programmed the
app correctly, you should now be able to click on the picture and hear the speech.
10. I Have a Dream, a Two-Part Introductory Tutorial - 10
Download the app to your computer or device
Your app is only working within the testing app, the Companion. If you disconnected from WiFi, the
app wouldn't be on your phone, and so far you can't send it to a friend. So go back to the Designer
and choose "Build | App (save to my computer)" This will download a ".apk" file, an executable
Android app. Once you download it you can email it to yourself or a friend. Then you and your
friends can open the email on their Android phone and install the attachment.
You can also choose the top choice and have a QR code appear. If you scan the QR code on your
device, it will download the app (the .apk) directly to your device for installation.
Note: on some Android phones, you need to change a security setting to allow "Unknown
Sources". This allows
the device to install apps from places other than the Play Store.
Congratulations! You've built your first app!
11. I Have a Dream, a Two-Part Introductory Tutorial - 11
Part II. Add Malcolm X and his speech
Now that you have your feet wet, let's make the app more fun. MLK and Malcolm X were Civil
Rights leaders of great contrast. Let's build an app that also plays an app by Malcolm X in order to
show this contrast. You'll need to modify the UI, then the behavior. Behavior-wise, things will
become more complicated as you'll need to make sure the speeches don't overlap.
SaveAs your project to create a new project
Choose Project | SaveAs and name your new app something else (e.g., DreamWithNoName).
12. I Have a Dream, a Two-Part Introductory Tutorial - 12
Choose a smaller image for MLK and add an image of Malcolm X.
In the designer, modify the user interface. First, change the text of the top label so it mentions
Malcolm X (1).Then drag out a second button for Malcolm X (2) and set its picture property as
shown (3).Then change the Image for MLK's button to the smaller image (4). Finally, drag out a
HorizontalArrangment from the Layout drawer (5), and drag the two buttons into it so that they
appear side-by-side as shown.
Add the image of both leaders
Add an Image component (1) then set its Picture property to the picture of both leaders Note that
the top component is an Image not a Button because nothing should happen when the user clicks
it.
13. I Have a Dream, a Two-Part Introductory Tutorial - 13
Add a second player and rename components
Drag out another Player component (1) and set its Source property to Malcolm's spech (2). Then
rename the Button and Player components (3) so we can distiguish them easily in the blocks
editor. A rule-of-thumb is to give a descriptive name with a suffix which is the component type, e.g.,
MalcolmPlayer.
Add a Screen Title and Background Color
To complete the UI, set the BackgroundColor to black and set the screen's Title property. You can
also set the Screen's Icon property to an image that you want to show on a device representing the
app. Now you're ready to program the behavior.
14. I Have a Dream, a Two-Part Introductory Tutorial - 14
Code it so you start/pause the MLK speech
Open the Blocks editor. Note that the Button1.Click event and other blocks have been renamed
based on your renames in the designer. First, focus on the MLK button. The behavior we want is
for the first click to start the speech, the next one pause it, next one start it, and so on. So you don't
always want the same thing to happen when the button is clicked. To program this, you use an
if-else block. If-else allows the app to ask
questions, such as, "is the speech already playing?". To code this, drag out an if-block from the
Control drawer, then click on the blue "modifier" icon. The modifier allows you to add branches. In
this case, there are two possibilities, start or pause, so drag an "else" within the picture to its right
so that there are two branches as shown.
Code it so the if-else starts/pauses MLK's speech.
Place the if-else block in the event handler. Then drag out an MLKPlayer.IsPlaying property block
from the MLKPlayer drawer. This block is true if the speech is playing, false if not. If it is playing,
you want to pause the speech, so drag out this block from MLKPlayer. If it is not playing, the "else"
15. I Have a Dream, a Two-Part Introductory Tutorial - 15
branch will be taken, so MLKPLayer.Start is called.
In this code, you're seeing two new things, both fundamental to software. First is the conditional
(if-else) block. Conditional blocks provide the mechanism for the app to ask questions, the basis of
artificial intellgence. The second new thing is you are checking a component property in the
blocks. You set a few properties in the designer (e.g., the Screen.Title). Here you are checking the
Player's IsPlaying property in the blocks.
For more on these fundamental topics, see these notes
on conditionals and component properties.
Test this new behavior
Your device should still be connected. Test this updated behavior to see if the speech starts and
pauses.
Copy-Paste the MLKButton event handler
You want the Malcolm button to behave similarly to the MLK button, so copy-paste the event
handler. Select the MLKButton.Click event handler and copy/paste it using command-c and
command-v on Mac (ctrl-c and v on Windows). A red error triangle will appear because you can't
have two handlers for the same event. Next, you'll fix this.
16. I Have a Dream, a Two-Part Introductory Tutorial - 16
Change the blocks to refer to MalcolmButton and MalcolmPlayer
Using the upside down triangle widget circled above, switch the copied blocks to refer to
MalcolmButton and MalcolmPlayer.
Program it so that you pause the "other" speech
You just need to pause Malcolm when MLK speaks, and vice-a-versa. The final blocks for the app
are shown above with the additional blocks circled. Test the app again (you should still be
connected). Does it work how you'd expect?
This app is simple, but indicative of the architecture of most apps. This one consists of two event
handlers. Each event handler consists of an event (a click in this case) and a response which is a
sequence of blocks (they're executed in order). Some blocks in the response are only conditionally
executed.
So you've not only created an app, you've learned some programming lingo. Next time your
hanging out with your friends, smack talk a bit about "event handlers" and "if-else conditionals".