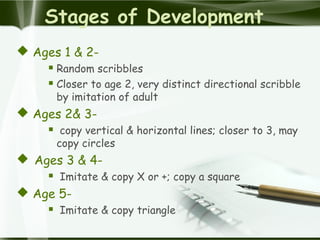
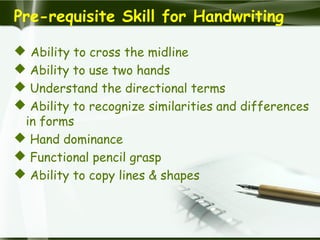
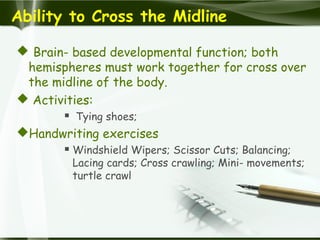
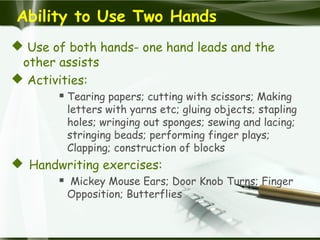
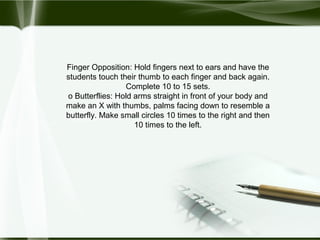
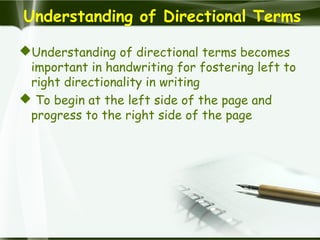
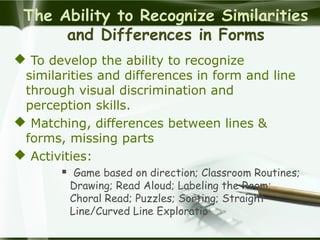
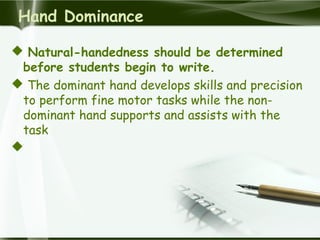
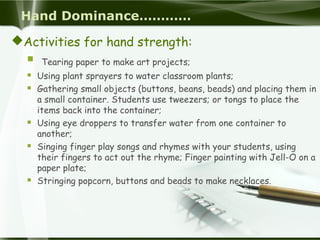
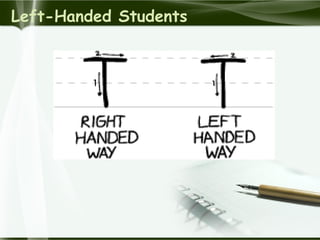
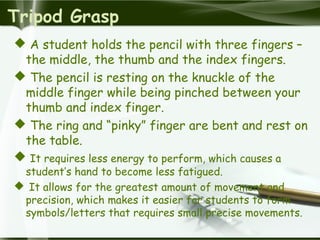
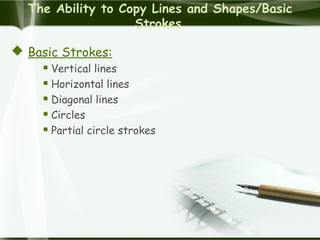
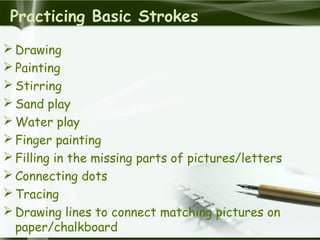
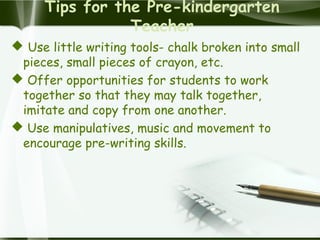
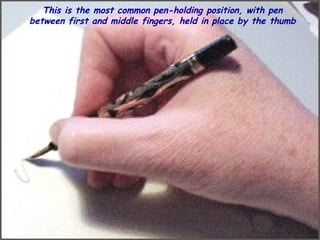
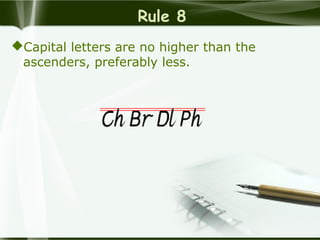
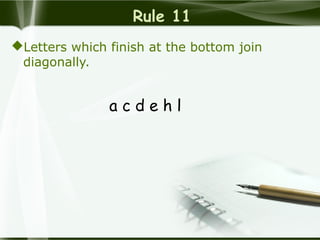
How to Write
Right
Right
WRite
impRove
handWRiting
impRove
handW
Riting
RightWRite
Right
WRite
impRove
ha
ndW
Riting
“Every Child Deserves a
Great Teacher”
Agenda
 Purpose
 Stages of Development
 Pre-requisite Skills
 Teacher Tips
Purpose
 Assist students to acquire the
prerequisite skills for writing, practice
correct Pencil Grasp and letter formation
 Improve automaticity
 Two notions:
 lack of professional training in hand writing
 Lack of time
Stages of Development
 Ages 1 & 2-
 Random scribbles
 Closer to age 2, very distinct directional scribble
by imitation of adult
 Ages 2& 3-
 copy vertical & horizontal lines; closer to 3, may
copy circles
 Ages 3 & 4-
 Imitate & copy X or +; copy a square
 Age 5-
 Imitate & copy triangle
Pre-requisite Skill for Handwriting
 Ability to cross the midline
 Ability to use two hands
 Understand the directional terms
 Ability to recognize similarities and differences
in forms
 Hand dominance
 Functional pencil grasp
 Ability to copy lines & shapes
Ability to Cross the Midline
 Brain- based developmental function; both
hemispheres must work together for cross over
the midline of the body.
 Activities:
 Tying shoes;
Handwriting exercises
 Windshield Wipers; Scissor Cuts; Balancing;
Lacing cards; Cross crawling; Mini- movements;
turtle crawl
Ability to Use Two Hands
 Use of both hands- one hand leads and the
other assists
 Activities:
 Tearing papers; cutting with scissors; Making
letters with yarns etc; gluing objects; stapling
holes; wringing out sponges; sewing and lacing;
stringing beads; performing finger plays;
Clapping; construction of blocks
 Handwriting exercises:
 Mickey Mouse Ears; Door Knob Turns; Finger
Opposition; Butterflies
Finger Opposition: Hold fingers next to ears and have the
students touch their thumb to each finger and back again.
Complete 10 to 15 sets.
o Butterflies: Hold arms straight in front of your body and
make an X with thumbs, palms facing down to resemble a
butterfly. Make small circles 10 times to the right and then
10 times to the left.
Understanding of Directional Terms
Understanding of directional terms becomes
important in handwriting for fostering left to
right directionality in writing
 To begin at the left side of the page and
progress to the right side of the page
The Ability to Recognize Similarities
and Differences in Forms
 To develop the ability to recognize
similarities and differences in form and line
through visual discrimination and
perception skills.
 Matching, differences between lines &
forms, missing parts
 Activities:
 Game based on direction; Classroom Routines;
Drawing; Read Aloud; Labeling the Room;
Choral Read; Puzzles; Sorting; Straight
Line/Curved Line Exploratio
Hand Dominance
 Natural-handedness should be determined
before students begin to write.
 The dominant hand develops skills and precision
to perform fine motor tasks while the non-
dominant hand supports and assists with the
task

Hand Dominance…………
Activities for hand strength:
 Tearing paper to make art projects;
 Using plant sprayers to water classroom plants;
 Gathering small objects (buttons, beans, beads) and placing them in
a small container. Students use tweezers; or tongs to place the
items back into the container;
 Using eye droppers to transfer water from one container to
another;
 Singing finger play songs and rhymes with your students, using
their fingers to act out the rhyme; Finger painting with Jell-O on a
paper plate;
 Stringing popcorn, buttons and beads to make necklaces.
How to Recognize Hand Dominance
 Hitting the ball with feet
 Cutting with scissors
 Drawing with stencils, templates or a ruler
 Using a sharpener
 Opening containers with lids
 Wearing a bracelet as a reminder
Left-Handed Students
 Approx. 10% are lefty.
 Group all lefty together; if possible lefty
teacher provide instruction
Left-Handed Students
 Basically, left-handers draw circles and “O”
anti-clockwise and draw horizontal lines from
right to left in such letters as A, E, F, H, J, T
and small “t”.
For Struggling Students
 Activities Before Handwriting
Using manipulatives:
• Jigsaw puzzles
• Snap beads
Molding with:
• Clay
• Sand
• Play-dough
Playing with small toys:
• Cars
• Miniature gas stations
• Transformers
• Doll furniture
“Daily experience activities:
• Zipping
• Buttoning
• Sewing
• Screwing lids on small jars
• Screwing nuts and bolts
Practicing art skills:
• Coloring
• Drawing
• Sketching
• Tearing paper
• Folding paper
• Cutting paper with scissors
“Hand Tools” for a Variety of Grasps
Hand Tools
• Sponges
• Funnels
• Straws
• Squeeze bottles
• Sieves
• Strainers
• Tongs/ Tweezers
• Containers of different
shapes/sizes
• Sticks
• Shovels
• Pails
Having a Functional Pencil Grasp
 Start writing with using markers or felt tip
pens
 Crayons too introduced at beginning
 Then only pencils- “Fat” pencils or “ golf pencils”
with soft lead
 Pencil Grasp- How a student holds a writing
instrument.
 Power Grasp- Hold with a closed fist-
inefficient grasp
 Tripod Grasp- the most efficient grasp
Tripod Grasp
 A student holds the pencil with three fingers –
the middle, the thumb and the index fingers.
 The pencil is resting on the knuckle of the
middle finger while being pinched between your
thumb and index finger.
 The ring and “pinky” finger are bent and rest on
the table.
 It requires less energy to perform, which causes a
student’s hand to become less fatigued.
 It allows for the greatest amount of movement and
precision, which makes it easier for students to form
symbols/letters that requires small precise movements.
The Ability to Copy Lines and Shapes/Basic
Strokes
 Basic Strokes:
 Vertical lines
 Horizontal lines
 Diagonal lines
 Circles
 Partial circle strokes
Practicing Basic Strokes
 Drawing
 Painting
 Stirring
 Sand play
 Water play
 Finger painting
 Filling in the missing parts of pictures/letters
 Connecting dots
 Tracing
 Drawing lines to connect matching pictures on
paper/chalkboard
Tips for the Pre-kindergarten
Teacher
 Use concrete activities.
Don’t give students pencils too soon.
Don’t have students sitting at tables, using handwriting
workbook pages.
Offer students opportunities to explore line formation
using the easel, blackboard space, blacktop and chalk,
blacktop and water, etc.
Provide wooden, plastic or foam cut outs of big and small
straight and curved lines so students can manipulate and
explore composing and decomposing letters and shapes
and discuss attributes of letter and shape.
Tips for the Pre-kindergarten
Teacher
 Use little writing tools- chalk broken into small
pieces, small pieces of crayon, etc.
 Offer opportunities for students to work
together so that they may talk together,
imitate and copy from one another.
 Use manipulatives, music and movement to
encourage pre-writing skills.
Tips for the Kindergarten Teacher
 Be certain that student tables are at the correct
height.
 Use little writing tools- chalk broken into small pieces,
small pieces of crayon, etc.
 Give students lots of space to draw freely on large
surfaces chalkboard, large easel paper, newsprint, etc.
 Be explicit about finger placement when teaching
students to hold both their writing hand and their
‘helping’ hand.
 Differentiate for the needs of individual students.
Tips for the Kindergarten Teacher
 Provide a center with wooden, plastic or foam cut-outs
of big and small straight and curved lines so students
can manipulate and explore composing and decomposing
letters and shapes and discuss attributes of letter and
shape.
Frequently use songs and rhymes that address letter
and number formation.
 Share with parents the correct formation of letters.
 Correct poor writing habits through explicit instruction
of pencil grasp, paper placement, correct writing
posture, etc.
 Begin with the writing and modeling of capital letters.
 Gradually begin to correct letter and number reversals,
one letter or number at a time.
Vertical Surfaces
 Color forms, felt boards and flannel boards
 Chalkboard and accompanying small pieces of
chalk
 Chalkboard and accompanying paint brush and
water
 White board
 Magnetic boards,
 Making pictures with stickers
Materials to Have On Hand
Helpful Materials
• small individual chalkboards
• large chalkboard
• wide and thin tipped markers
• crayons of varying widths
• small pieces of chalk
• easels and paint
• finger paint
• clay/play dough
• unlined paper
• lined paper
• rubber bands
• pencils in a variety of widths
• stamps and stamp pads
• pincers and cotton balls
• newsprint for tearing
• beads for stringing
• laces and lace-up pictures
• pegs and pegboards
• variety of manipulatives
• scissors
• eye droppers
• dice games
• coins
• buttons
• plant sprayers
• tweezers and tongs
• finger play songs and puppets
Definition of Writing
Writing is defined as inscribing characters or
symbols on a surface
Writing is one of the oldest known forms of
communication
In today’s age of Information and Technology,
writing has become a lost art.
Improve Your Handwriting
 Crampy, uneven letters are often the result of drawing the
letters with the fingers rather than using the whole arm to
write
If you use the right muscle groups, your writing will have a
smooth, easy flow and not look tortured

A few people hold the pen between first and
middle fingers, which feels really awkward.

This is the most common pen-holding position, with pen
between first and middle fingers, held in place by the thumb
The two-fingers-on-top method for holding the pen while writing.
Commonly called the "hook" position, this is often seen in left-
handers. It makes it harder, but not impossible, for them to use a
fountain pen, because their hands tend to drag over the wet ink.
Note that with this position, usually used for calligraphy (or among
really disciplined writers), causes the pen to rest atop the knuckle of
the forefinger.
Improve Your Handwriting……
It will take time to re-train muscles and learn
new habits.
The first thing you must have (beg, buy, borrow
or steal it) is patience and gentleness with
yourself.
The second requirement is determination.
If you finger-write, that is the first, most
important thing you must un-learn.
Do not draw your letters! Do not write with your
fingers!
Write it in the butter, on the shaving mirror,
stick notes in the cereal boxes. But learn it!
Improve Your Handwriting….
 Hold the pen lightly; don’t squeeze it.
Sit up straight, but not stiffly; don’t sit hunched over or
slumped.
 The important thing is what makes you feel relaxed and
comfortable.
 Use the “right muscle groups” to write.
 “Right muscle groups”- the shoulder-girdle and forearm
muscles.
“Right muscle groups” tire much less easily than fingers,
 Write big. Use arm and shoulder to shape letters; hold
your forearm, wrist and fingers stationary and in writing
position
Improve Your Handwriting….
 Hold your arm out in front of you, elbow bent, and
write in the air.
 Write in the air until it becomes as natural as
breathing.
 As you become comfortable, reduce the size of the air-
letters you make.
 You’ll feel your shoulder, arm, chest and some back
muscles doing most of the work.
 At some point, you’ll want to try this with a pen. Hold it
gently.
12 Rules for Good Cursive Handwriting
Rule 1
 Good writing is based on a pattern of ovals and
parallel lines.
Rule 2
All small letters start at the top.
Rule 3
 All the down strokes are parallel.
Rule 4
All similar letters are the same height.
Rule 5
All down strokes are equidistant
Rule 6
The space between words is the width of the
small letter o.
Rule 7
Ascenders and descenders are no more
than twice the height of small letters,
preferably less.
Rule 8
Capital letters are no higher than the
ascenders, preferably less.
Rule 9
Lines of writing are far enough apart for ascenders and
descenders not to touch. Lines of writing are far enough
apart for ascenders and descenders not to touch.
Rule 10
Letters which finish at the top join
horizontally.
Rule 11
Letters which finish at the bottom join
diagonally.
a c d e h l
Rule 12
Letters which finish on a stroke moving left, are
best left unjoined.
wishing you a very happy
writing
Thank You.

How to write right

  • 1.
  • 2.
    “Every Child Deservesa Great Teacher”
  • 3.
    Agenda  Purpose  Stagesof Development  Pre-requisite Skills  Teacher Tips
  • 4.
    Purpose  Assist studentsto acquire the prerequisite skills for writing, practice correct Pencil Grasp and letter formation  Improve automaticity  Two notions:  lack of professional training in hand writing  Lack of time
  • 5.
    Stages of Development Ages 1 & 2-  Random scribbles  Closer to age 2, very distinct directional scribble by imitation of adult  Ages 2& 3-  copy vertical & horizontal lines; closer to 3, may copy circles  Ages 3 & 4-  Imitate & copy X or +; copy a square  Age 5-  Imitate & copy triangle
  • 6.
    Pre-requisite Skill forHandwriting  Ability to cross the midline  Ability to use two hands  Understand the directional terms  Ability to recognize similarities and differences in forms  Hand dominance  Functional pencil grasp  Ability to copy lines & shapes
  • 7.
    Ability to Crossthe Midline  Brain- based developmental function; both hemispheres must work together for cross over the midline of the body.  Activities:  Tying shoes; Handwriting exercises  Windshield Wipers; Scissor Cuts; Balancing; Lacing cards; Cross crawling; Mini- movements; turtle crawl
  • 8.
    Ability to UseTwo Hands  Use of both hands- one hand leads and the other assists  Activities:  Tearing papers; cutting with scissors; Making letters with yarns etc; gluing objects; stapling holes; wringing out sponges; sewing and lacing; stringing beads; performing finger plays; Clapping; construction of blocks  Handwriting exercises:  Mickey Mouse Ears; Door Knob Turns; Finger Opposition; Butterflies
  • 9.
    Finger Opposition: Holdfingers next to ears and have the students touch their thumb to each finger and back again. Complete 10 to 15 sets. o Butterflies: Hold arms straight in front of your body and make an X with thumbs, palms facing down to resemble a butterfly. Make small circles 10 times to the right and then 10 times to the left.
  • 10.
    Understanding of DirectionalTerms Understanding of directional terms becomes important in handwriting for fostering left to right directionality in writing  To begin at the left side of the page and progress to the right side of the page
  • 11.
    The Ability toRecognize Similarities and Differences in Forms  To develop the ability to recognize similarities and differences in form and line through visual discrimination and perception skills.  Matching, differences between lines & forms, missing parts  Activities:  Game based on direction; Classroom Routines; Drawing; Read Aloud; Labeling the Room; Choral Read; Puzzles; Sorting; Straight Line/Curved Line Exploratio
  • 12.
    Hand Dominance  Natural-handednessshould be determined before students begin to write.  The dominant hand develops skills and precision to perform fine motor tasks while the non- dominant hand supports and assists with the task 
  • 13.
    Hand Dominance………… Activities forhand strength:  Tearing paper to make art projects;  Using plant sprayers to water classroom plants;  Gathering small objects (buttons, beans, beads) and placing them in a small container. Students use tweezers; or tongs to place the items back into the container;  Using eye droppers to transfer water from one container to another;  Singing finger play songs and rhymes with your students, using their fingers to act out the rhyme; Finger painting with Jell-O on a paper plate;  Stringing popcorn, buttons and beads to make necklaces.
  • 14.
    How to RecognizeHand Dominance  Hitting the ball with feet  Cutting with scissors  Drawing with stencils, templates or a ruler  Using a sharpener  Opening containers with lids  Wearing a bracelet as a reminder
  • 15.
    Left-Handed Students  Approx.10% are lefty.  Group all lefty together; if possible lefty teacher provide instruction
  • 16.
  • 17.
    Left-Handed Students  Basically,left-handers draw circles and “O” anti-clockwise and draw horizontal lines from right to left in such letters as A, E, F, H, J, T and small “t”.
  • 18.
    For Struggling Students Activities Before Handwriting Using manipulatives: • Jigsaw puzzles • Snap beads Molding with: • Clay • Sand • Play-dough Playing with small toys: • Cars • Miniature gas stations • Transformers • Doll furniture “Daily experience activities: • Zipping • Buttoning • Sewing • Screwing lids on small jars • Screwing nuts and bolts Practicing art skills: • Coloring • Drawing • Sketching • Tearing paper • Folding paper • Cutting paper with scissors
  • 19.
    “Hand Tools” fora Variety of Grasps Hand Tools • Sponges • Funnels • Straws • Squeeze bottles • Sieves • Strainers • Tongs/ Tweezers • Containers of different shapes/sizes • Sticks • Shovels • Pails
  • 20.
    Having a FunctionalPencil Grasp  Start writing with using markers or felt tip pens  Crayons too introduced at beginning  Then only pencils- “Fat” pencils or “ golf pencils” with soft lead  Pencil Grasp- How a student holds a writing instrument.  Power Grasp- Hold with a closed fist- inefficient grasp  Tripod Grasp- the most efficient grasp
  • 21.
    Tripod Grasp  Astudent holds the pencil with three fingers – the middle, the thumb and the index fingers.  The pencil is resting on the knuckle of the middle finger while being pinched between your thumb and index finger.  The ring and “pinky” finger are bent and rest on the table.  It requires less energy to perform, which causes a student’s hand to become less fatigued.  It allows for the greatest amount of movement and precision, which makes it easier for students to form symbols/letters that requires small precise movements.
  • 22.
    The Ability toCopy Lines and Shapes/Basic Strokes  Basic Strokes:  Vertical lines  Horizontal lines  Diagonal lines  Circles  Partial circle strokes
  • 23.
    Practicing Basic Strokes Drawing  Painting  Stirring  Sand play  Water play  Finger painting  Filling in the missing parts of pictures/letters  Connecting dots  Tracing  Drawing lines to connect matching pictures on paper/chalkboard
  • 24.
    Tips for thePre-kindergarten Teacher  Use concrete activities. Don’t give students pencils too soon. Don’t have students sitting at tables, using handwriting workbook pages. Offer students opportunities to explore line formation using the easel, blackboard space, blacktop and chalk, blacktop and water, etc. Provide wooden, plastic or foam cut outs of big and small straight and curved lines so students can manipulate and explore composing and decomposing letters and shapes and discuss attributes of letter and shape.
  • 25.
    Tips for thePre-kindergarten Teacher  Use little writing tools- chalk broken into small pieces, small pieces of crayon, etc.  Offer opportunities for students to work together so that they may talk together, imitate and copy from one another.  Use manipulatives, music and movement to encourage pre-writing skills.
  • 26.
    Tips for theKindergarten Teacher  Be certain that student tables are at the correct height.  Use little writing tools- chalk broken into small pieces, small pieces of crayon, etc.  Give students lots of space to draw freely on large surfaces chalkboard, large easel paper, newsprint, etc.  Be explicit about finger placement when teaching students to hold both their writing hand and their ‘helping’ hand.  Differentiate for the needs of individual students.
  • 27.
    Tips for theKindergarten Teacher  Provide a center with wooden, plastic or foam cut-outs of big and small straight and curved lines so students can manipulate and explore composing and decomposing letters and shapes and discuss attributes of letter and shape. Frequently use songs and rhymes that address letter and number formation.  Share with parents the correct formation of letters.  Correct poor writing habits through explicit instruction of pencil grasp, paper placement, correct writing posture, etc.  Begin with the writing and modeling of capital letters.  Gradually begin to correct letter and number reversals, one letter or number at a time.
  • 28.
    Vertical Surfaces  Colorforms, felt boards and flannel boards  Chalkboard and accompanying small pieces of chalk  Chalkboard and accompanying paint brush and water  White board  Magnetic boards,  Making pictures with stickers
  • 29.
    Materials to HaveOn Hand Helpful Materials • small individual chalkboards • large chalkboard • wide and thin tipped markers • crayons of varying widths • small pieces of chalk • easels and paint • finger paint • clay/play dough • unlined paper • lined paper • rubber bands • pencils in a variety of widths • stamps and stamp pads • pincers and cotton balls • newsprint for tearing • beads for stringing • laces and lace-up pictures • pegs and pegboards • variety of manipulatives • scissors • eye droppers • dice games • coins • buttons • plant sprayers • tweezers and tongs • finger play songs and puppets
  • 30.
    Definition of Writing Writingis defined as inscribing characters or symbols on a surface Writing is one of the oldest known forms of communication In today’s age of Information and Technology, writing has become a lost art.
  • 31.
    Improve Your Handwriting Crampy, uneven letters are often the result of drawing the letters with the fingers rather than using the whole arm to write
  • 32.
    If you usethe right muscle groups, your writing will have a smooth, easy flow and not look tortured
  • 33.
     A few peoplehold the pen between first and middle fingers, which feels really awkward.
  • 34.
     This is themost common pen-holding position, with pen between first and middle fingers, held in place by the thumb
  • 35.
    The two-fingers-on-top methodfor holding the pen while writing.
  • 36.
    Commonly called the"hook" position, this is often seen in left- handers. It makes it harder, but not impossible, for them to use a fountain pen, because their hands tend to drag over the wet ink.
  • 37.
    Note that withthis position, usually used for calligraphy (or among really disciplined writers), causes the pen to rest atop the knuckle of the forefinger.
  • 38.
    Improve Your Handwriting…… Itwill take time to re-train muscles and learn new habits. The first thing you must have (beg, buy, borrow or steal it) is patience and gentleness with yourself. The second requirement is determination. If you finger-write, that is the first, most important thing you must un-learn. Do not draw your letters! Do not write with your fingers! Write it in the butter, on the shaving mirror, stick notes in the cereal boxes. But learn it!
  • 39.
    Improve Your Handwriting…. Hold the pen lightly; don’t squeeze it. Sit up straight, but not stiffly; don’t sit hunched over or slumped.  The important thing is what makes you feel relaxed and comfortable.  Use the “right muscle groups” to write.  “Right muscle groups”- the shoulder-girdle and forearm muscles. “Right muscle groups” tire much less easily than fingers,  Write big. Use arm and shoulder to shape letters; hold your forearm, wrist and fingers stationary and in writing position
  • 40.
    Improve Your Handwriting…. Hold your arm out in front of you, elbow bent, and write in the air.  Write in the air until it becomes as natural as breathing.  As you become comfortable, reduce the size of the air- letters you make.  You’ll feel your shoulder, arm, chest and some back muscles doing most of the work.  At some point, you’ll want to try this with a pen. Hold it gently.
  • 41.
    12 Rules forGood Cursive Handwriting
  • 42.
    Rule 1  Goodwriting is based on a pattern of ovals and parallel lines.
  • 43.
    Rule 2 All smallletters start at the top.
  • 44.
    Rule 3  Allthe down strokes are parallel.
  • 45.
    Rule 4 All similarletters are the same height.
  • 46.
    Rule 5 All downstrokes are equidistant
  • 47.
    Rule 6 The spacebetween words is the width of the small letter o.
  • 48.
    Rule 7 Ascenders anddescenders are no more than twice the height of small letters, preferably less.
  • 49.
    Rule 8 Capital lettersare no higher than the ascenders, preferably less.
  • 50.
    Rule 9 Lines ofwriting are far enough apart for ascenders and descenders not to touch. Lines of writing are far enough apart for ascenders and descenders not to touch.
  • 51.
    Rule 10 Letters whichfinish at the top join horizontally.
  • 52.
    Rule 11 Letters whichfinish at the bottom join diagonally. a c d e h l
  • 53.
    Rule 12 Letters whichfinish on a stroke moving left, are best left unjoined.
  • 54.
    wishing you avery happy writing Thank You.

Editor's Notes

  • #8 Mini-Movements: Roll out paper on the floor and tape it in place. Invite students to find a place alongside the paper where they can lay on their stomachs to paint. Using finger paint, students will make a variety of tiny movements with their fingers that matches the rhythm of music being played.
  • #9 Finger Opposition: Hold fingers next to ears and have the students touch their thumb to each finger and back again. Complete 10 to 15 sets. o Butterflies: Hold arms straight in front of your body and make an X with thumbs, palms facing down to resemble a butterfly. Make small circles 10 times to the right and then 10 times to the left.