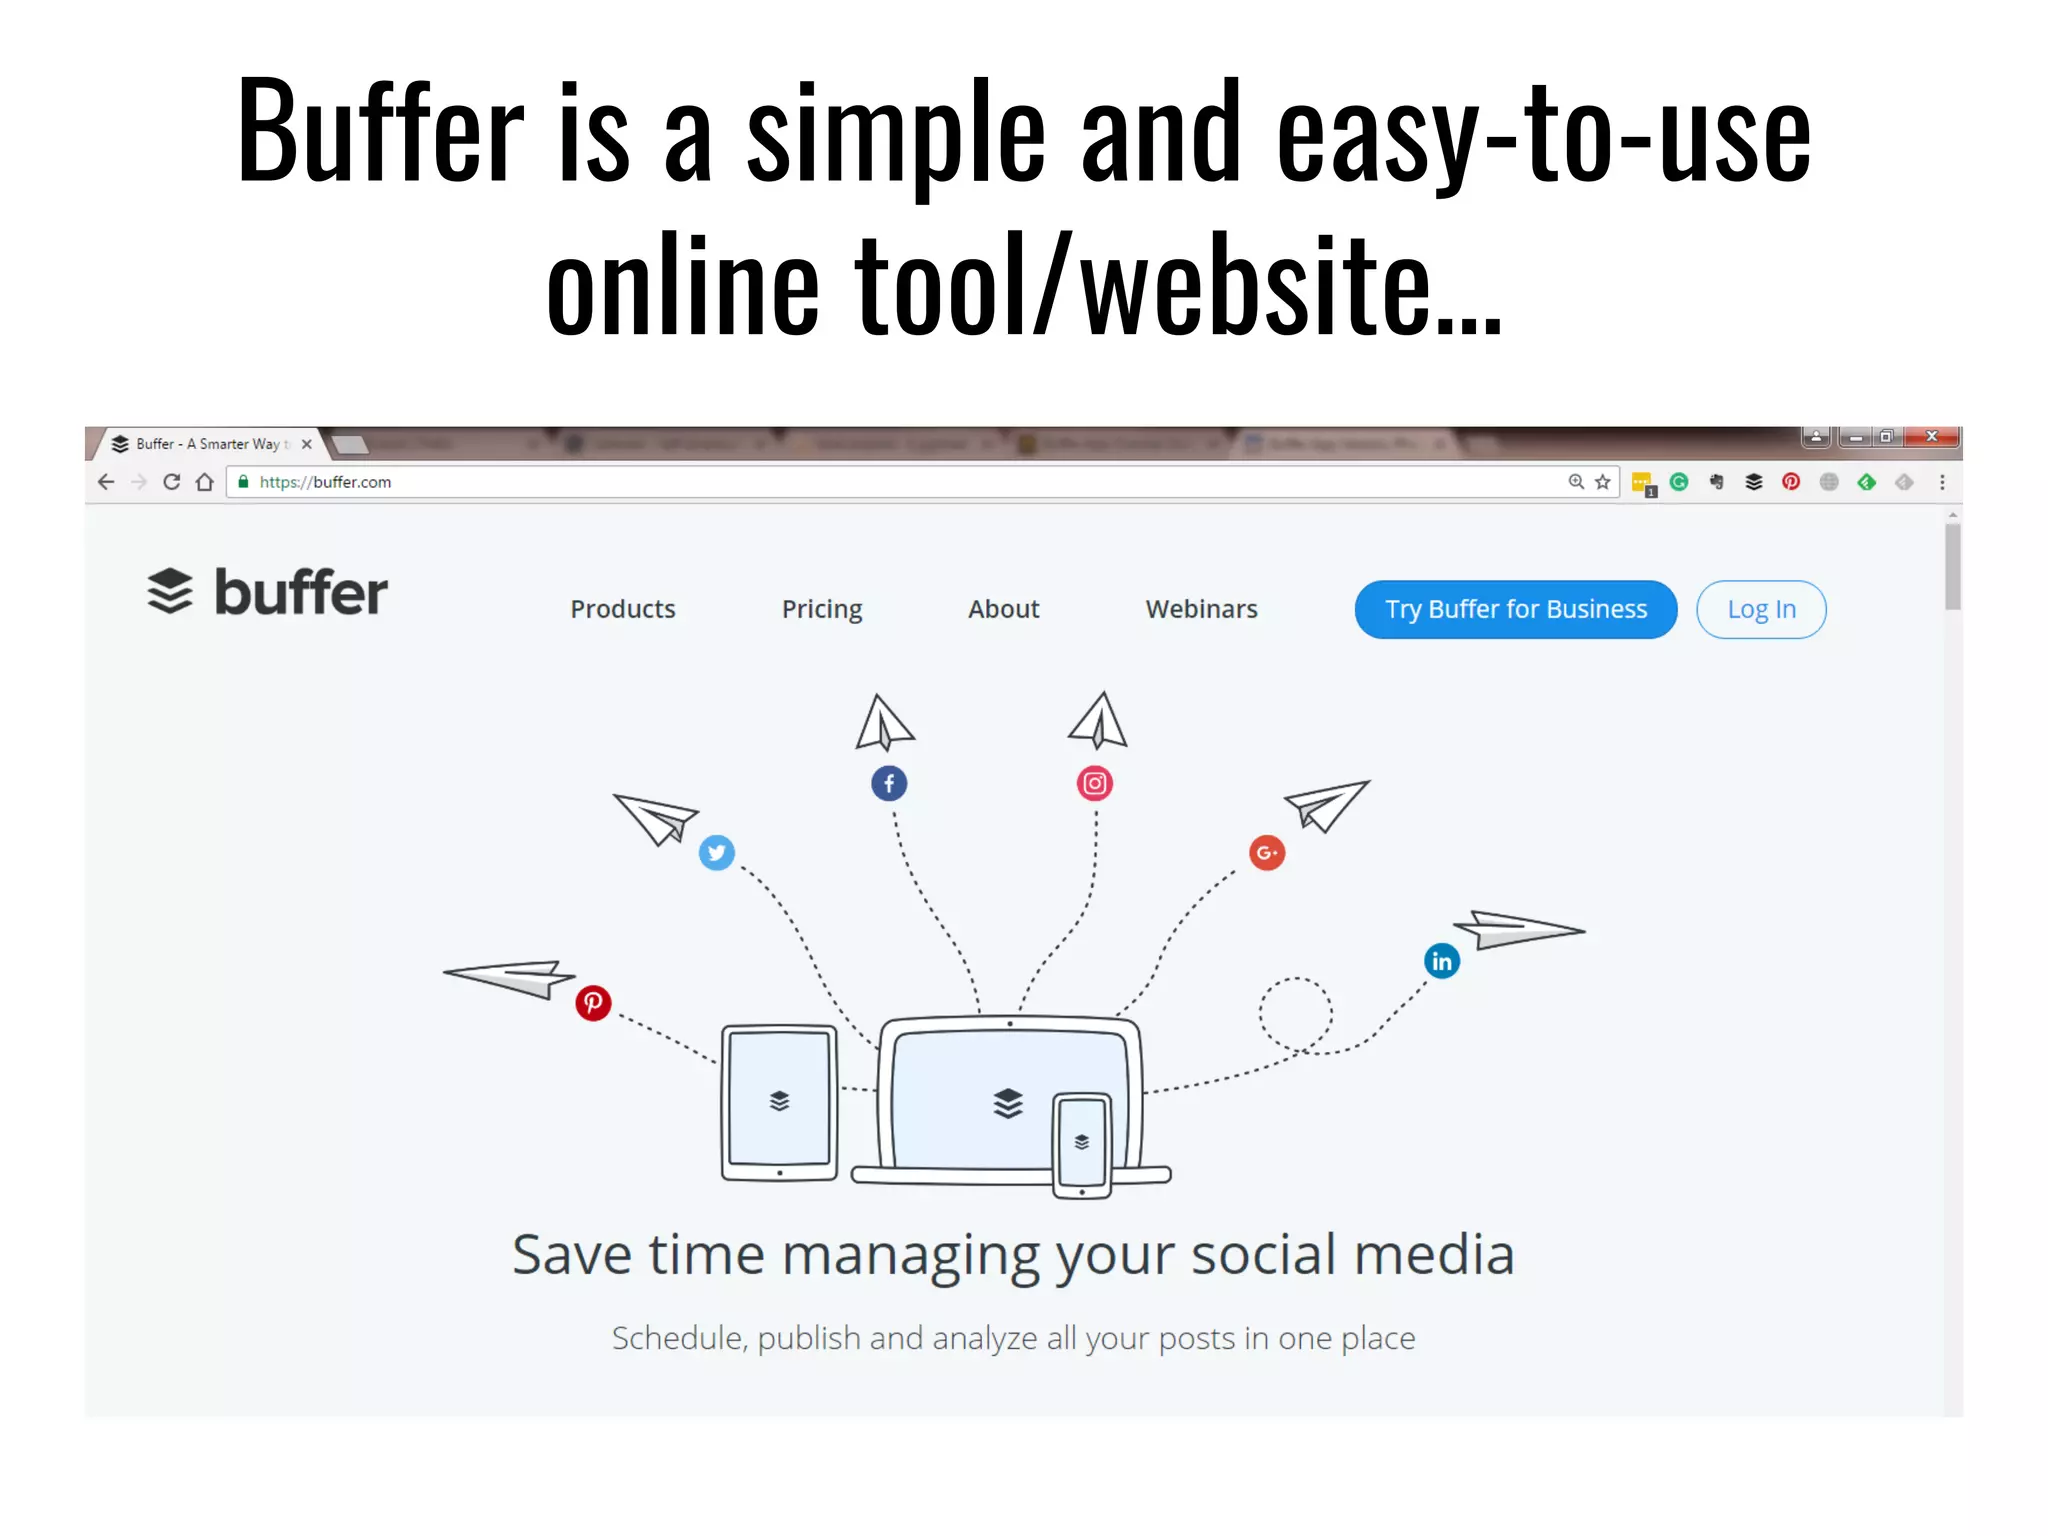
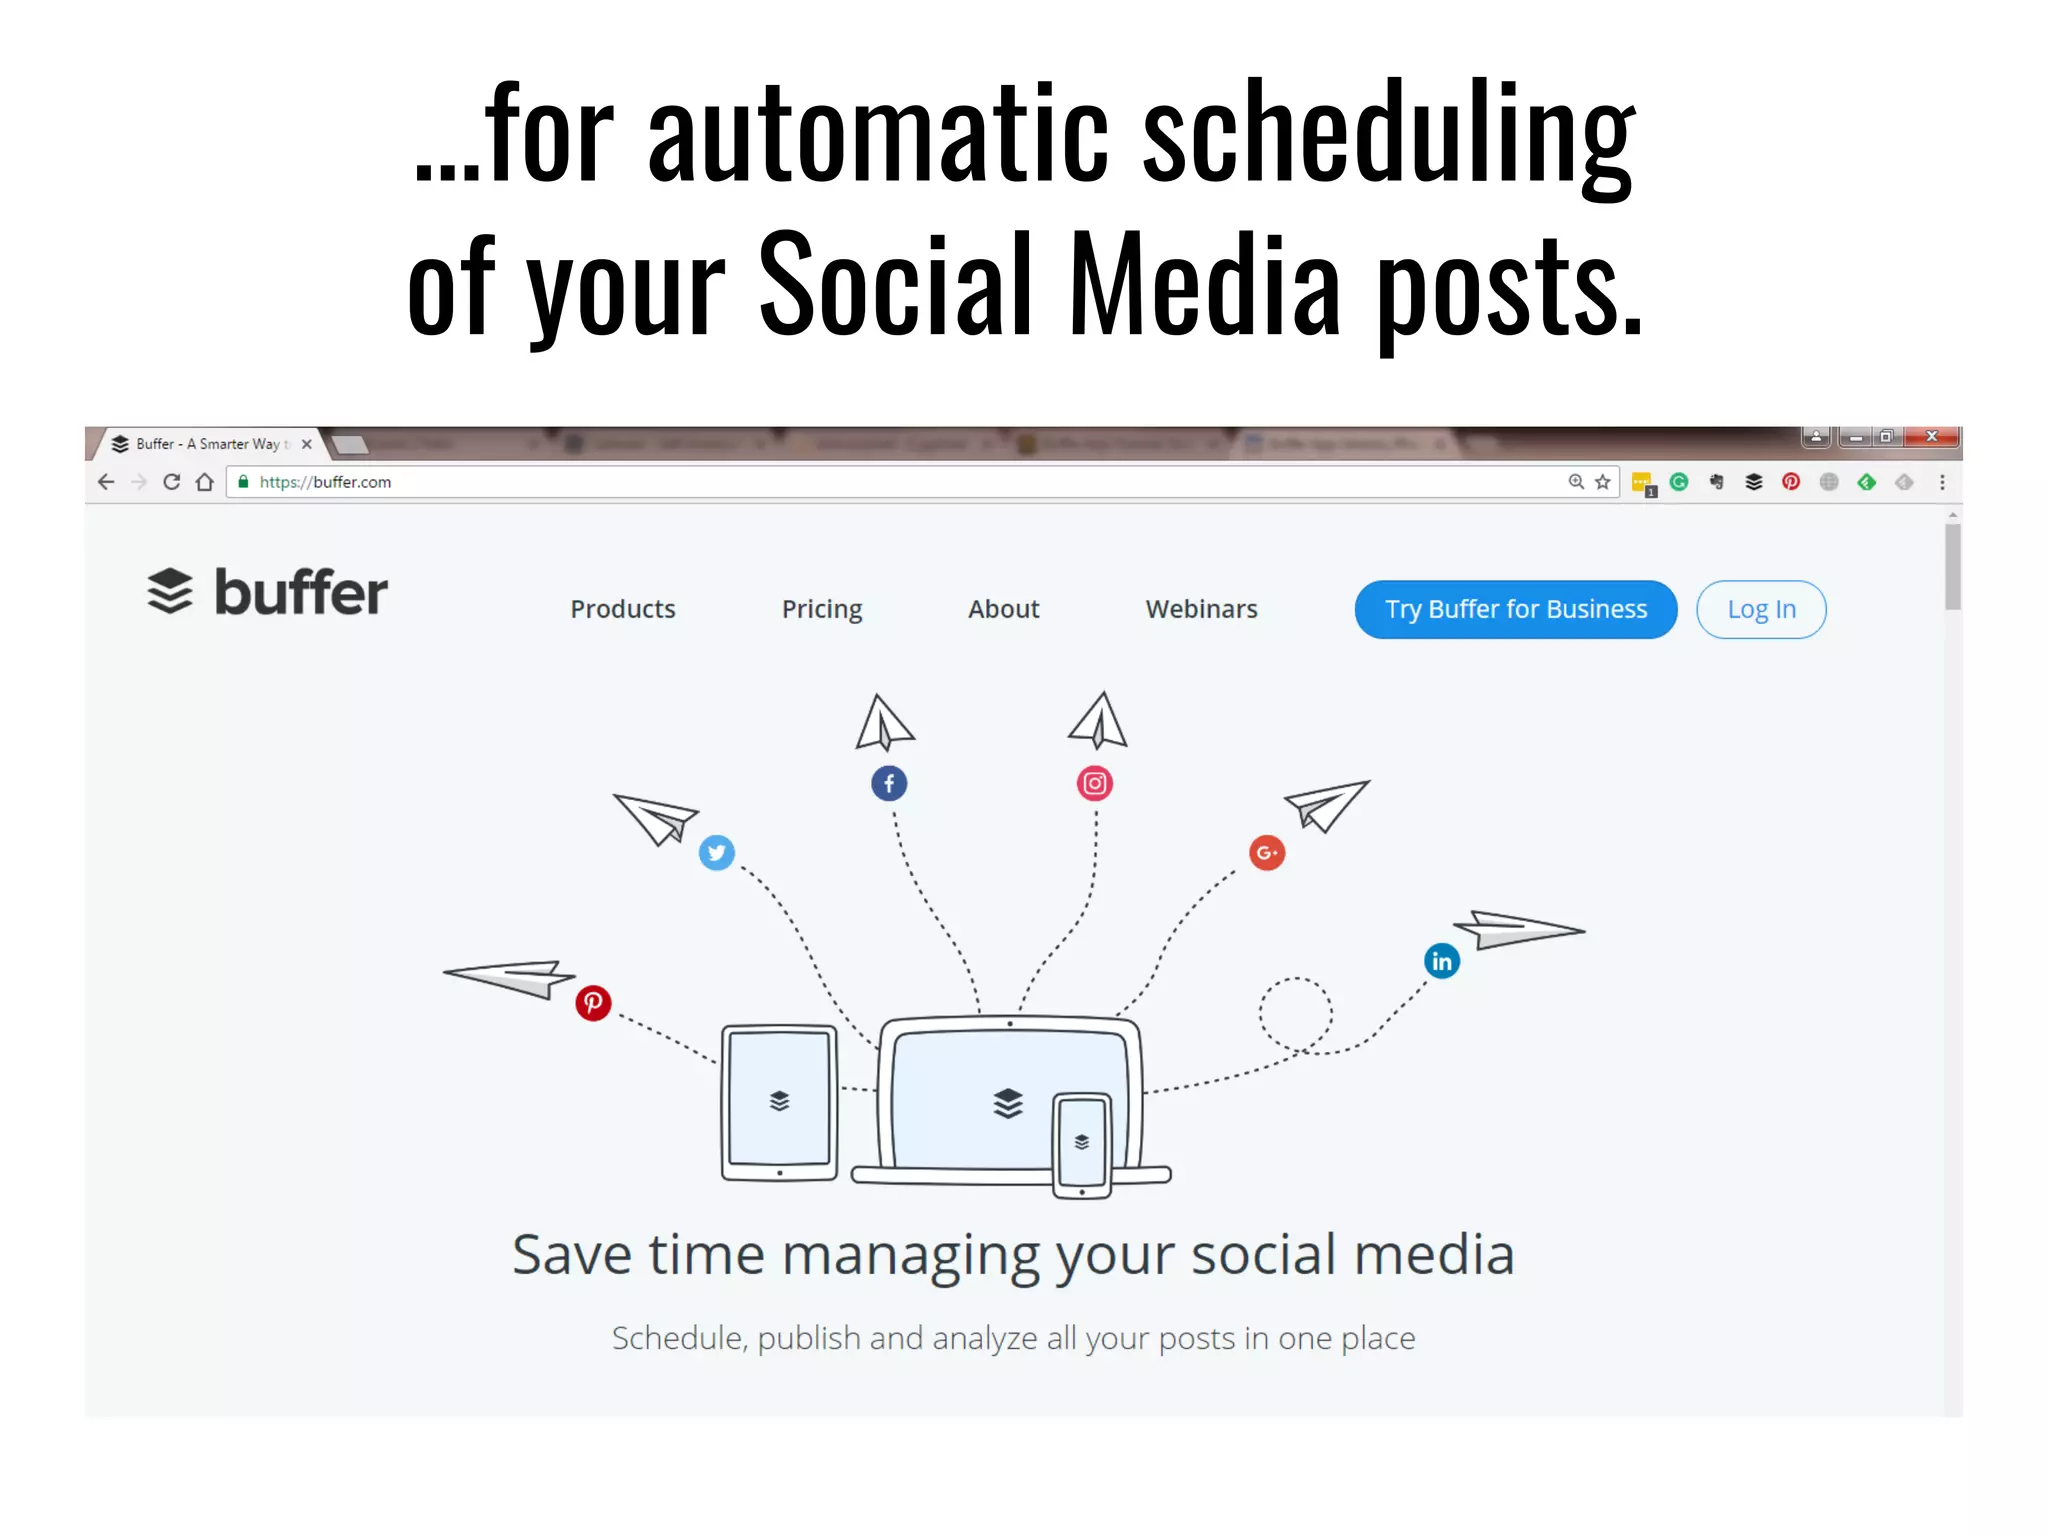
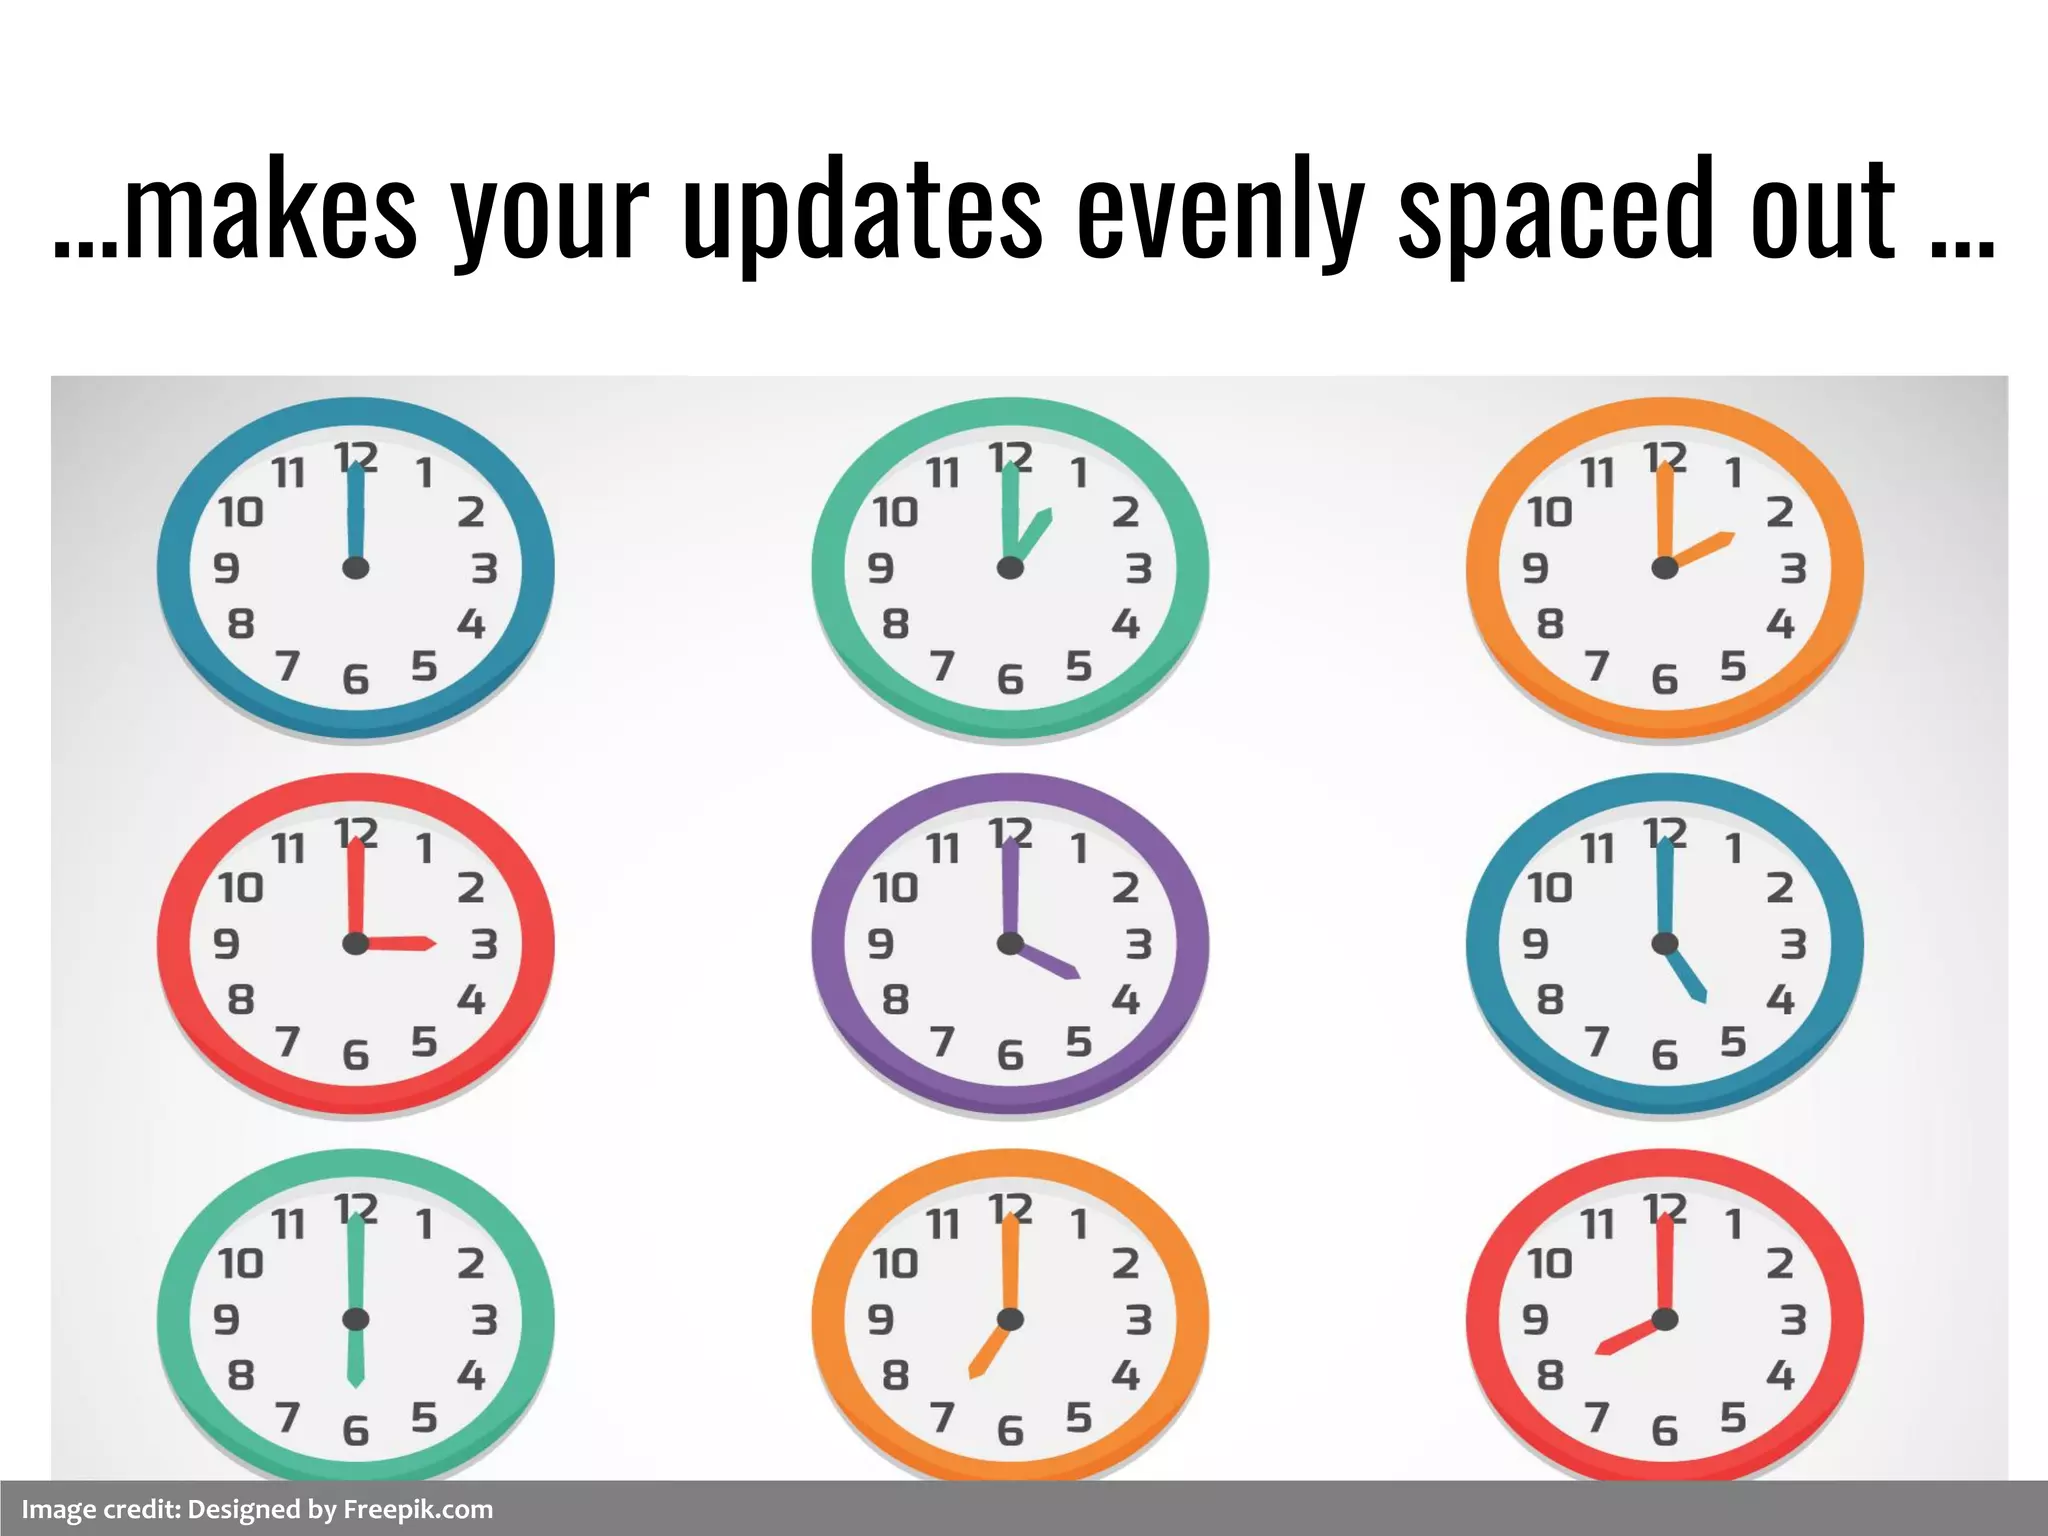
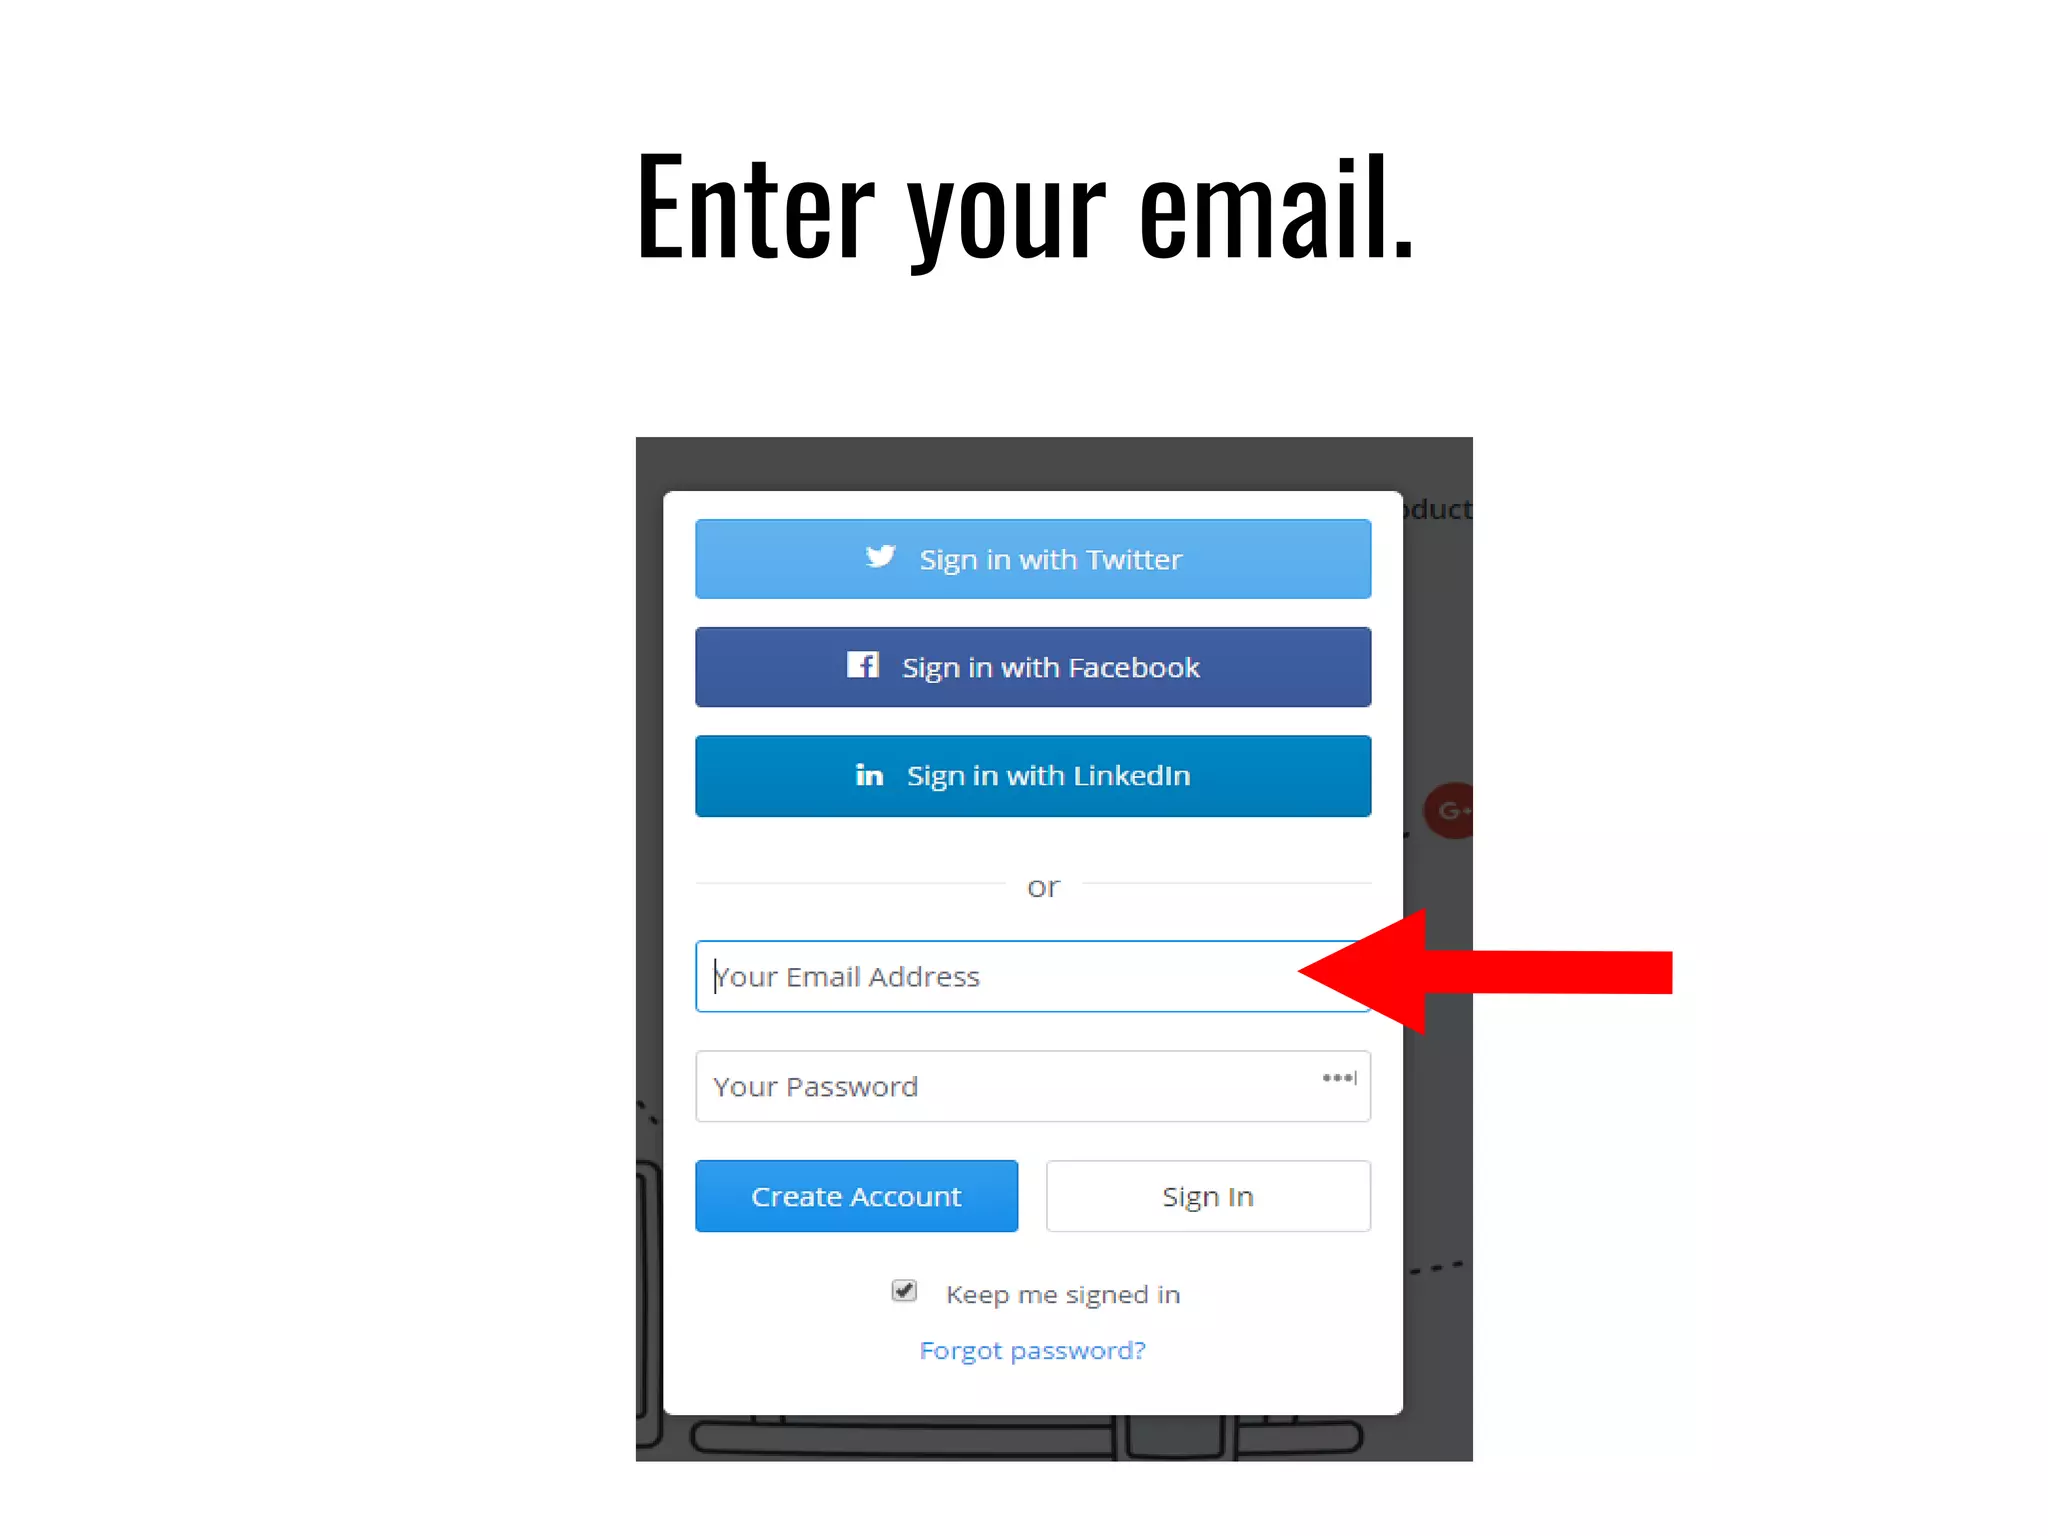
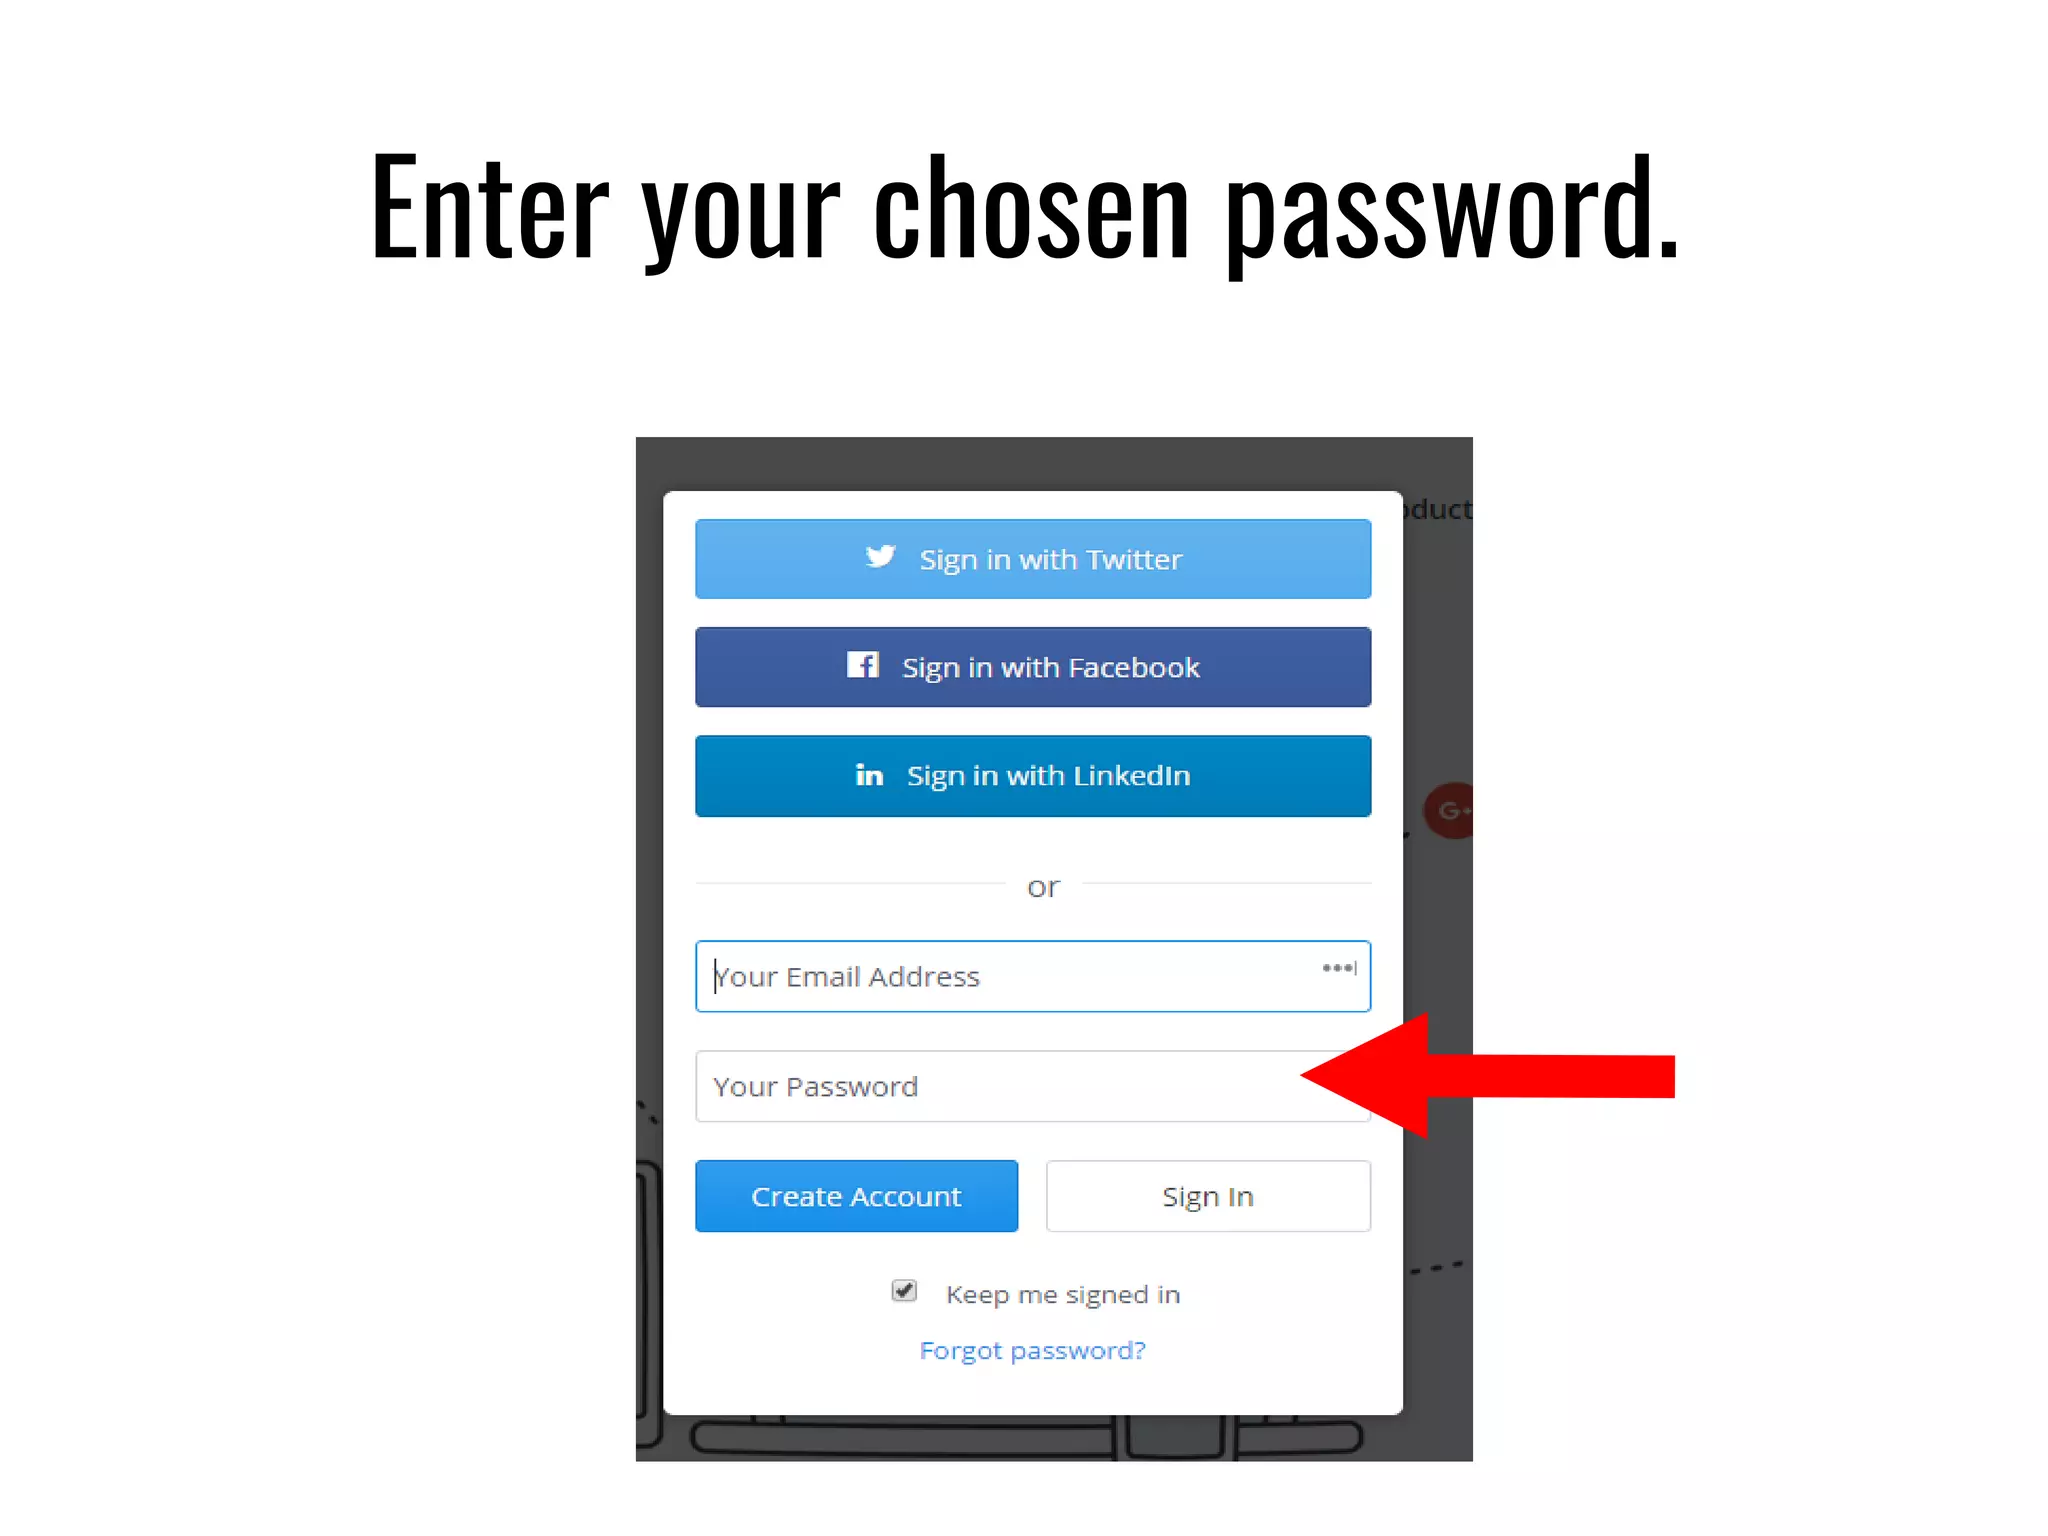
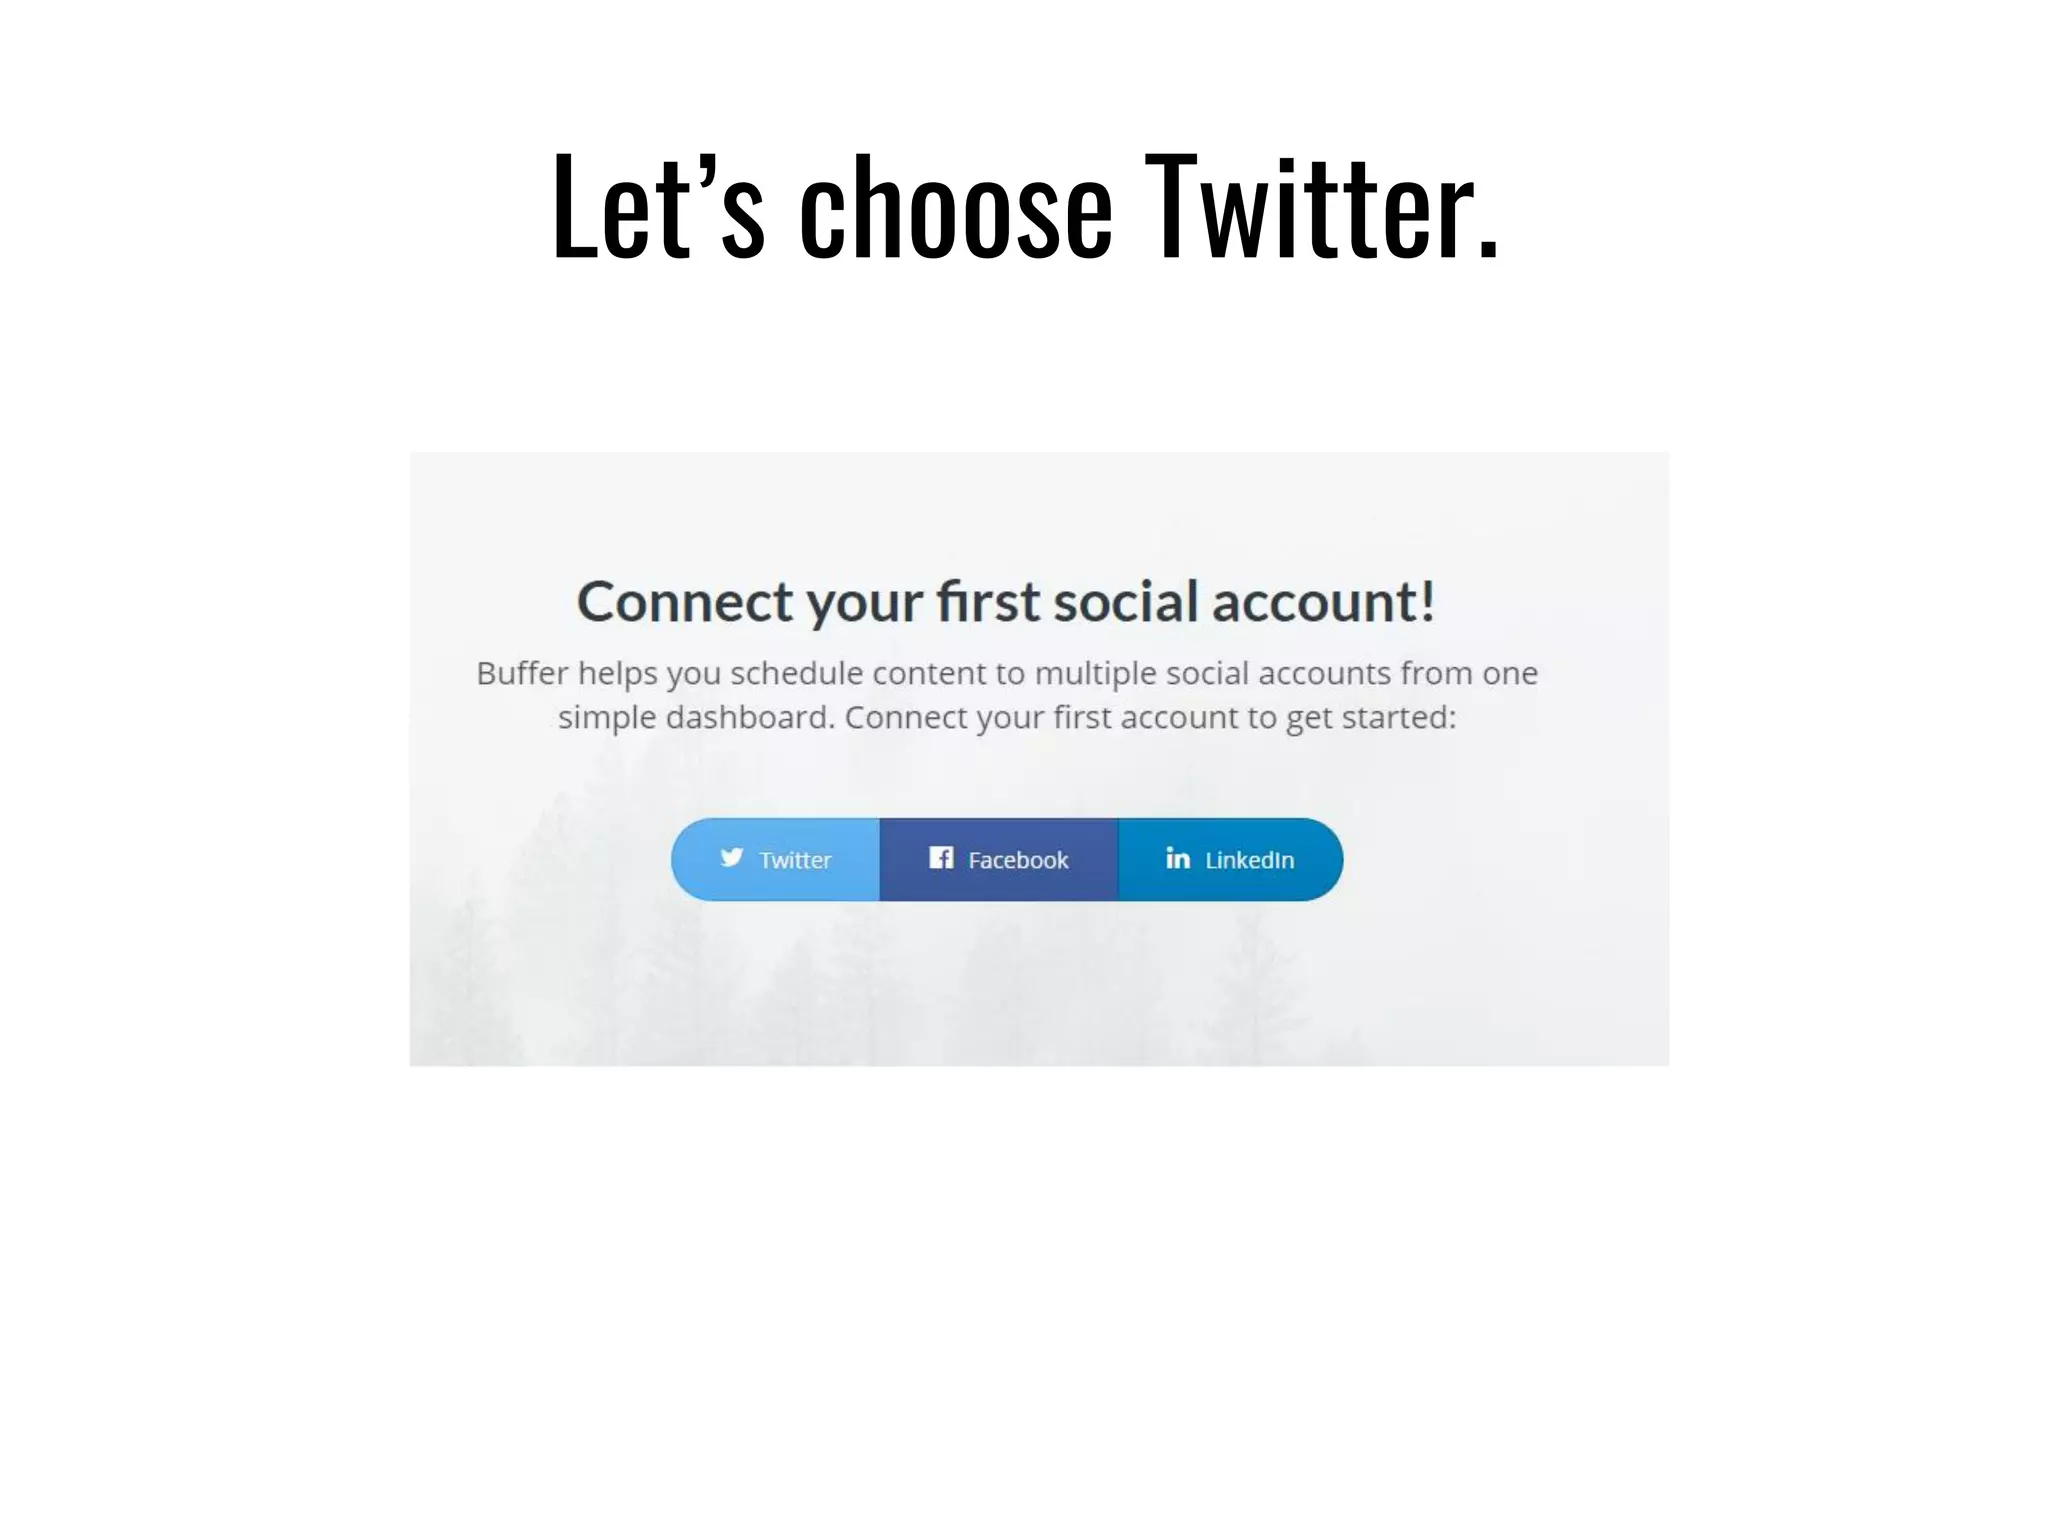
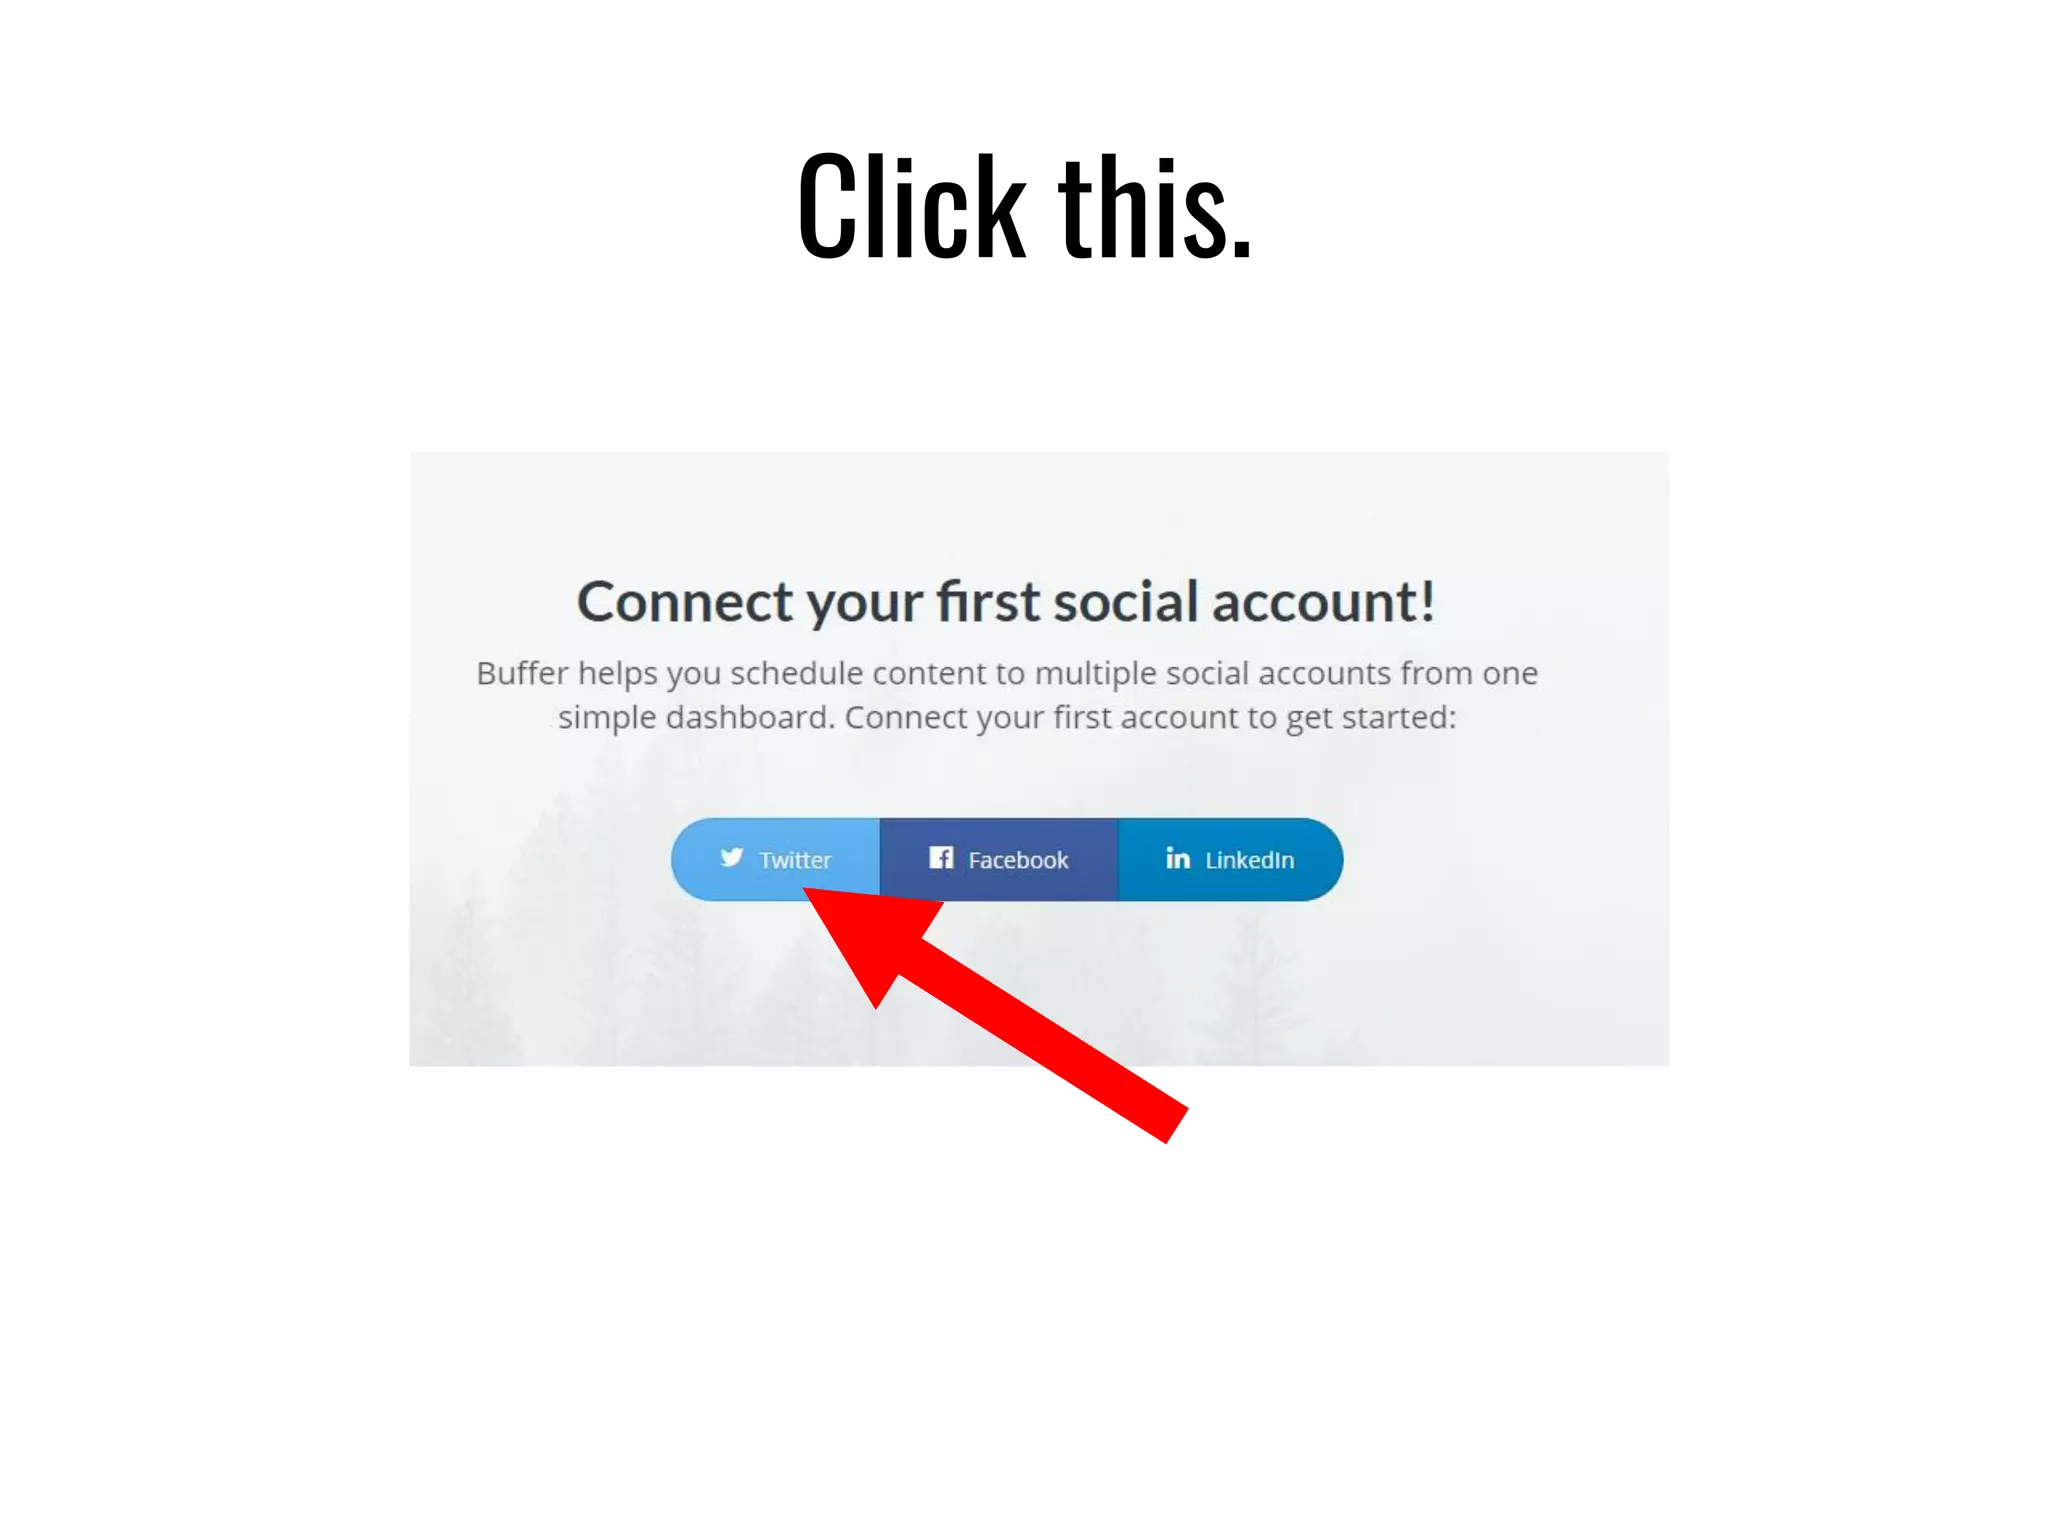
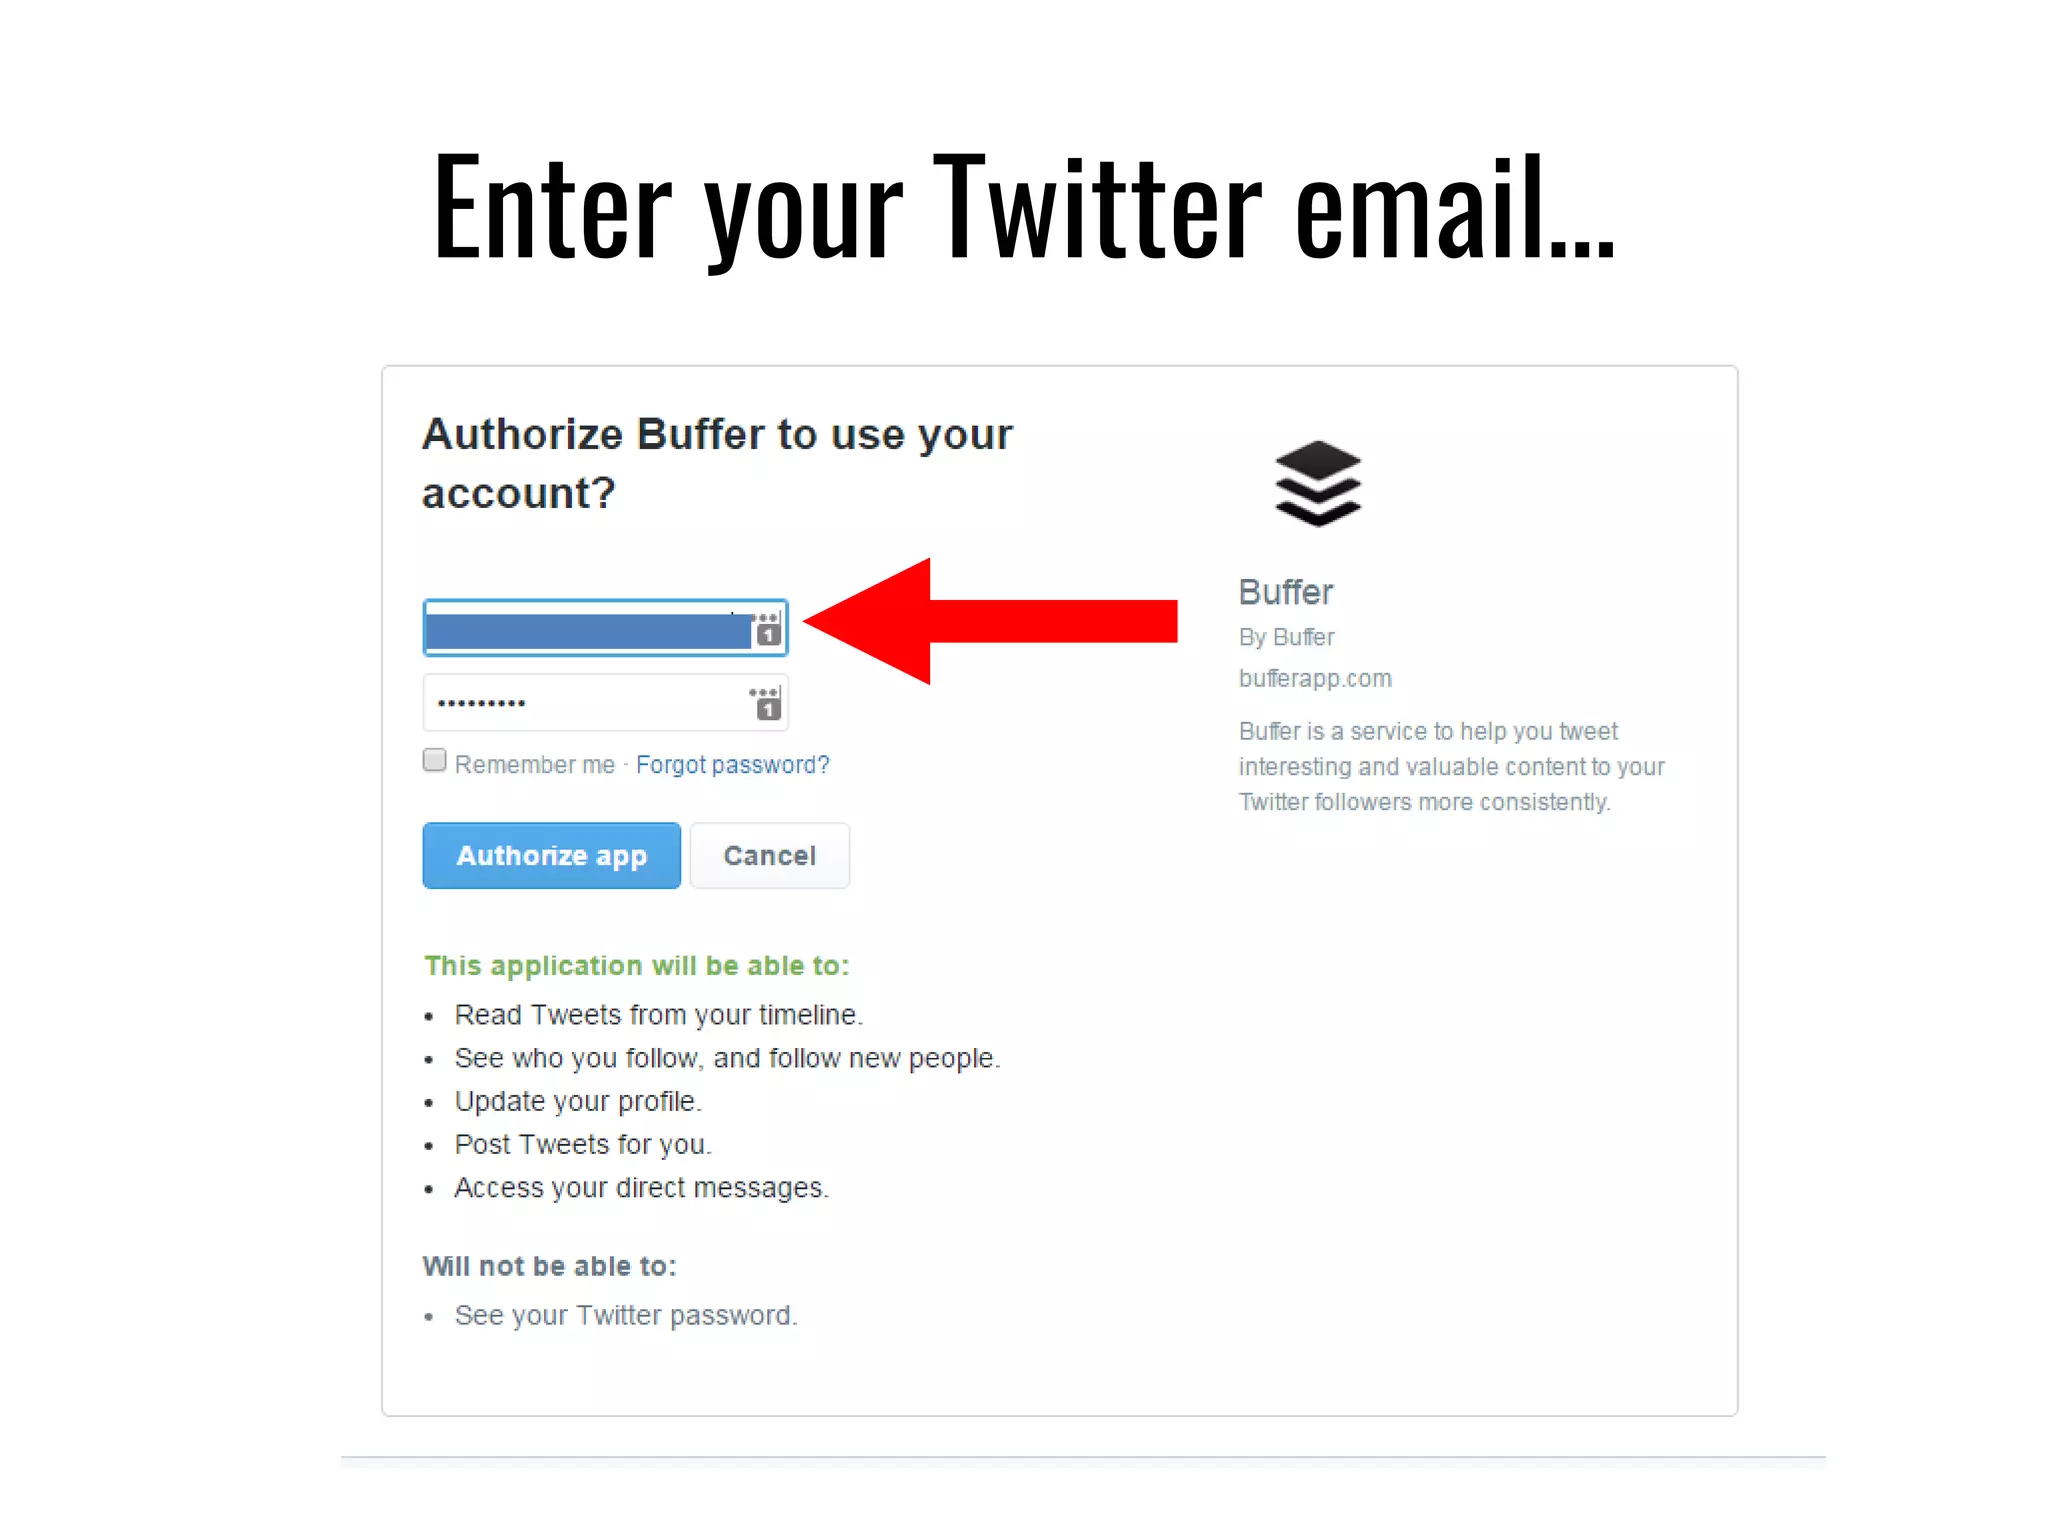
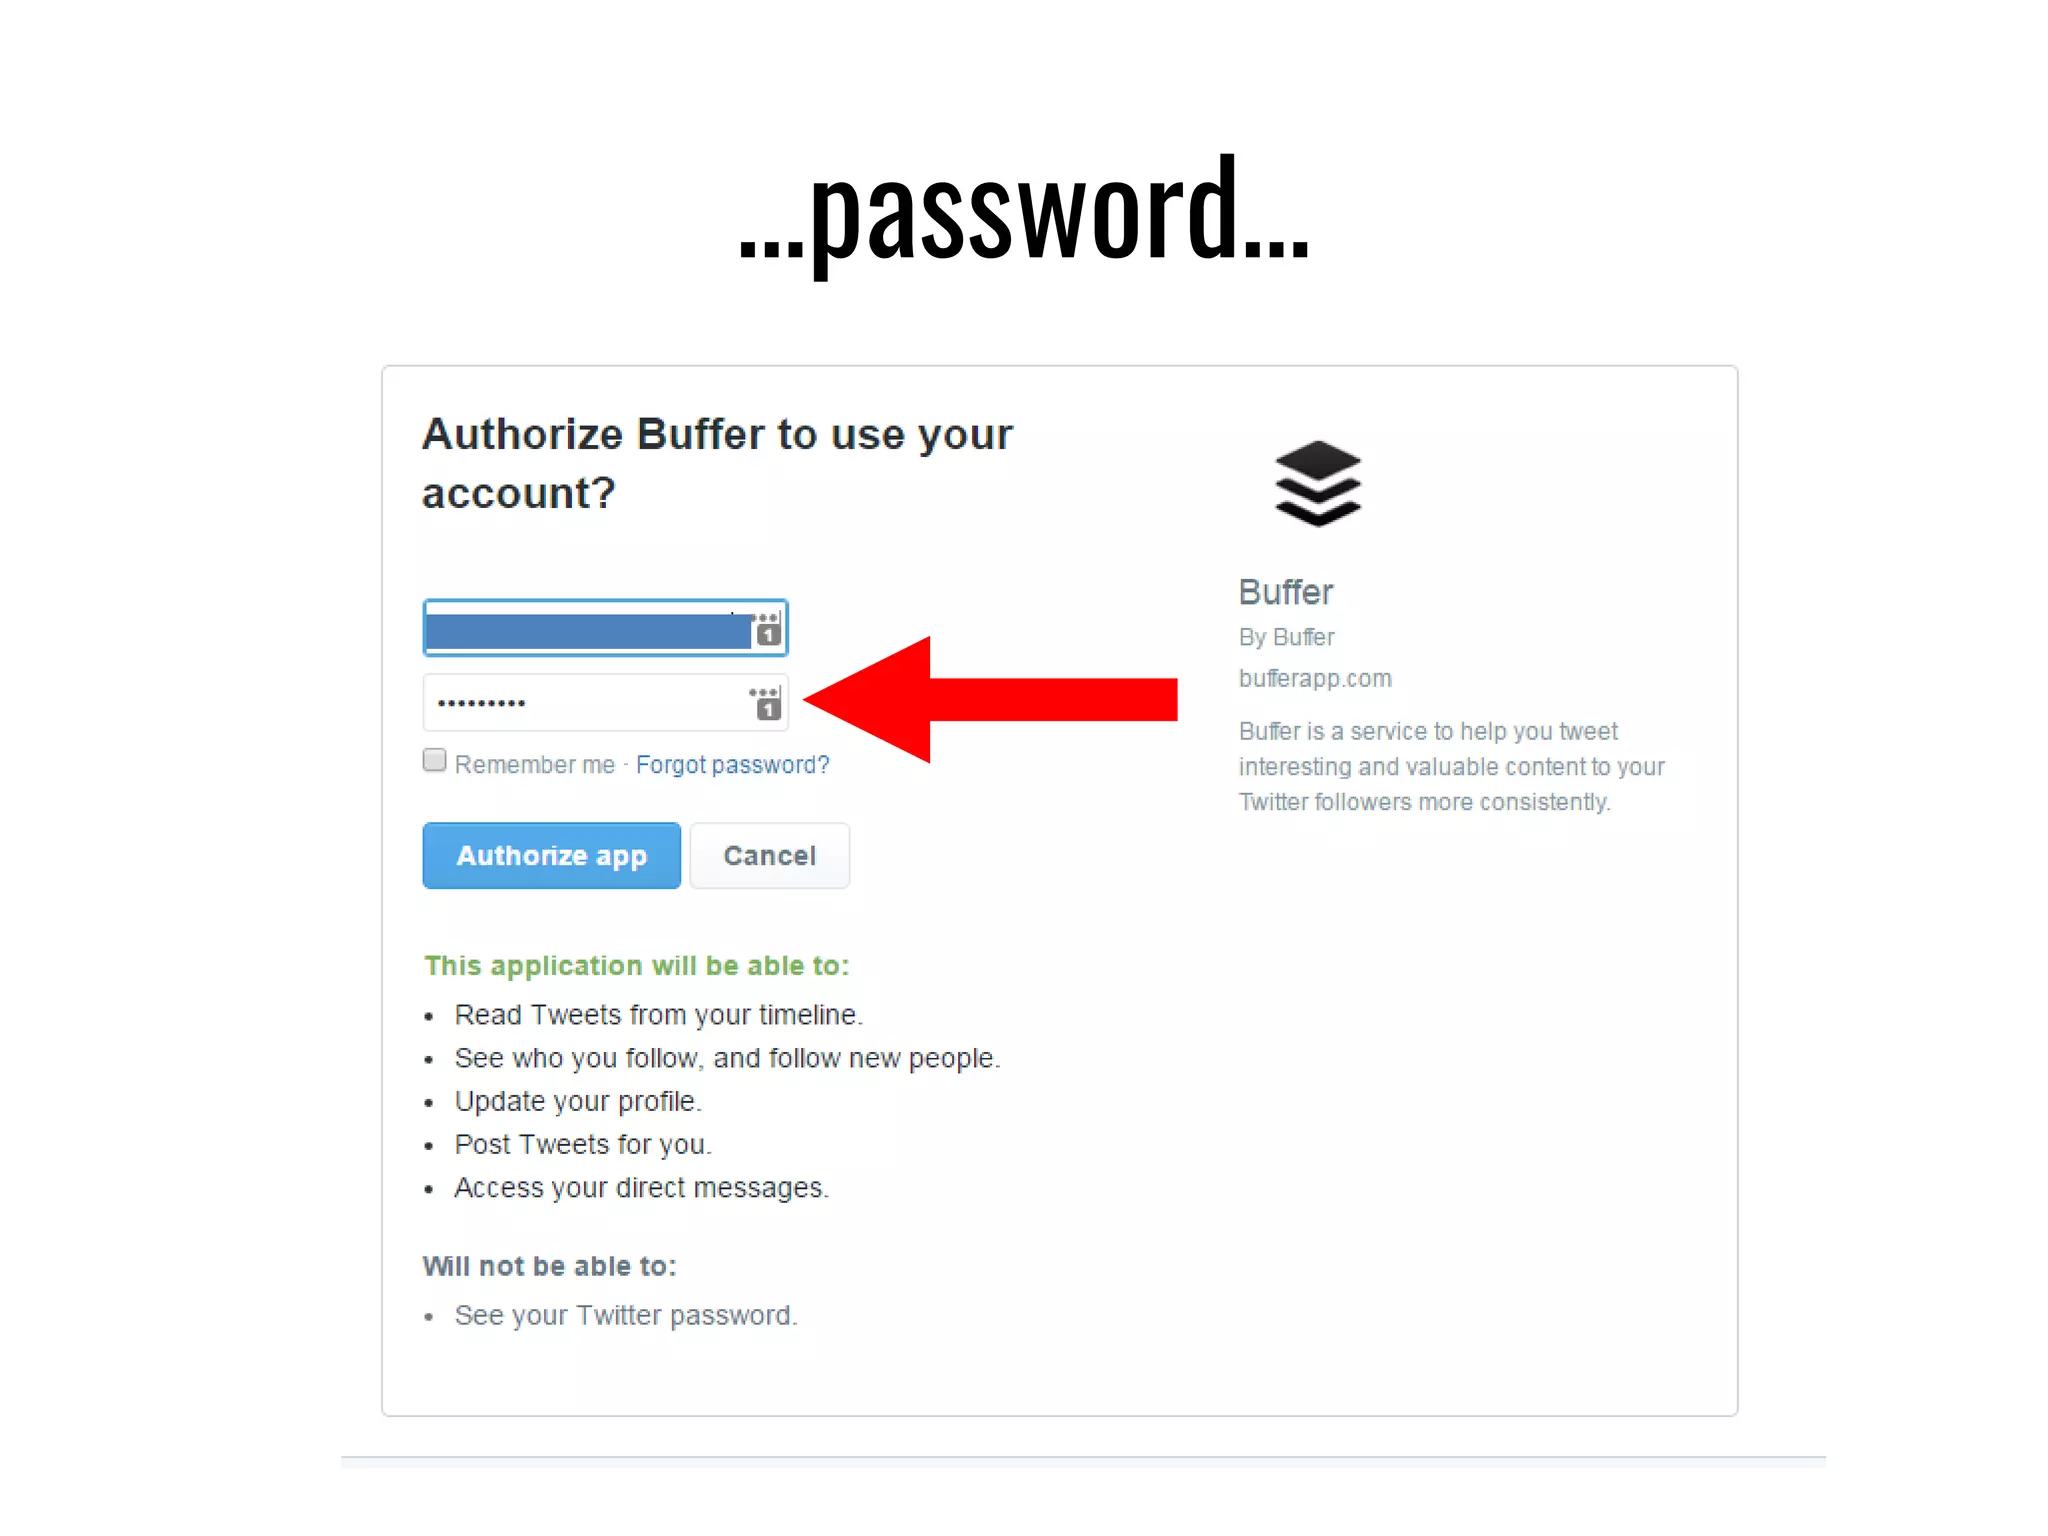
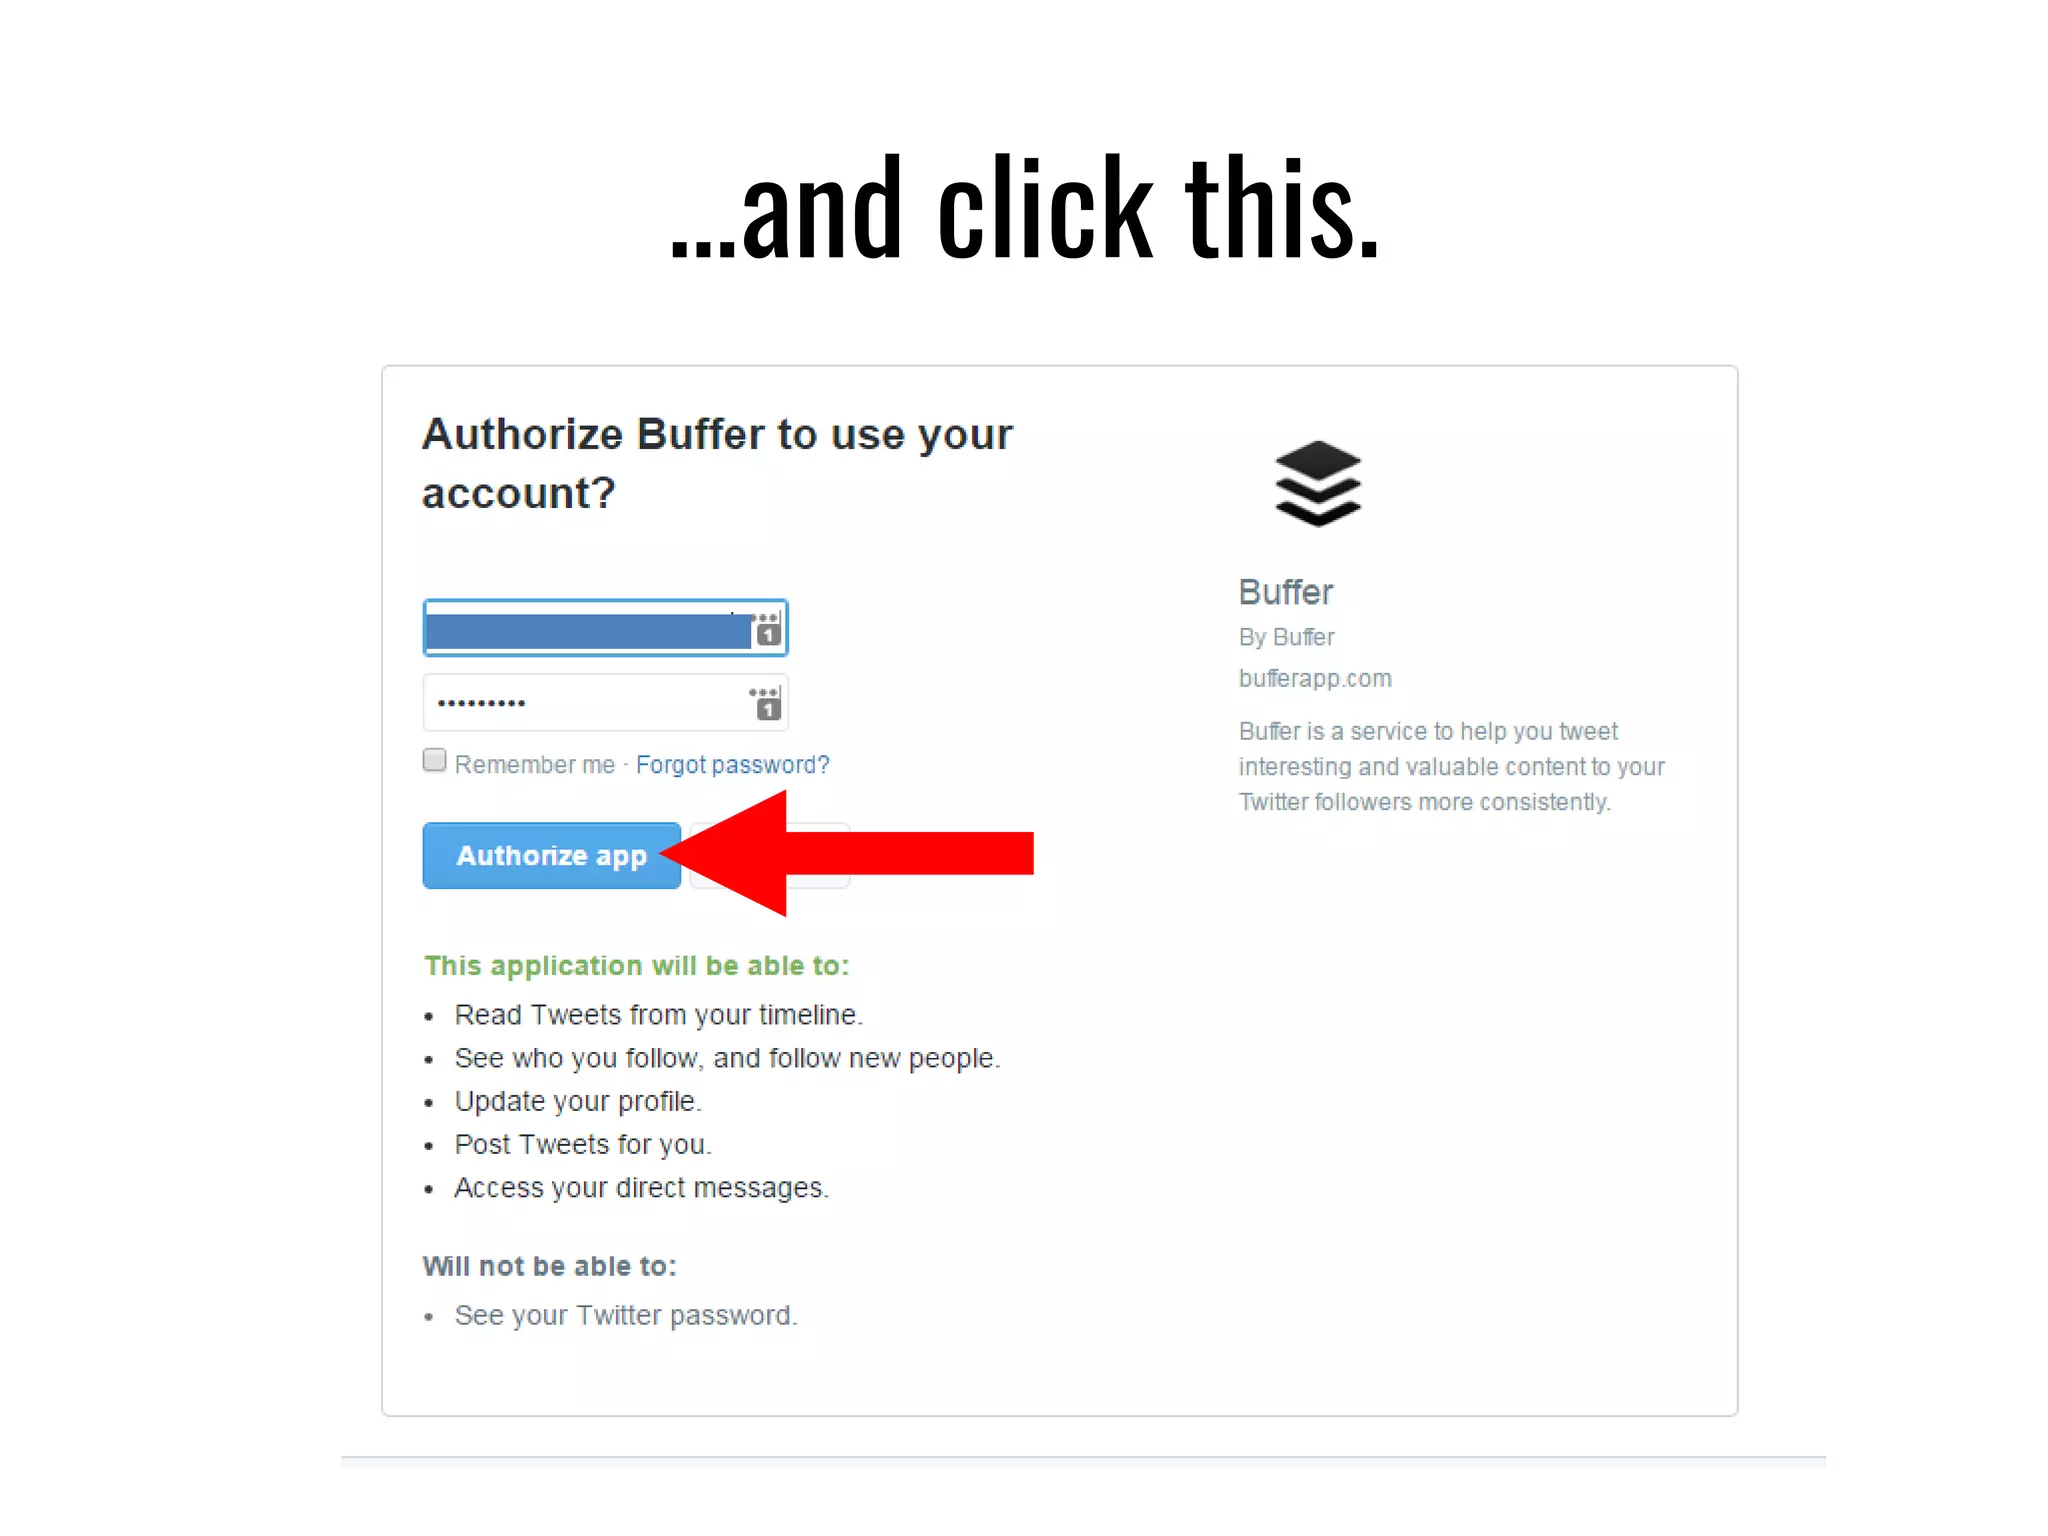
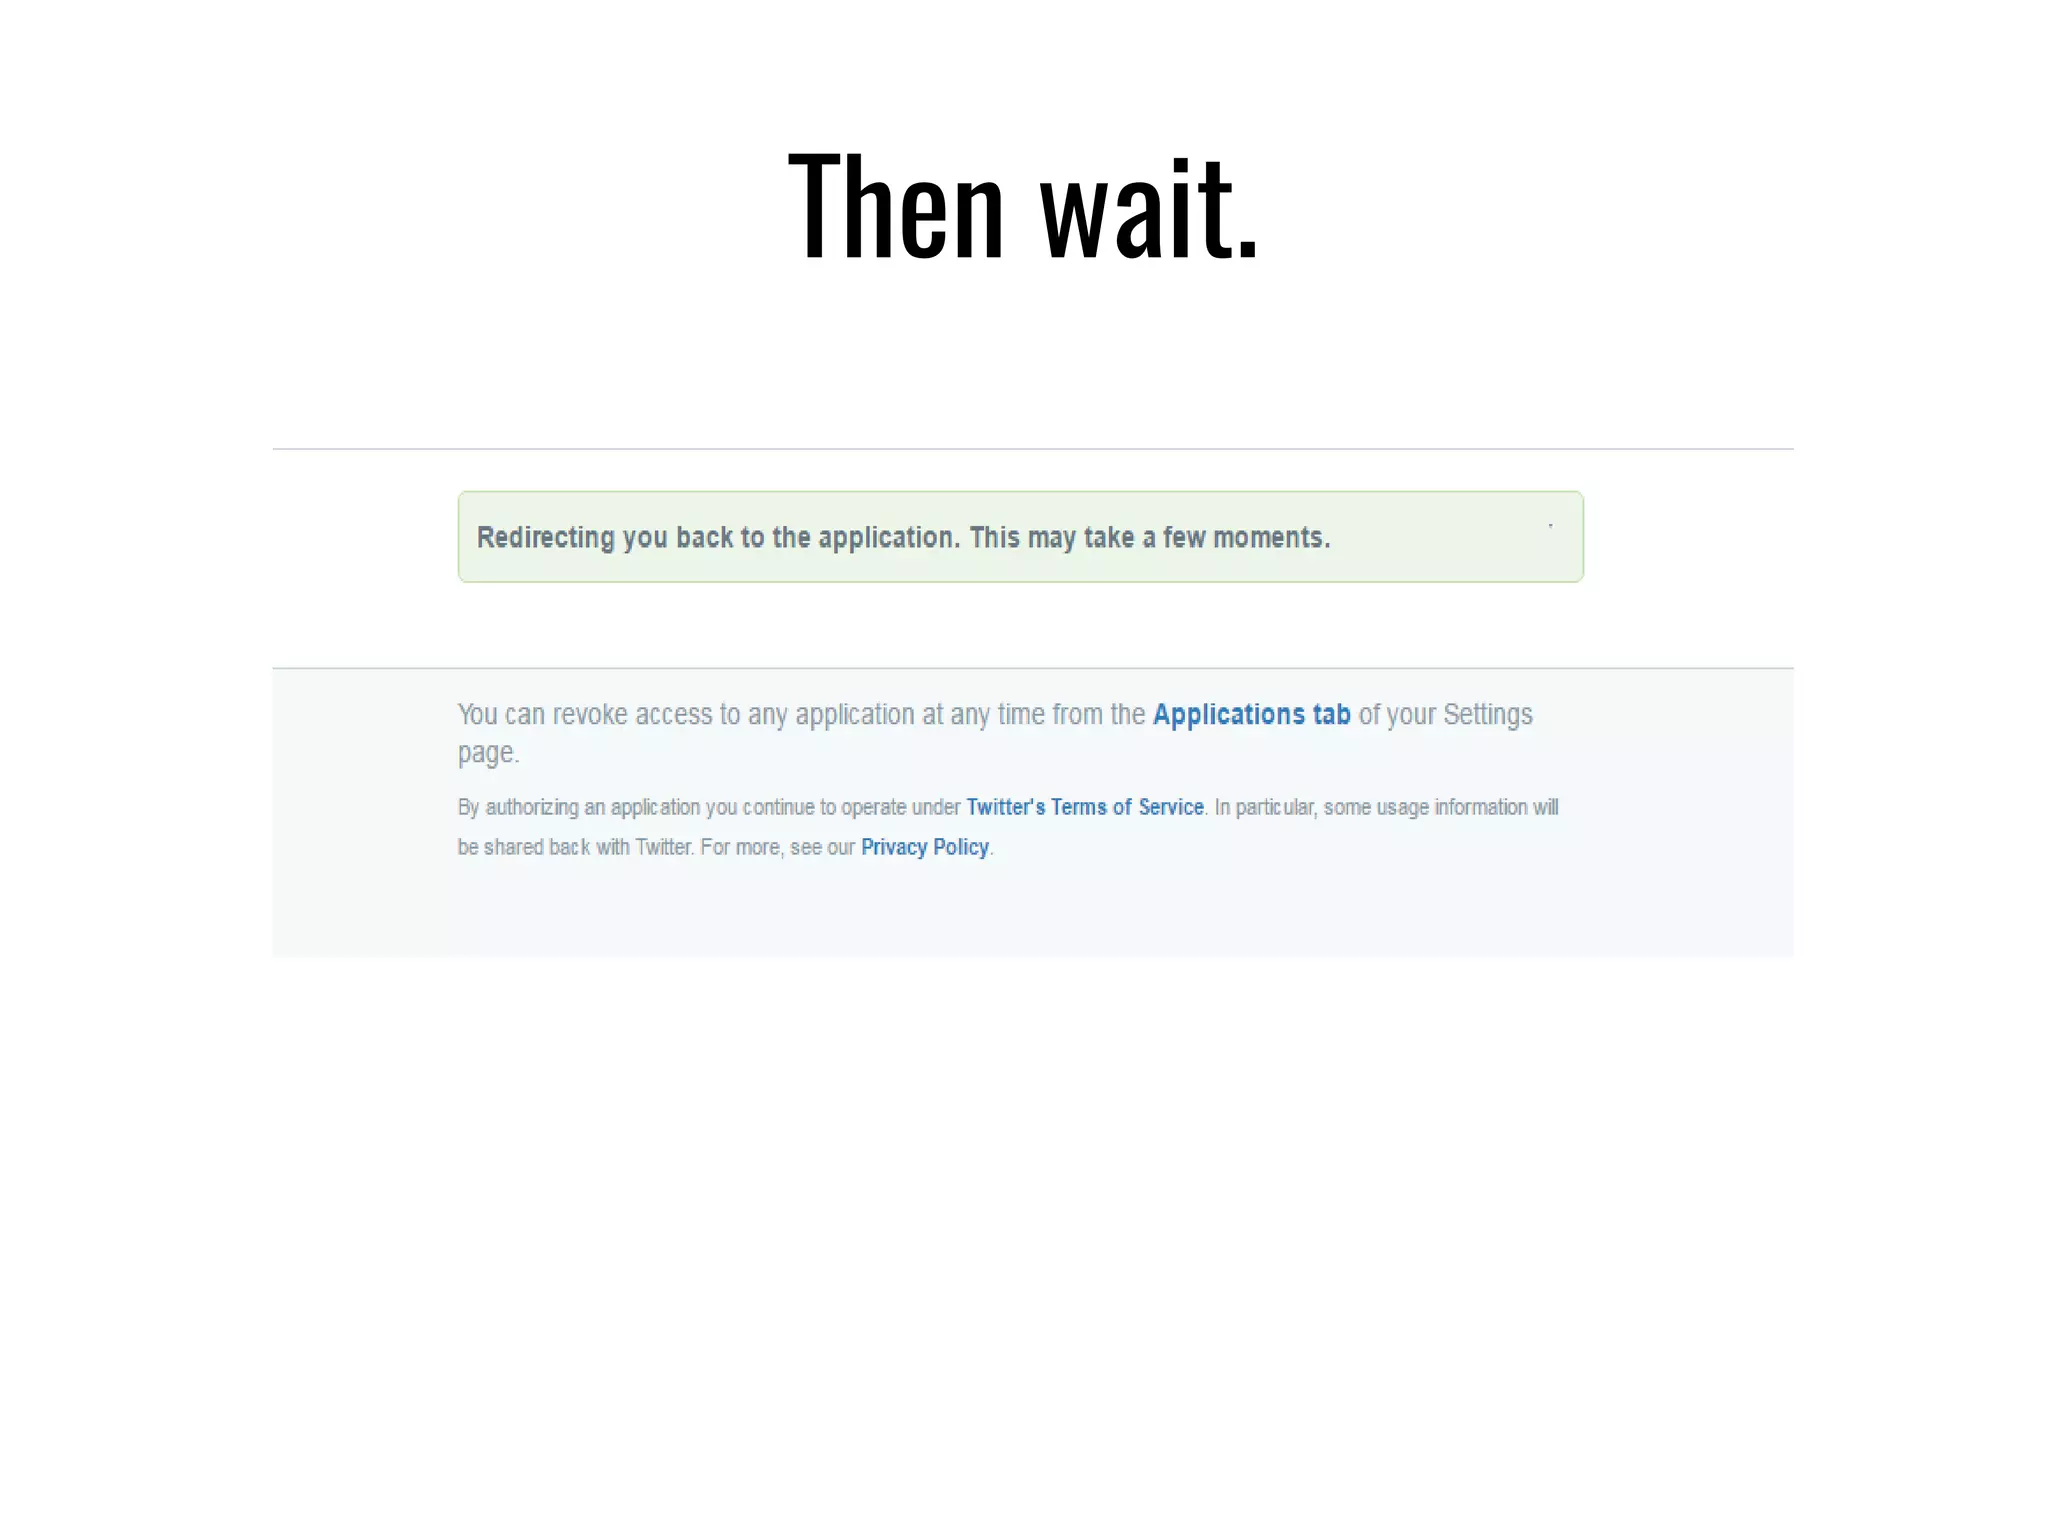
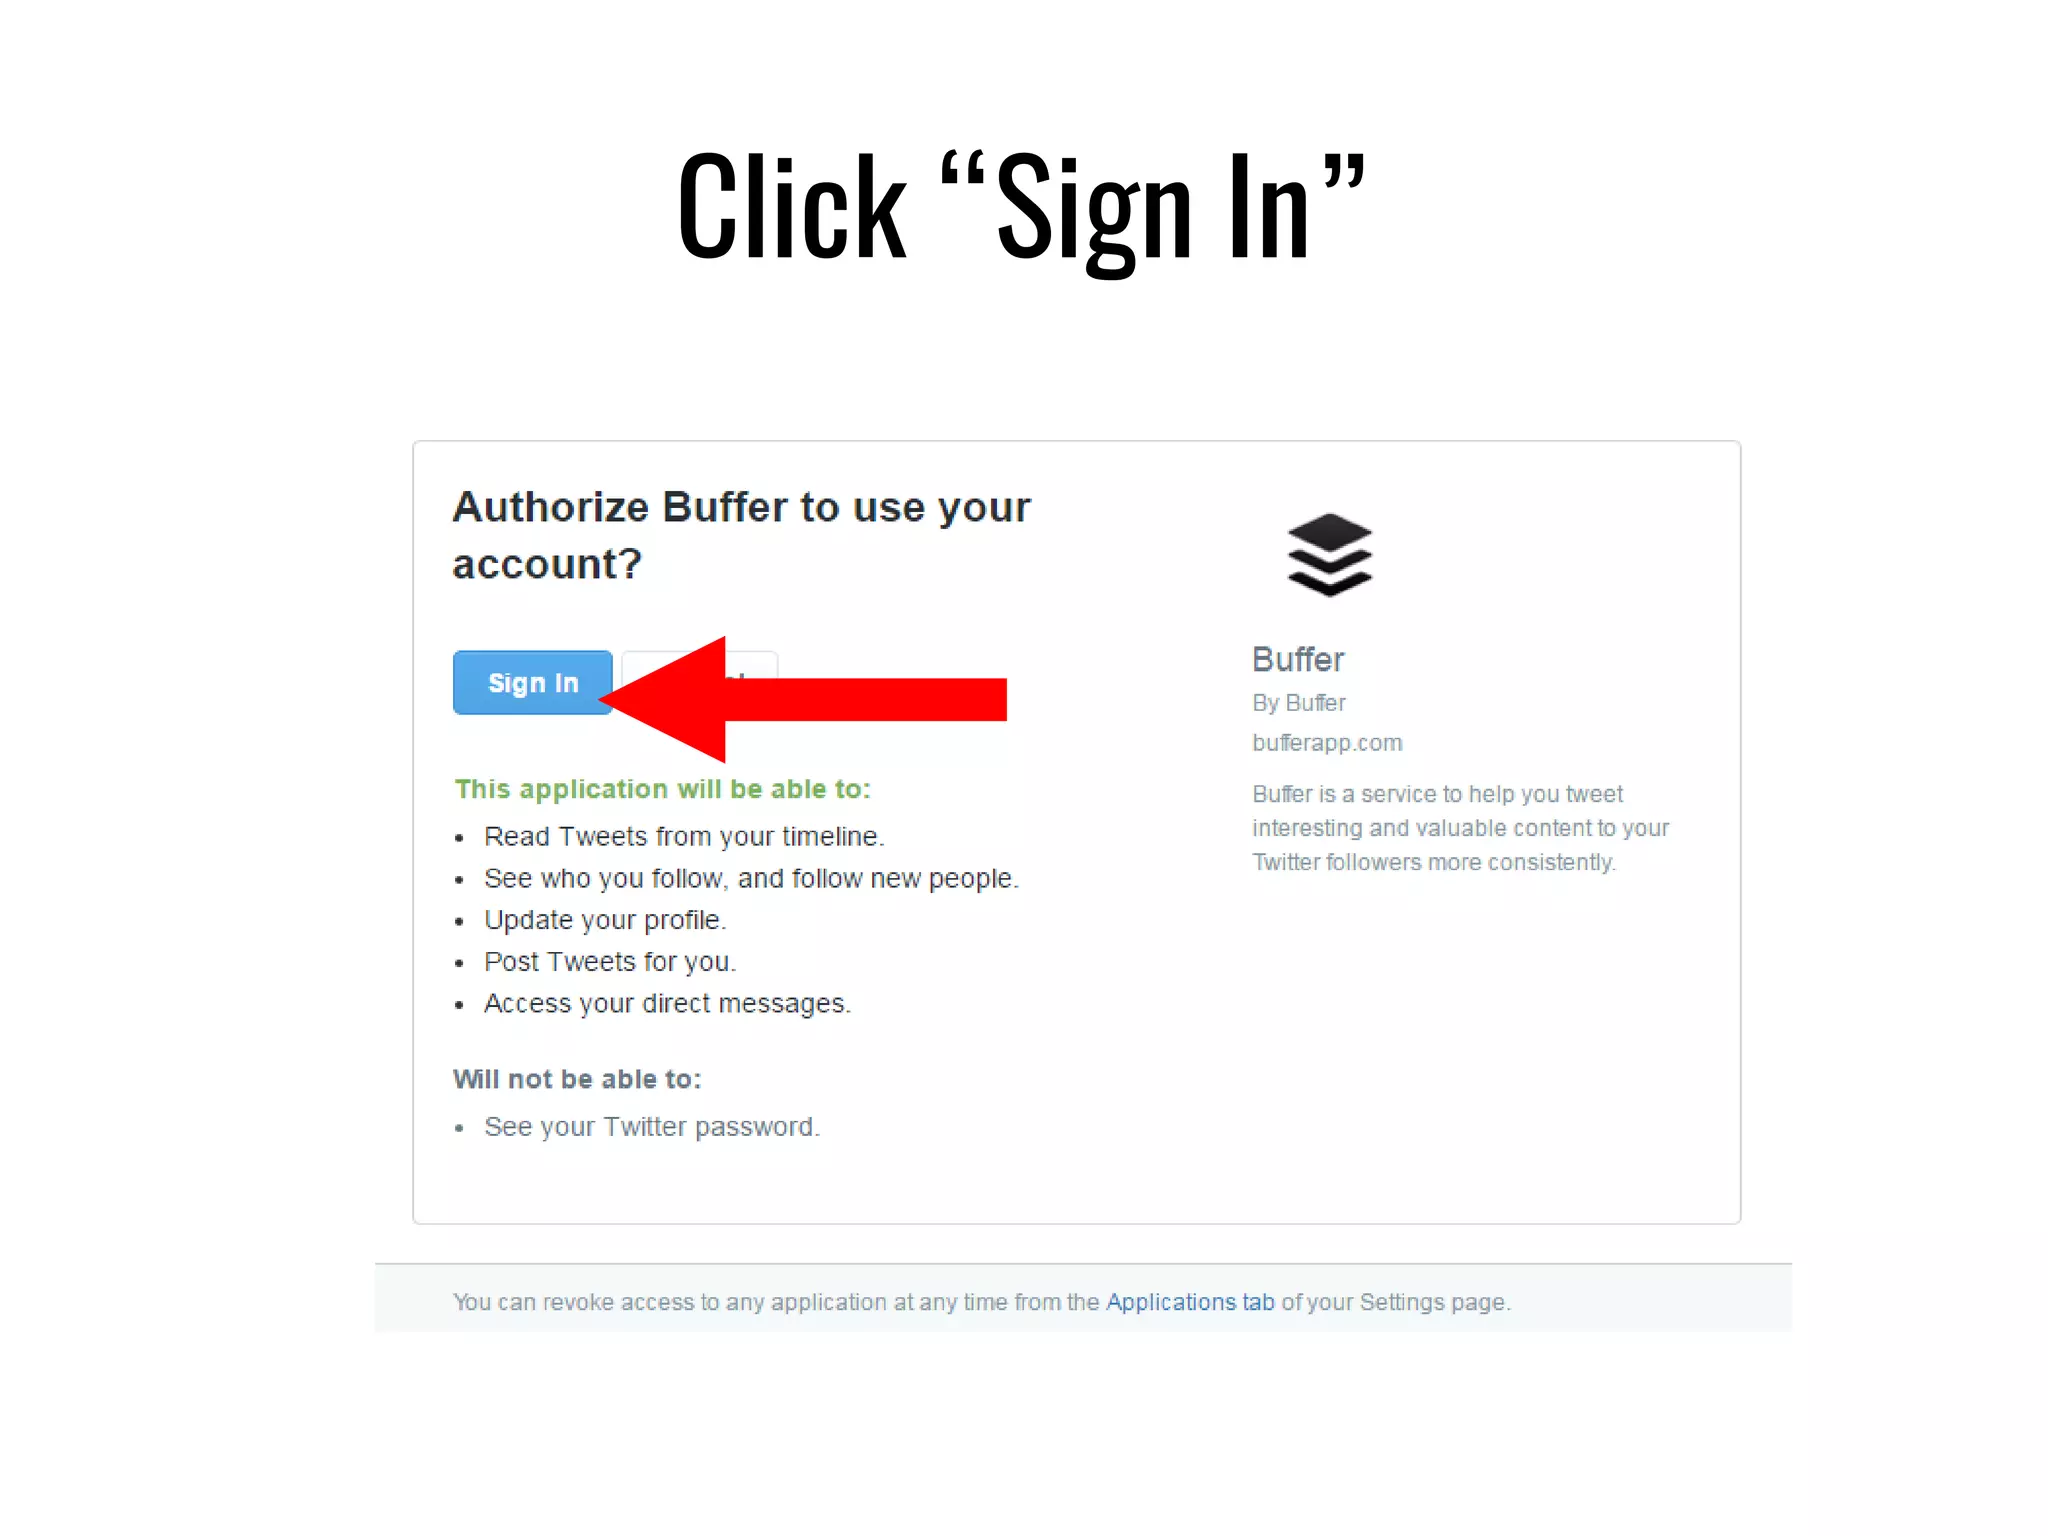
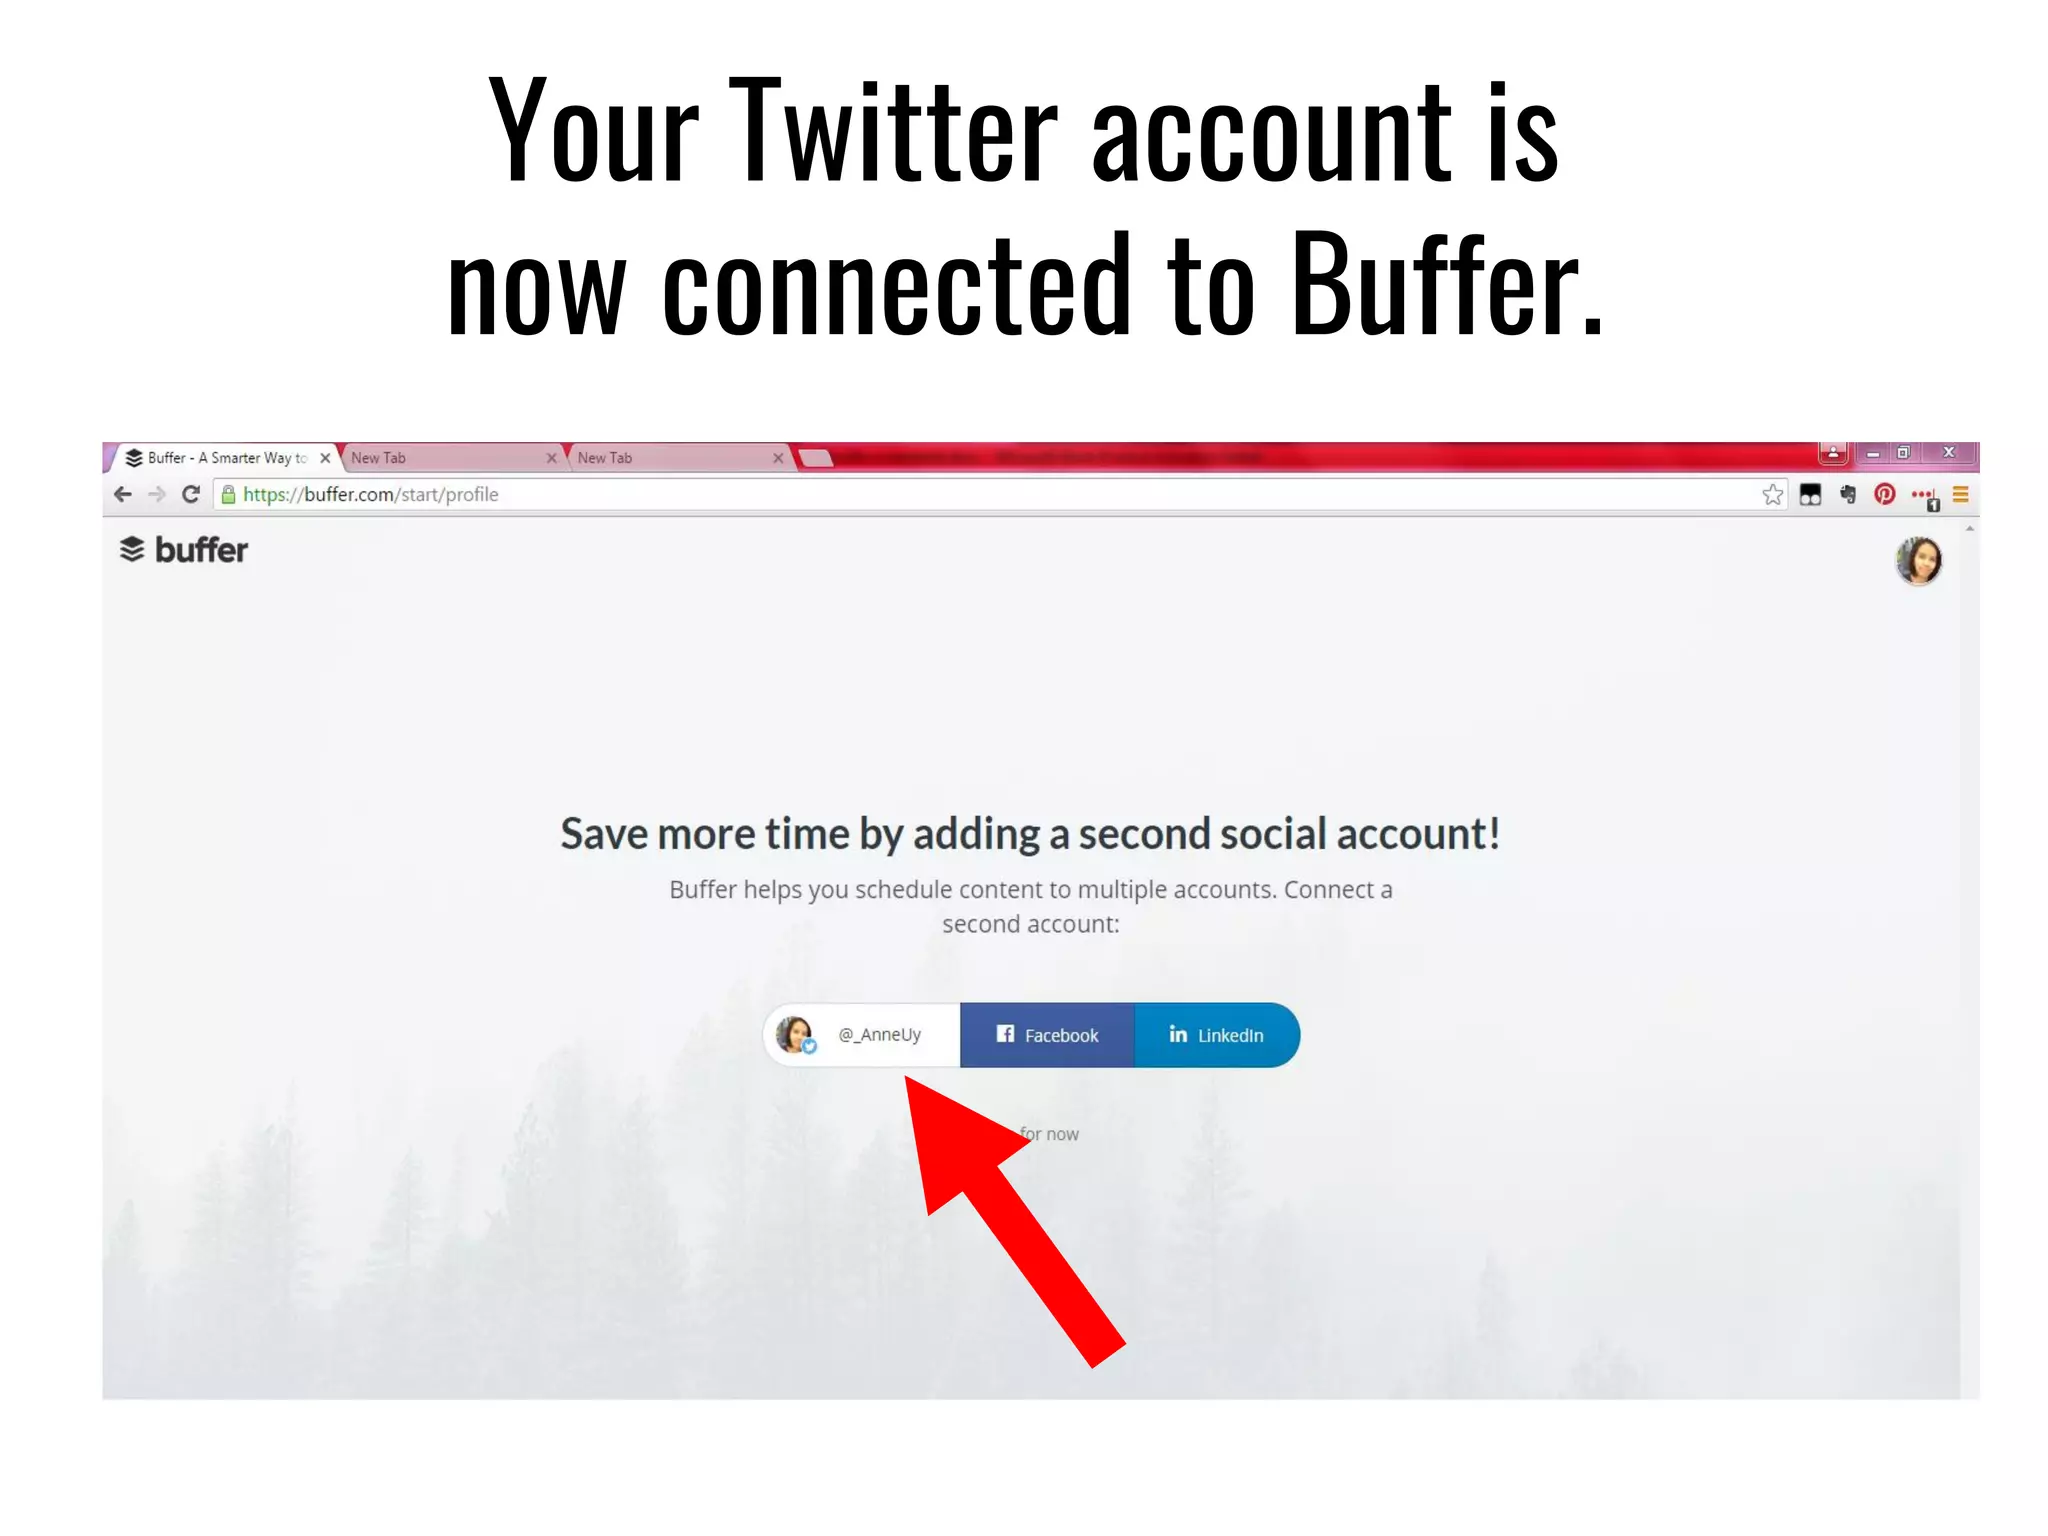
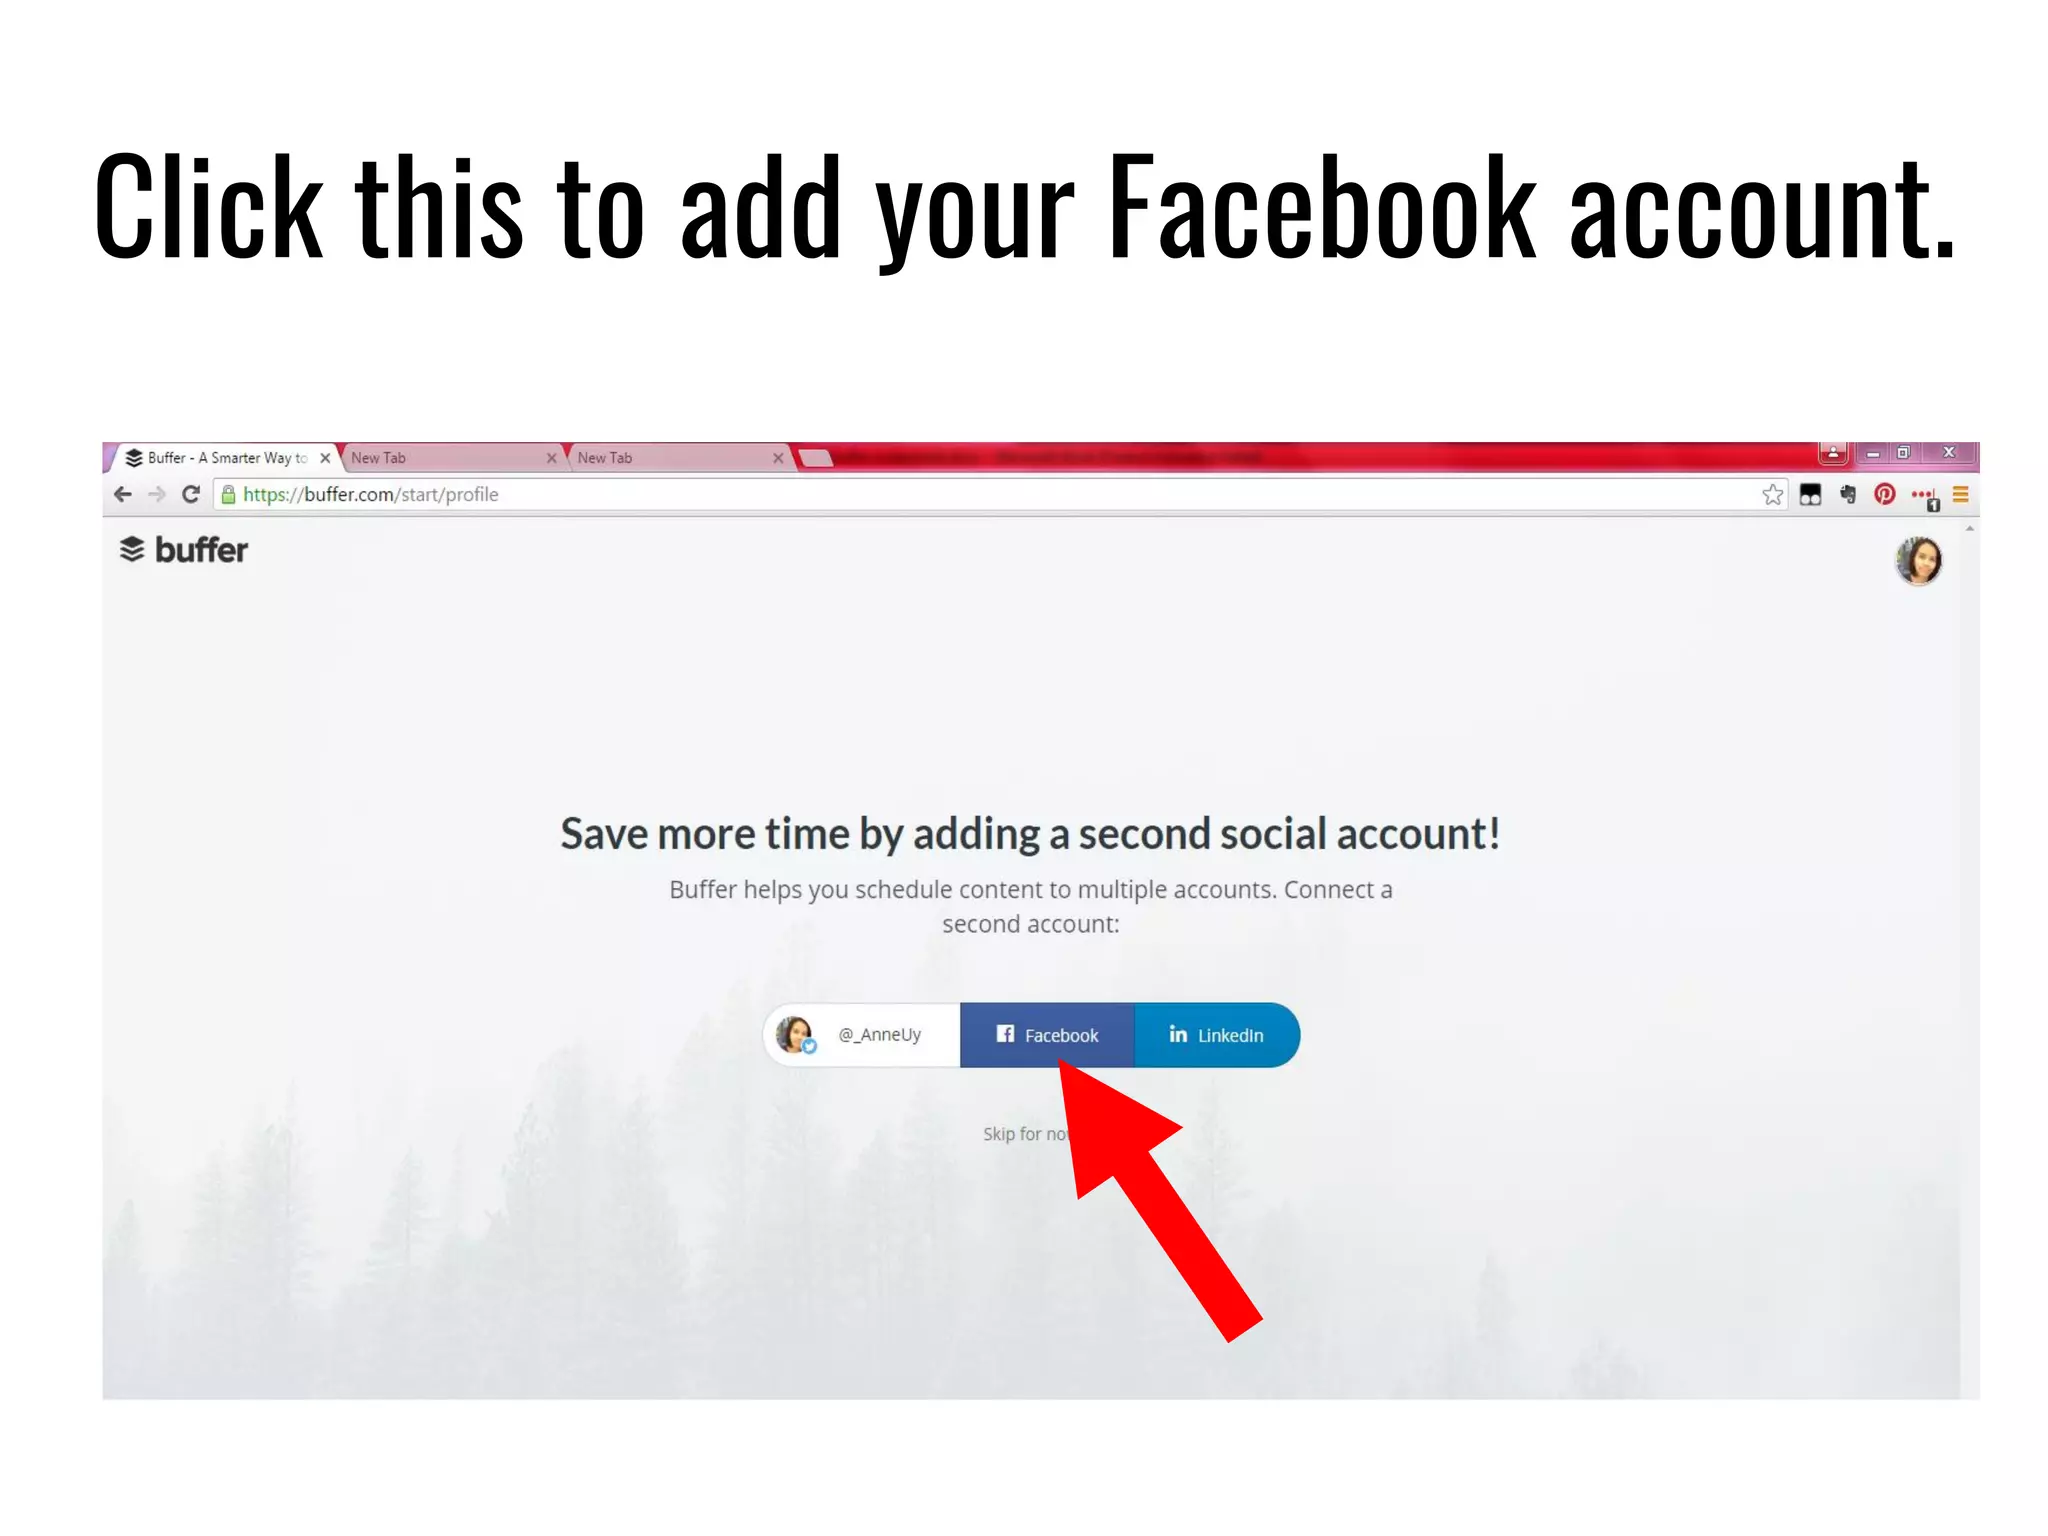
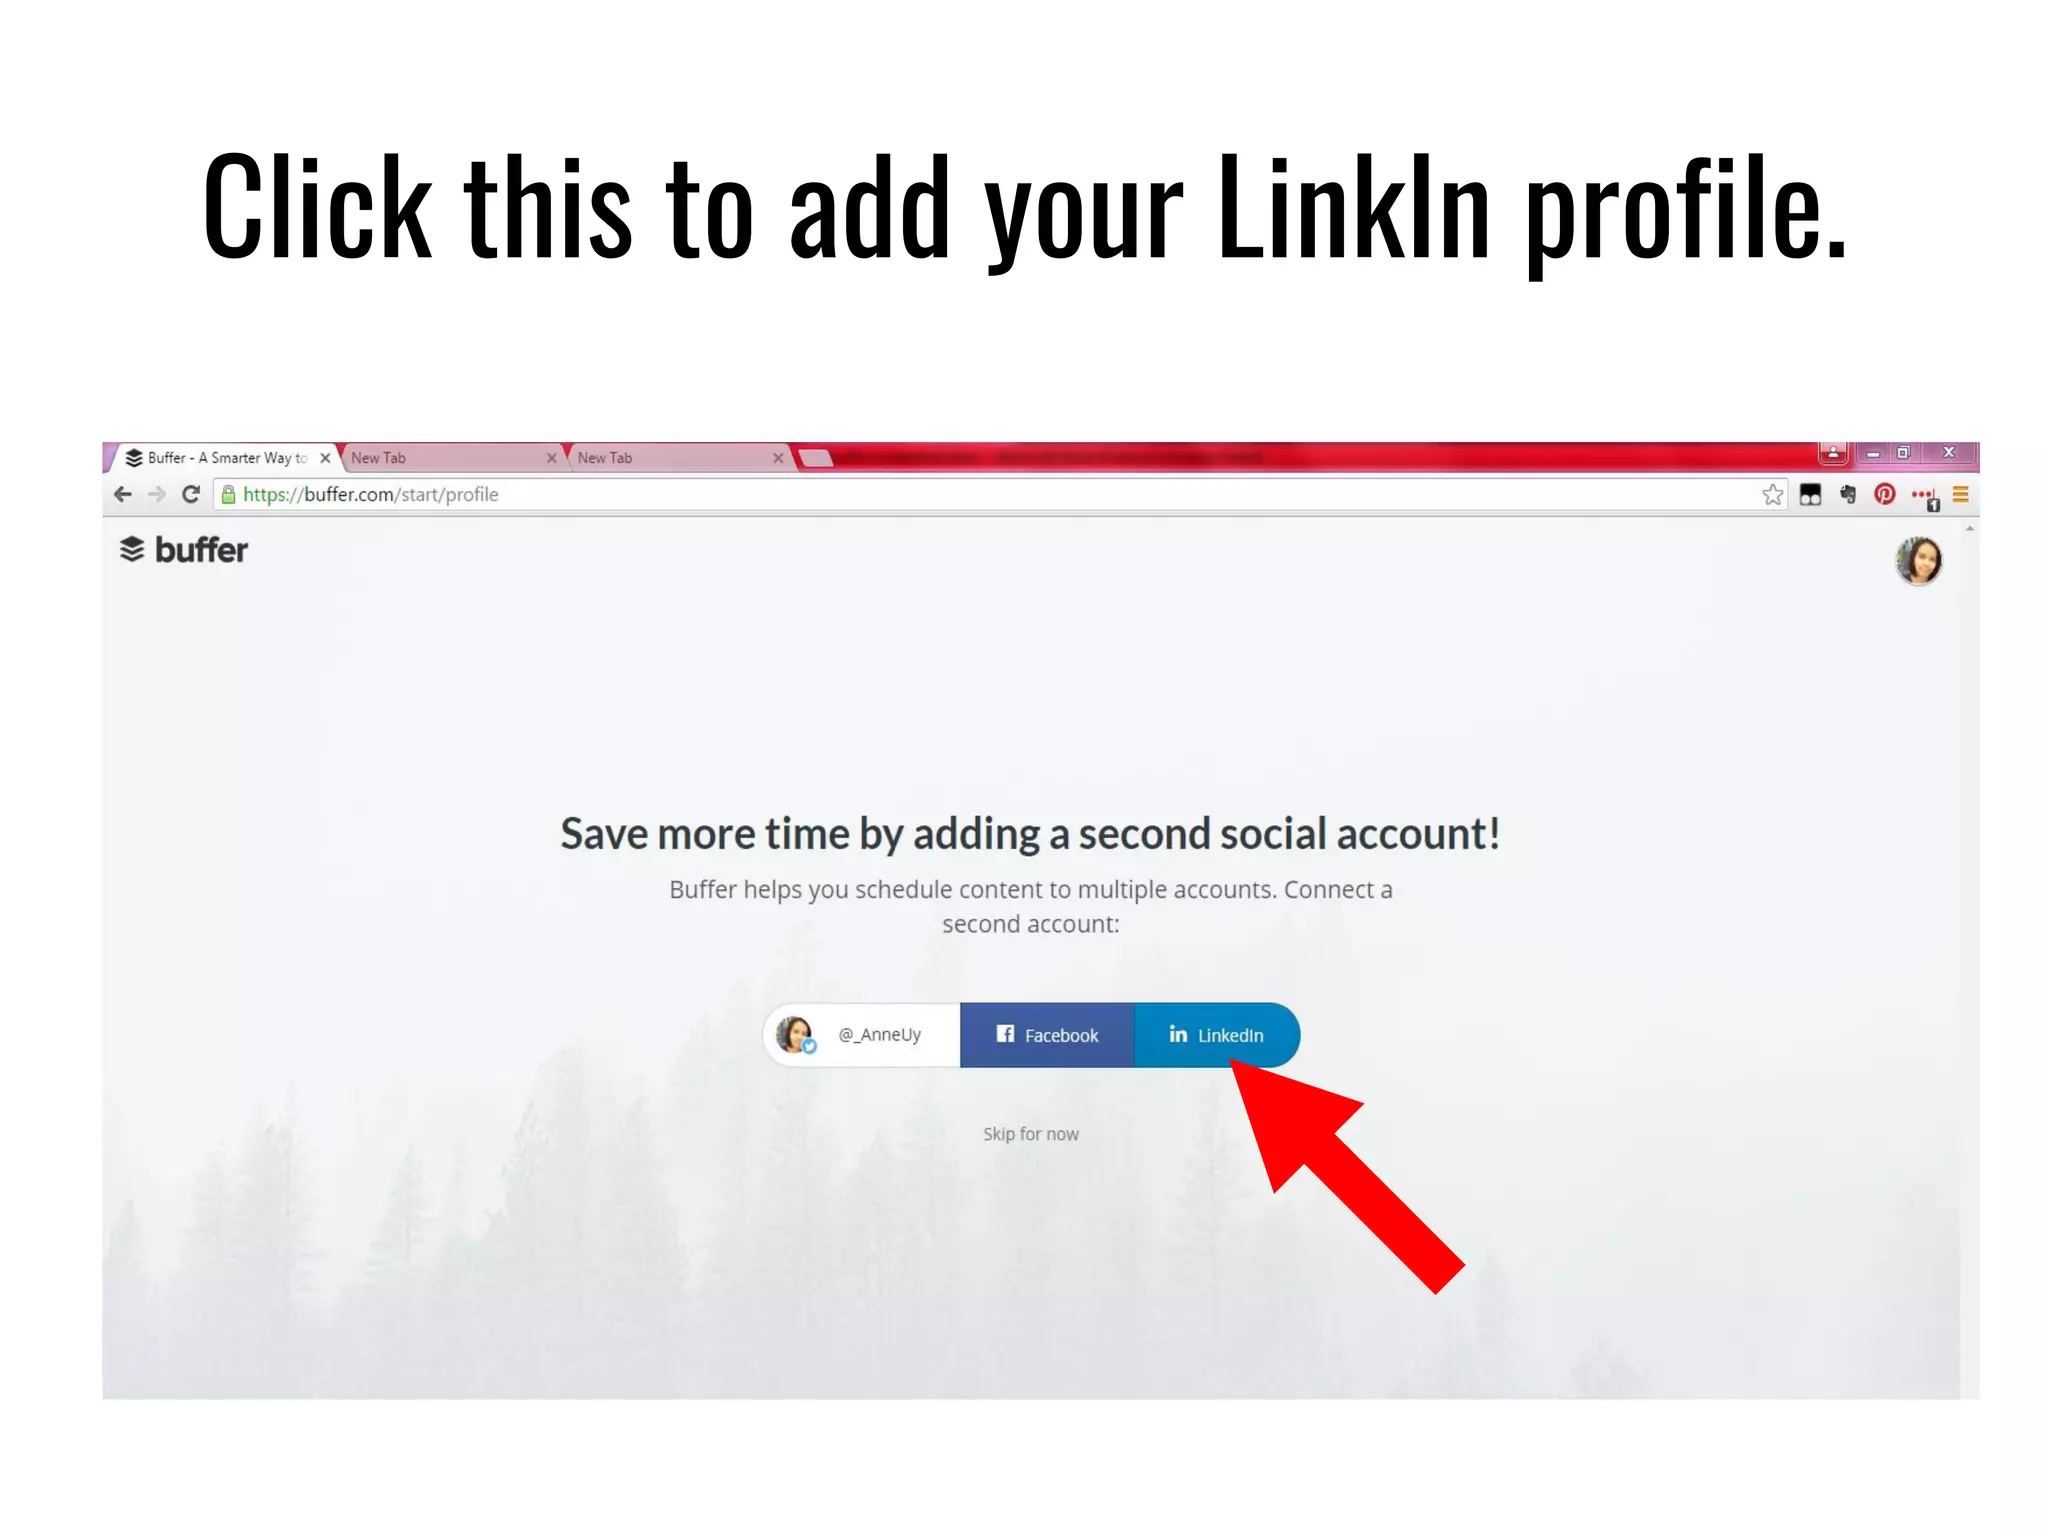
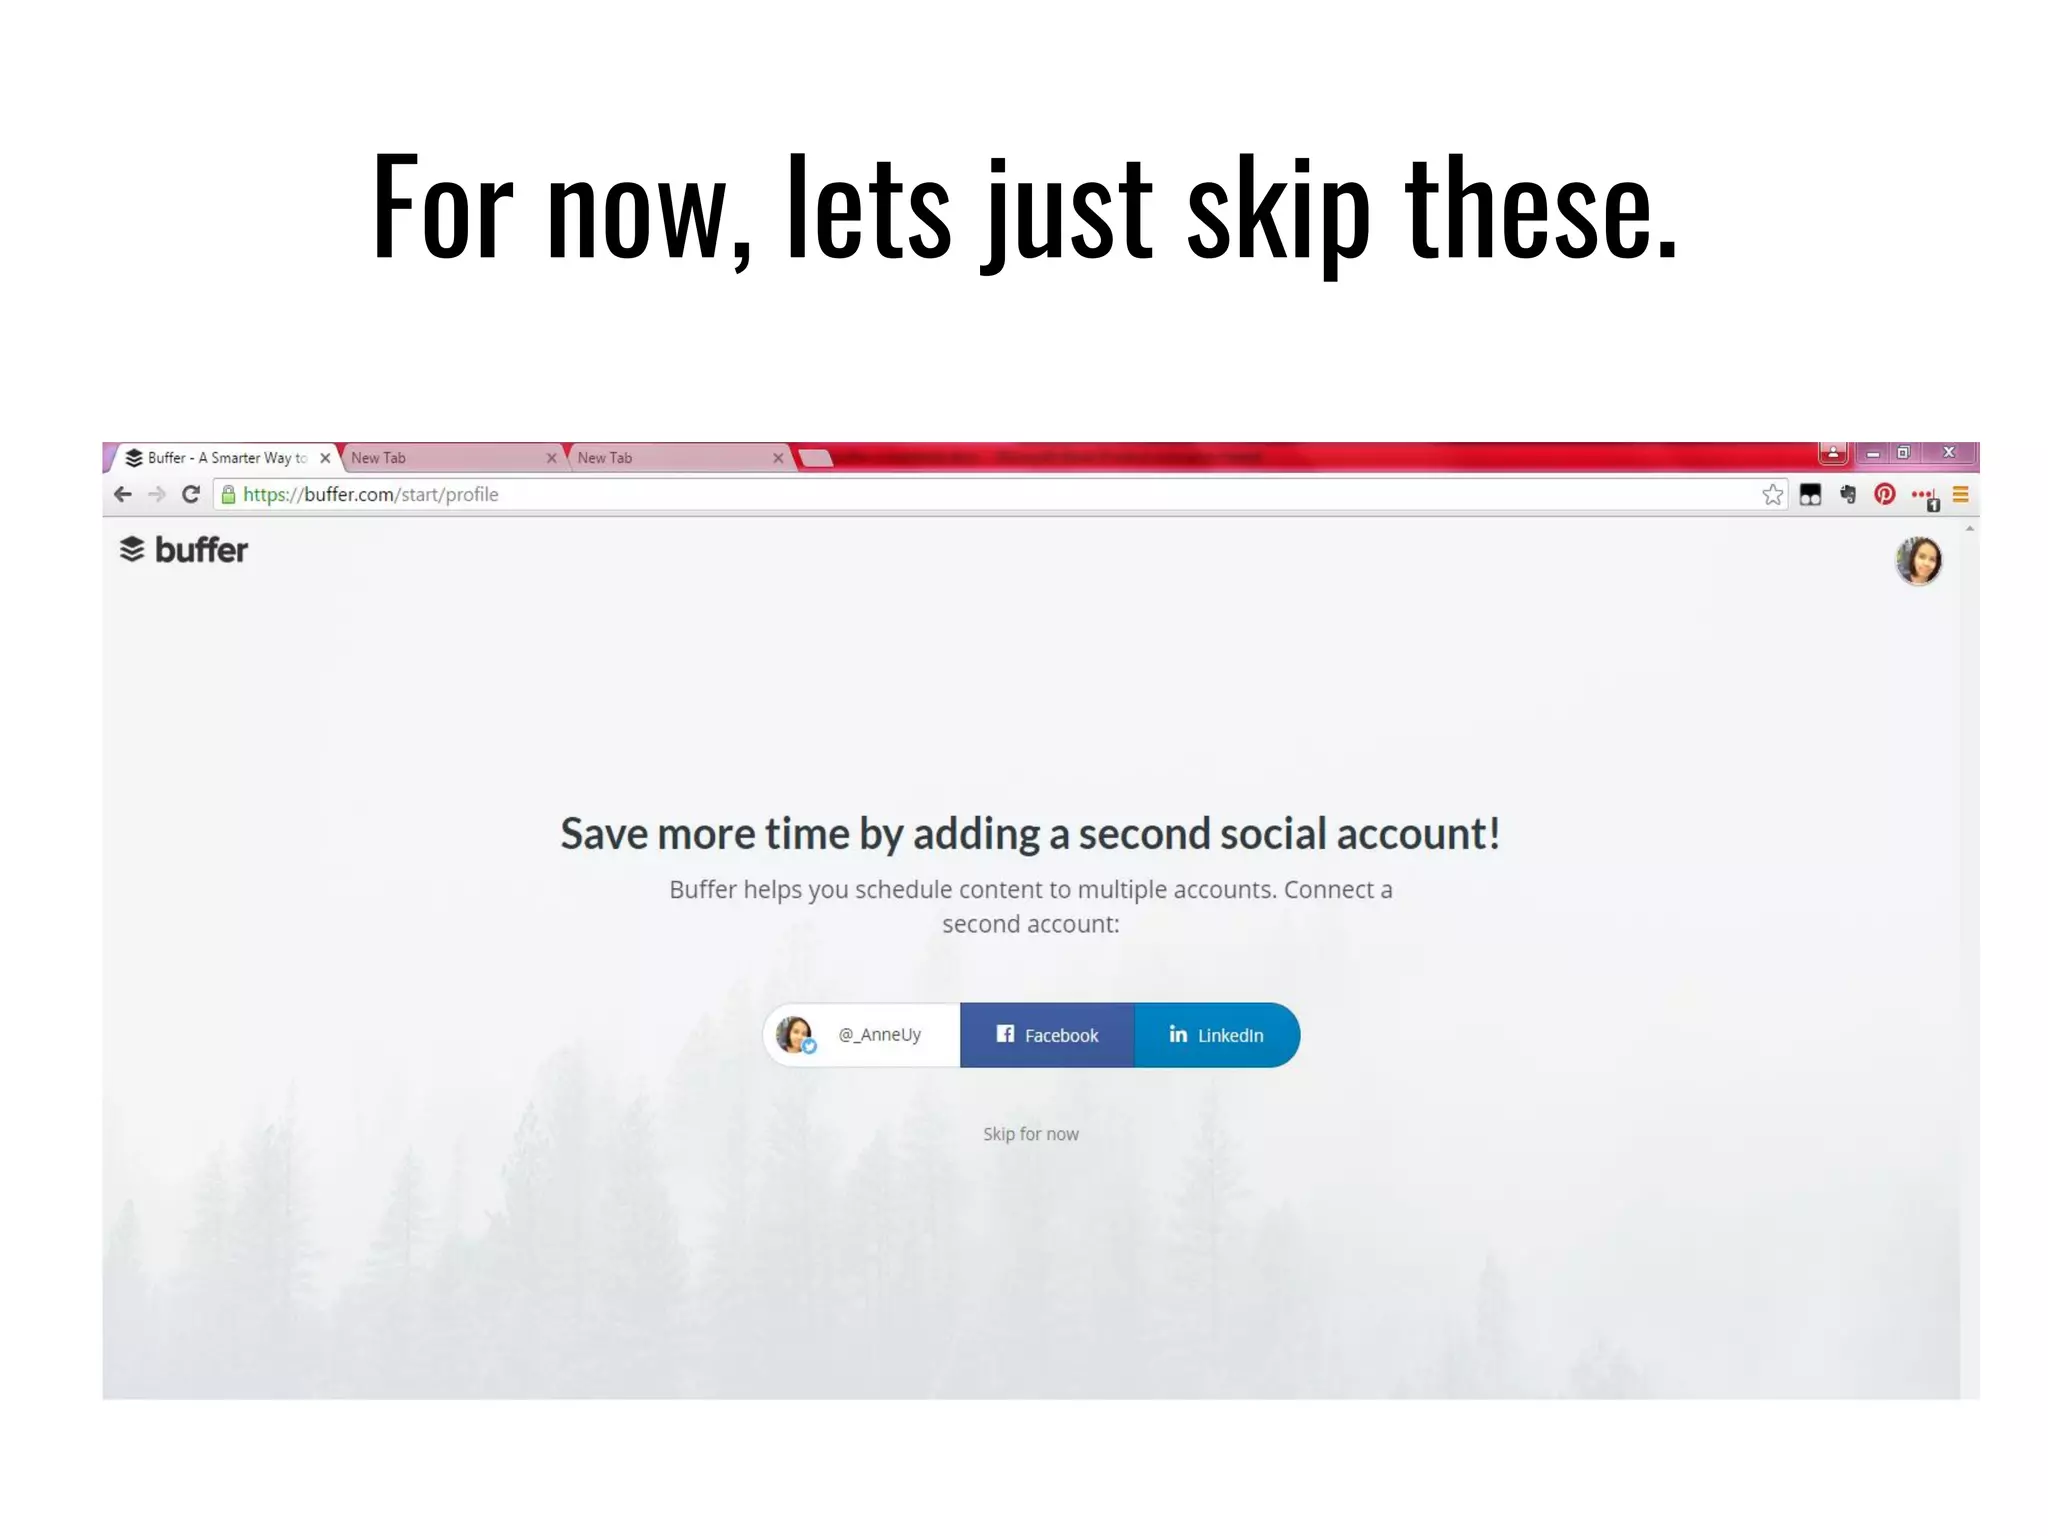
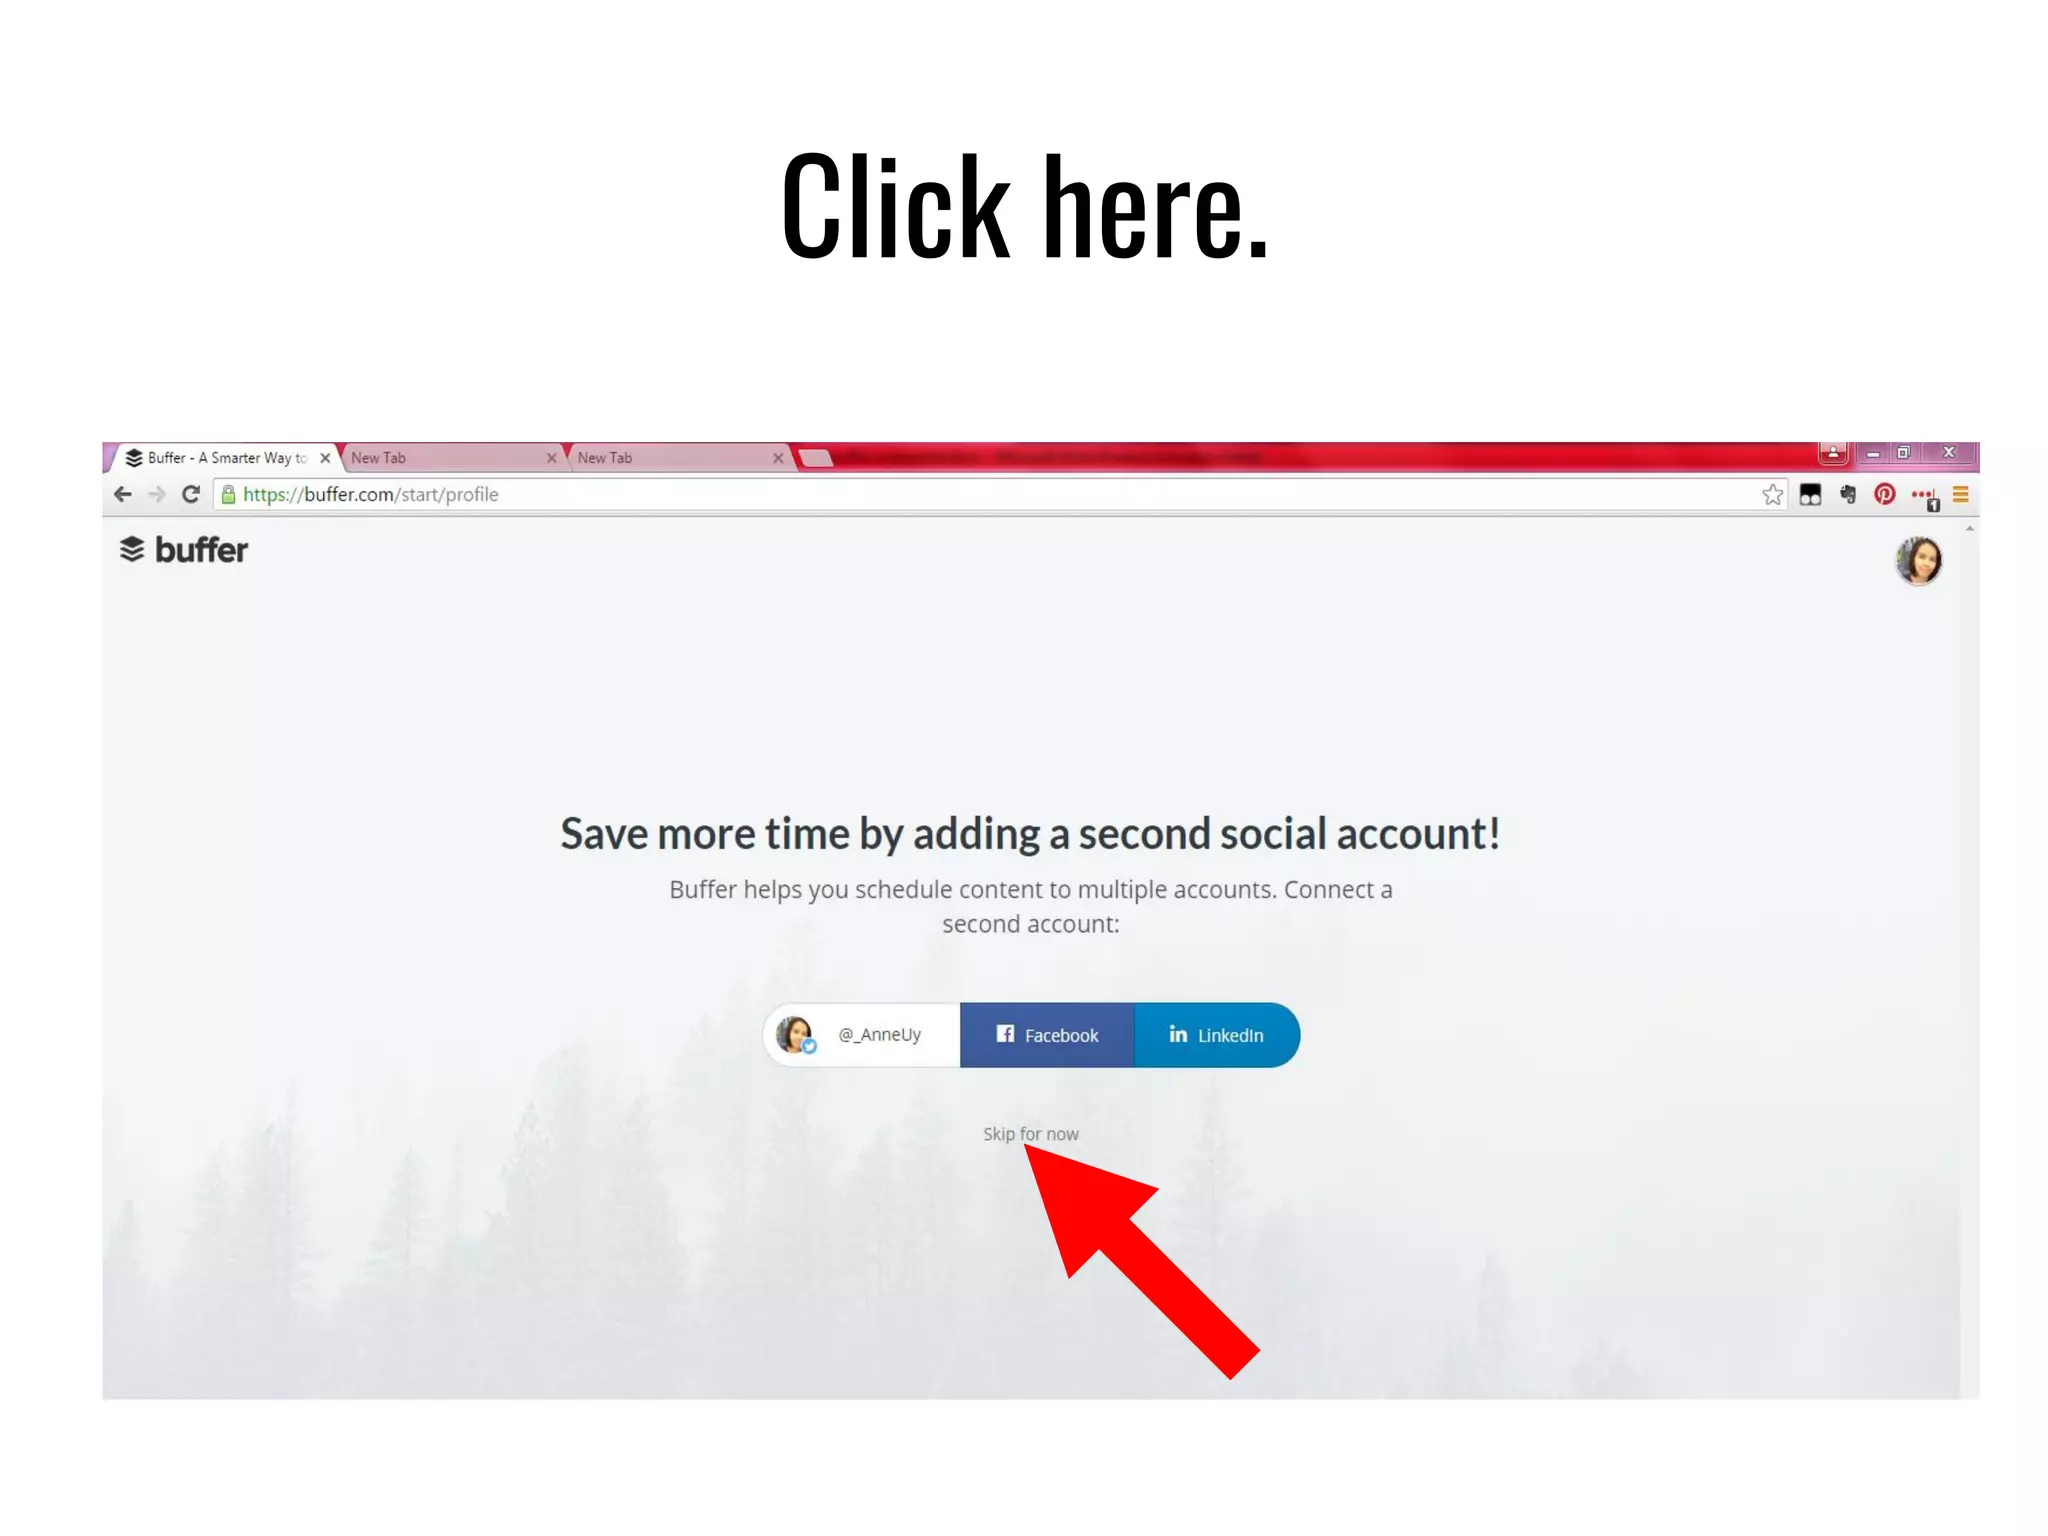
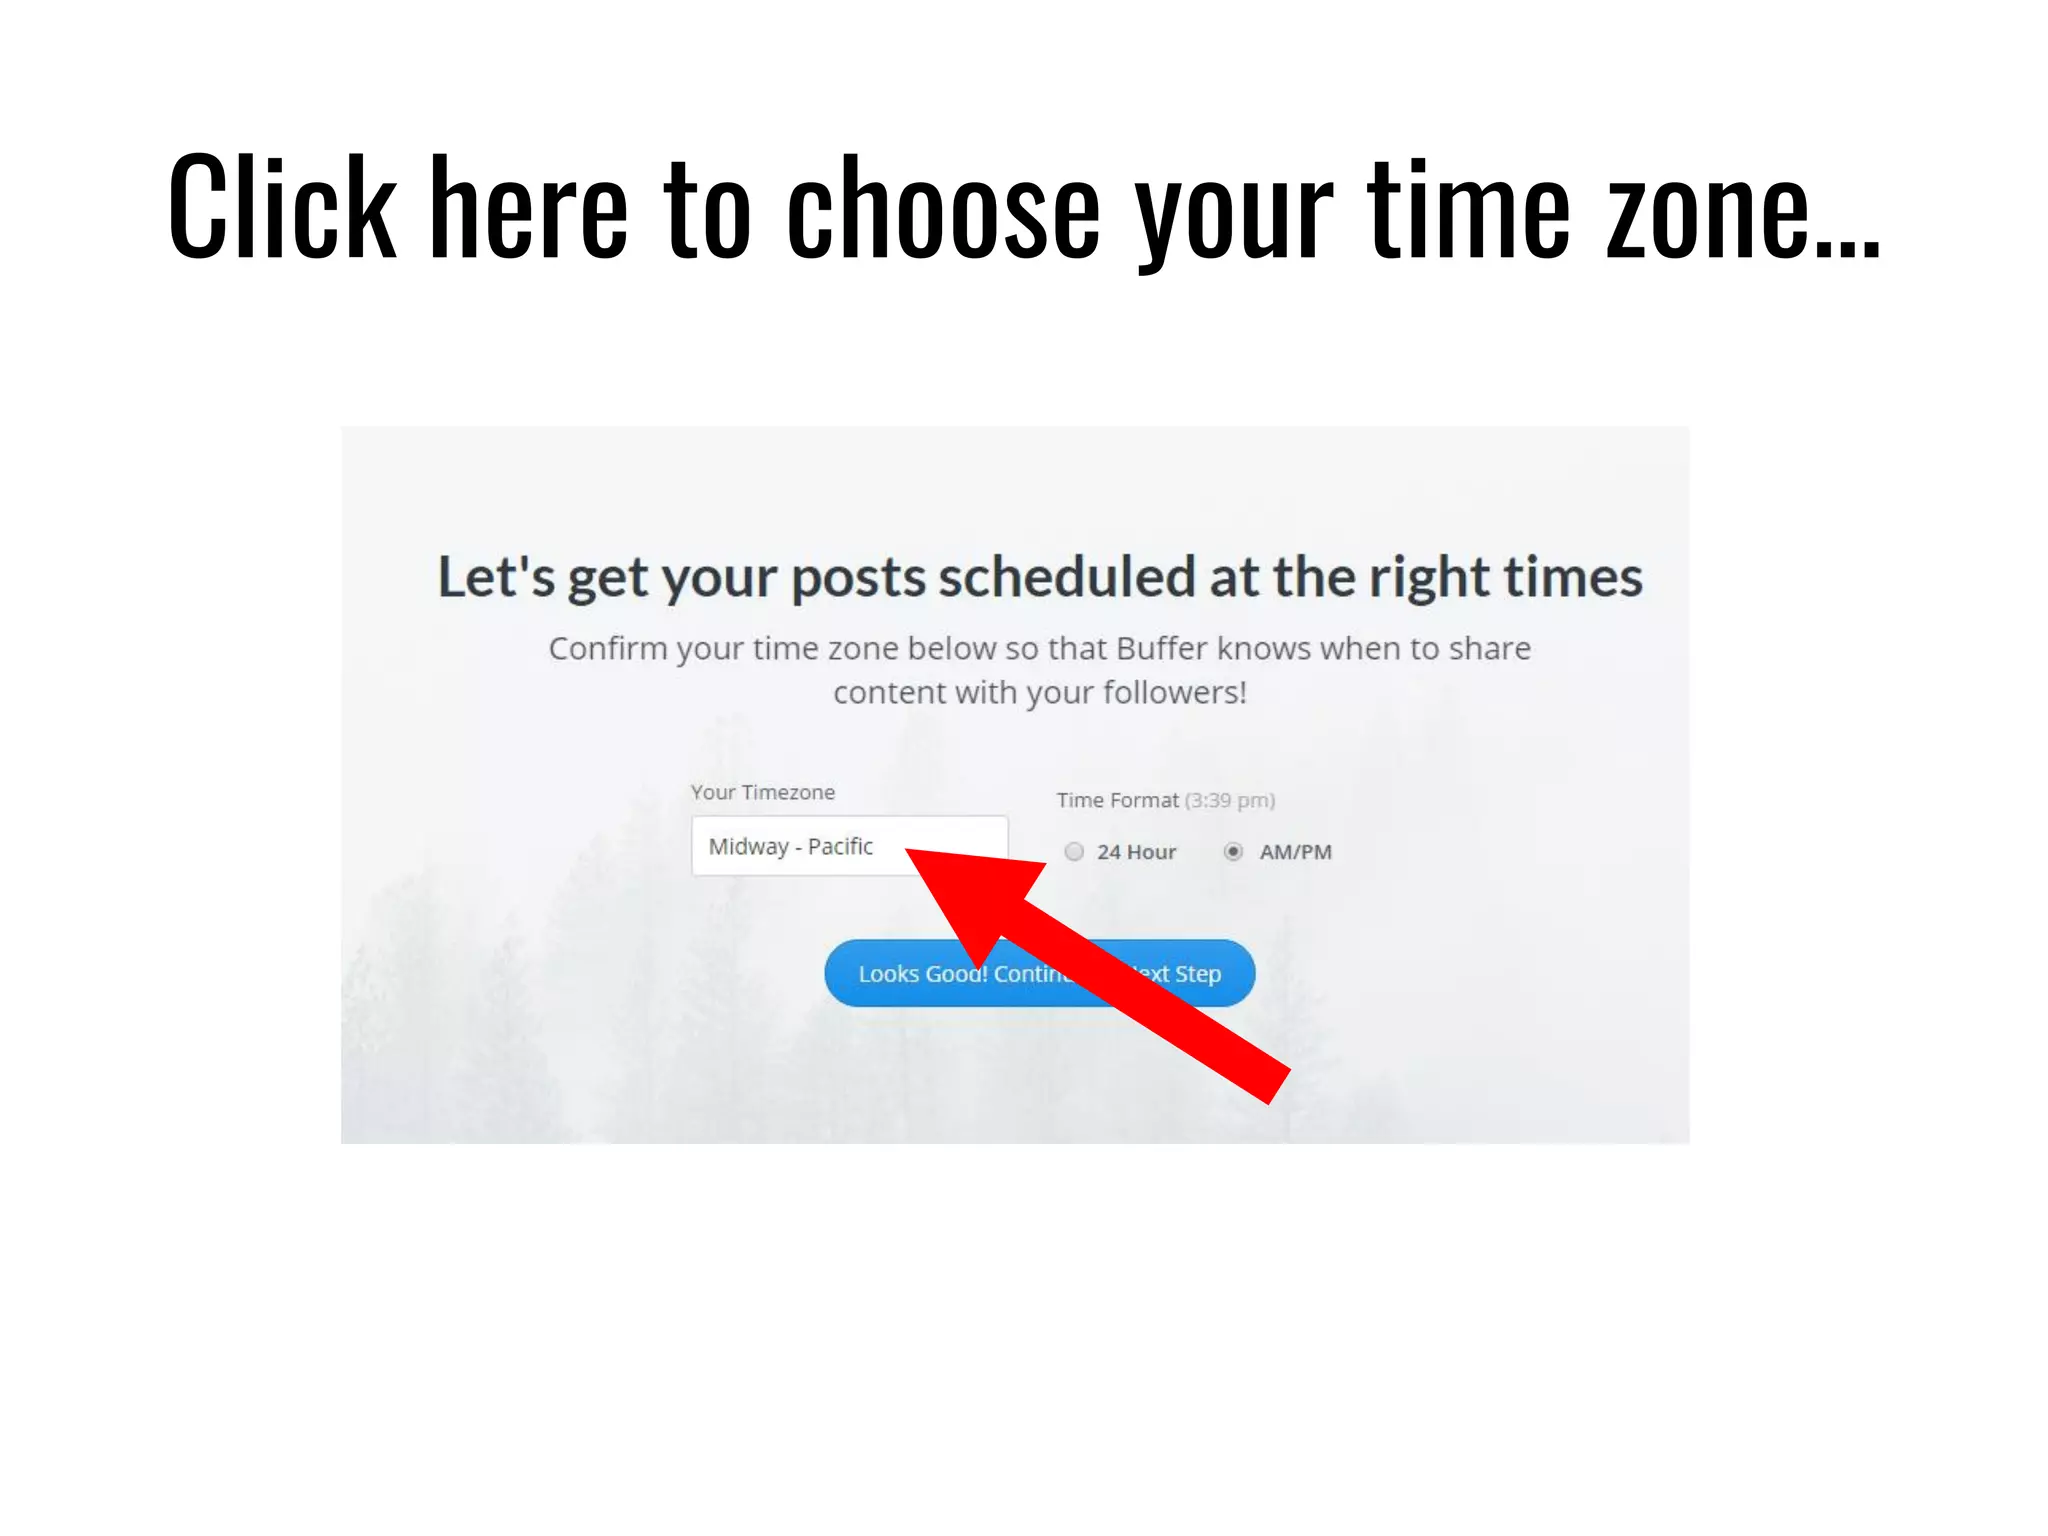
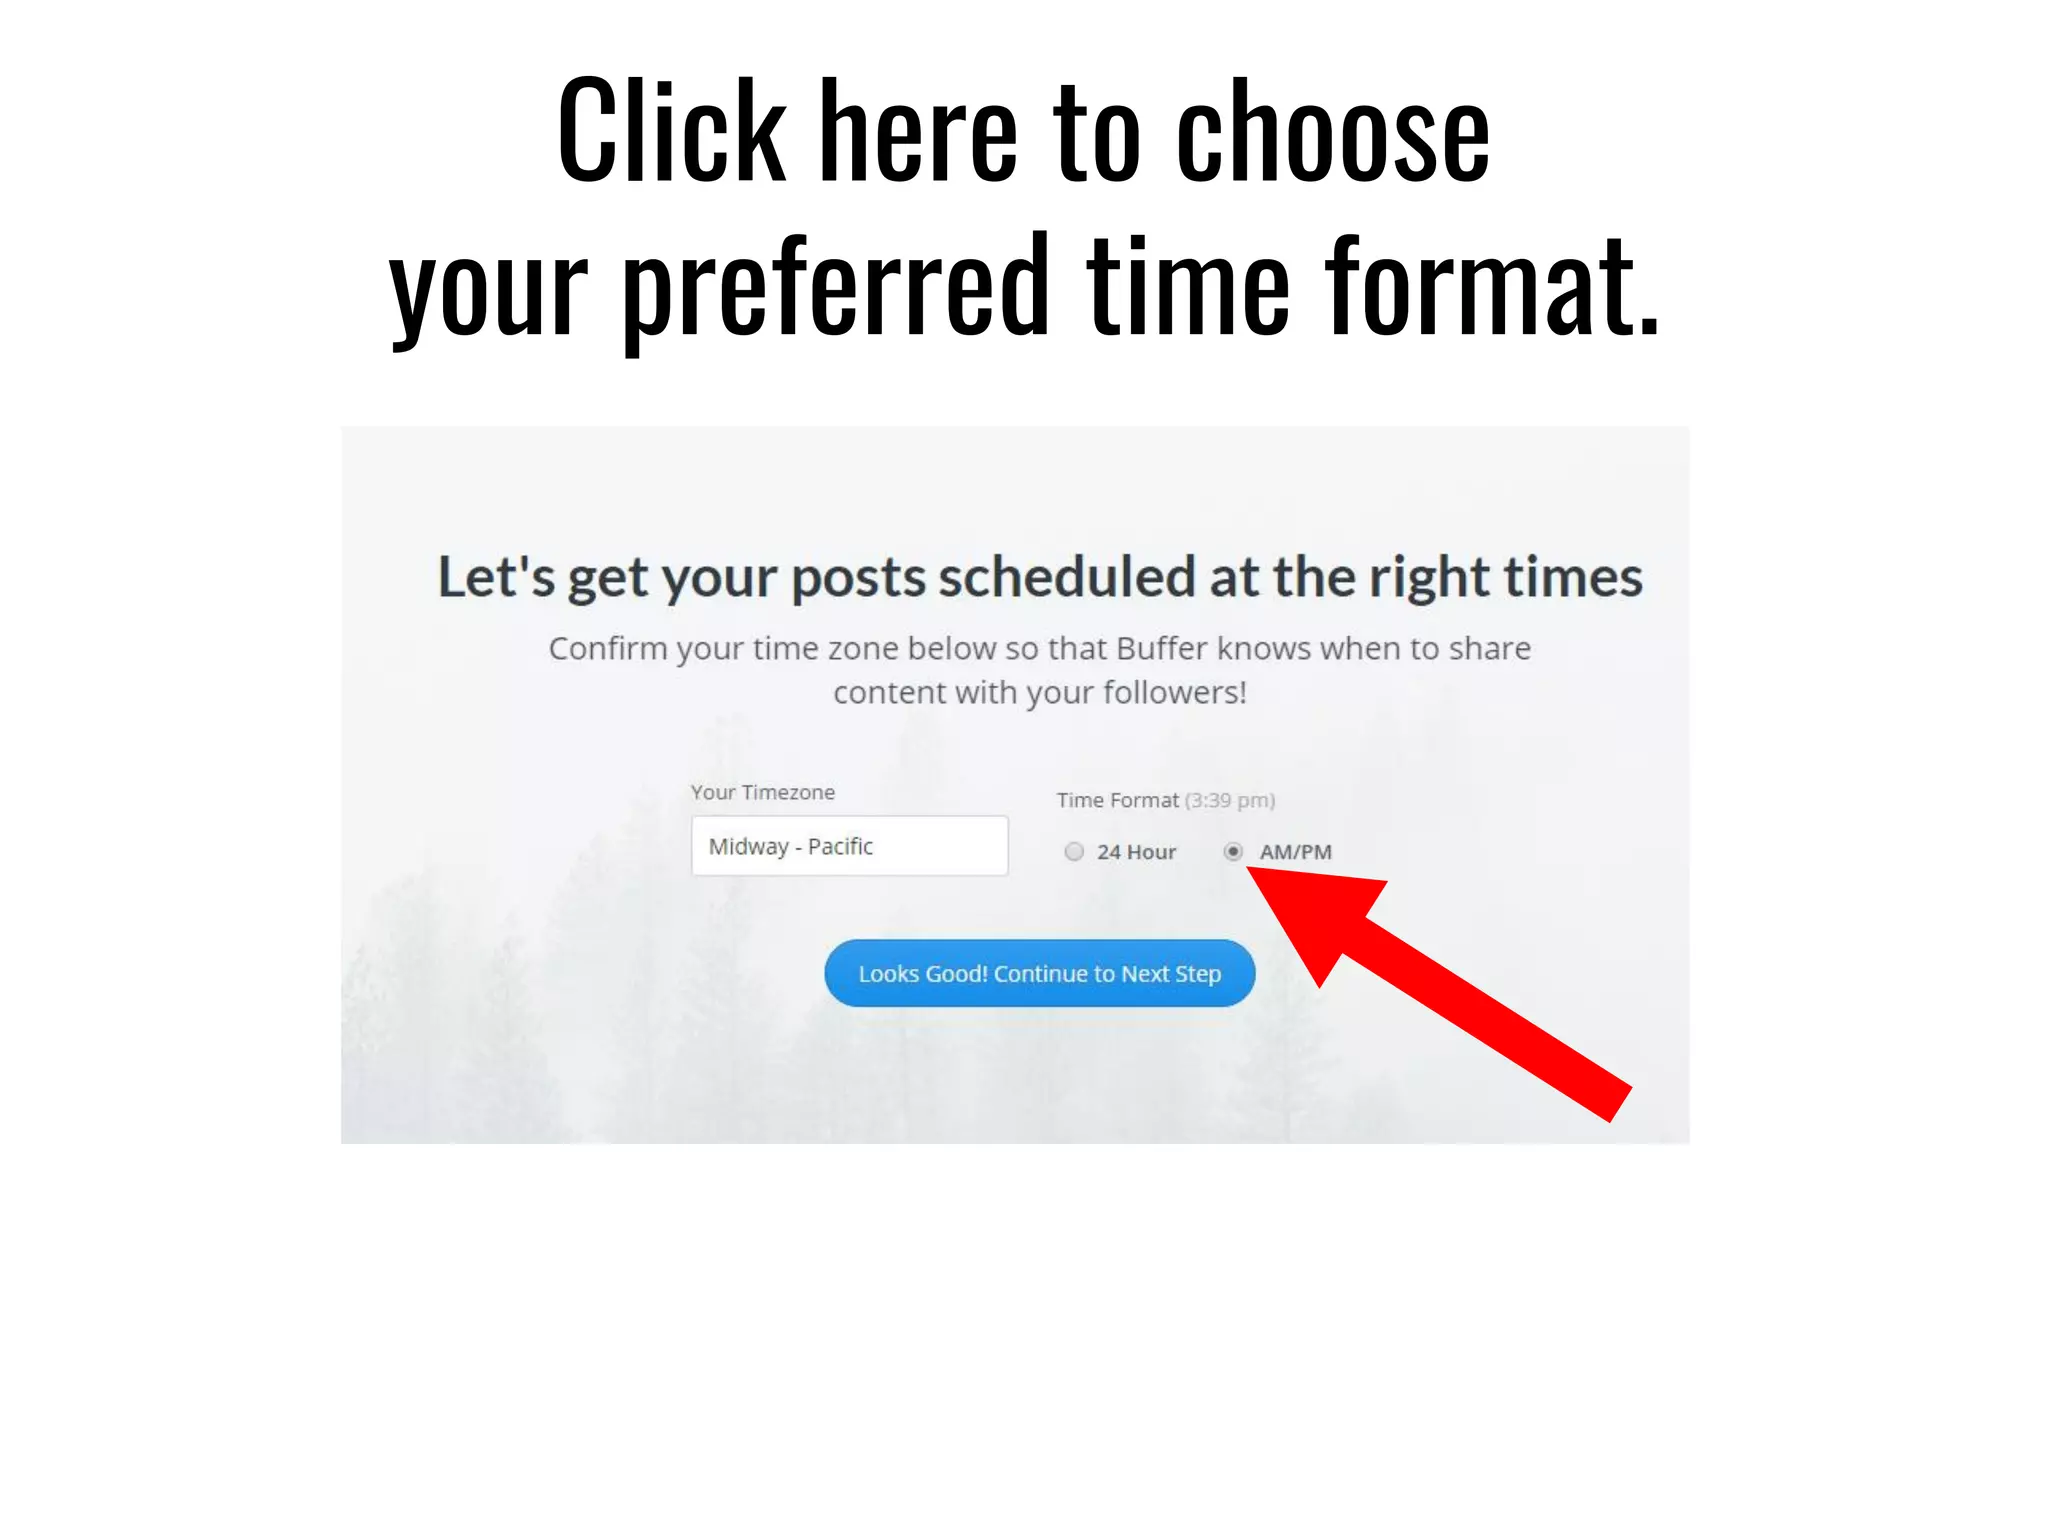
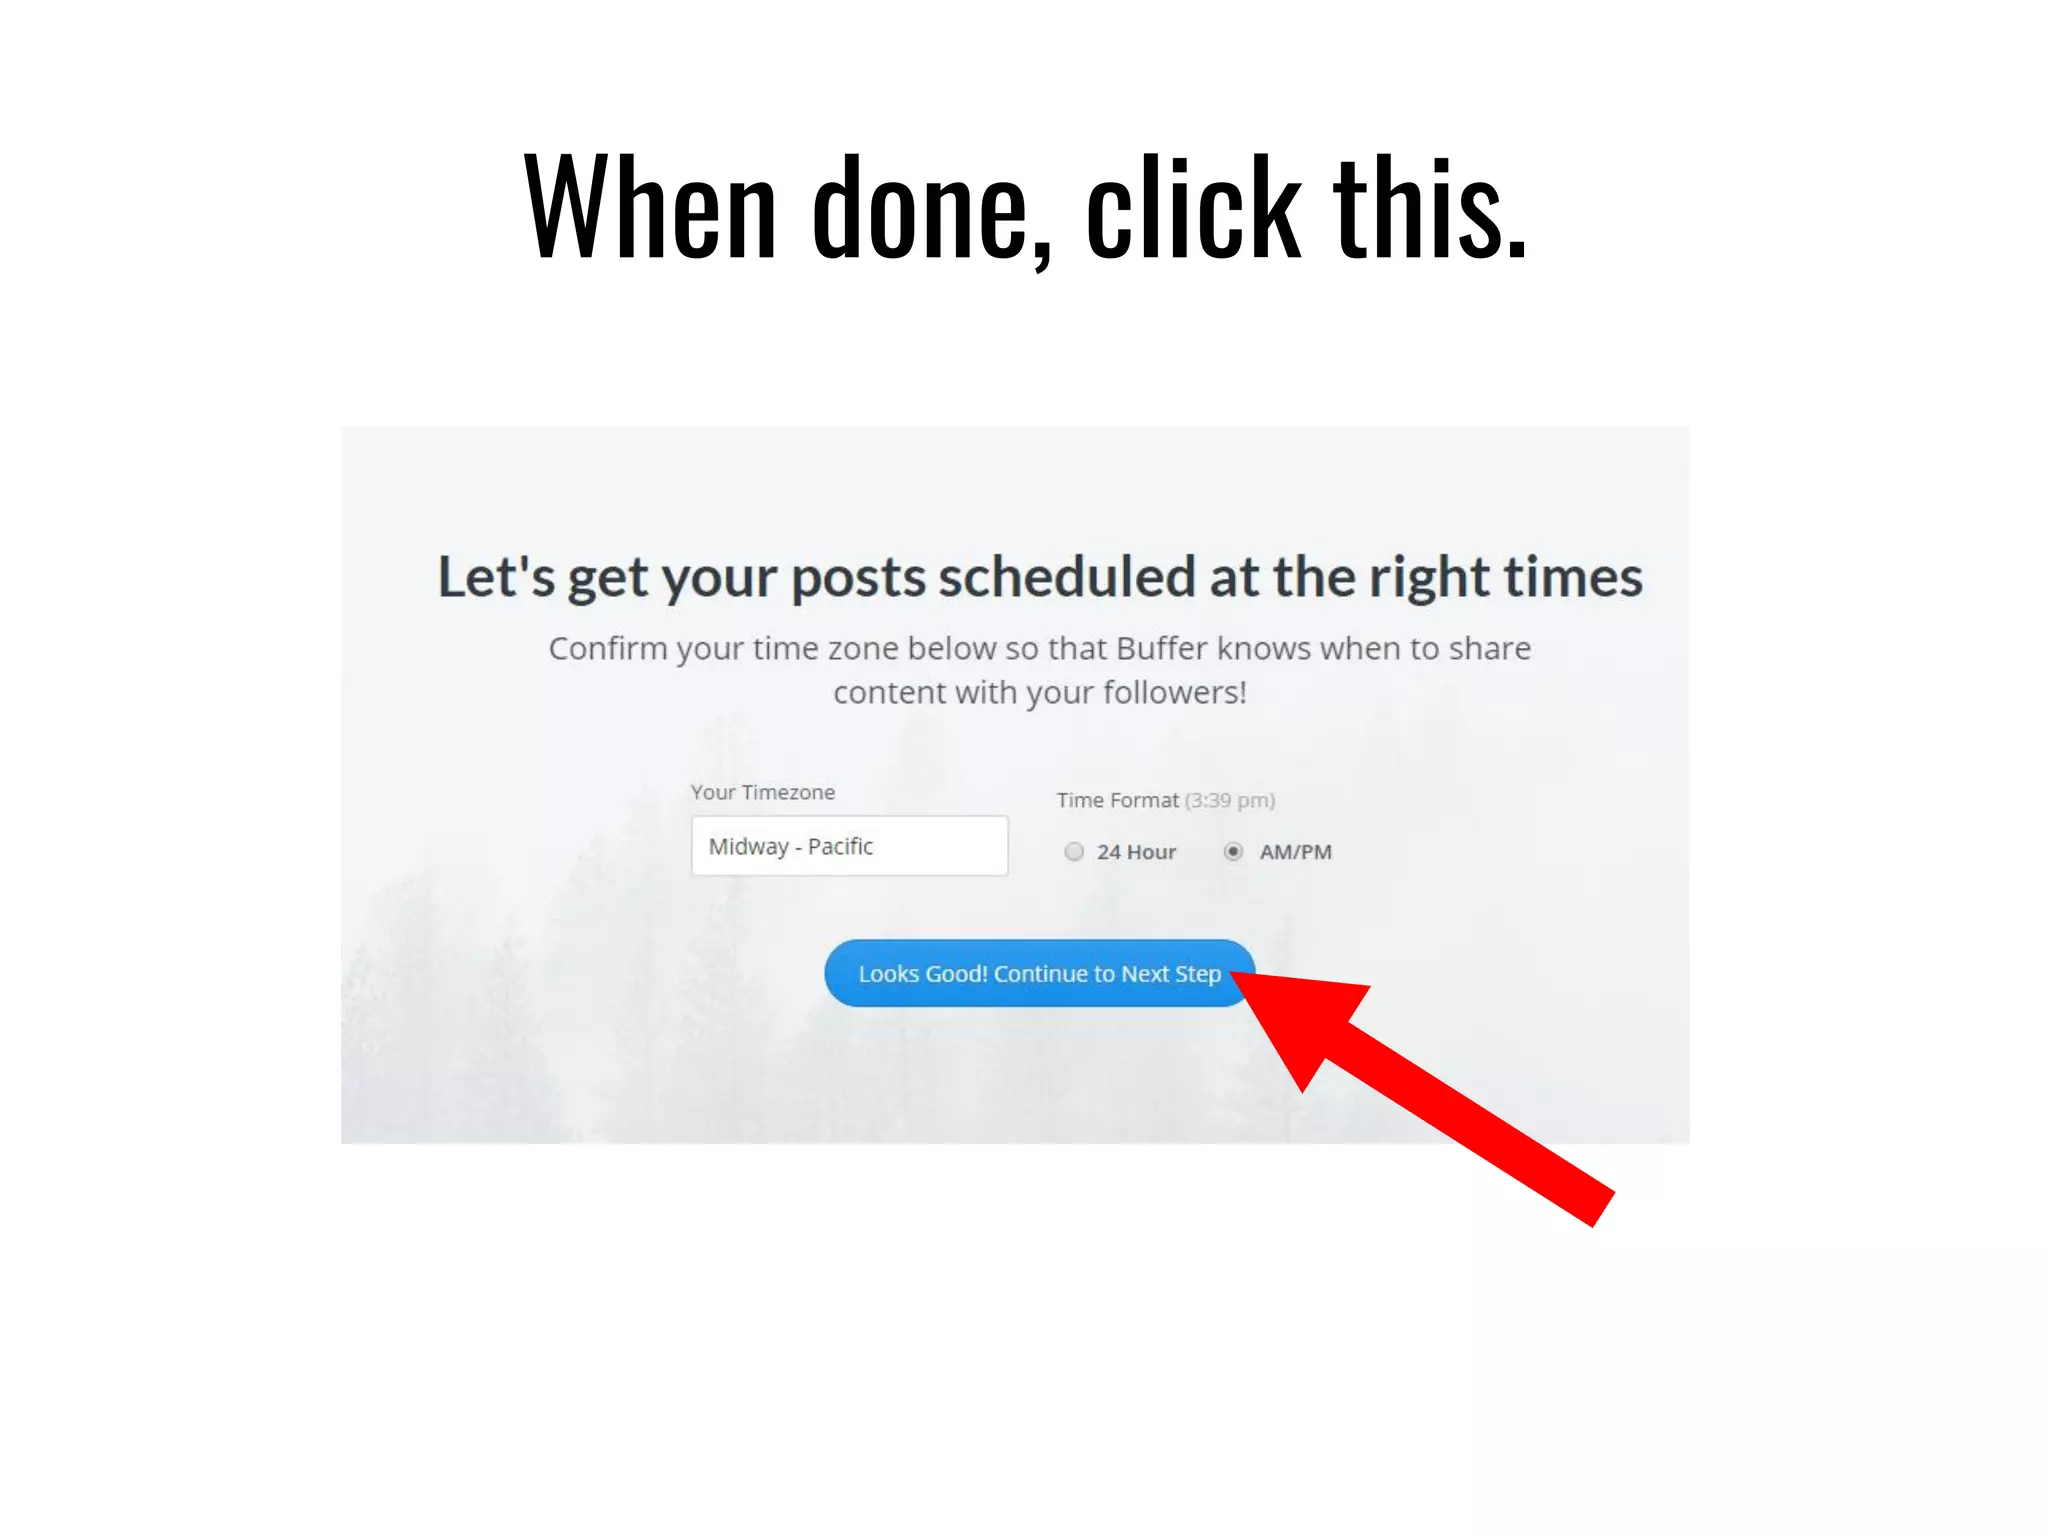
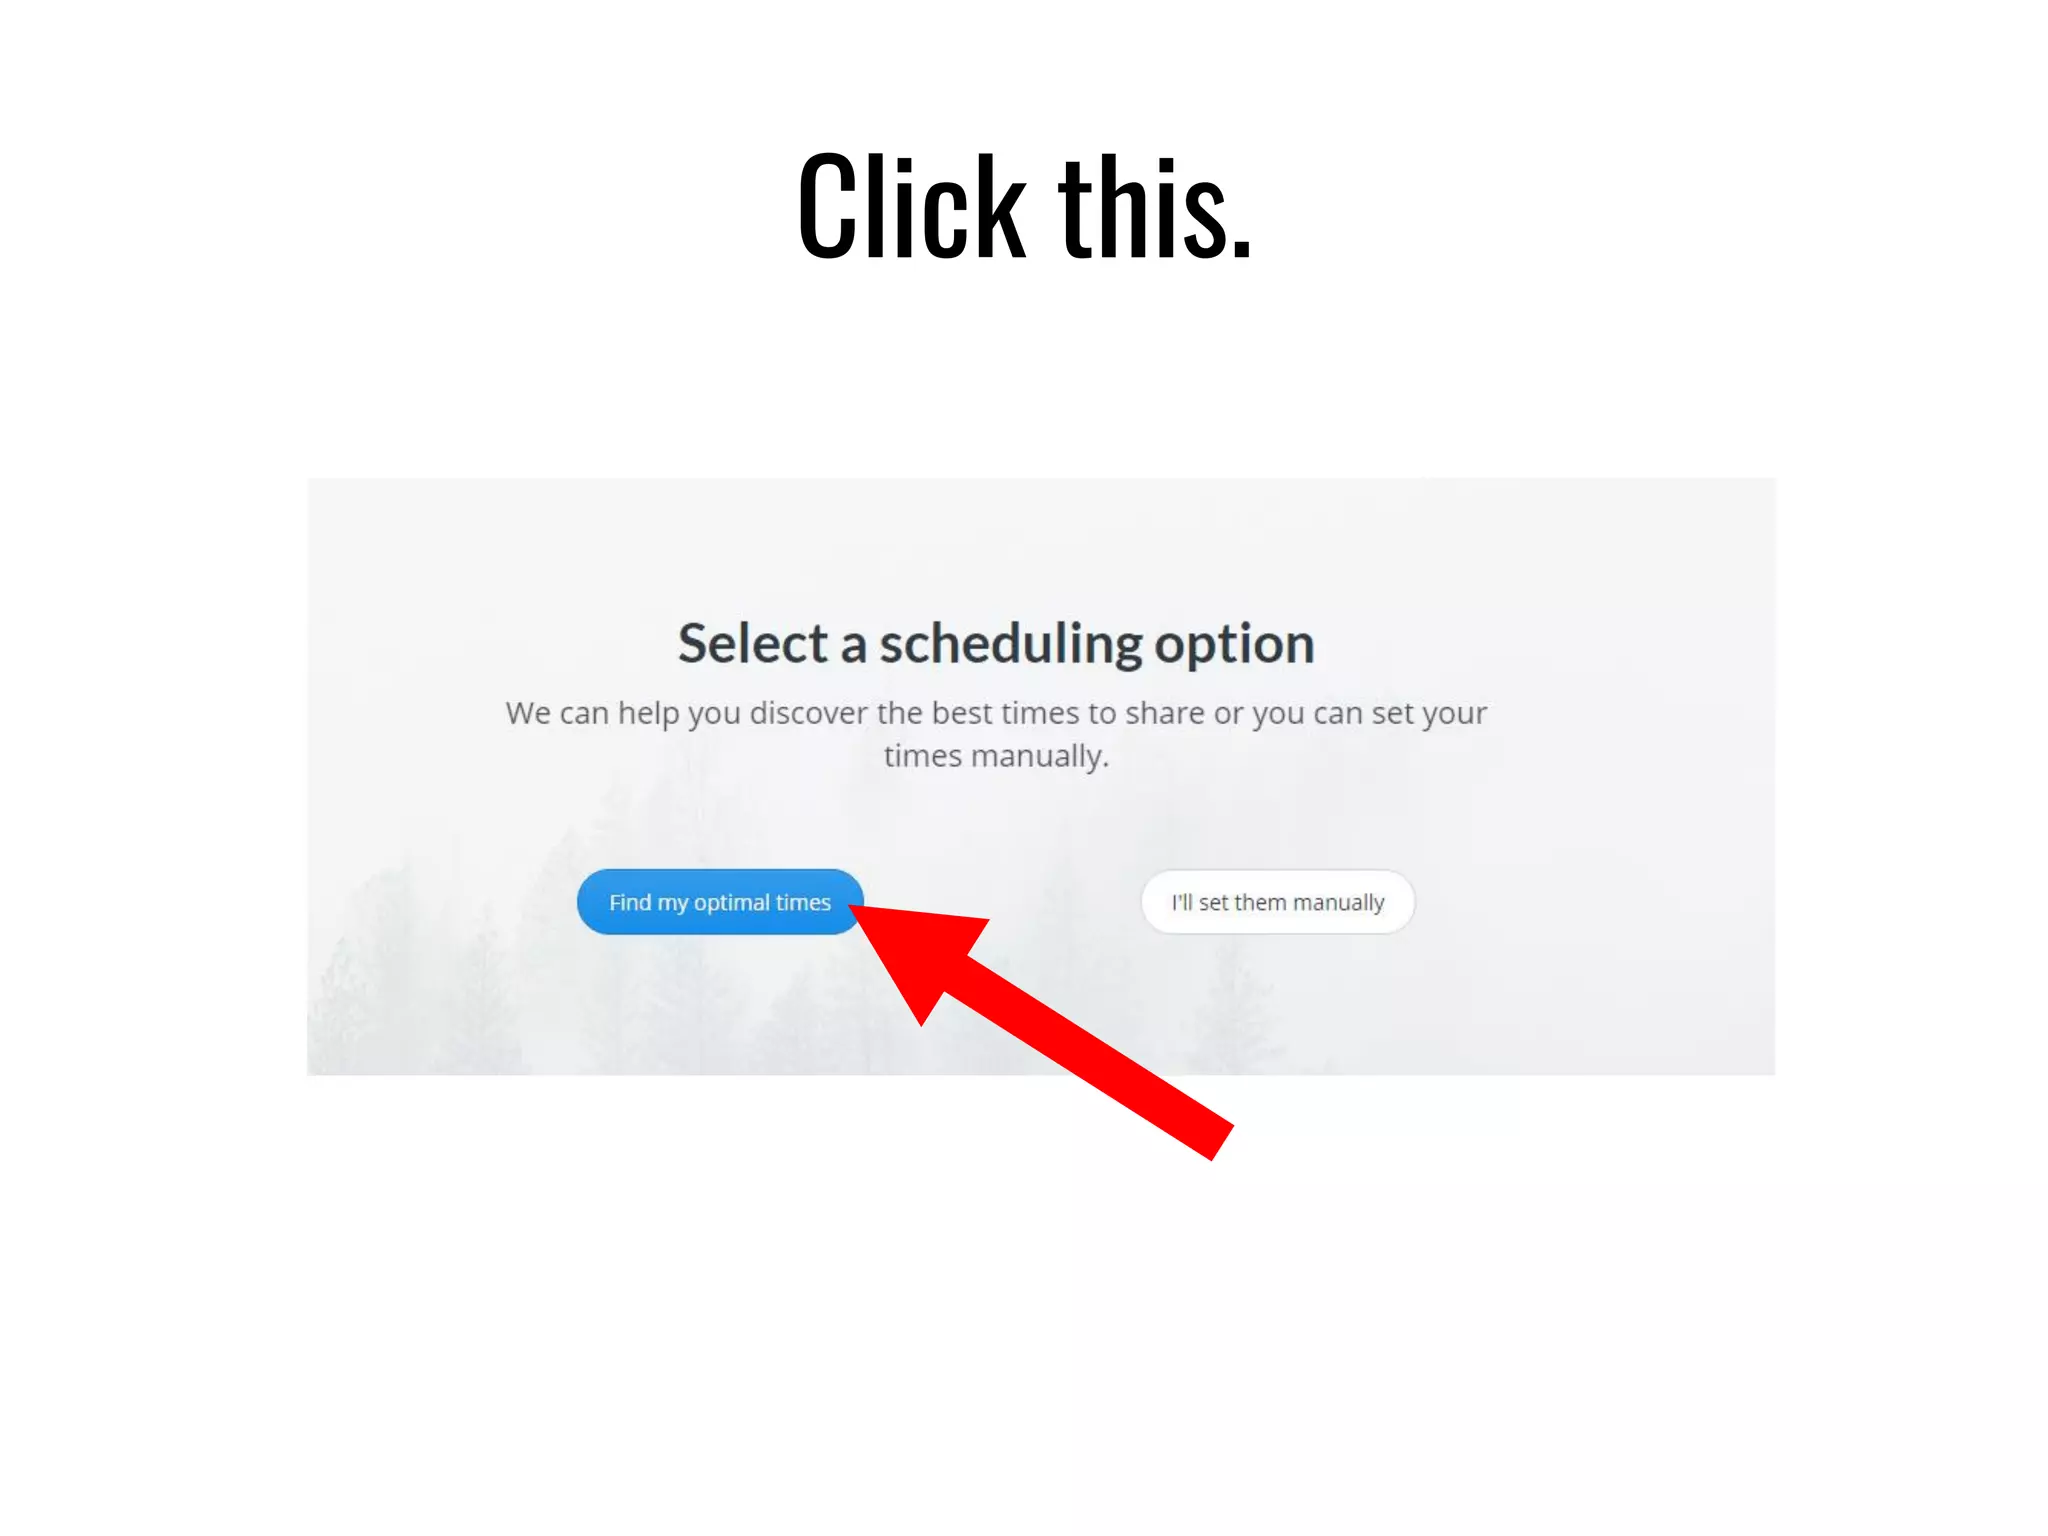
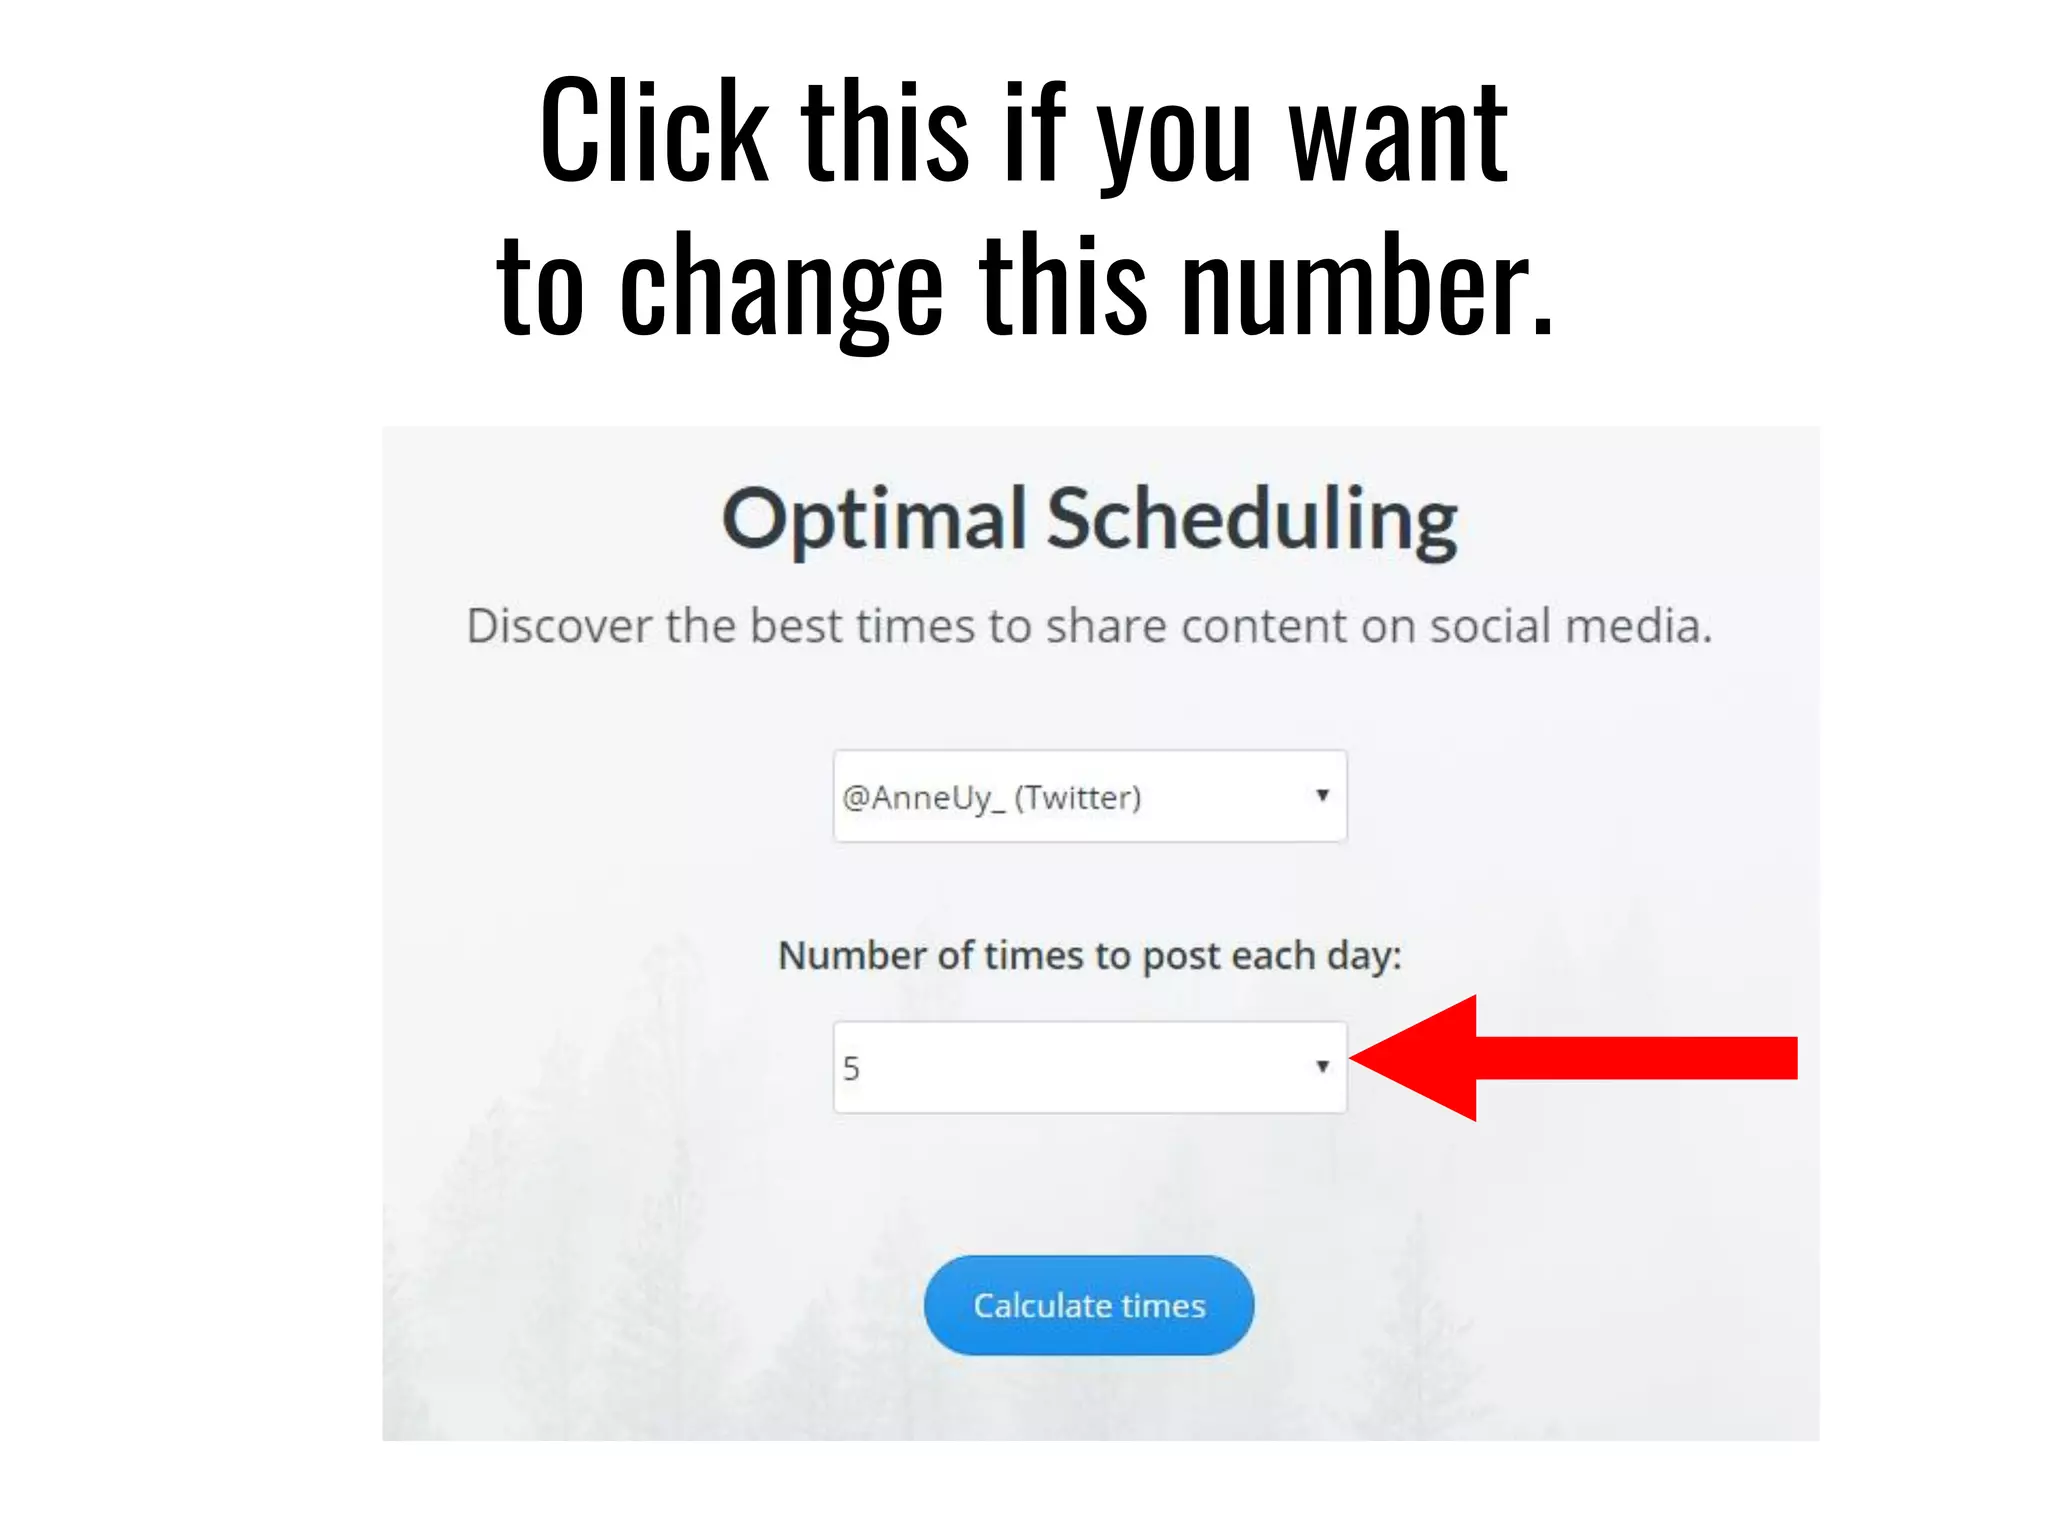
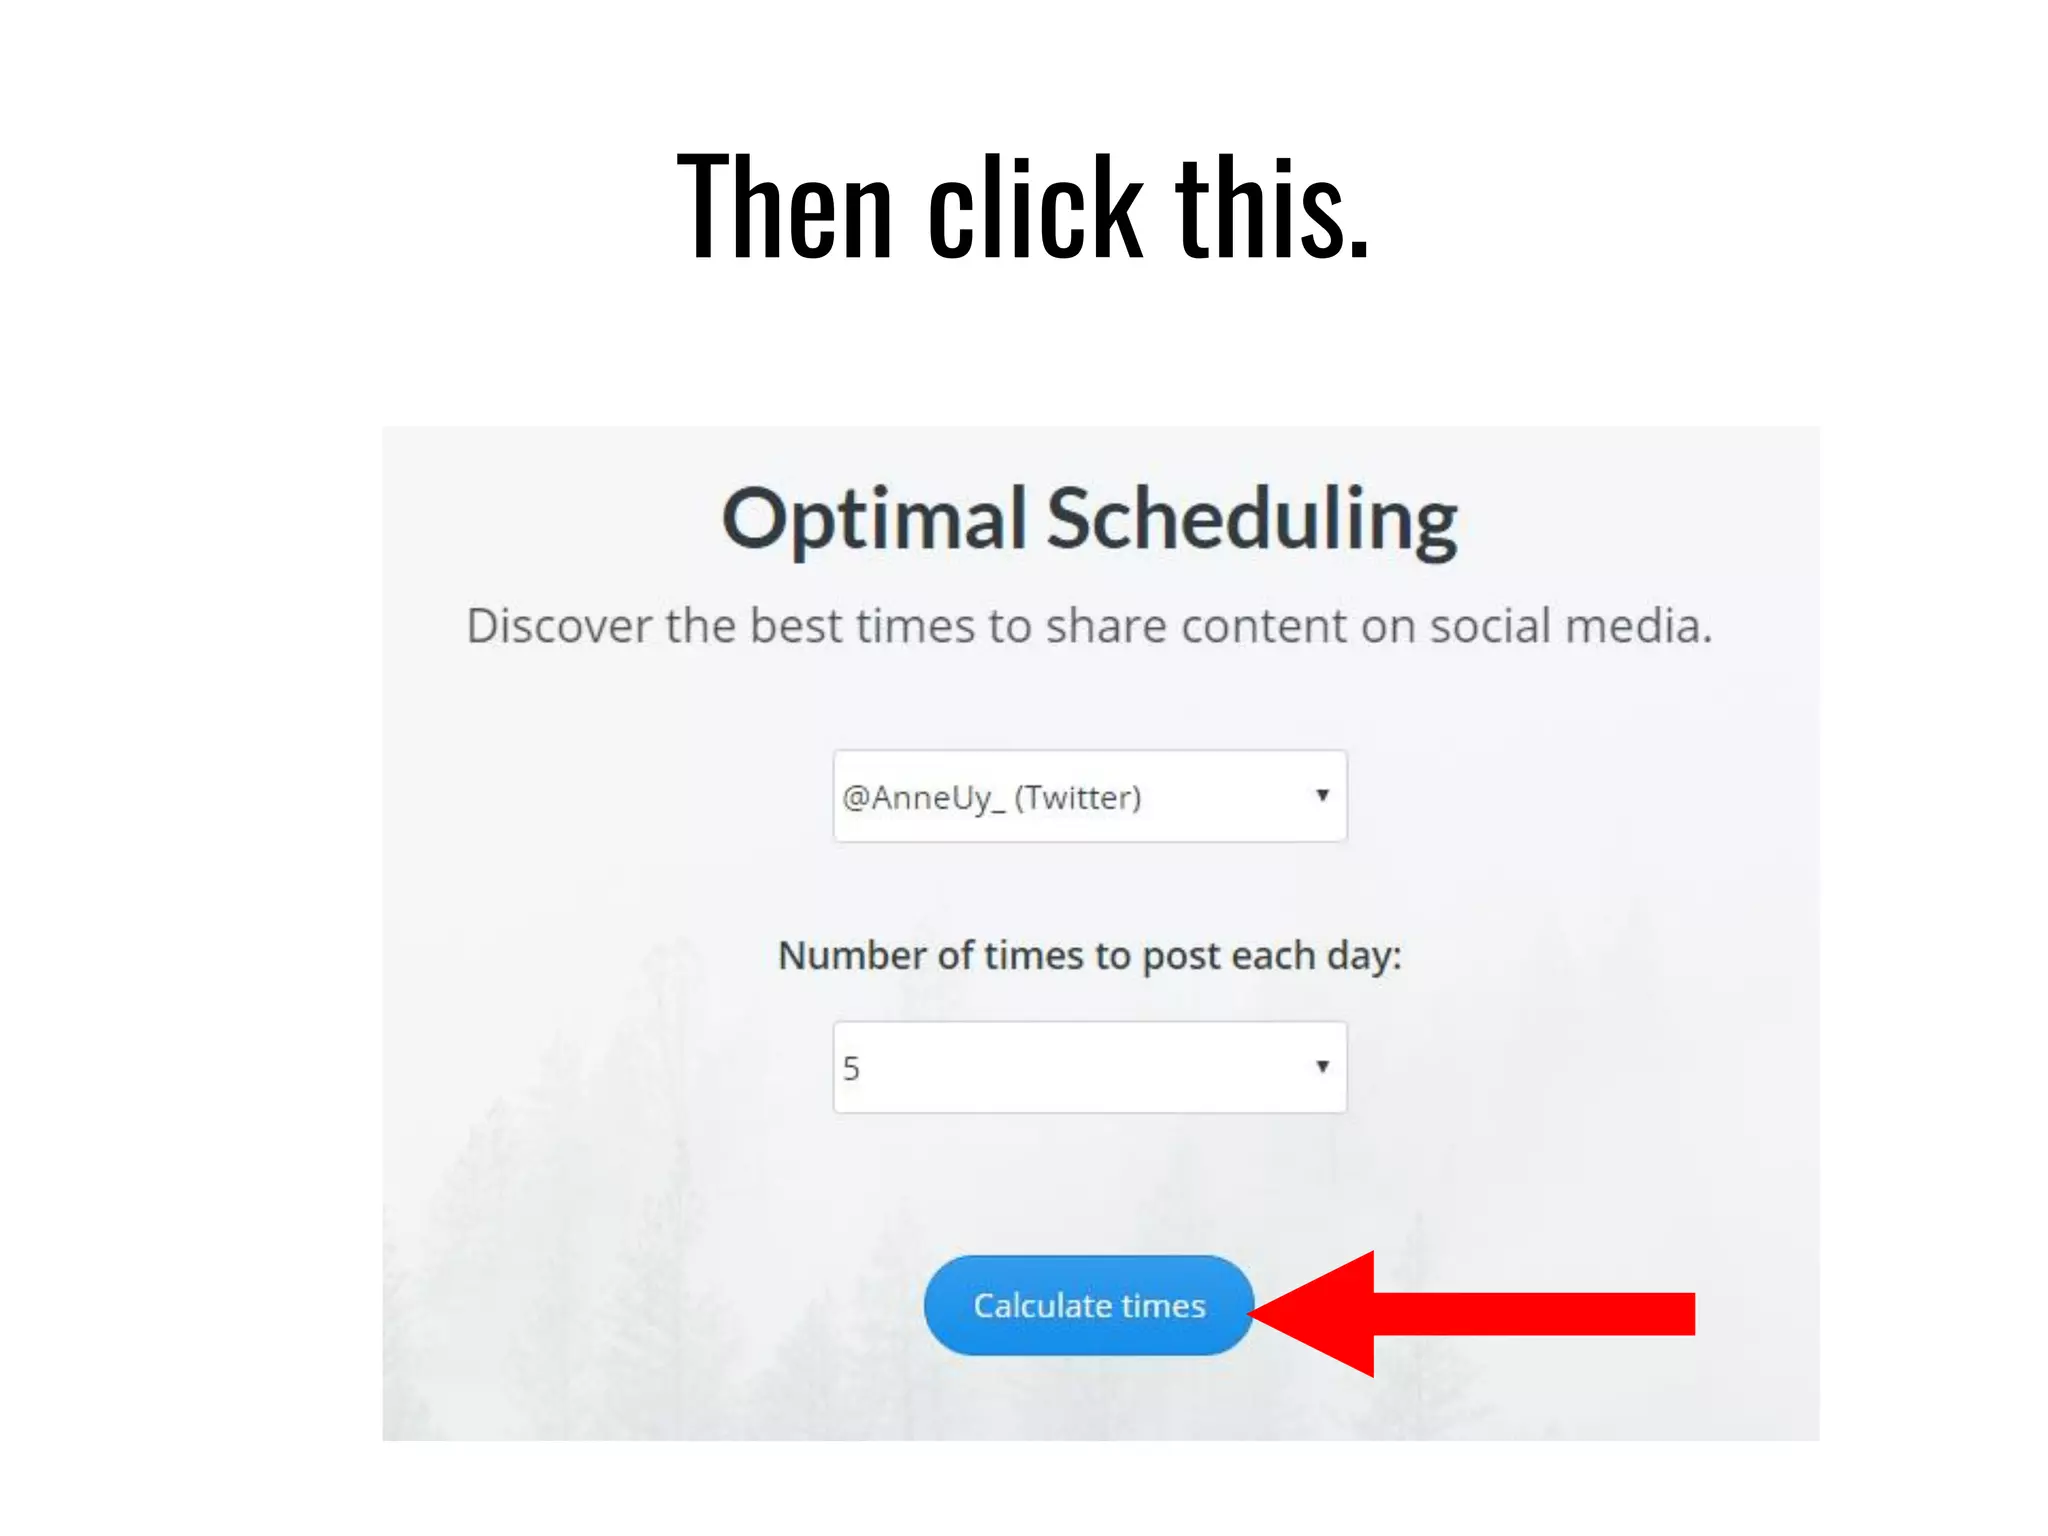
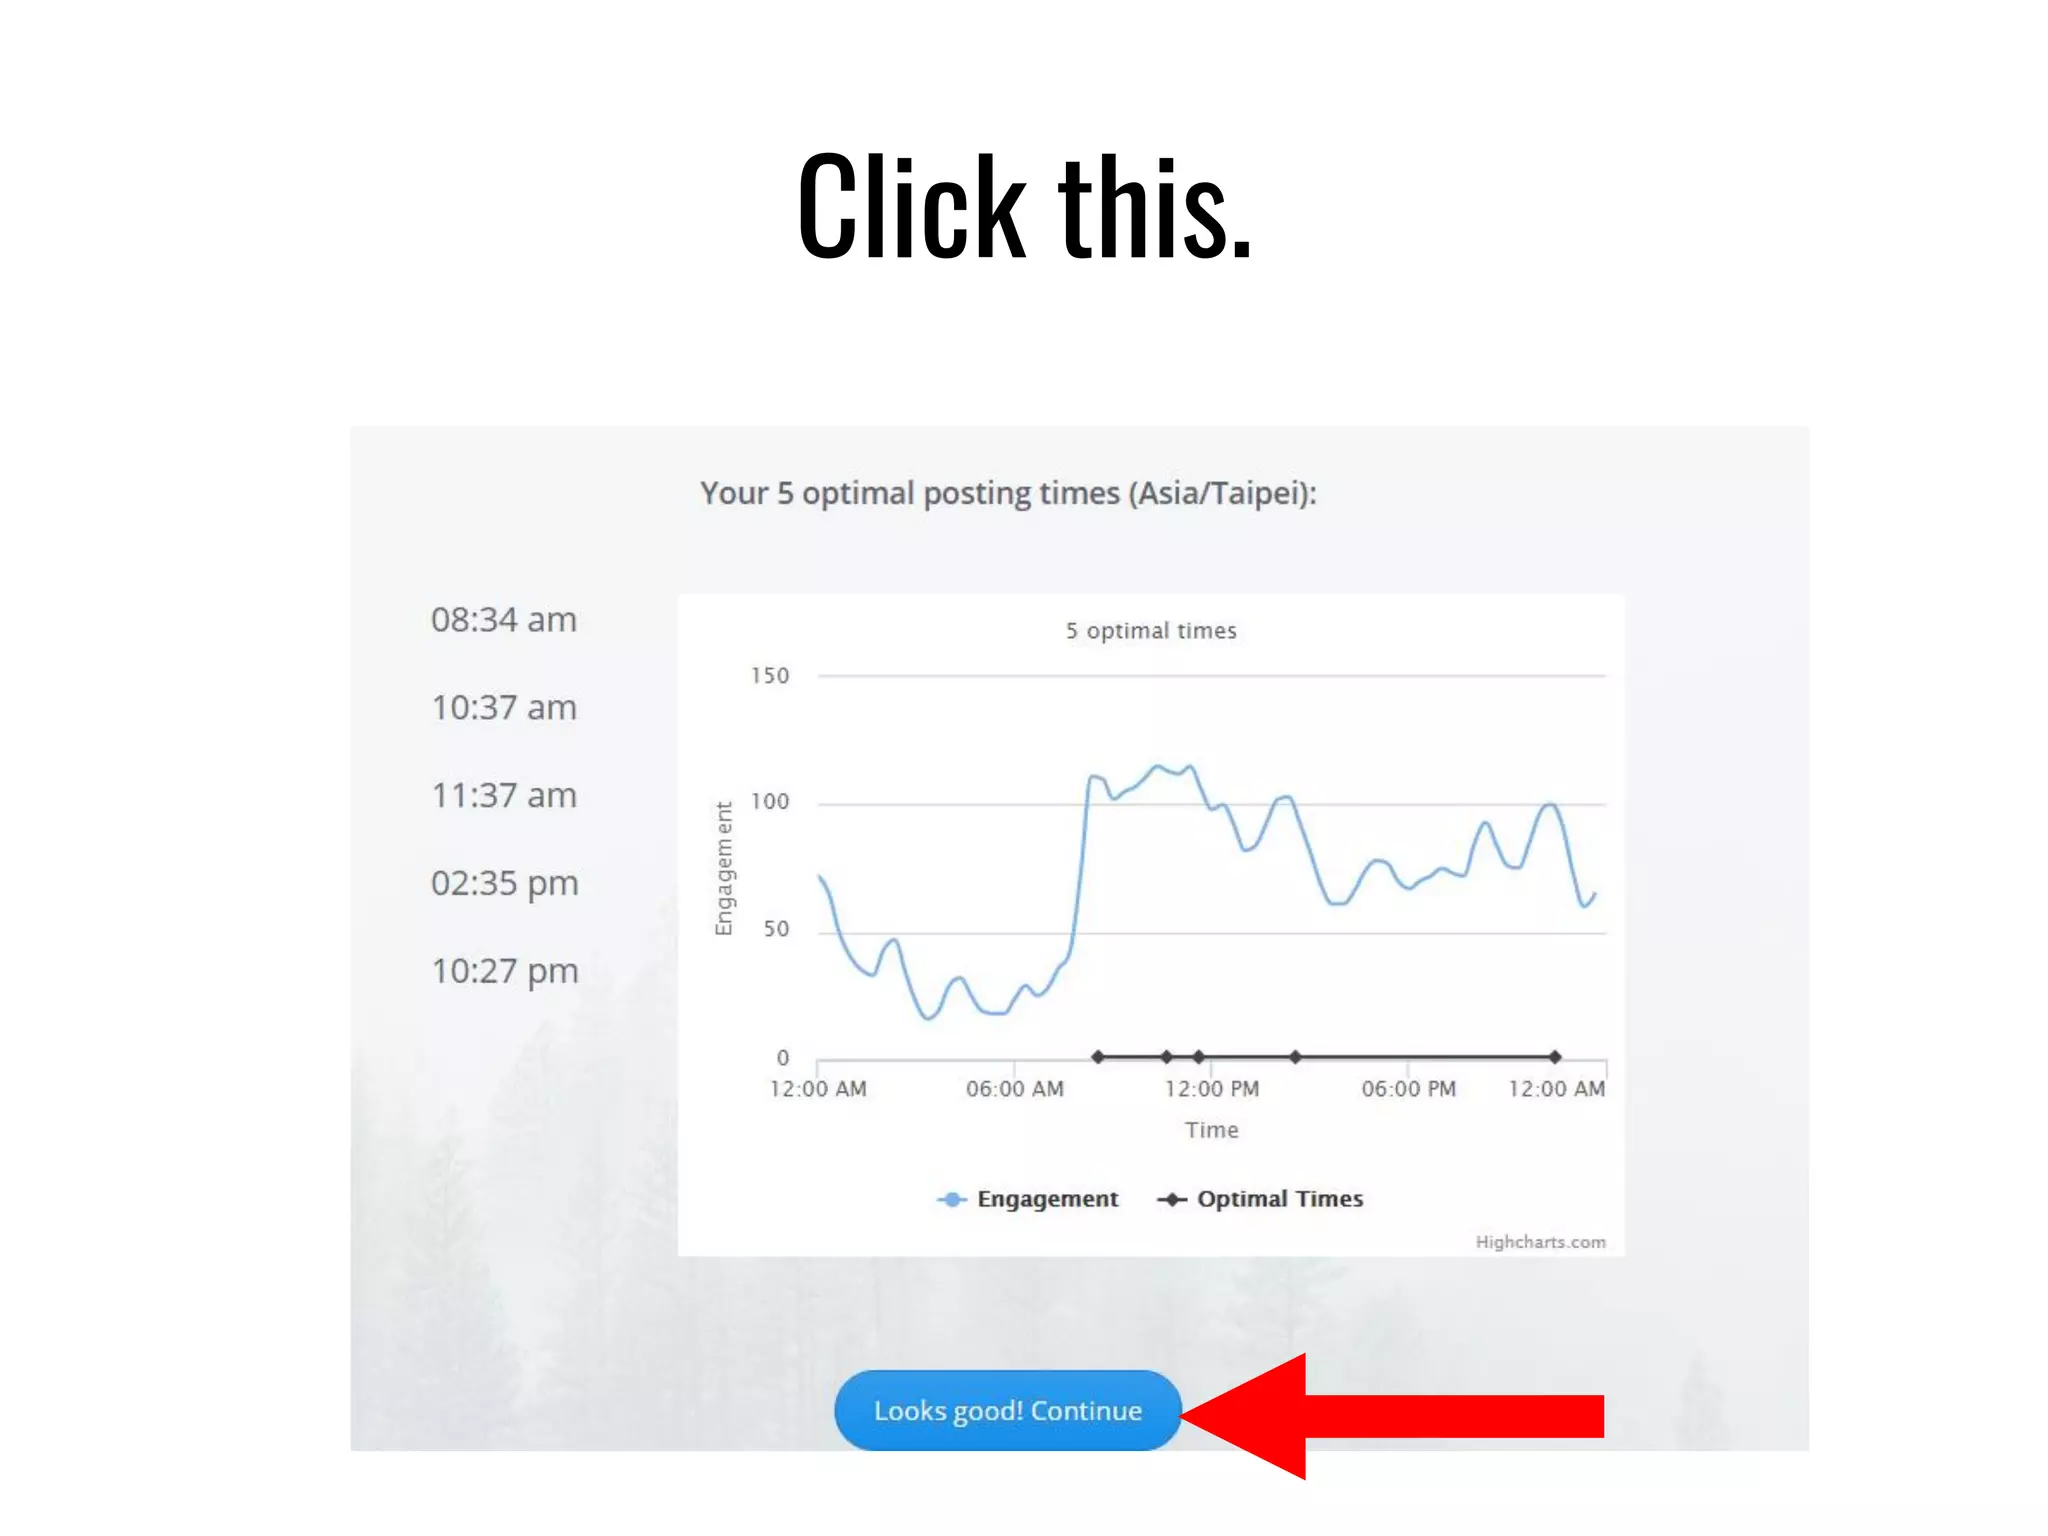
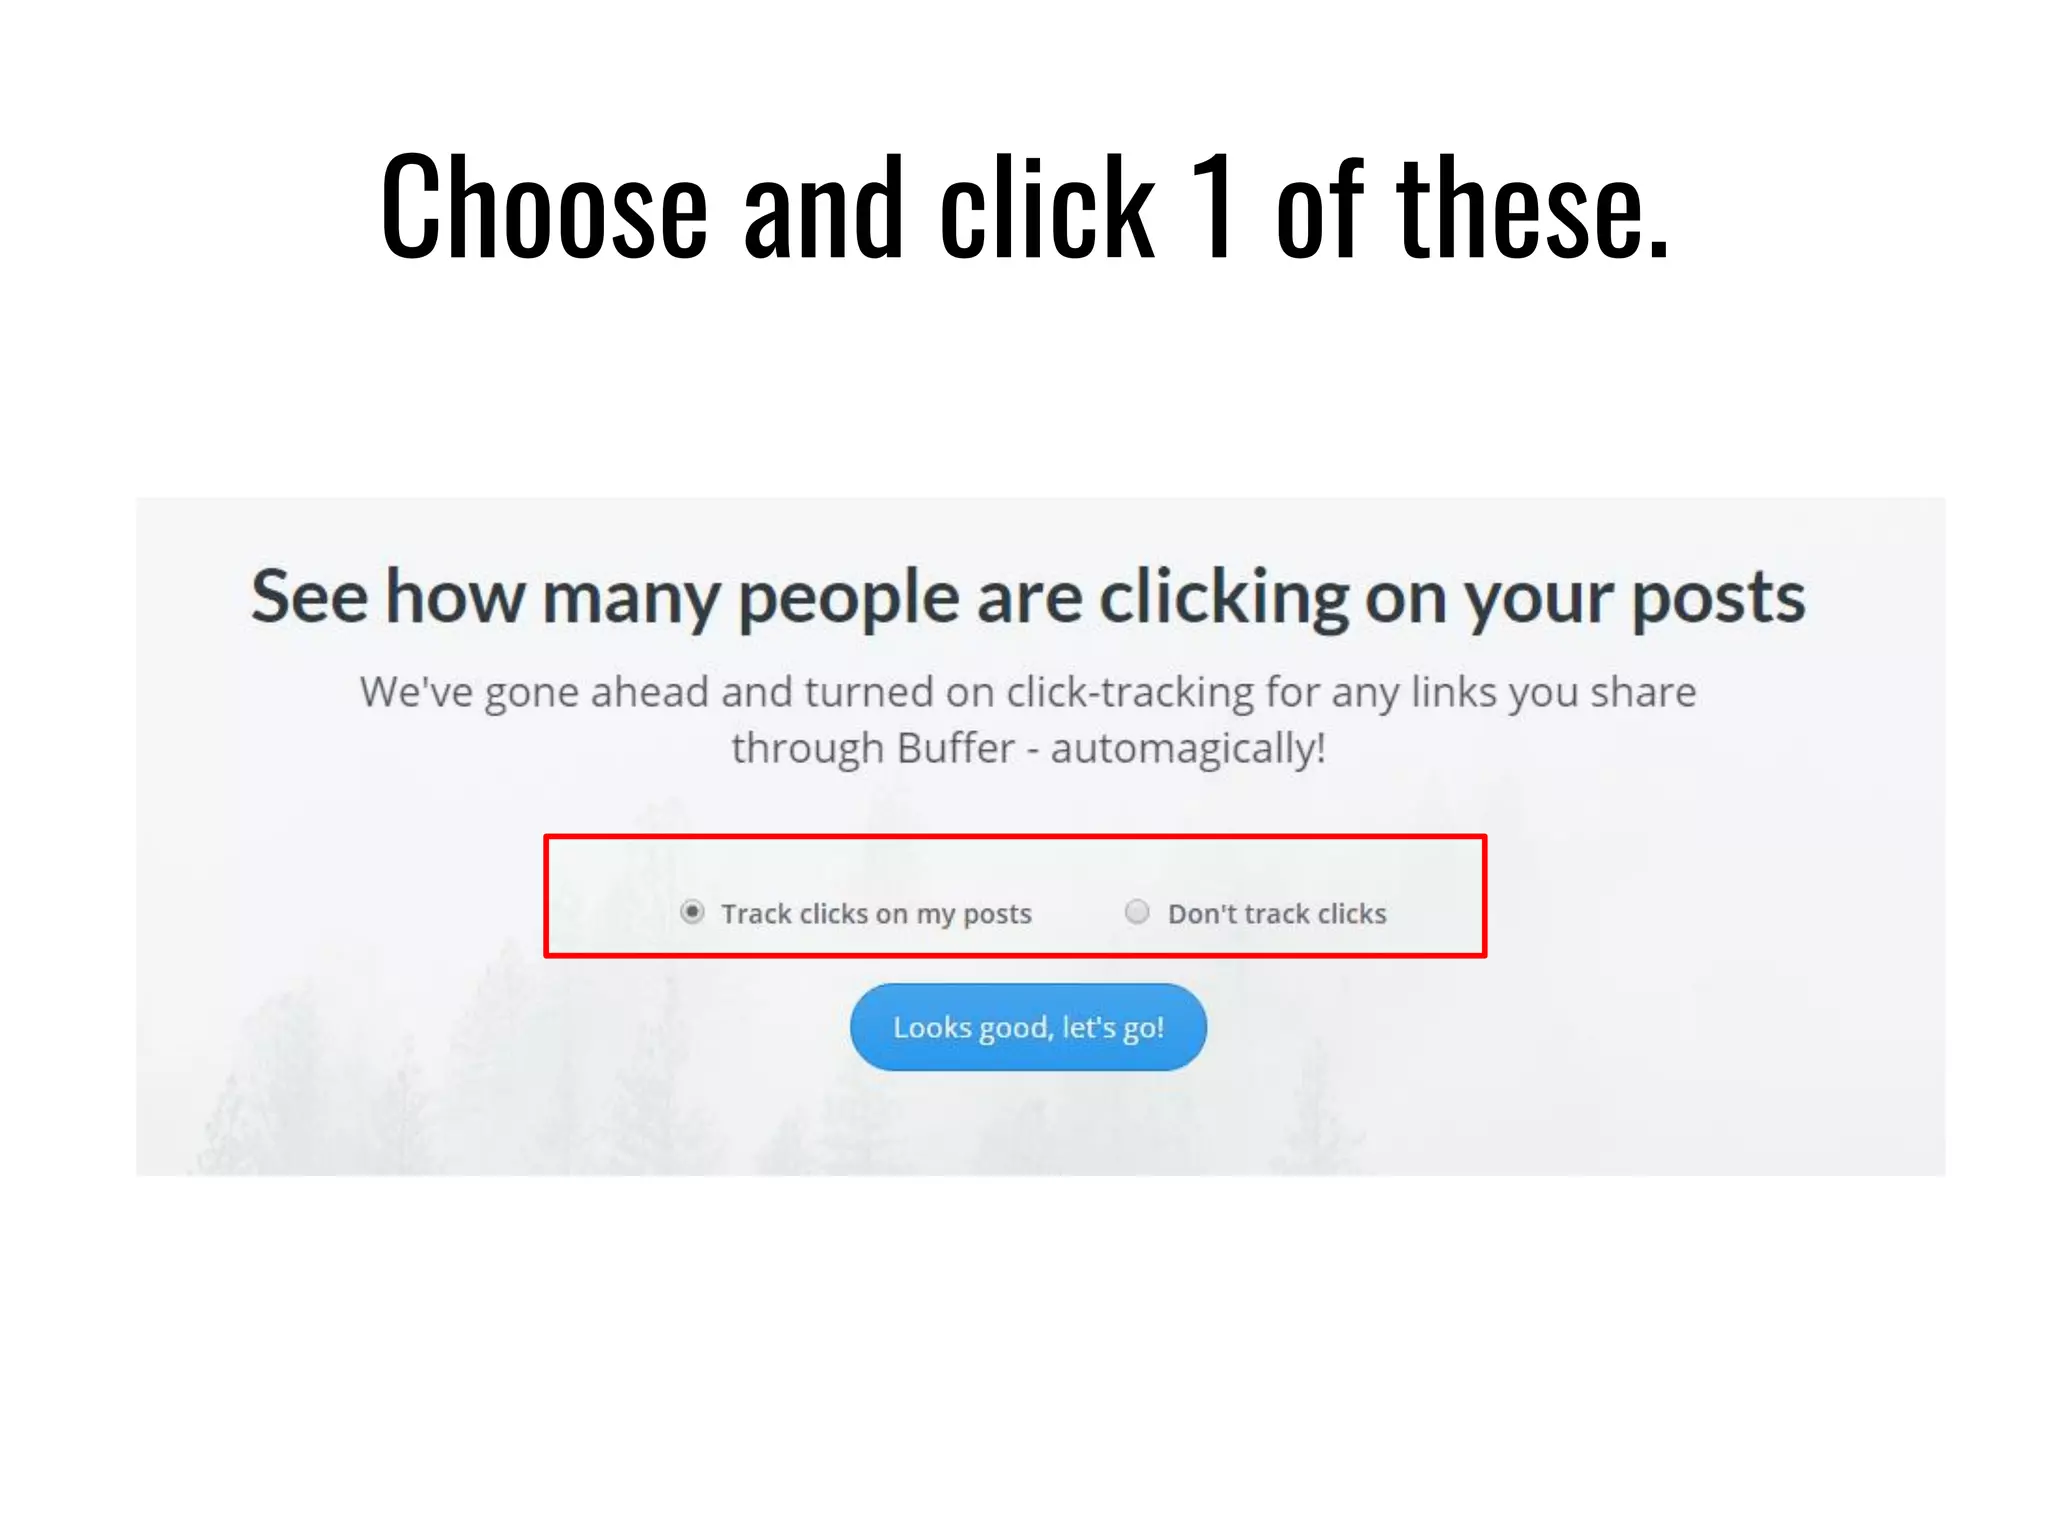
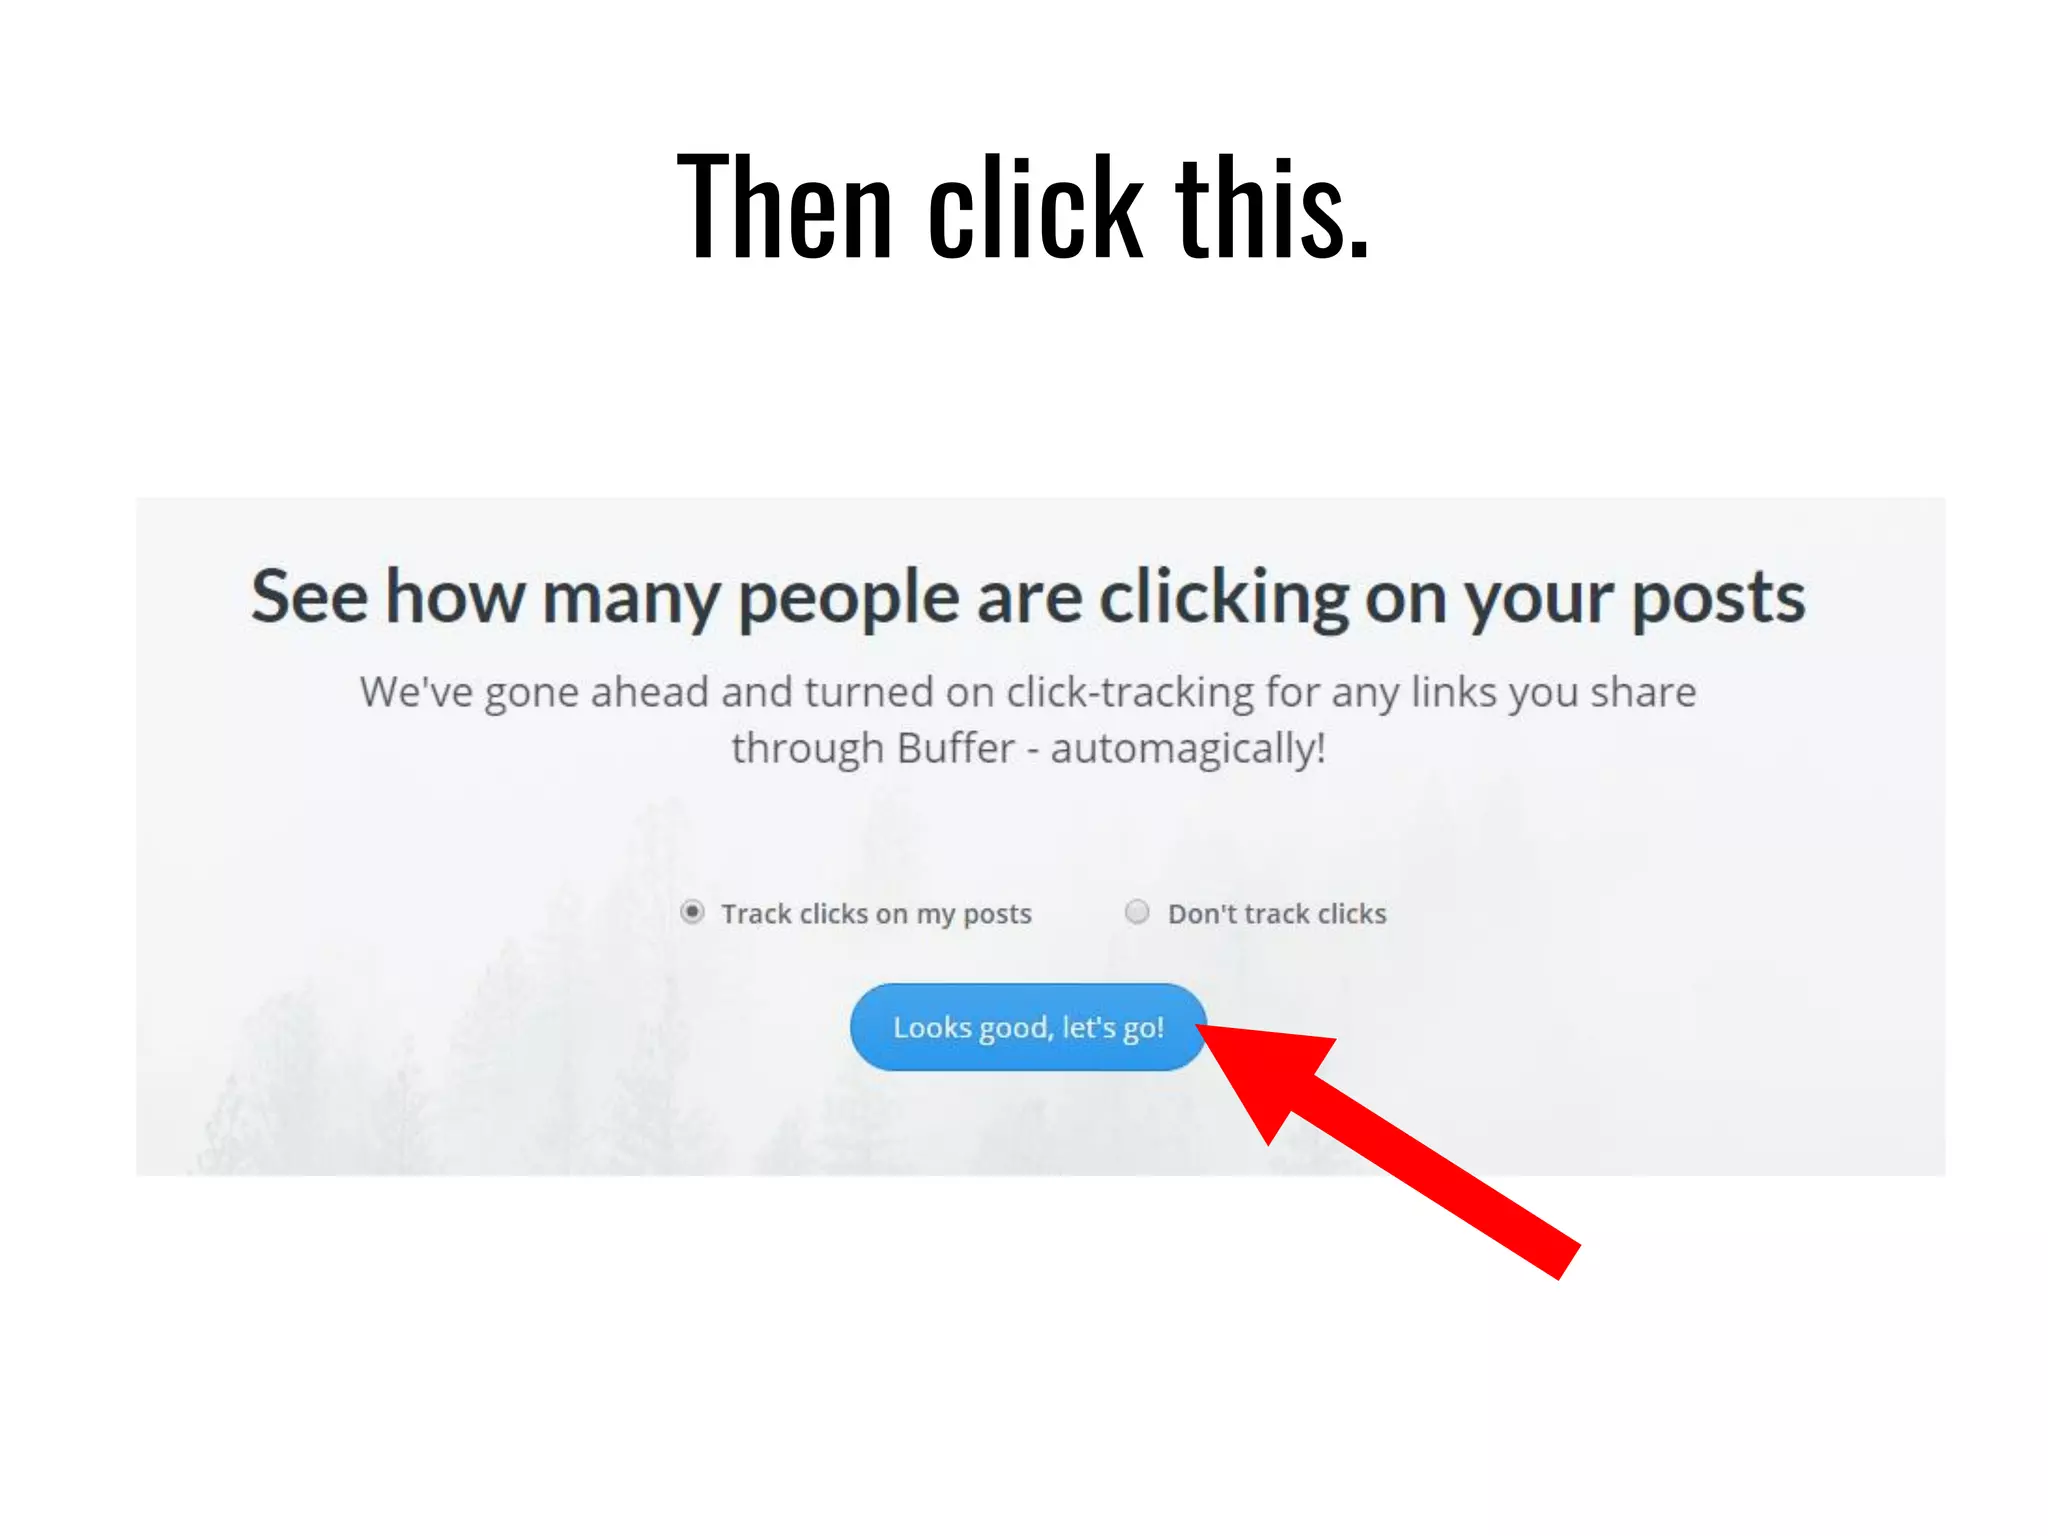
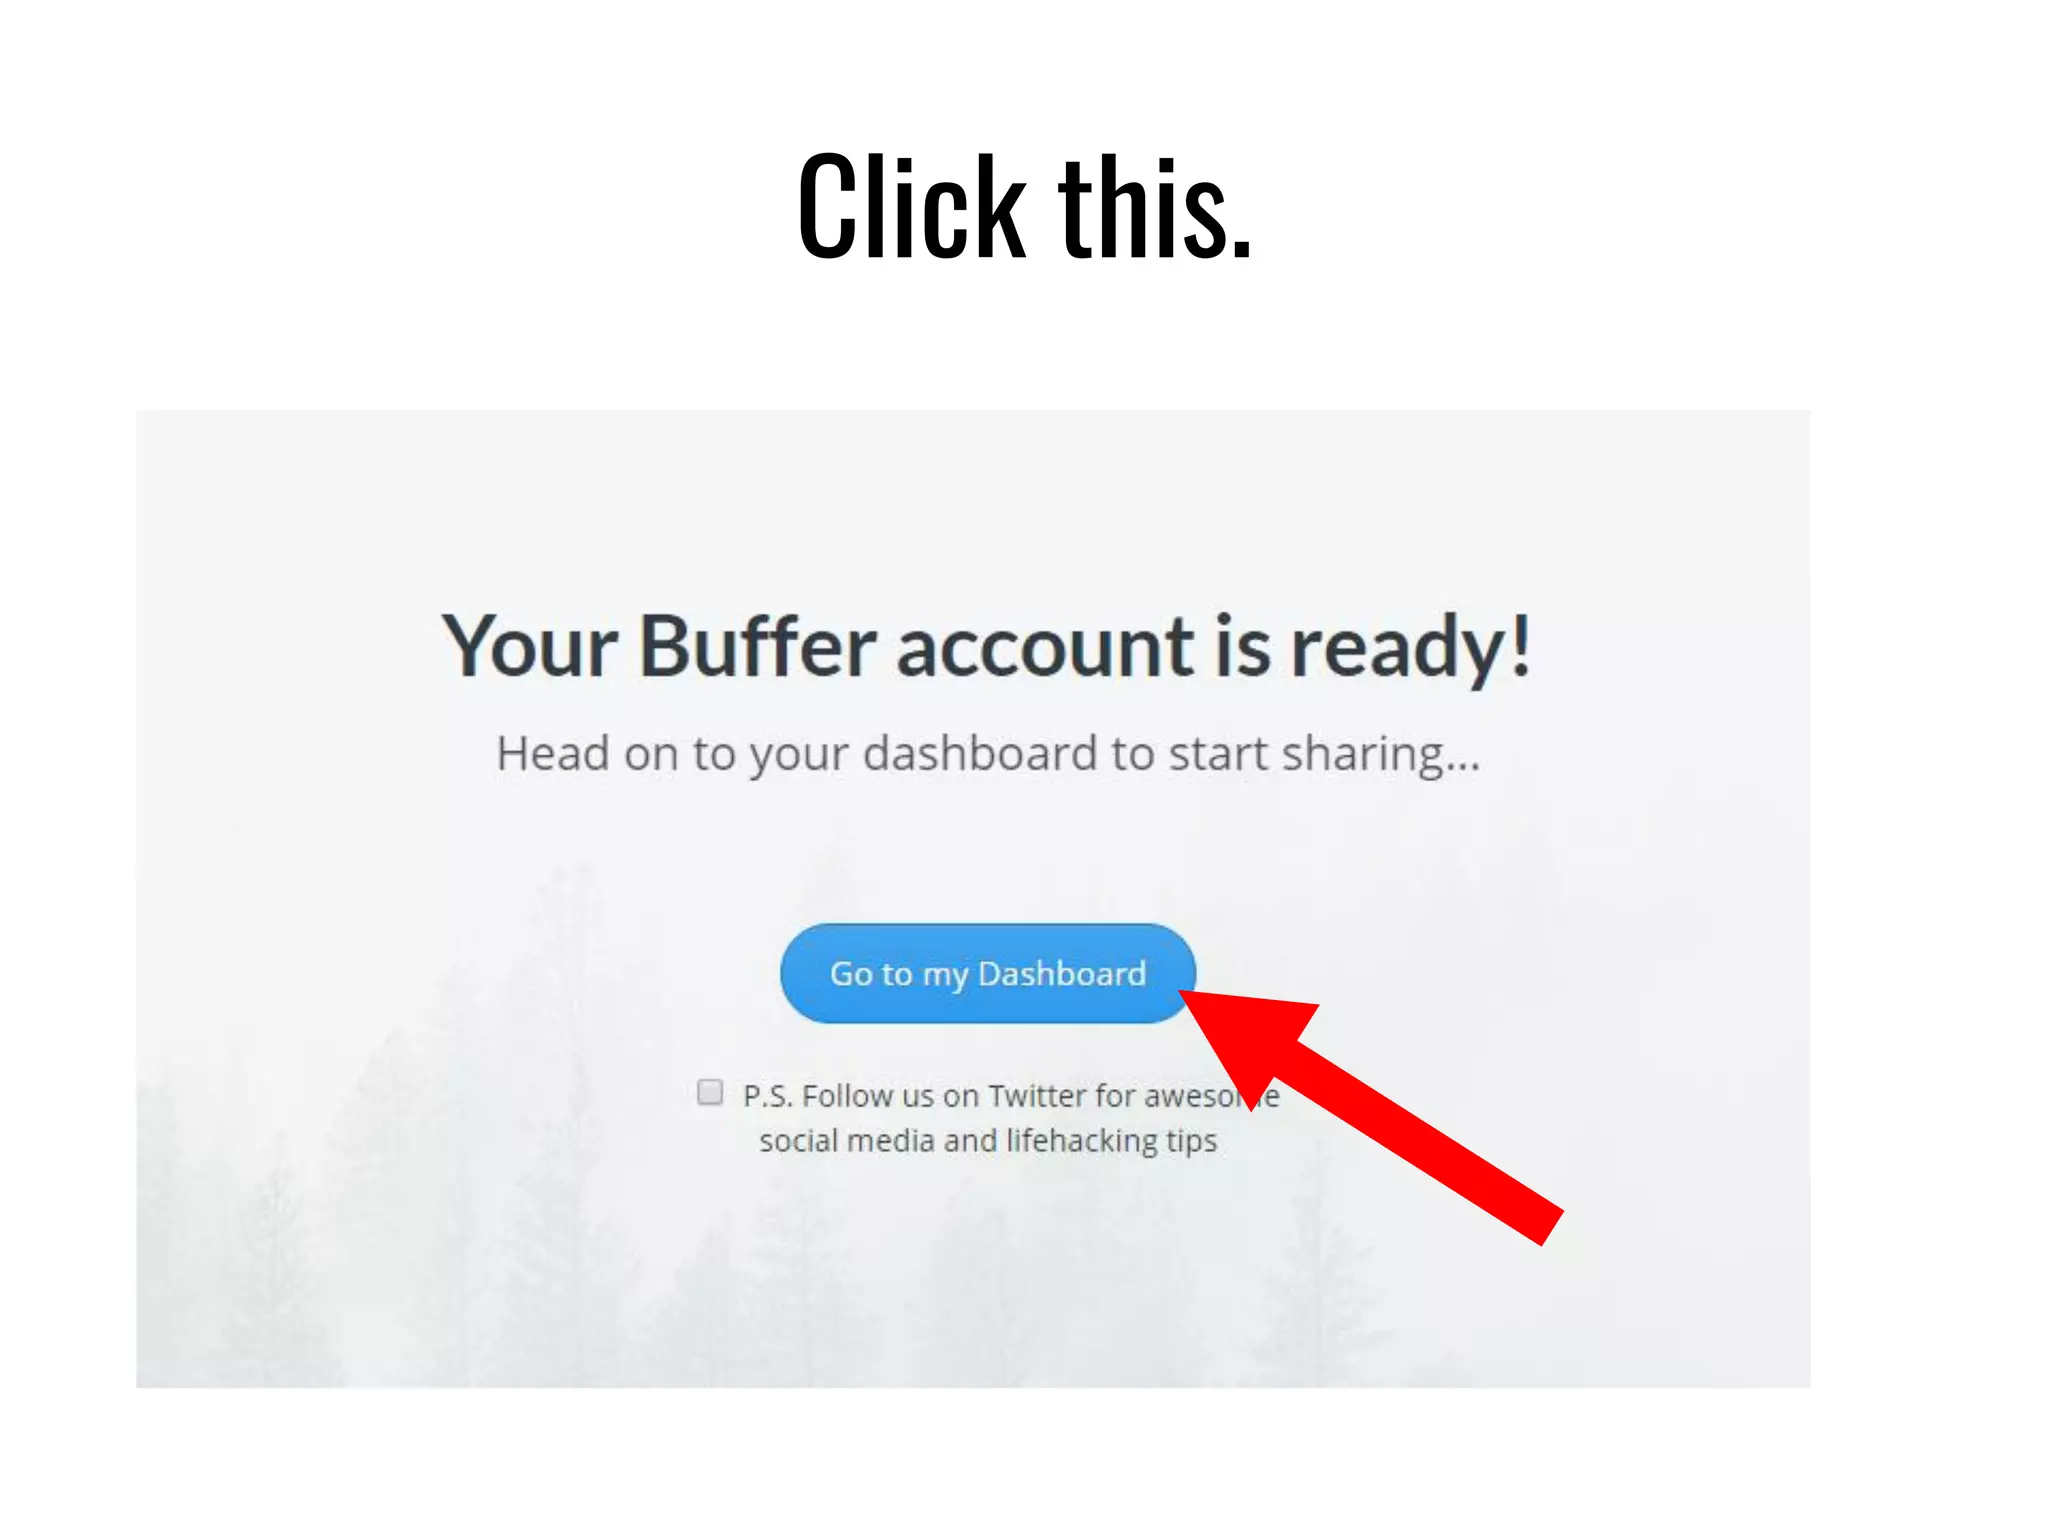
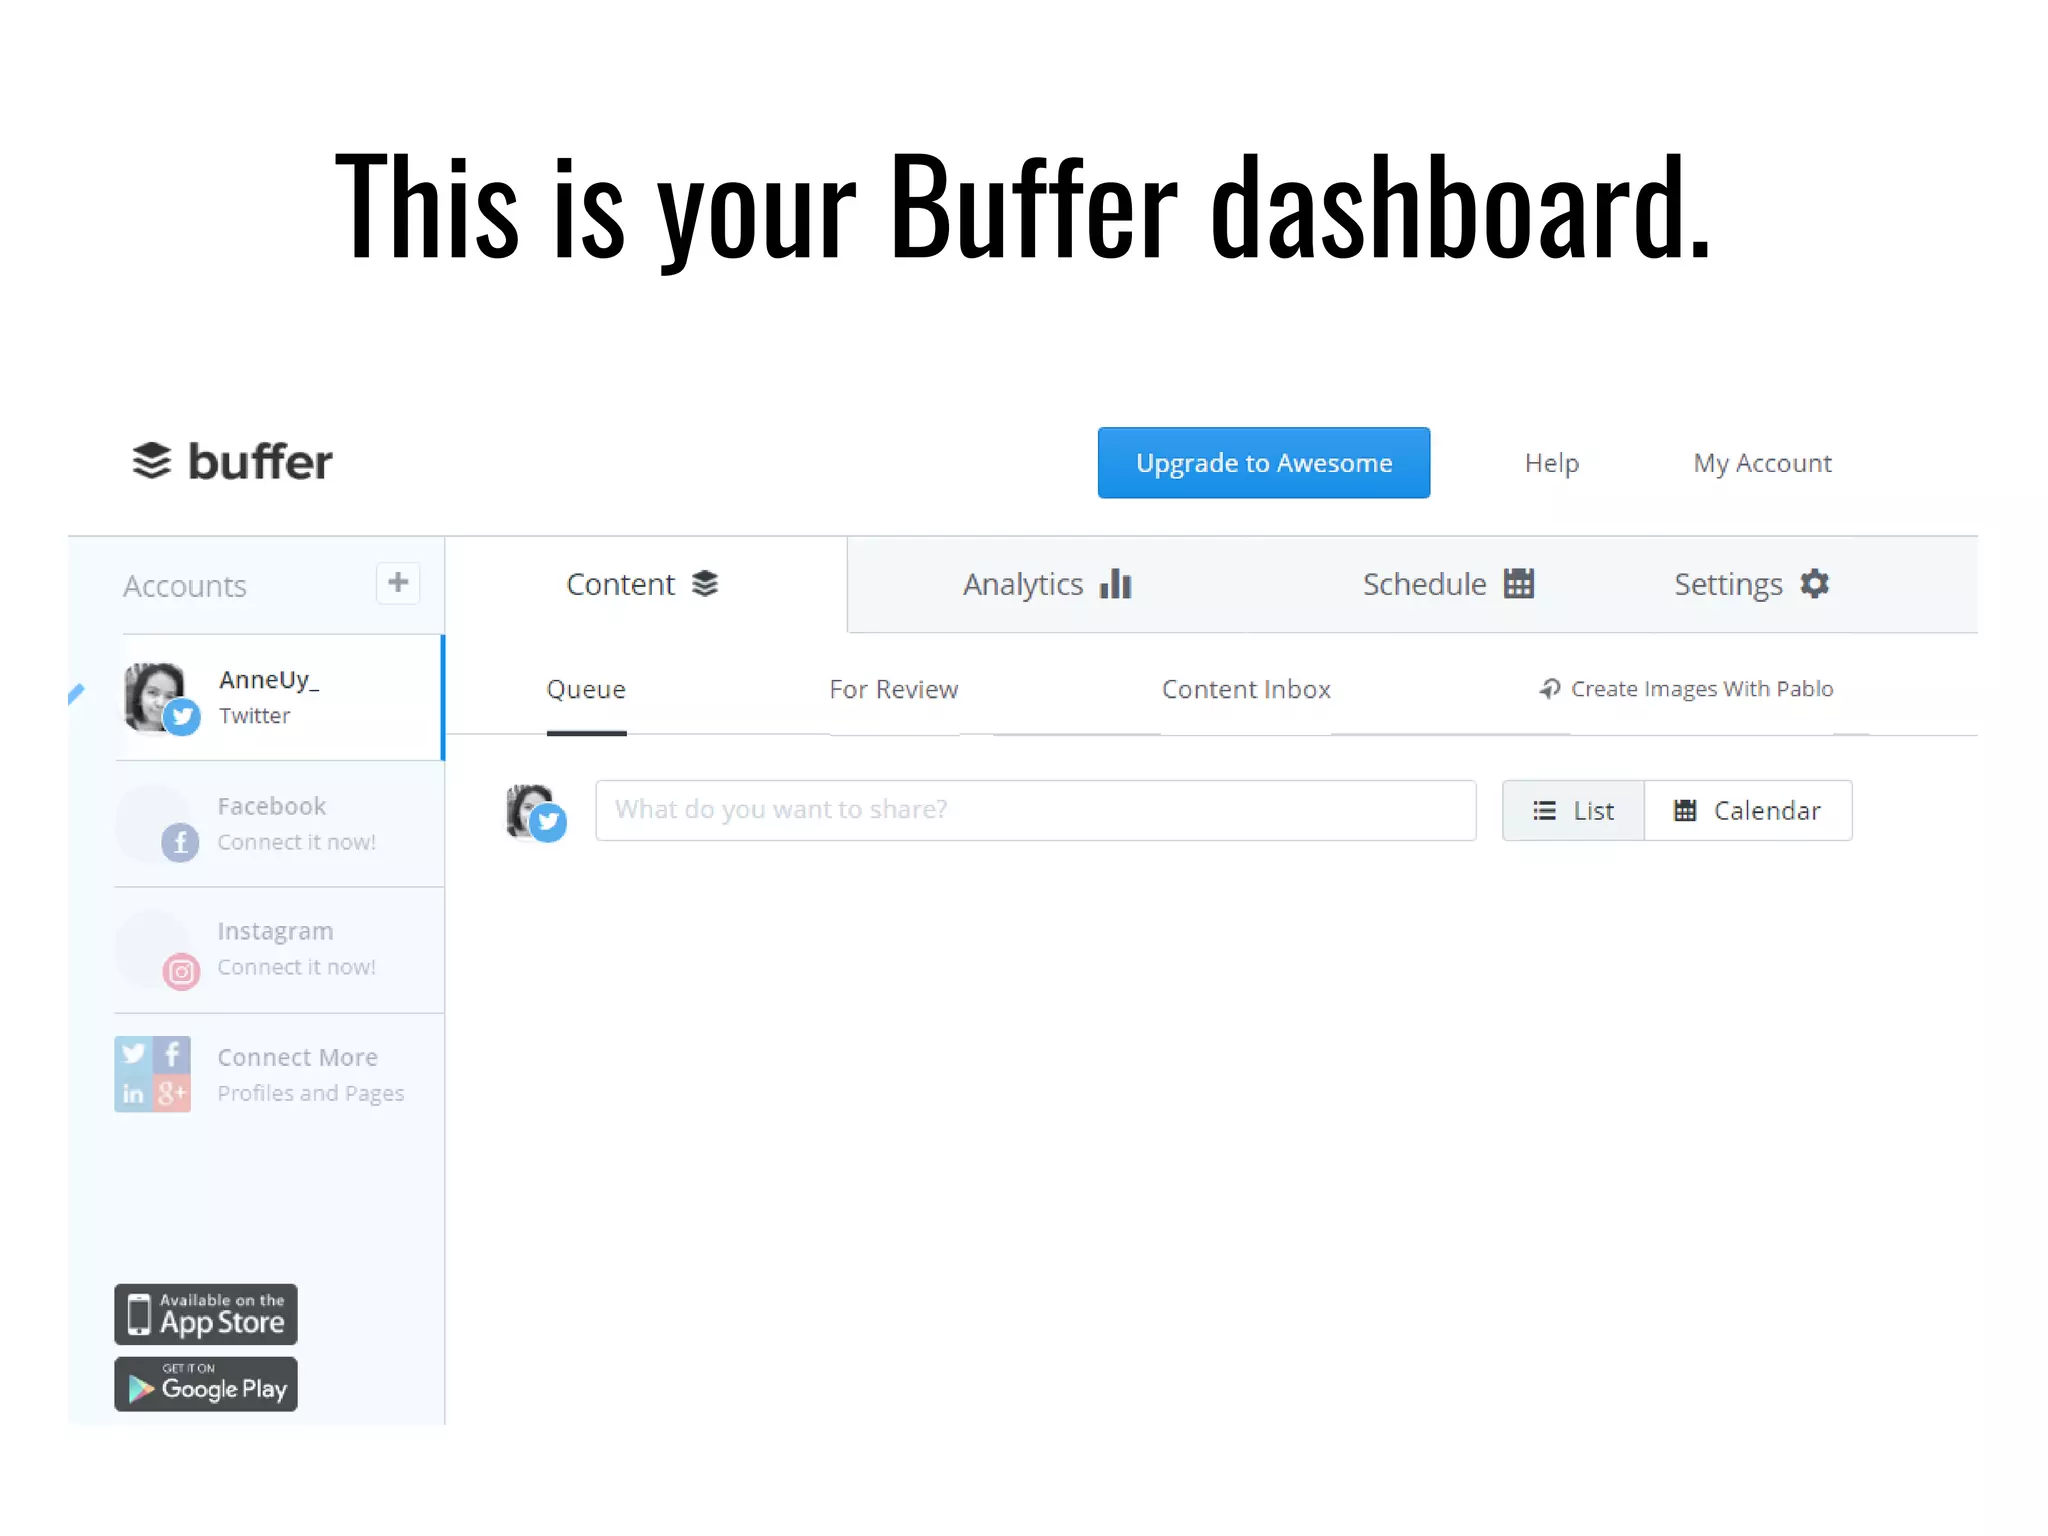
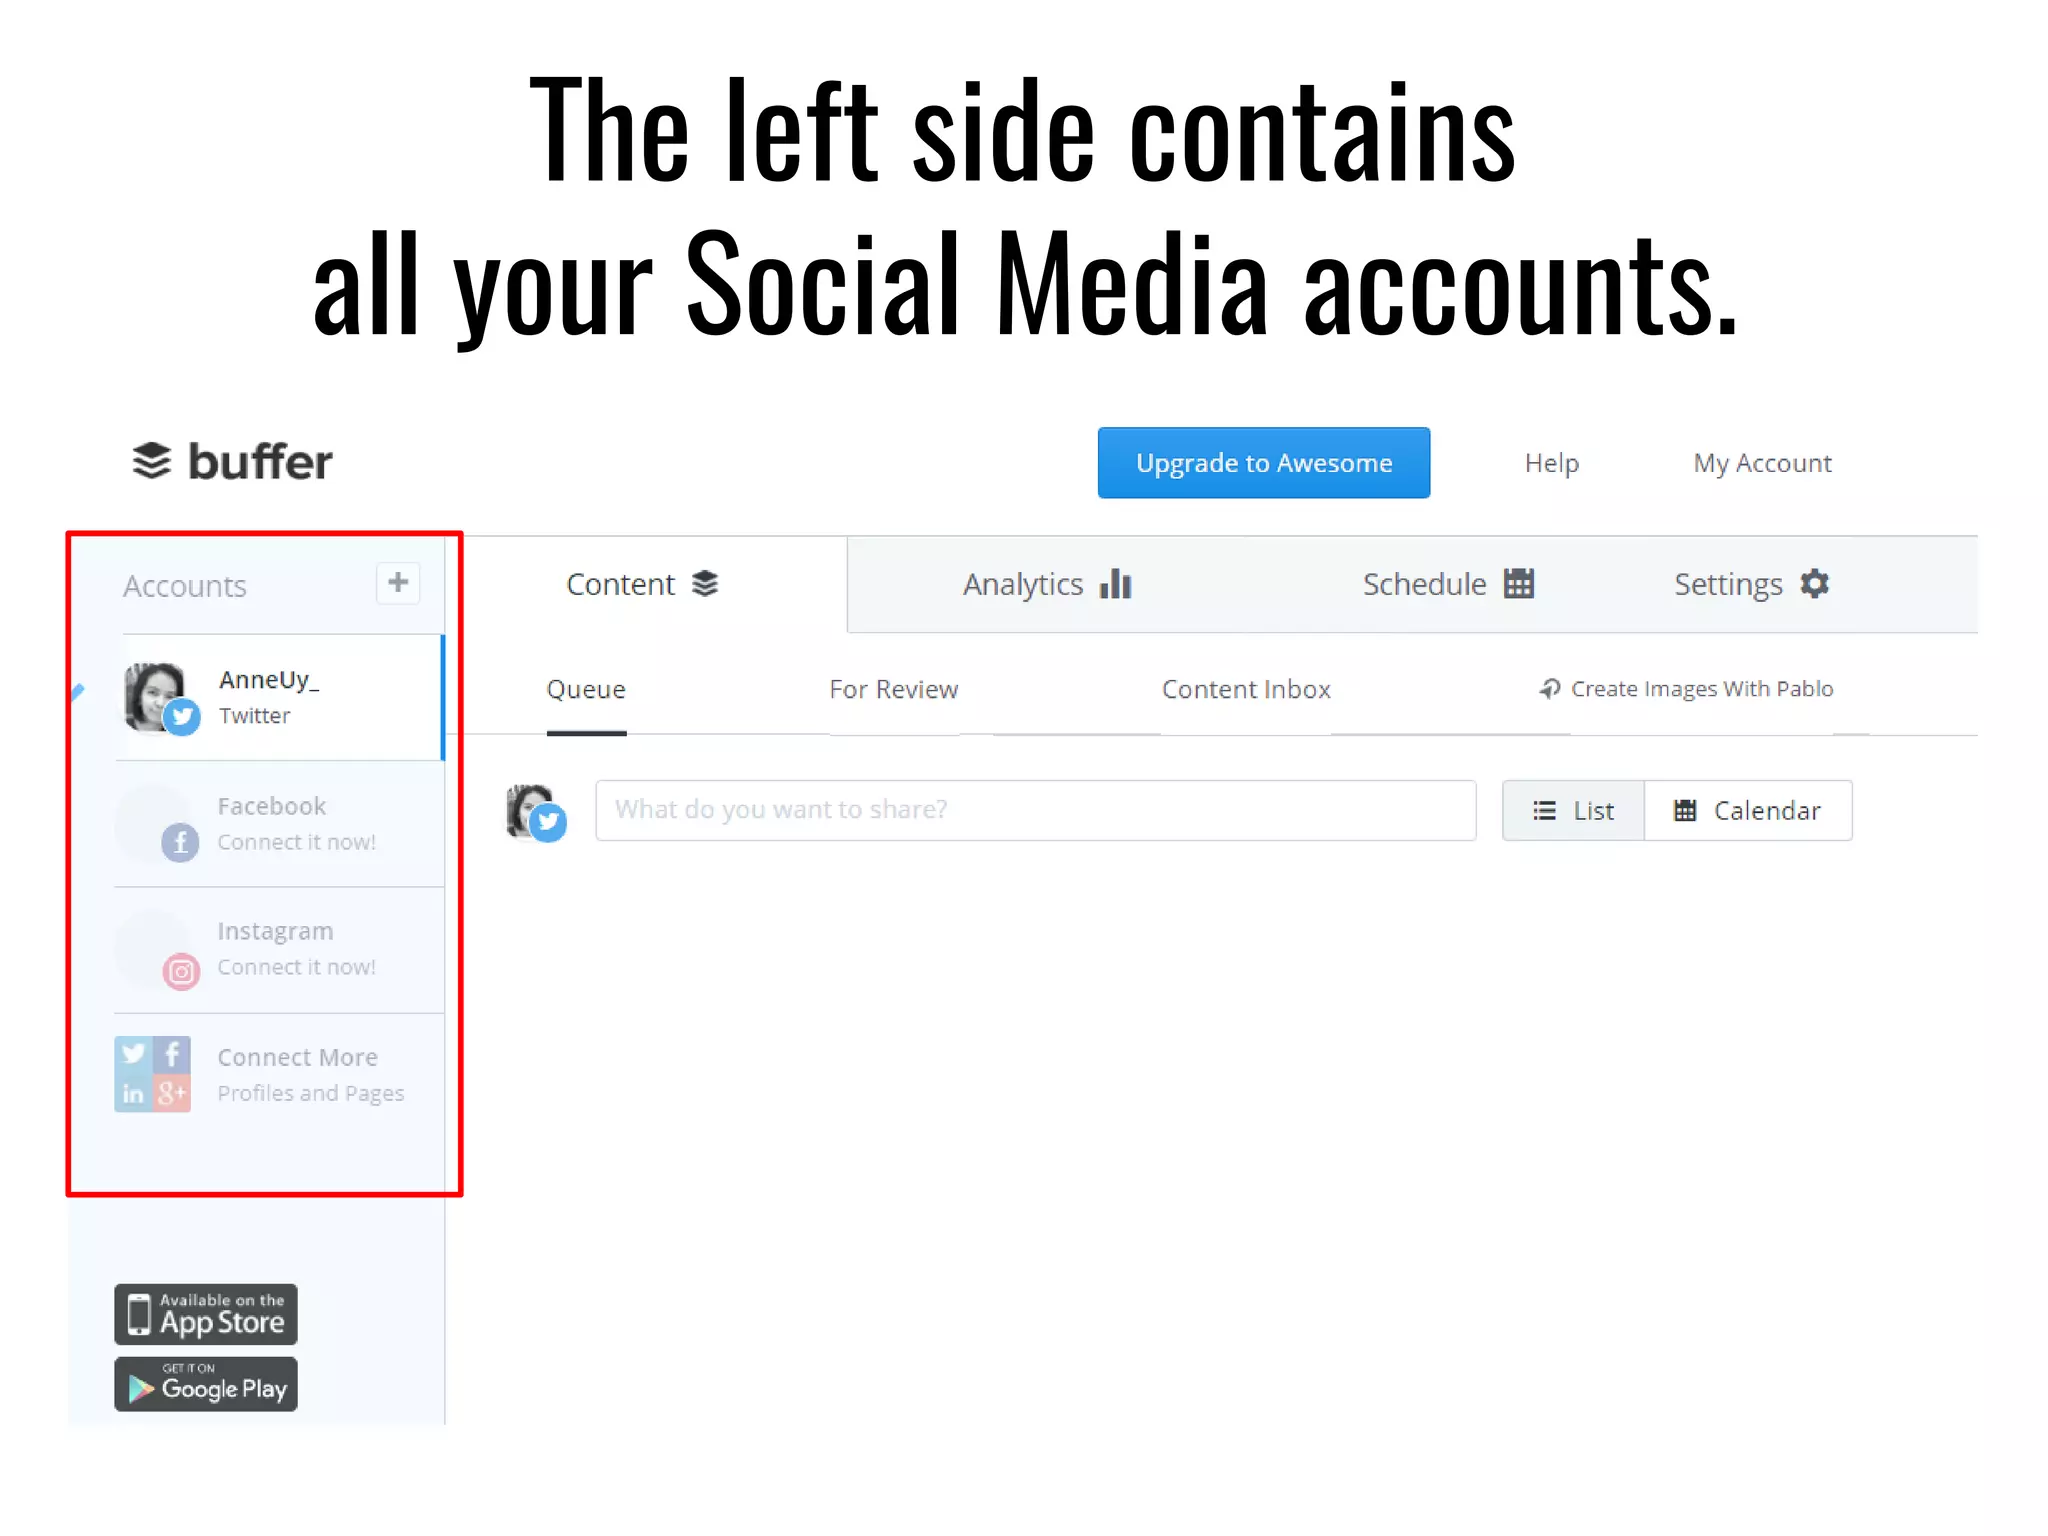
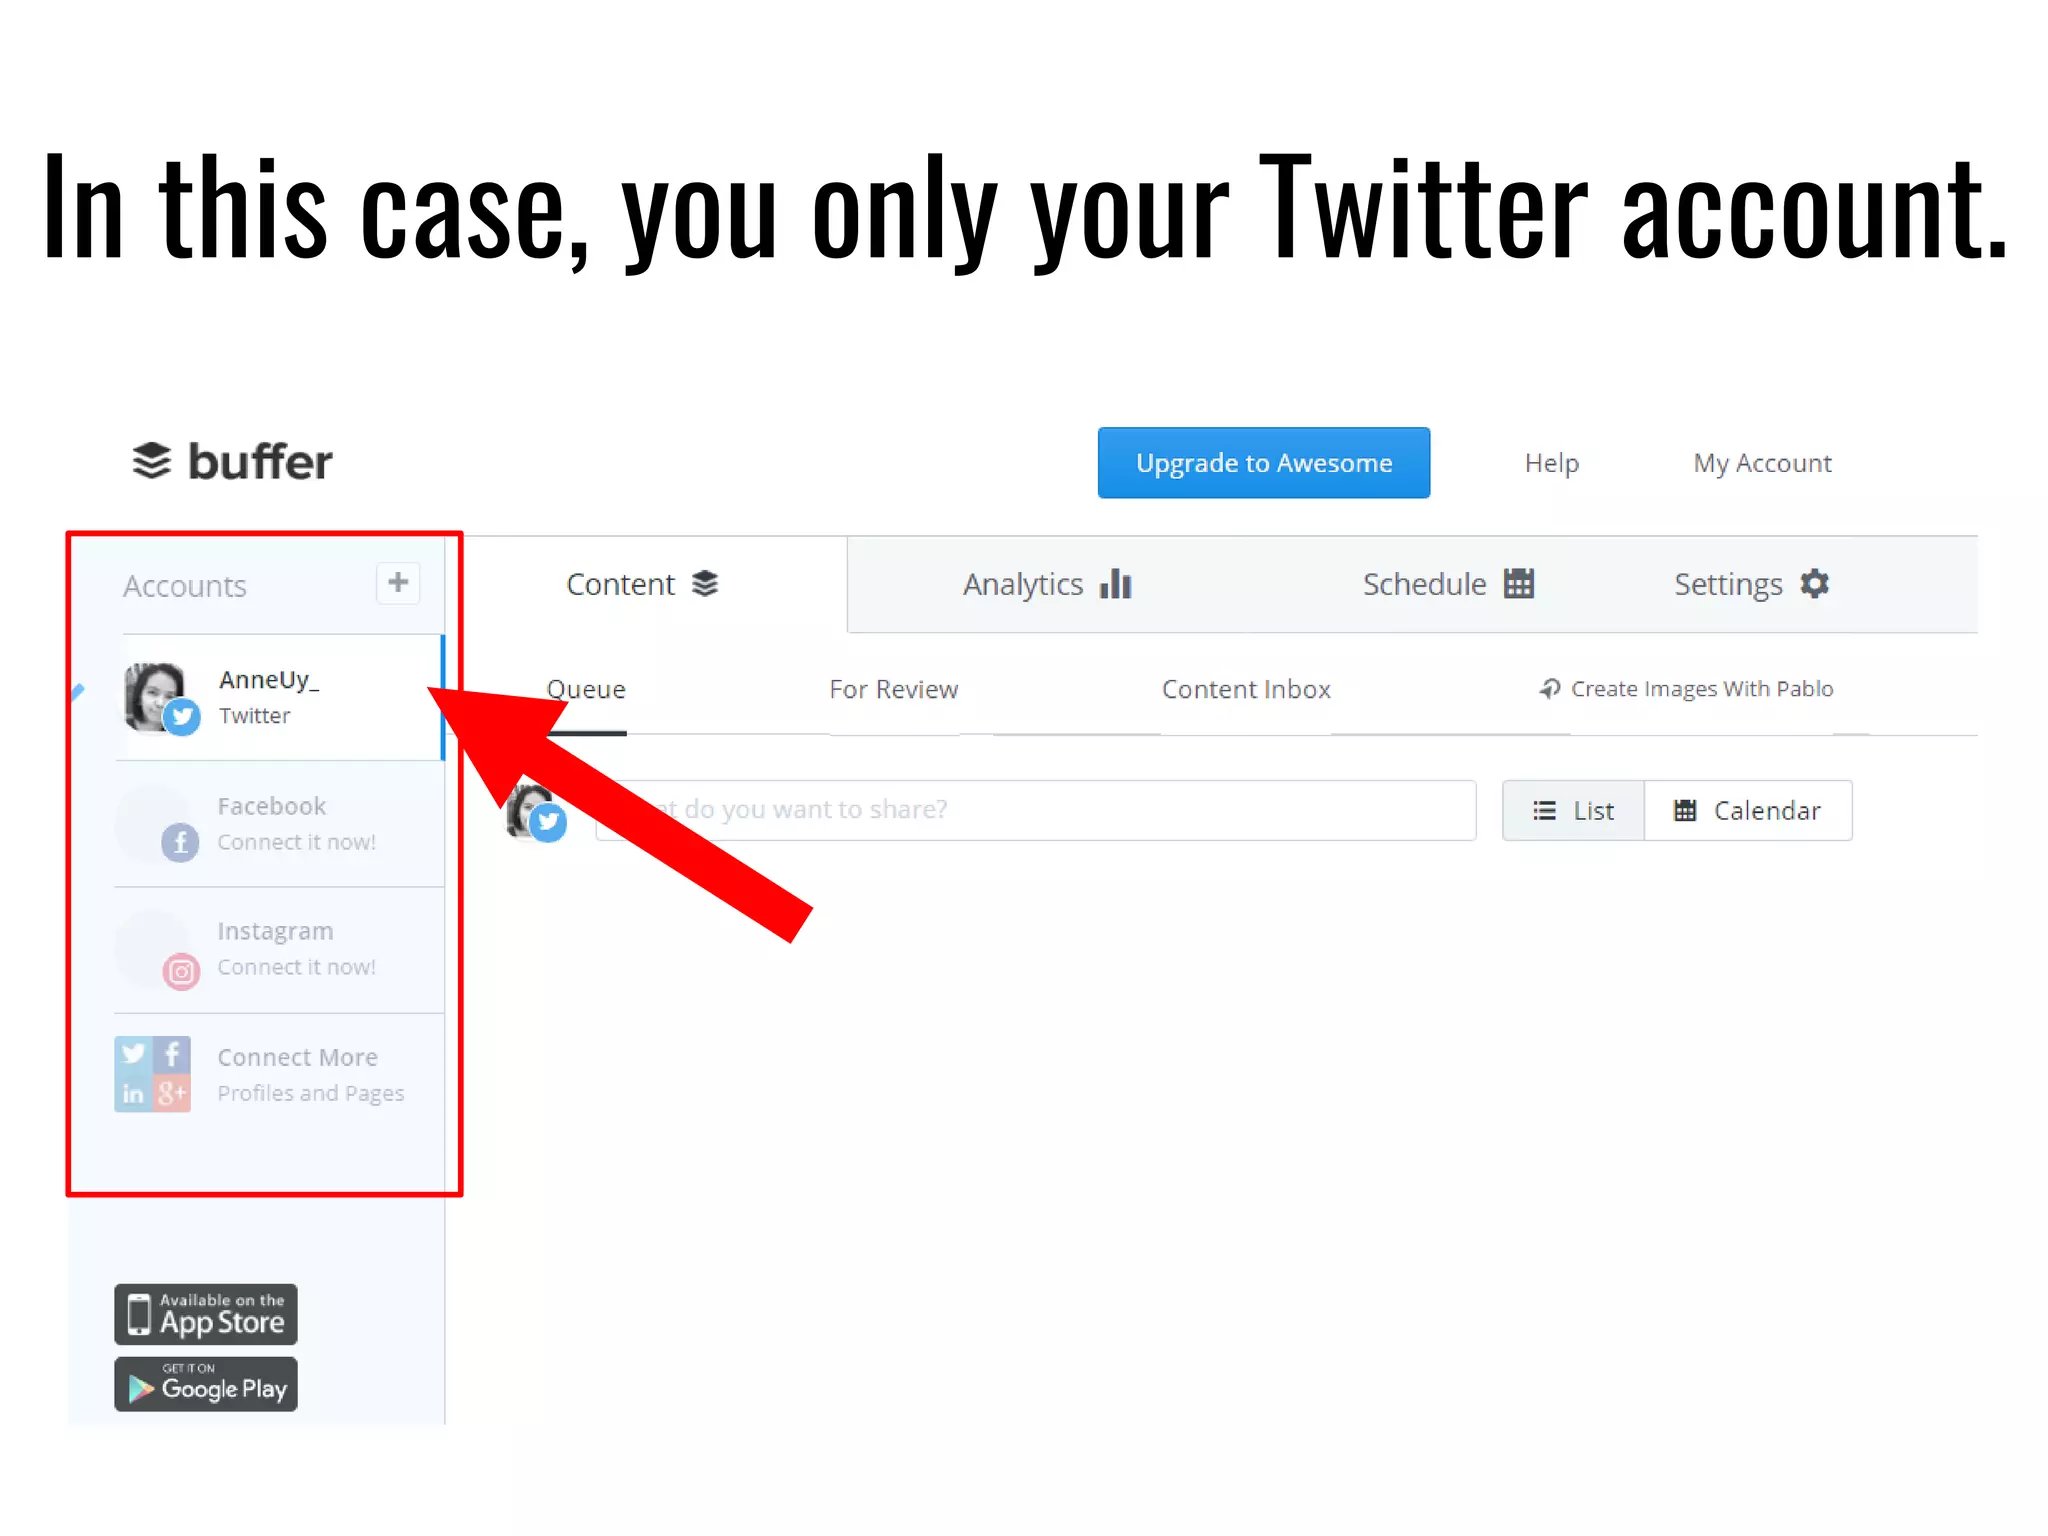
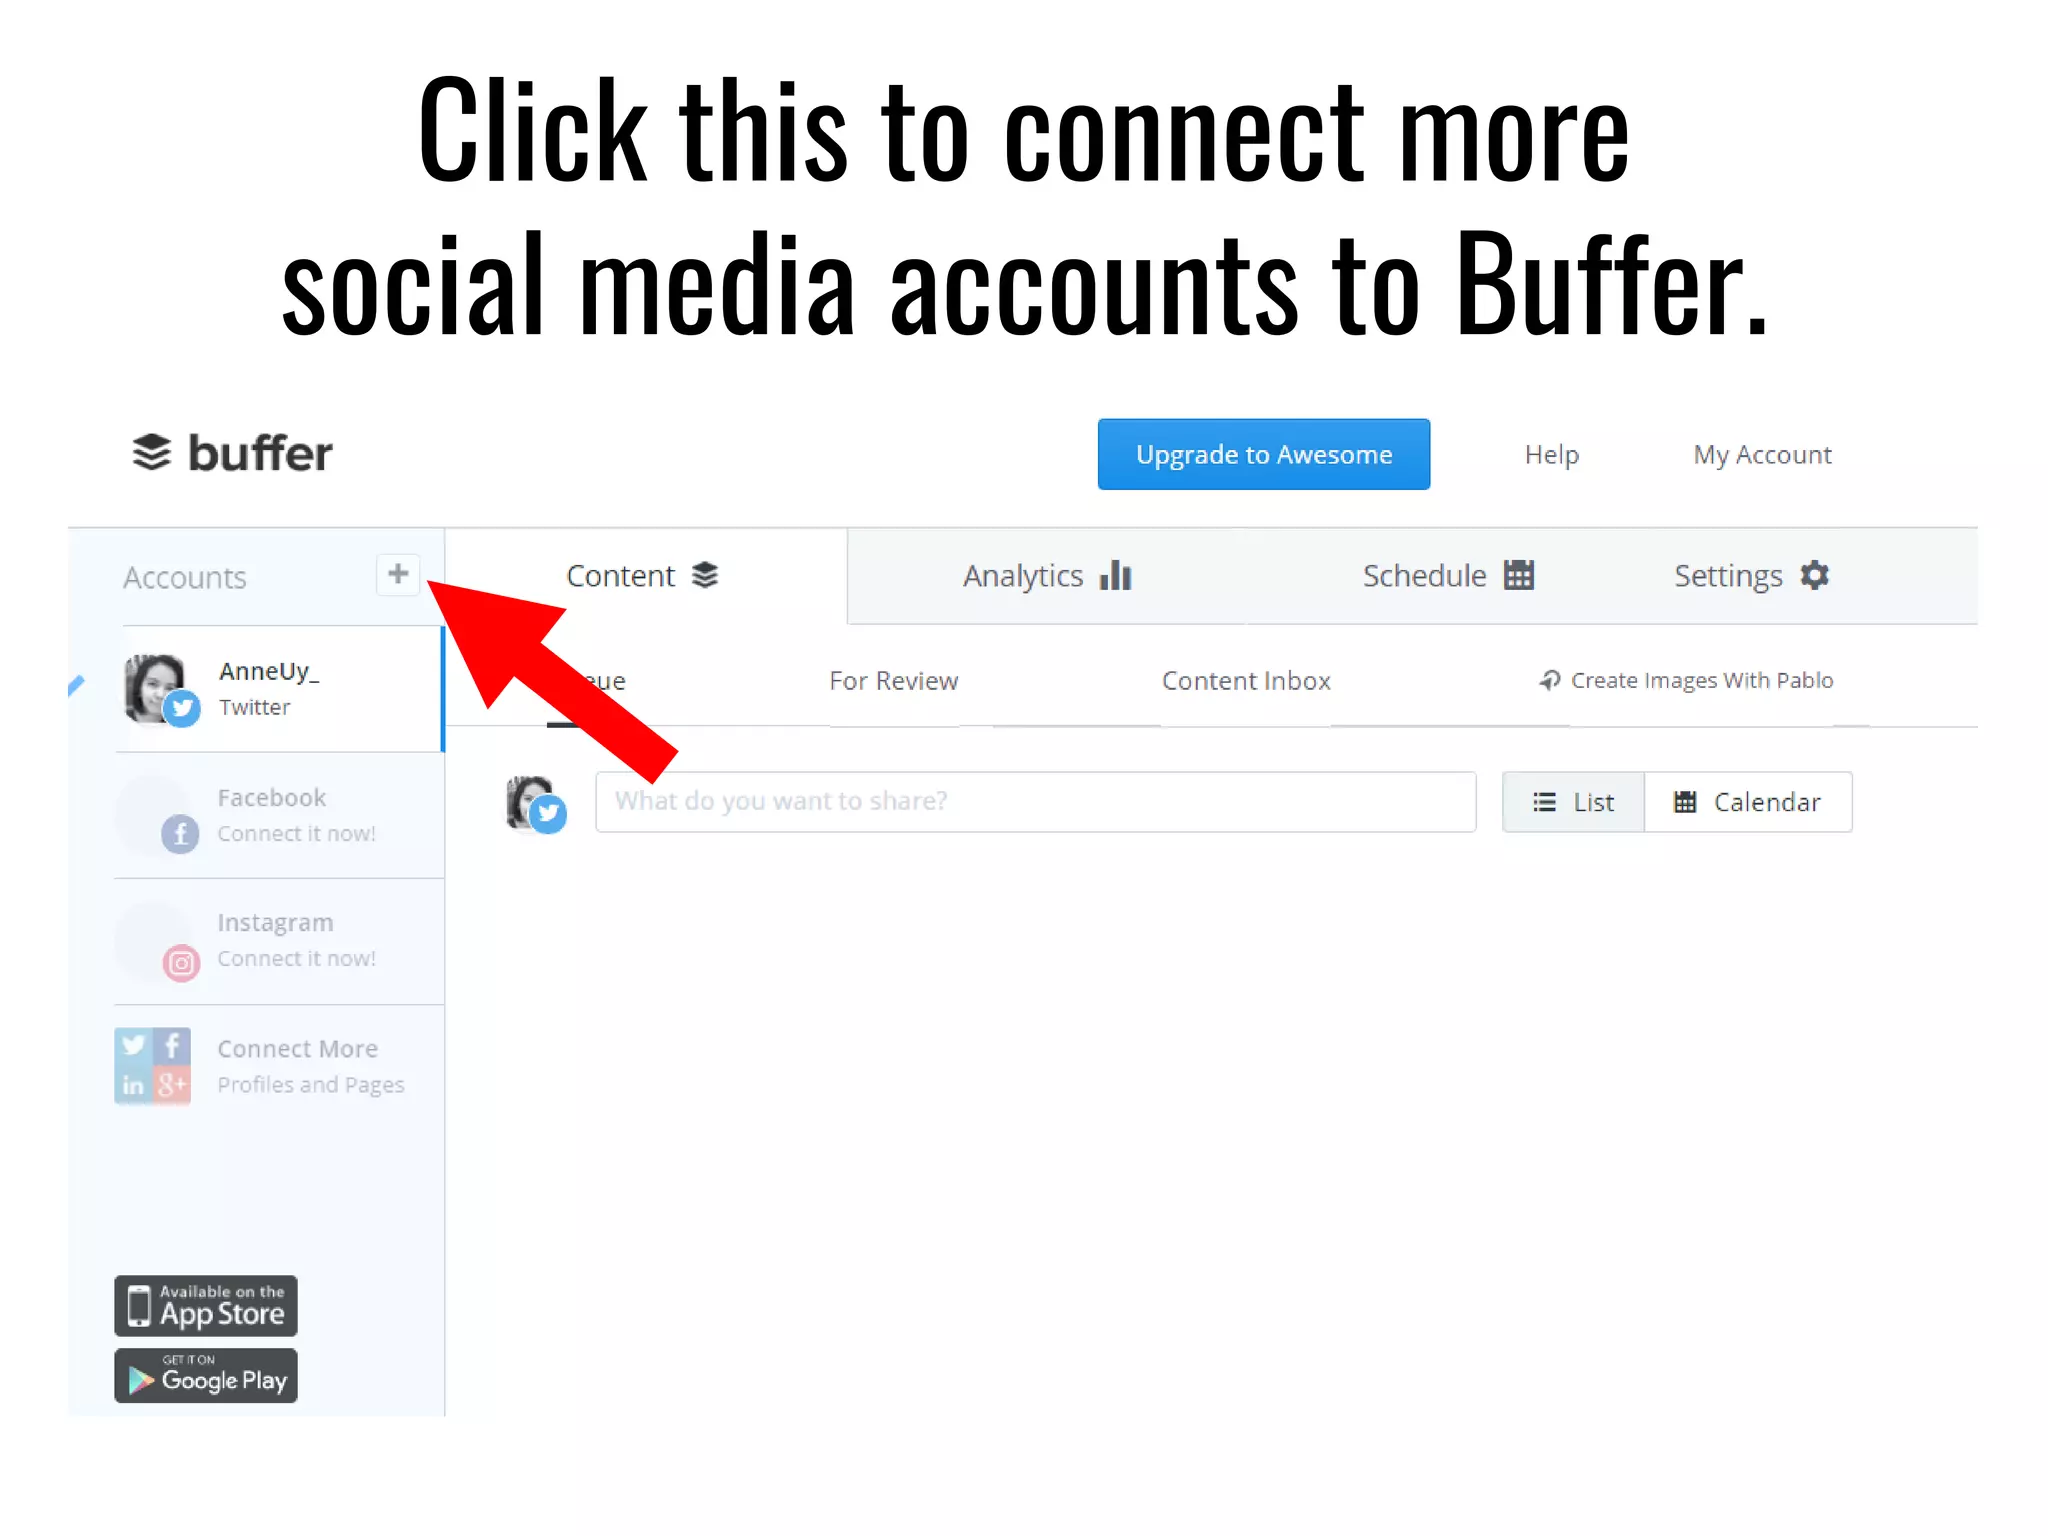
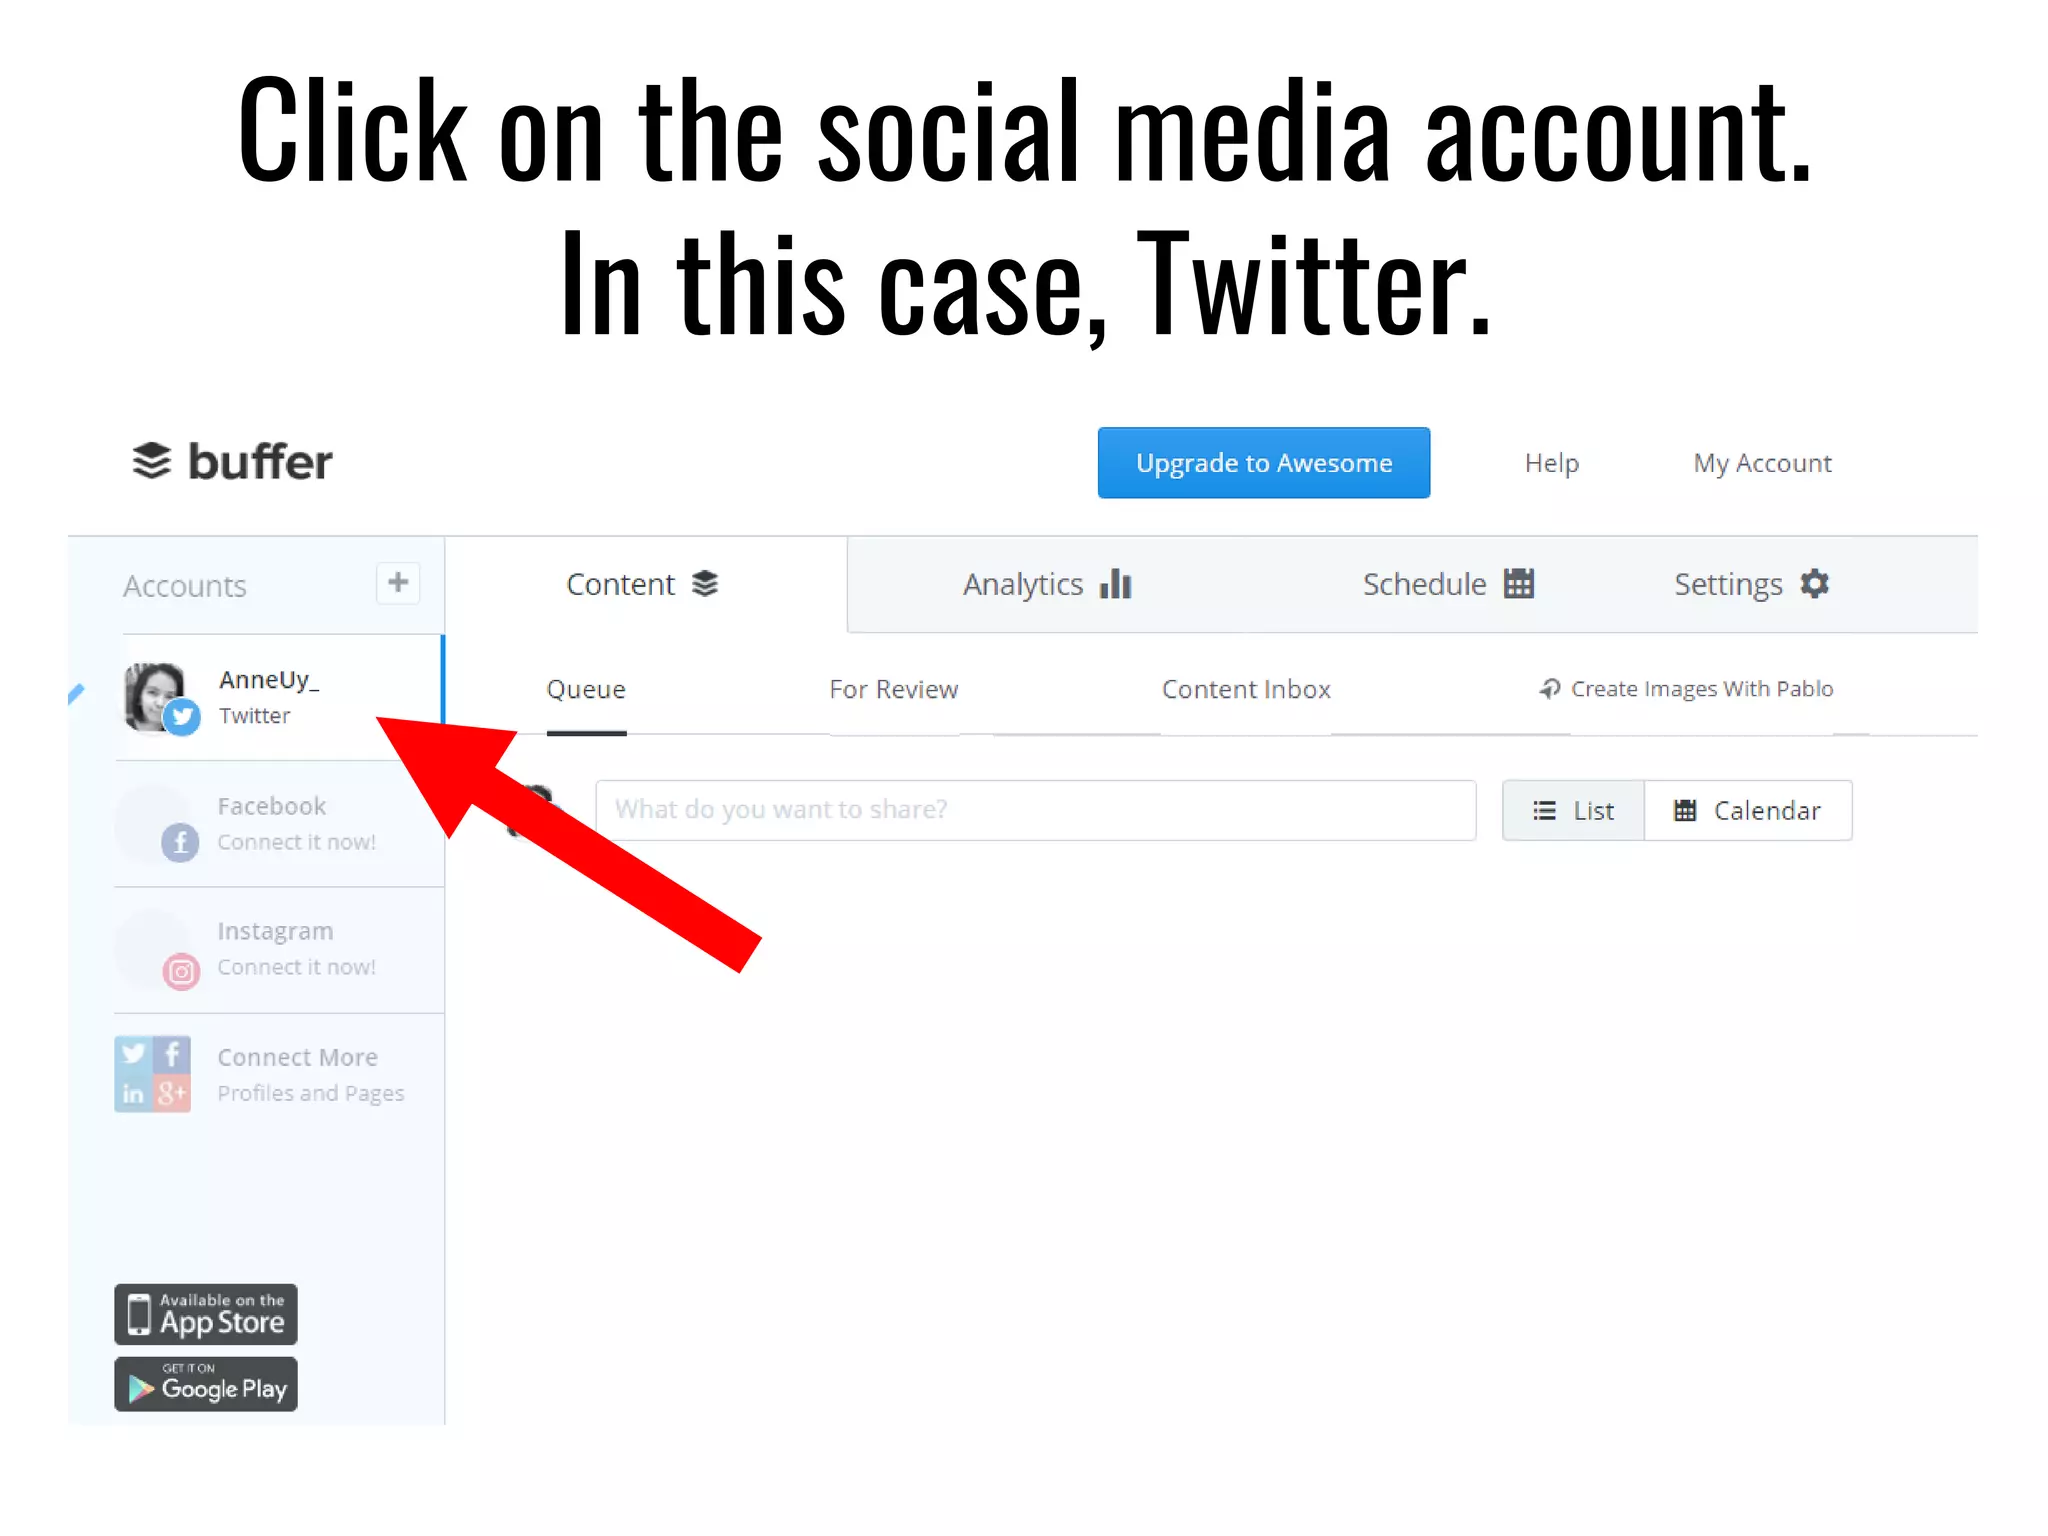
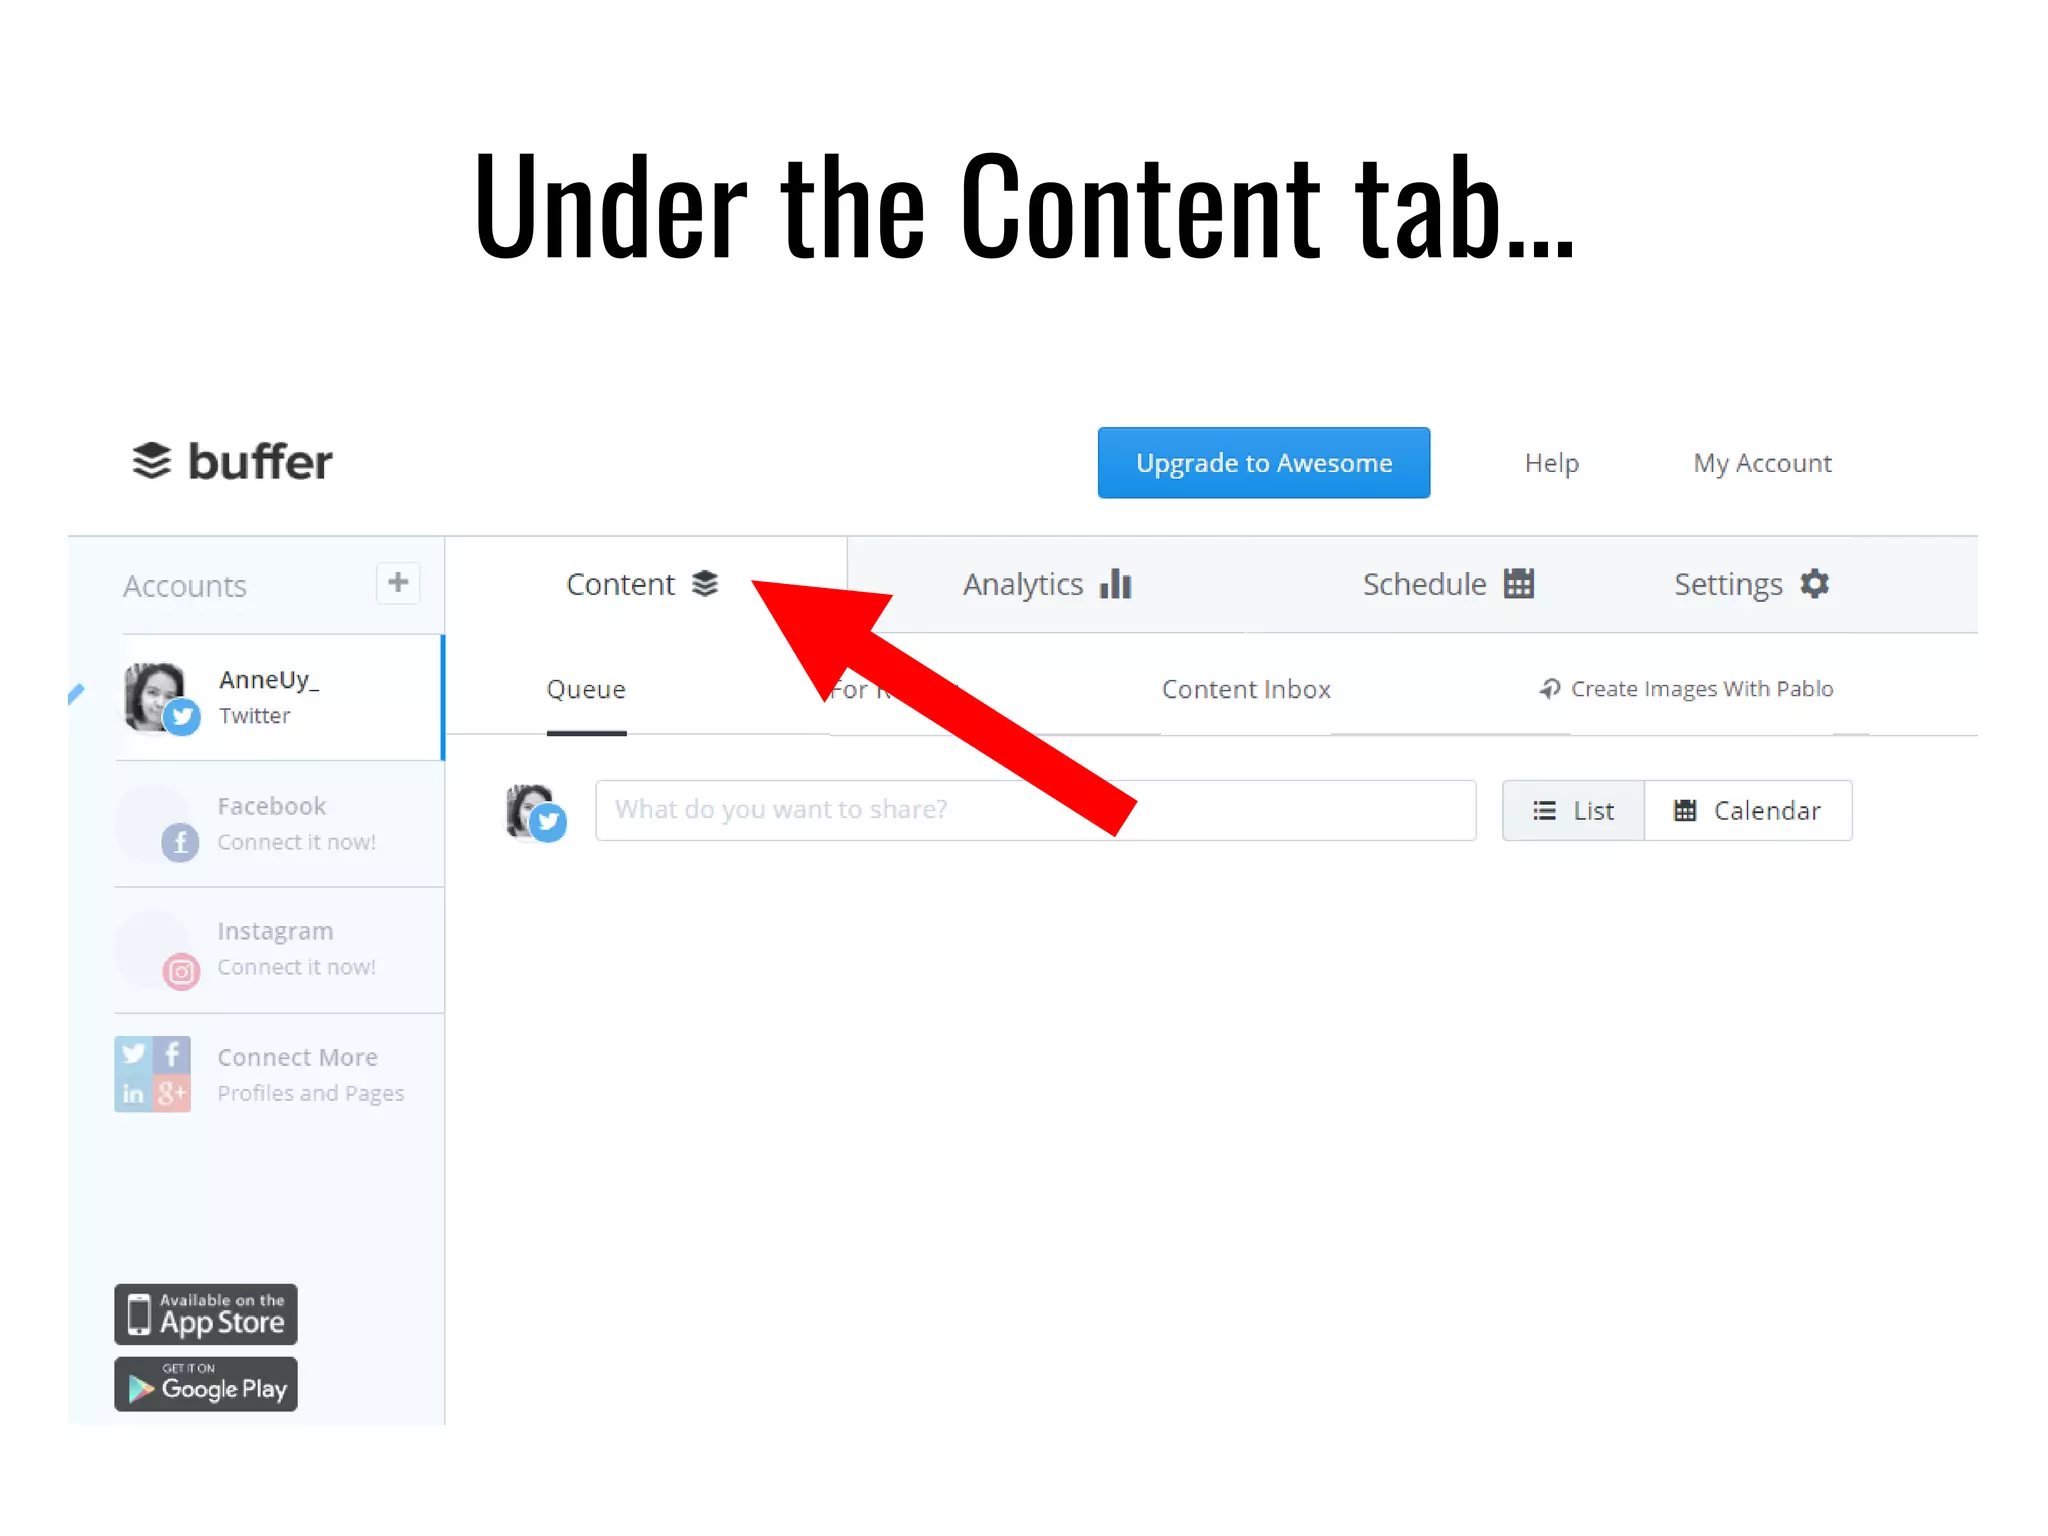
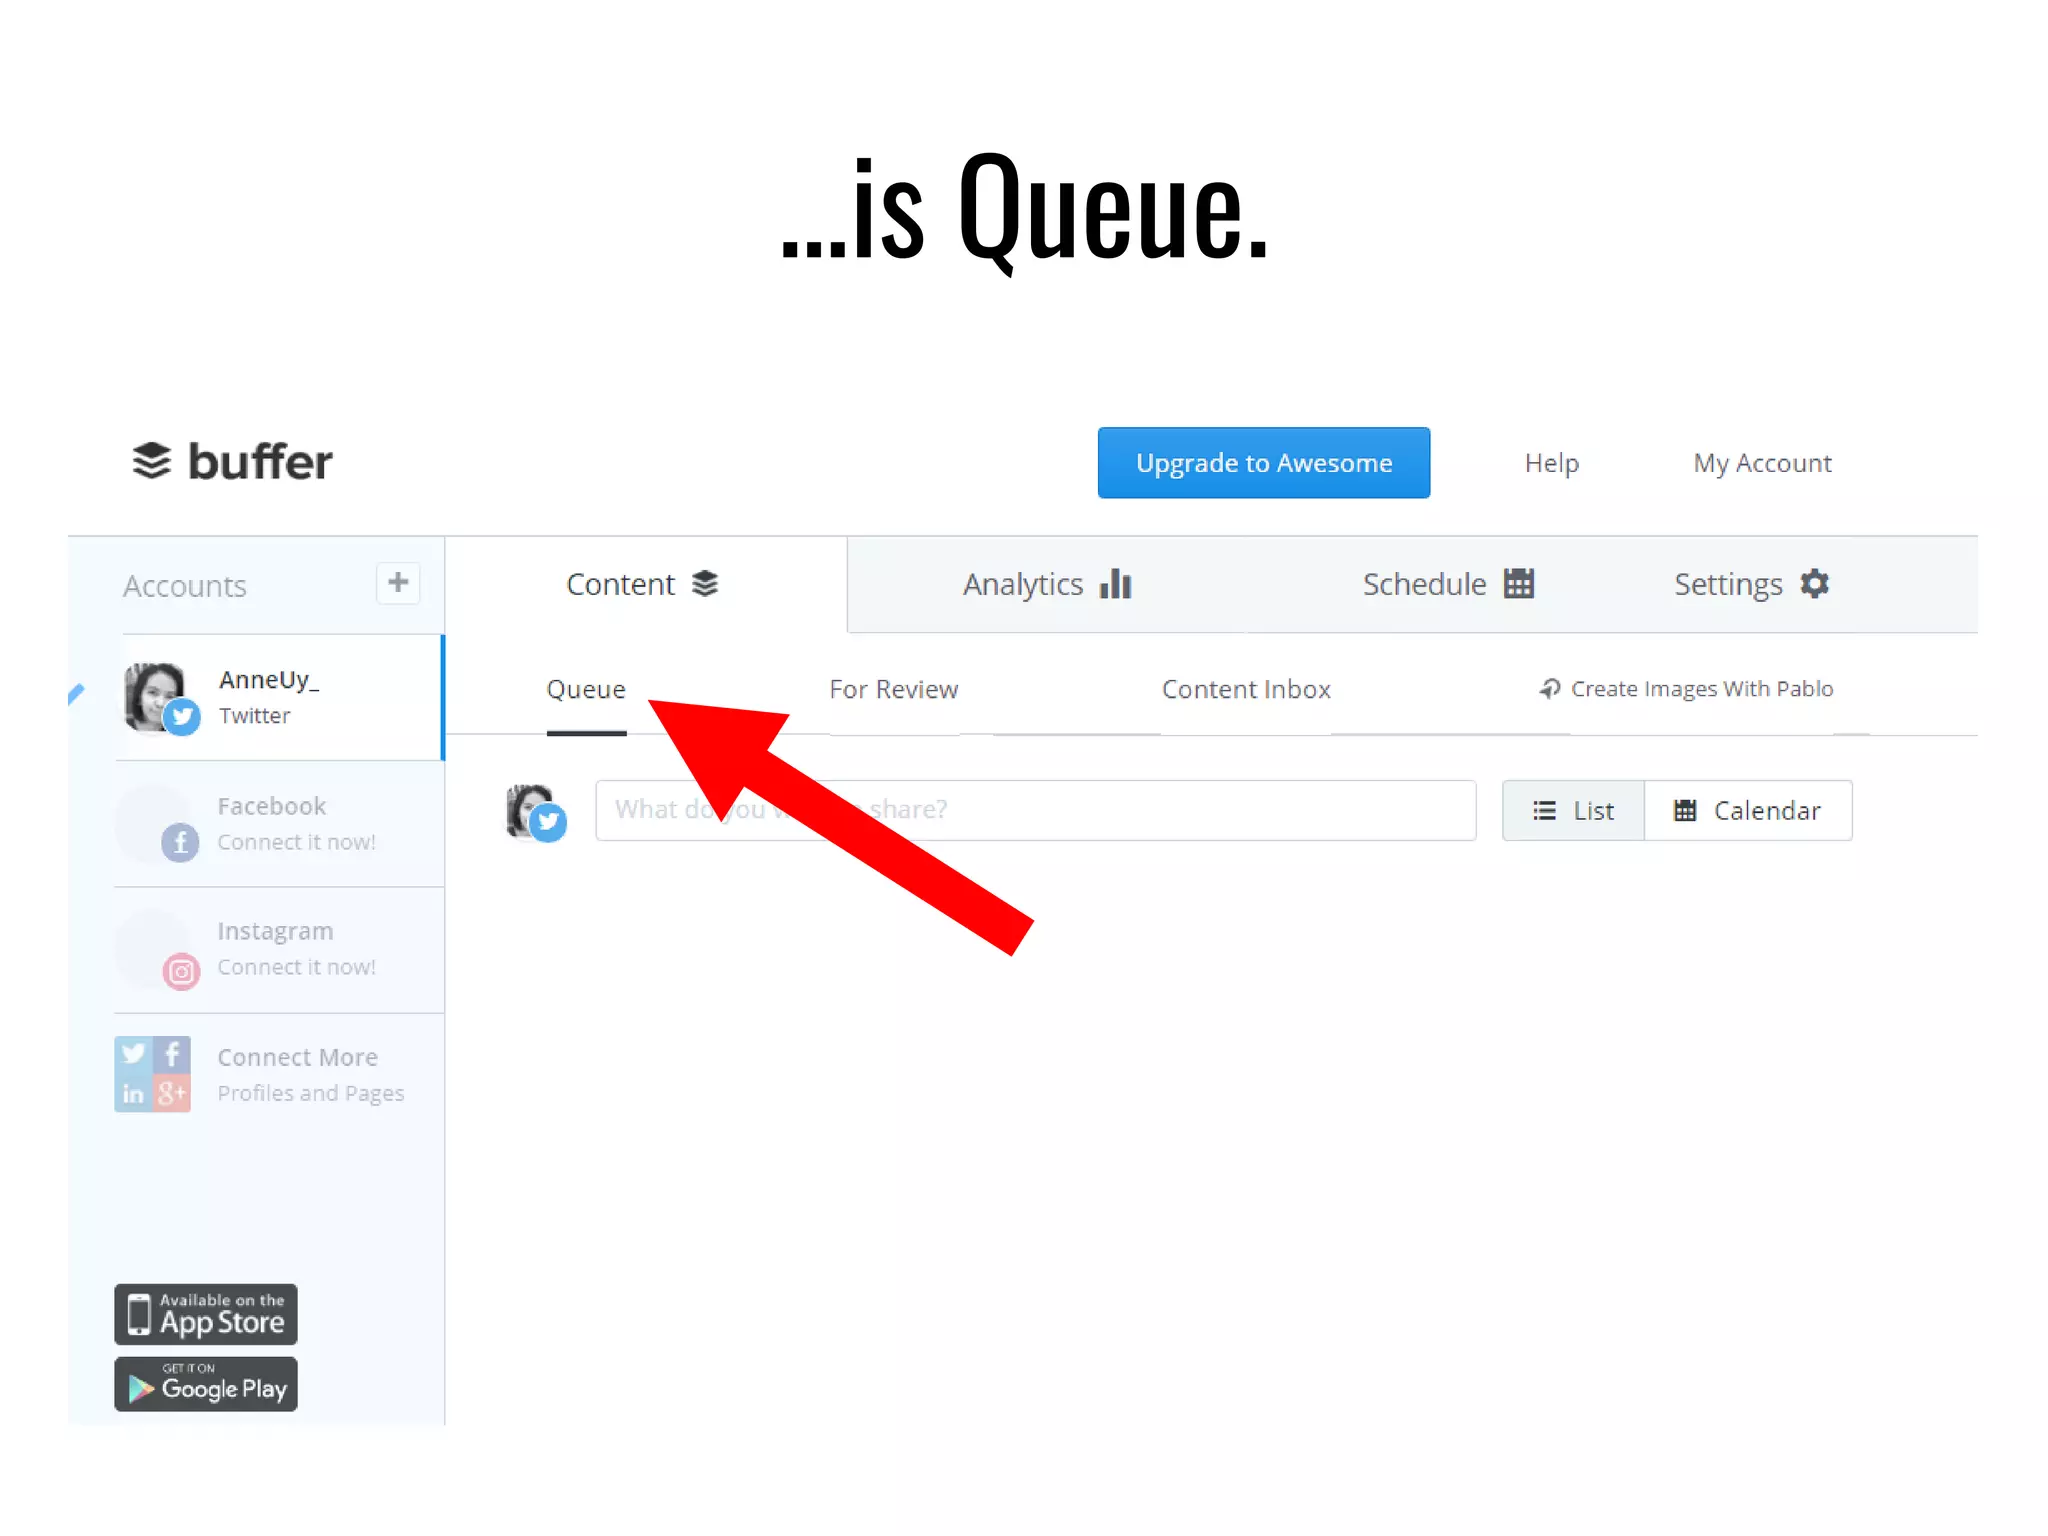
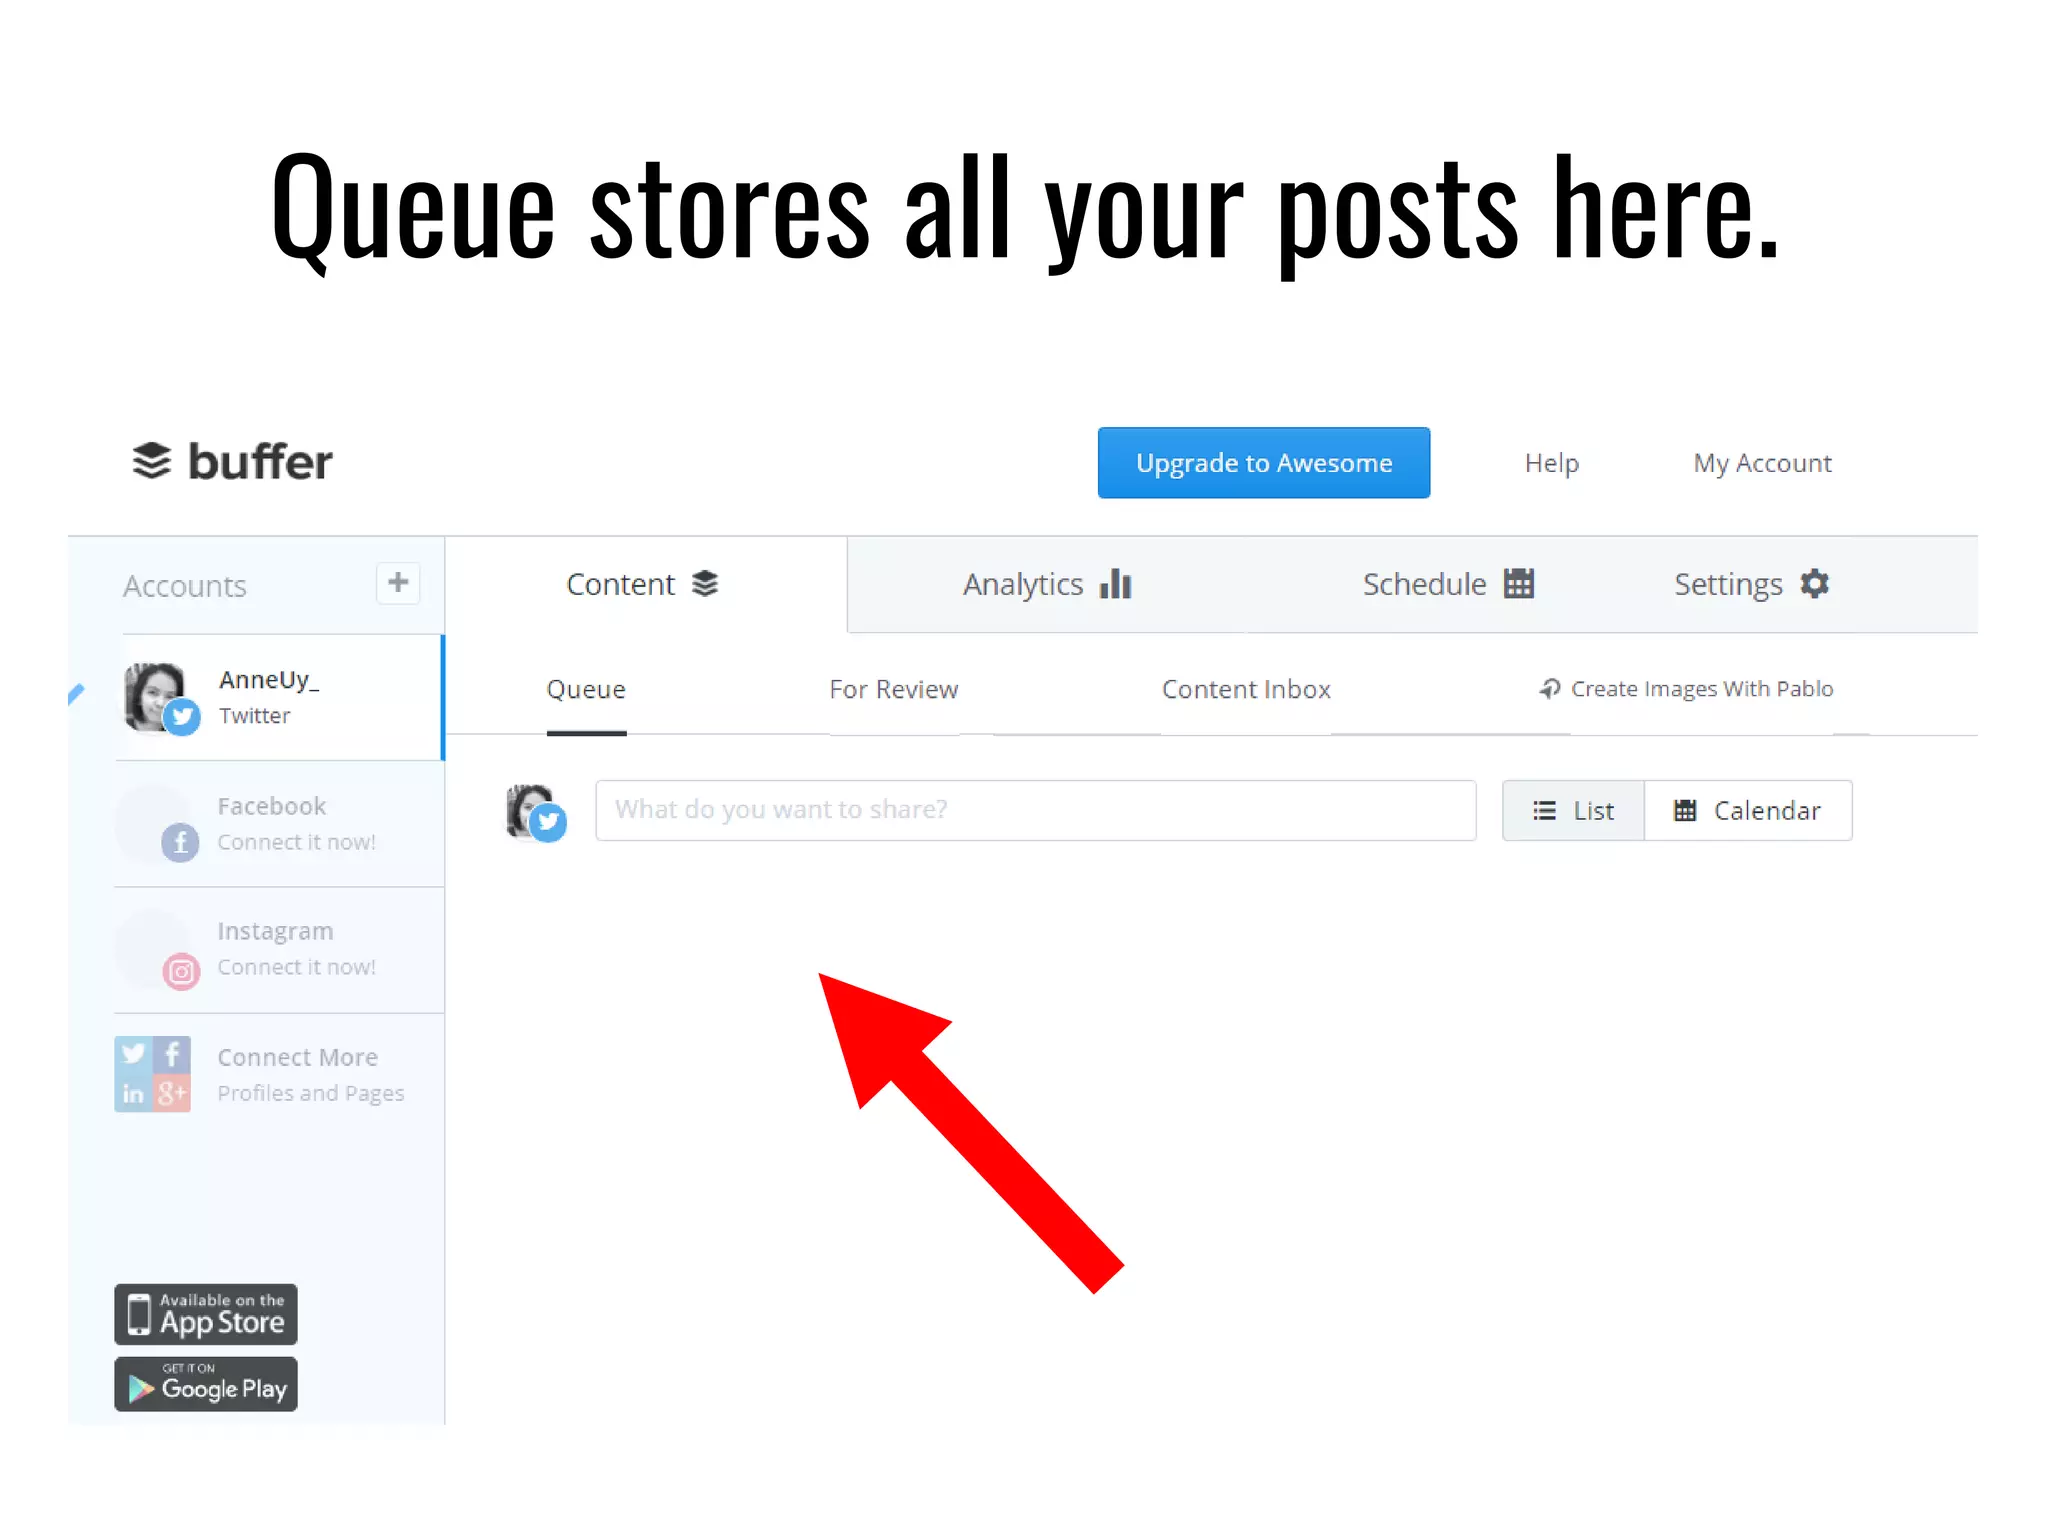
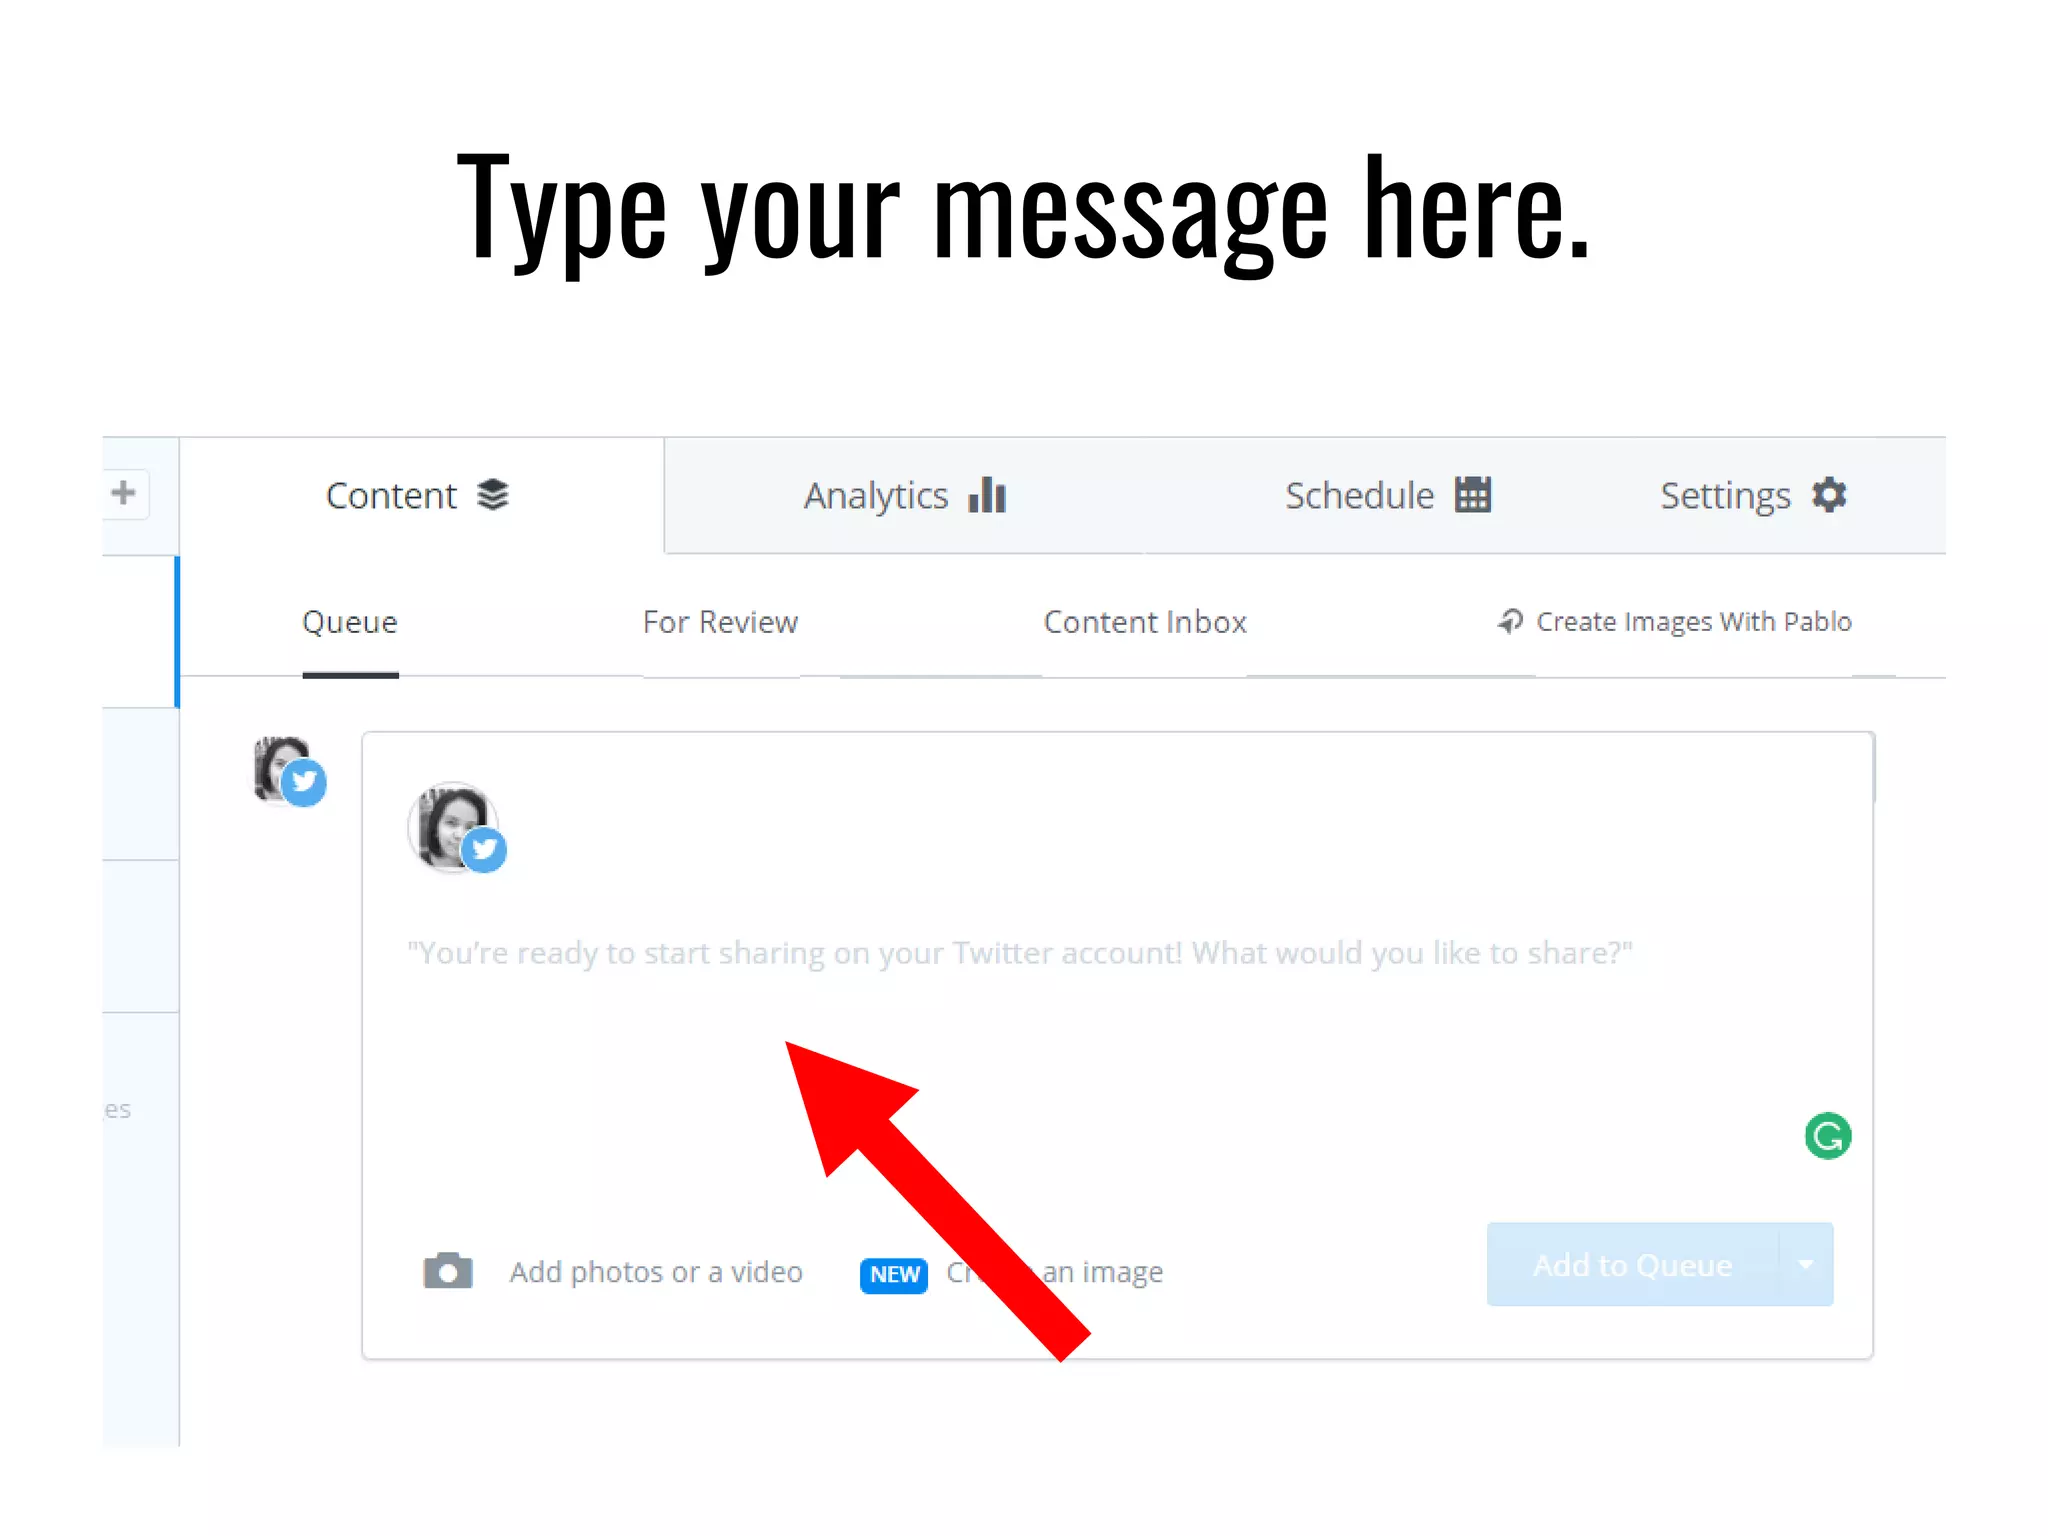
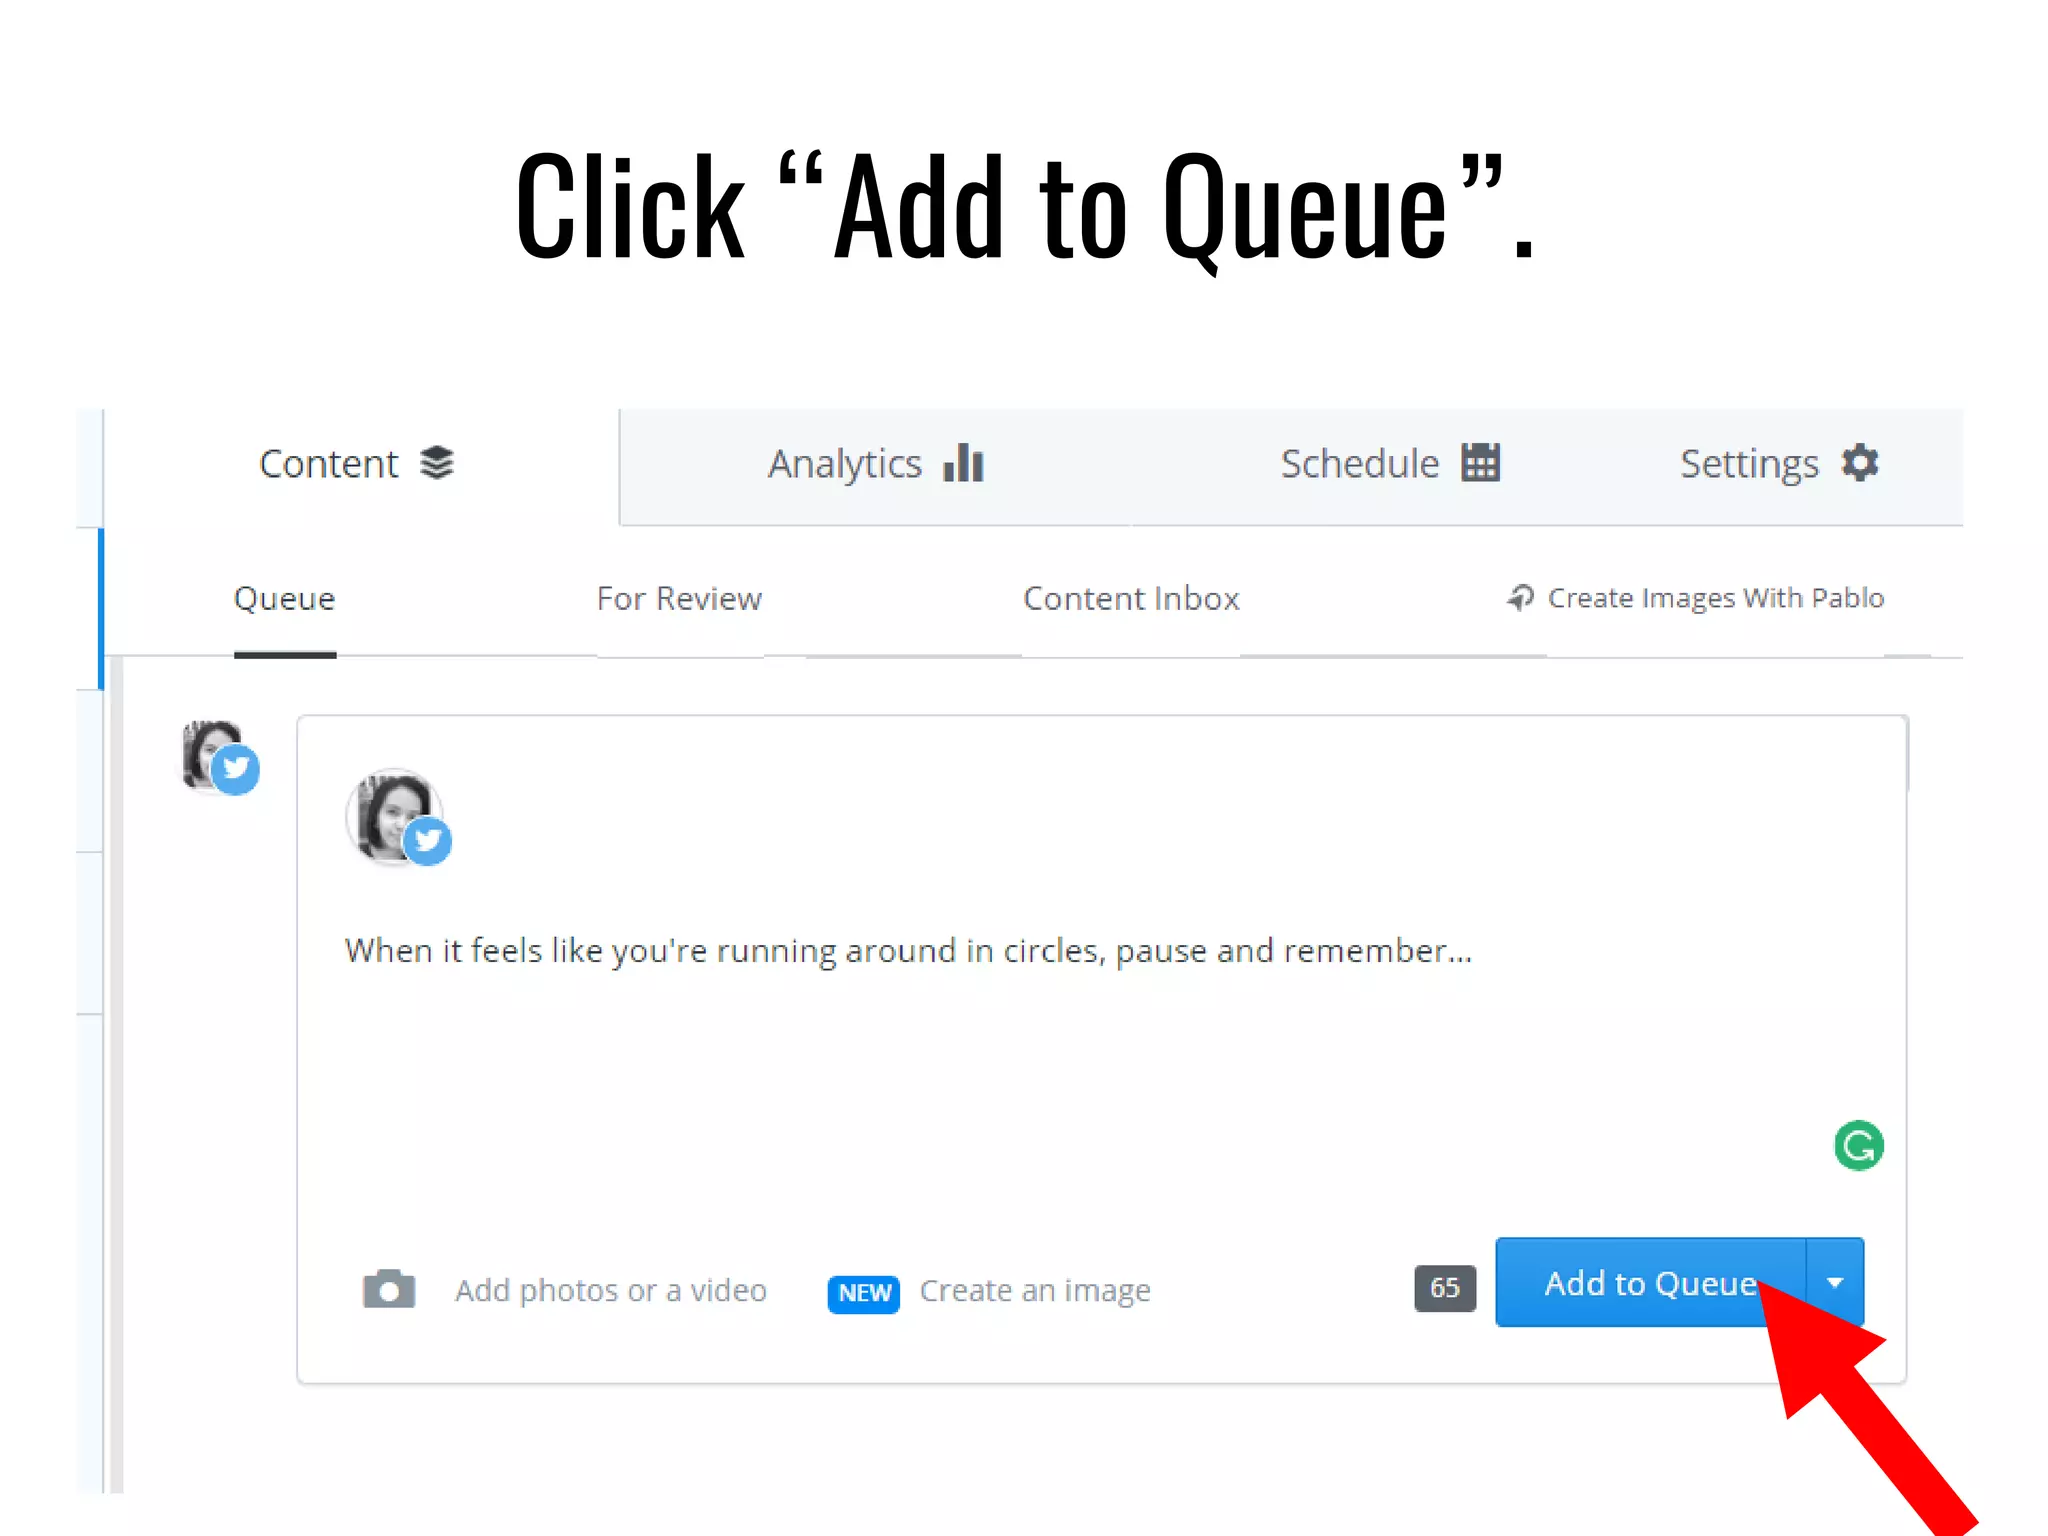
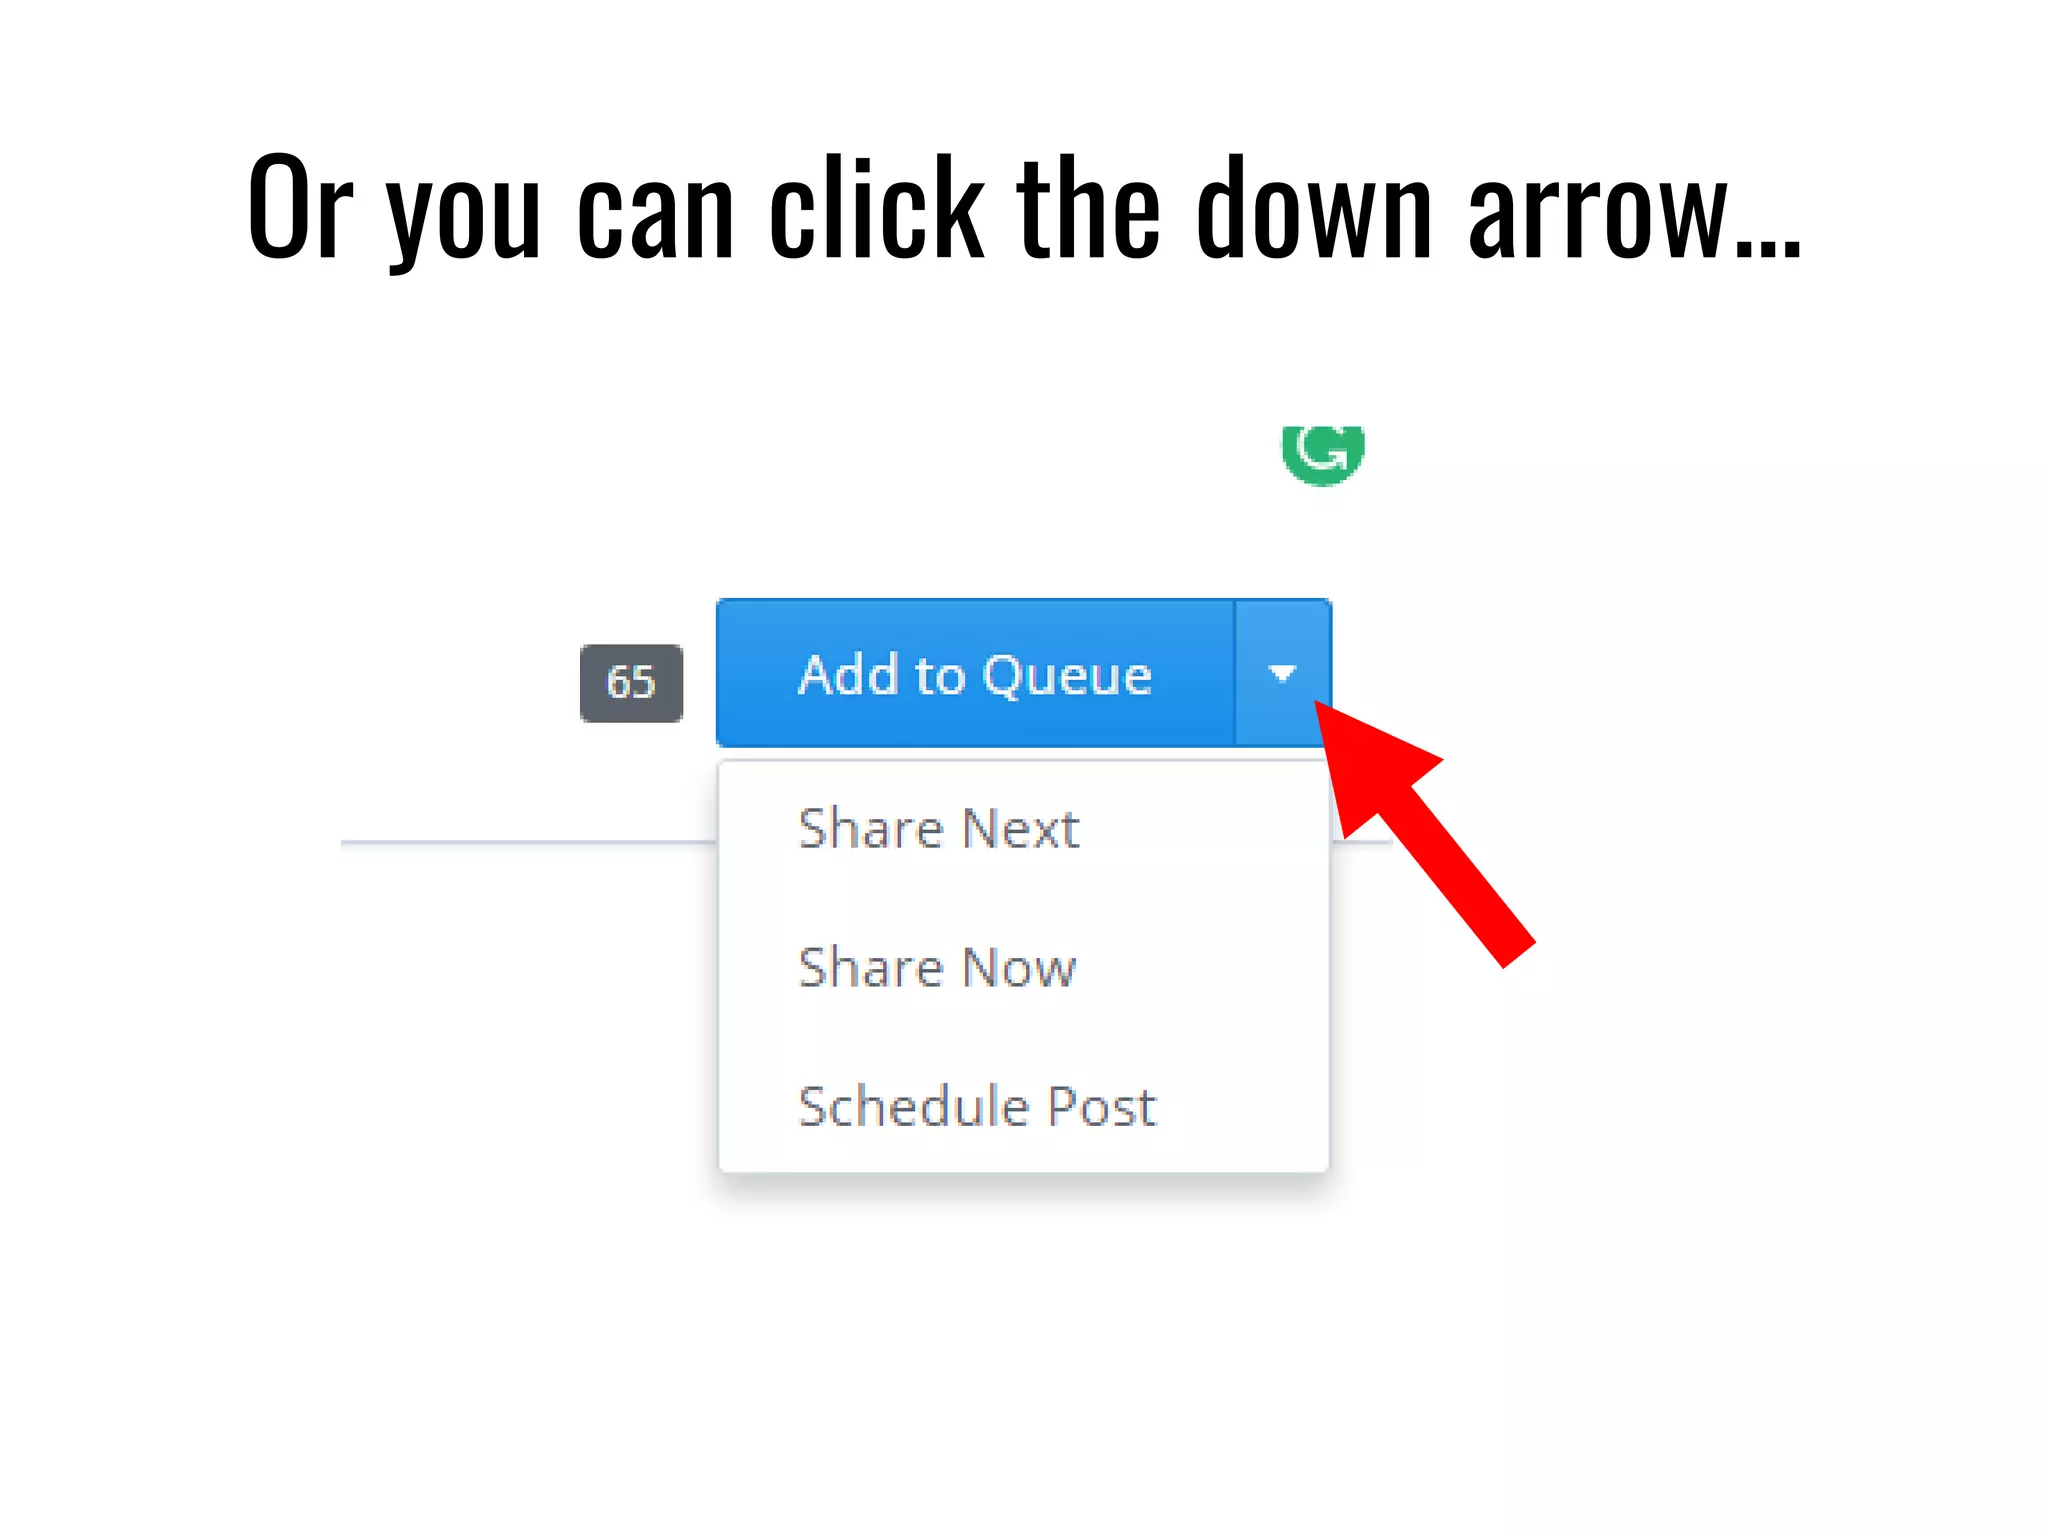
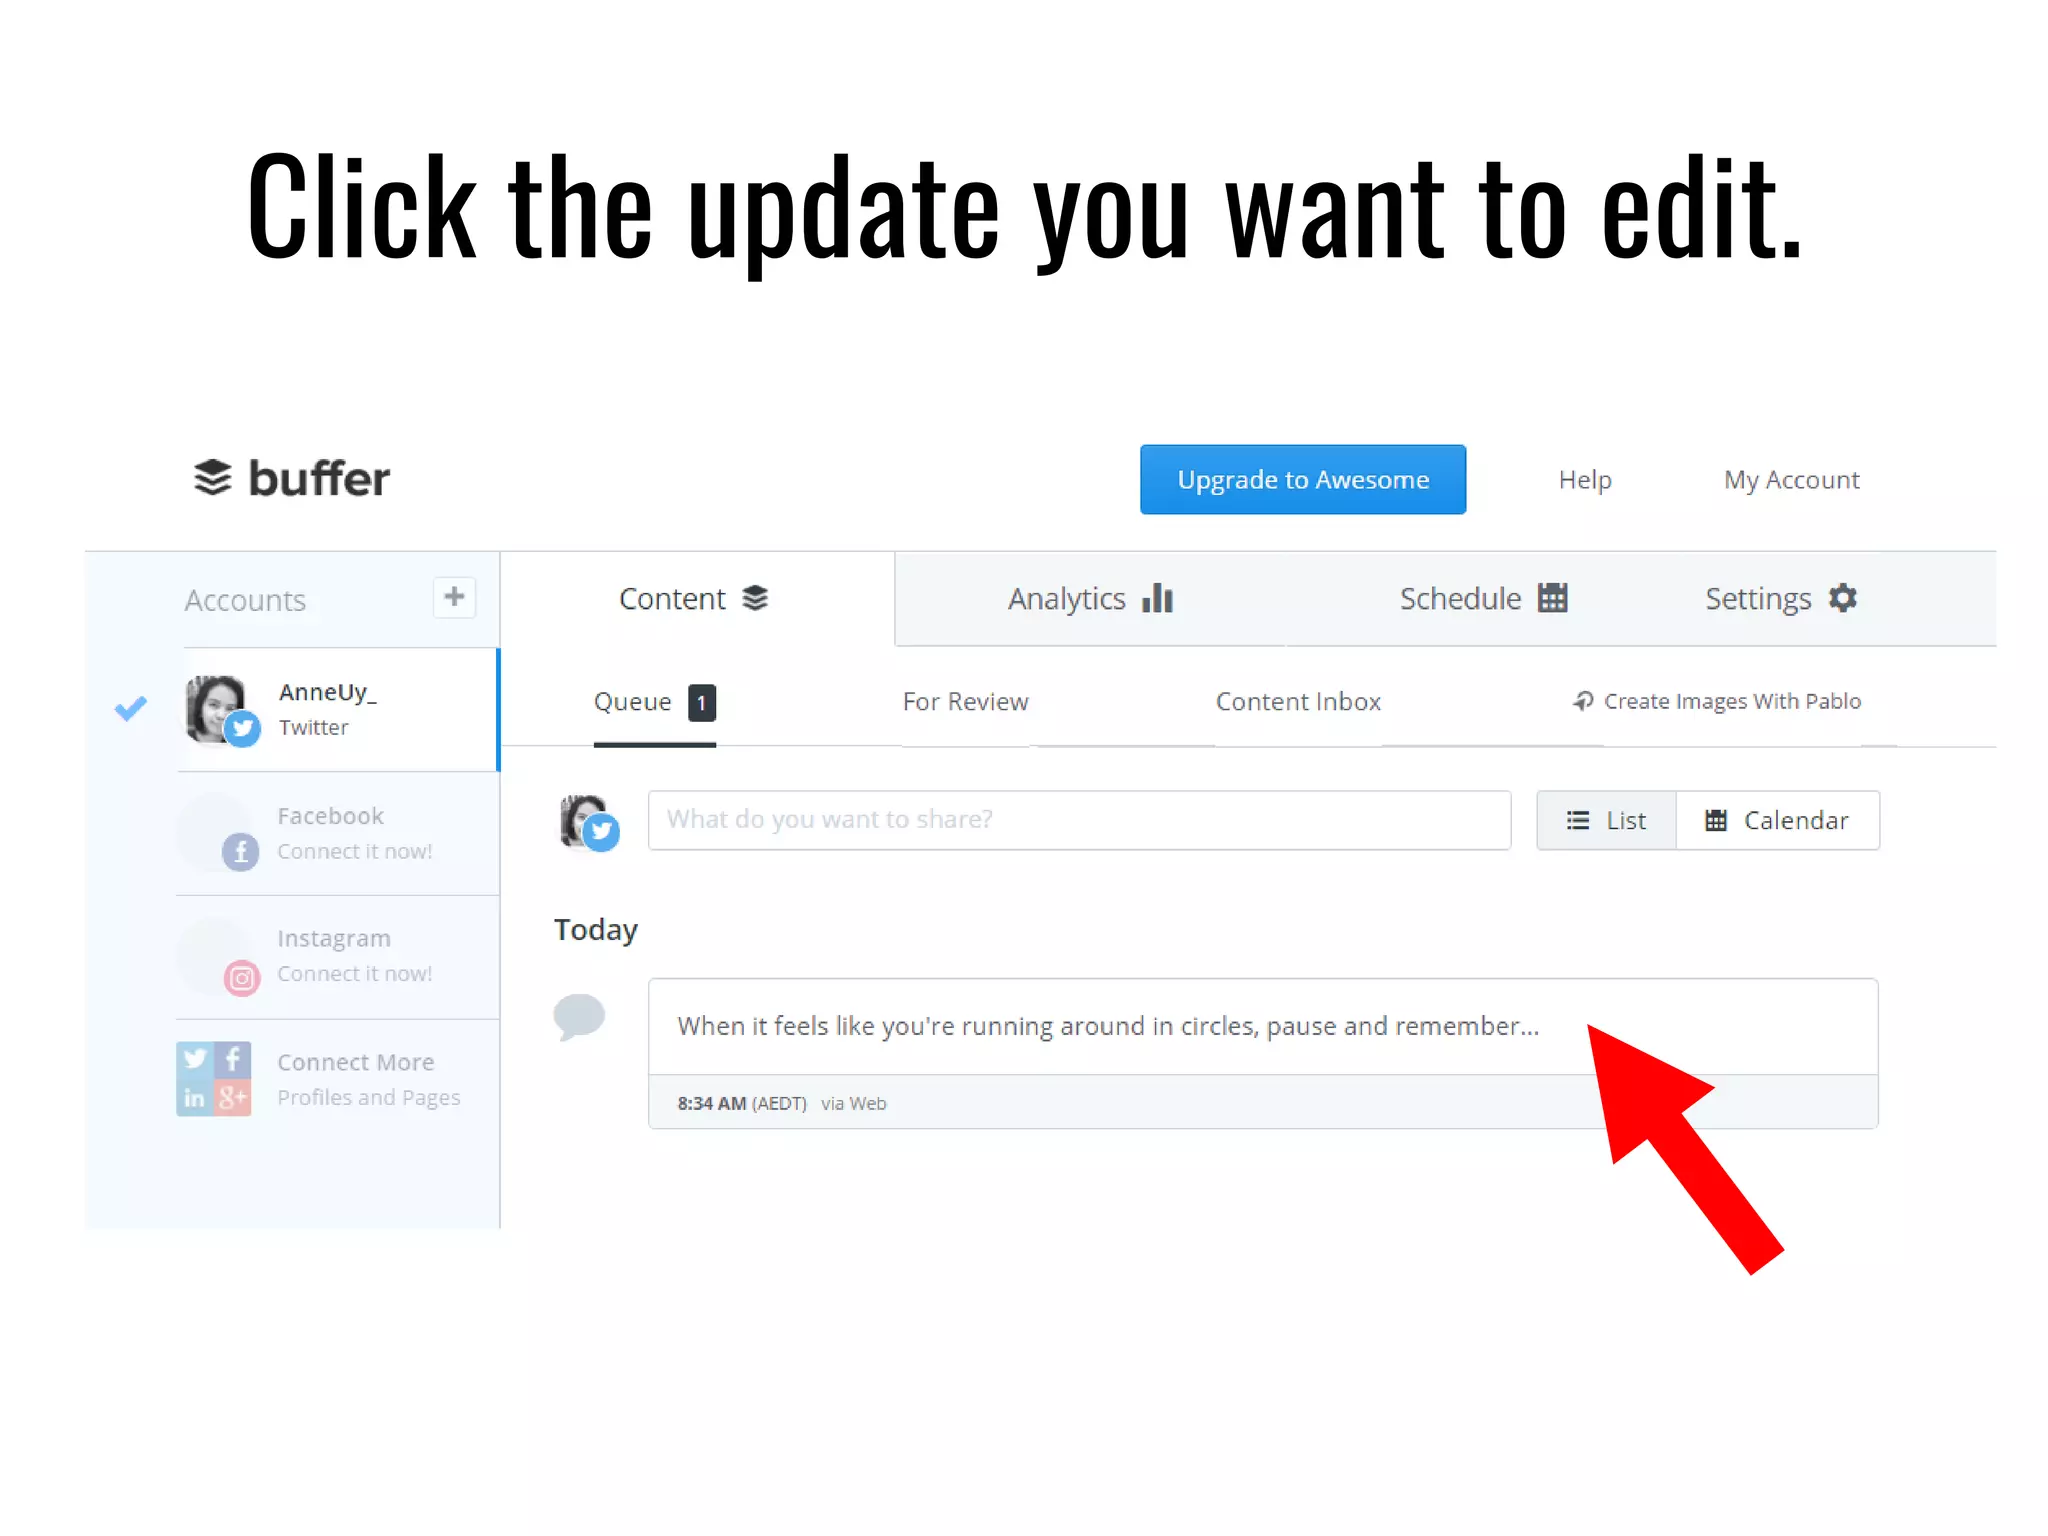
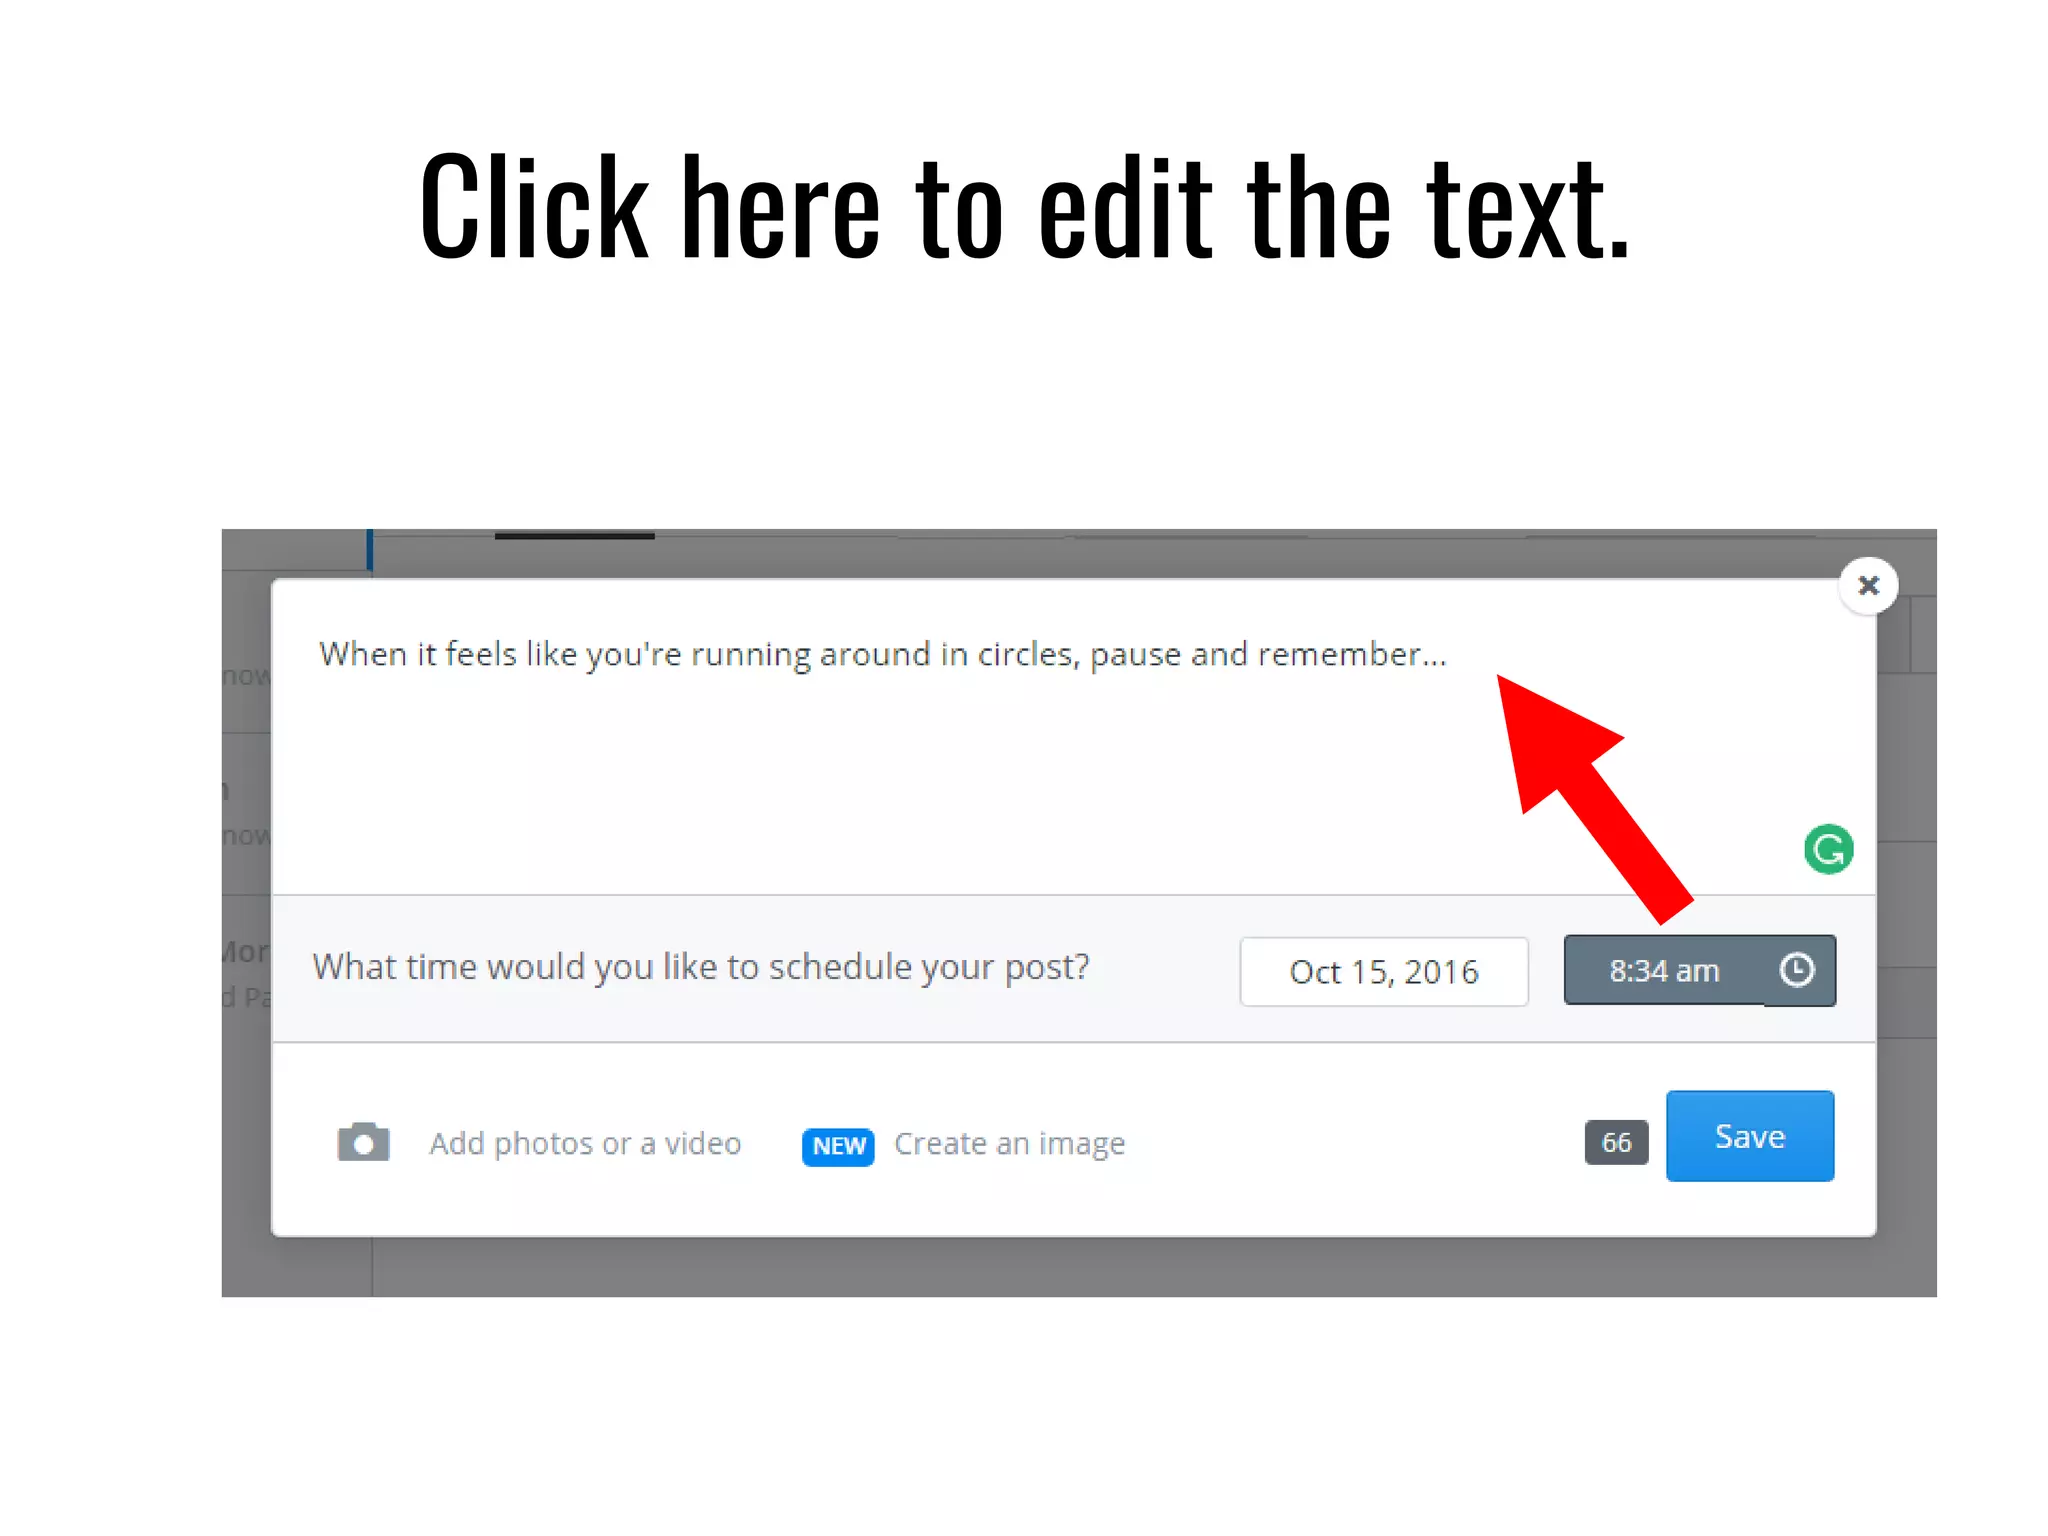
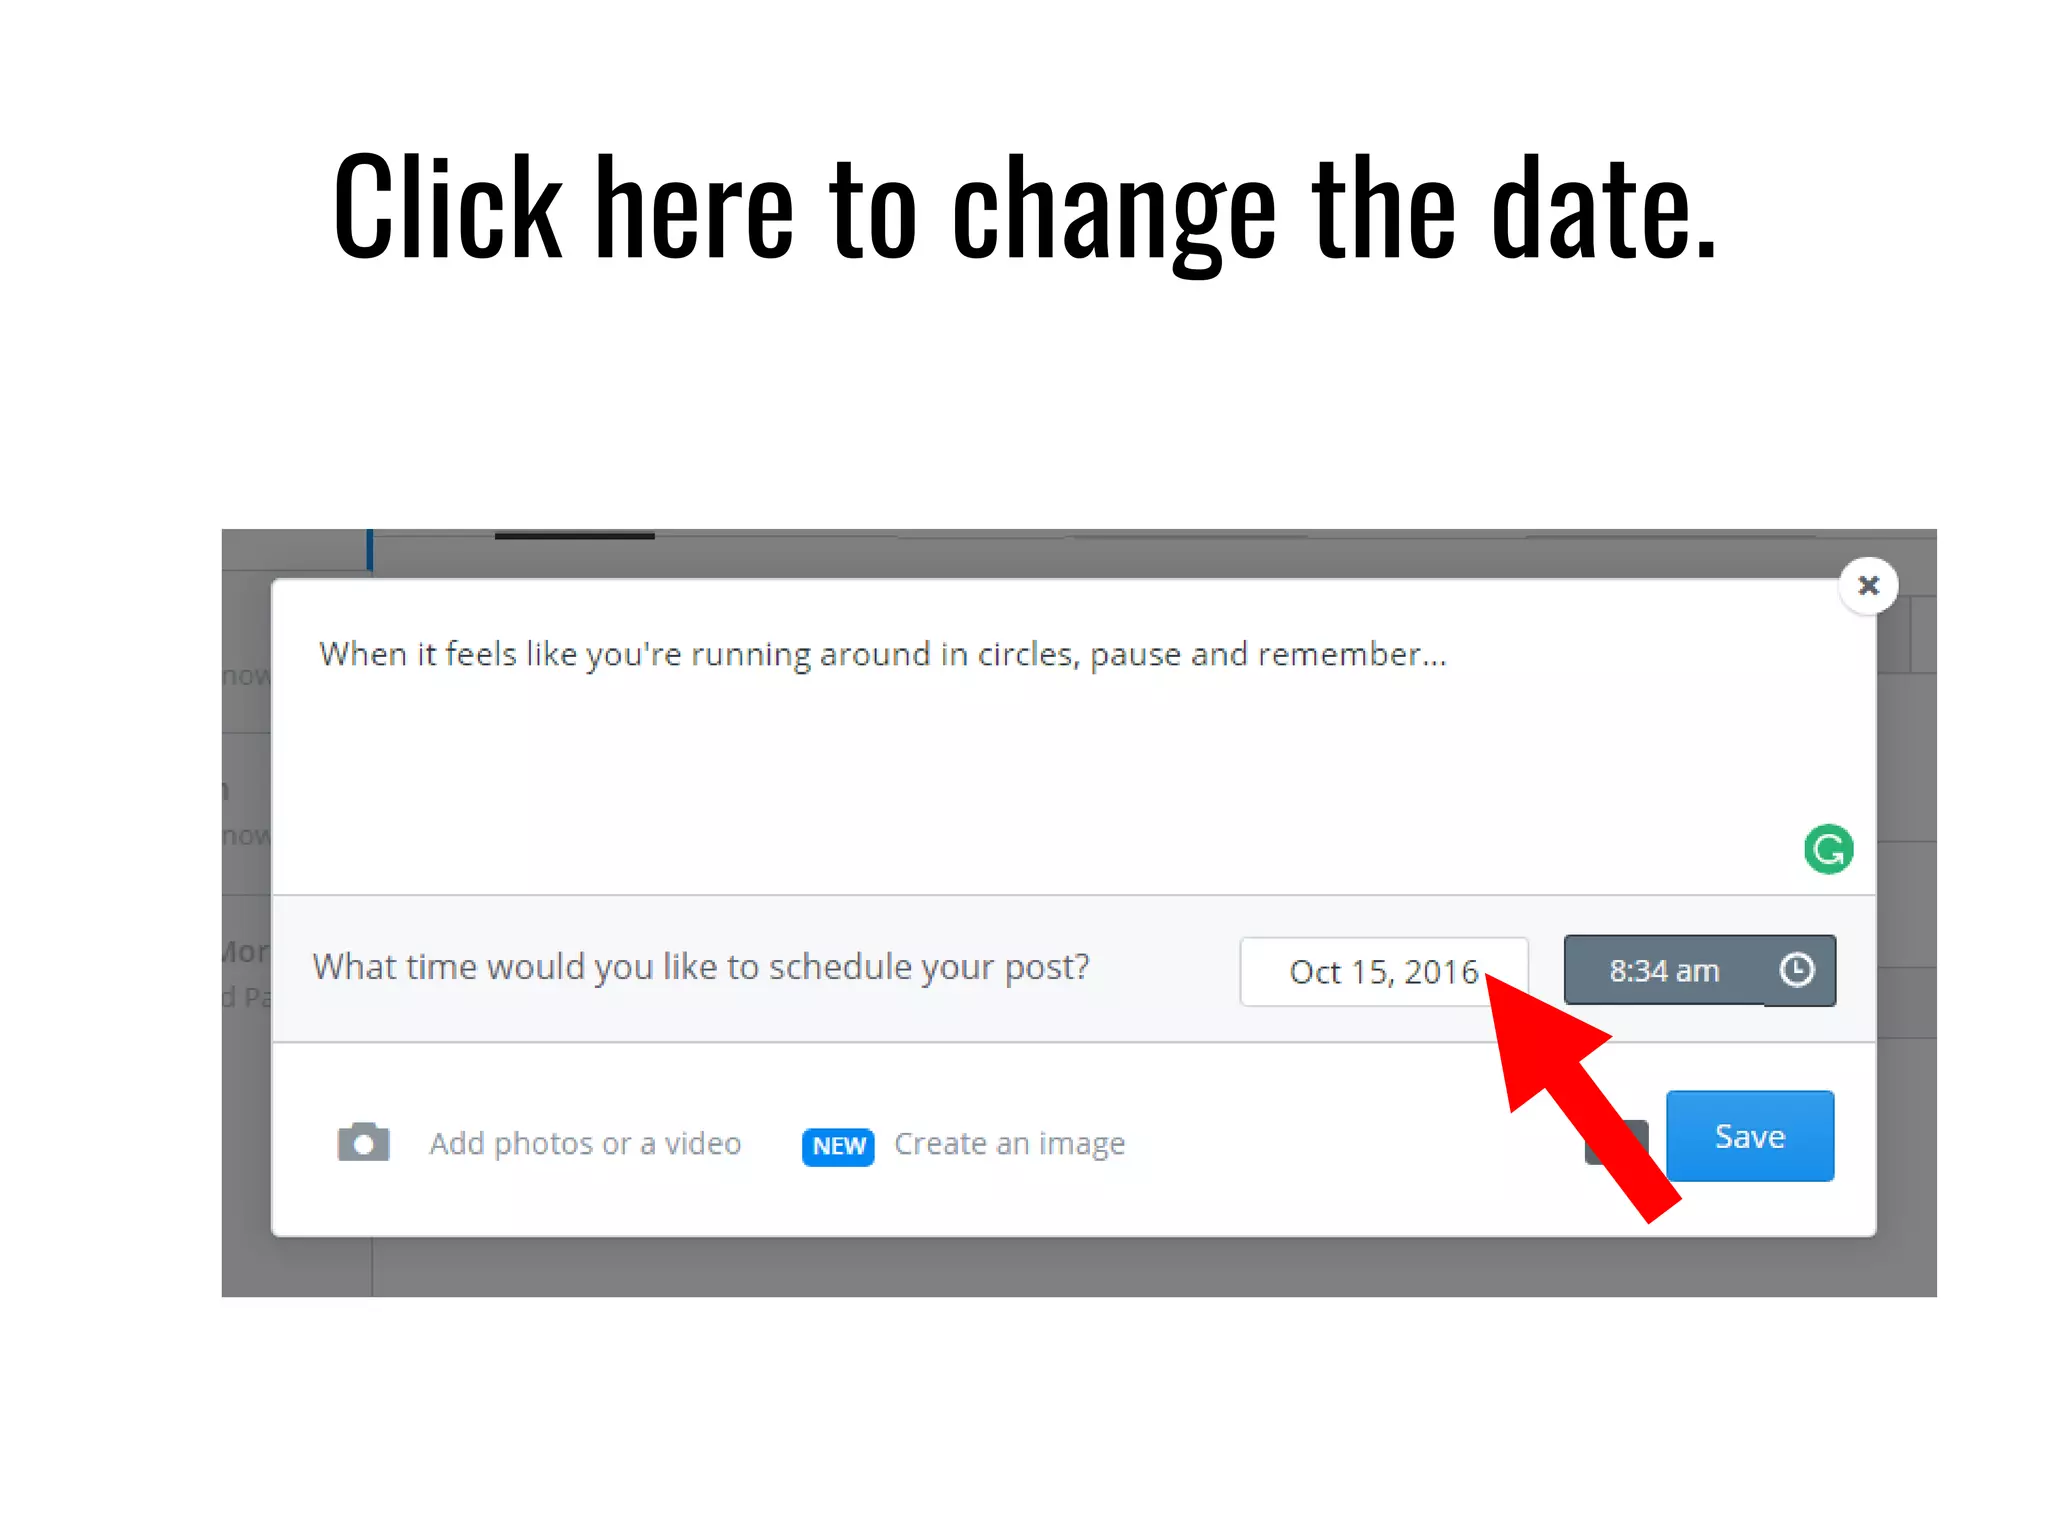
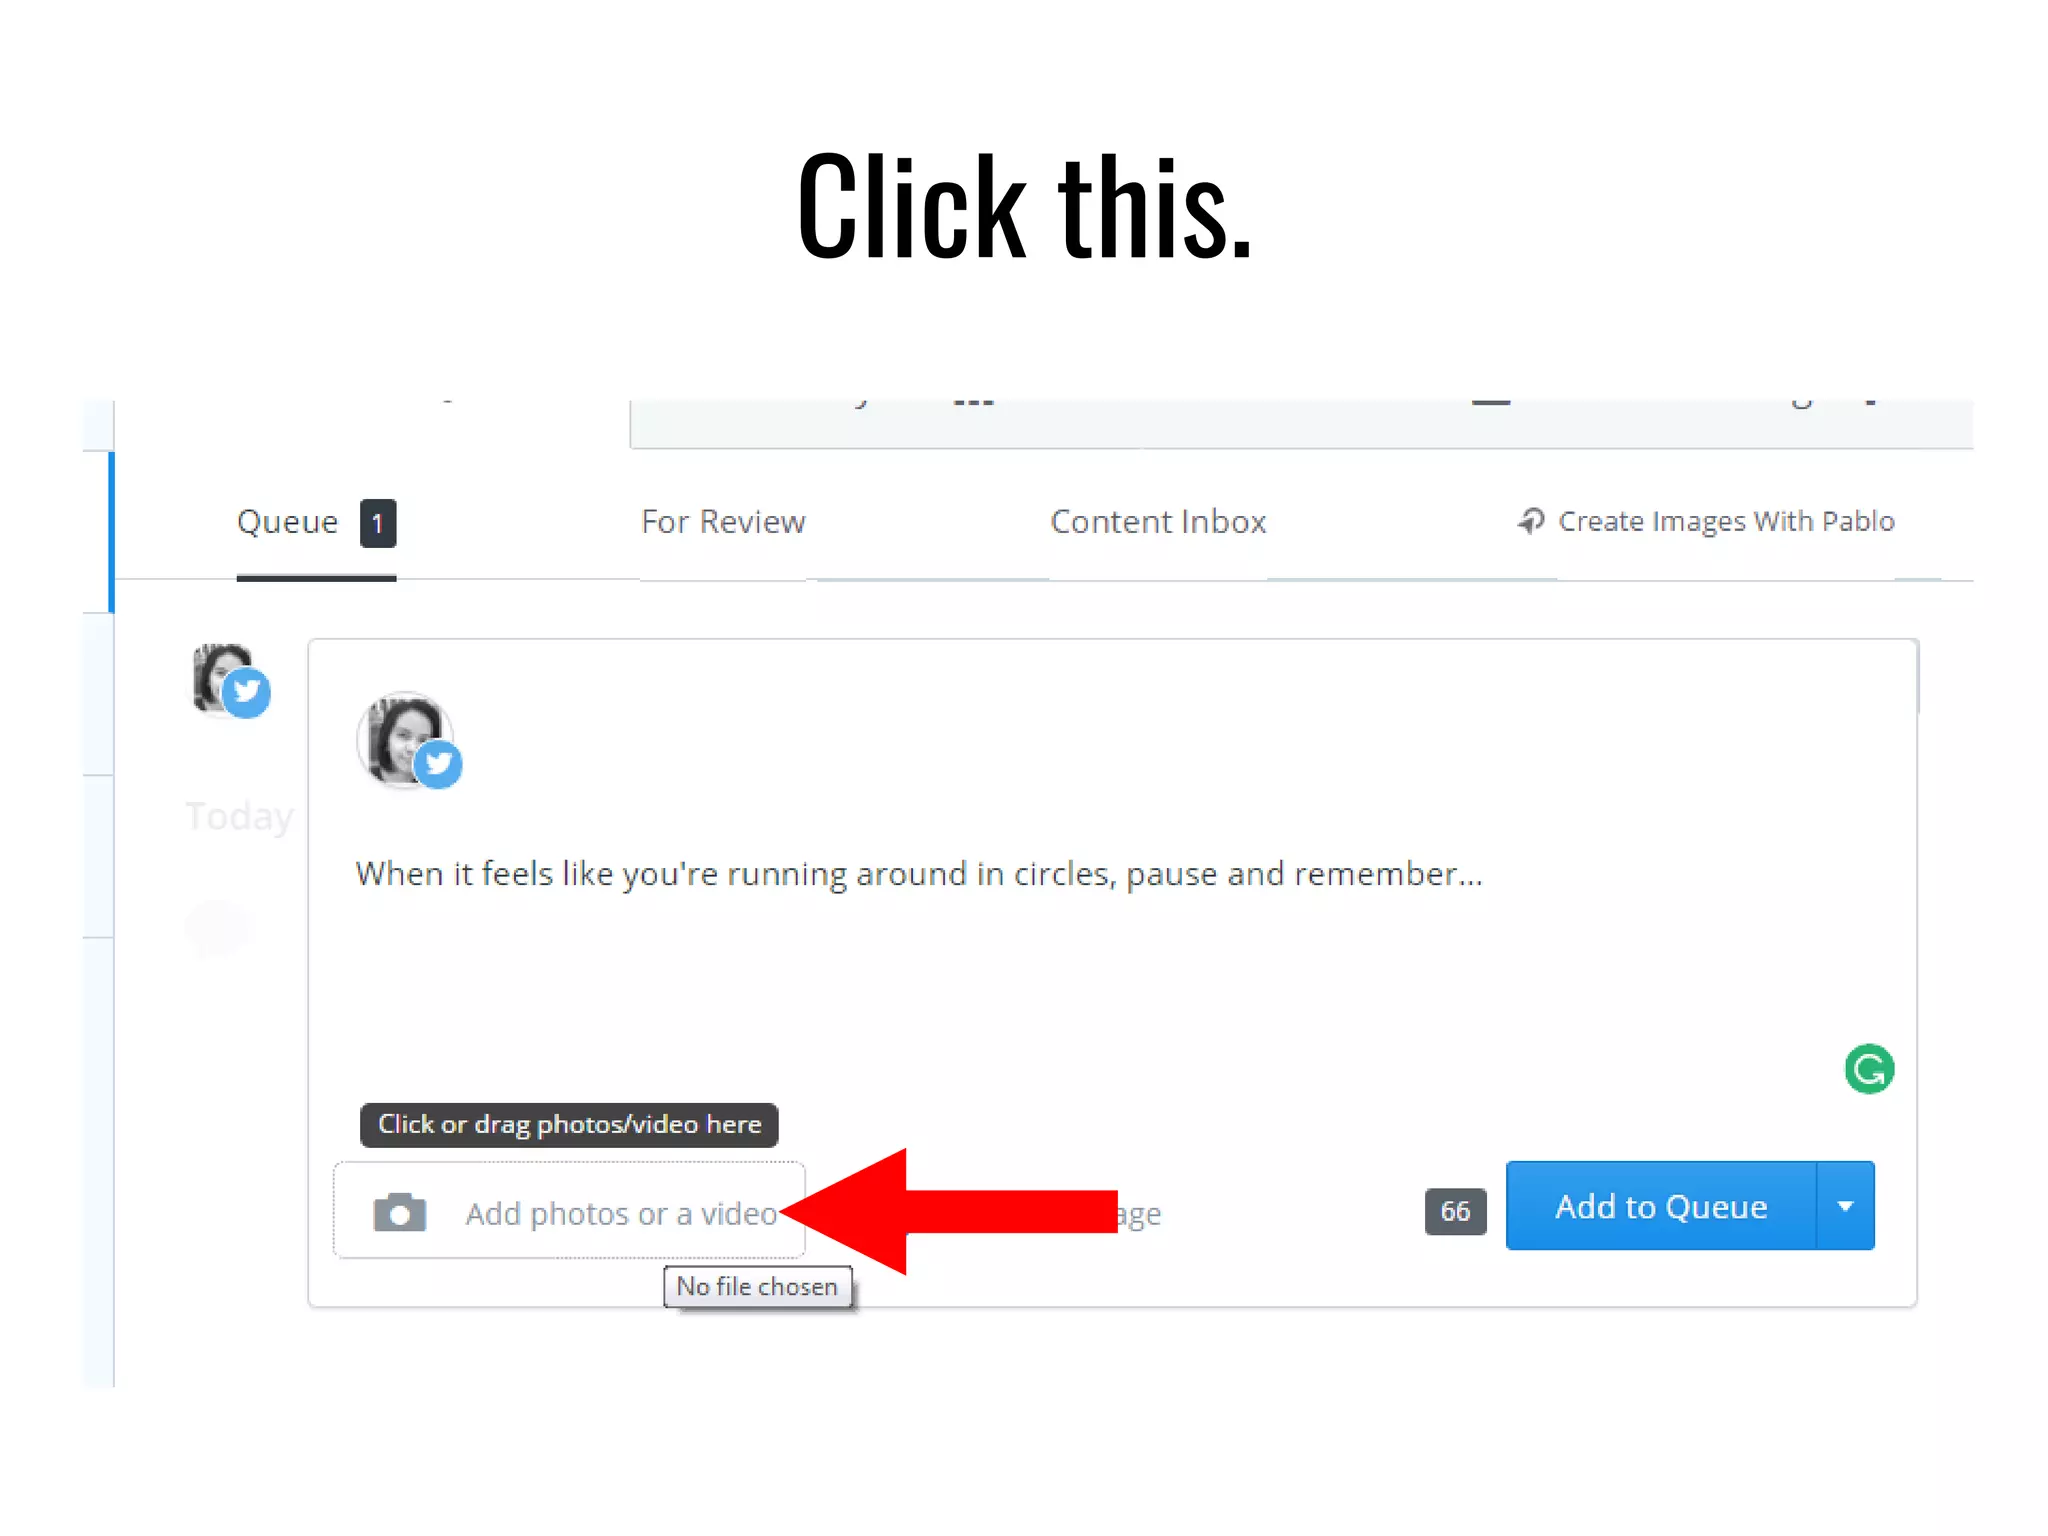
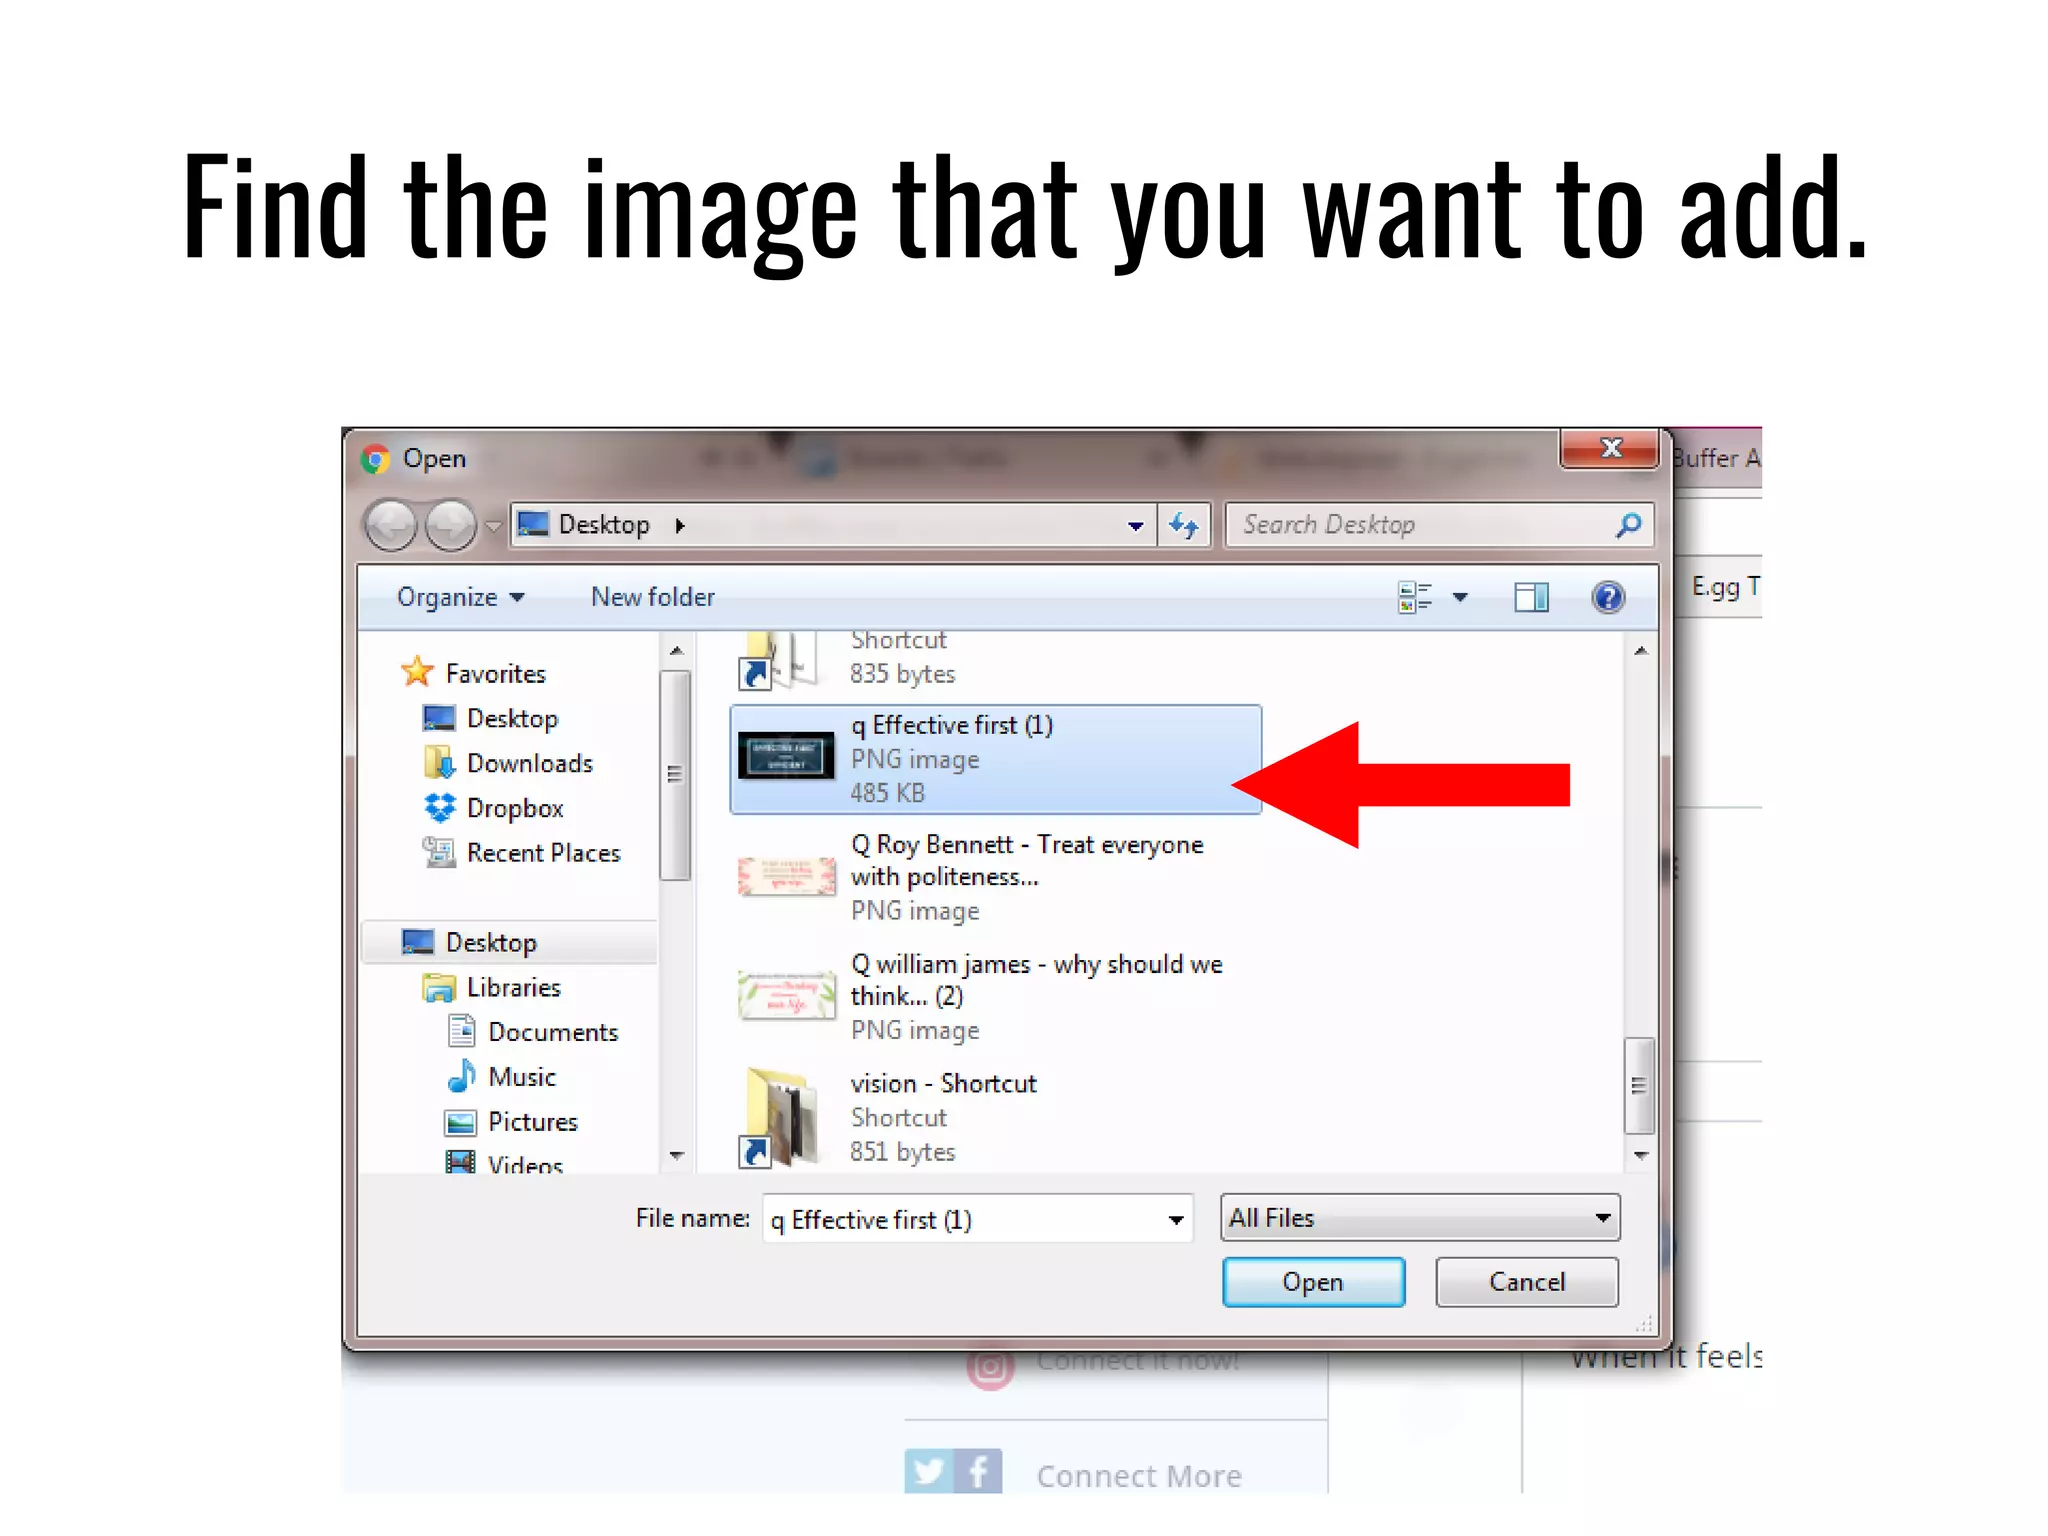
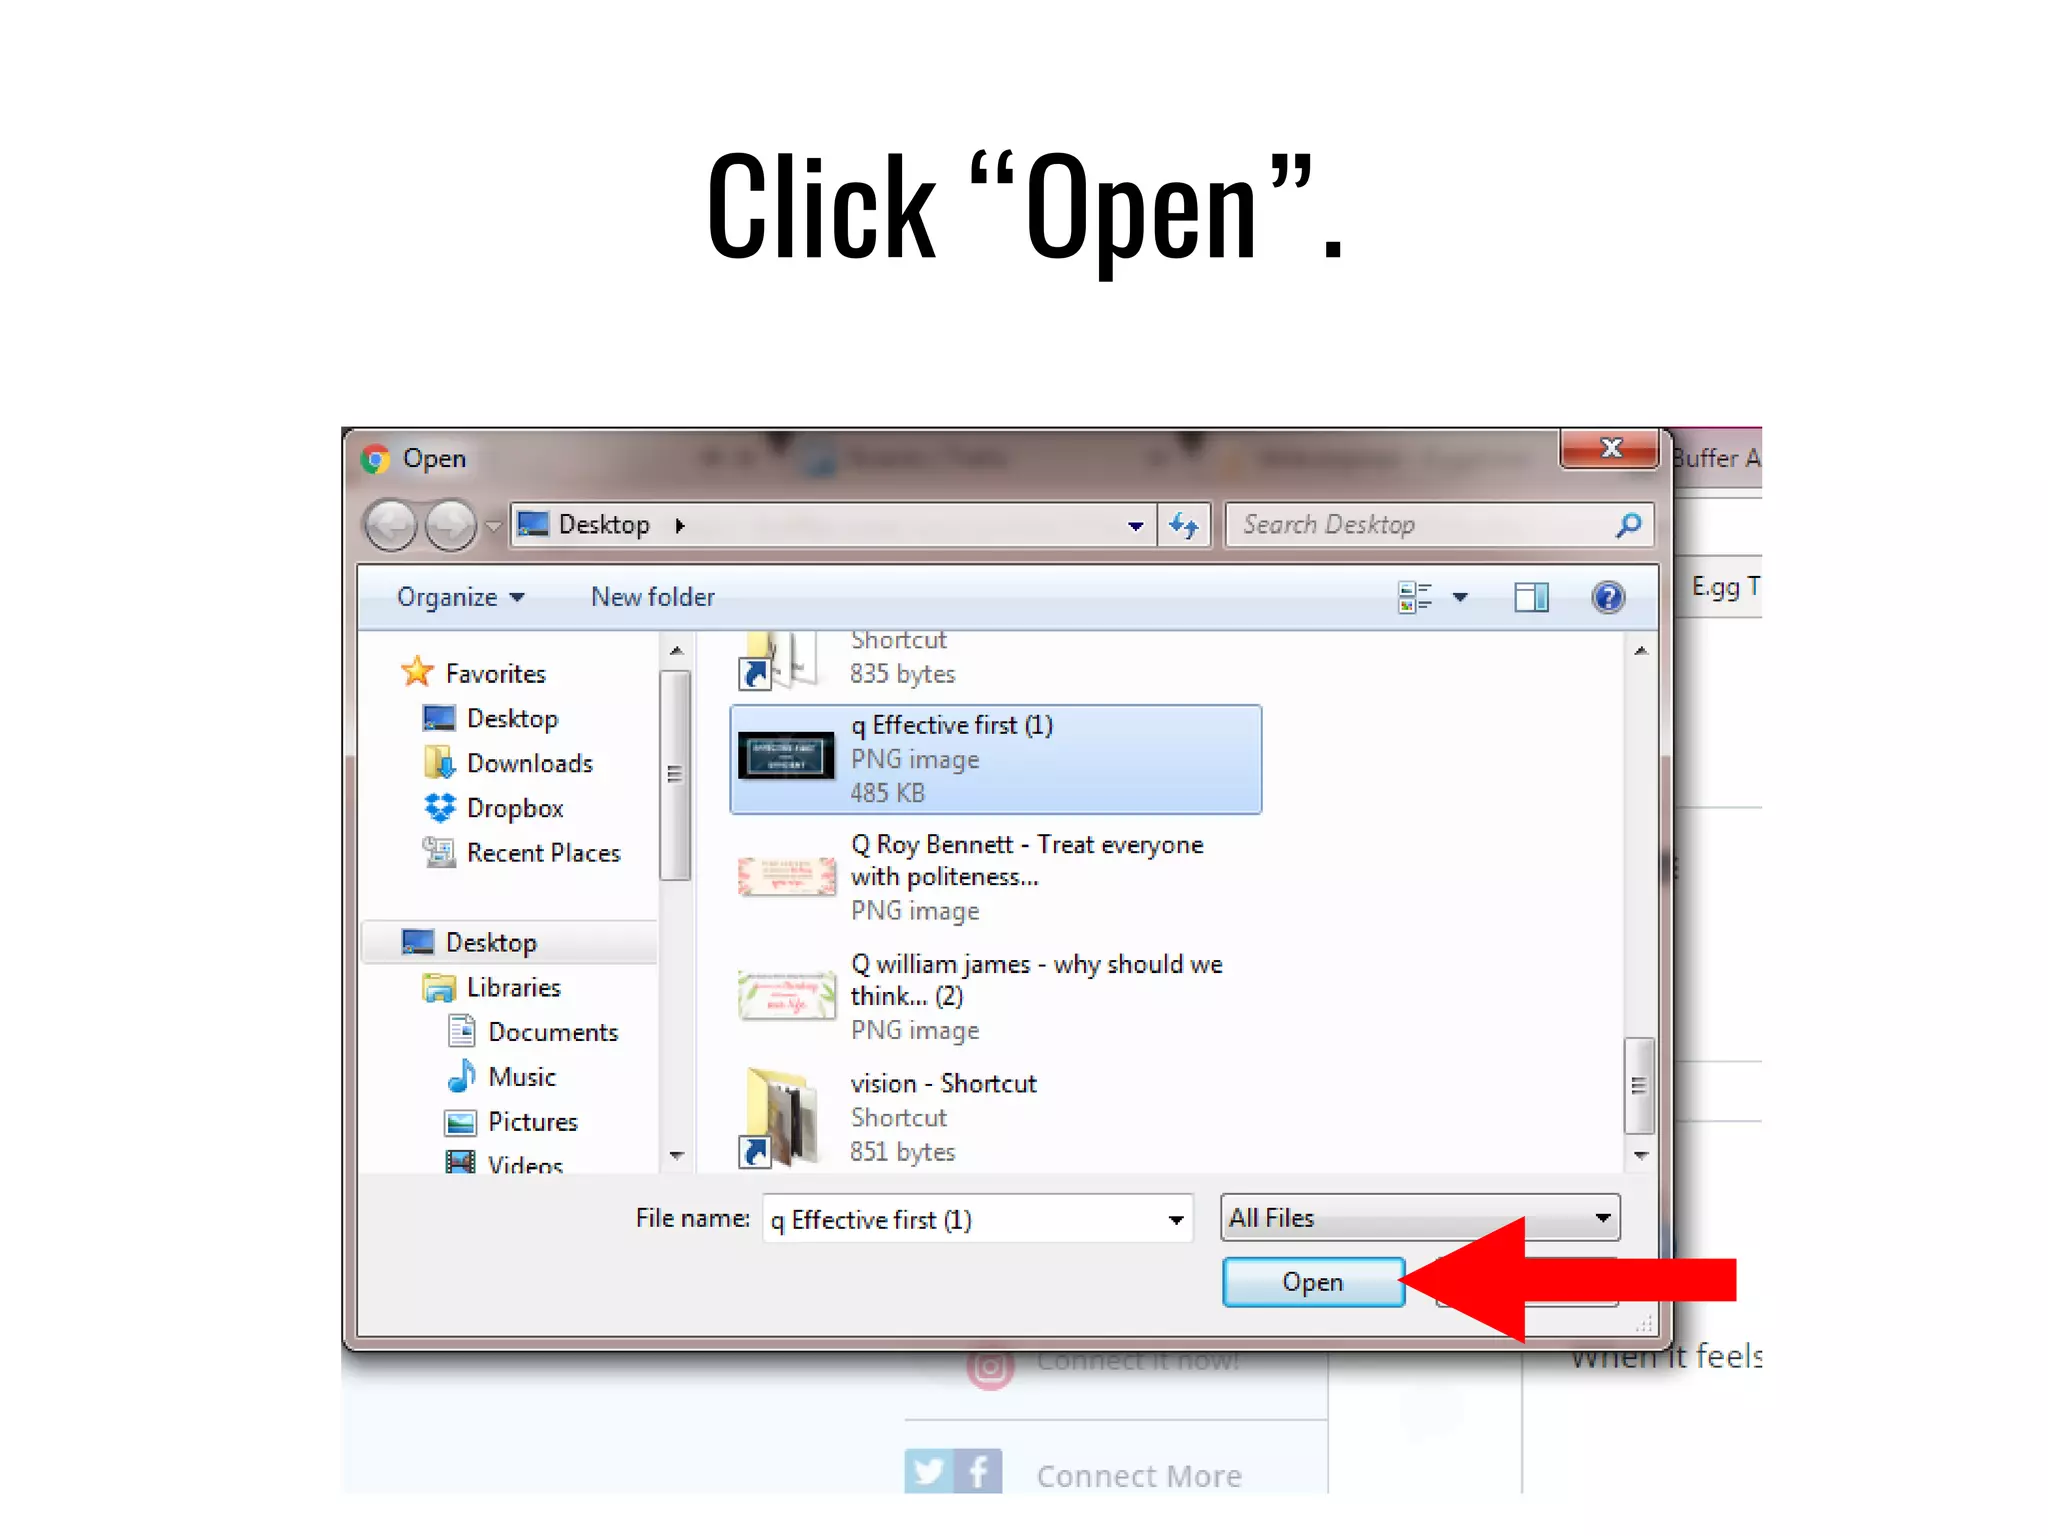
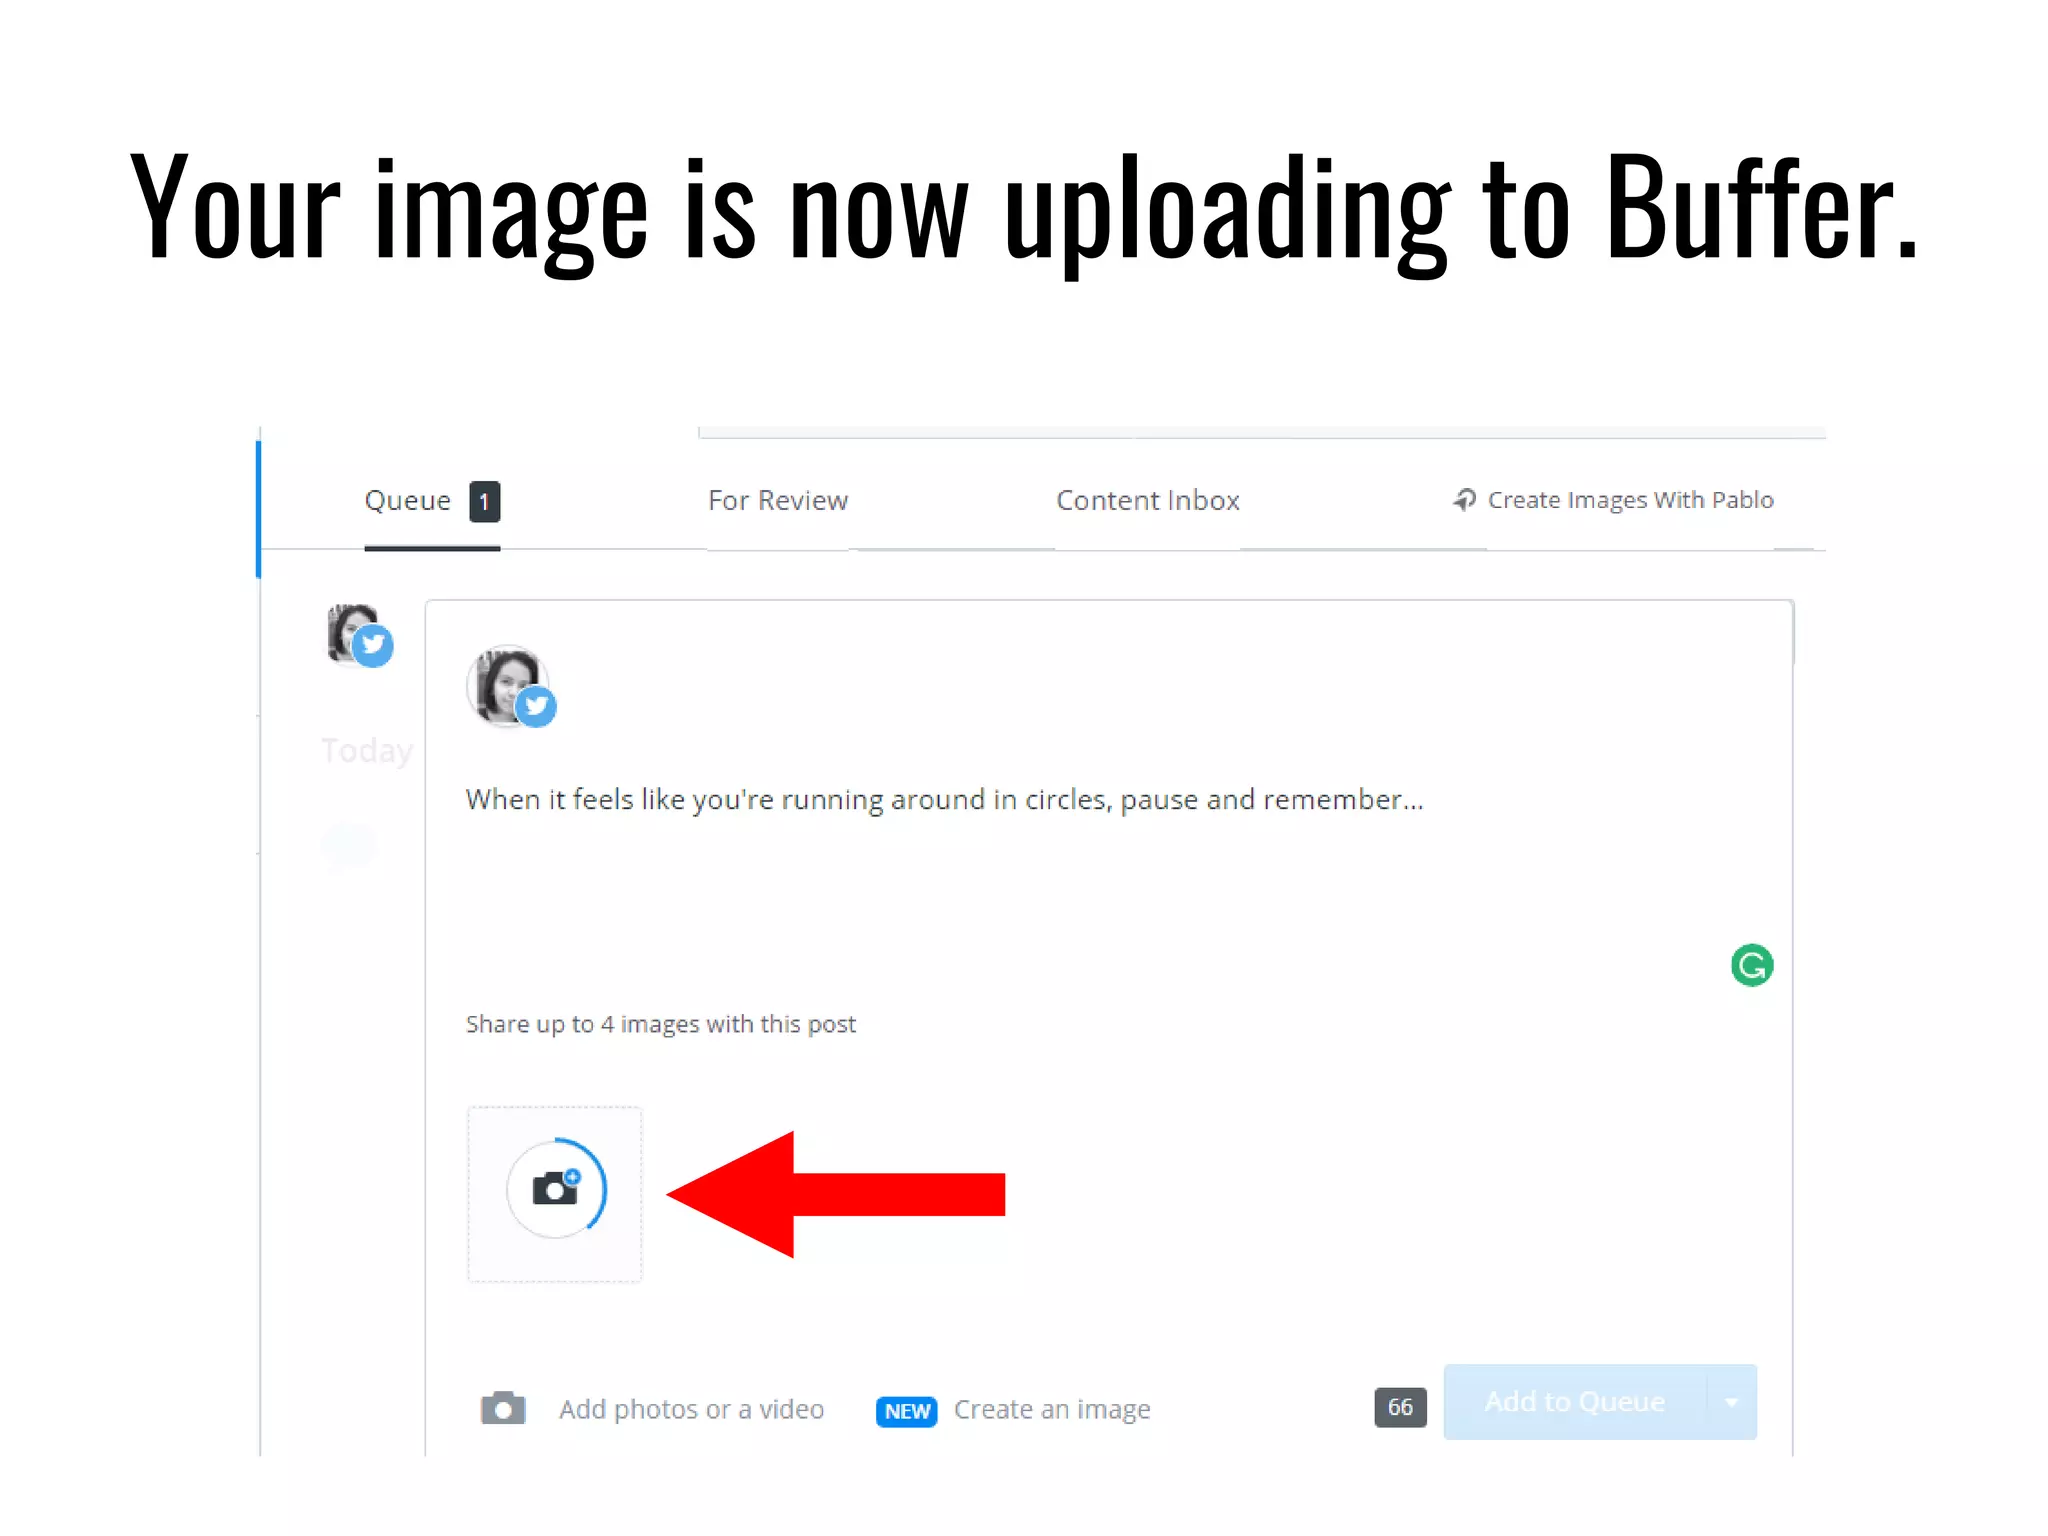
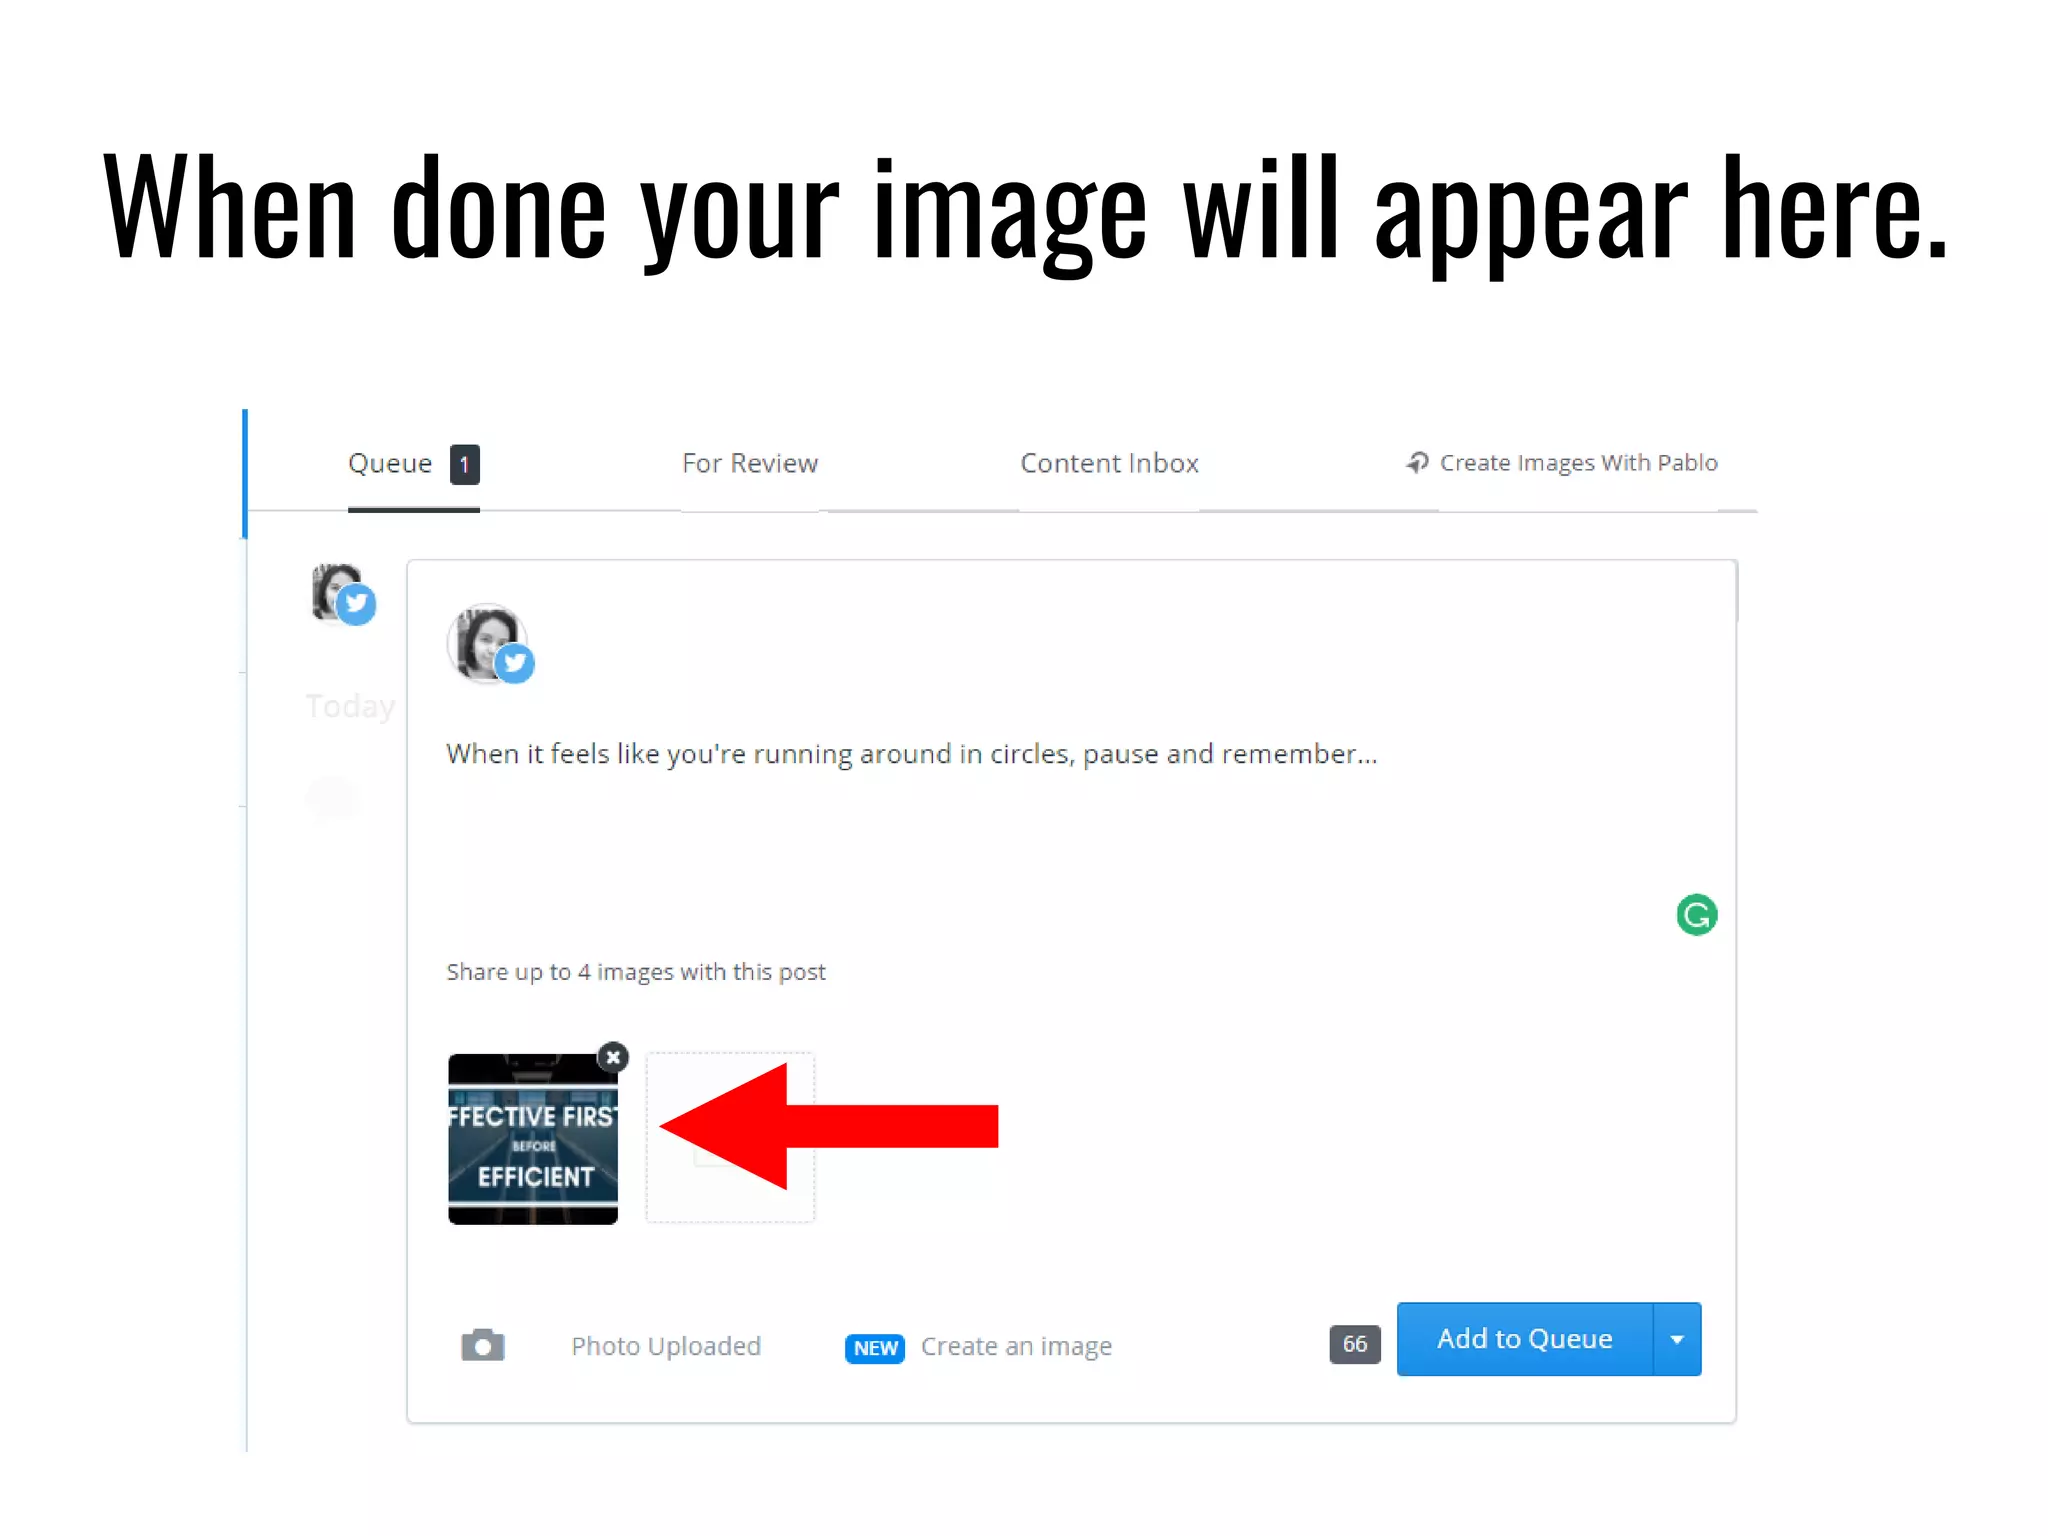
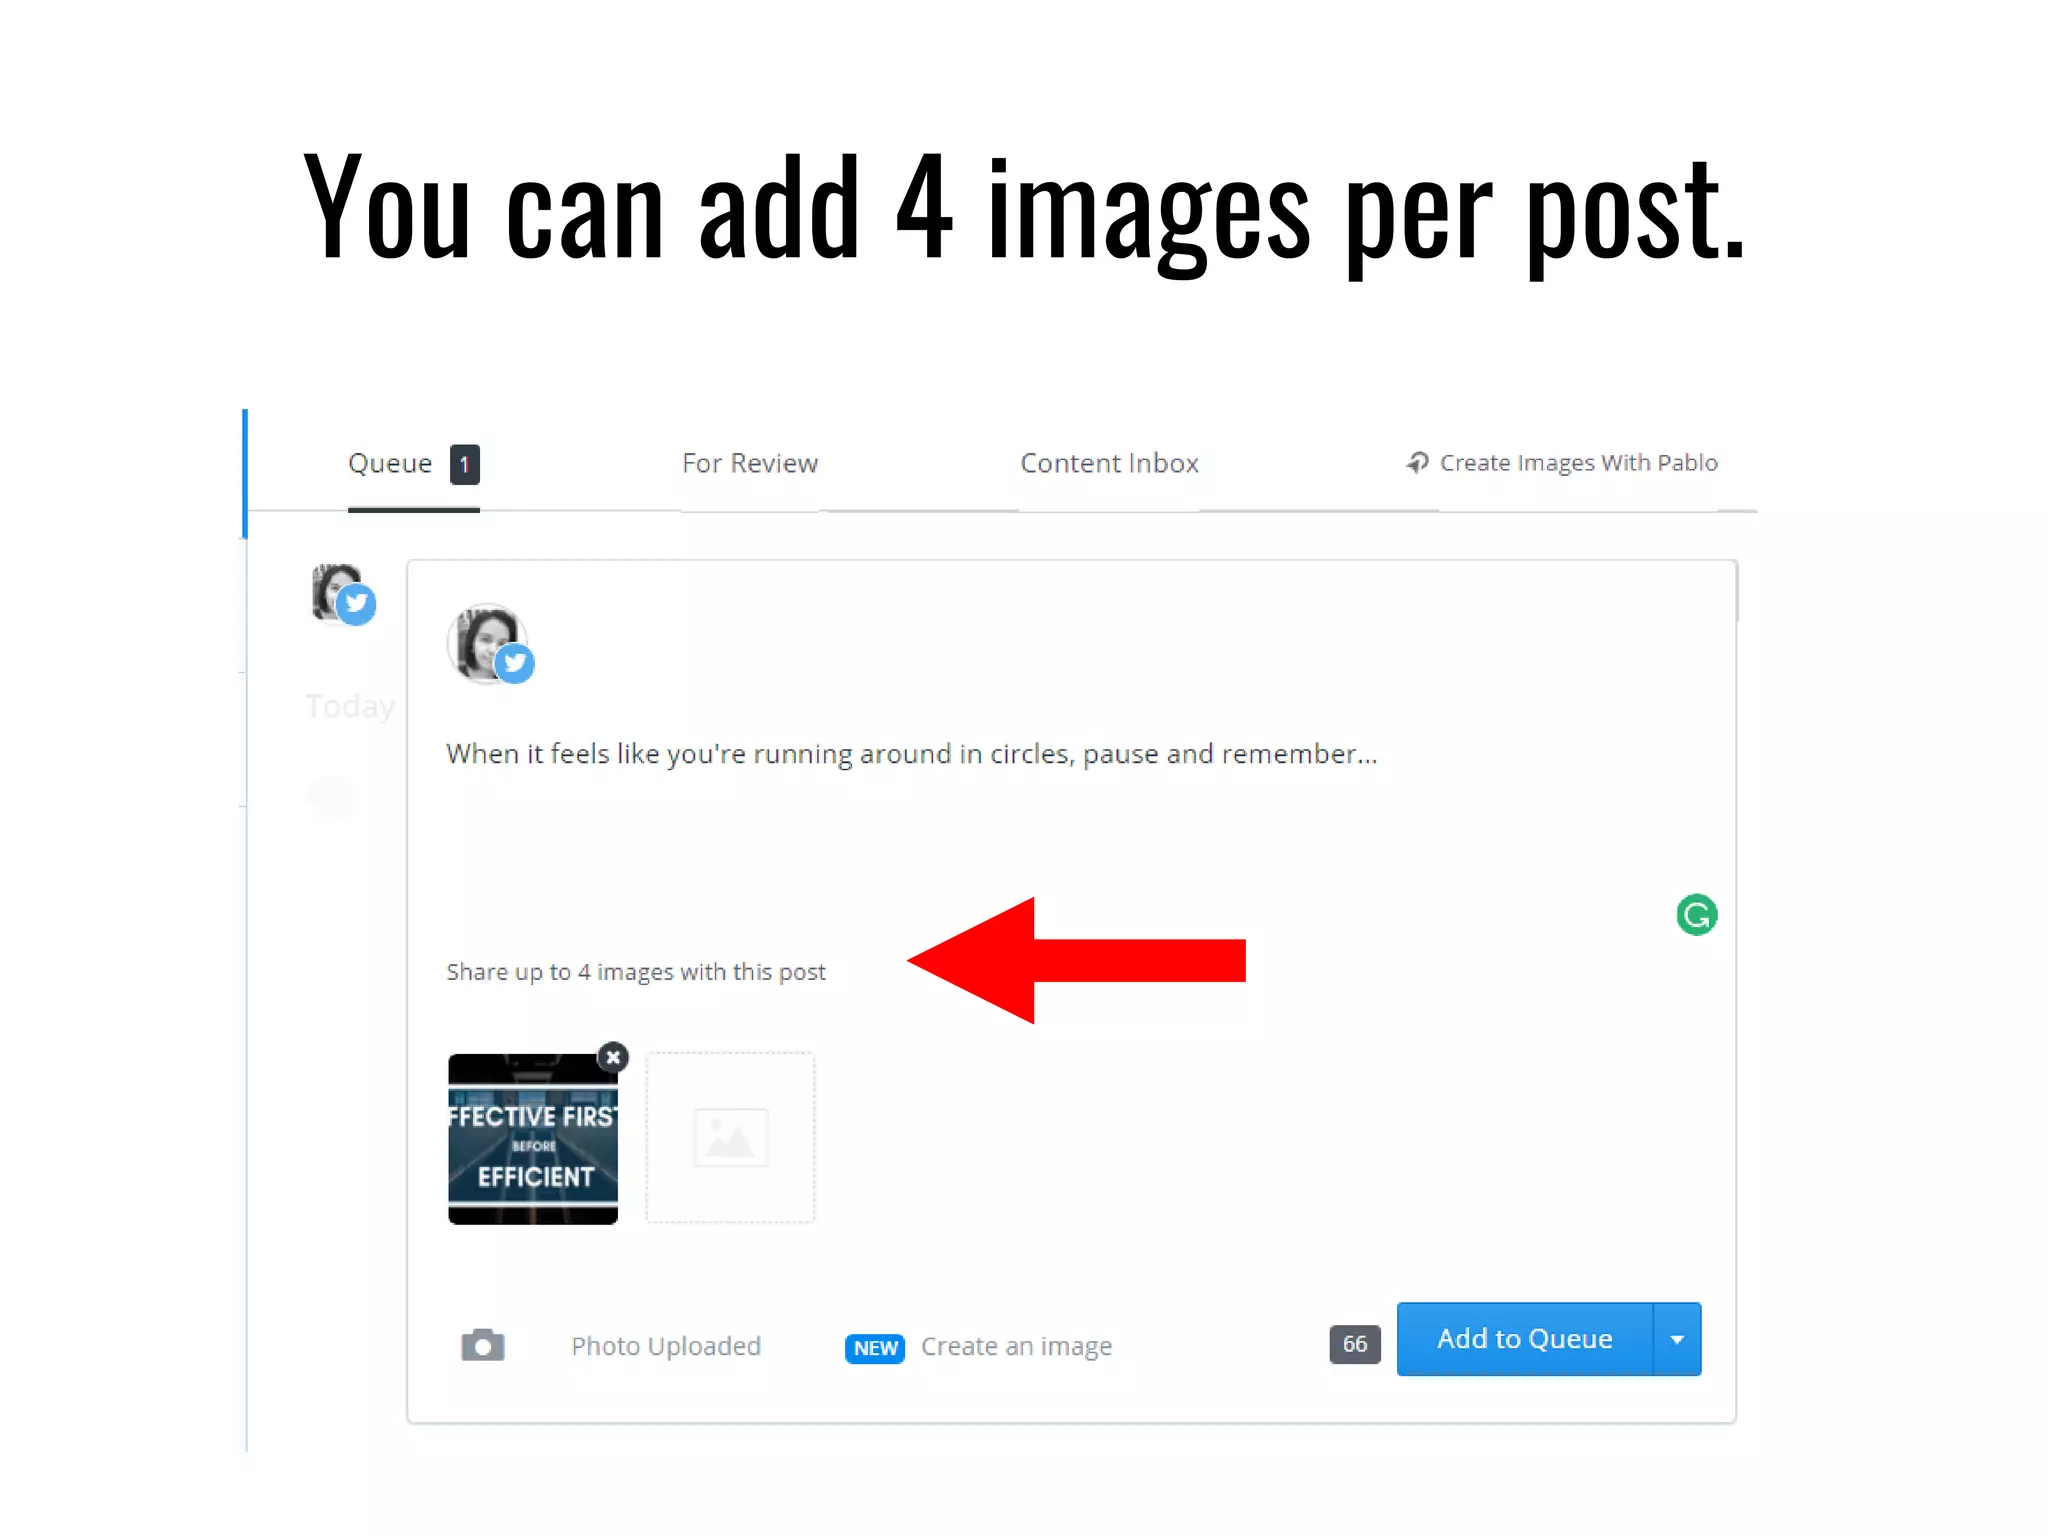
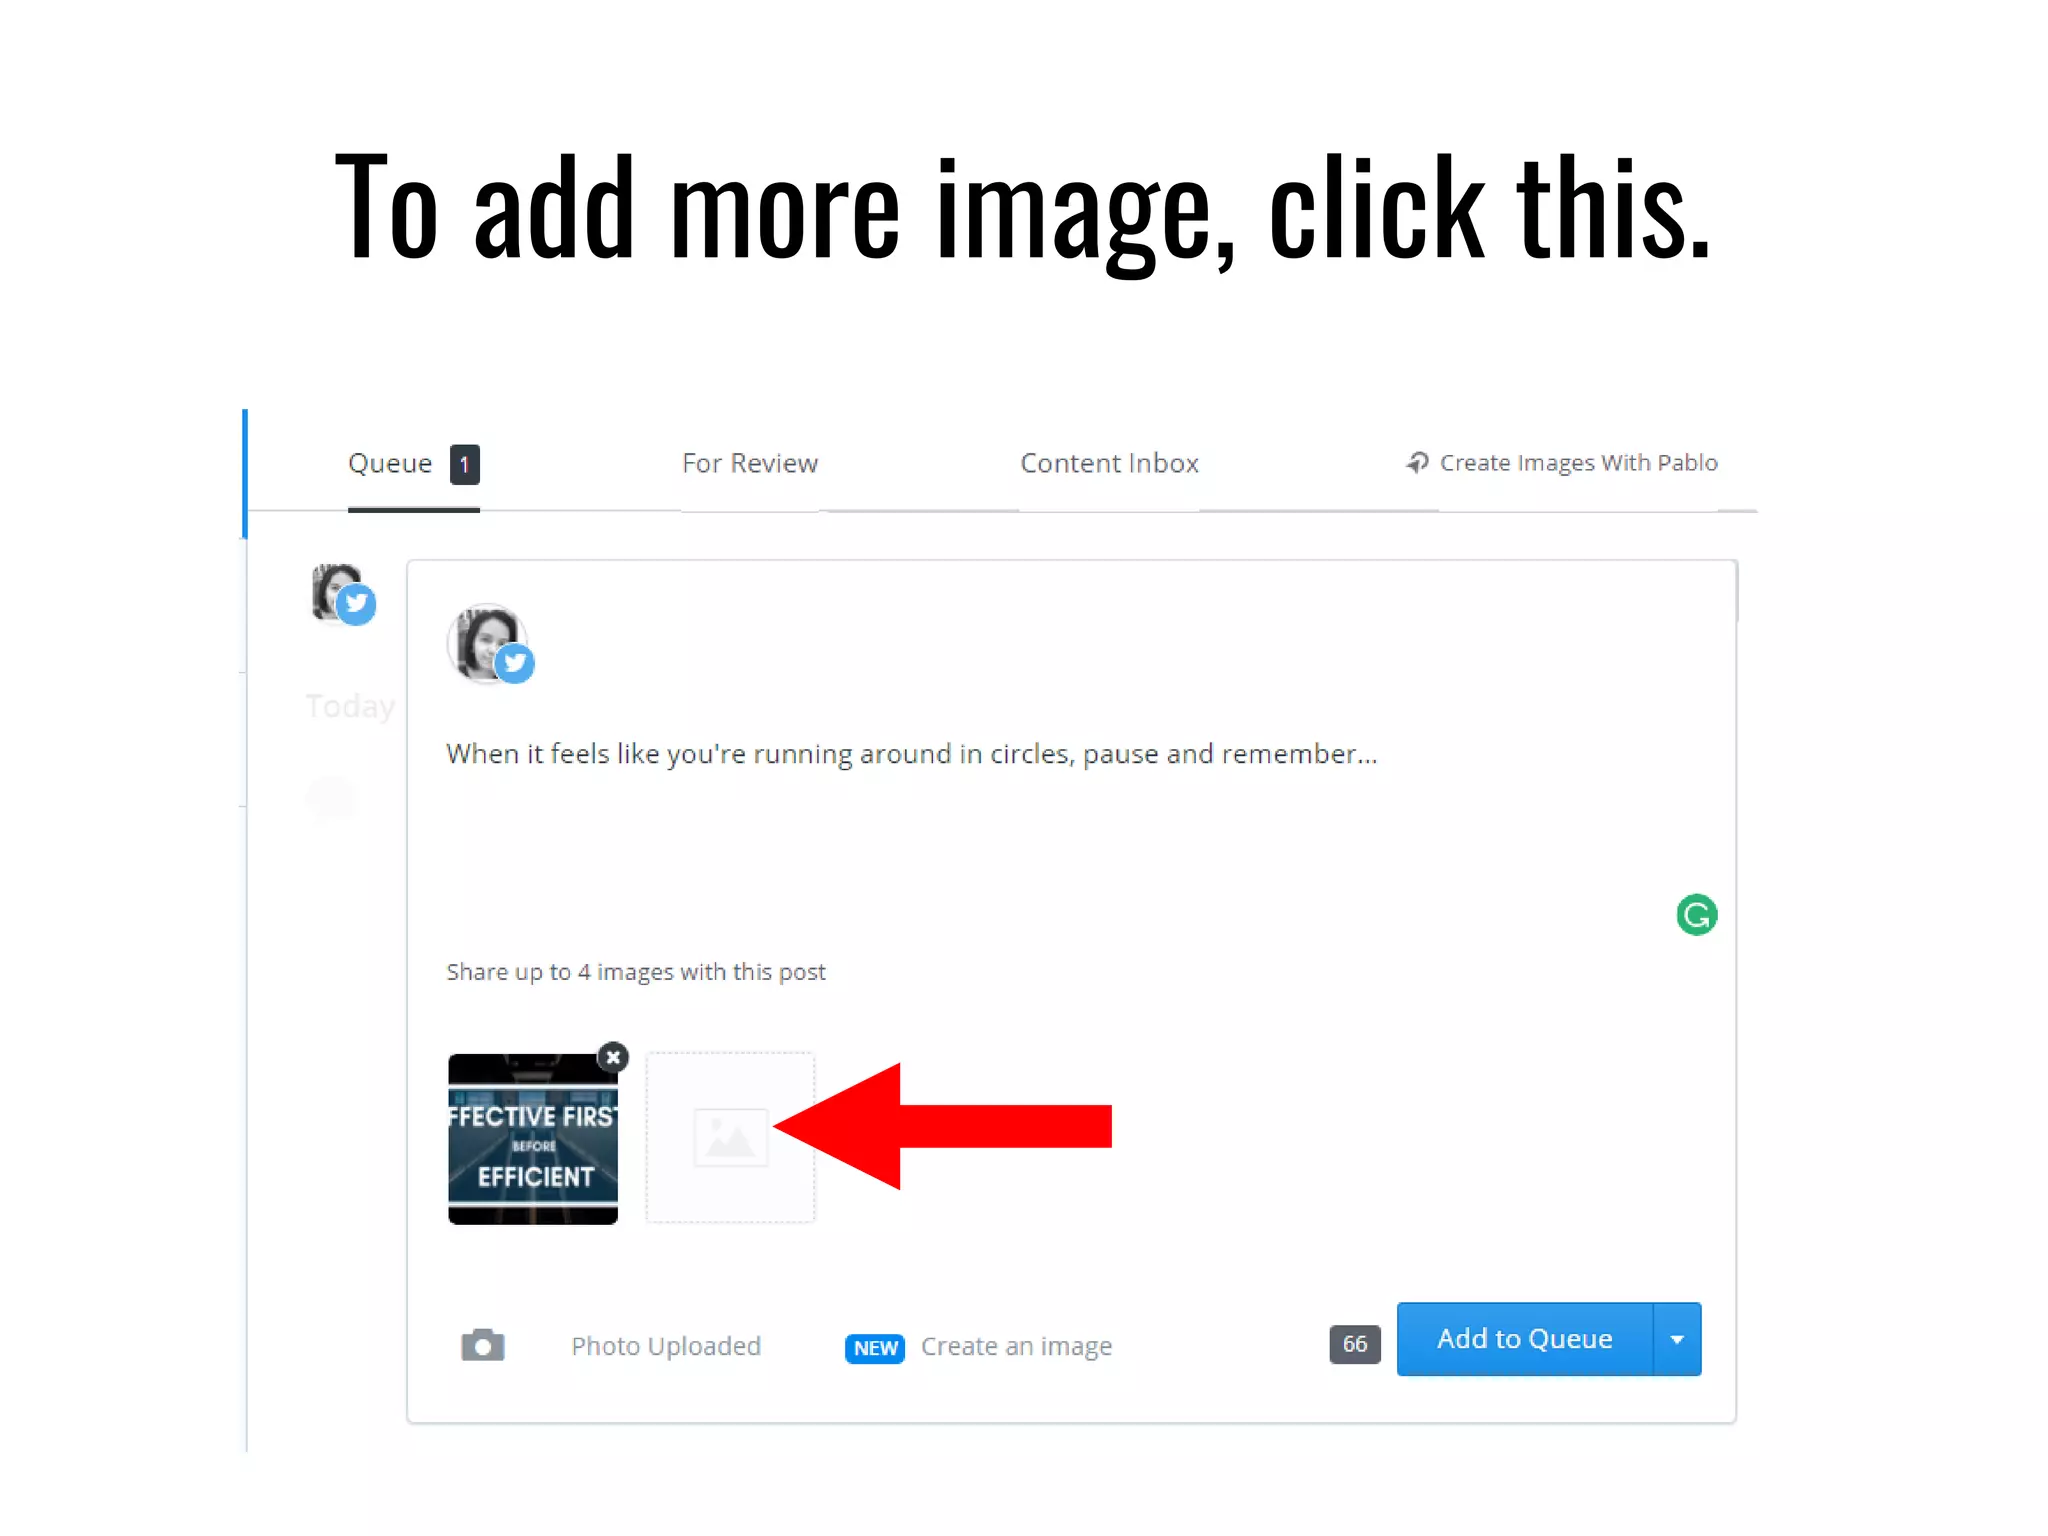
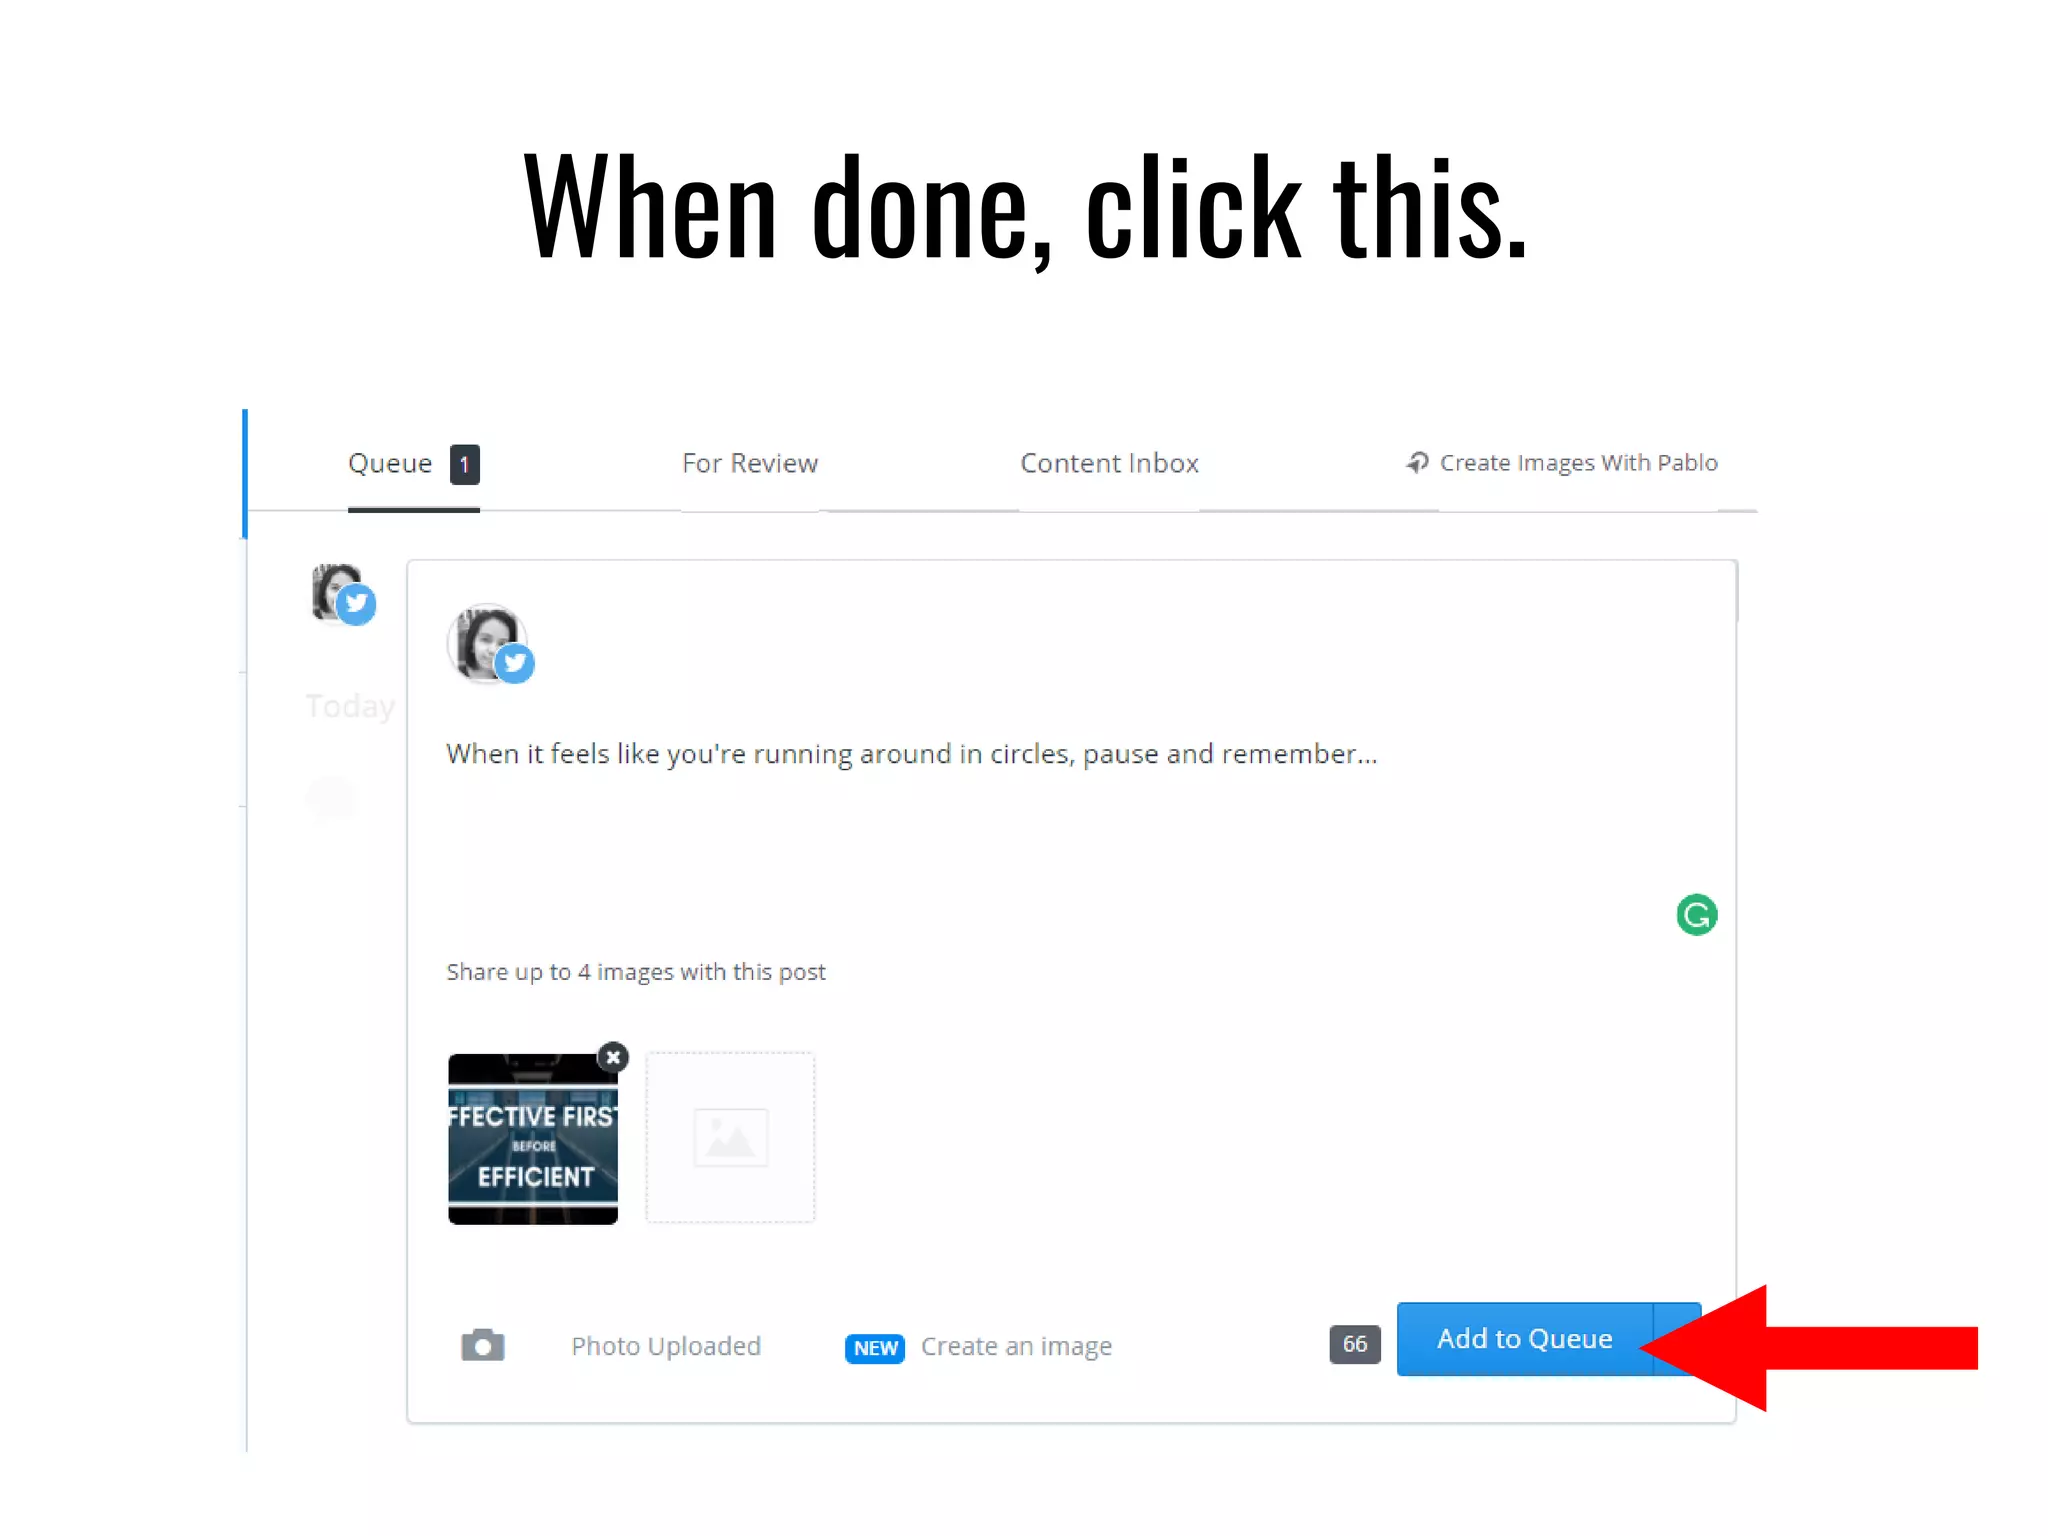
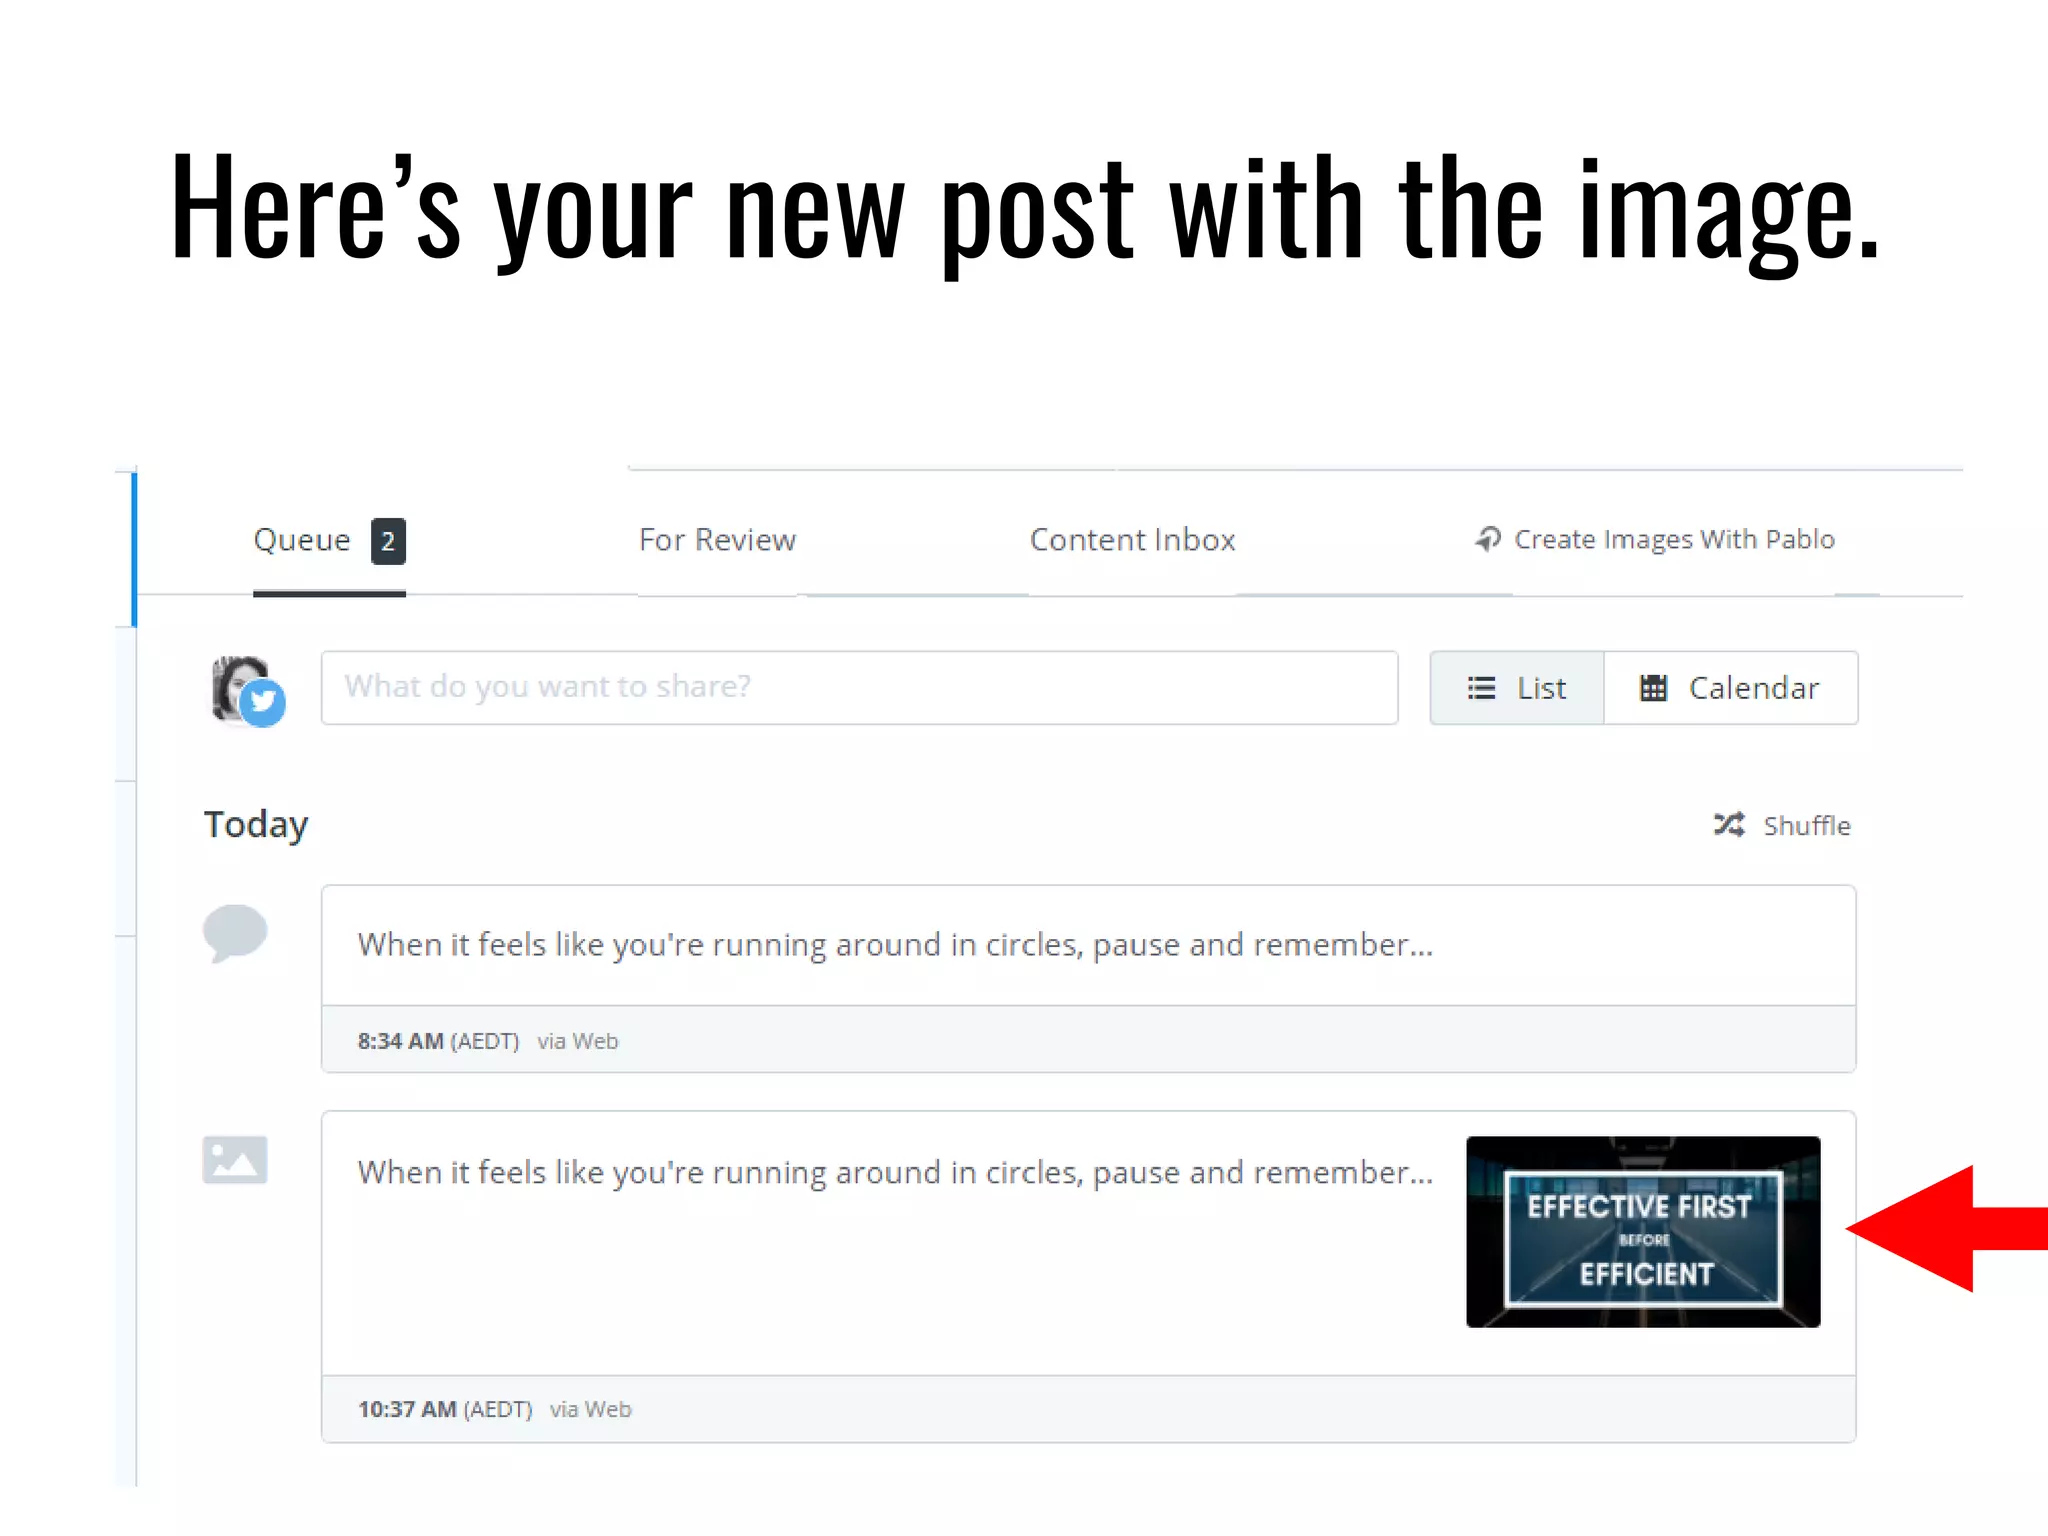
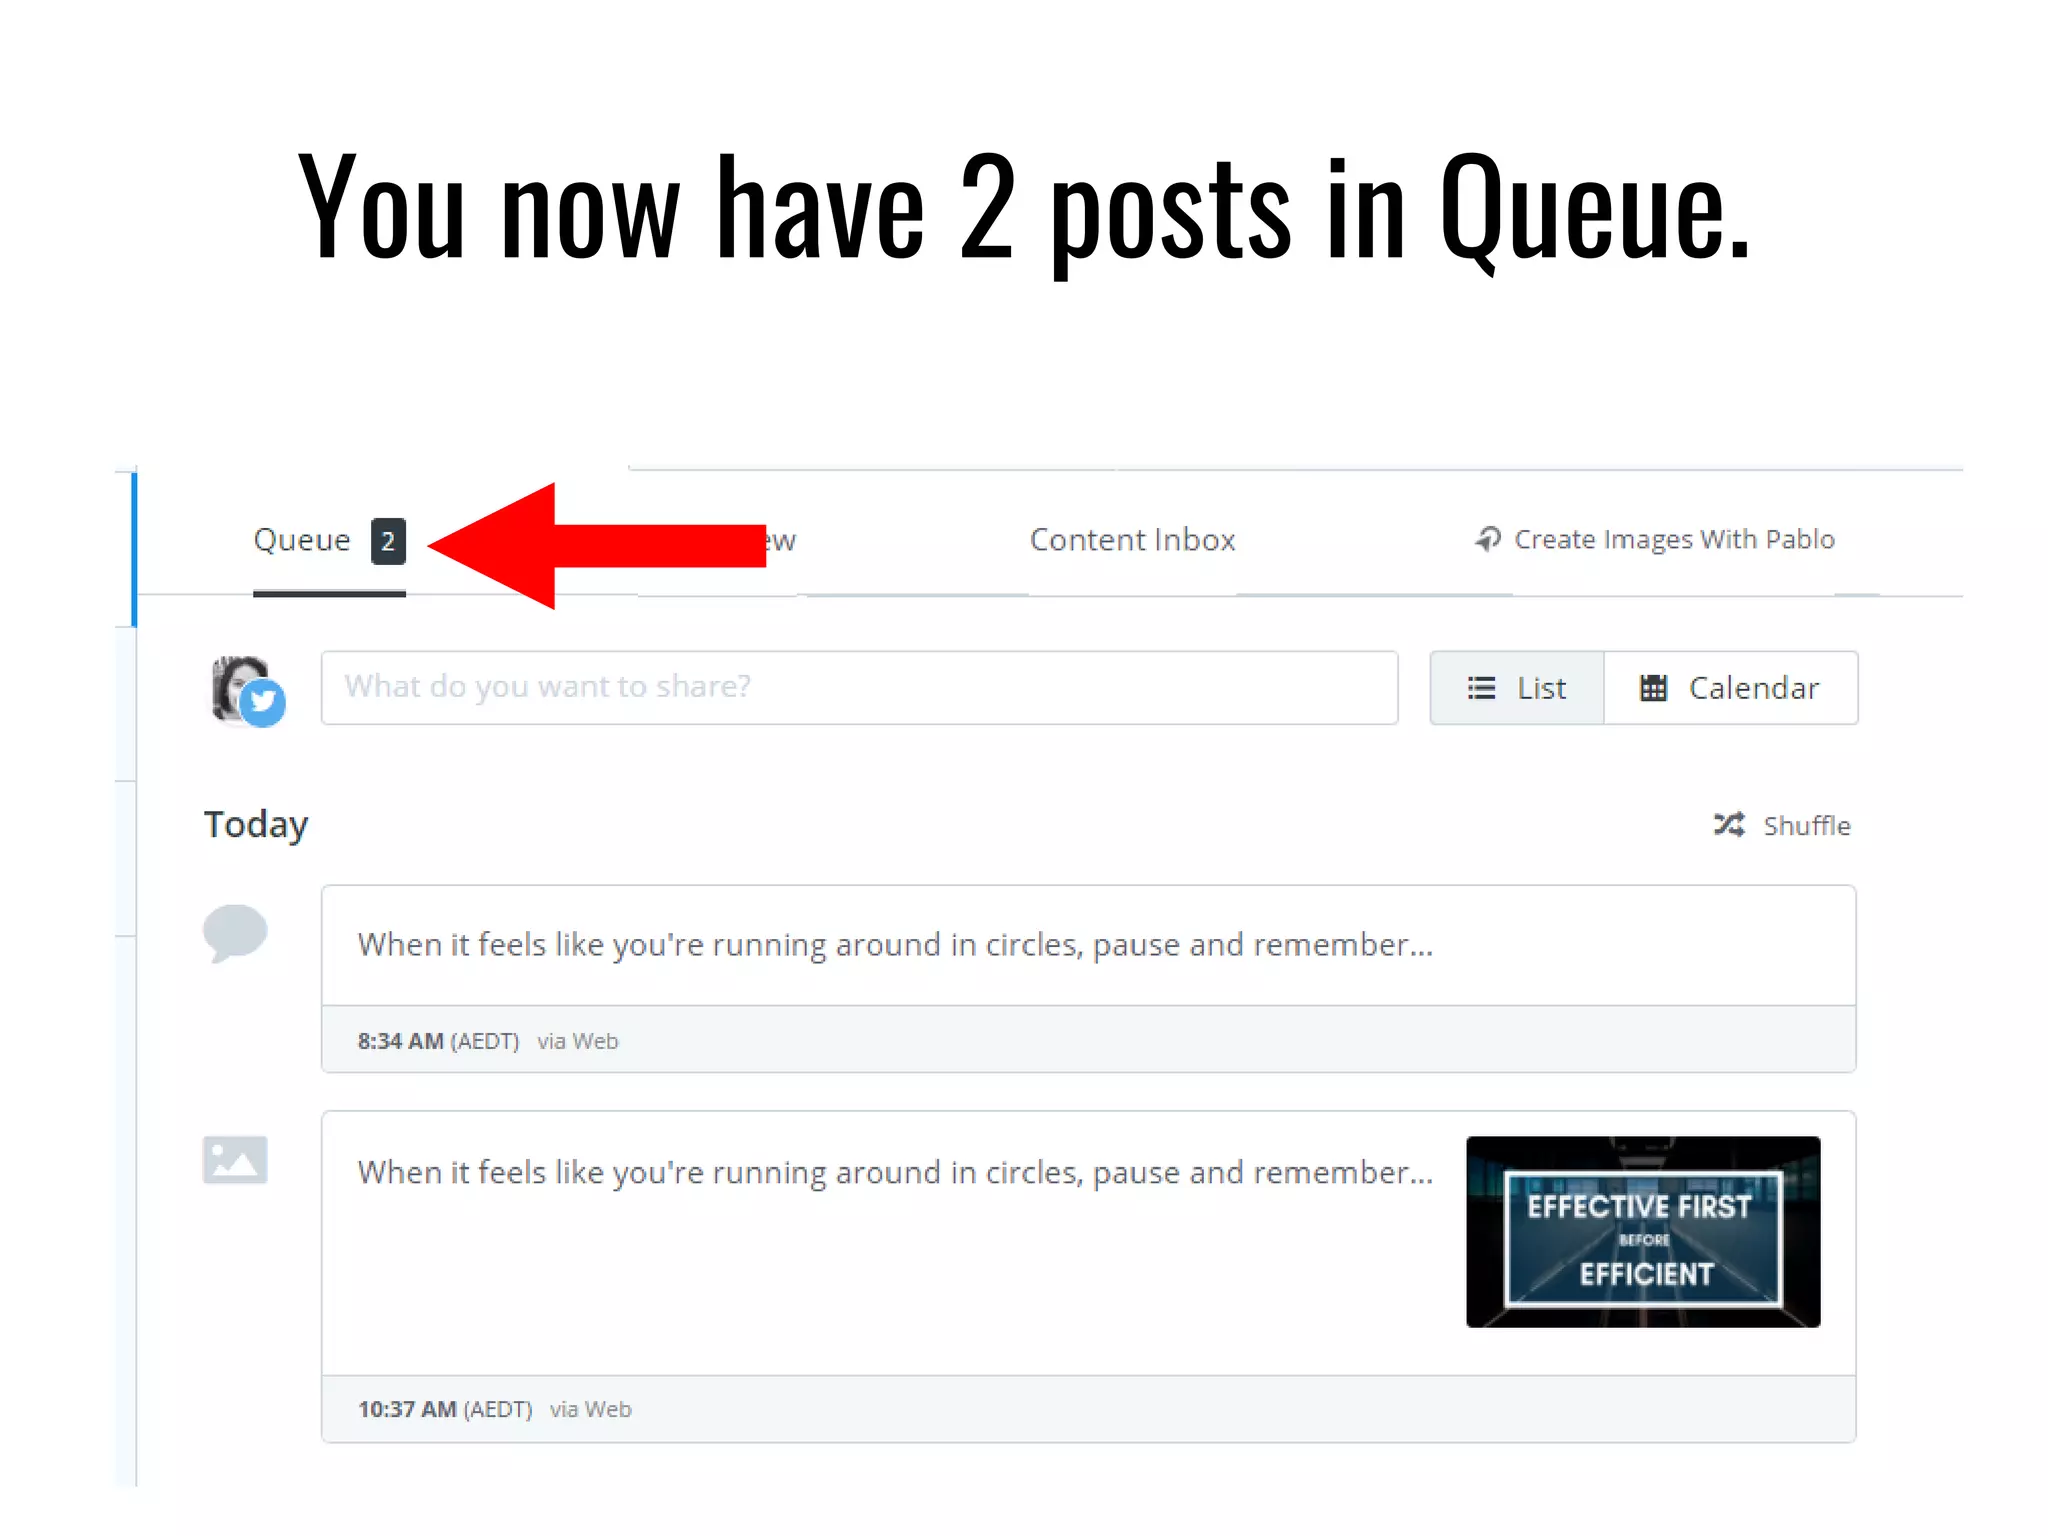
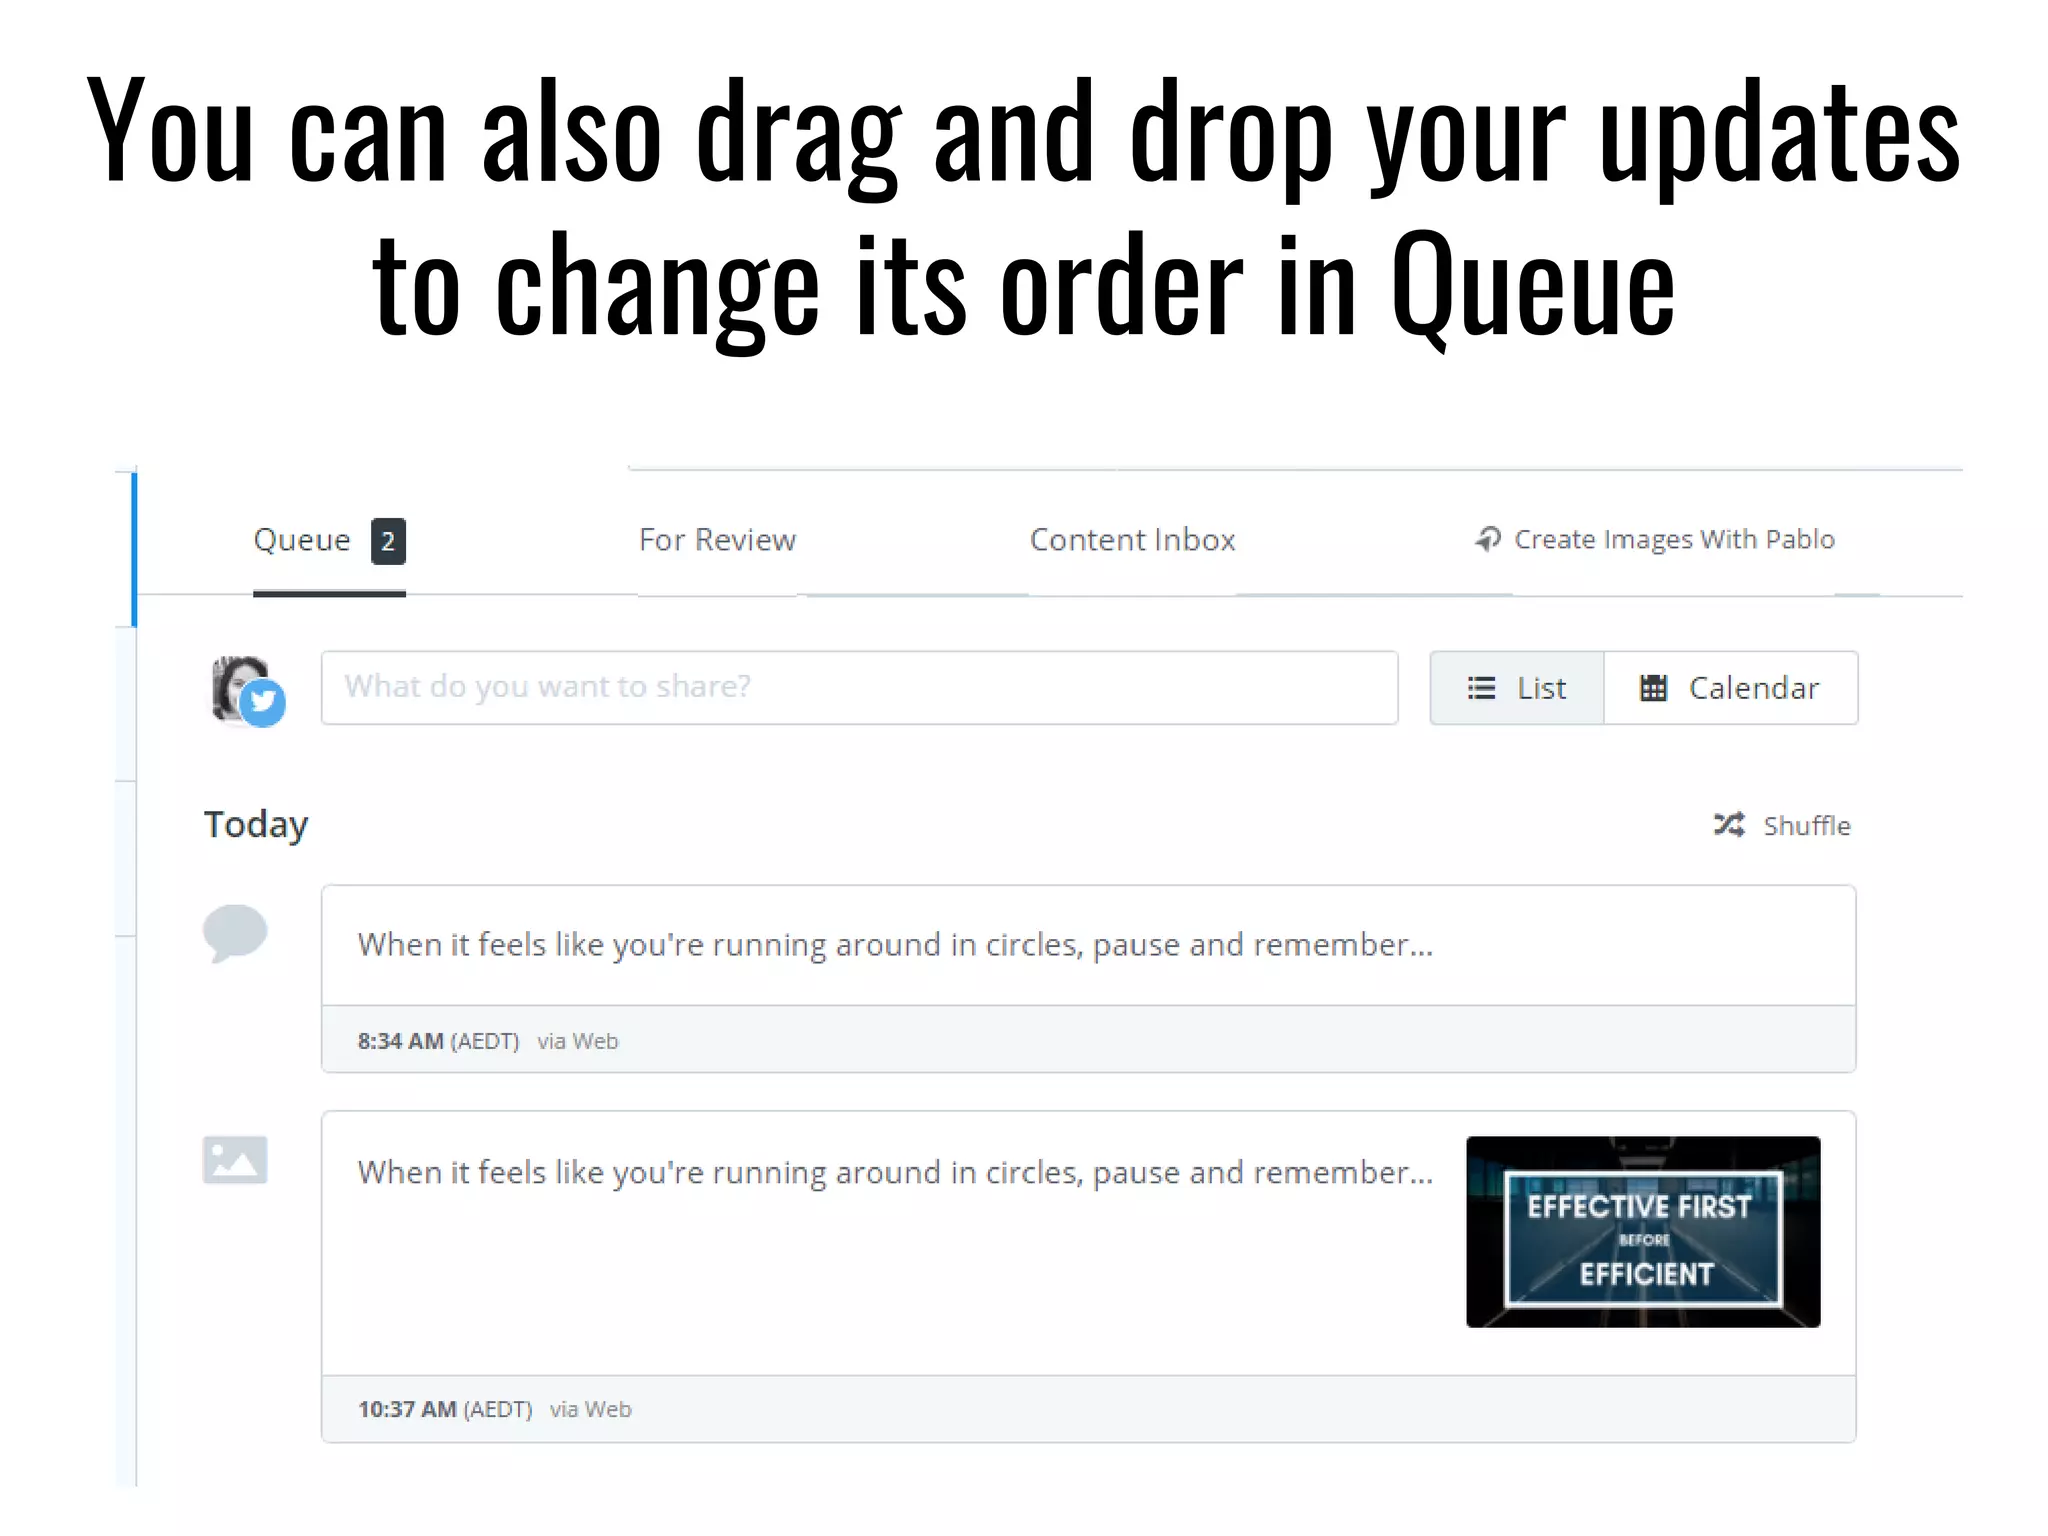
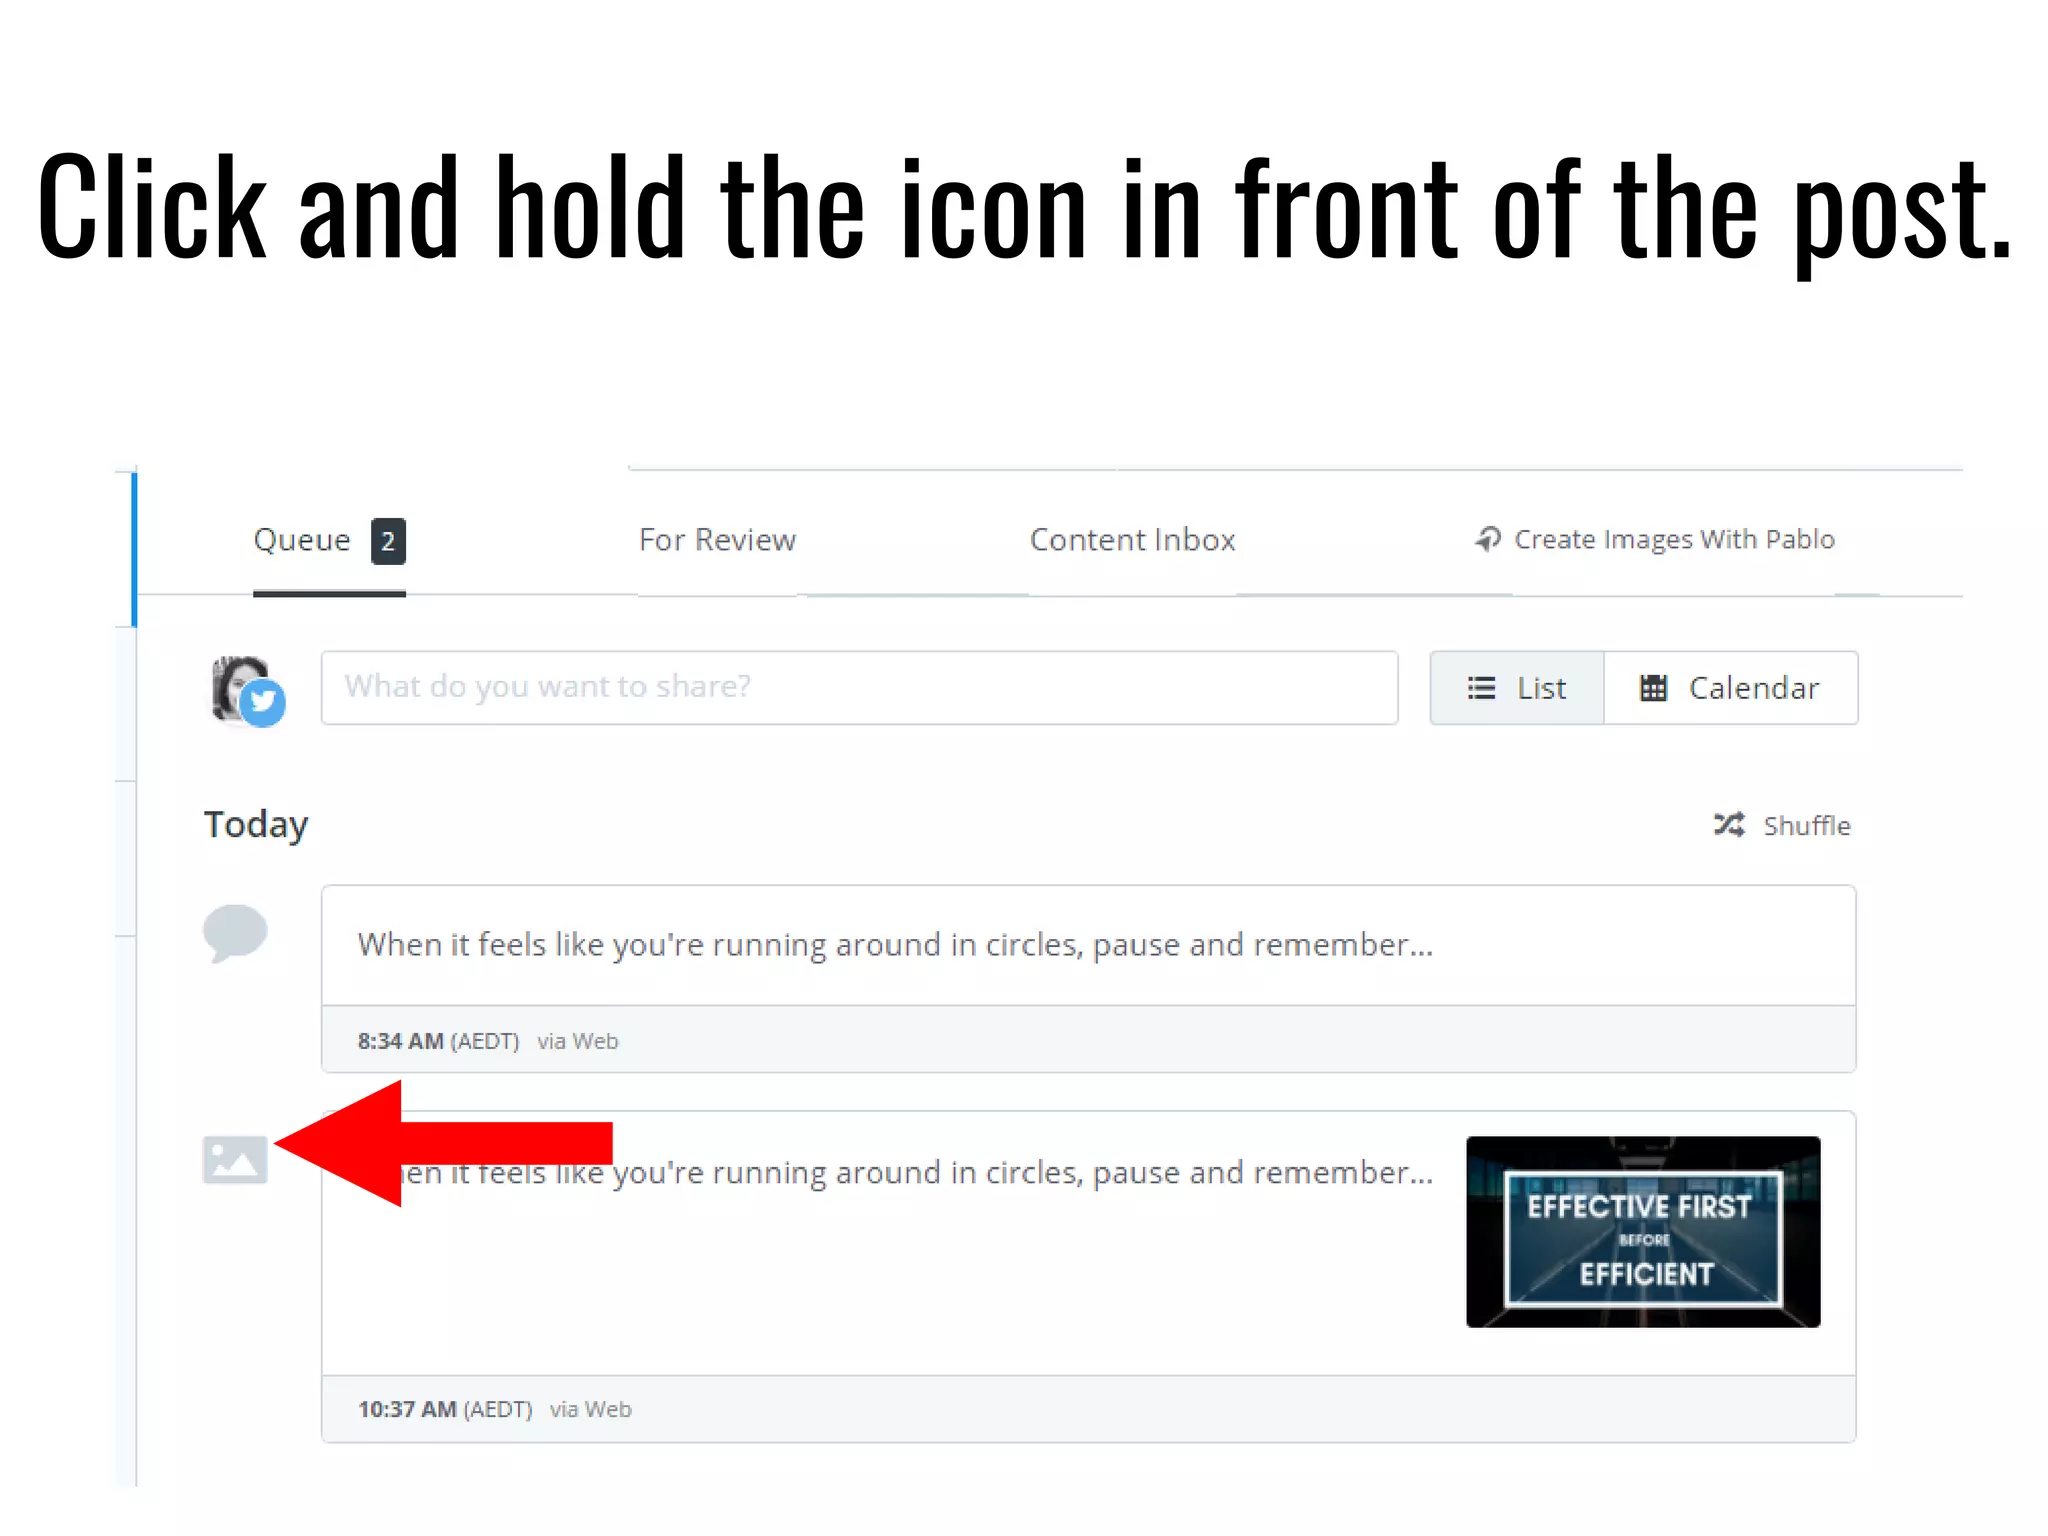
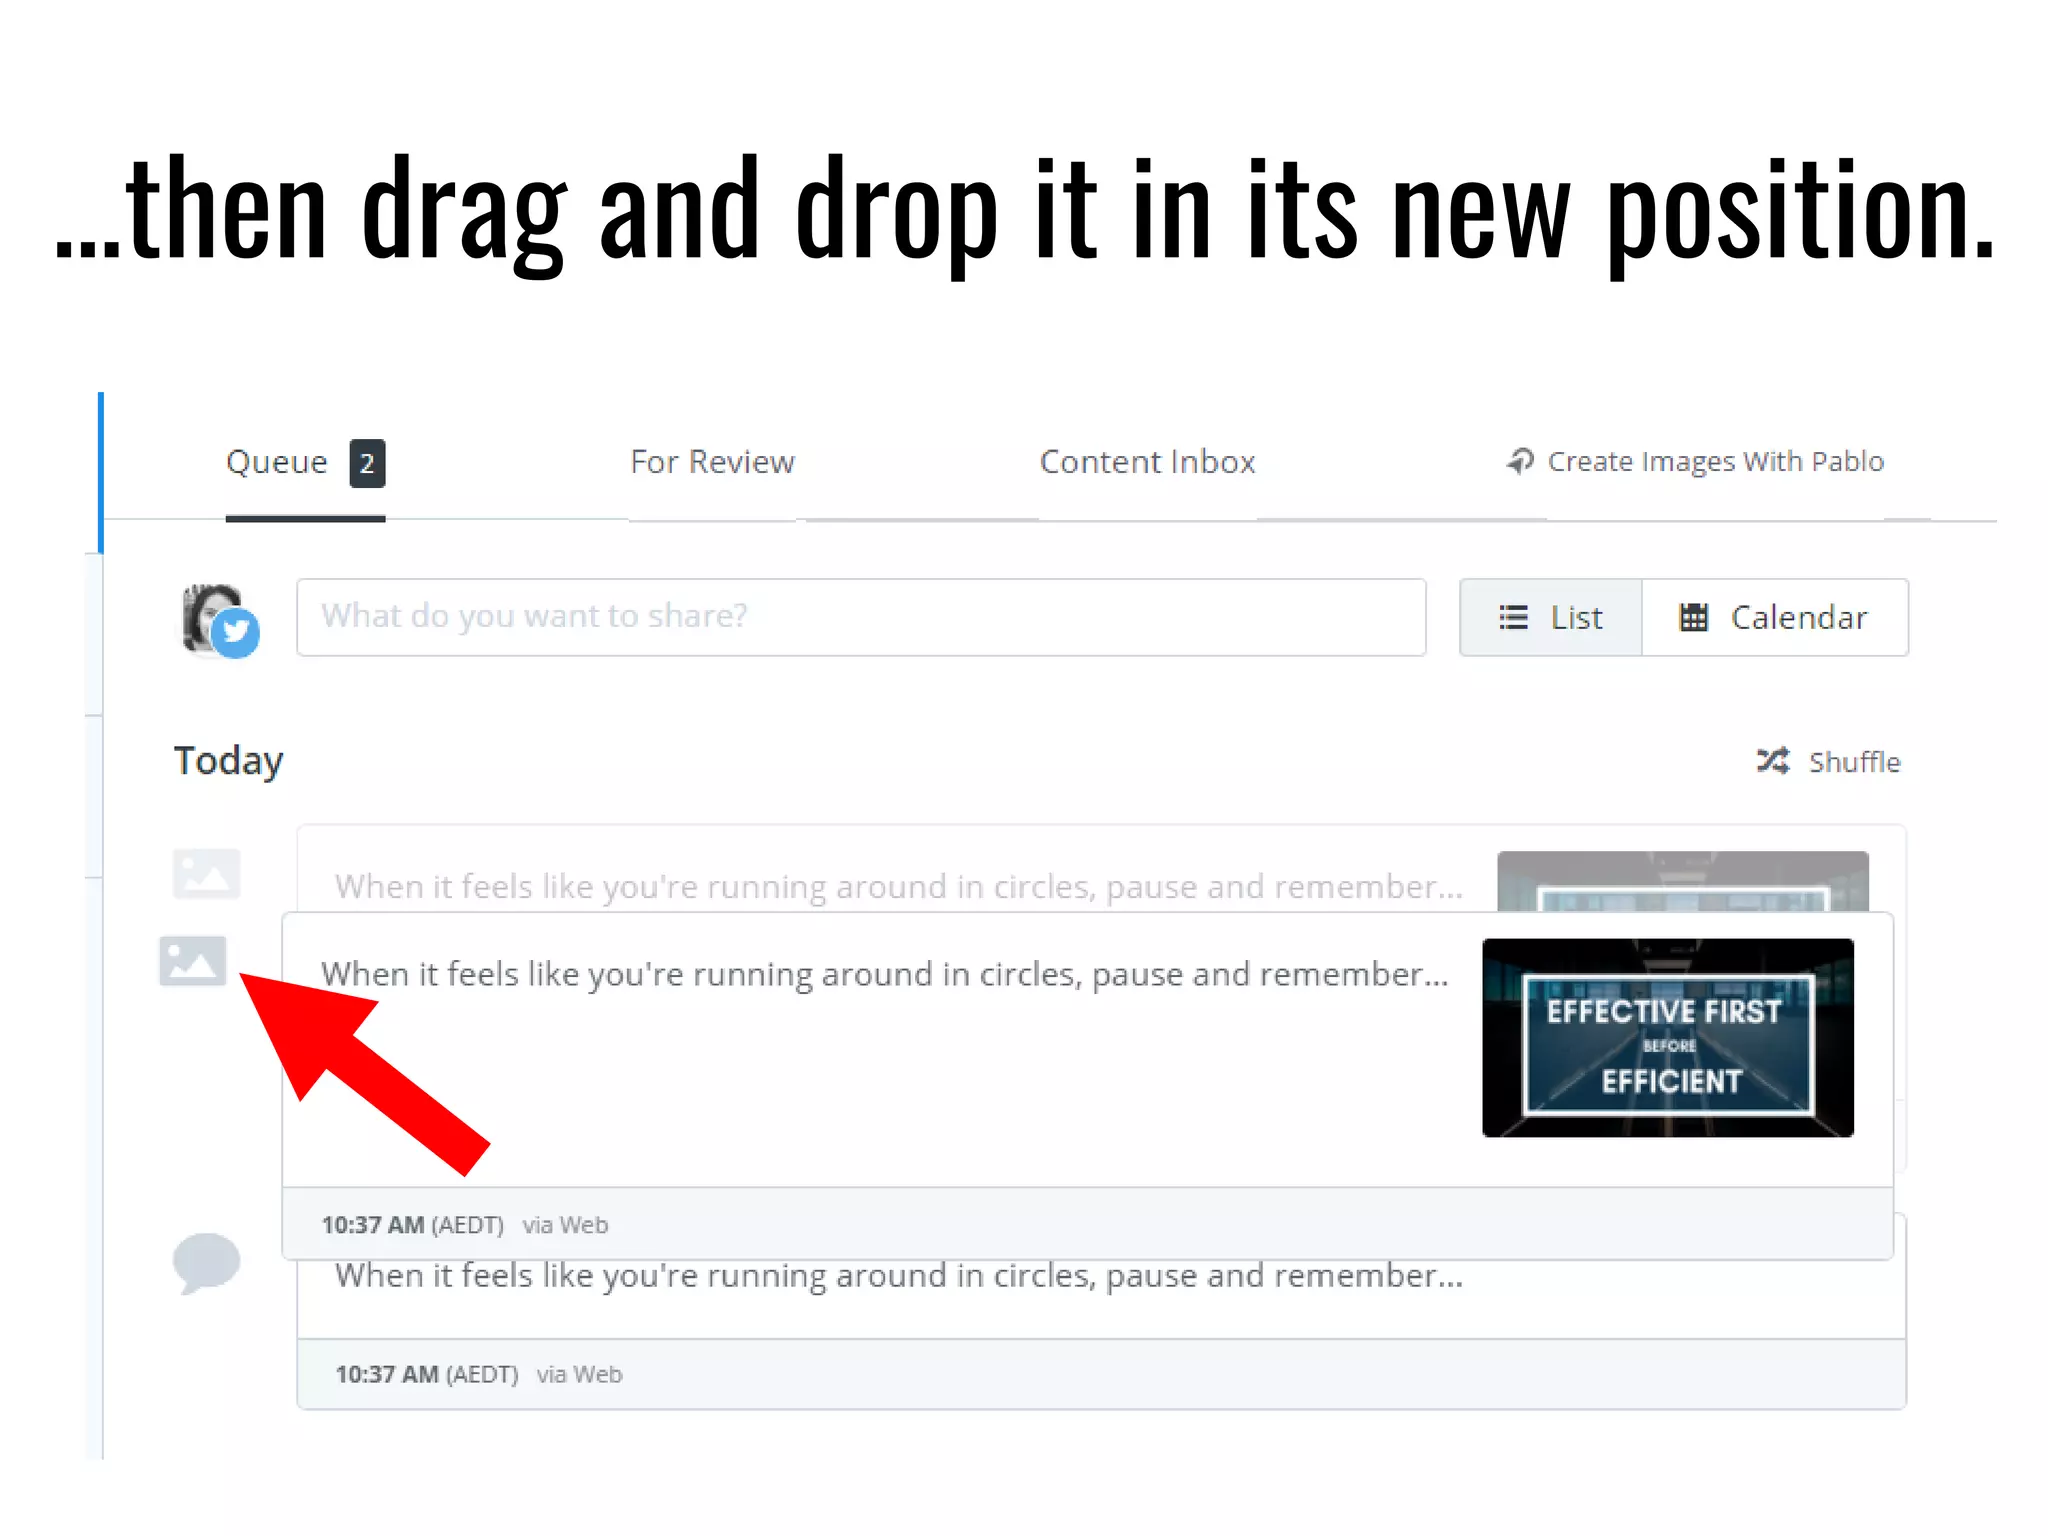
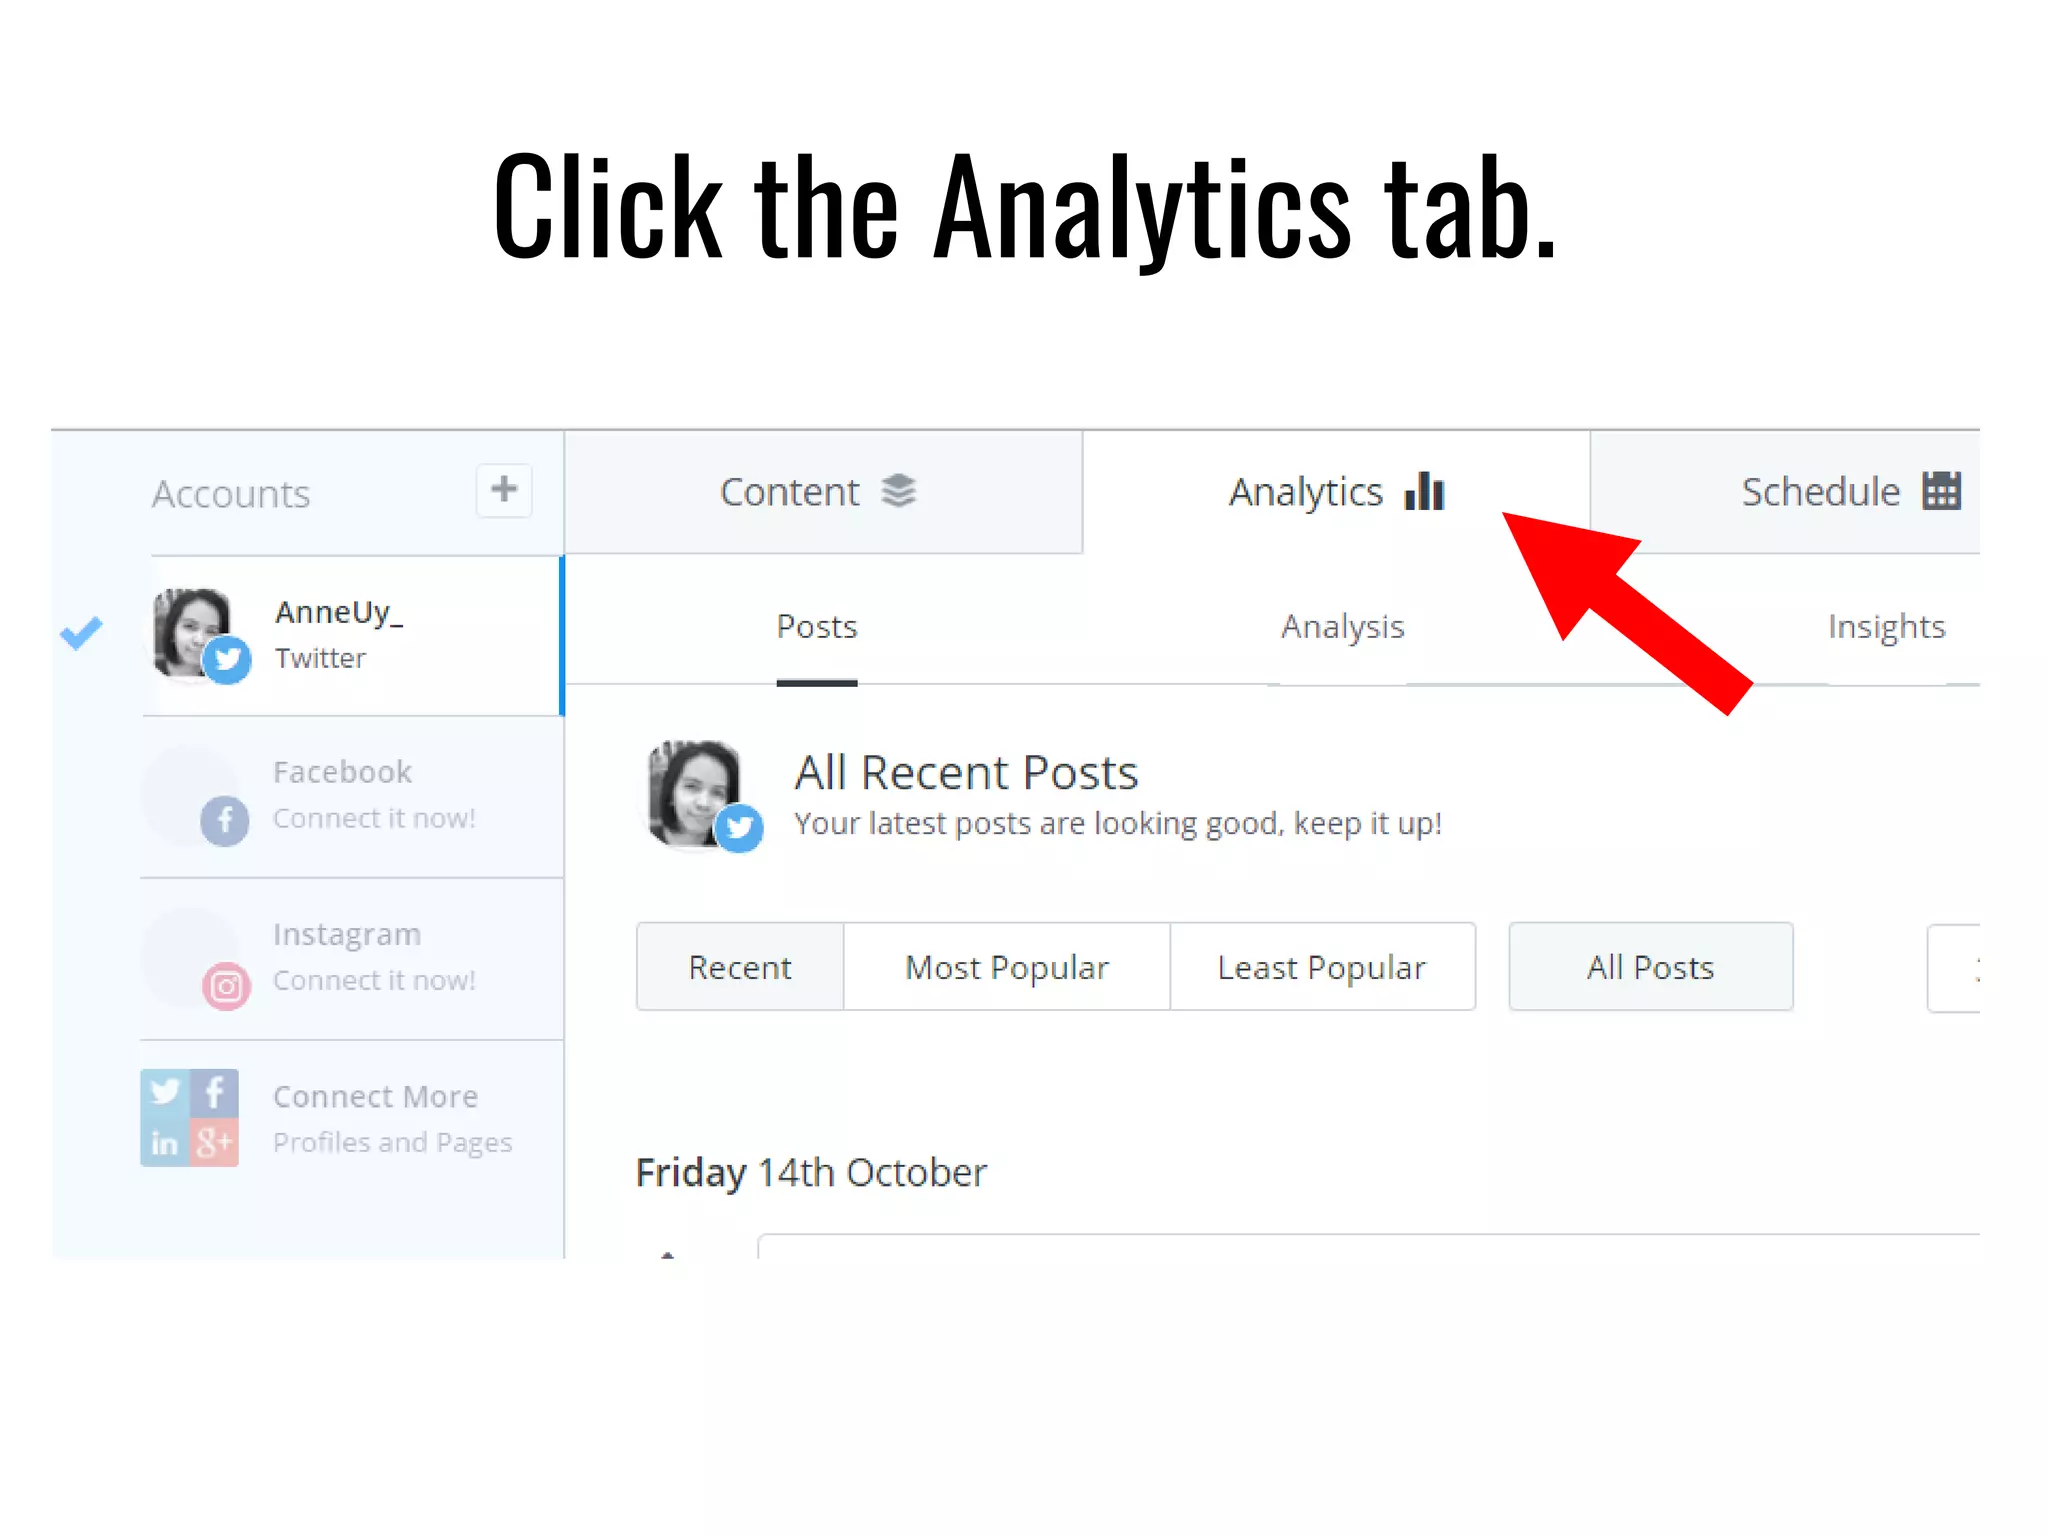
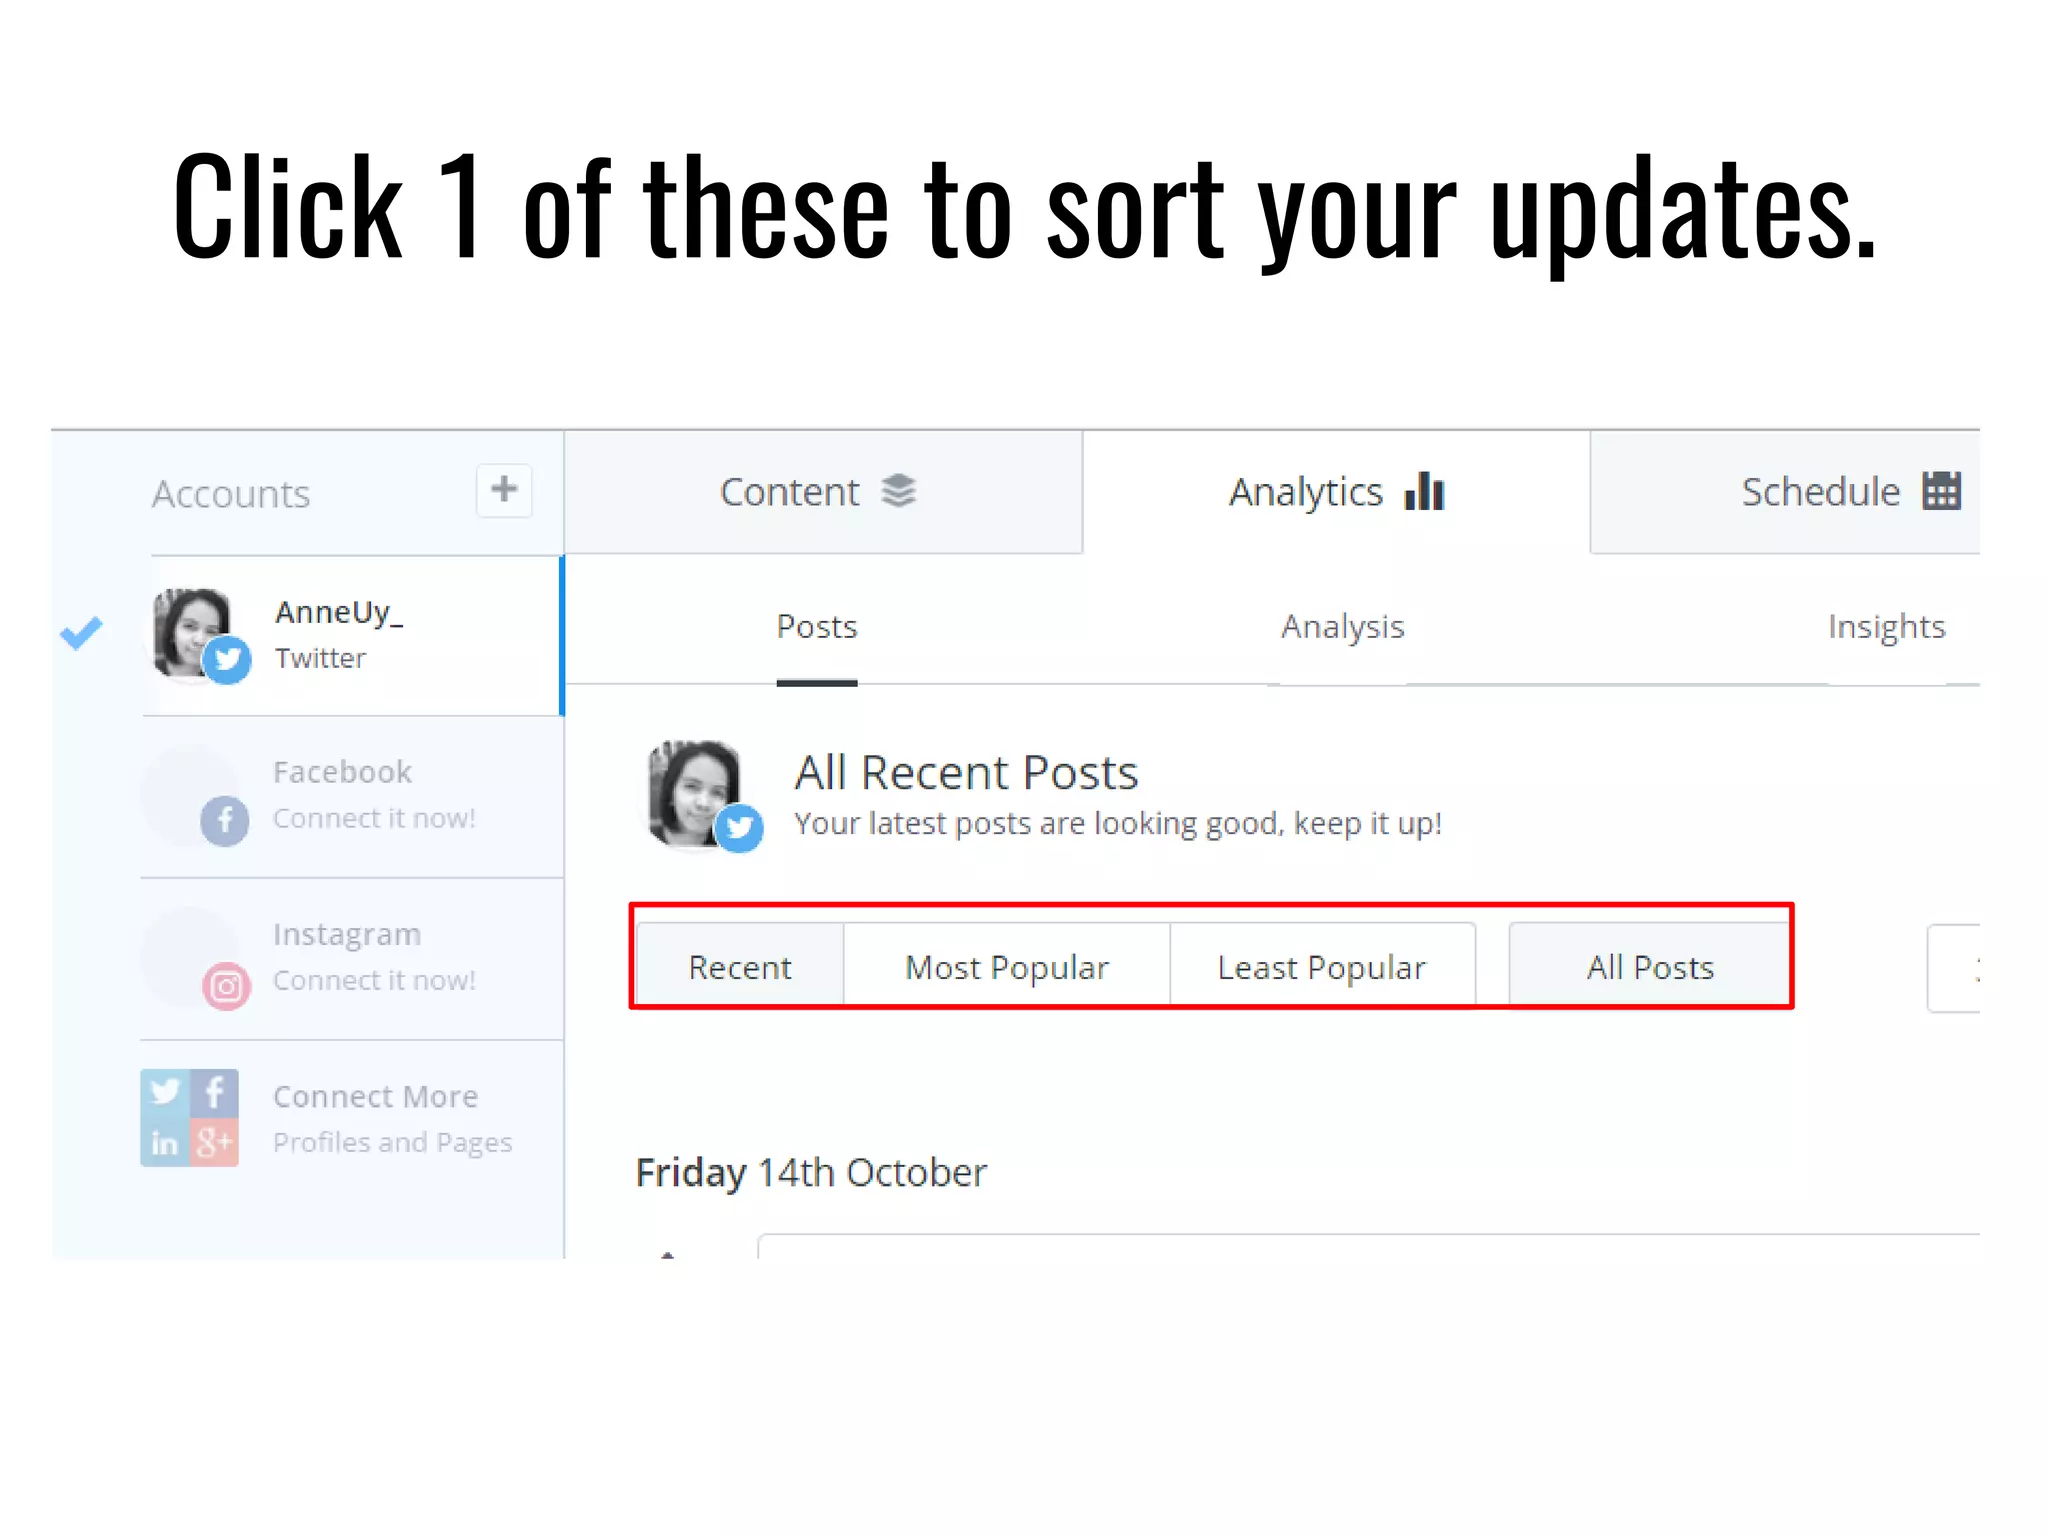
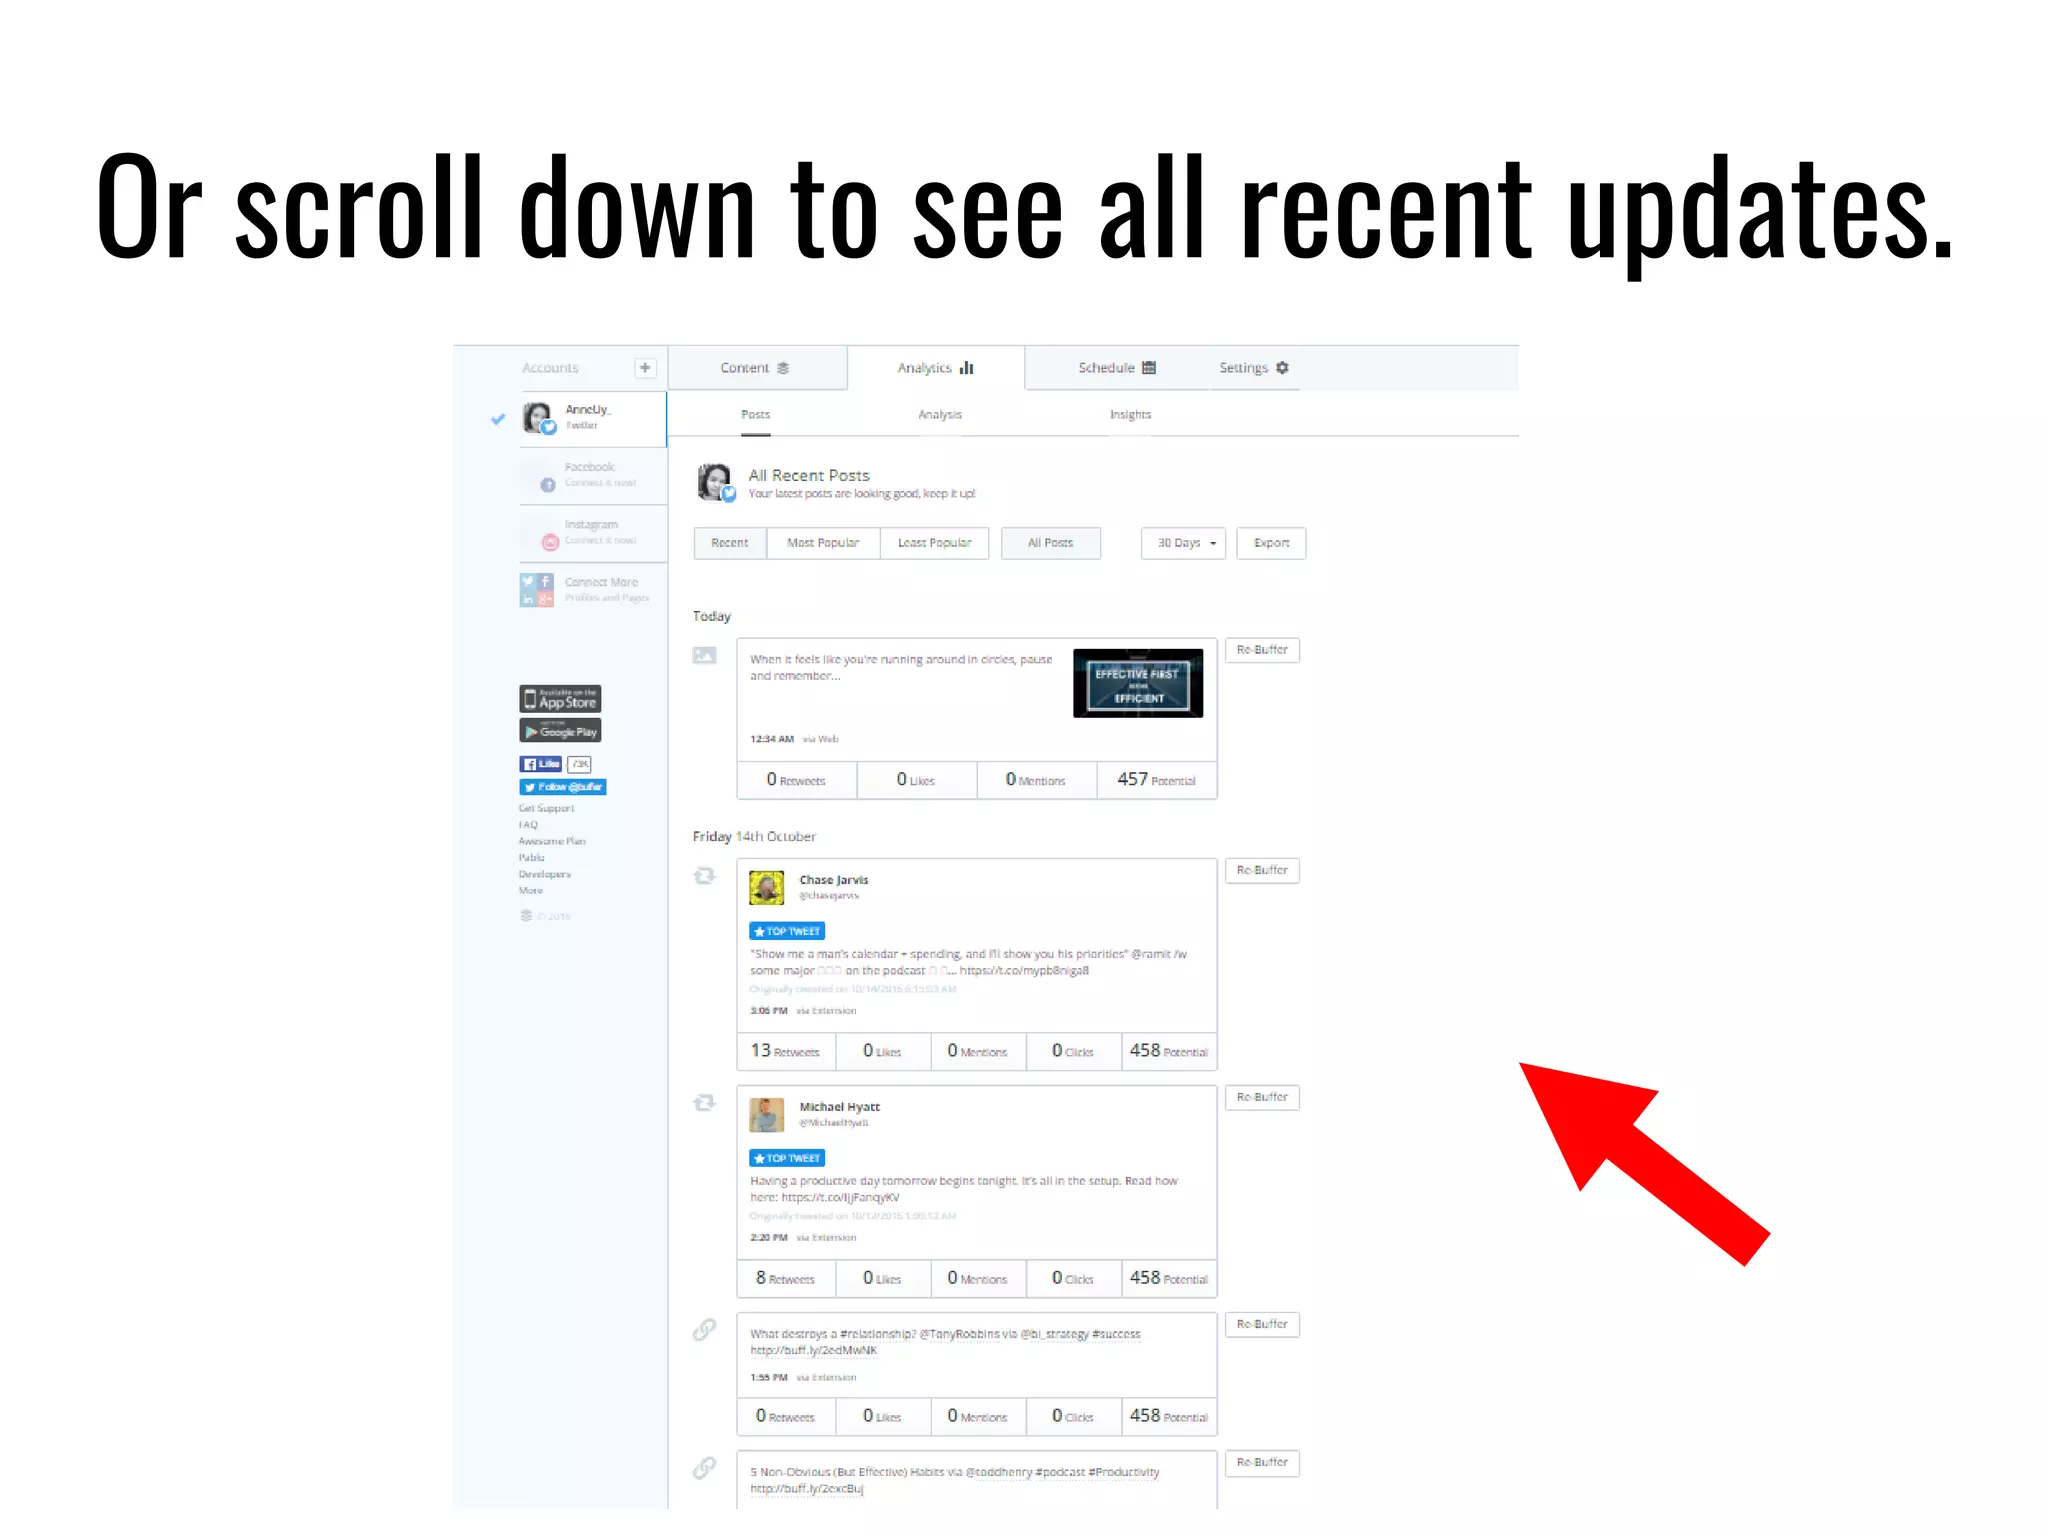
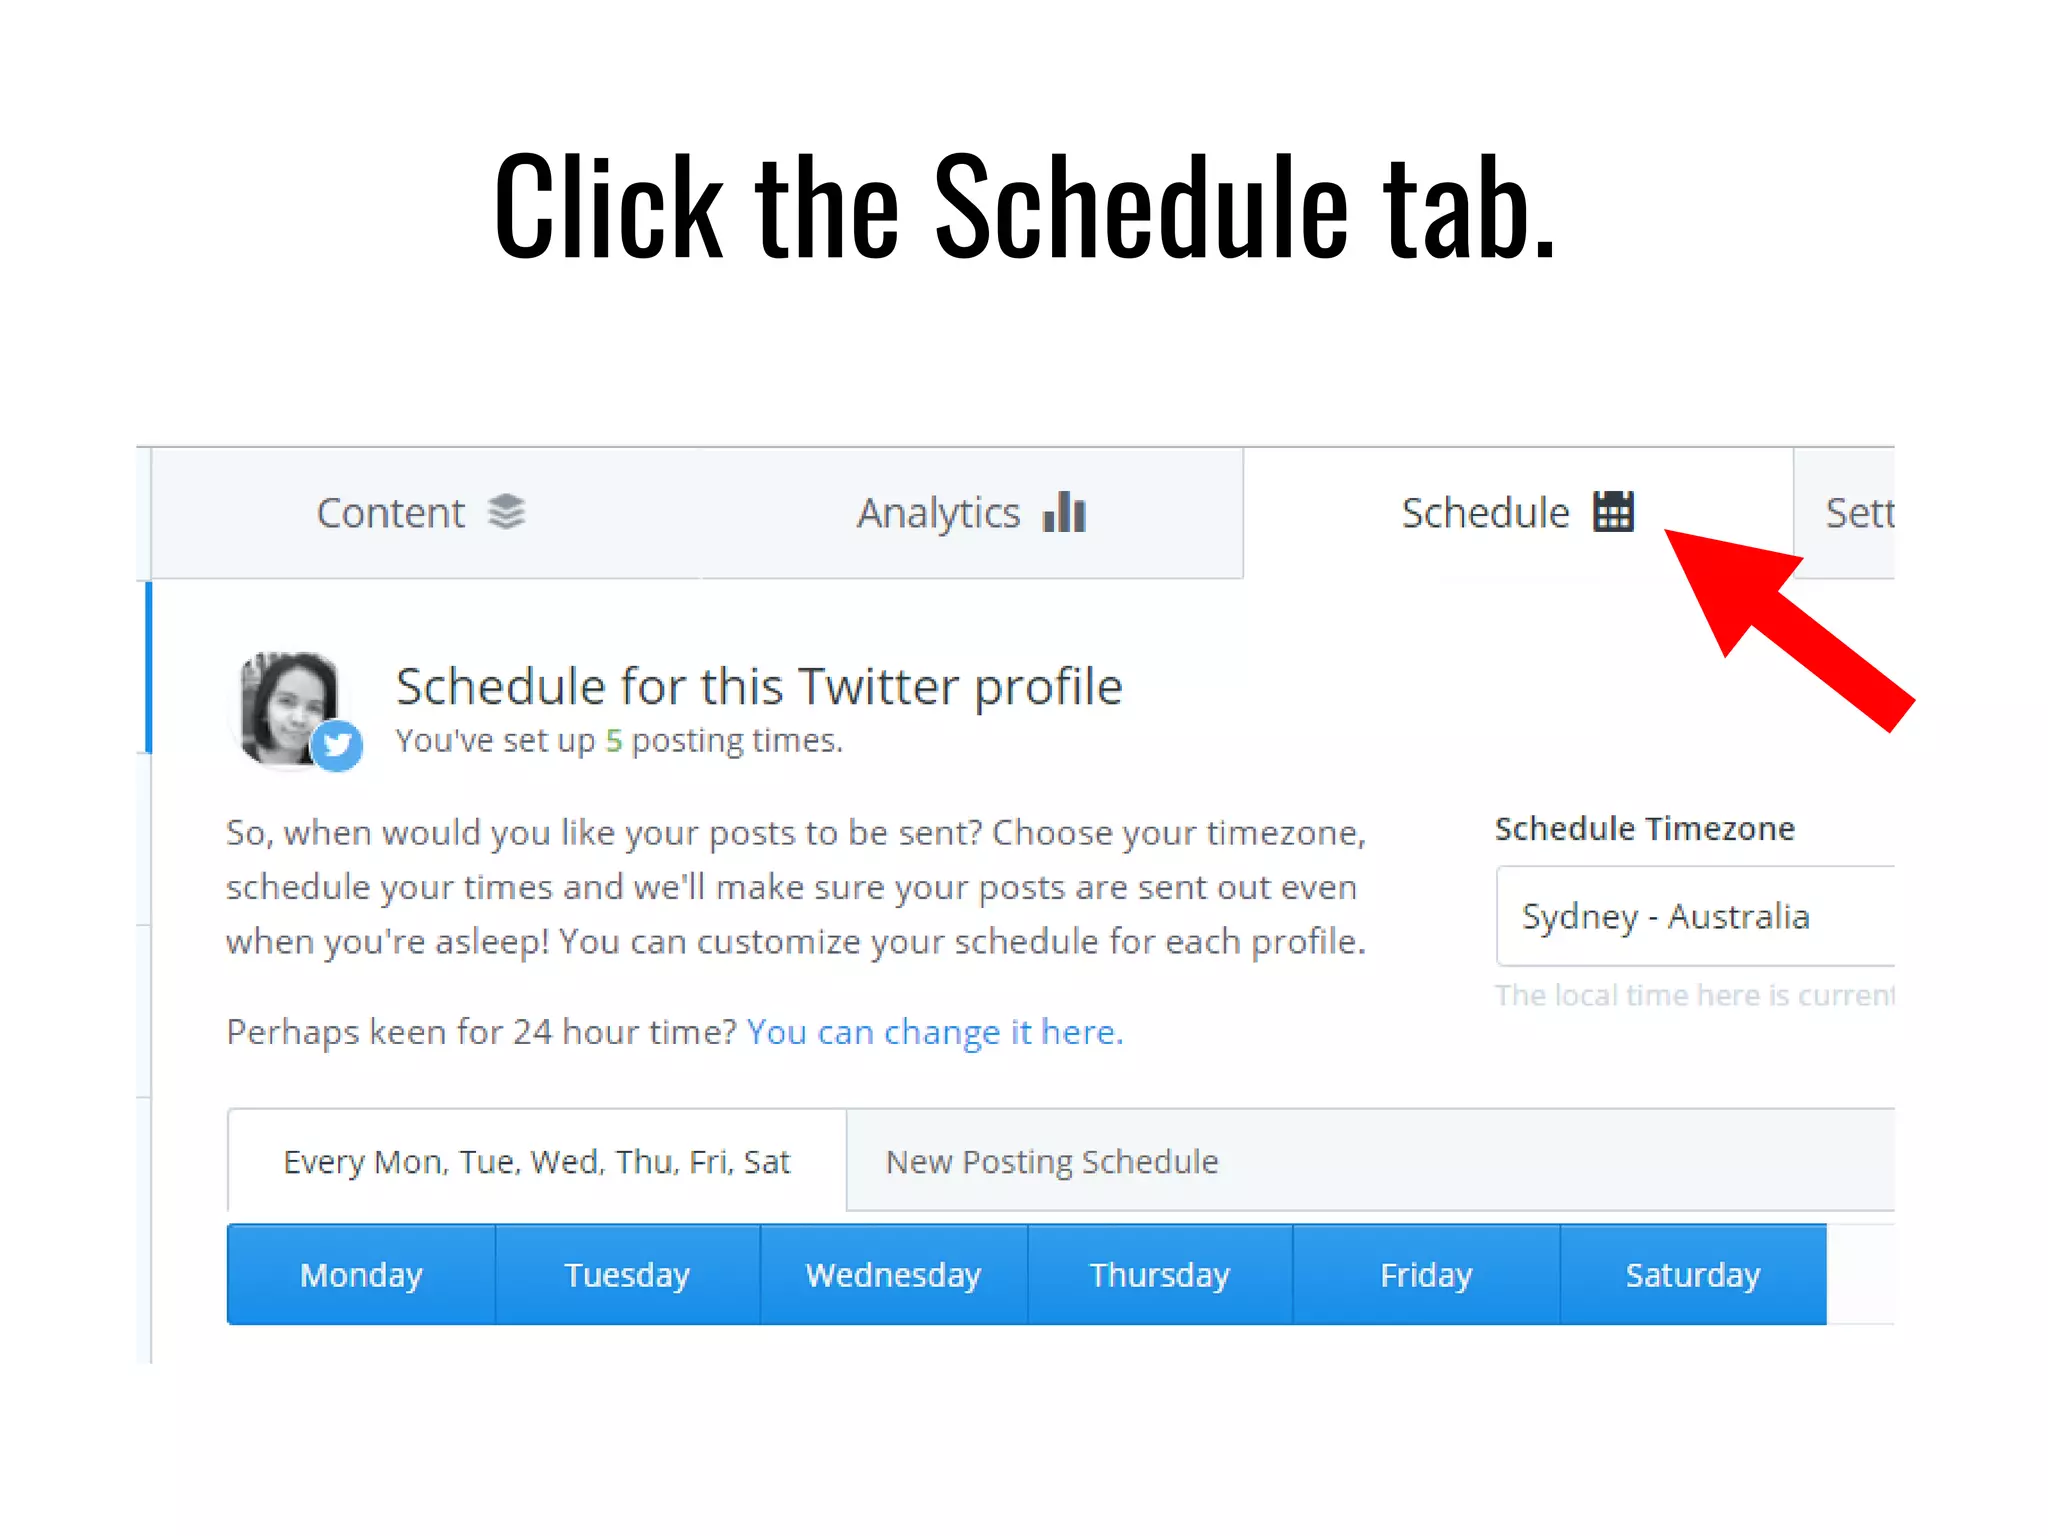
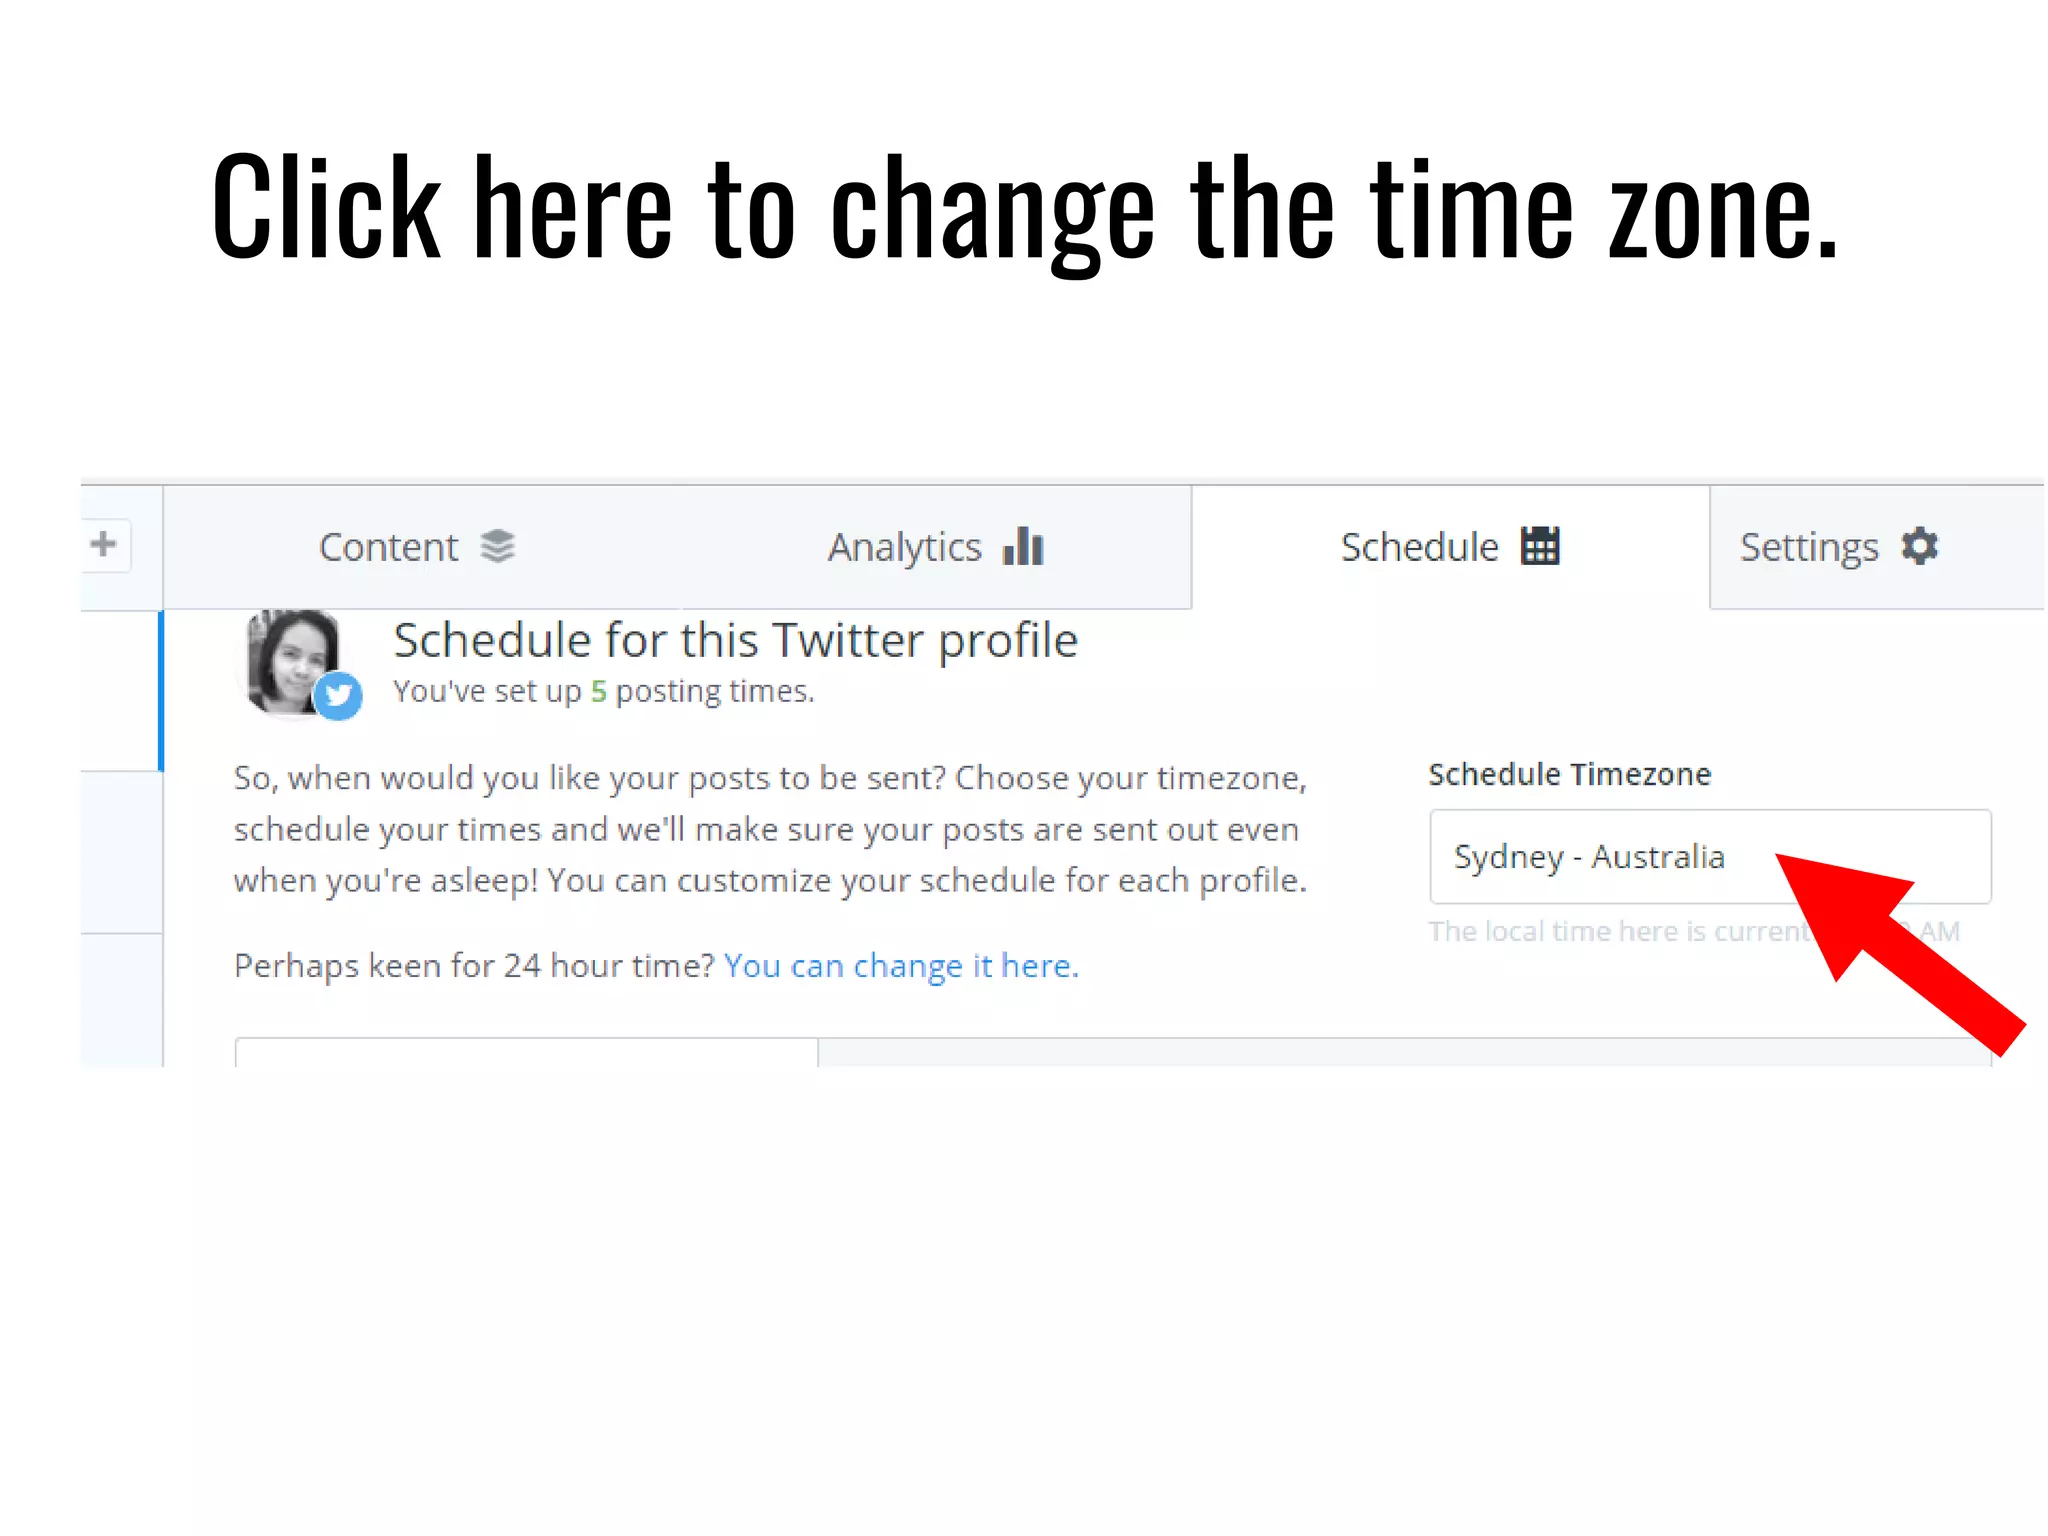
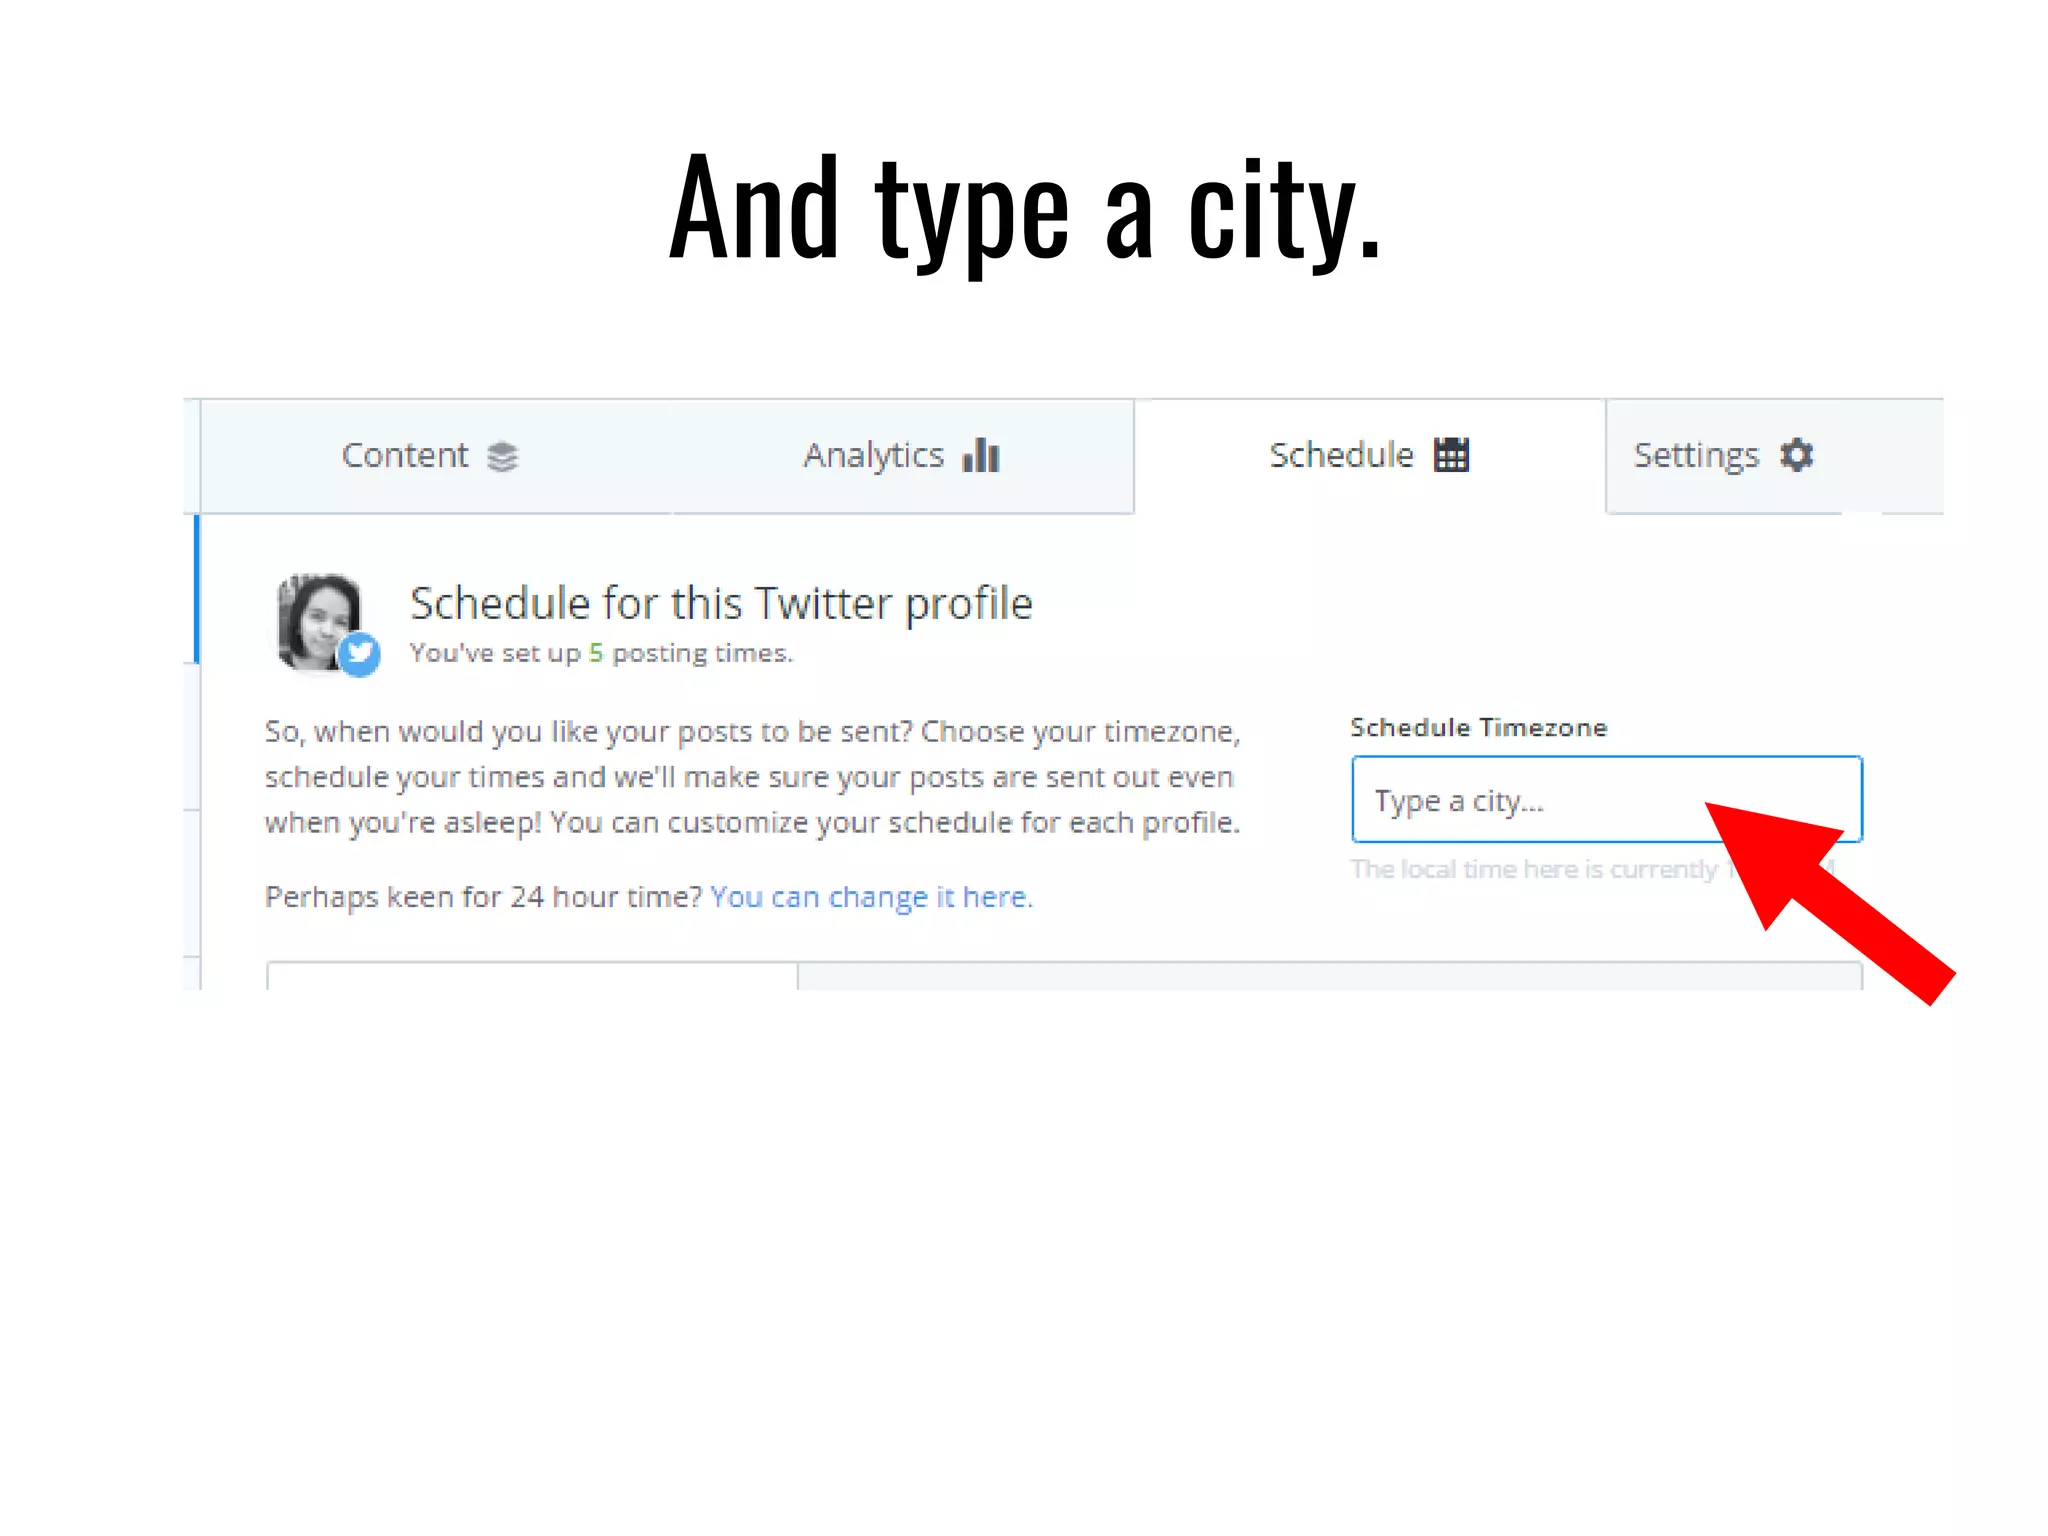
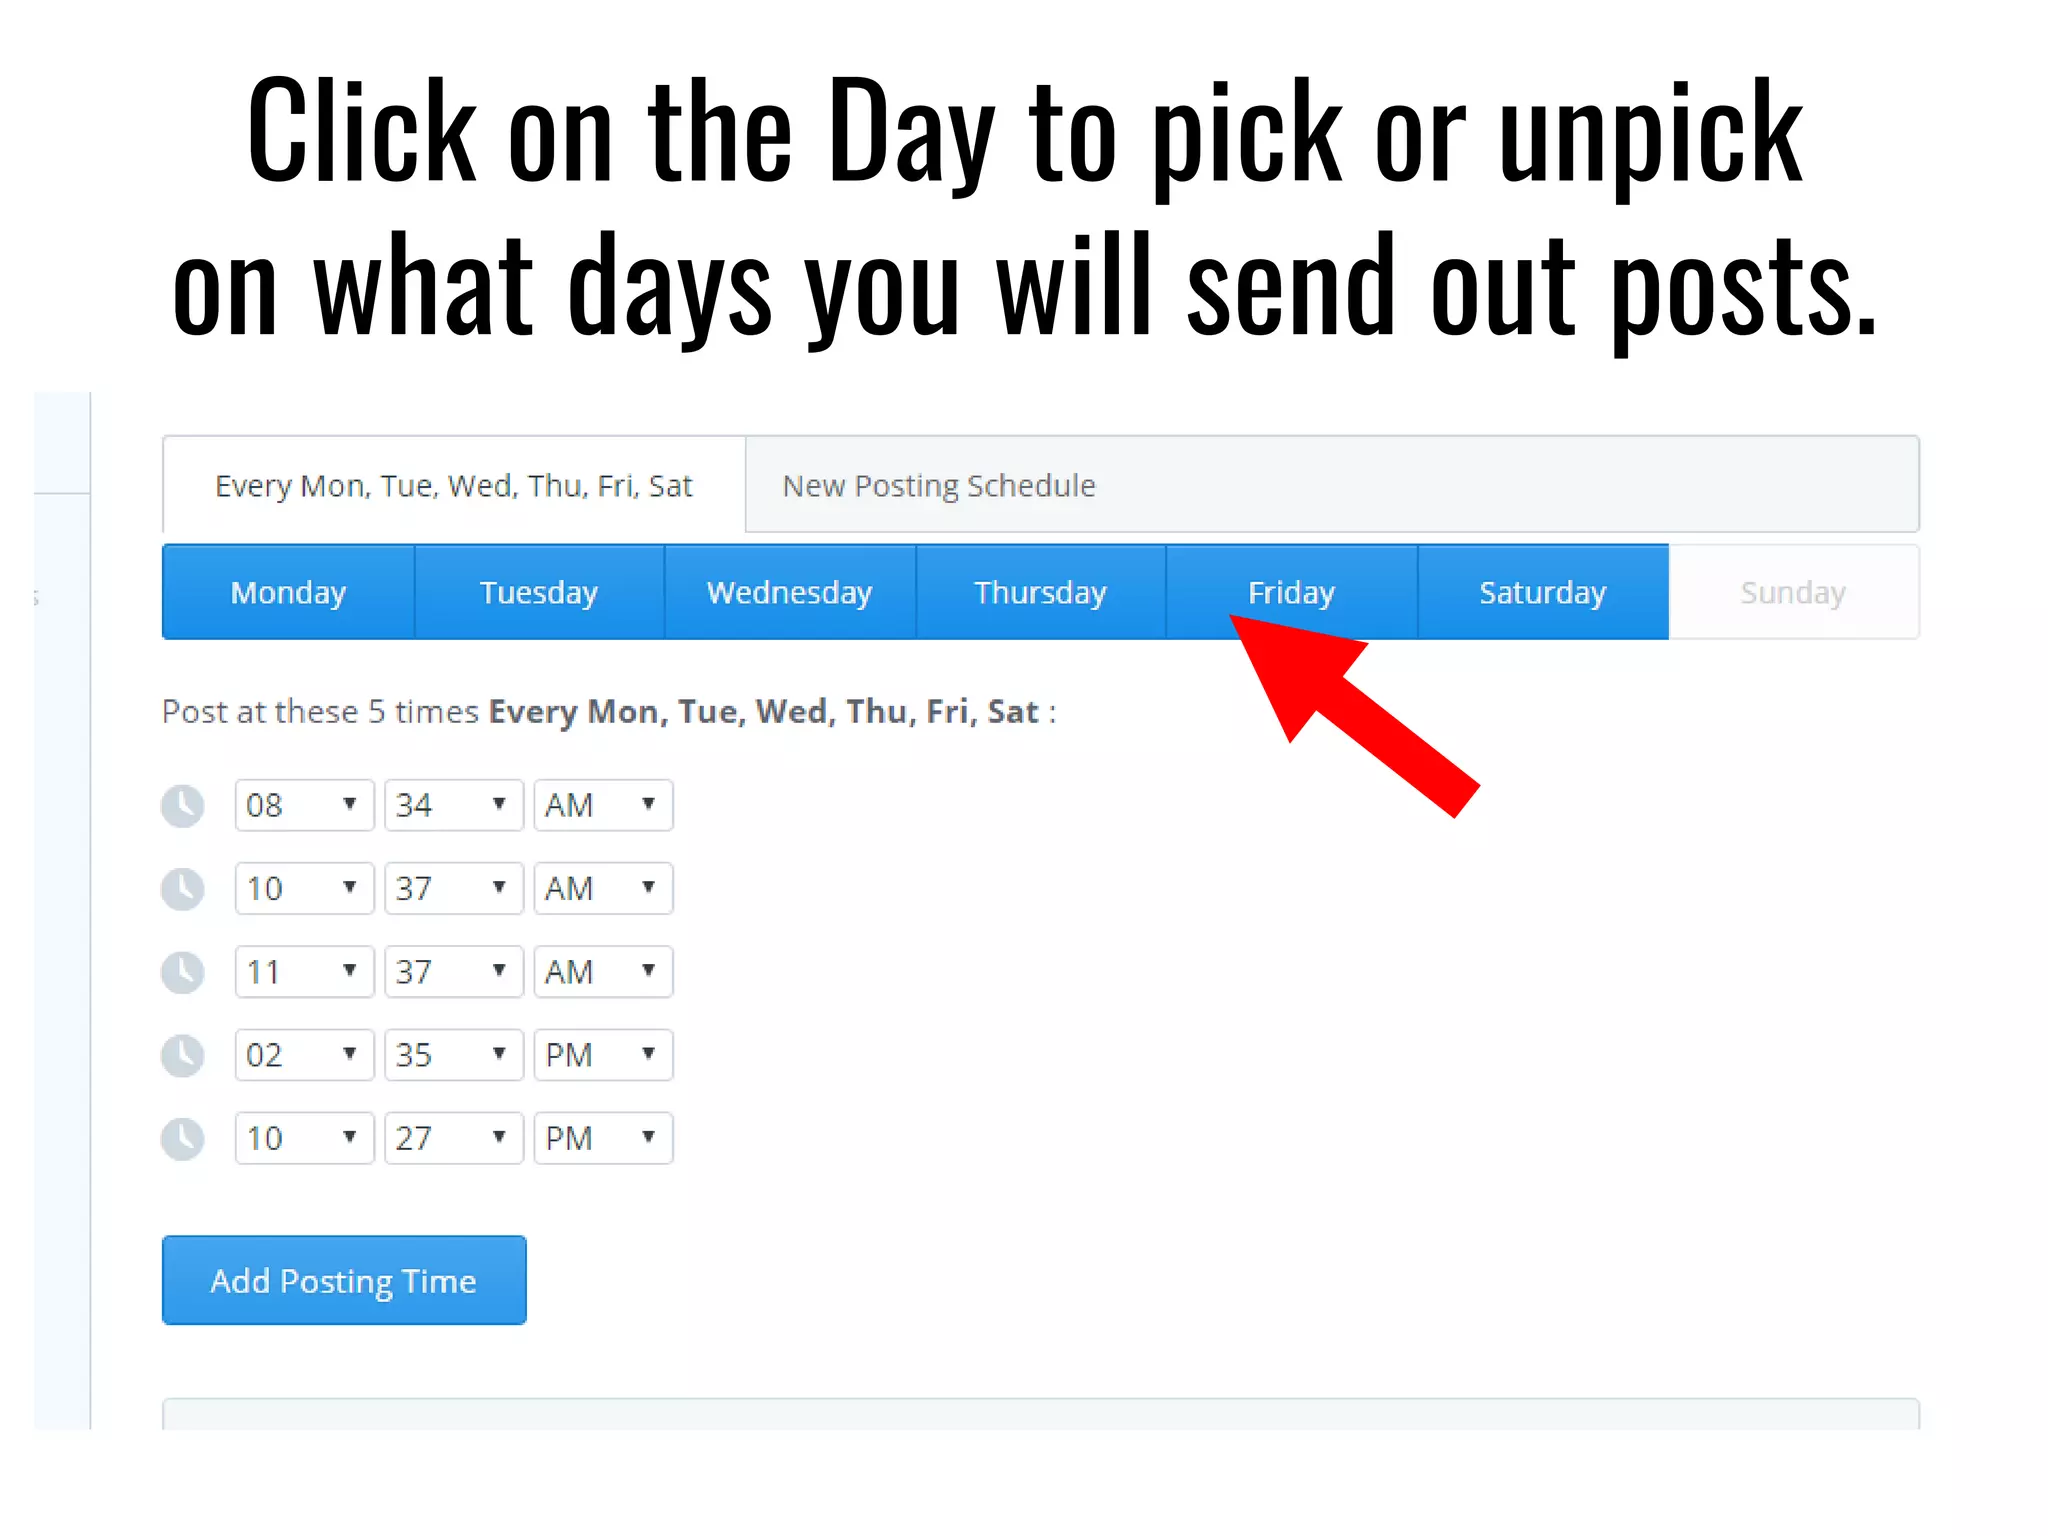
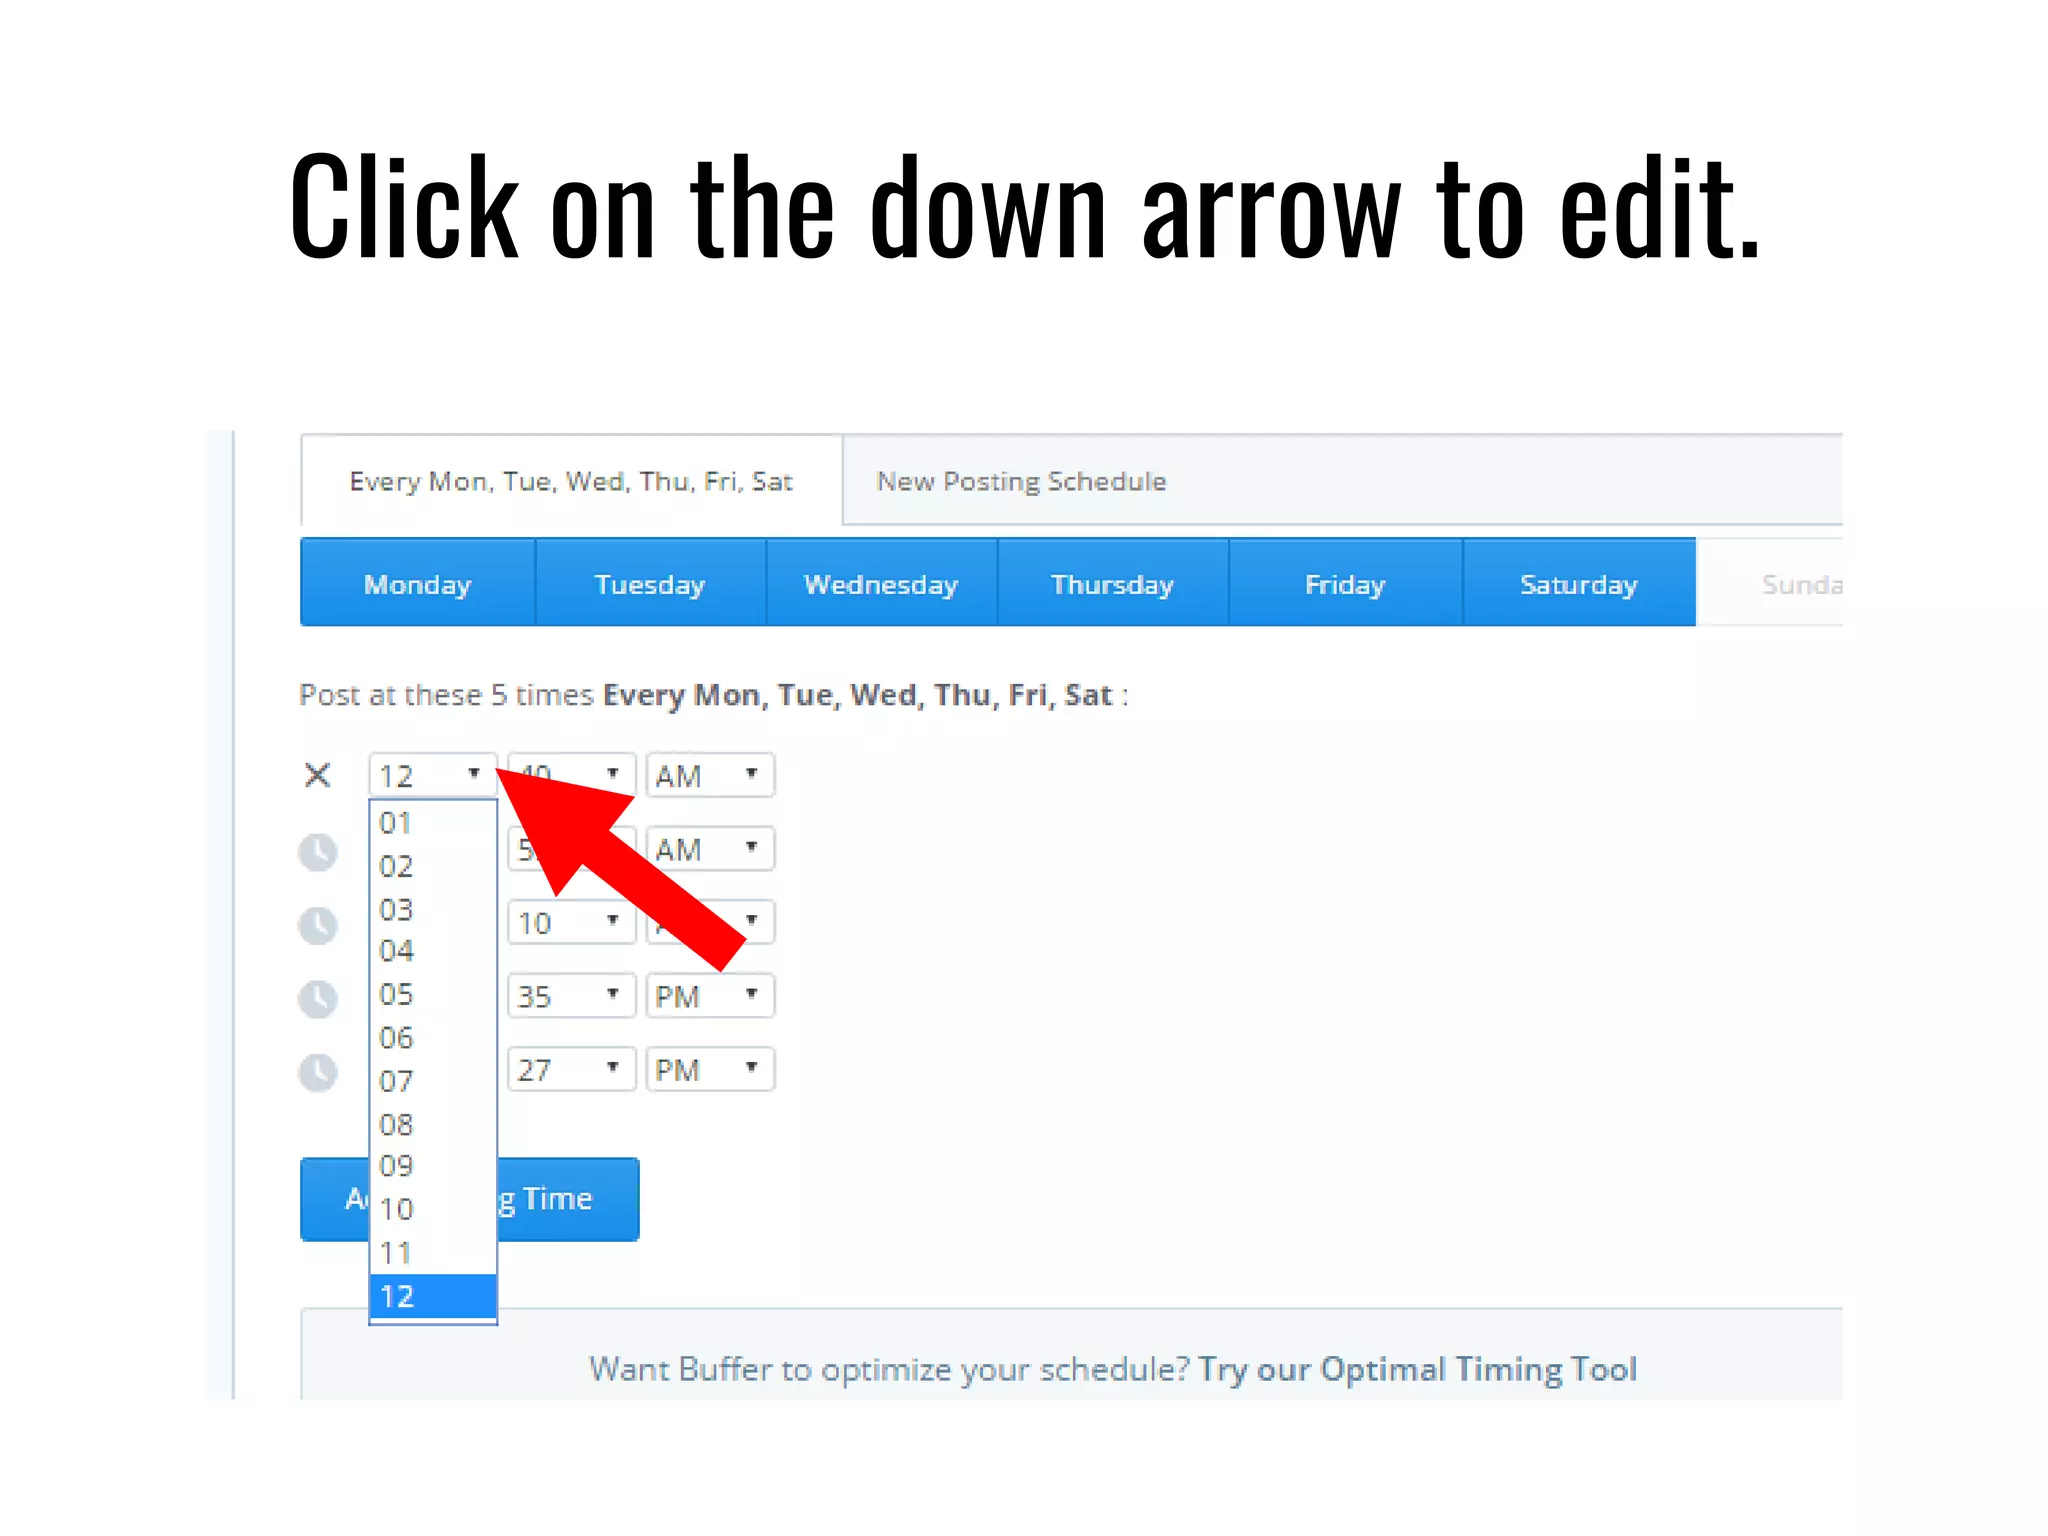
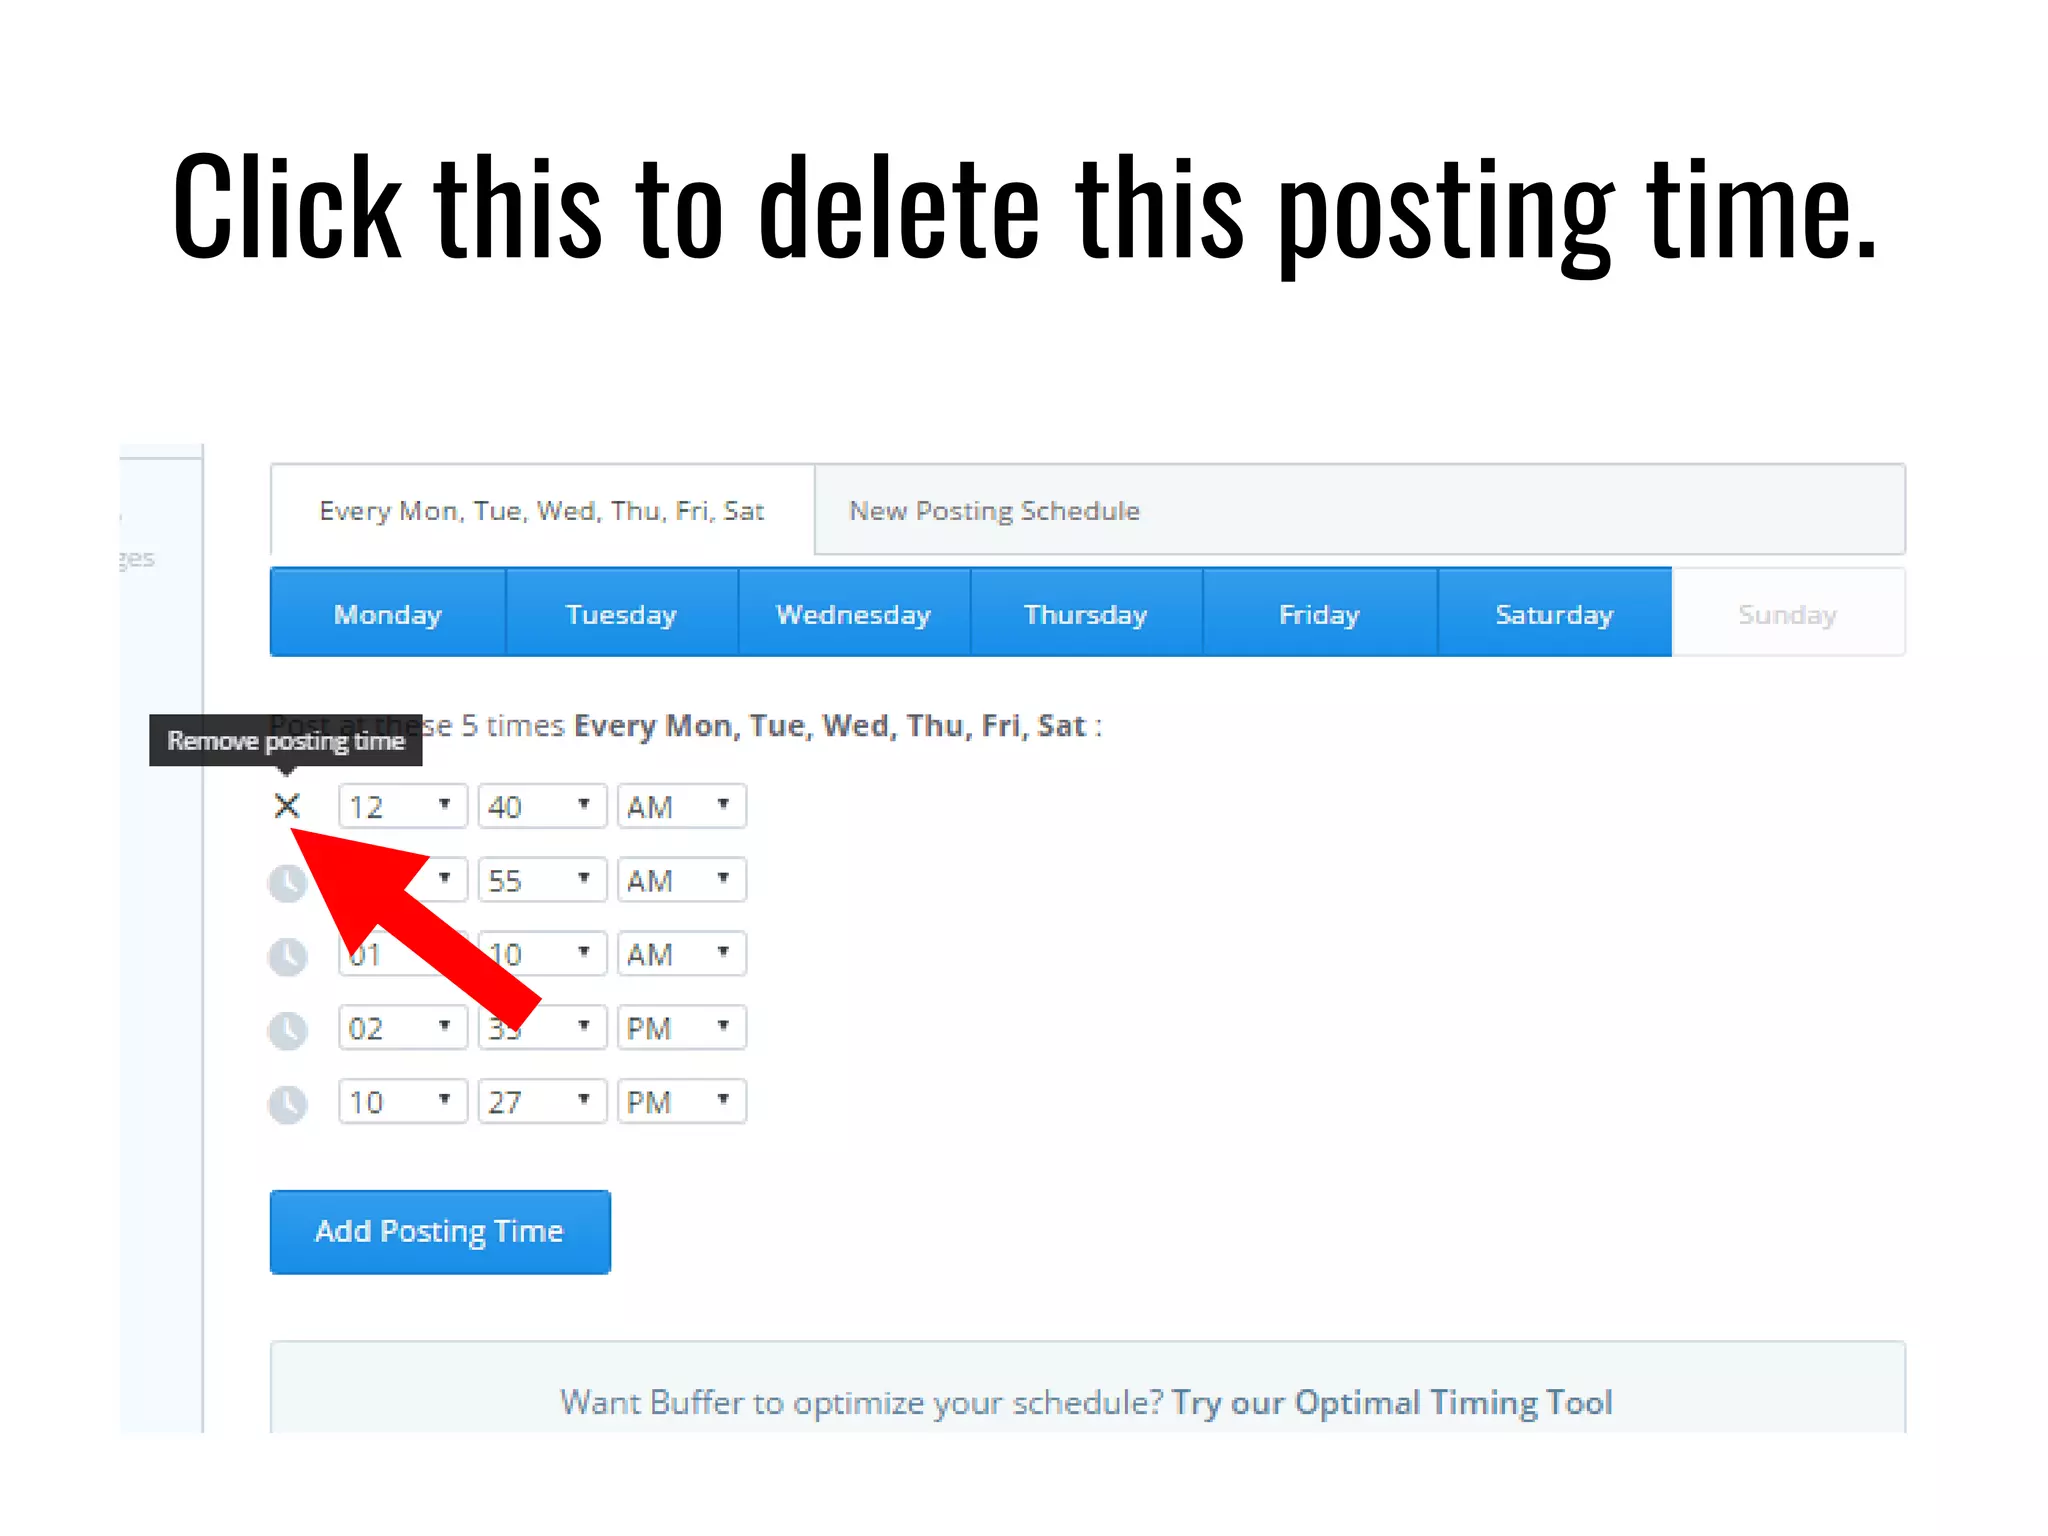
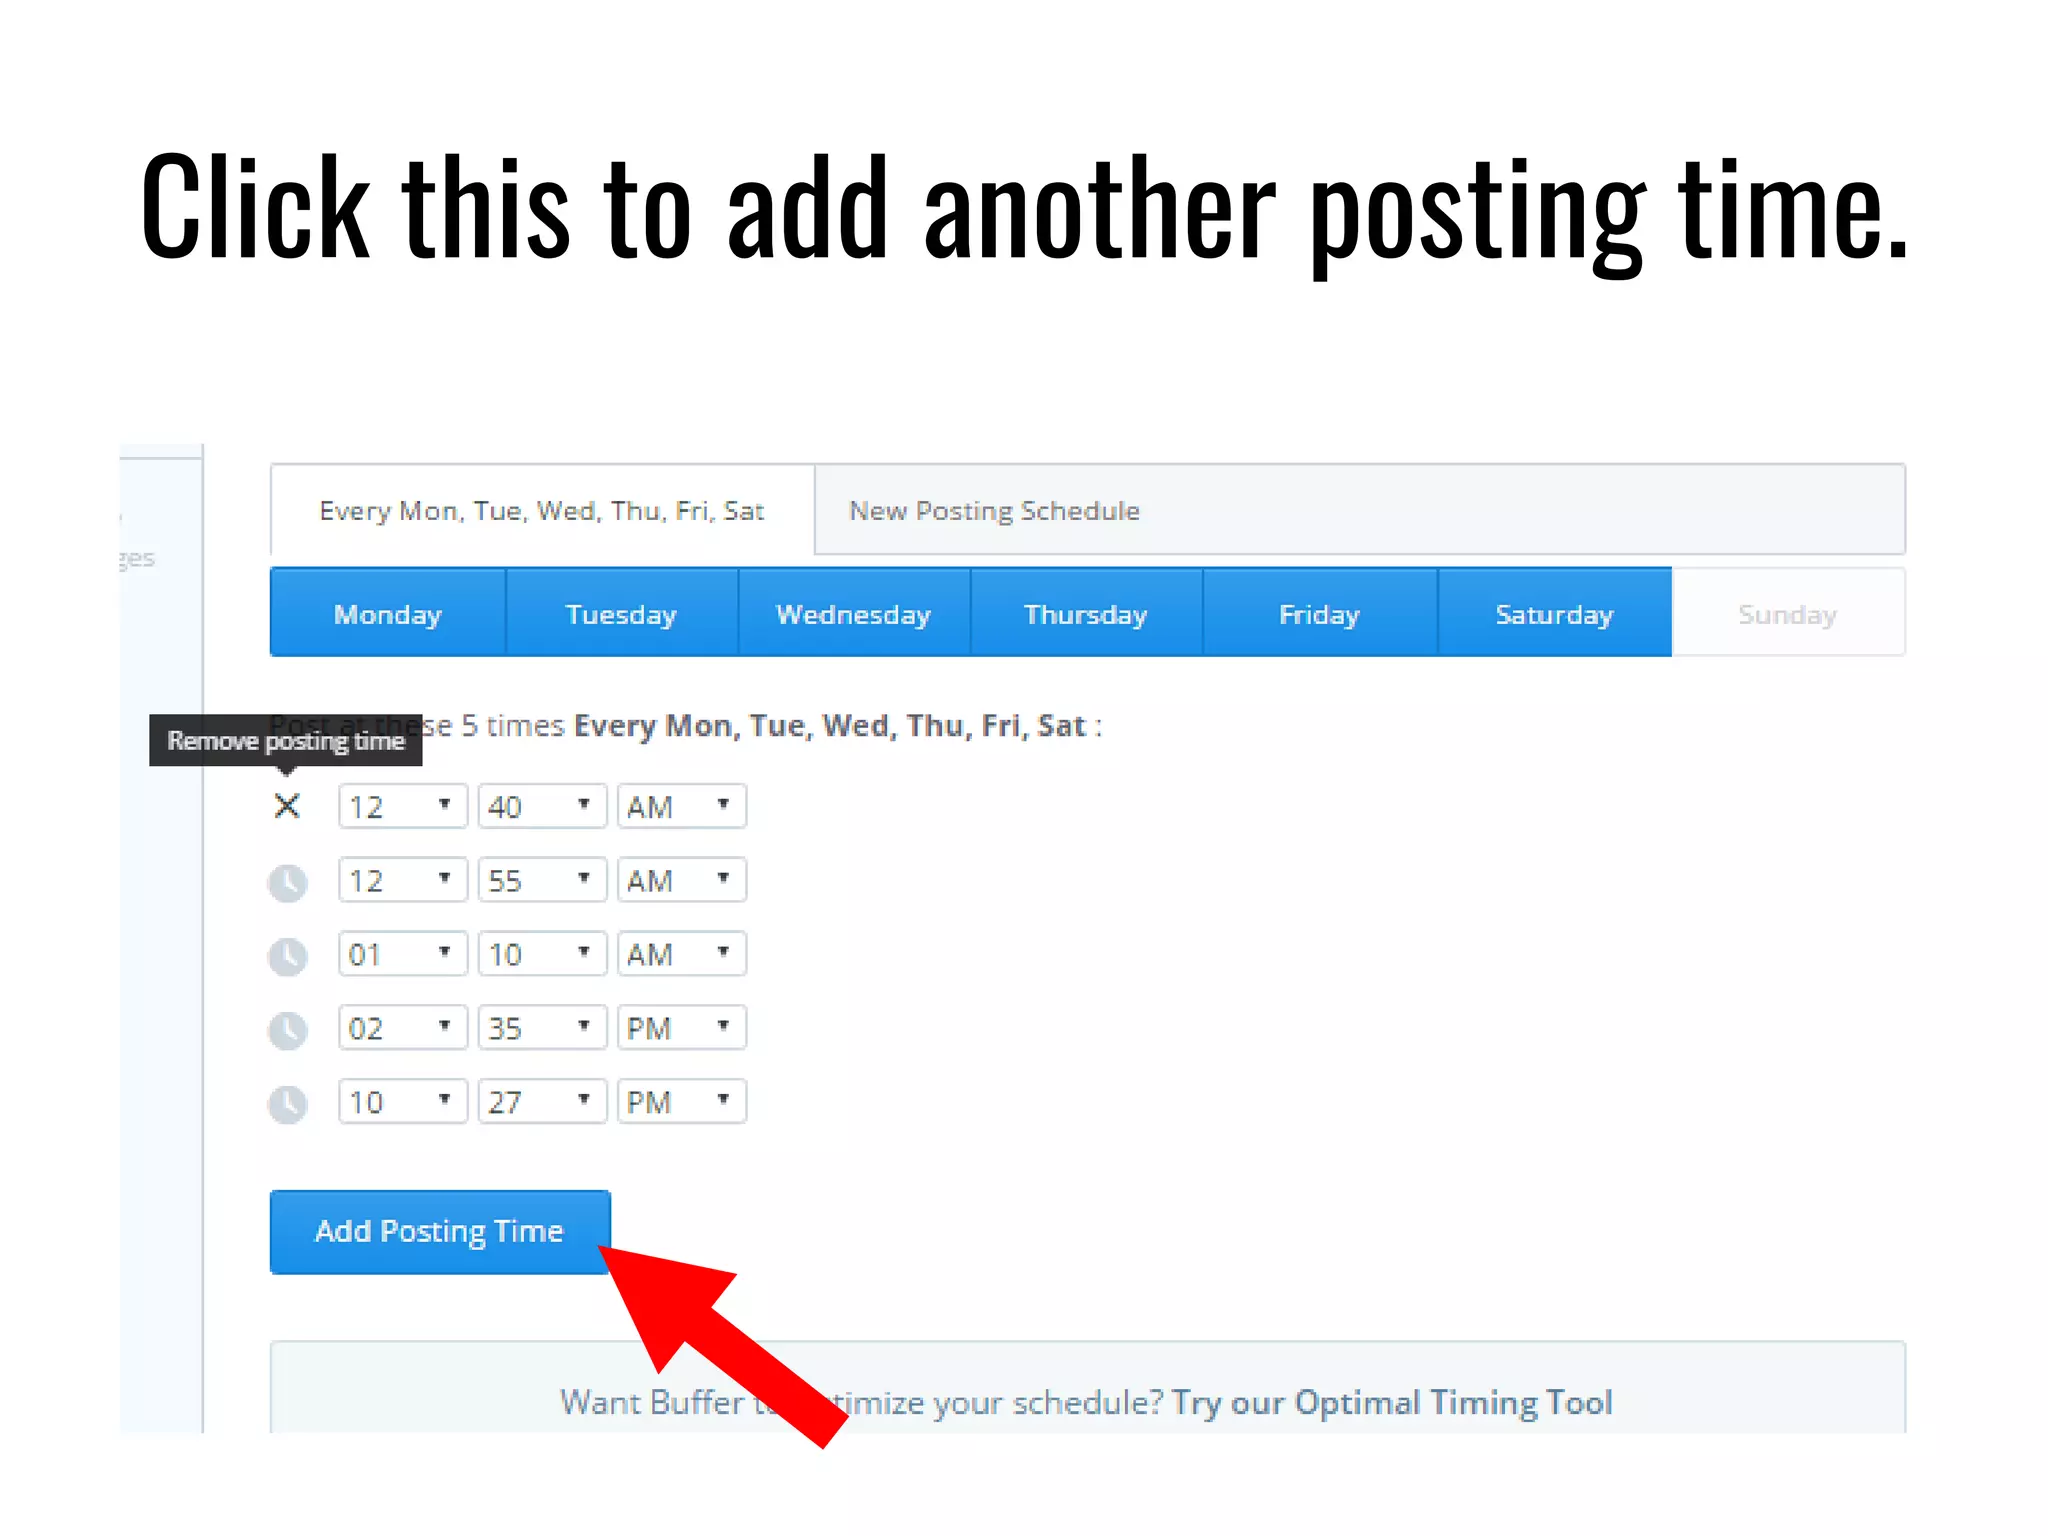
by: Anne Uy
buffer
For Scheduling Social Media Posts
A Beginner’s Guide to
Thank you!
This slide presentation is created by:
Anne Uy
Freelancer | Virtual Assistant
@AnneUy_
anne.uy7@gmail.com
Image credit: Designed by Freepik.com
What is buffer?
Buffer is a simple and easy-to-use
online tool/website…
…for automatic scheduling
of your Social Media posts.
Set your
posting times…
(aka the
schedule)
Image credit: Designed by Freepik.com
…and what posts to share.
Image credit: Designed by Freepik.com
Buffer sends out your updates
on your preset schedule.
Image credit: Designed by D3images - Freepik.com
Why use buffer?
Buffer frees you from manual posting
that takes time…
Image credit: Designed by Jcomp - Freepik.com
…makes your updates evenly spaced out …
Image credit: Designed by Freepik.com
…sends your posts even when you sleep…
Image credit: Designed by Freepik.com
…or away.
Image credit: Designed by Freepik.com
Currently, Buffer supports
6 Social Media platforms.
Available
on your
PC, iOS,
and Android
devices.
Choose from free and paid plans today.
Let’s get started
Sign up for a
free Buffer account
In Google Search, type “buffer.com”…
…and press “Enter”.
Click this.
Enter your email.
Enter your chosen password.
Click “Create Account”.
Let’s choose Twitter.
Click this.
Enter your Twitter email…
…password…
…and click this.
Then wait.
Click “Sign In”
Your Twitter account is
now connected to Buffer.
Click this to add your Facebook account.
Click this to add your LinkIn profile.
For now, lets just skip these.
Click here.
Click here to choose your time zone…
Click here to choose
your preferred time format.
When done, click this.
Click this.
Click this if you want
to change this number.
Then click this.
Click this.
Choose and click 1 of these.
Then click this.
Click this.
This is your Buffer dashboard.
The left side contains
all your Social Media accounts.
In this case, you only your Twitter account.
Click this to connect more
social media accounts to Buffer.
How to schedule your
posts in Buffer
Click on the social media account.
In this case, Twitter.
Under the Content tab...
…is Queue.
Queue stores all your posts here.
Click inside the text box.
Type your message here.
Click “Add to Queue”.
Or you can click the down arrow...
…and choose 1 of these 3 options.
Here’s your first Tweet.
Click this.
Here’s your first update for today.
Scheduled to be send out on this time.
How to edit your
updates in Buffer
Click the update you want to edit.
Click here to edit the text.
Click here to change the date.
Click here to change the time.
Click “Save”.
How to schedule
a post with image in Buffer
Click inside the text box.
Type your message/update here.
Click this.
Find the image that you want to add.
Click “Open”.
Your image is now uploading to Buffer.
When done your image will appear here.
You can add 4 images per post.
To add more image, click this.
When done, click this.
Here’s your new post with the image.
You now have 2 posts in Queue.
You can also drag and drop your updates
to change its order in Queue
Click and hold the icon in front of the post.
…then drag and drop it in its new position.
How to use Buffer Analytics
Click the Analytics tab.
Click 1 of these to sort your updates.
Or scroll down to see all recent updates.
How to change your
posting schedule in Buffer
Click the Schedule tab.
Click here to change the time zone.
And type a city.
Click on the Day to pick or unpick
on what days you will send out posts.
Click on the down arrow to edit.
Click this to delete this posting time.
Click this to add another posting time.
That’s it!
You can now
start using
Buffer!
Image credit: Designed by Freepik.com
Thank you for viewing!
Connect with me:
Anne Uy
Freelancer | Virtual Assistant
@AnneUy_
anne.uy7@gmail.com
Image credit: Designed by Freepik.com

[Easy] Use Buffer to Schedule Social Media Posts