How to Password Protect a Folder in Windows10
•Download as PPTX, PDF•
0 likes•204 views

This tutorial provides 3 ways to protect files and folders in Windows 10. Lock a file and folder in Windows 10 Pro using folder encryption; Password protects a folder with 7-Zip; Password protects a folder using a batch file.

Recommended
More Related Content
What's hot
Similar to How to Password Protect a Folder in Windows10
Similar to How to Password Protect a Folder in Windows10 (20)
More from moli he
More from moli he (6)
Recently uploaded
Recently uploaded (20)
How to Password Protect a Folder in Windows10
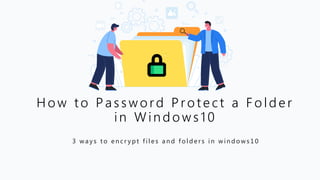
- 1. 3 w a y s t o e n c r y p t f i l e s a n d f o l d e r s i n w i n d o w s 1 0 How to Password Protect a Folder in Windows10
- 2. 1. Lock a folder in Windows 10 Pro using folder encryption 2. Password protect a folder with 7-Zip 3. Password protect a folder using a batch file CONTENTS
- 3. Lock a folder in Windows 10 Pro using folder encryption If you’re running Windows 10 Pro, there is a built-in protection system, which locks a file to your account. That way, however, anyone using your PC and account would still have access.
- 4. How to Use Windows 10 Pro Folder Encryption 4 Step 1: Do a right-click on the folder you want to lock, and then click on Properties. Step 2: Click Advanced. Step 3: Check the box next to Encrypt contents to secure data and click OK. Step 4: Click Apply and when prompted, choose whether you want all folders within that directory to be encrypted, or merely the top-level one. When you’ve decided, click OK.
- 5. Password protect a folder with 7-Zip For most Windows users, adding a password to a folder requires a third-party archiving utility or some form of compression software. Options include 7-Zip and WinZip. They do a great job of password-protecting your important data.
- 6. How to create a password protected Zip file in Windows 10 6 Step 1: Navigate to the 7-Zip or WinZip download page and select the right download for you. Install and run it. Step 2: Locate the folder you wish to password protect, right-click and select: WinZip or 7- Zip > Add to archive. Step 3: Then, enter and re-enter your desired password for the folder in the text fields located on the right-hand side of the window. Click the OK button when finished and allow the utility to create a compressed. See Also: How to Create a Password Protected ZIP File with WinZip or 7-Zip
- 7. Password protect a folder using a batch file
- 8. How to Password protect a folder using a batch file 8 1. Open Notepad. 2. Copy the following codes and paste them into Notepad. cls @ECHO OFF title Folder Locker if EXIST "Control Panel.{21EC2020-3AEA-1069-A2DD-08002B30309D}" goto UNLOCK if NOT EXIST Locker goto MDLOCKER :CONFIRM echo Are you sure u want to Lock the folder(Y/N) set/p "cho=>" if %cho%==Y goto LOCK if %cho%==y goto LOCK if %cho%==n goto END if %cho%==N goto END echo Invalid choice. goto CONFIRM :LOCK ren Locker "Control Panel.{21EC2020-3AEA-1069-A2DD-08002B30309D}" attrib +h +s "Control Panel.{21EC2020-3AEA-1069-A2DD-08002B30309D}" echo Folder locked goto End :UNLOCK echo Enter password to Unlock folder set/p "pass=>"
- 9. 3. Change the password. 9 Locate if NOT “%pass%==your_password” goto FAIL in the code that you just pasted. And then change your password to the password of your choice.
- 10. 10 4. Save the file and choose a name a ensure that you add a .bat extension to your file. Also, make sure that the encoding type is ANSI. Click on Save.
- 11. 11 5. Double click on the BAT file that you just created. 6. Run the batch file by double-clicking it. You will see a folder with the name same as the BAT file. 7. Move the files and folders that you think are sensitive to the same folder which including the .bat file. 8 Double-click on the .bat file again. A Command Prompt will open and asking if you want to lock the folder. Type Y then press enter. 9. Done. No one can access your folder without the password.