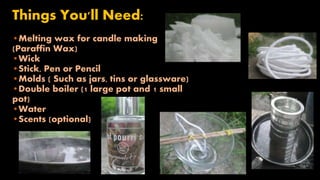
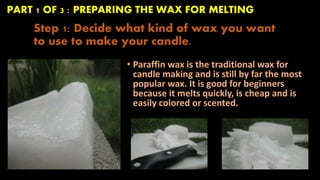
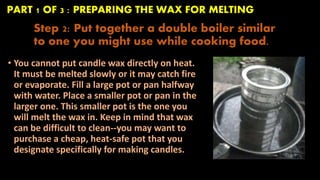
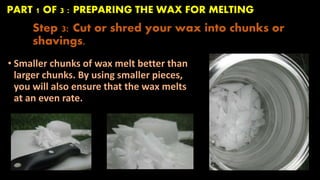
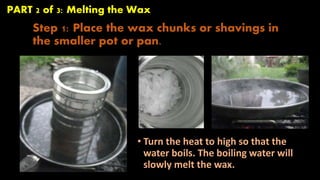
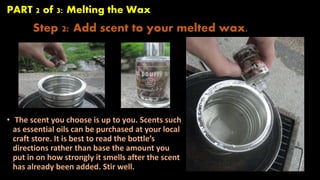
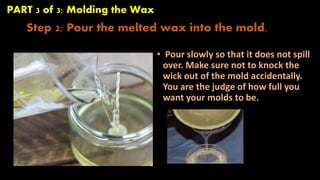
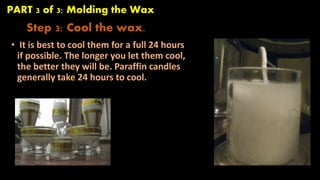
HOW TO MAKE 
HOMEMADE 
CANDLES.
Things You'll Need: 
•Melting wax for candle making 
(Paraffin Wax) 
•Wick 
•Stick, Pen or Pencil 
•Molds ( Such as jars, tins or glassware) 
•Double boiler (1 large pot and 1 small 
pot) 
•Water 
•Scents (optional)
PART 1 OF 3 : PREPARING THE WAX FOR MELTING 
Step 1: Decide what kind of wax you want 
to use to make your candle. 
• Paraffin wax is the traditional wax for 
candle making and is still by far the most 
popular wax. It is good for beginners 
because it melts quickly, is cheap and is 
easily colored or scented.
PART 1 OF 3 : PREPARING THE WAX FOR MELTING 
Step 2: Put together a double boiler similar 
to one you might use while cooking food. 
• You cannot put candle wax directly on heat. 
It must be melted slowly or it may catch fire 
or evaporate. Fill a large pot or pan halfway 
with water. Place a smaller pot or pan in the 
larger one. This smaller pot is the one you 
will melt the wax in. Keep in mind that wax 
can be difficult to clean--you may want to 
purchase a cheap, heat-safe pot that you 
designate specifically for making candles.
PART 1 OF 3 : PREPARING THE WAX FOR MELTING 
Step 3: Cut or shred your wax into chunks or 
shavings. 
• Smaller chunks of wax melt better than 
larger chunks. By using smaller pieces, 
you will also ensure that the wax melts 
at an even rate.
PART 2 of 3: Melting the Wax 
Step 1: Place the wax chunks or shavings in 
the smaller pot or pan. 
• Turn the heat to high so that the 
water boils. The boiling water will 
slowly melt the wax.
PART 2 of 3: Melting the Wax 
Step 2: Add scent to your melted wax. 
• The scent you choose is up to you. Scents such 
as essential oils can be purchased at your local 
craft store. It is best to read the bottle’s 
directions rather than base the amount you 
put in on how strongly it smells after the scent 
has already been added. Stir well.
PART 2 of 3: Melting the Wax 
Step 3: Place a wick in the center of the candle 
mold. 
• The wick should be in the center of the candle mold with 
about two inches sticking out of the candle. You can 
adhere the wick to the bottom of your tin using double-stick 
adhesive. To keep the wick in place, loop the end 
that will be out of the wax around the center of a stick, 
pen or pencil. Make sure the wick hangs down straight 
into the center of the mold.
PART 3 of 3: Molding the Wax 
Step 1: Prepare your molds. 
• You can use tins, mason jars, 
old teacups, orany sort of 
container that you know can 
withstand heat. Metal tins are 
generally the safest way to go 
but as long as you know your 
container can stand up to heat, 
you can really use whatever you 
like. Place them on a flat surface 
in your protected workspace.
Step 2: Pour the melted wax into the mold. 
• Pour slowly so that it does not spill 
over. Make sure not to knock the 
wick out of the mold accidentally. 
You are the judge of how full you 
want your molds to be. 
PART 3 of 3: Molding the Wax
PART 3 of 3: Molding the Wax 
Step 3: Cool the wax. 
• It is best to cool them for a full 24 hours 
if possible. The longer you let them cool, 
the better they will be. Paraffin candles 
generally take 24 hours to cool.

How to Make Homemade Candles

  • 1.
    HOW TO MAKE HOMEMADE CANDLES.
  • 2.
    Things You'll Need: •Melting wax for candle making (Paraffin Wax) •Wick •Stick, Pen or Pencil •Molds ( Such as jars, tins or glassware) •Double boiler (1 large pot and 1 small pot) •Water •Scents (optional)
  • 3.
    PART 1 OF3 : PREPARING THE WAX FOR MELTING Step 1: Decide what kind of wax you want to use to make your candle. • Paraffin wax is the traditional wax for candle making and is still by far the most popular wax. It is good for beginners because it melts quickly, is cheap and is easily colored or scented.
  • 4.
    PART 1 OF3 : PREPARING THE WAX FOR MELTING Step 2: Put together a double boiler similar to one you might use while cooking food. • You cannot put candle wax directly on heat. It must be melted slowly or it may catch fire or evaporate. Fill a large pot or pan halfway with water. Place a smaller pot or pan in the larger one. This smaller pot is the one you will melt the wax in. Keep in mind that wax can be difficult to clean--you may want to purchase a cheap, heat-safe pot that you designate specifically for making candles.
  • 5.
    PART 1 OF3 : PREPARING THE WAX FOR MELTING Step 3: Cut or shred your wax into chunks or shavings. • Smaller chunks of wax melt better than larger chunks. By using smaller pieces, you will also ensure that the wax melts at an even rate.
  • 6.
    PART 2 of3: Melting the Wax Step 1: Place the wax chunks or shavings in the smaller pot or pan. • Turn the heat to high so that the water boils. The boiling water will slowly melt the wax.
  • 7.
    PART 2 of3: Melting the Wax Step 2: Add scent to your melted wax. • The scent you choose is up to you. Scents such as essential oils can be purchased at your local craft store. It is best to read the bottle’s directions rather than base the amount you put in on how strongly it smells after the scent has already been added. Stir well.
  • 8.
    PART 2 of3: Melting the Wax Step 3: Place a wick in the center of the candle mold. • The wick should be in the center of the candle mold with about two inches sticking out of the candle. You can adhere the wick to the bottom of your tin using double-stick adhesive. To keep the wick in place, loop the end that will be out of the wax around the center of a stick, pen or pencil. Make sure the wick hangs down straight into the center of the mold.
  • 9.
    PART 3 of3: Molding the Wax Step 1: Prepare your molds. • You can use tins, mason jars, old teacups, orany sort of container that you know can withstand heat. Metal tins are generally the safest way to go but as long as you know your container can stand up to heat, you can really use whatever you like. Place them on a flat surface in your protected workspace.
  • 10.
    Step 2: Pourthe melted wax into the mold. • Pour slowly so that it does not spill over. Make sure not to knock the wick out of the mold accidentally. You are the judge of how full you want your molds to be. PART 3 of 3: Molding the Wax
  • 11.
    PART 3 of3: Molding the Wax Step 3: Cool the wax. • It is best to cool them for a full 24 hours if possible. The longer you let them cool, the better they will be. Paraffin candles generally take 24 hours to cool.