How to insert a picture in word-PPT Tutorial
•Download as PPT, PDF•
1 like•962 views
Another assignment from Alvin Trusty's EDFI560 class. A PPT "how to" insert a picture in a Microsoft Word document.
Report
Share
Report
Share

Recommended
Inserting a Picture into Word
To insert a picture into a Word document, place the cursor where the picture is needed, click Insert and Picture, select the image file, and insert it. The picture can then be formatted by specifying its height, cropping the width, and centering it. Finally, right click the picture and select Tight wrap text to finish inserting the picture.
Insert a picture in Word
To insert and format a picture in a document, place the cursor where the picture will go, insert the picture from the Insert tab, and crop and size the picture using the Format tab. The picture can then be cropped and resized until the height and width are equal, and text wrapping can be set to tight to wrap text around the picture.
Technology and Education
To insert a picture into a Word document, place the cursor where you want the picture, select Insert and Picture to choose a file, insert the picture, format it by cropping and resizing using the handles or boxes until the height and width are equal, and set the text wrapping to tight around the picture.
Inserting an image in word
How to insert an image in a text document using Microsoft Word (Word version 365, Windows application).
Power Point Tutorial
To insert a picture in Microsoft Word, select the Insert tab and click the Picture icon to choose an image file. The picture can then be cropped and resized using the edge handles or by manually entering height and width values until they are equal. Additional formatting options include adjusting text wrapping around the picture.
Technology Integration Power Point Tutorial
This document provides instructions for inserting and cropping a picture in Microsoft Word. The steps are: 1) click the Picture icon under the Insert tab, 2) select the picture file and click Insert, 3) click the picture and select the Crop button under the Format tab, 4) use the crop handles to make the picture square and check that the height and width are equal, 5) right-click the picture and select Wrap Text then Tight.
Inserting a picture into a word doc.
To insert and crop a picture in a document, insert the picture using the Insert and Picture icons, then use the Format tab to enter a height and crop the picture by dragging edge handles to reduce the width. Right click the picture and select Format to access text wrapping options like Tight.
Editing Images
I edited the color balance of an image by increasing the red slider to make it warmer, then increased the blue slider to make it colder. I also added text to the image by selecting the area, typing, and setting the size.
Intoduction to photoshop
To open a new document in Photoshop, click File > New and adjust the size and presentation preferences, then click OK. Text and images can be added by using the various tools on the left side bar. Text is added by clicking the "T" tool and images by clicking File > Open or dragging an image into Photoshop. Layers allow elements to be edited individually by double clicking the layer or using the tools under Image > Adjustments. The Lasso and Quick Selection tools allow precise removal of backgrounds.
Photoshop Guide
Step 1. Set the page size and background transparency.
Step 2. Open a photo to cut out and select the Quick selection tool to highlight the area to cut out.
Step 3. Add a pixel mask and invert it to cut out the highlighted photo area.
How i edited my images
By editing an image's brightness, contrast, saturation, and cropping white space, a user customized an image to make it appear more bold and aggressive for its audience, then copied and pasted it into a word document for use on a front cover. The user increased brightness and contrast by 20%, lowered saturation to 0%, and cropped the image to remove excess white space.
Skills development crop tool
Harvey Johnson resized an image for a magazine cover using the transform and crop tools. He resized the image to avoid distortion, then cropped it to the desired area. Finally, he used the move tool and arrow keys to precisely position the cropped image and a barcode in the bottom corner of the magazine cover.
Editing process
The document provides steps for editing an image for a front cover using Photoshop tools. It describes selecting areas of the image and using the paint brush tool to color in details. The selection tool is used to remove unwanted areas and give a cleaner edge. Once an area is selected and copied, it can be pasted onto a new background image on a separate layer to create the cover design.
Output no 2. changing background
This document provides instructions for changing the background of an image in 6 steps: 1) Open the image and select a new background, 2) Select the image using the Quick Selection or Magnetic Lasso tools, 3) Move the selected image onto the new background, 4) Transform and size the image as desired, 5) Hide the background layer and erase unwanted areas and clean edges, and 6) Unhide the background layer to reveal the new composite image.
Insering a pictuire
To insert a picture into a document, place the cursor where the picture will go, click Insert and Picture to select an image from your files, then crop and resize the picture as needed before setting the text wrapping to tight and positioning the picture.
Photoshop How To
This document provides instructions for using various tools in Photoshop to edit and combine photographs. It describes how to open images, adjust qualities like brightness and color, and resize images. Tools like the move, marquee, lasso, crop, clone stamp, and eraser tools are mentioned. The document explains how to add one image on top of another by using the move tool to drag it into place as a new layer. It emphasizes using layers and the opacity and eraser tools to blend images together so they look like one photo. The reader is advised to use at least 5 layers in their photomontage and that the edit undo function or "step backward" can be used to fix mistakes.
Frontpageprocess
The document describes the process taken to select a model from a photo and place her on a white background for a magazine cover. Key steps included:
1. Using the quick selection tool and refine tool to select the model from the original photo background.
2. Applying the black and white and increasing the radius size to select fine details like hair.
3. Clicking "on layers" to place the selected model on a white background.
4. Making adjustments to the image like adding a blue photo filter and increasing sharpness to improve the quality and tone of the final cover image.
Nspire iPad App--Tutorial--Constructing an Isosceles Triangle
This tutorial teaches how to construct an isosceles triangle using the TI-Nspire App. The steps include: creating a geometry window, constructing a line segment and finding its midpoint, creating a perpendicular line at the midpoint, constructing the triangle by connecting segments from the midpoint and base, and measuring the side lengths and base angles to show the triangle's isosceles properties.
1st quarter 4th meeting- spreadsheet
This document provides instructions for adjusting cell widths and row heights, inserting and deleting cells, and moving cells in Microsoft Excel. It describes how to use the mouse or toolbar to adjust sizes, insert cells by right-clicking or using the insert menu, move cells by dragging, and delete cells or columns by right-clicking and selecting delete options. The document concludes by providing step-by-step instructions for practicing these skills by creating a sample worksheet about a garments business.
Skills Development
The document provides instructions for various skills in Photoshop including entering and sizing text, adding grids, making images bigger, adding glow and blur effects, removing backgrounds, adding shapes, rotating images, changing text color, and adding shadows to text boxes. The instructions describe the tools and menu options needed to perform each task, such as using the transform tool to resize fonts, the magic wand tool to remove backgrounds, and effect menus to add glows and drop shadows.
Screenshot analysis
The document provides instructions for editing photos in Photoshop to give them an old, vintage look using various tools and effects. The key steps are to adjust the channel mixer and selective color to balance colors and add black, invert images to remove skin tones, use the gradient map and color picker to add overlay colors and textures, and add vertical text over images at a lowered opacity.
Marie christine joyce buena
The document provides instructions for blending two images together in GIMP and removing an image's background.
To blend images, the second image is given a layer mask initialized to white. The Gradient tool is used to create partial transparency from right to left. The layers are then merged.
To remove a background, the Fuzzy Select tool selects the background which is then given an alpha channel for transparency. The Delete key removes the selected background, leaving the image on a transparent layer. The edges are smoothed before saving.
Photo Story 3 Tutorial
The document provides instructions for creating a photostory using PhotoStory 3. It outlines the steps to import pictures, remove borders, crop images, add text and effects to each slide, record narration, add custom music, and save the completed project. The tutorial explains how to arrange the slides, edit photos, and finish the photostory by saving it and exiting the program.
Inkscape: Creating a Custom Icon / Logo
This lesson provides a step-by-step walkthrough for creating a custom computer icon of a cartoon character -- Fin from Cartoon Network's Adventure Time. The class was designed for tweens (ages 9-12). Tools covered include: circle/ellipse, align, distribute, rectangle, path, curves, and fill/stroke. The same class can be used when creating a logo.
Pepsi vector tutorial
The document provides instructions for recreating the Pepsi logo using vector shapes in Adobe Illustrator. It describes tracing the outline of the logo by drawing geometric shapes like rectangles and circles, and using the pathfinder tool to cut shapes out of one another to refine the design. Key steps include tracing the red bar outline, adding an ellipse for the inner circle, drawing a rectangle to cut out the middle, and adjusting anchor points to curve the shape.
Tutorials to posters
The document provides instructions for basic film cover editing in Adobe Photoshop or similar software. It explains how to create a black background, insert and position an image, add and format text, move objects around, change text and color properties, create a star shape, modify text styles, arrange object layers, and use the shift key to create symmetrical shapes.
Contact sheet for cd digipack
This document discusses image editing techniques used to create a final image for an advertisement and digipack cover. The original image was cropped using the rectangular marquee tool and inverse selection. Then the hue and saturation were adjusted to remove color and set the image to black and white. Finally, the hue/saturation layer and image layer were merged. Additional effects like blur and sharpen tools were used to manipulate the depth of field and make the artist stand out from the background respectively.
Photoshop getting started part4
This document provides instructions for cropping, resizing, and correcting images in Adobe Photoshop CS4. It discusses three methods for cropping images: using the Crop tool, cropping to a specific size, or cropping with the Marquee tool. It also provides steps for resizing images to poster size without losing quality and describes how to use the Red Eye tool to remove red eye from photos.
Microsoft word presentation
Microsoft Word can be used to create various documents like essays, school papers, resumes, and more. It offers different formatting tools to change text styles, colors, and add tables, pictures, or clip art. Common uses of MS Word include writing papers for school, making calendars, birthday cards, and even books by utilizing its various formatting and insertion tools.
Powerpoint.02
This document provides instructions for applying and modifying text and graphic objects in Microsoft PowerPoint 2003. It describes how to create a new presentation from a design template, apply a different design template, insert and resize clip art and pictures, recolor and modify clip art, modify slide masters, insert tab stops and footers, create tables and diagrams, use AutoShapes to draw graphics, and generate a summary slide.
More Related Content
What's hot
Intoduction to photoshop
To open a new document in Photoshop, click File > New and adjust the size and presentation preferences, then click OK. Text and images can be added by using the various tools on the left side bar. Text is added by clicking the "T" tool and images by clicking File > Open or dragging an image into Photoshop. Layers allow elements to be edited individually by double clicking the layer or using the tools under Image > Adjustments. The Lasso and Quick Selection tools allow precise removal of backgrounds.
Photoshop Guide
Step 1. Set the page size and background transparency.
Step 2. Open a photo to cut out and select the Quick selection tool to highlight the area to cut out.
Step 3. Add a pixel mask and invert it to cut out the highlighted photo area.
How i edited my images
By editing an image's brightness, contrast, saturation, and cropping white space, a user customized an image to make it appear more bold and aggressive for its audience, then copied and pasted it into a word document for use on a front cover. The user increased brightness and contrast by 20%, lowered saturation to 0%, and cropped the image to remove excess white space.
Skills development crop tool
Harvey Johnson resized an image for a magazine cover using the transform and crop tools. He resized the image to avoid distortion, then cropped it to the desired area. Finally, he used the move tool and arrow keys to precisely position the cropped image and a barcode in the bottom corner of the magazine cover.
Editing process
The document provides steps for editing an image for a front cover using Photoshop tools. It describes selecting areas of the image and using the paint brush tool to color in details. The selection tool is used to remove unwanted areas and give a cleaner edge. Once an area is selected and copied, it can be pasted onto a new background image on a separate layer to create the cover design.
Output no 2. changing background
This document provides instructions for changing the background of an image in 6 steps: 1) Open the image and select a new background, 2) Select the image using the Quick Selection or Magnetic Lasso tools, 3) Move the selected image onto the new background, 4) Transform and size the image as desired, 5) Hide the background layer and erase unwanted areas and clean edges, and 6) Unhide the background layer to reveal the new composite image.
Insering a pictuire
To insert a picture into a document, place the cursor where the picture will go, click Insert and Picture to select an image from your files, then crop and resize the picture as needed before setting the text wrapping to tight and positioning the picture.
Photoshop How To
This document provides instructions for using various tools in Photoshop to edit and combine photographs. It describes how to open images, adjust qualities like brightness and color, and resize images. Tools like the move, marquee, lasso, crop, clone stamp, and eraser tools are mentioned. The document explains how to add one image on top of another by using the move tool to drag it into place as a new layer. It emphasizes using layers and the opacity and eraser tools to blend images together so they look like one photo. The reader is advised to use at least 5 layers in their photomontage and that the edit undo function or "step backward" can be used to fix mistakes.
Frontpageprocess
The document describes the process taken to select a model from a photo and place her on a white background for a magazine cover. Key steps included:
1. Using the quick selection tool and refine tool to select the model from the original photo background.
2. Applying the black and white and increasing the radius size to select fine details like hair.
3. Clicking "on layers" to place the selected model on a white background.
4. Making adjustments to the image like adding a blue photo filter and increasing sharpness to improve the quality and tone of the final cover image.
Nspire iPad App--Tutorial--Constructing an Isosceles Triangle
This tutorial teaches how to construct an isosceles triangle using the TI-Nspire App. The steps include: creating a geometry window, constructing a line segment and finding its midpoint, creating a perpendicular line at the midpoint, constructing the triangle by connecting segments from the midpoint and base, and measuring the side lengths and base angles to show the triangle's isosceles properties.
1st quarter 4th meeting- spreadsheet
This document provides instructions for adjusting cell widths and row heights, inserting and deleting cells, and moving cells in Microsoft Excel. It describes how to use the mouse or toolbar to adjust sizes, insert cells by right-clicking or using the insert menu, move cells by dragging, and delete cells or columns by right-clicking and selecting delete options. The document concludes by providing step-by-step instructions for practicing these skills by creating a sample worksheet about a garments business.
Skills Development
The document provides instructions for various skills in Photoshop including entering and sizing text, adding grids, making images bigger, adding glow and blur effects, removing backgrounds, adding shapes, rotating images, changing text color, and adding shadows to text boxes. The instructions describe the tools and menu options needed to perform each task, such as using the transform tool to resize fonts, the magic wand tool to remove backgrounds, and effect menus to add glows and drop shadows.
Screenshot analysis
The document provides instructions for editing photos in Photoshop to give them an old, vintage look using various tools and effects. The key steps are to adjust the channel mixer and selective color to balance colors and add black, invert images to remove skin tones, use the gradient map and color picker to add overlay colors and textures, and add vertical text over images at a lowered opacity.
Marie christine joyce buena
The document provides instructions for blending two images together in GIMP and removing an image's background.
To blend images, the second image is given a layer mask initialized to white. The Gradient tool is used to create partial transparency from right to left. The layers are then merged.
To remove a background, the Fuzzy Select tool selects the background which is then given an alpha channel for transparency. The Delete key removes the selected background, leaving the image on a transparent layer. The edges are smoothed before saving.
Photo Story 3 Tutorial
The document provides instructions for creating a photostory using PhotoStory 3. It outlines the steps to import pictures, remove borders, crop images, add text and effects to each slide, record narration, add custom music, and save the completed project. The tutorial explains how to arrange the slides, edit photos, and finish the photostory by saving it and exiting the program.
Inkscape: Creating a Custom Icon / Logo
This lesson provides a step-by-step walkthrough for creating a custom computer icon of a cartoon character -- Fin from Cartoon Network's Adventure Time. The class was designed for tweens (ages 9-12). Tools covered include: circle/ellipse, align, distribute, rectangle, path, curves, and fill/stroke. The same class can be used when creating a logo.
Pepsi vector tutorial
The document provides instructions for recreating the Pepsi logo using vector shapes in Adobe Illustrator. It describes tracing the outline of the logo by drawing geometric shapes like rectangles and circles, and using the pathfinder tool to cut shapes out of one another to refine the design. Key steps include tracing the red bar outline, adding an ellipse for the inner circle, drawing a rectangle to cut out the middle, and adjusting anchor points to curve the shape.
Tutorials to posters
The document provides instructions for basic film cover editing in Adobe Photoshop or similar software. It explains how to create a black background, insert and position an image, add and format text, move objects around, change text and color properties, create a star shape, modify text styles, arrange object layers, and use the shift key to create symmetrical shapes.
Contact sheet for cd digipack
This document discusses image editing techniques used to create a final image for an advertisement and digipack cover. The original image was cropped using the rectangular marquee tool and inverse selection. Then the hue and saturation were adjusted to remove color and set the image to black and white. Finally, the hue/saturation layer and image layer were merged. Additional effects like blur and sharpen tools were used to manipulate the depth of field and make the artist stand out from the background respectively.
Photoshop getting started part4
This document provides instructions for cropping, resizing, and correcting images in Adobe Photoshop CS4. It discusses three methods for cropping images: using the Crop tool, cropping to a specific size, or cropping with the Marquee tool. It also provides steps for resizing images to poster size without losing quality and describes how to use the Red Eye tool to remove red eye from photos.
What's hot (20)
Nspire iPad App--Tutorial--Constructing an Isosceles Triangle
Nspire iPad App--Tutorial--Constructing an Isosceles Triangle
Viewers also liked
Microsoft word presentation
Microsoft Word can be used to create various documents like essays, school papers, resumes, and more. It offers different formatting tools to change text styles, colors, and add tables, pictures, or clip art. Common uses of MS Word include writing papers for school, making calendars, birthday cards, and even books by utilizing its various formatting and insertion tools.
Powerpoint.02
This document provides instructions for applying and modifying text and graphic objects in Microsoft PowerPoint 2003. It describes how to create a new presentation from a design template, apply a different design template, insert and resize clip art and pictures, recolor and modify clip art, modify slide masters, insert tab stops and footers, create tables and diagrams, use AutoShapes to draw graphics, and generate a summary slide.
WD Chapter 2
This document provides instructions for creating a research paper in Microsoft Word 2010, including formatting citations and references using MLA style. It describes how to modify styles, change line and paragraph spacing, add page numbers, insert citations and footnotes, edit citation sources, create a bibliography, and more. The overall goal is to guide users through writing and formatting a research paper with proper citations and a reference list.
Ms Word (Insert Option)
Insert option is the most important option of MS word. It not only gives you chance to add charts and graphs but also gives you the facility to add your own pictures
In this presentation you will find everything about Insert option of MS word.
How to wrap text around images
This document discusses different options for wrapping text around images in a document, including in line with text, square, tight, behind text, in front of text, through, and top and bottom. It provides examples of square wrapping, through wrapping, and top and bottom wrapping. It also notes that the top and bottom wrapping option can be modified by adding extra lines above and below the image with no spacing.
MS Word Chapter 1 PPT
This document provides an overview of the objectives that will be covered in Chapter 1 of the book "GO! with Microsoft Word 2010". The objectives include creating a new document and inserting text, inserting and formatting graphics, inserting and modifying text boxes and shapes, previewing and printing a document, changing document and paragraph layout, creating and modifying lists, setting and modifying tab stops, and inserting a SmartArt graphic. Each objective is accompanied by brief explanatory text and screenshots.
Word processing
This presentation will tell you about the basic theory of Word Processing or Microsoft Word. Its features, pros and cons and evolution over time.
PowerPoint Tutorial
This document provides guidance on using PowerPoint effectively for presentations. It discusses the various toolbars in PowerPoint and how to use them. It also offers tips on creating slides, such as using simple designs with short bullet points, consistent formatting, and colors. The document emphasizes keeping content concise and using visual elements like images, charts and animation effects sparingly to reinforce key points.
Slideshare.Com Powerpoint
Computer hardware devices include webcams, scanners, mice, speakers, trackballs, and light pens. Webcams connect via USB or network and are used for video calls and conferencing. Scanners optically scan images and documents into digital formats. Mice are pointing devices that detect motion to move a cursor. Speakers have internal amplifiers and audio jacks. Trackballs contain ball and sensors to detect rotation for cursor movement. Light pens allow pointing directly on CRT displays.
Viewers also liked (9)
How to insert a picture in word-PPT Tutorial
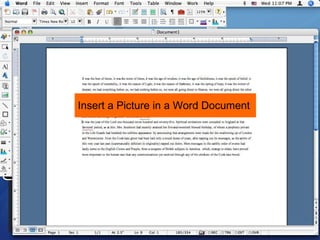
- 1. Insert a Picture in a Word Document
- 3. Place your cursor where you want your picture.
- 4. Click Insert
- 5. Select Picture and slide over to From File…
- 6. Find and select a picture to be inserted.
- 8. Click on the Format Picture…
- 9. Make sure you are in Size and enter the Width.
- 10. Click OK
- 11. With the picture selected, click on the Crop button.
- 12. Click and drag the edge handle to reduce height of picture.
- 13. May do this to the other points if more cropping is necessary.
- 14. Click on the Format Picture…
- 15. Cropping can be manually entered in these boxes.
- 16. Adjust Cropping and Size, under these tabs, until both height and width are equal.
- 17. Select Tight to make text wrap tight around the picture.
- 18. Click OK.
- 19. And you have successfully inserted a picture, cropped it and changed the text wrapping!