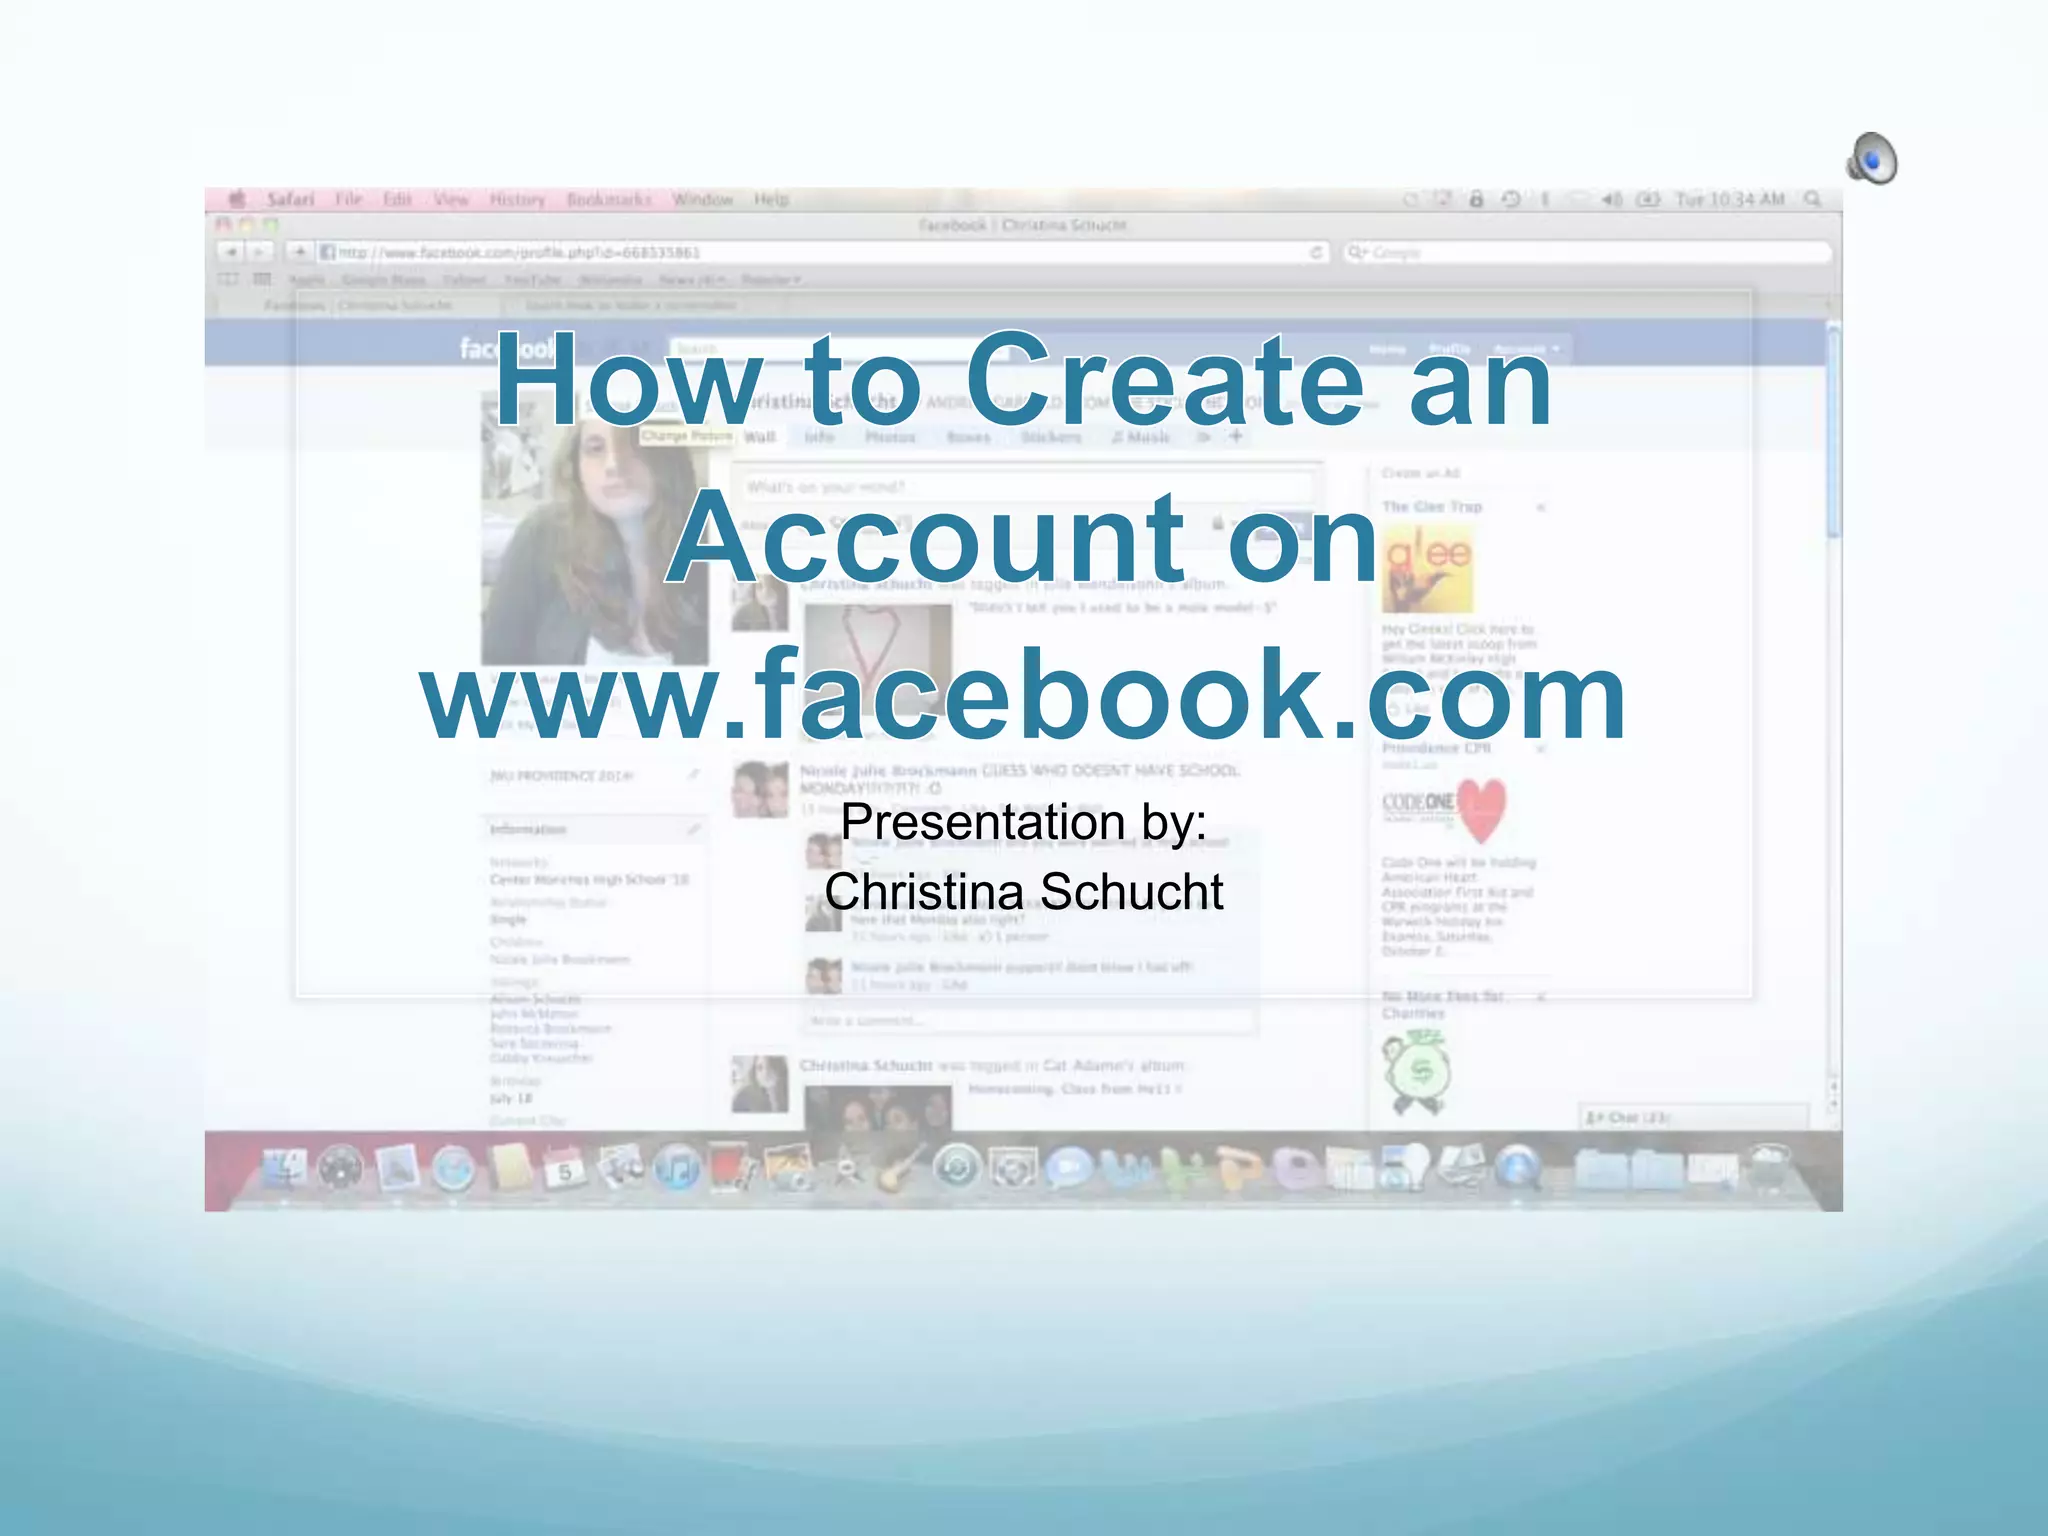
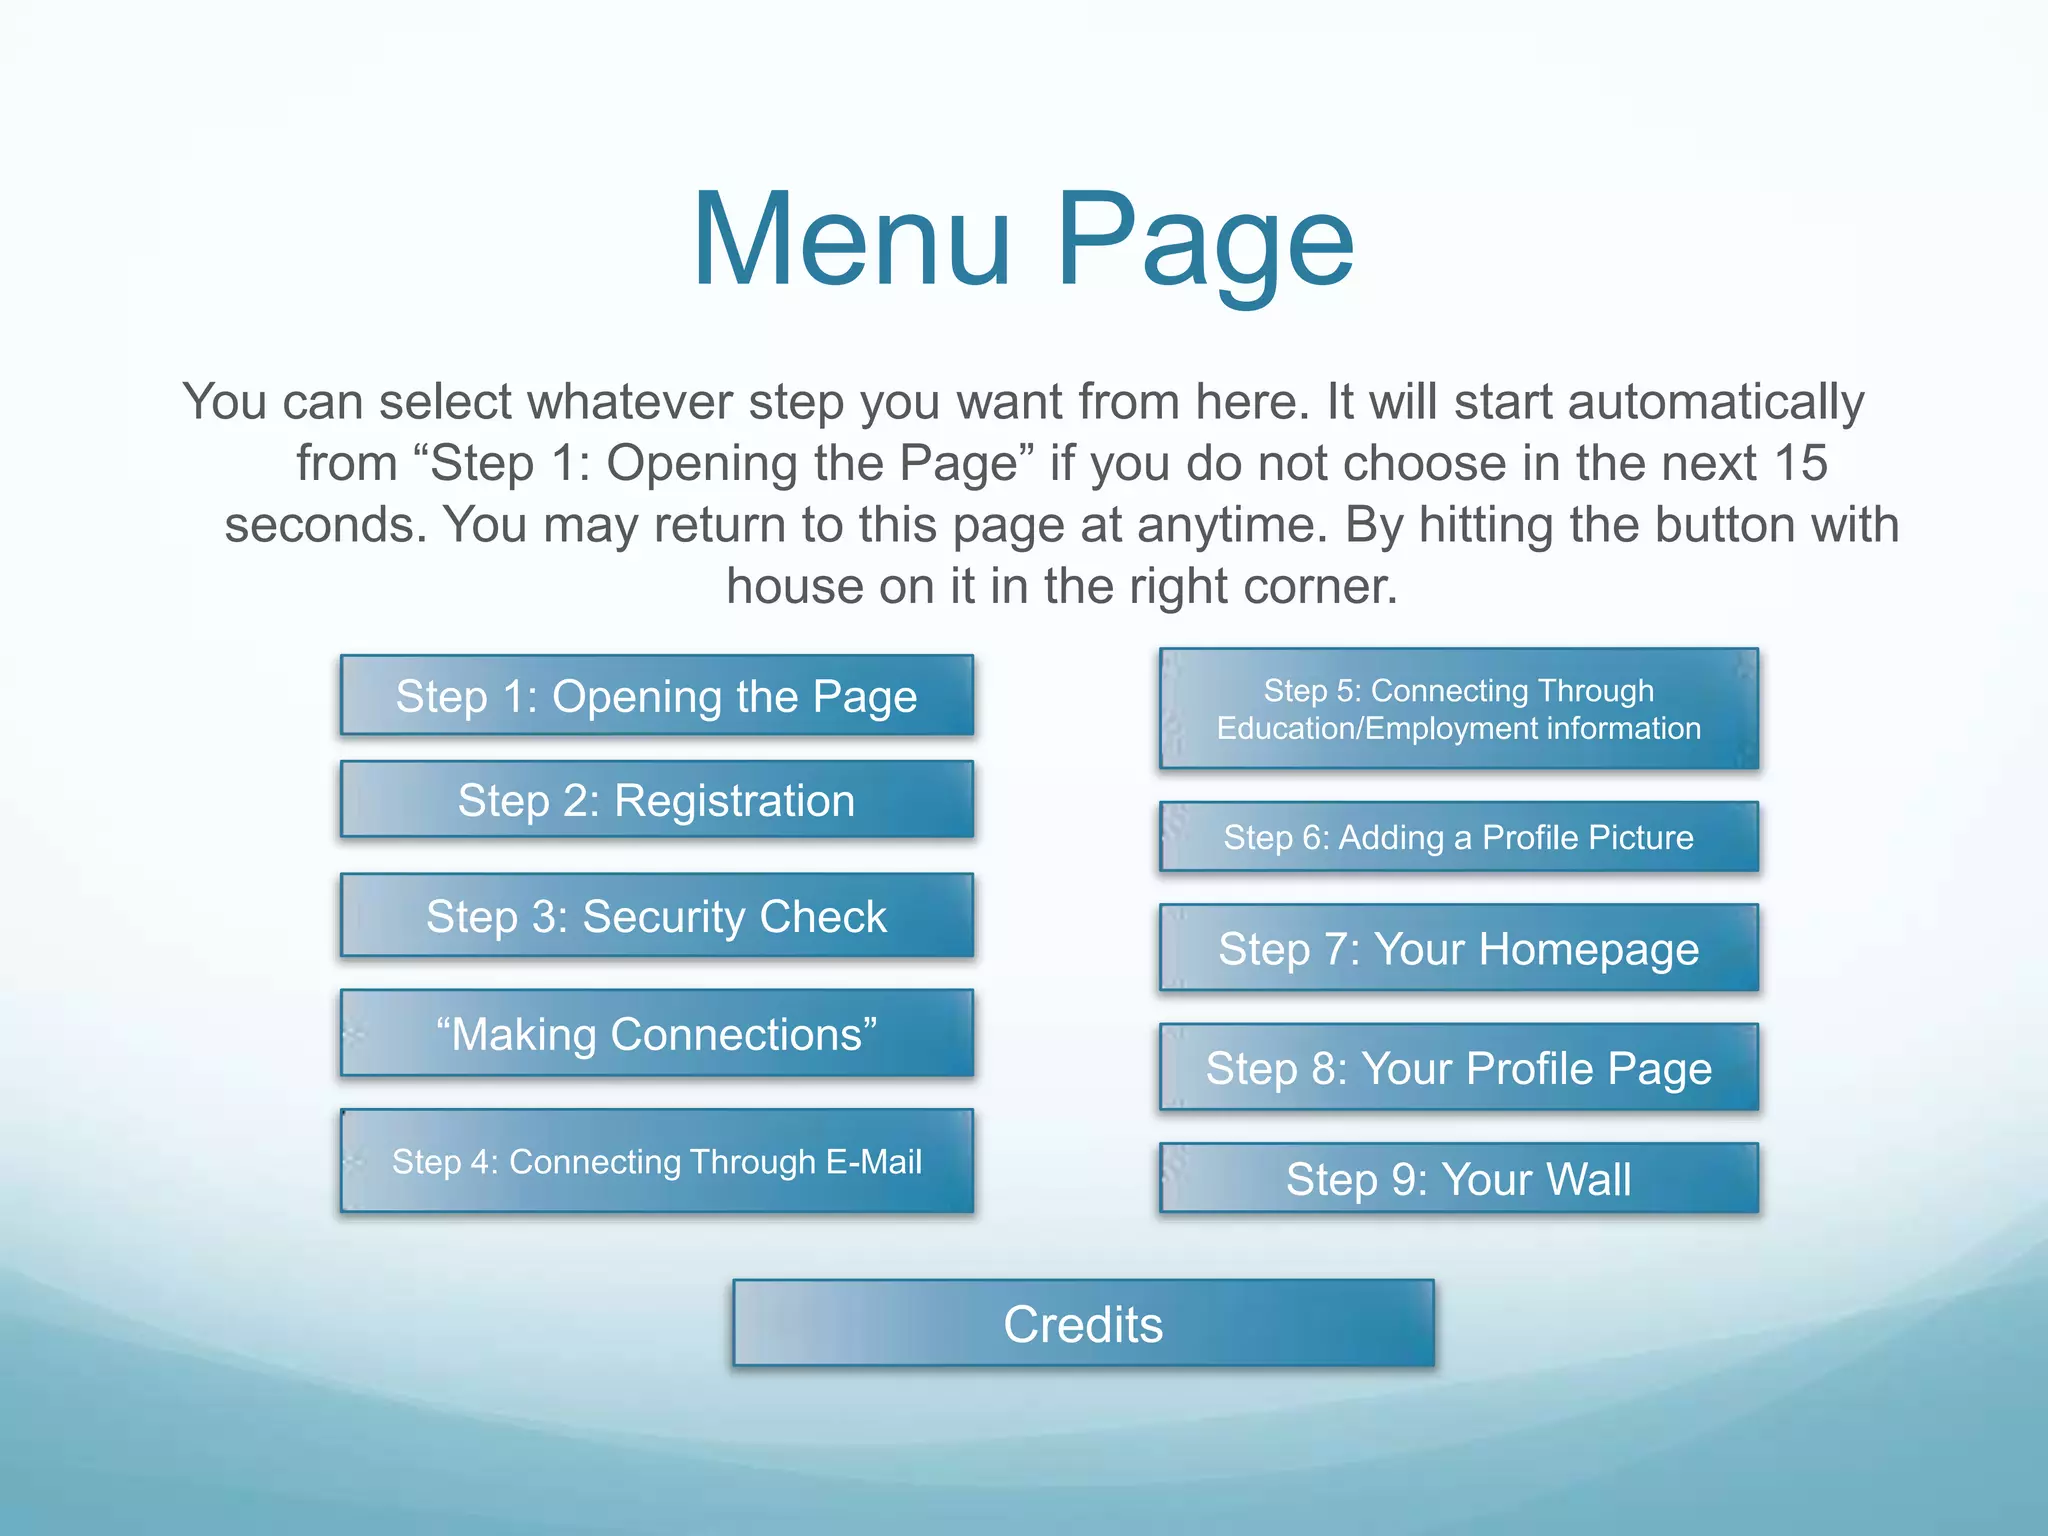
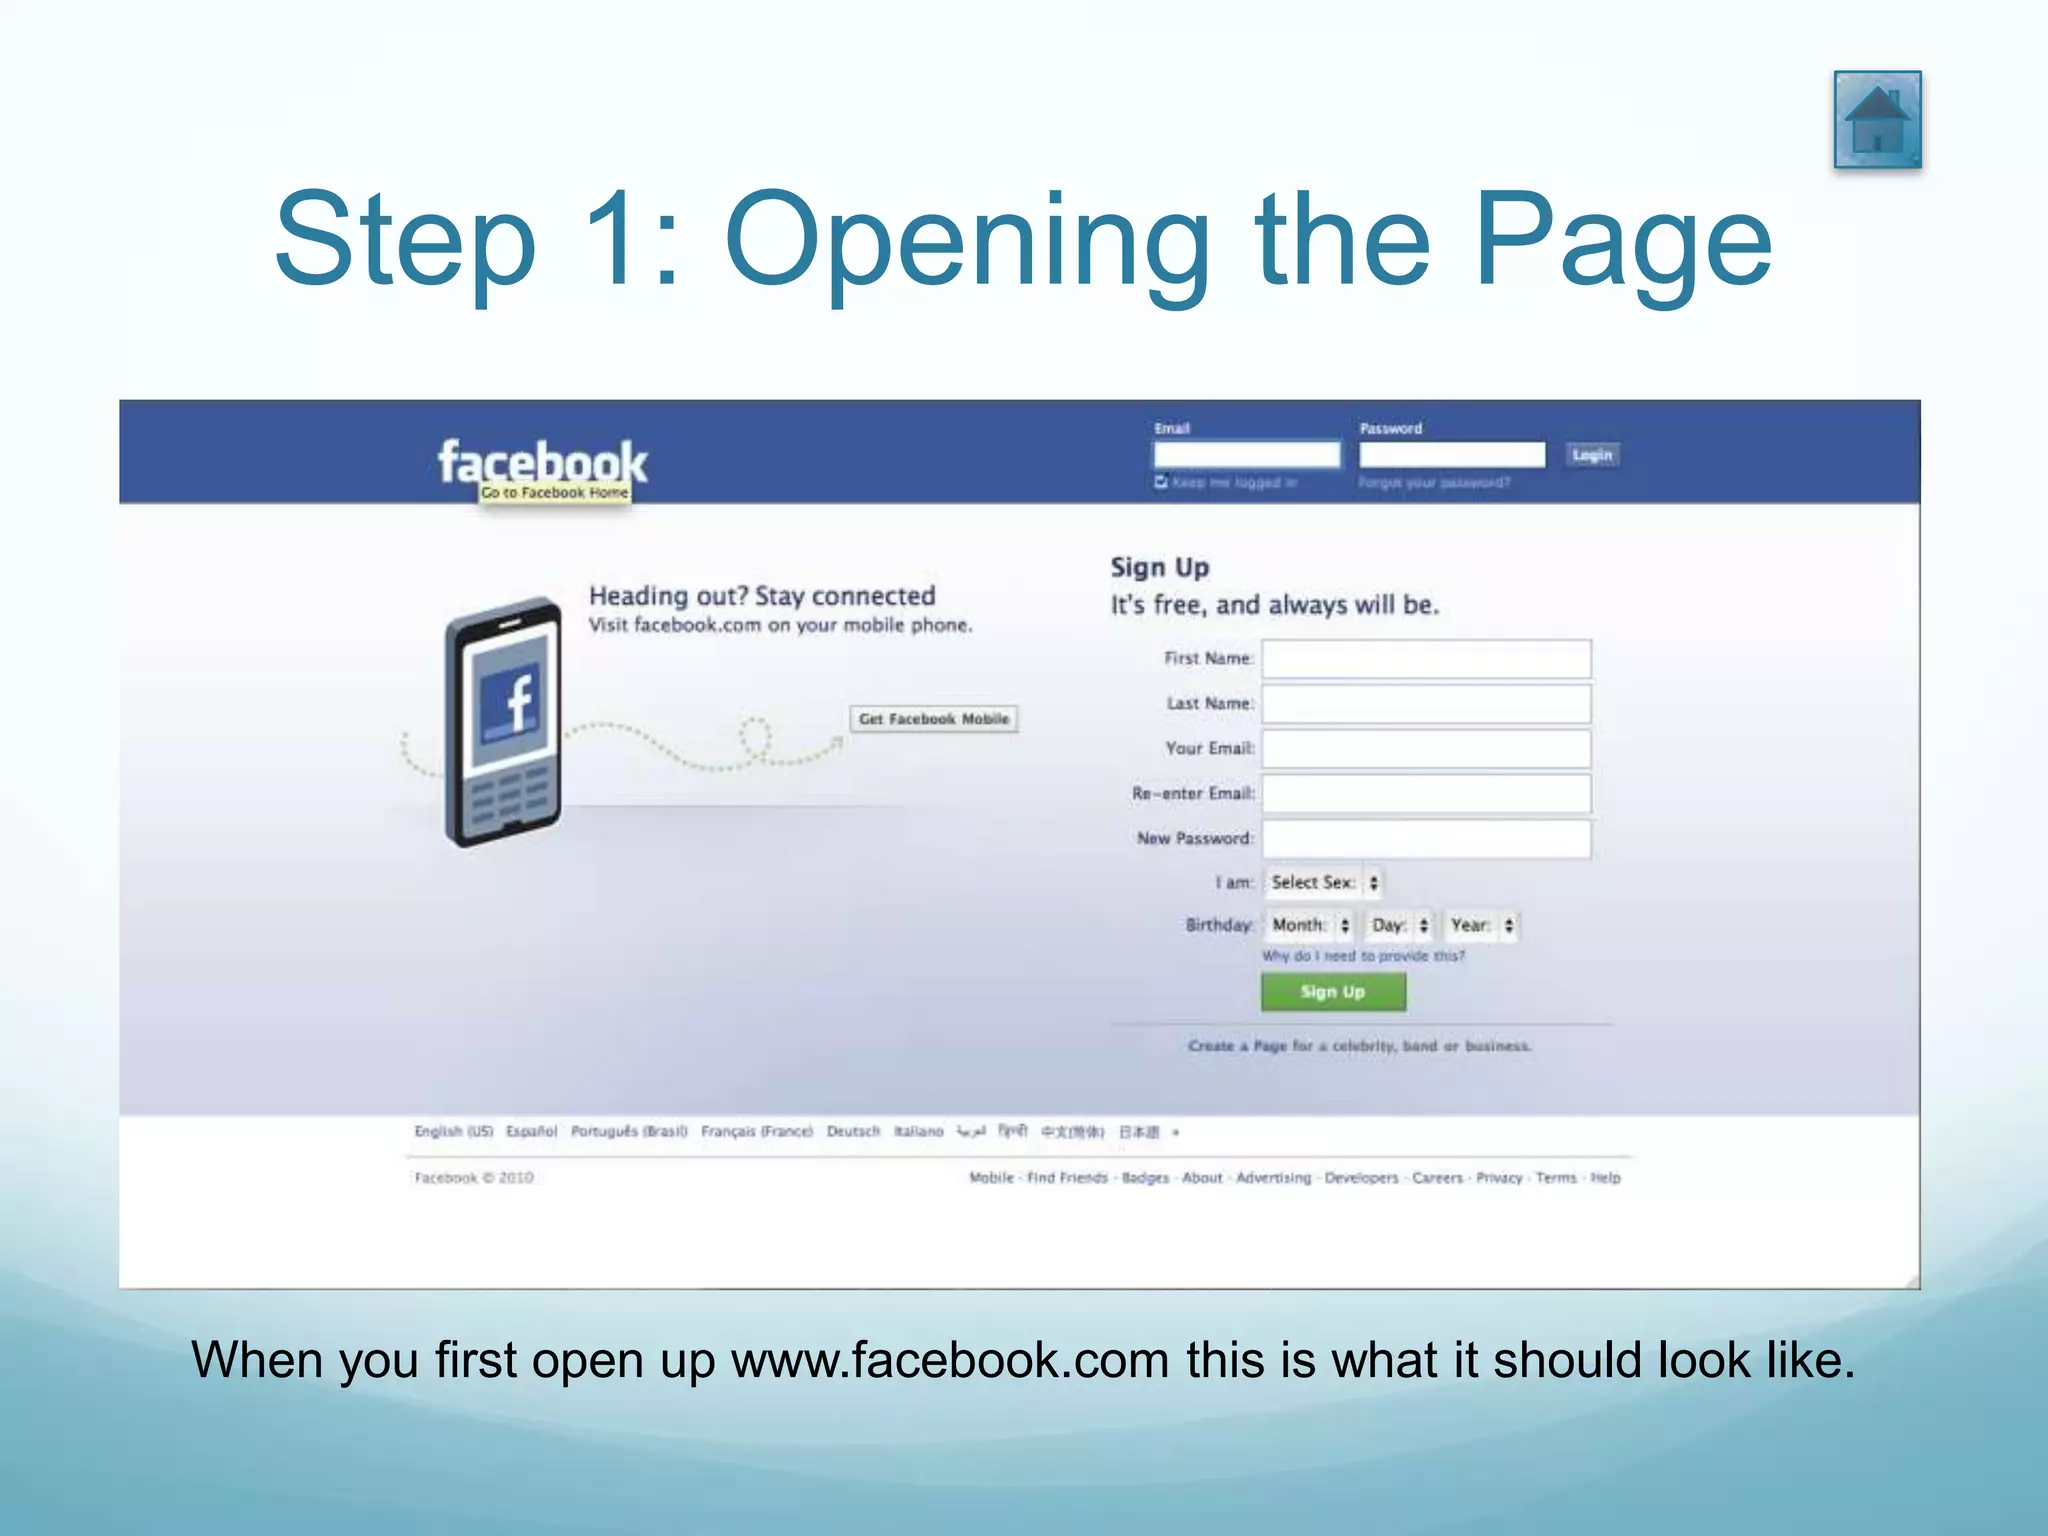
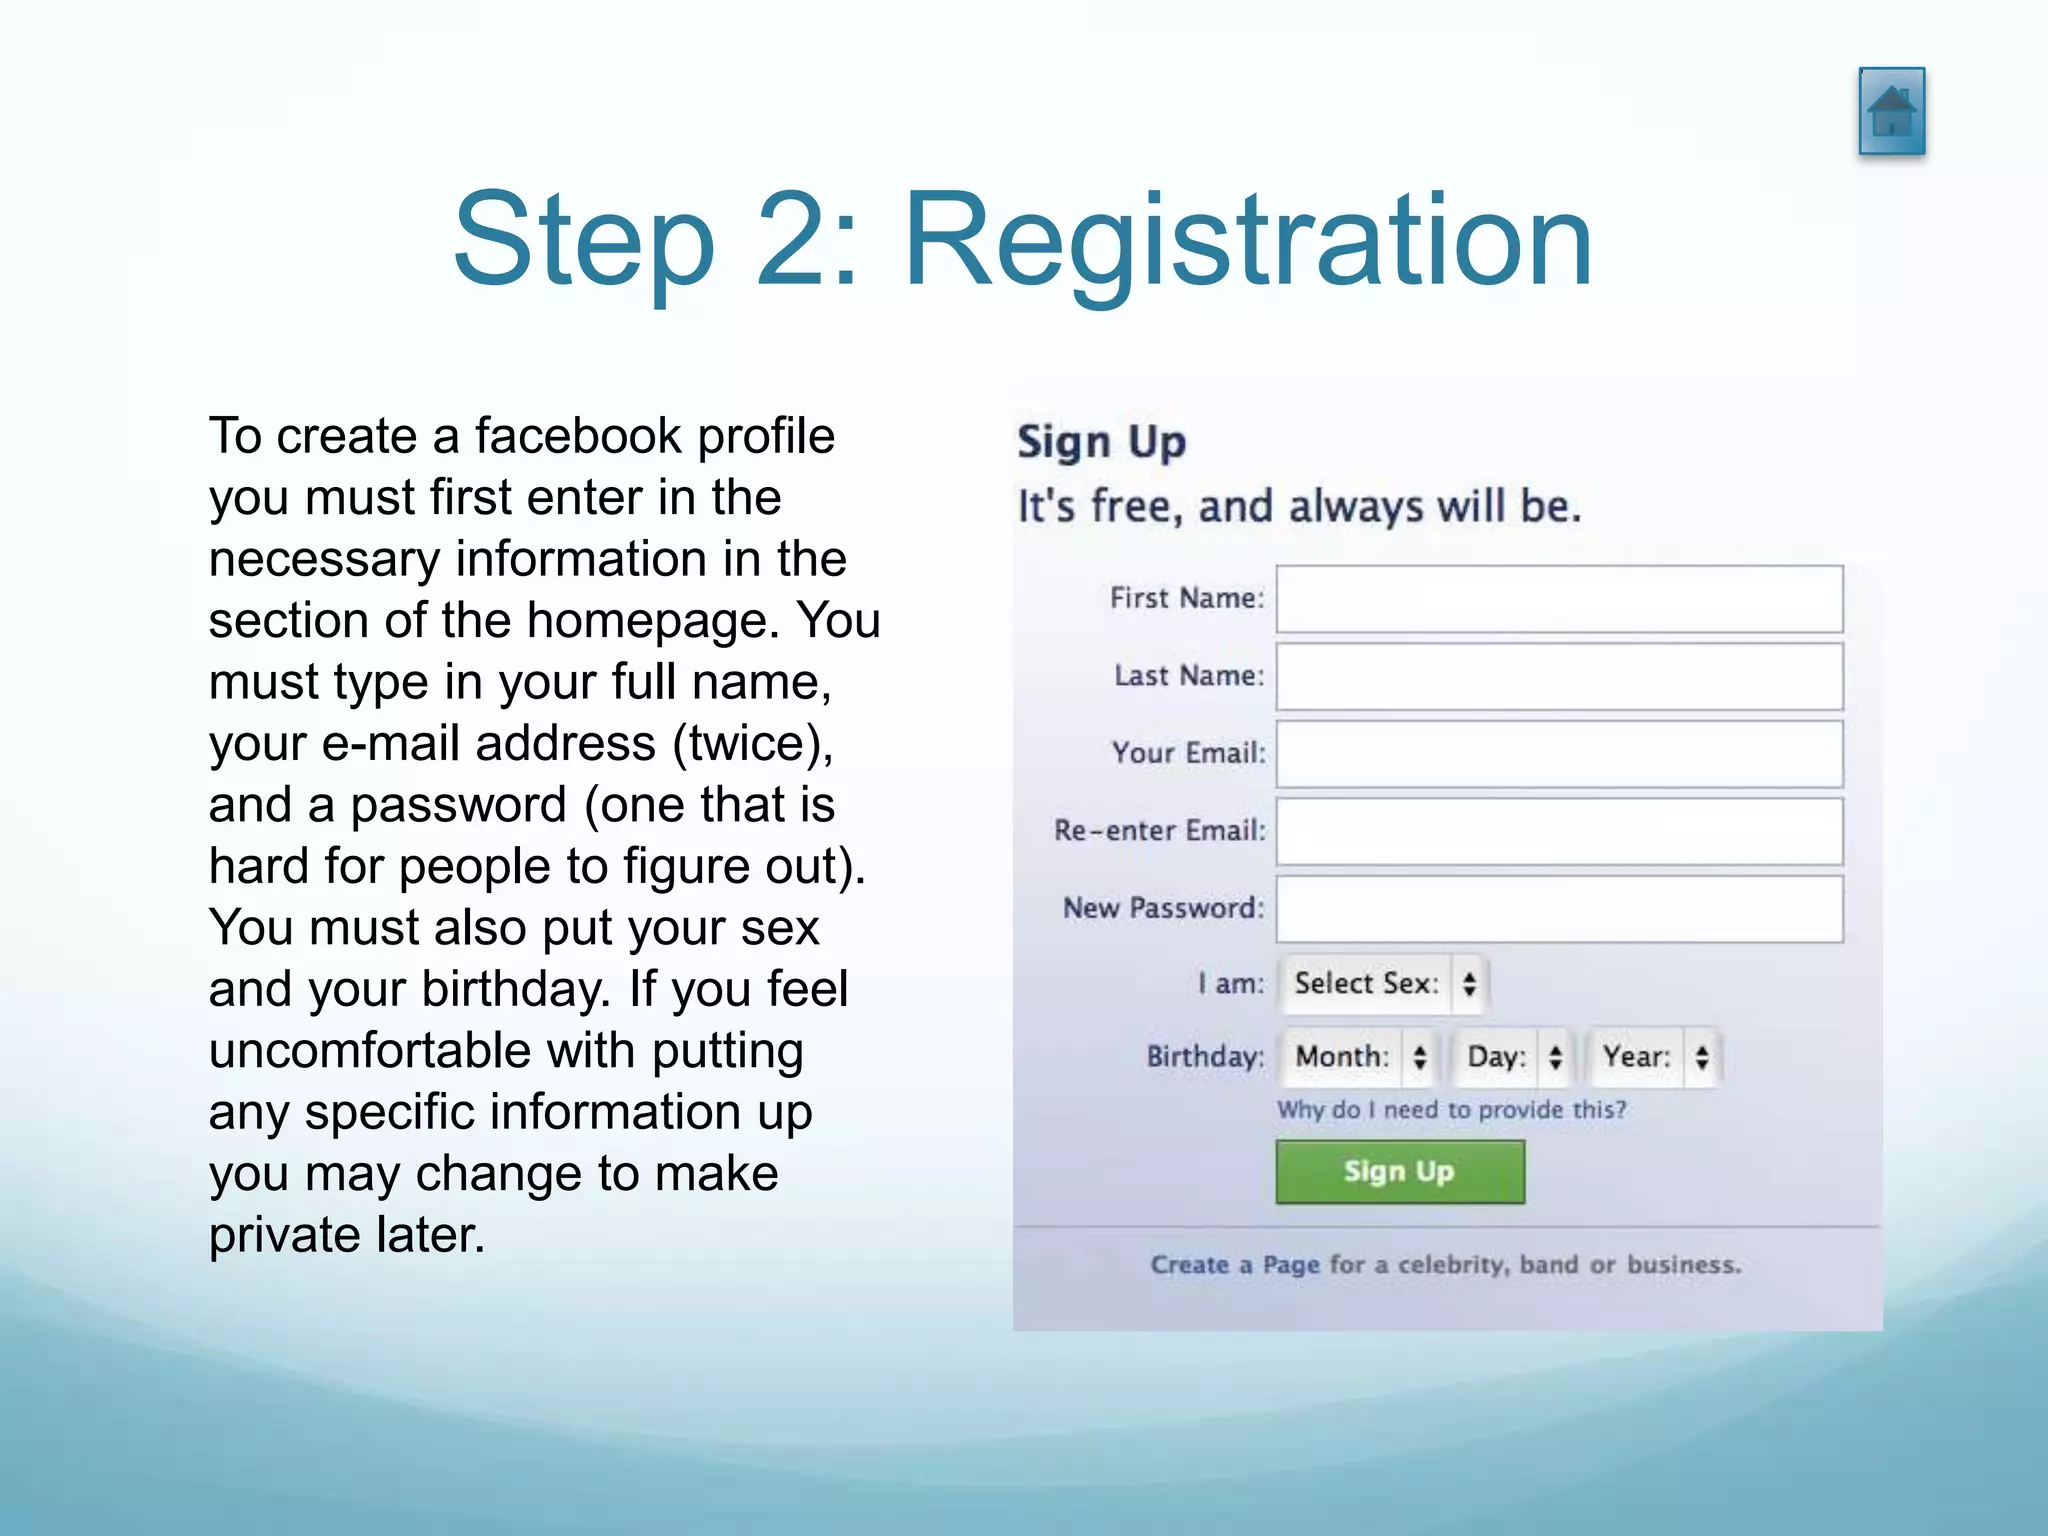
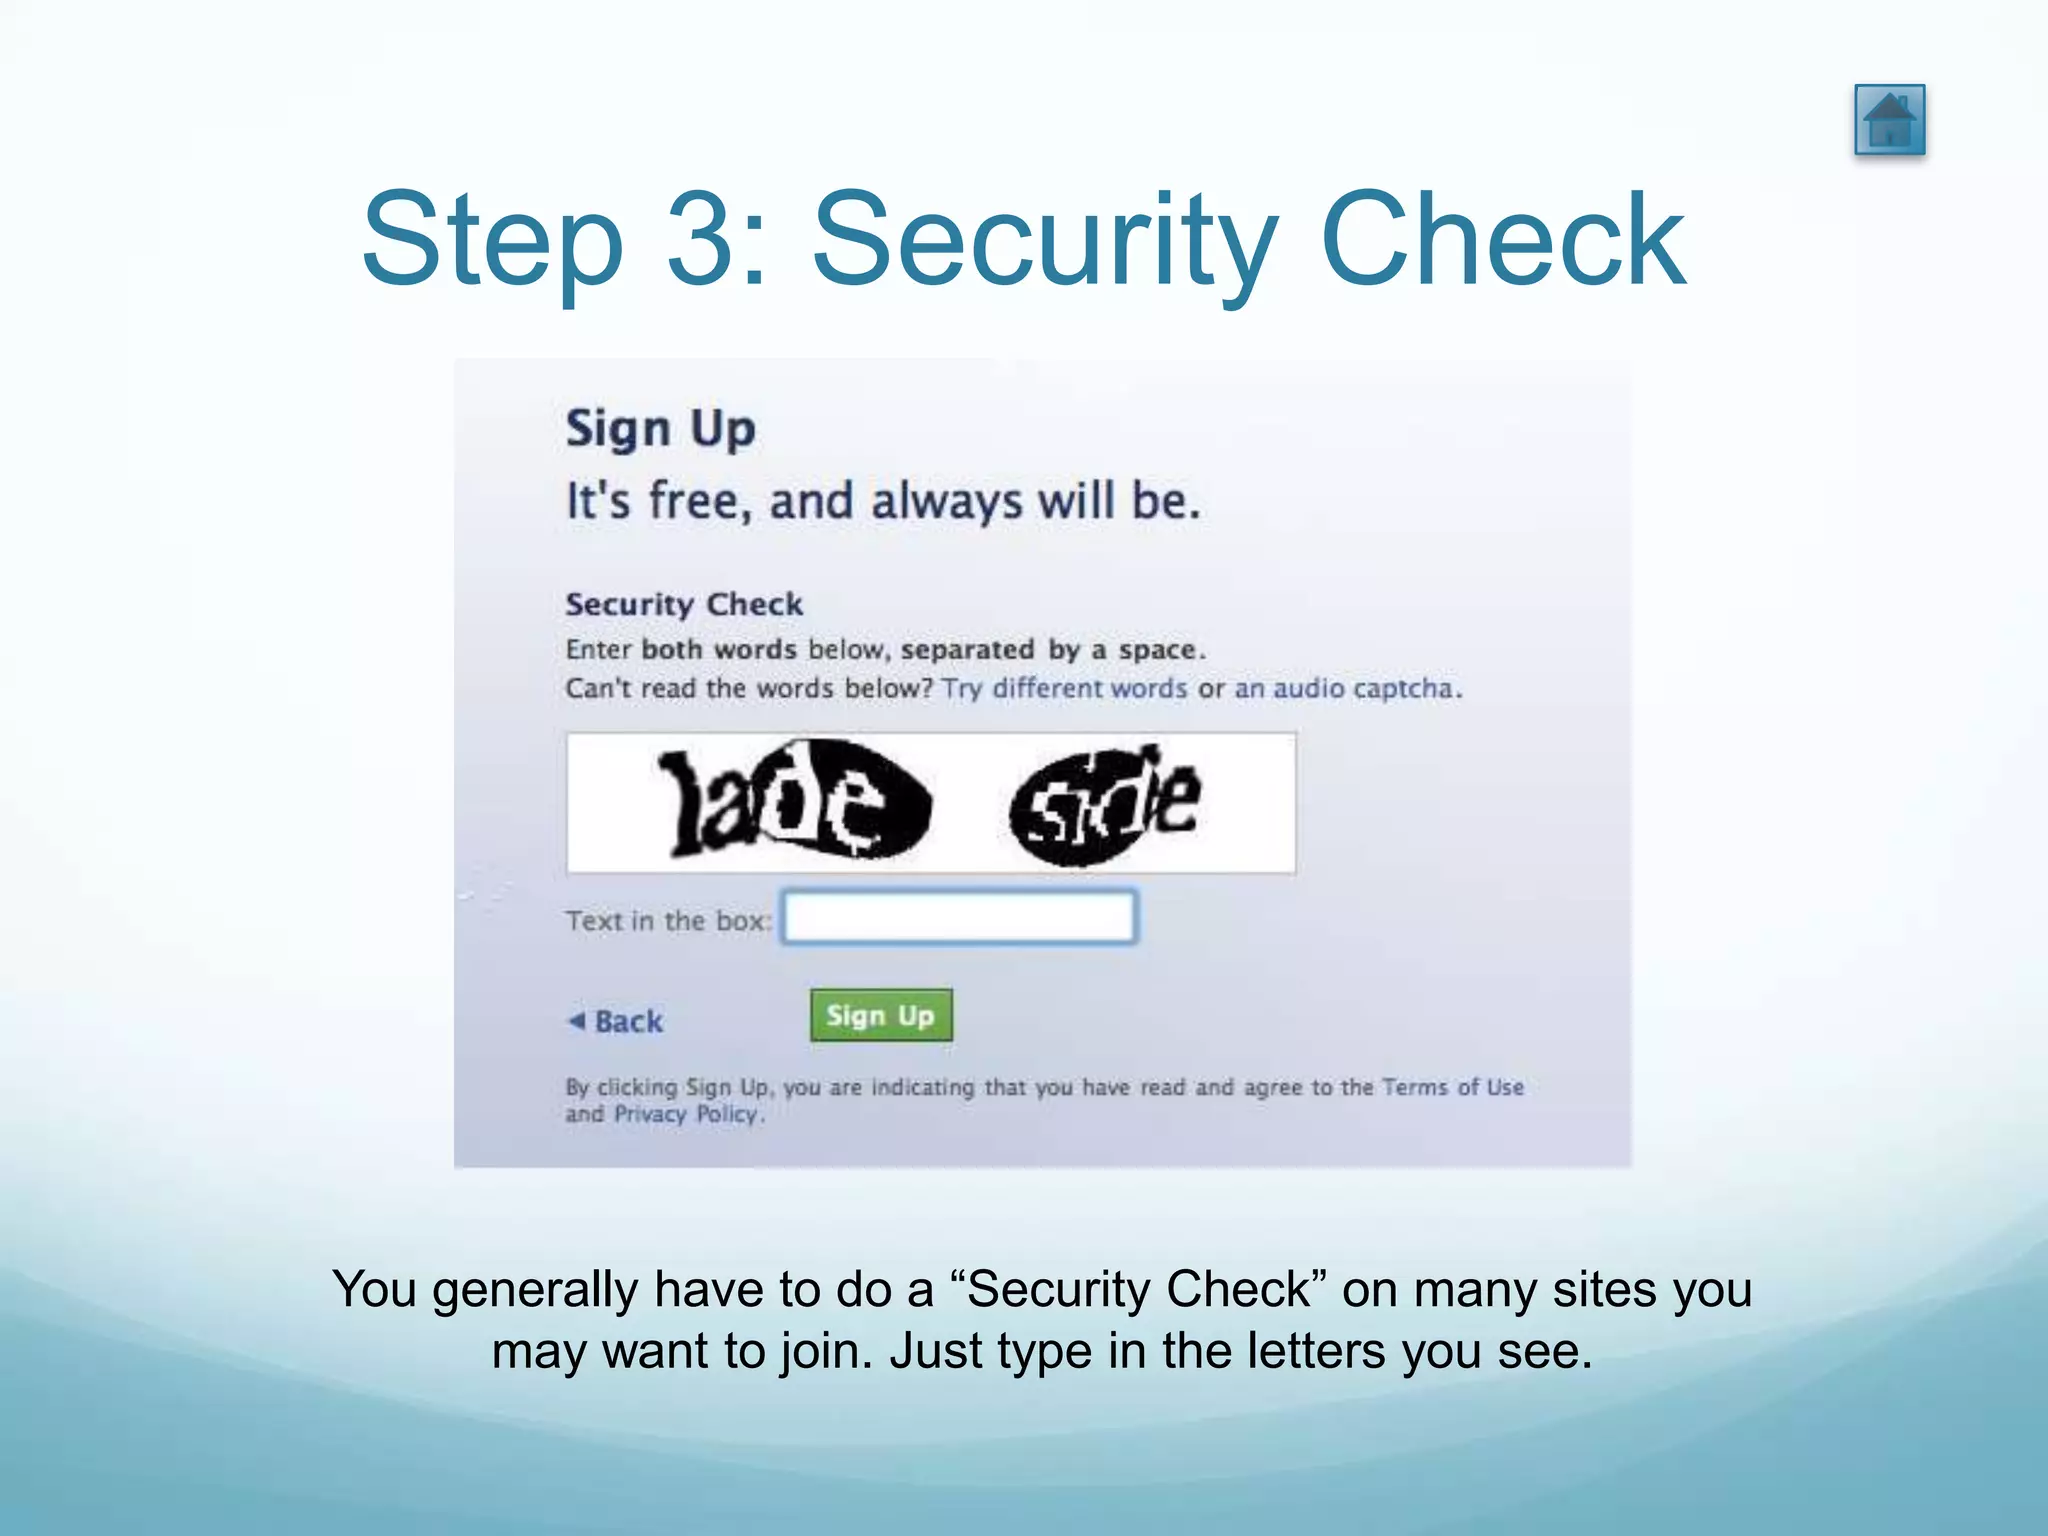
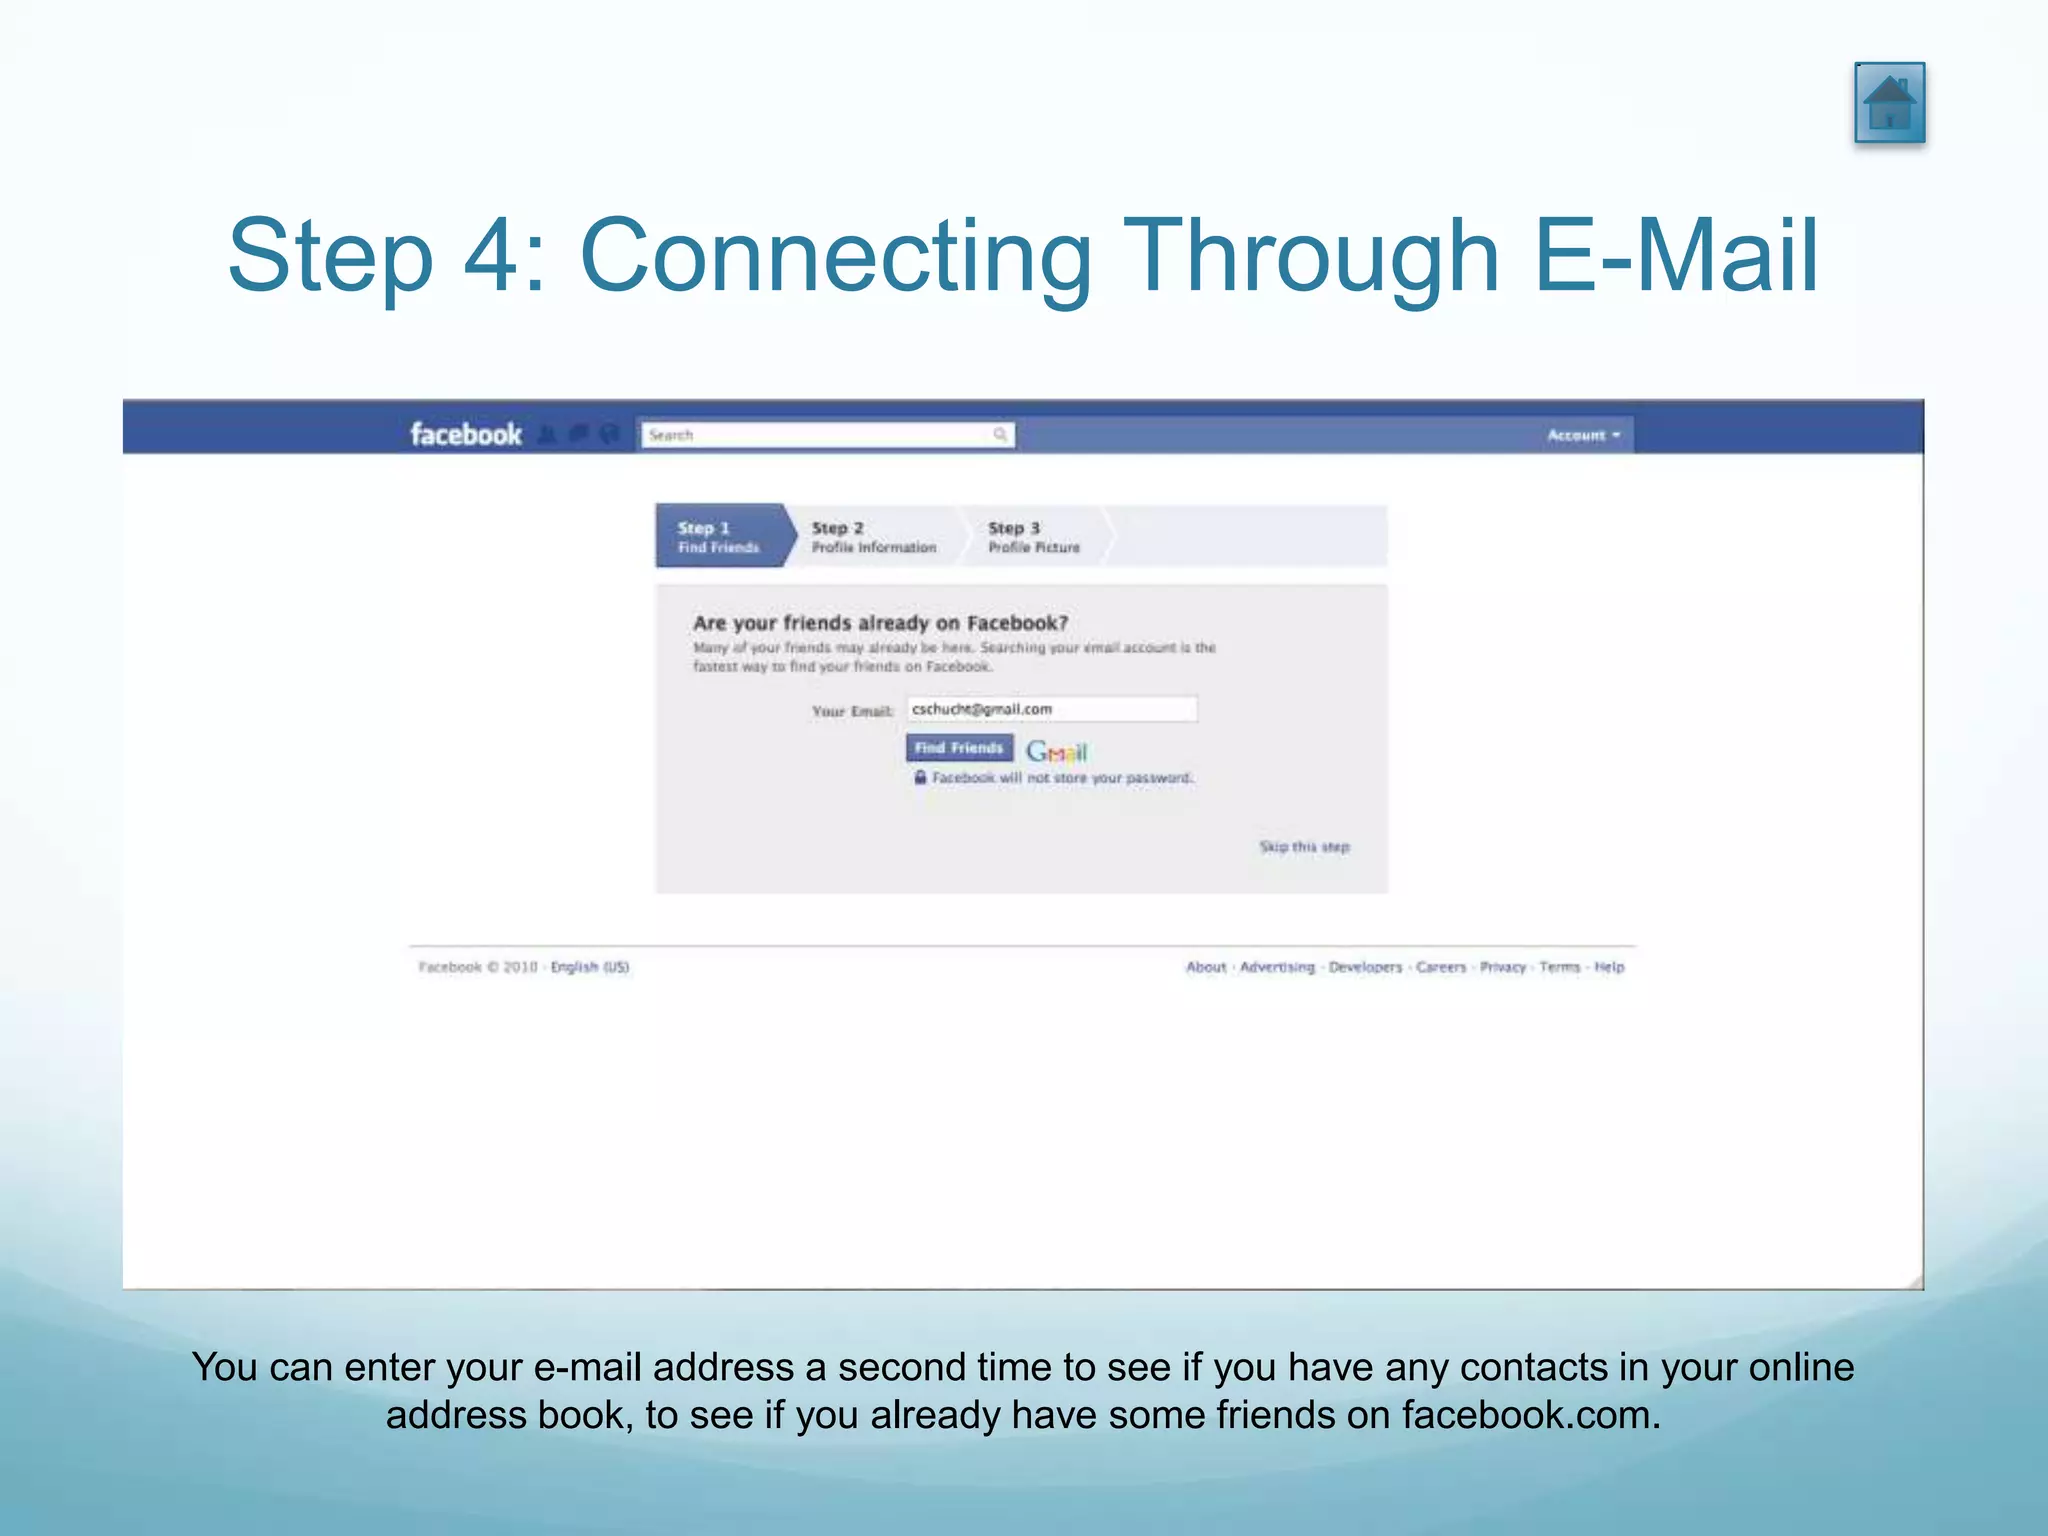
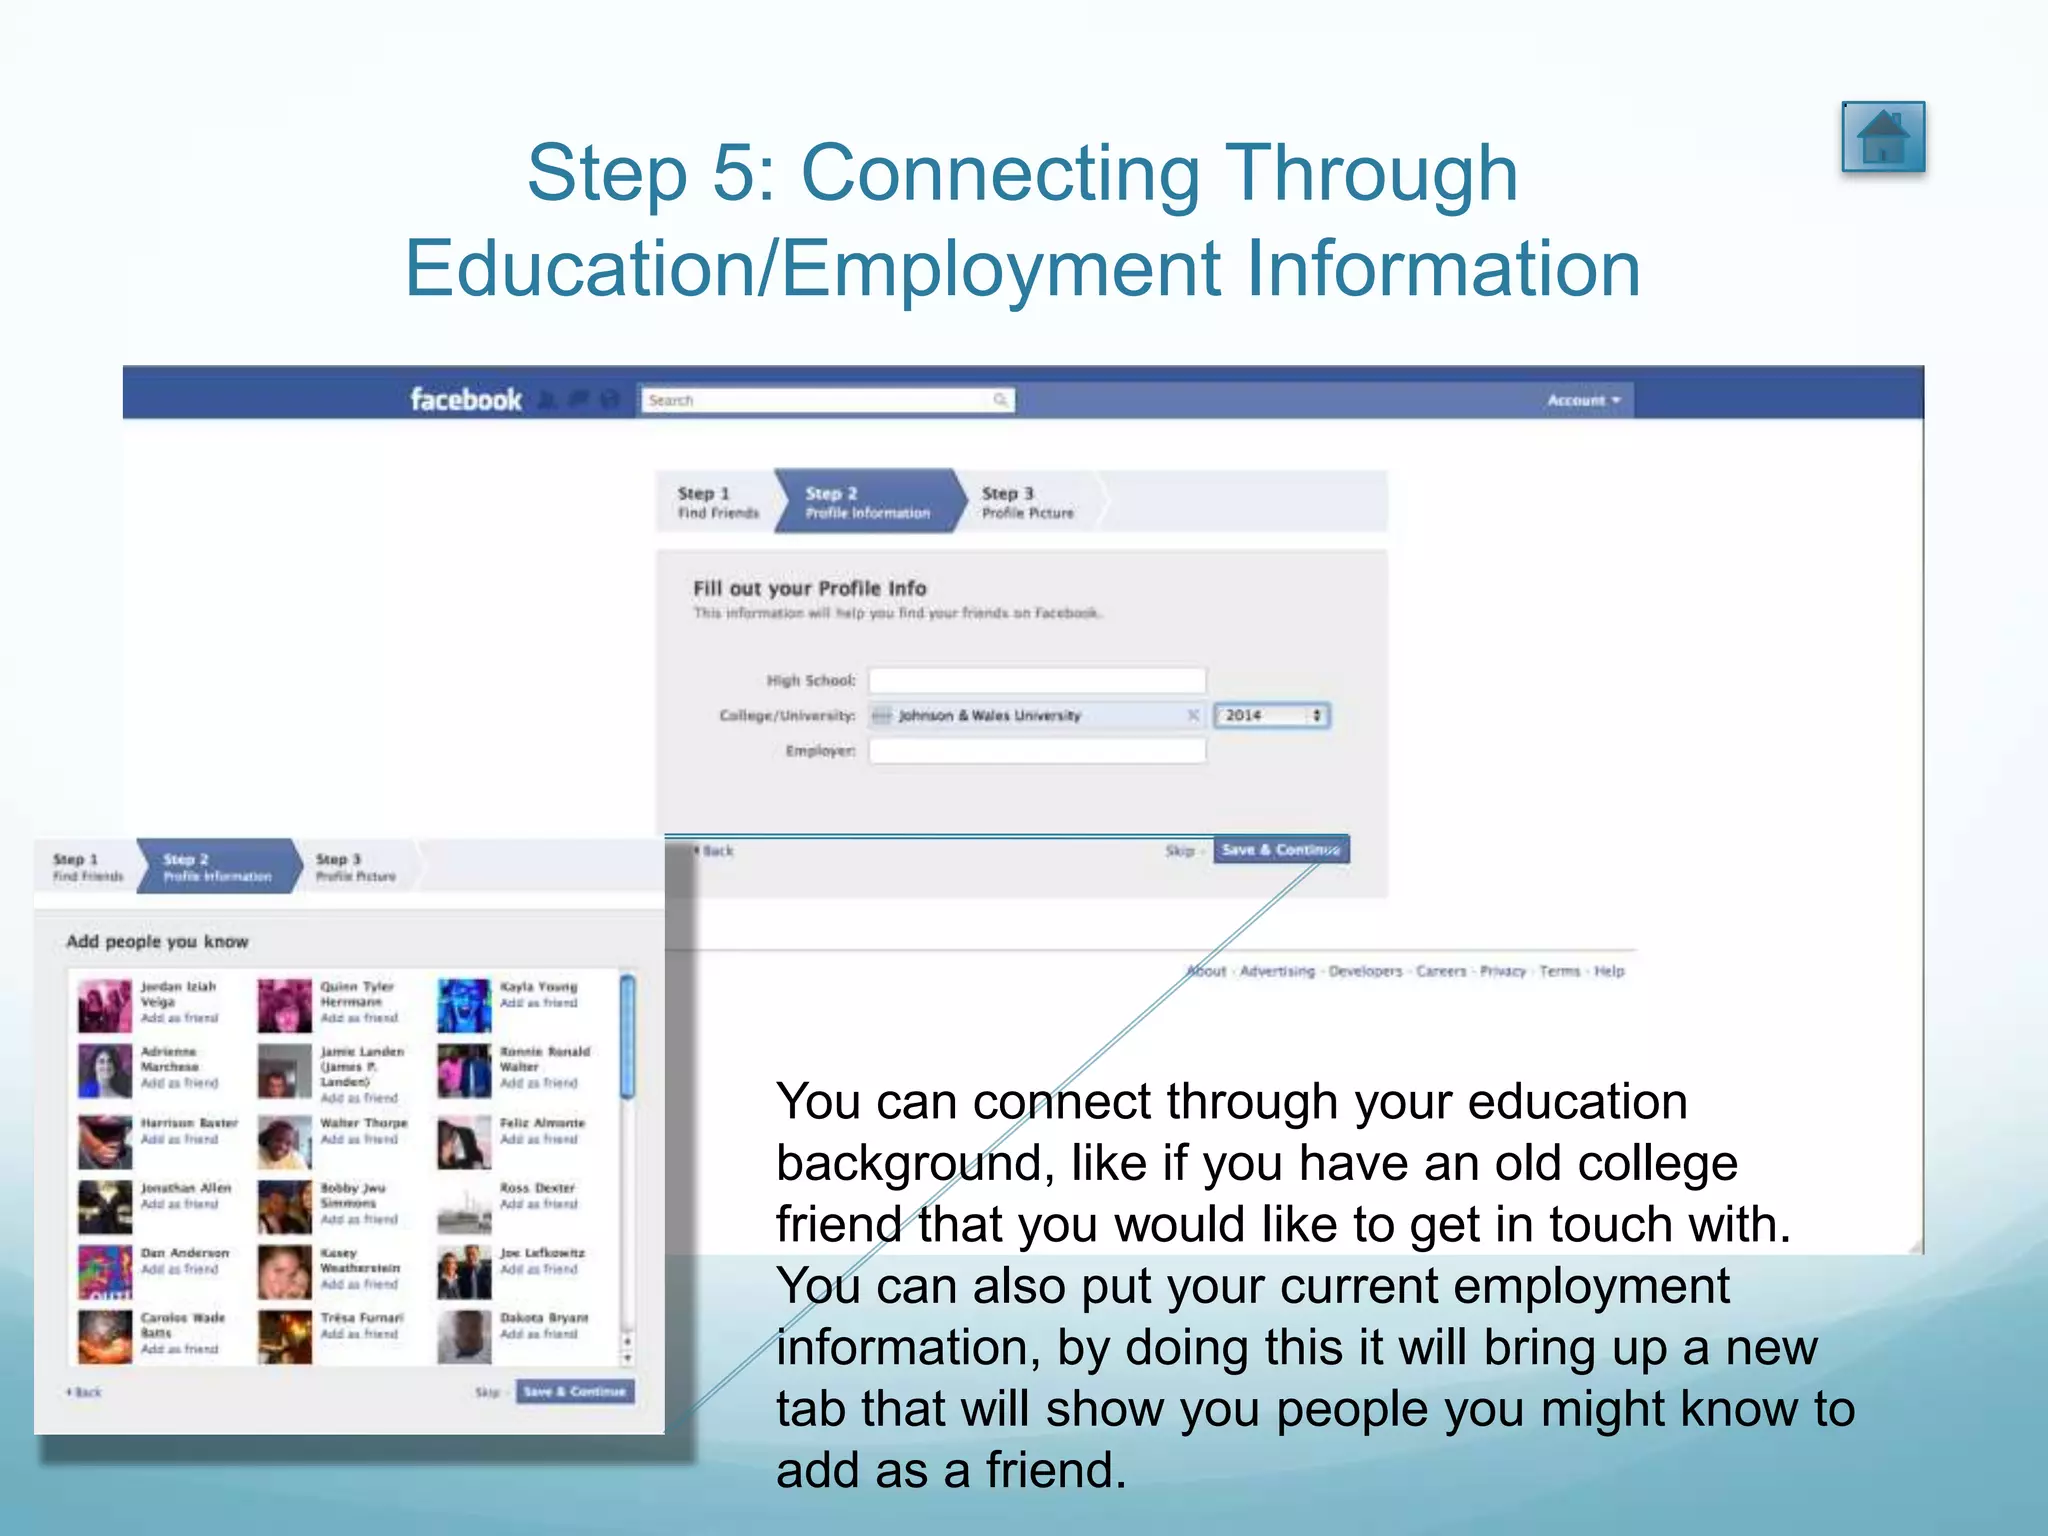
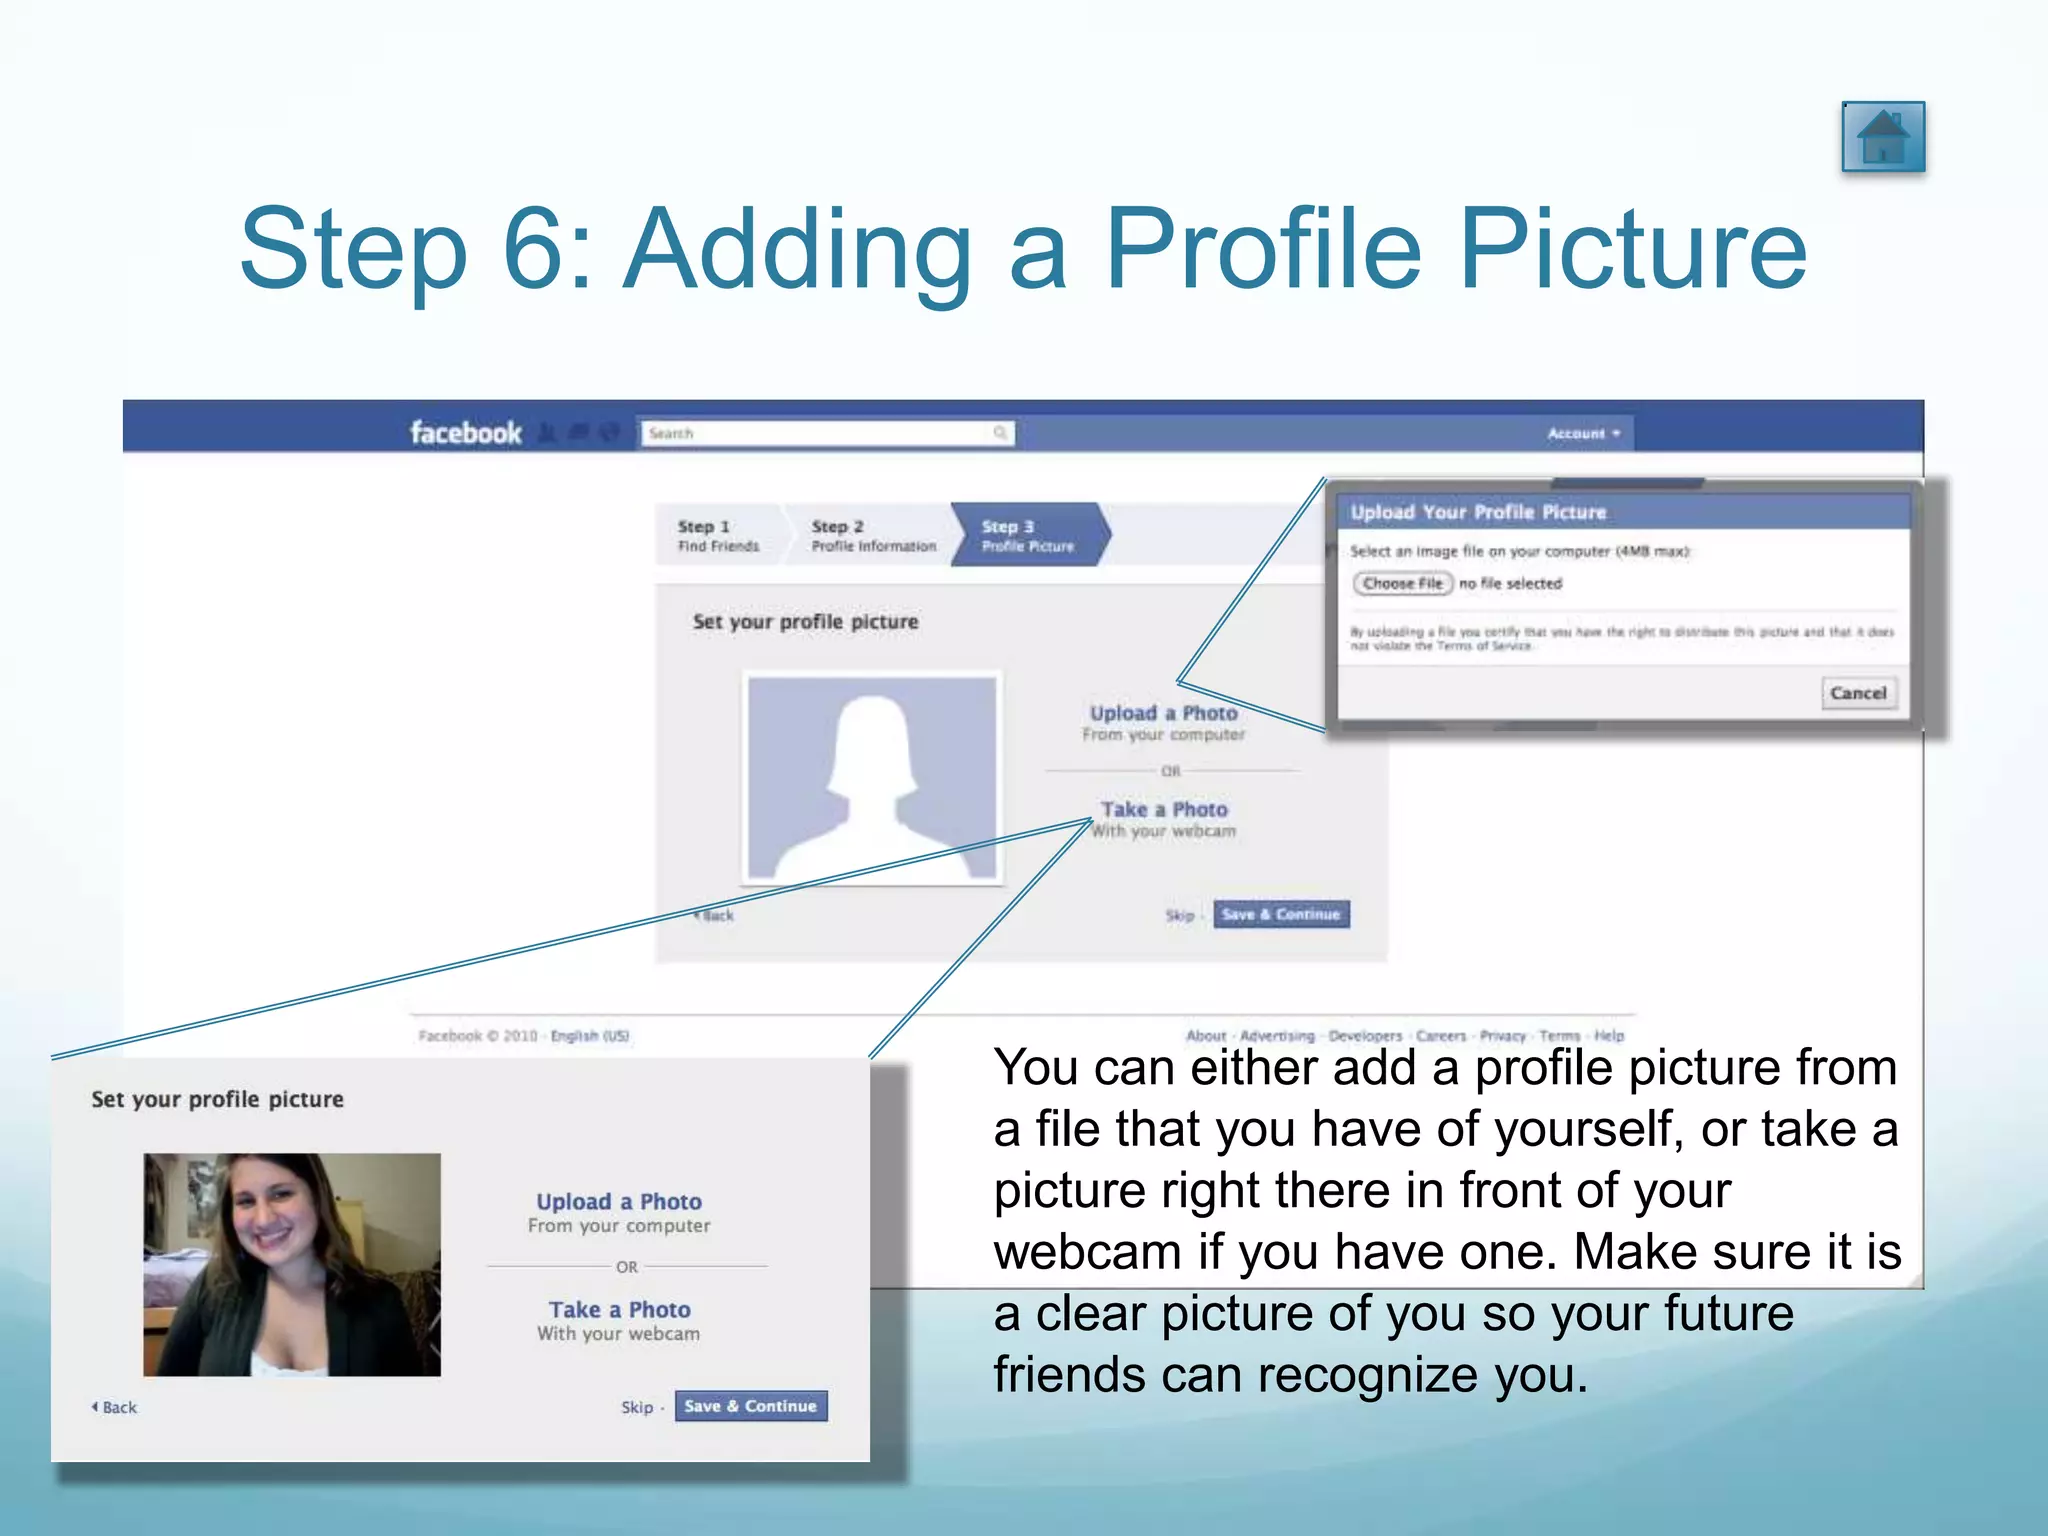
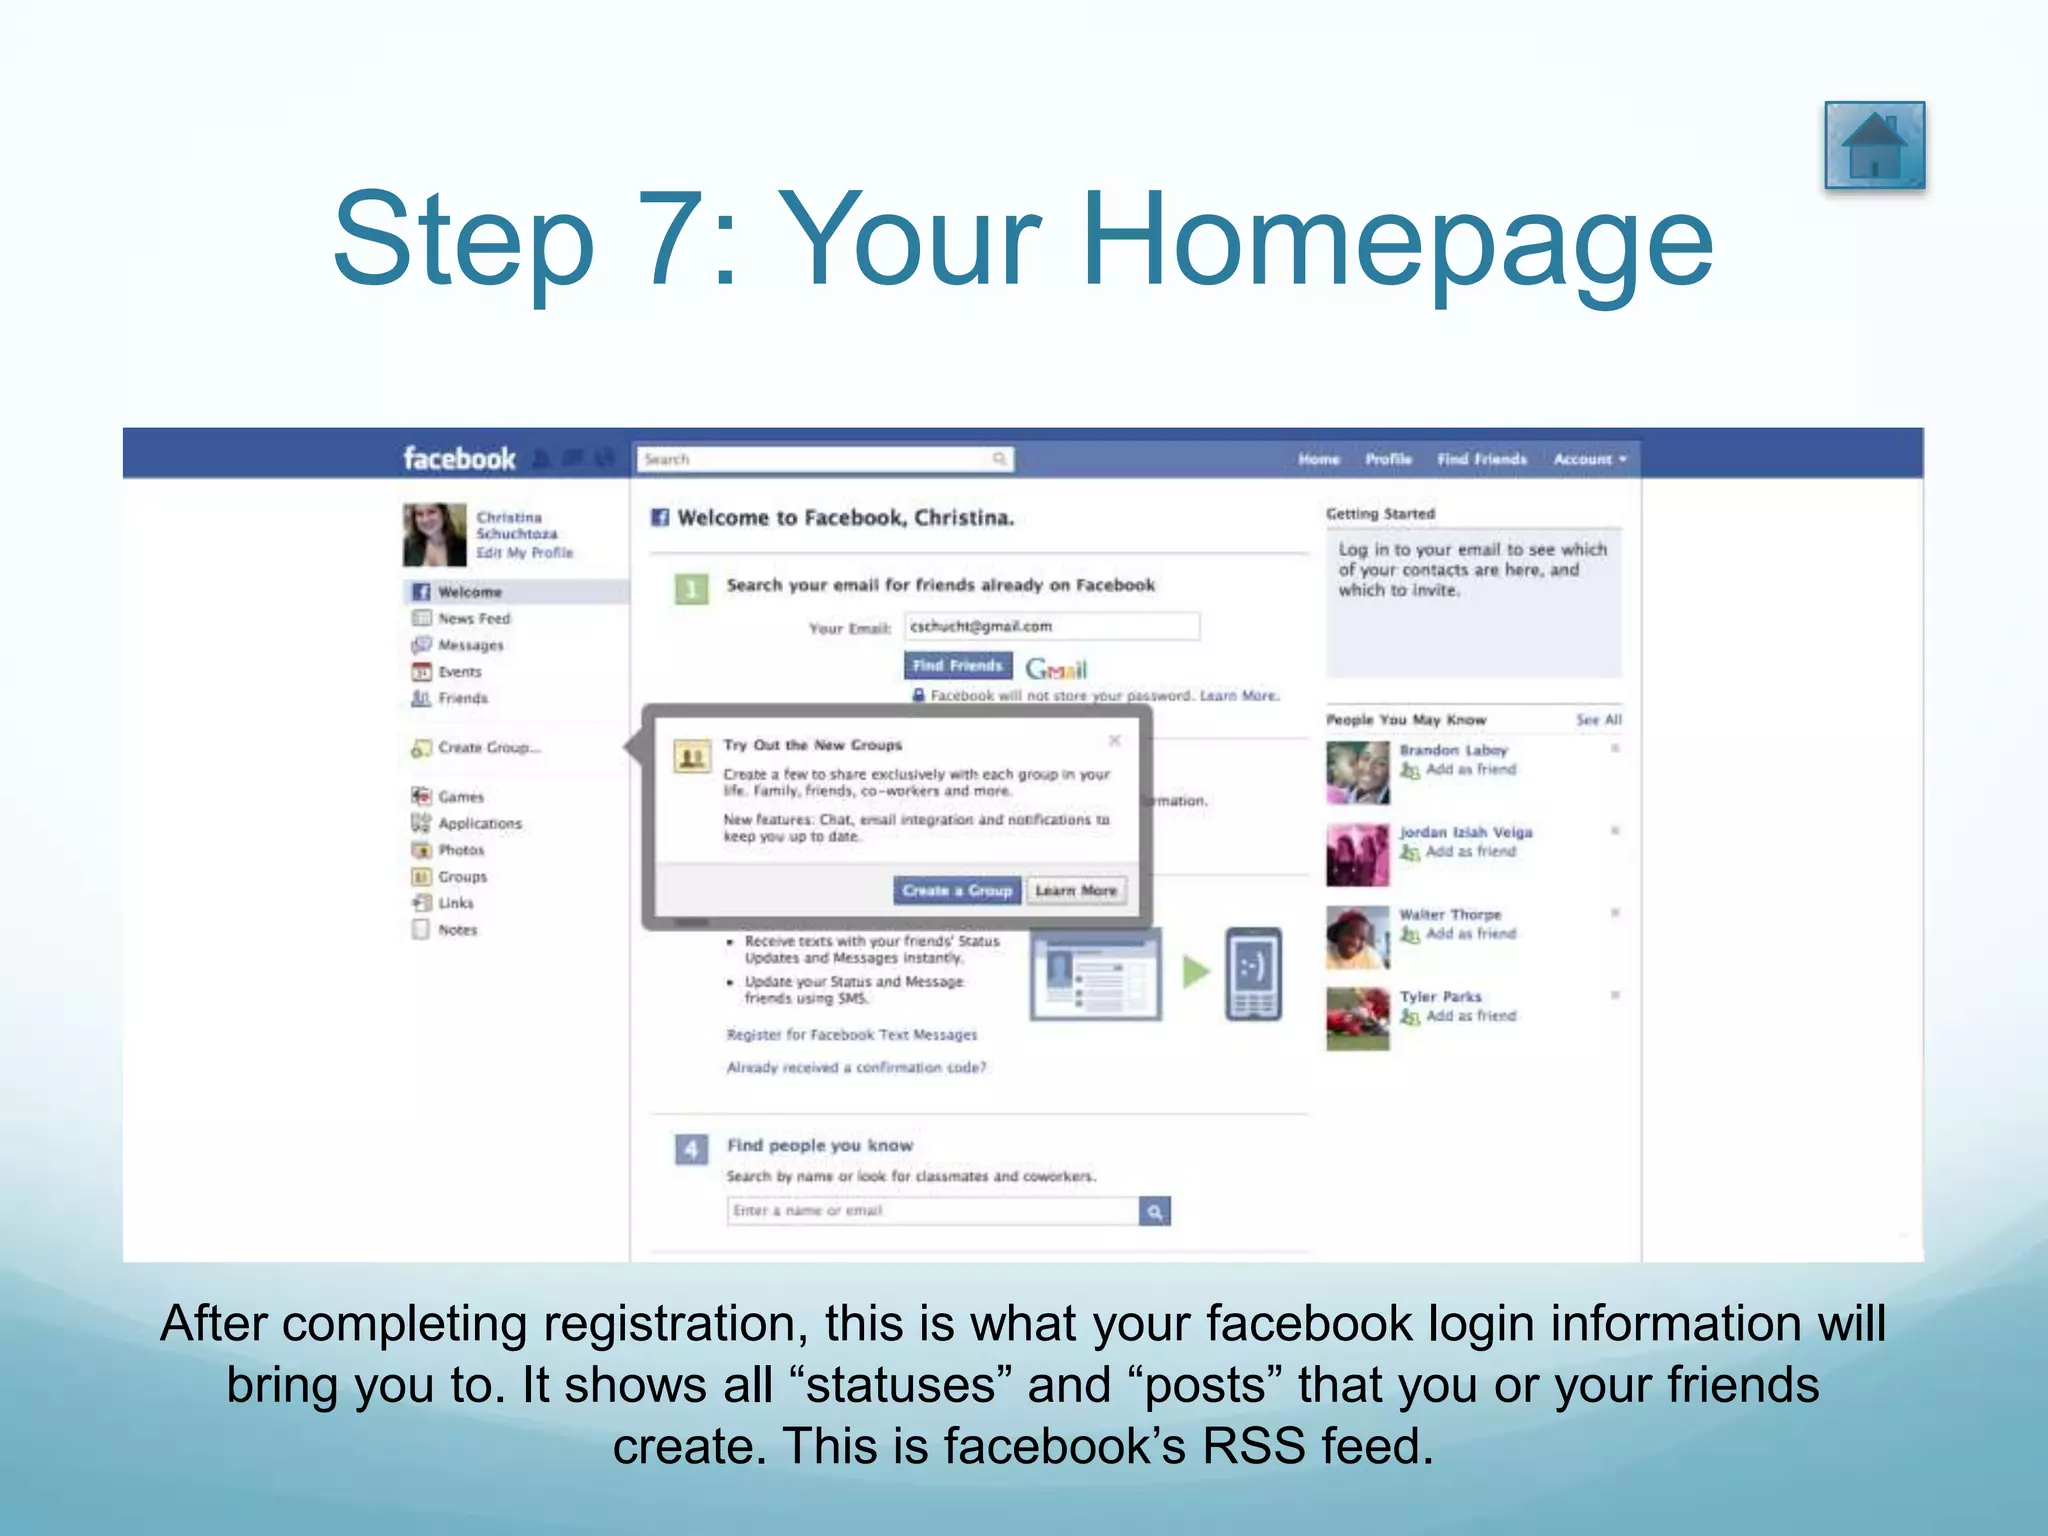
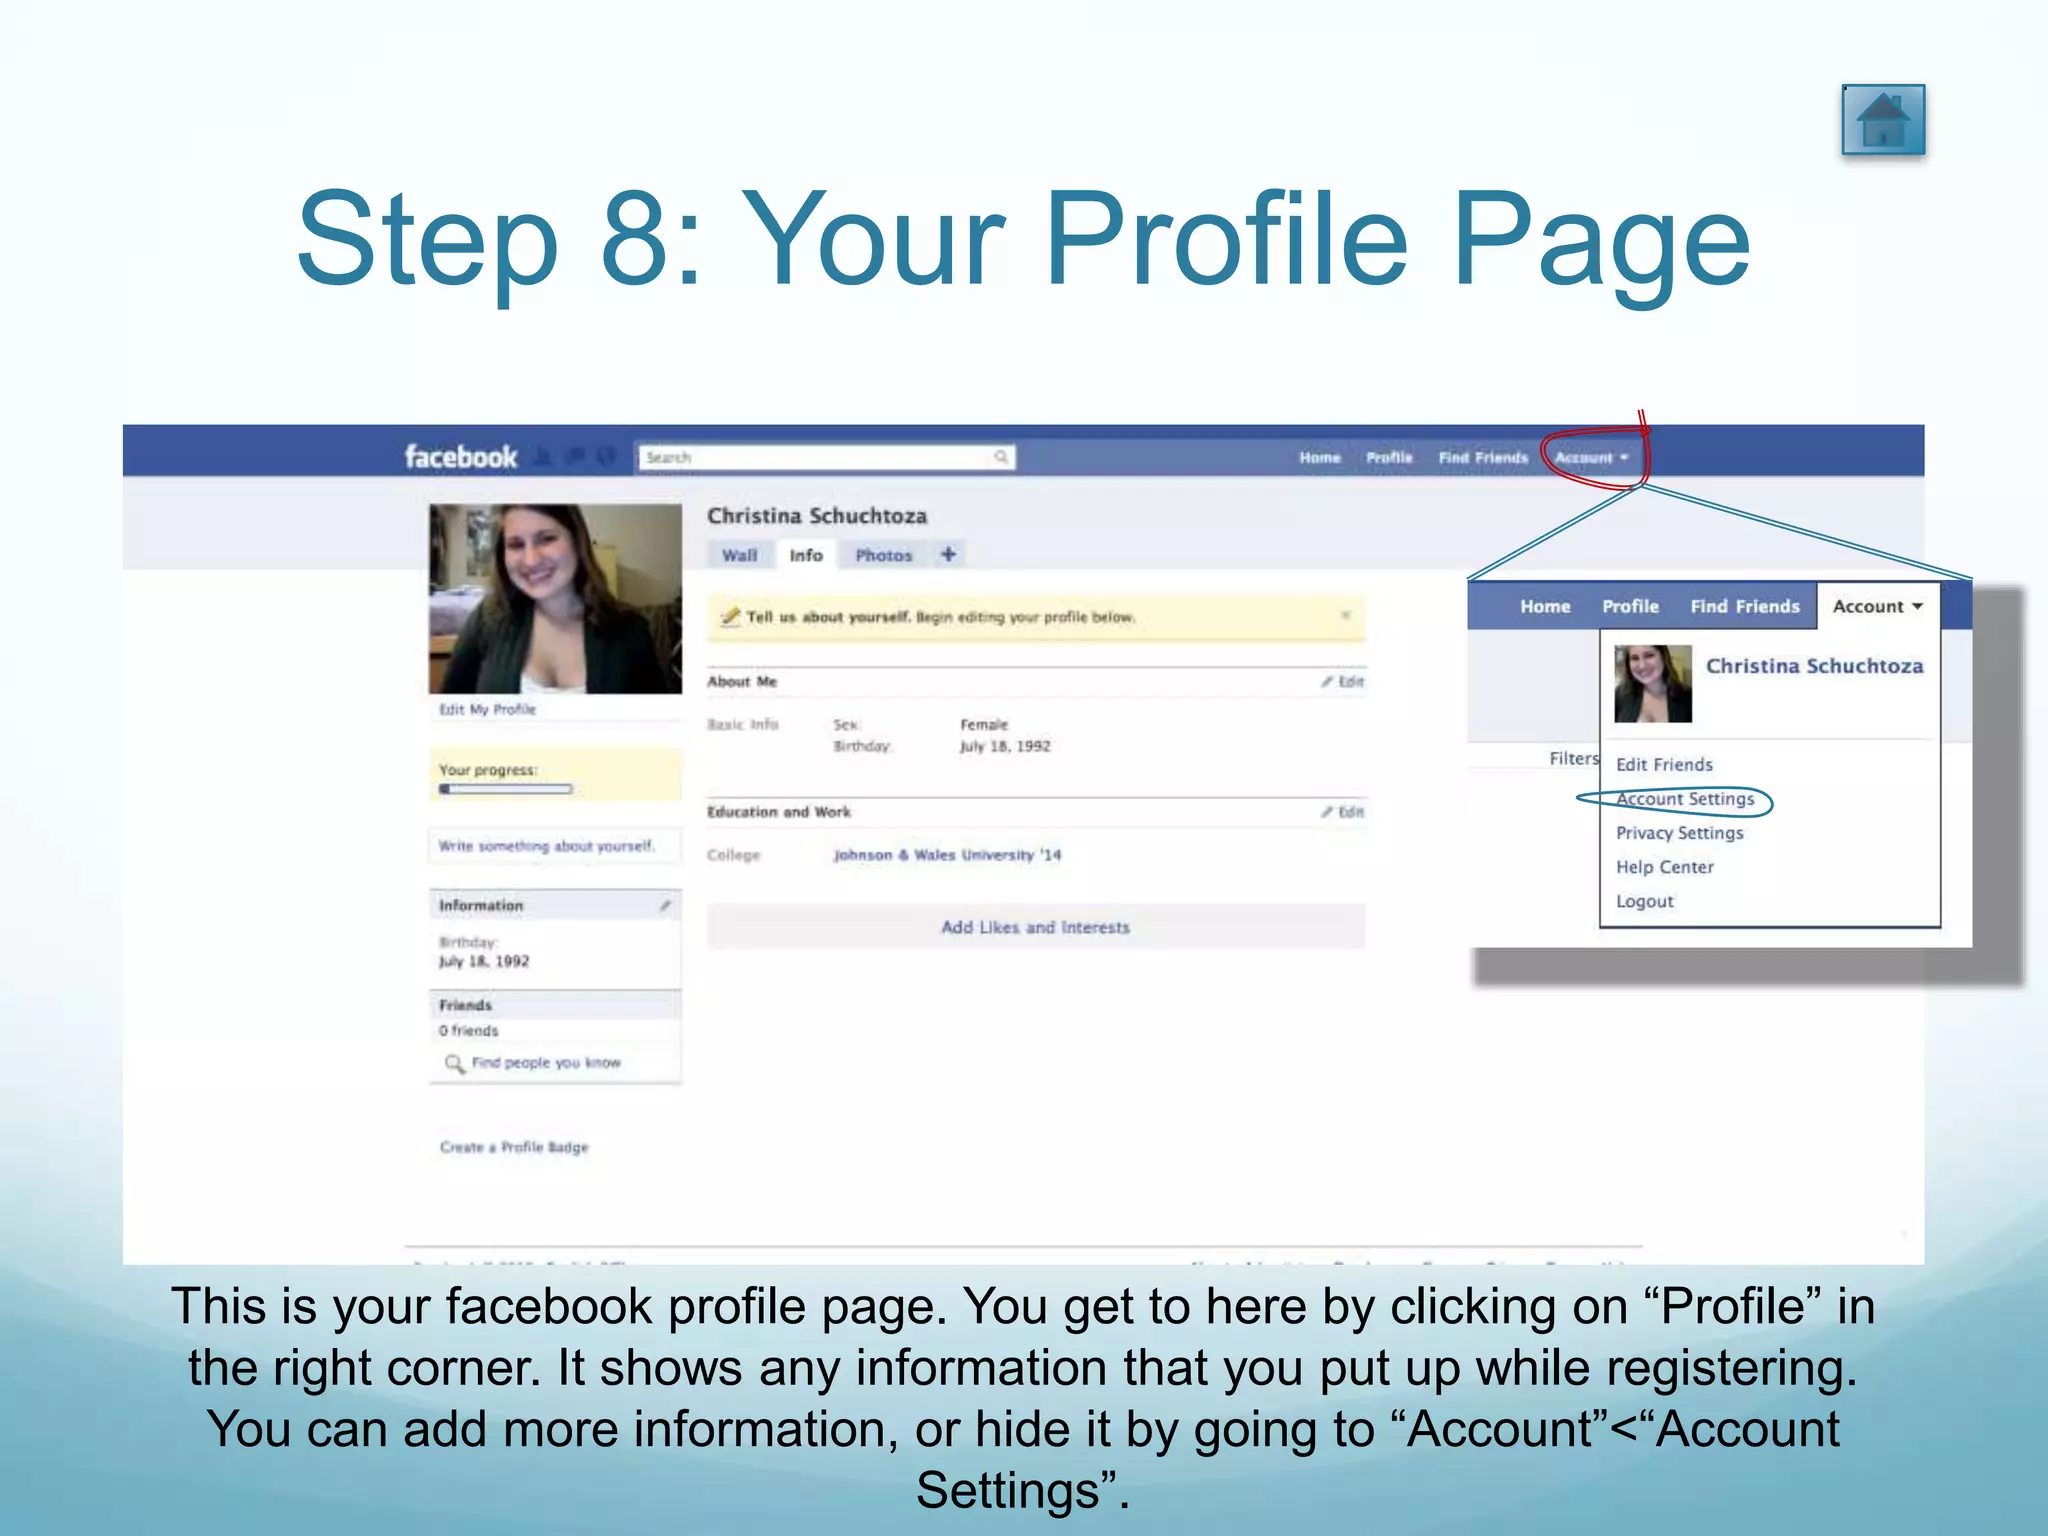
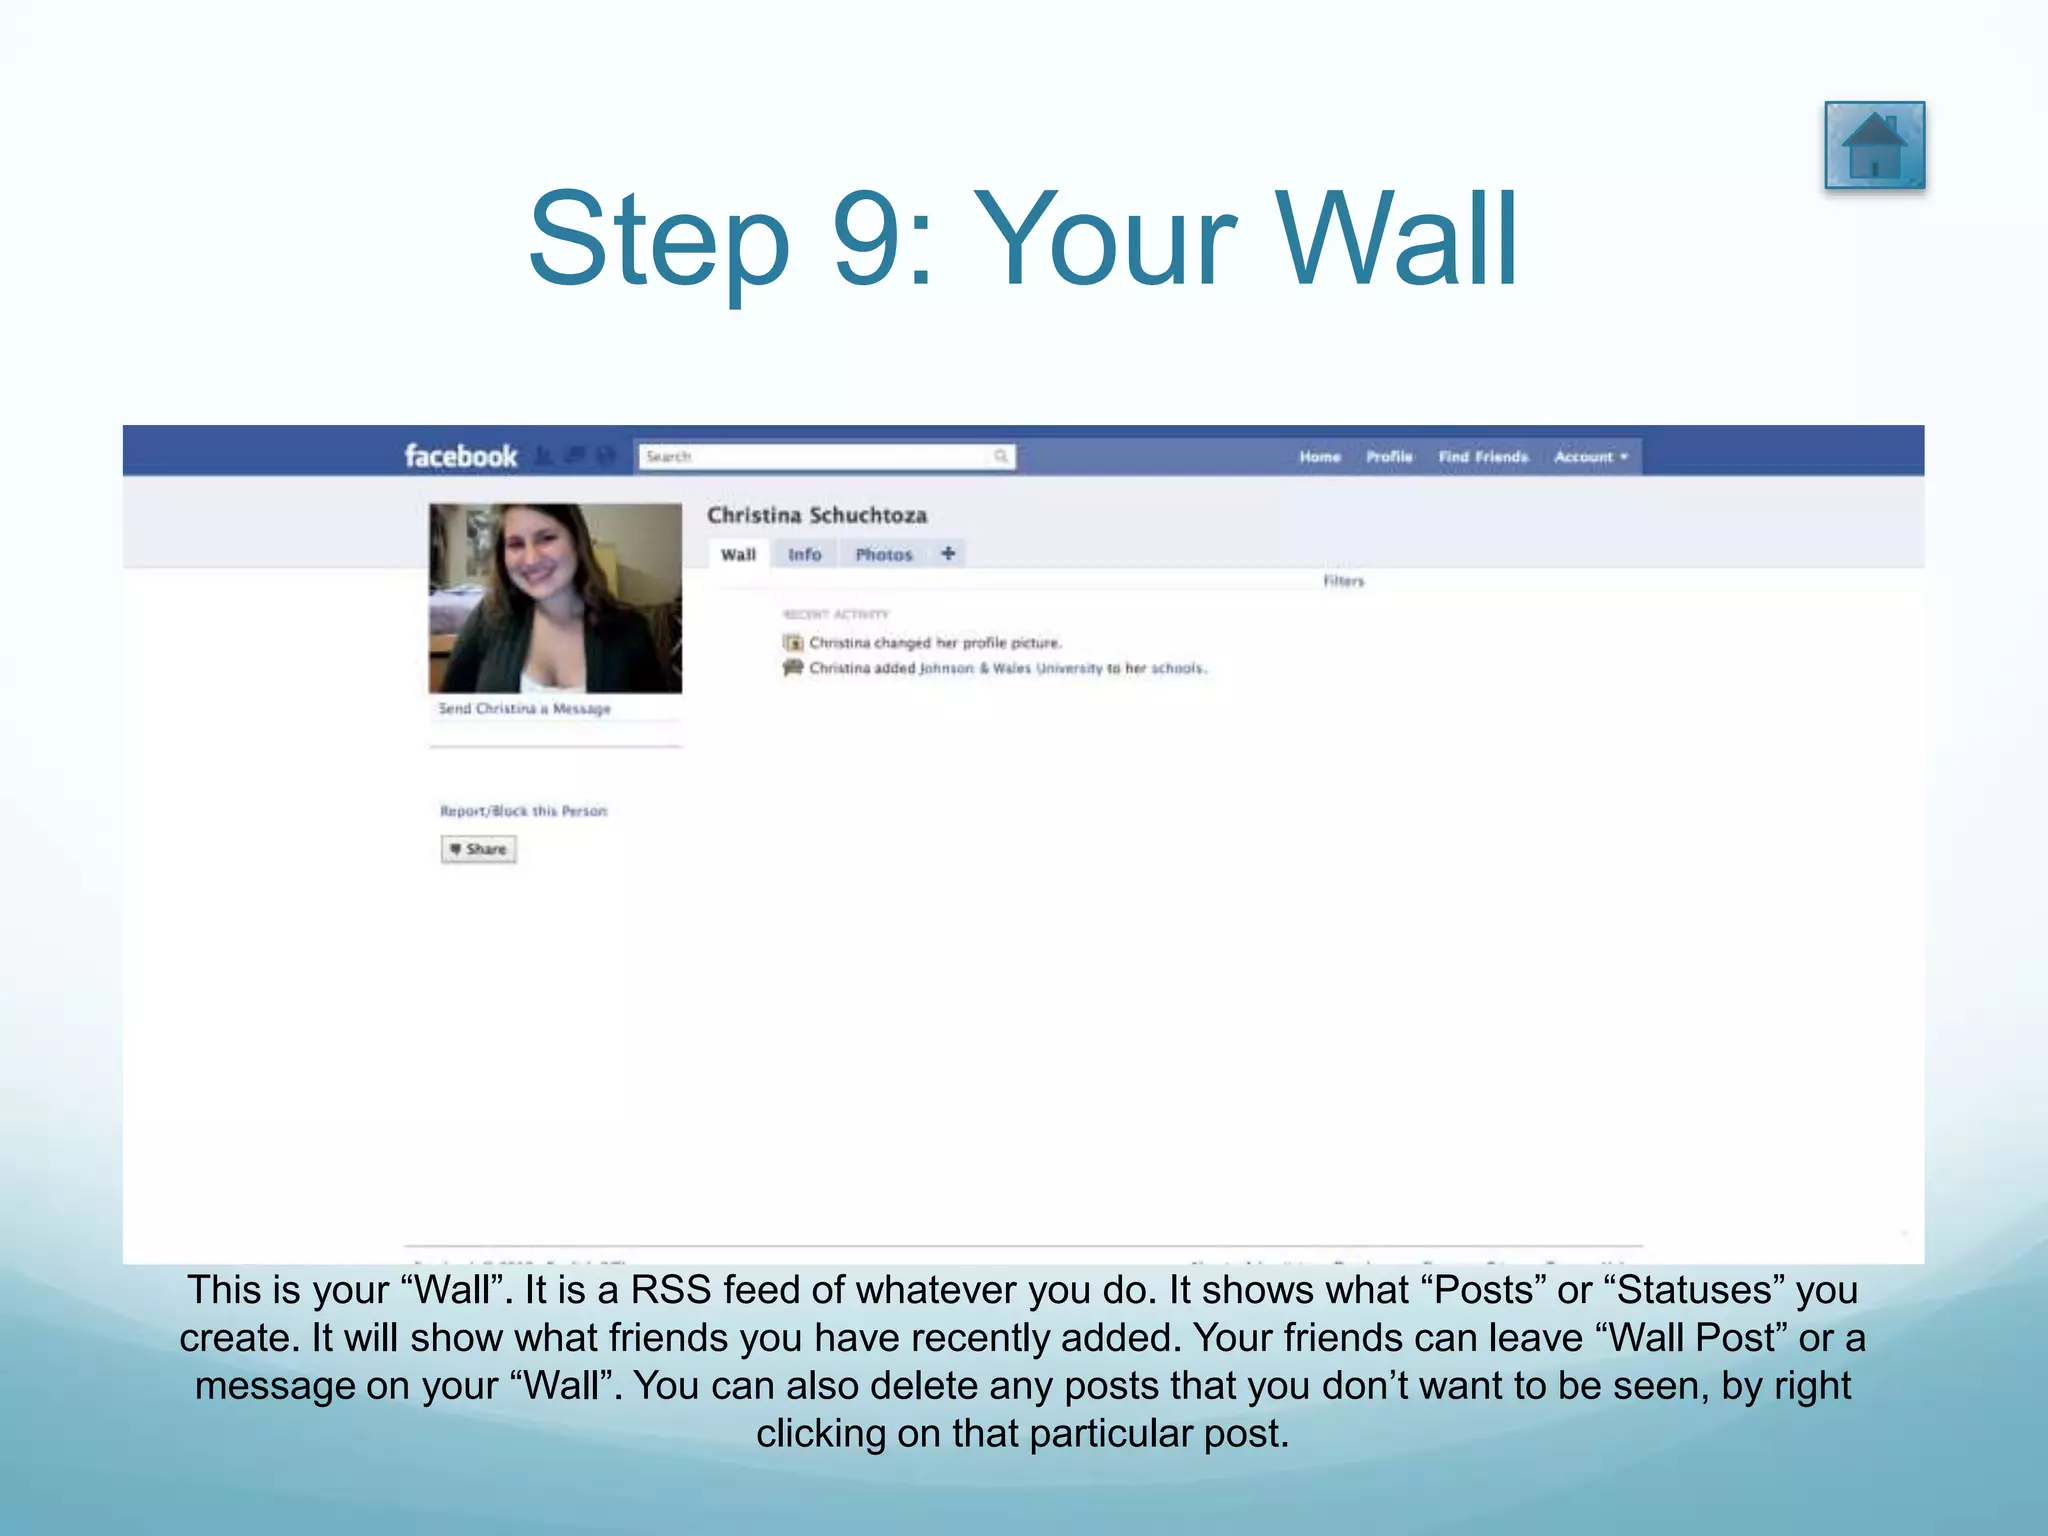
Presentation by:
Christina Schucht
Menu Page
You can select whatever step you want from here. It will start automatically
     from “Step 1: Opening the Page” if you do not choose in the next 15
 seconds. You may return to this page at anytime. By hitting the button with
                       house on it in the right corner.

         Step 1: Opening the Page                         Step 5: Connecting Through
                                                       Education/Employment information

             Step 2: Registration
                                                       Step 6: Adding a Profile Picture

           Step 3: Security Check
                                                       Step 7: Your Homepage
           “Making Connections”
                                                       Step 8: Your Profile Page
         Step 4: Connecting Through E-Mail
                                                           Step 9: Your Wall


                                             Credits
Step 1: Opening the Page


When you first open up www.facebook.com this is what it should look like.
Step 2: Registration
To create a facebook profile
you must first enter in the
necessary information in the
section of the homepage. You
must type in your full name,
your e-mail address (twice),
and a password (one that is
hard for people to figure out).
You must also put your sex
and your birthday. If you feel
uncomfortable with putting
any specific information up
you may change to make
private later.
Step 3: Security Check


You generally have to do a “Security Check” on many sites you
      may want to join. Just type in the letters you see.
“Making Connections” Steps
The next couple of steps are about “making
   connections” through different ways on
 facebook.com. Facebook.com is all about
    connecting with friends that you have
  now, friends from your past, and maybe
       help you make future friends.
Step 4: Connecting Through E-Mail


You can enter your e-mail address a second time to see if you have any contacts in your online
          address book, to see if you already have some friends on facebook.com.
Step 5: Connecting Through
Education/Employment Information


         You can connect through your education
         background, like if you have an old college
         friend that you would like to get in touch with.
         You can also put your current employment
         information, by doing this it will bring up a new
         tab that will show you people you might know to
         add as a friend.
Step 6: Adding a Profile Picture


               You can either add a profile picture from
               a file that you have of yourself, or take a
               picture right there in front of your
               webcam if you have one. Make sure it is
               a clear picture of you so your future
               friends can recognize you.
Step 7: Your Homepage


After completing registration, this is what your facebook login information will
   bring you to. It shows all “statuses” and “posts” that you or your friends
                      create. This is facebook’s RSS feed.
Step 8: Your Profile Page


This is your facebook profile page. You get to here by clicking on “Profile” in
 the right corner. It shows any information that you put up while registering.
  You can add more information, or hide it by going to “Account”<“Account
                                   Settings”.
Step 9: Your Wall


This is your “Wall”. It is a RSS feed of whatever you do. It shows what “Posts” or “Statuses” you
create. It will show what friends you have recently added. Your friends can leave “Wall Post” or a
 message on your “Wall”. You can also delete any posts that you don’t want to be seen, by right
                                   clicking on that particular post.
CONGRATULATIONS!
You have successfully created
 your own facebook.com page!

  CLICK HERE TO CREATE YOUR OWN ACCOUNT NOW!
CREDITS!
 Music by Trent Renzor& Atticus Ross
   The Social Network Soundrack
     Selection 2: “In Motion”

 Screen shots from www.facebook.com

How to Create an Account on www.facebook.com

  • 1.
  • 2.
    Menu Page You canselect whatever step you want from here. It will start automatically from “Step 1: Opening the Page” if you do not choose in the next 15 seconds. You may return to this page at anytime. By hitting the button with house on it in the right corner. Step 1: Opening the Page Step 5: Connecting Through Education/Employment information Step 2: Registration Step 6: Adding a Profile Picture Step 3: Security Check Step 7: Your Homepage “Making Connections” Step 8: Your Profile Page Step 4: Connecting Through E-Mail Step 9: Your Wall Credits
  • 3.
    Step 1: Openingthe Page When you first open up www.facebook.com this is what it should look like.
  • 4.
    Step 2: Registration Tocreate a facebook profile you must first enter in the necessary information in the section of the homepage. You must type in your full name, your e-mail address (twice), and a password (one that is hard for people to figure out). You must also put your sex and your birthday. If you feel uncomfortable with putting any specific information up you may change to make private later.
  • 5.
    Step 3: SecurityCheck You generally have to do a “Security Check” on many sites you may want to join. Just type in the letters you see.
  • 6.
    “Making Connections” Steps Thenext couple of steps are about “making connections” through different ways on facebook.com. Facebook.com is all about connecting with friends that you have now, friends from your past, and maybe help you make future friends.
  • 7.
    Step 4: ConnectingThrough E-Mail You can enter your e-mail address a second time to see if you have any contacts in your online address book, to see if you already have some friends on facebook.com.
  • 8.
    Step 5: ConnectingThrough Education/Employment Information You can connect through your education background, like if you have an old college friend that you would like to get in touch with. You can also put your current employment information, by doing this it will bring up a new tab that will show you people you might know to add as a friend.
  • 9.
    Step 6: Addinga Profile Picture You can either add a profile picture from a file that you have of yourself, or take a picture right there in front of your webcam if you have one. Make sure it is a clear picture of you so your future friends can recognize you.
  • 10.
    Step 7: YourHomepage After completing registration, this is what your facebook login information will bring you to. It shows all “statuses” and “posts” that you or your friends create. This is facebook’s RSS feed.
  • 11.
    Step 8: YourProfile Page This is your facebook profile page. You get to here by clicking on “Profile” in the right corner. It shows any information that you put up while registering. You can add more information, or hide it by going to “Account”<“Account Settings”.
  • 12.
    Step 9: YourWall This is your “Wall”. It is a RSS feed of whatever you do. It shows what “Posts” or “Statuses” you create. It will show what friends you have recently added. Your friends can leave “Wall Post” or a message on your “Wall”. You can also delete any posts that you don’t want to be seen, by right clicking on that particular post.
  • 13.
    CONGRATULATIONS! You have successfullycreated your own facebook.com page! CLICK HERE TO CREATE YOUR OWN ACCOUNT NOW!
  • 14.
    CREDITS!  Music byTrent Renzor& Atticus Ross  The Social Network Soundrack  Selection 2: “In Motion”  Screen shots from www.facebook.com