This document provides an introduction to using IBM Bluemix DevOps Services to deploy applications. It is broken into multiple parts that build on each other. Part 1 walks through deploying a simple application and one that uses a Bluemix service. It also demonstrates how to plan and track work using DevOps Services. Part 2 introduces live editing and debugging capabilities for Bluemix applications. The overall lab guides users through common DevOps tasks like deploying apps, making changes, using services, and automating processes.
Intro to IBM Bluemix DevOps Services, a Workshop with a Cloudant twistLauren Hayward Schaefer
Have you found my Intro to IBM Bluemix DevOps Services open lab (http://www.slideshare.net/LaurenHaywardSchaefe/open-lab-44892944) or article series (http://www.ibm.com/developerworks/cloud/library/cl-intro1-app/index.html) and wished the database was Cloudant instead of MongoLab? Your wish is my command!
This workshop will introduce you to the basics of deploying to Bluemix, planning your work, coding in the web IDE, creating a delivery pipeline, and debugging your Bluemix app. And you'll even get to use Cloudant!
Have you ever wondered how website designers create dazzling websites? This is your chance to dive into the wonderful world of web design. Come learn the basics of HTML and CSS. You'll even get to do a little coding! By the end of the session, you'll launch a customized website about the topic of your choice!
MoodLocator uses Google Maps and Twitter to display the current Twitter Messages (Tweets) on a map. This has a city name as defined search criteria and therefore also defines the border area to collect the tweets. Bluemix provides the cloud platform where this app runs and even though one of the Bluemix services called Watson User Modeling will be chosen to combine.The Watson User Modeling service collects the City Tweets and uses linguistic analytics to extract a spectrum of cognitive and social characteristics of them. How to use it in presentation
Have you ever wondered how website designers create dazzling websites? This is your chance to dive into the wonderful world of web design. Come learn the basics of HTML and CSS. You'll even get to do a little coding! By the end of the session, you'll launch a customized website about the topic of your choice!
These have been slightly updated from the presentation given by Kevin Pettitt with Bruce Elgort and Vince Schuurman at the Irish Lotus User Group (ILUG) conference in May 2007
For the first time, 'WordPress-Trivandrum' had a Live Demo Session.
WordPress is not just about blogging. We’ve experienced e-commerce and social media revolution. It's time for another one, the Internet of Things or IoT. There are a handful of automation plugins and services available for WordPress and the number is about to grow. In this session, we will have a look at what we can do with WordPress for connecting our website to real-world Things – "The Internet of Things".
Key focus:-
• Google Assistant
• Amazon Alexa
• IFTTT
• Philips Hue
• Arduino
• Raspberry Pi
Live Demos: -
• Get a Light flashing when someone comments in posts
• Get an Alert sound when you receive an order in your shop
• Add photos to the Photo Gallery whenever you post it in Instagram
• Ask Google Assistant to create a new post
• Get an alert when someone submits a custom web form you created
A Grace Hopper Celebration of Women in Computing Workshop
Development tools installed on your PC? SO LAST YEAR! By leveraging Platforms as a Service, Software as a Service, and DevOps techniques, you can develop the next great app without ever leaving your web browser.
Bring your laptop or tablet, and get ready to code! You’ll leave this session with a running app and the knowledge you need to lead your team into the wonderful world of cloud computing.
#ghc15
10 Minutes Bluemix Pitch from Dev to Dev
Video: https://www.youtube.com/watch?v=U7zS1_6TZD8
Niklas Heidloff, IBM, Bluemix Developer Advocate
http://twitter.com/nheidloff,
http://heidloff.net
https://bluemix.net
A progressive web app (PWA) delivers an app-like experience through your mobile phone’s browser but has the same flexibility and gestures as a native application. Because they are powered by mobile browsers, they are not particular to any one device, meaning developers no longer need to write separate code for Android and Apple devices.
Rapid prototyping with BlackBerry Webworks is a getting started guide to developing and publishing your html, css, and javascript application for the BlackBerry platform.
An overview of Bluemix, the platform's console, and steps on deploying and updating a simple application. Final slides go over several Bluemix-Watson use cases.
Introduction to Docker and Containers- Learning SimpleSandeep Hijam
This small free E-book talks about what docker and containers are. Also I believe every reader can easily understand the underlying principle without technical jargon
Hybrid apps allow you to reach the user base of both Android and iOS devices. But developing an app that seamlessly performs on different operating systems needs adequate efficiency. Check out the best practices of hybrid app development and build a superb app in no time. https://www.webguru-india.com/blog/how-to-build-a-hybrid-app-a-detailed-outline/
by Luca Della Giovanna - Come to IBM Code Lab and grab the opportunity to get hand-on experience with Bluemix, the next generation open-standards, cloud-based platform for building, managing, and running your apps, of all types. At Code Lab you can explore the world of infinite possibilities Bluemix supplies to mobile and back-end development and application monitoring, as well as for web, mobile, big data, and smart devices. Our knowledgeable staff will lead you through Boilerplates, Java runtimes, and all features from a rich ecosystem of partners and open source projects — all provided as-a-service in the cloud.
Forget best practices–let’s talk *worst practices* for building an API. In this session, we’ll evaluate a fictitious API and identify everything we hate about it. You’ll leave this session with seven worst practices for you to avoid as you build and develop your next API.
Developer Advocacy: A Career Path for Those With a Passion for Code, Communit...Lauren Hayward Schaefer
Chances are good that you’ve interacted with a developer advocate at one point or another. Perhaps you’ve chatted with them at a booth at a conference, read their blog post, or cloned their code sample on GitHub. This session will provide you with a deeper understanding of the role of developer advocacy and its significance in the tech industry.
What is a developer advocate? A developer advocate advocates for two entities at the same time: at their company, they advocate for the developer community, and, in the developer community, they advocate for their company. Developer advocates have a passion for developer experience and reaching developers where they are, through a variety of mediums, including conference talks, documentation, written tutorials, social media, videos, live streams, code samples, online forums, and more.
Come chat with Liz and Lauren about their experiences as developer advocates and discover if developer advocacy could be the right next step for your career. They'll reveal the highs and lows of their positions, how they successfully transitioned into these roles, and how they’ve customized their careers to fit their unique strengths and interests.
More Related Content
Similar to Intro to IBM Bluemix DevOps Services, an open lab for IBM InterConnect
A Grace Hopper Celebration of Women in Computing Workshop
Development tools installed on your PC? SO LAST YEAR! By leveraging Platforms as a Service, Software as a Service, and DevOps techniques, you can develop the next great app without ever leaving your web browser.
Bring your laptop or tablet, and get ready to code! You’ll leave this session with a running app and the knowledge you need to lead your team into the wonderful world of cloud computing.
#ghc15
10 Minutes Bluemix Pitch from Dev to Dev
Video: https://www.youtube.com/watch?v=U7zS1_6TZD8
Niklas Heidloff, IBM, Bluemix Developer Advocate
http://twitter.com/nheidloff,
http://heidloff.net
https://bluemix.net
A progressive web app (PWA) delivers an app-like experience through your mobile phone’s browser but has the same flexibility and gestures as a native application. Because they are powered by mobile browsers, they are not particular to any one device, meaning developers no longer need to write separate code for Android and Apple devices.
Rapid prototyping with BlackBerry Webworks is a getting started guide to developing and publishing your html, css, and javascript application for the BlackBerry platform.
An overview of Bluemix, the platform's console, and steps on deploying and updating a simple application. Final slides go over several Bluemix-Watson use cases.
Introduction to Docker and Containers- Learning SimpleSandeep Hijam
This small free E-book talks about what docker and containers are. Also I believe every reader can easily understand the underlying principle without technical jargon
Hybrid apps allow you to reach the user base of both Android and iOS devices. But developing an app that seamlessly performs on different operating systems needs adequate efficiency. Check out the best practices of hybrid app development and build a superb app in no time. https://www.webguru-india.com/blog/how-to-build-a-hybrid-app-a-detailed-outline/
by Luca Della Giovanna - Come to IBM Code Lab and grab the opportunity to get hand-on experience with Bluemix, the next generation open-standards, cloud-based platform for building, managing, and running your apps, of all types. At Code Lab you can explore the world of infinite possibilities Bluemix supplies to mobile and back-end development and application monitoring, as well as for web, mobile, big data, and smart devices. Our knowledgeable staff will lead you through Boilerplates, Java runtimes, and all features from a rich ecosystem of partners and open source projects — all provided as-a-service in the cloud.
Forget best practices–let’s talk *worst practices* for building an API. In this session, we’ll evaluate a fictitious API and identify everything we hate about it. You’ll leave this session with seven worst practices for you to avoid as you build and develop your next API.
Developer Advocacy: A Career Path for Those With a Passion for Code, Communit...Lauren Hayward Schaefer
Chances are good that you’ve interacted with a developer advocate at one point or another. Perhaps you’ve chatted with them at a booth at a conference, read their blog post, or cloned their code sample on GitHub. This session will provide you with a deeper understanding of the role of developer advocacy and its significance in the tech industry.
What is a developer advocate? A developer advocate advocates for two entities at the same time: at their company, they advocate for the developer community, and, in the developer community, they advocate for their company. Developer advocates have a passion for developer experience and reaching developers where they are, through a variety of mediums, including conference talks, documentation, written tutorials, social media, videos, live streams, code samples, online forums, and more.
Come chat with Liz and Lauren about their experiences as developer advocates and discover if developer advocacy could be the right next step for your career. They'll reveal the highs and lows of their positions, how they successfully transitioned into these roles, and how they’ve customized their careers to fit their unique strengths and interests.
10 Best Practices for Writing Documentation (For Those Who Would Rather Do An...Lauren Hayward Schaefer
When I joined my current team, I discovered that writing external documentation was part of my role. While I had experience writing tech blogs, writing documentation felt like an entirely new skill. And I didn't love it.
Chances are good you've written documentation previously or will need to in the future. Perhaps you’re writing official documentation for your users or something more informal, like internal documentation for your teammates or a GitHub readme.
In this session, I’ll share ten best practices for writing documentation. You’ll leave with the knowledge you need to successfully write documentation your readers will enjoy, and you’ll possibly even be excited about the prospect of doing so.
Intro to Technical Writing: Creating Content that Google and Readers will LoveLauren Hayward Schaefer
Do you ever find yourself with an itch to write but end up staring at a blank screen until you eventually give up and do something else? We’ve been there, and we’re ready to help you get started.
Sharing your expertise with the developer community online through thought-leadership articles and tutorials has many benefits, including becoming known as the go-to expert for a topic, building connections with others who share a passion for your topic, and enhancing your case for a promotion. In this workshop, we’ll guide you through:
- Brainstorming and selecting a topic
- Optimizing your content for search engines (SEO)
- Leveraging best practices as you write your article or tutorial
- Reusing your content on other platforms
By the end of this workshop, you will publish an article or tutorial online and have a topic for your next piece.
We commonly think about leveling up our technical careers by exploring new technology, learning best practices, or finding a mentor. But we don’t always think about the power of the written word.
In this keynote full of personal stories and practical advice, Lauren will explain how you can use writing to level up your technical career. She’ll provide you with concrete strategies for how to write internally at your company as well as externally in the wider tech community. Then she’ll share steps you can take to improve the quality of your writing.
You’ll leave this keynote energized and ready to level up your career by writing.
The first page of this worksheet will help you identify what your profile is and how you want your profile to evolve. The second page of this worksheet helps you make a plan for raising your profile.
Recording of talk associated with this worksheet: https://www.youtube.com/watch?v=Z3tgvOZdinM&feature=youtu.be
Slides associated with this worksheet: https://www.slideshare.net/LaurenHaywardSchaefe/how-to-raise-your-profile-as-a-developer-and-why-you-should-bother
If you've ever found yourself questioning how to apply data modeling best practices to your projects, you're not going to want to miss this session.
Lauren Schaefer recently worked with Maxime Beugnet and Mark Smith to rapidly build an app. The app retrieves daily stats about YouTube videos and visualizes the data in a dashboard. In their two-week sprint to get a working MVP, they did their best to model the data, but they didn't get it all right the first time.
In this stream, Lauren will share five things she learned while modeling data for this app. You'll leave with practical data modeling tips you can apply to your next project that uses MongoDB.
This session is based on https://www.mongodb.com/developer/article/7-things-learned-while-modeling-data-youtube-stats/
How to Raise Your Profile as a Developer (And Why You Should Bother!)Lauren Hayward Schaefer
We like to think the tech industry is a meritocracy: if you put your head down and do your work well, you will be recognized. Unfortunately, this is not typically the case. In order to advance your career, you will likely need to raise your profile internally at your company and/or externally in the broader developer community. During this session, Lauren Schaefer will share personal stories of how she has worked to overcome the discomfort of raising her profile. You'll leave this session with practical steps you can take in the coming weeks and months to raise your profile.
CI/CD pipelines are essential to rapidly developing apps...but they can be time consuming to create. Come learn how I used GitHub Actions and brand new Realm code deployment features to create a CI/CD pipeline for a Realm mobile app.
You'll leave this session with an understanding of how you can move your Realm mobile or web app through the stages of a CI/CD pipeline from development to staging to production. You’ll also get a link to the GitHub repo with my pipeline code, so you can get your pipeline up and running quickly.
Did you grow up on relational databases? Are document-based databases a bit of a mystery to you? If so, you don't want to miss this meetup! We’ll compare terms and concepts, explain the benefits of document-based databases, and walk through the 3 key ways you need to change your mindset to successfully use document-based databases.
When you need to model data, is your first instinct to start breaking it down into rows and columns? When you want to develop apps in a modern, agile way, NoSQL databases can be the best option.
As a startup, you're probably interested in spending more time on shipping features than managing your database.
We will discuss:
- What is NoSQL?
- How terms and concepts in MongoDB relate to those in relational databases
- The benefits of MongoDB for startups
- The 3 key ways you need to change your mindset to successfully use MongoDB for your startup
and more!
https://mongodbcom.website.prod.corp.mongodb.com/webinar/why-use-no-sql-for-startups
Want to learn the fundamentals of document databases and why they have become the widely used alternative to traditional relational databases? If so, you don’t want to miss this webinar!
In Back to Basics, we’ll introduce you to the foundational concepts of the world’s most popular NoSQL database, MongoDB, and explain how you can leverage the MongoDB Cloud to build modern, data-driven applications.
Agenda includes:
- A brief overview of how data is stored in MongoDB vs relational databases
- A live demo of MongoDB Atlas, a fully managed multi-cloud database service
- Tips and tricks you should know to get the best out of MongoDB
Serverless application development is fabulous…but if you don’t have a CI/CD pipeline with a strong foundation of test automation, you’ll likely fail.
In this session, MongoDB Developer Advocate Lauren Schaefer will walk you through the process of crafting test automation and DevOps pipelines for serverless apps that are built on MongoDB Realm. Then, she’ll jump into the always-terrifying-for-the-presenter live demo so you can see how this all works in a very practical way. She’ll make some changes to her codebase, update her automated tests, and push her code changes. You’ll watch as the various pieces of the pipeline fail and (hopefully) succeed.
You’ll walk away from this session equipped to build test automation and DevOps pipelines for your serverless apps.
As Daniel Tiger wisely sings, "It's OK to make mistakes. Try to fix them, and learn from them too."
Come learn common mistakes developers make as they model their data in document databases. You'll leave this session ready to spot and correct common document database schema design anti-patterns.
A presentation for the MongoDB WICS Summit.
If you're comfortable with relational databases but not so comfortable with document databases like MongoDB, this is the session for you! We'll walk through an example of how you would store the same data in both a relational database and a document database. Then we'll discuss how common relational database terms and concepts map to terms in document databases. You'll leave feeling comfortable with the basics of how to store data in document databases.
Did you grow up on relational databases? Are document-based databases a bit of a mystery to you? This is the session for you!
We’ll compare terms and concepts, explain the benefits of document-based databases, and walk through the 3 key ways you need to change your mindset to successfully use document-based databases.
Shakespeare knew what he was talking about when he wrote "Some are born great remote workers, some achieve great remote work, and some have great remote work thrust upon them." Ok, maybe that's not exactly what he wrote. Whether you love working remotely or you were voluntold to work remotely, this is the session for you. Come discover tips and tricks to being a successful remote employee from a ten-year remote work veteran.
https://home.yougotthis.io/
Serverless application development is fabulous…but, if you can’t automate your delivery pipeline, you’ll likely fail.
In this session, MongoDB Developer Advocate Lauren Schaefer will walk you through the process of crafting test automation and DevOps pipelines for serverless apps that are built on the MongoDB Data Platform. Then, she’ll jump in to the always-terrifying-for-the-presenter live demo so you can see how this all works in a very practical way. She’ll make some changes to her code base, update her automated tests, and push her code changes. You’ll watch as the various pieces of the pipeline fail and (hopefully) succeed.
If you’re a DevOps engineer or a developer responsible for creating your own Continuous Integration/Continuous Delivery automation, you won’t want to miss this talk! You’ll walk away from this session equipped to build DevOps pipelines for your serverless apps.
Register for the webinar at https://www.mongodb.com/webinar/devops-with-mongodb-serverless
Does NoSQL feel like a bunch of NoSense to you? If so, you don’t want to miss this webinar!
In Back to Basics, we’ll teach you the fundamentals of the world’s most popular NoSQL database, MongoDB.
We'll start with a brief overview of how data is stored in MongoDB and compare that to the legacy table-based (relational) structure you may be used to. After that, we will dive deep into a demo! The demo will include:
- How to create a MongoDB database using MongoDB Atlas (for free!)
- A walk through the basic CRUD (create, read, update, and delete) operations
- Some tips and tricks for better efficiency/productivity
After this webinar, you'll be able to confidently use MongoDB to build your next app.
Does NoSQL feel like a bunch of NoSense to you? If so, you don’t want to miss this workshop! We’ll walk you through the basics of how to use the open database MongoDB.
We’ll begin with an overview of how data is stored in MongoDB and compare that to the table-based (relational) structure you may be used to. Then we’ll get hands-on! You’ll create a database and learn how to perform the basic CRUD (create, read, update, and delete) operations. Then you’ll load a large dataset into your database so you can see how to explore it and understand what schemaless data really looks like. We’ll wrap up with some tips and tricks, so you will leave the workshop feeling confident you’re ready to use MongoDB when you build your next app!
AI Pilot Review: The World’s First Virtual Assistant Marketing SuiteGoogle
AI Pilot Review: The World’s First Virtual Assistant Marketing Suite
👉👉 Click Here To Get More Info 👇👇
https://sumonreview.com/ai-pilot-review/
AI Pilot Review: Key Features
✅Deploy AI expert bots in Any Niche With Just A Click
✅With one keyword, generate complete funnels, websites, landing pages, and more.
✅More than 85 AI features are included in the AI pilot.
✅No setup or configuration; use your voice (like Siri) to do whatever you want.
✅You Can Use AI Pilot To Create your version of AI Pilot And Charge People For It…
✅ZERO Manual Work With AI Pilot. Never write, Design, Or Code Again.
✅ZERO Limits On Features Or Usages
✅Use Our AI-powered Traffic To Get Hundreds Of Customers
✅No Complicated Setup: Get Up And Running In 2 Minutes
✅99.99% Up-Time Guaranteed
✅30 Days Money-Back Guarantee
✅ZERO Upfront Cost
See My Other Reviews Article:
(1) TubeTrivia AI Review: https://sumonreview.com/tubetrivia-ai-review
(2) SocioWave Review: https://sumonreview.com/sociowave-review
(3) AI Partner & Profit Review: https://sumonreview.com/ai-partner-profit-review
(4) AI Ebook Suite Review: https://sumonreview.com/ai-ebook-suite-review
Quarkus Hidden and Forbidden ExtensionsMax Andersen
Quarkus has a vast extension ecosystem and is known for its subsonic and subatomic feature set. Some of these features are not as well known, and some extensions are less talked about, but that does not make them less interesting - quite the opposite.
Come join this talk to see some tips and tricks for using Quarkus and some of the lesser known features, extensions and development techniques.
Enterprise Resource Planning System includes various modules that reduce any business's workload. Additionally, it organizes the workflows, which drives towards enhancing productivity. Here are a detailed explanation of the ERP modules. Going through the points will help you understand how the software is changing the work dynamics.
To know more details here: https://blogs.nyggs.com/nyggs/enterprise-resource-planning-erp-system-modules/
Large Language Models and the End of ProgrammingMatt Welsh
Talk by Matt Welsh at Craft Conference 2024 on the impact that Large Language Models will have on the future of software development. In this talk, I discuss the ways in which LLMs will impact the software industry, from replacing human software developers with AI, to replacing conventional software with models that perform reasoning, computation, and problem-solving.
Navigating the Metaverse: A Journey into Virtual Evolution"Donna Lenk
Join us for an exploration of the Metaverse's evolution, where innovation meets imagination. Discover new dimensions of virtual events, engage with thought-provoking discussions, and witness the transformative power of digital realms."
OpenMetadata Community Meeting - 5th June 2024OpenMetadata
The OpenMetadata Community Meeting was held on June 5th, 2024. In this meeting, we discussed about the data quality capabilities that are integrated with the Incident Manager, providing a complete solution to handle your data observability needs. Watch the end-to-end demo of the data quality features.
* How to run your own data quality framework
* What is the performance impact of running data quality frameworks
* How to run the test cases in your own ETL pipelines
* How the Incident Manager is integrated
* Get notified with alerts when test cases fail
Watch the meeting recording here - https://www.youtube.com/watch?v=UbNOje0kf6E
May Marketo Masterclass, London MUG May 22 2024.pdfAdele Miller
Can't make Adobe Summit in Vegas? No sweat because the EMEA Marketo Engage Champions are coming to London to share their Summit sessions, insights and more!
This is a MUG with a twist you don't want to miss.
Understanding Globus Data Transfers with NetSageGlobus
NetSage is an open privacy-aware network measurement, analysis, and visualization service designed to help end-users visualize and reason about large data transfers. NetSage traditionally has used a combination of passive measurements, including SNMP and flow data, as well as active measurements, mainly perfSONAR, to provide longitudinal network performance data visualization. It has been deployed by dozens of networks world wide, and is supported domestically by the Engagement and Performance Operations Center (EPOC), NSF #2328479. We have recently expanded the NetSage data sources to include logs for Globus data transfers, following the same privacy-preserving approach as for Flow data. Using the logs for the Texas Advanced Computing Center (TACC) as an example, this talk will walk through several different example use cases that NetSage can answer, including: Who is using Globus to share data with my institution, and what kind of performance are they able to achieve? How many transfers has Globus supported for us? Which sites are we sharing the most data with, and how is that changing over time? How is my site using Globus to move data internally, and what kind of performance do we see for those transfers? What percentage of data transfers at my institution used Globus, and how did the overall data transfer performance compare to the Globus users?
Gamify Your Mind; The Secret Sauce to Delivering Success, Continuously Improv...Shahin Sheidaei
Games are powerful teaching tools, fostering hands-on engagement and fun. But they require careful consideration to succeed. Join me to explore factors in running and selecting games, ensuring they serve as effective teaching tools. Learn to maintain focus on learning objectives while playing, and how to measure the ROI of gaming in education. Discover strategies for pitching gaming to leadership. This session offers insights, tips, and examples for coaches, team leads, and enterprise leaders seeking to teach from simple to complex concepts.
How Recreation Management Software Can Streamline Your Operations.pptxwottaspaceseo
Recreation management software streamlines operations by automating key tasks such as scheduling, registration, and payment processing, reducing manual workload and errors. It provides centralized management of facilities, classes, and events, ensuring efficient resource allocation and facility usage. The software offers user-friendly online portals for easy access to bookings and program information, enhancing customer experience. Real-time reporting and data analytics deliver insights into attendance and preferences, aiding in strategic decision-making. Additionally, effective communication tools keep participants and staff informed with timely updates. Overall, recreation management software enhances efficiency, improves service delivery, and boosts customer satisfaction.
Top Features to Include in Your Winzo Clone App for Business Growth (4).pptxrickgrimesss22
Discover the essential features to incorporate in your Winzo clone app to boost business growth, enhance user engagement, and drive revenue. Learn how to create a compelling gaming experience that stands out in the competitive market.
Introducing Crescat - Event Management Software for Venues, Festivals and Eve...Crescat
Crescat is industry-trusted event management software, built by event professionals for event professionals. Founded in 2017, we have three key products tailored for the live event industry.
Crescat Event for concert promoters and event agencies. Crescat Venue for music venues, conference centers, wedding venues, concert halls and more. And Crescat Festival for festivals, conferences and complex events.
With a wide range of popular features such as event scheduling, shift management, volunteer and crew coordination, artist booking and much more, Crescat is designed for customisation and ease-of-use.
Over 125,000 events have been planned in Crescat and with hundreds of customers of all shapes and sizes, from boutique event agencies through to international concert promoters, Crescat is rigged for success. What's more, we highly value feedback from our users and we are constantly improving our software with updates, new features and improvements.
If you plan events, run a venue or produce festivals and you're looking for ways to make your life easier, then we have a solution for you. Try our software for free or schedule a no-obligation demo with one of our product specialists today at crescat.io
Graspan: A Big Data System for Big Code AnalysisAftab Hussain
We built a disk-based parallel graph system, Graspan, that uses a novel edge-pair centric computation model to compute dynamic transitive closures on very large program graphs.
We implement context-sensitive pointer/alias and dataflow analyses on Graspan. An evaluation of these analyses on large codebases such as Linux shows that their Graspan implementations scale to millions of lines of code and are much simpler than their original implementations.
These analyses were used to augment the existing checkers; these augmented checkers found 132 new NULL pointer bugs and 1308 unnecessary NULL tests in Linux 4.4.0-rc5, PostgreSQL 8.3.9, and Apache httpd 2.2.18.
- Accepted in ASPLOS ‘17, Xi’an, China.
- Featured in the tutorial, Systemized Program Analyses: A Big Data Perspective on Static Analysis Scalability, ASPLOS ‘17.
- Invited for presentation at SoCal PLS ‘16.
- Invited for poster presentation at PLDI SRC ‘16.
OpenFOAM solver for Helmholtz equation, helmholtzFoam / helmholtzBubbleFoamtakuyayamamoto1800
In this slide, we show the simulation example and the way to compile this solver.
In this solver, the Helmholtz equation can be solved by helmholtzFoam. Also, the Helmholtz equation with uniformly dispersed bubbles can be simulated by helmholtzBubbleFoam.
Providing Globus Services to Users of JASMIN for Environmental Data AnalysisGlobus
JASMIN is the UK’s high-performance data analysis platform for environmental science, operated by STFC on behalf of the UK Natural Environment Research Council (NERC). In addition to its role in hosting the CEDA Archive (NERC’s long-term repository for climate, atmospheric science & Earth observation data in the UK), JASMIN provides a collaborative platform to a community of around 2,000 scientists in the UK and beyond, providing nearly 400 environmental science projects with working space, compute resources and tools to facilitate their work. High-performance data transfer into and out of JASMIN has always been a key feature, with many scientists bringing model outputs from supercomputers elsewhere in the UK, to analyse against observational or other model data in the CEDA Archive. A growing number of JASMIN users are now realising the benefits of using the Globus service to provide reliable and efficient data movement and other tasks in this and other contexts. Further use cases involve long-distance (intercontinental) transfers to and from JASMIN, and collecting results from a mobile atmospheric radar system, pushing data to JASMIN via a lightweight Globus deployment. We provide details of how Globus fits into our current infrastructure, our experience of the recent migration to GCSv5.4, and of our interest in developing use of the wider ecosystem of Globus services for the benefit of our user community.
A Study of Variable-Role-based Feature Enrichment in Neural Models of CodeAftab Hussain
Understanding variable roles in code has been found to be helpful by students
in learning programming -- could variable roles help deep neural models in
performing coding tasks? We do an exploratory study.
- These are slides of the talk given at InteNSE'23: The 1st International Workshop on Interpretability and Robustness in Neural Software Engineering, co-located with the 45th International Conference on Software Engineering, ICSE 2023, Melbourne Australia
A Study of Variable-Role-based Feature Enrichment in Neural Models of Code
Intro to IBM Bluemix DevOps Services, an open lab for IBM InterConnect
1. Intro to IBM
Bluemix DevOps
Services
An IBM InterConnect Open Lab
By Lauren Schaefer
Try me! I’m way
more fun than
those other labs!
2. 1
Table of Contents
A Note from the Lab Writer........................................................................................................................................2
Part 1A: Deploying & Updating a Simple App ...........................................................................................................3
Part 1B: Deploying an App that Uses a Bluemix Service ...........................................................................................7
Part 1C: Planning, Tracking, & Leveraging New Bluemix Services.......................................................................... 10
Part 1D: Deploying Automatically Using the Delivery Pipeline .............................................................................. 18
Part 2A: Live Edit..................................................................................................................................................... 24
Part 2B: Bluemix Debug.......................................................................................................................................... 28
3. 2
A Note from the Lab Writer
Hello there, InterConnecter,
I’m sure you’re busy scurrying from session to session, searching for free food, and looking for the very best
SWAG you can find to squeeze into your already overstuffed suitcase home. I’m right there with you. So thanks
for taking the time to sit down and learn more about IBM Bluemix DevOps Services!
In this lab, you’ll get an introduction to using DevOps Services to deploy apps to Bluemix. You’ll discover how
you can use Bluemix services to significantly speed up your development time. And you’ll learn how to create a
delivery pipeline, so you can dive into the wonderful world of DevOps.
About a week ago, the DevOps Services team debuted some really exciting new functionality called Bluemix Live
Sync. This functionality is currently optimized for Node.js. This lab was already written using Python apps, and I
really wanted you to be able to try Bluemix Live Sync, so I added part 2 to the end of the lab. Parts 1A, 1B, 1C,
and 1D build on each other, and parts 2A and 2B build on each other. Part 1 takes a little over an hour to
complete, and part 2 takes around 30 minutes to complete.
If you enjoy this lab so much that you want to reference the instructions after InterConnect or share them with
your friends and colleagues, vist http://www.slideshare.net/LaurenHaywardSchaefe/open-lab-44892944.
Love the lab or have suggestions for improvement? Feel free to Tweet me. Here is an example to get you
started:
Love the Intro to #Bluemix #DevOpsServices Open Lab at #ibminterconnect.
@Lauren_Schaefer should get a raise!
http://www.slideshare.net/LaurenHaywardSchaefe/open-lab-44892944
Enjoy!
Lauren Schaefer
Software Engineer, IBM Bluemix DevOps Services
@Lauren_Schaefer
4. 3
Part 1A: Deploying & Updating a Simple App
Part 1 of this lab is broken into three pieces and demonstrates how easy it is to use IBM Bluemix DevOps
Services to plan, code, and deploy applications. In part 1A, you'll learn how to deploy and make changes to a
simple application. In part 1B, you'll learn how to deploy an application that uses a Bluemix service. In part 1C,
you'll learn how to use the planning capabilities in DevOps Services to plan and track your app, how to add a
new Bluemix service to an application, and how to write code that leverages a Bluemix service. Finally, in part
1D, you’ll learn how to use a delivery pipeline to automatically deploy changes to your app whenever code is
pushed to your project’s repository.
As a bonus, you'll also get an application that checks the prices of items in online stores for you, so you don't
have to surf the web to see if your favorite items are on sale!
Before we get started, let's discuss the products we'll be using in this lab:
IBM Bluemix DevOps Services is a place where you can collaborate with others to develop, track, plan,
and deploy software.
IBM Bluemix is an open-standards cloud-based platform where you can run the applications you develop
in DevOps Services. Bluemix provides a variety of services that you can leverage in your applications, so
you don't have to start coding from scratch.
In part 1A, you'll be working with a sample online store called "Lauren's Lovely Landscapes." The store currently
sells three prints; each print's page displays the name, image, and price associated with the print.
5. 4
Learn this!
1. Forking a project means to take a copy of the code in an existing project and put it in to a new
project.
2. Making changes to an application can be fast and simple when you use the DevOps Services
Web IDE. However, users of DevOps Services can use whatever IDE they prefer when coding.
Try this!
1. Sign up for DevOps Services (a SaaS)
a. Navigate to http://ibm.biz/ic-devops and sign up.
b. After you complete the 3-step sign up process, you will be prompted to begin your free
Bluemix trial. Check the Begin your free Bluemix trial box, input your phone number,
and click Continue.
c. You will receive an e-mail asking you to confirm your Bluemix trial. Click the link in the
e-mail to complete your Bluemix registration.
2. Fork Lauren’s Lovely Landscapes
At DevOps Services, forking a project means taking a copy of the code in an existing project and
putting it in a new project.
a. Go to the Laurens Lovely Landscapes project overview page: http://ibm.biz/ic-
lllandscapes.
b. Click Edit Code in the upper-right corner. You might be prompted to authenticate if you
have not already done so. The Web IDE opens.
c. Click FORK in the upper-left corner.
d. Type a name for your project, leave the Add features for Scrum development and Make
this a Bluemix Project boxes checked, and click CREATE.
e. Note that when the project has finished forking, your new project name is listed in the
upper-left corner.
Now you have a copy of the code in your own project. The next step is to deploy it.
3. Deploy Lauren’s Lovely Landscapes
To deploy an application means to bundle the project artifacts, create an app at Bluemix,
transfer the bundled app to Bluemix, and start the app. Bluemix application names and URLs are
created using properties, which are often defined in the manifest.yml file in a project. The
"Lauren's Lovely Landscapes" project already has the manifest created for you.
a. In the left navigation pane of the Web IDE, select manifest.yml.
6. 5
b. Click the deploy button ( ) in the top bar:
Note: When you deploy through the Web IDE, you are deploying the changes that are in
your Web IDE’s workspace. For example, you may have changes you are currently
working on that you have not yet pushed to your project’s repository. Those changes
will be deployed.
4. See Lauren’s Lovely Landscapes running
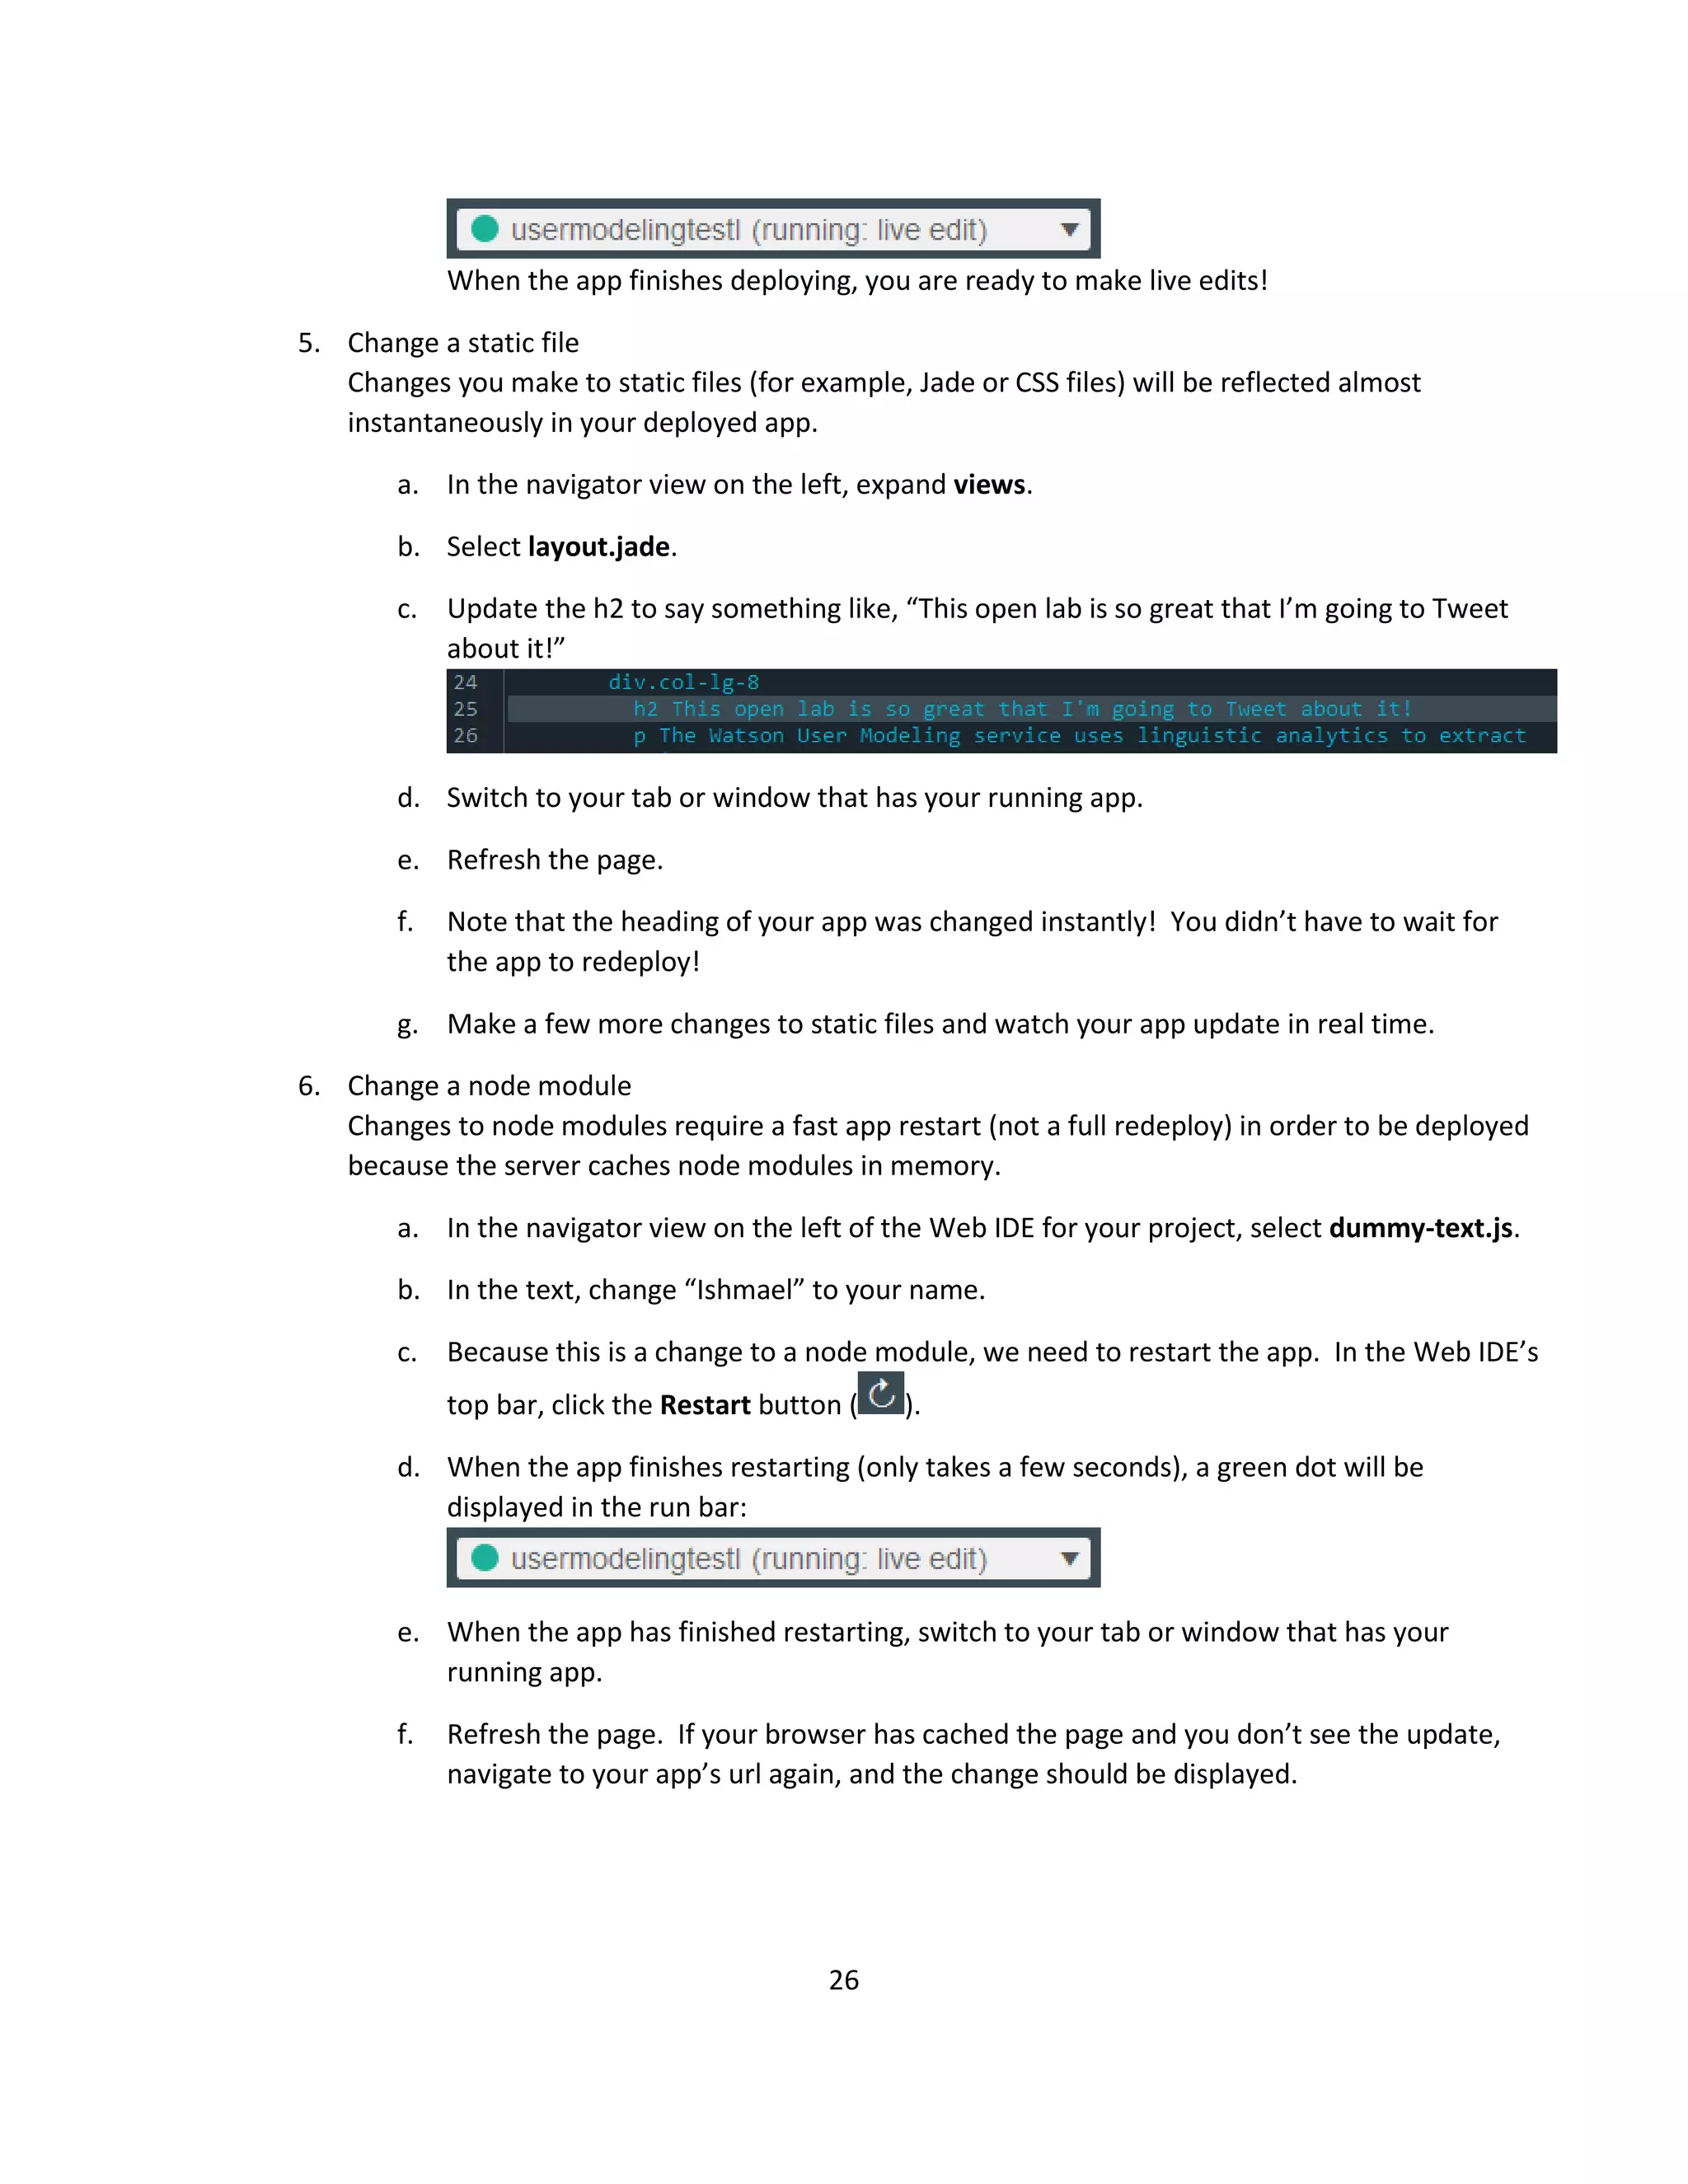
After your application is deployed to Bluemix, a green dot displays in the status area of the top
gray bar.
a. Click the Open URL button ( ) in the top bar.
b. Browse your application that is running live on Bluemix. Click on the Antarctica page and
note that the current price is $100.00.
5. Update the price of an item
Make a change to the application by updating the price of an item.
a. In the left pane of the Web IDE, expand views and select antarctica.tpl.
b. Scroll down until you see <div id="price">100.00</div>.
c. Replace 100.00 with 99.99. (Wow, that's a big sale! ;-) )
d. Click File > Save.
e. Click the Deploy button ( ).
f. If prompted to stop and redeploy your app, click OK.
g. After your application is deployed, click the Open URL button ( ) in the top gray bar.
h. In your app that opens, click Antarctica.
Notice that the price of the item has been updated. Success!
Tweet this!
Getting #SaaS-y at #ibminterconnect! Just deployed an app to the cloud by leveraging #Bluemix
#DevOpsServices. Check it out: [insert link to your app] [Feeling extra sassy? Include a selfie of
you looking sassy!]
Get creative
Lauren’s Lovely Landscapes is yours now. Change the name, change the color scheme, change
the pictures, or go crazy and implement a shopping cart. Make the site your own and redeploy!
7. 6
Additional resources
MQTT Starfighter, JazzHub, Bluemix and live Scaling Out
https://www.youtube.com/watch?v=b9hkCHmH7H4
Computerworld Forecast Study 2015 http://www.idgenterprise.com/report/computerworld-
forecast-study-2015
Transforming Enterprise Cloud Services
http://books.google.com/books?id=yyiPyIXgbxMC&pg=PA55#v=onepage&q&f=false
Rapidly create a Node.js app using a Bluemix boilerplate and DevOps Services
http://www.ibm.com/developerworks/library/d-Bluemix-devops90/index.html
8. 7
Part 1B: Deploying an App that Uses a Bluemix Service
In this part, you'll be working with the "Lauren's Lovely Landscapes" app you created in part 1A. You'll also be
working with "The Fabulous Price Finder" app. The Fabulous Price Finder provides you with the current prices of
items you're interested in purchasing online with the simple click of a button.
Learn this!
Leveraging Bluemix services like database services, Watson services, and DevOps Services makes
creating and managing apps easier.
Deploying apps that leverage Bluemix services can be fast and easy.
Try this!
1. Fork the Fabulous Price Finder
a. Go to the Fabulous Price Finder project overview page: https://ibm.biz/ic-
fabulouspricefinder.
b. Click EDIT CODE in the upper-right corner. You might be prompted to authenticate if
you have not already done so.
c. Click FORK in the upper-left corner.
d. Type a name for your project, leave the Add features for Scrum development and Make
this a Bluemix Project boxes checked, and click CREATE.
e. Note that when the project has finished forking, your new project name is listed in the
upper-left corner.
9. 8
2. Deploy the Fabulous Price Finder
The Fabulous Price Finder uses the MongoLab service hosted at Bluemix. MongoLab is a cloud
database service that enables you to create and manage MongoDB databases. To get the
Fabulous Price Finder running, you deploy the application and then bind a new MongoLab
instance to the application.
a. In the left navigation pane, select manifest.yml.
b. Click the Deploy ( ) button in the top gray bar. Note that when the app finishes
deploying, the database functionality will not yet work because you have not bound a
MongoLab instance to it.
c. When the application is deployed, click the Open application dashboard button ( ) in
the top gray bar.
d. If you are not already authenticated at Bluemix, you might be prompted to do so. After
you are authenticated, you are redirected to your application's page on Bluemix.
e. Click ADD A SERVICE.
f. Scroll down until you see the MongoLab service. Hint: Check the Data Management
section. The catalog is constantly being updated with new services!
g. Click the MongoLab service.
h. In the MongoLab dialog, leave the defaults in the dialog (the code assumes the name of
your MongoLab service starts with "mongo") and click CREATE.
i. When prompted if you want to restage your application now, click RESTAGE.
j. You know your application is restaged and running successfully when you the APP
HEALTH section indicates that your app is running.
k. When your application is running, click your application's route to open it.
3. Try the Fabulous Price Finder
Now that you have the Fabulous Price Finder running, it's time to explore!
The home page of the Fabulous Price Finder enables you to record the items for which you want
to check prices. You begin with the Antarctica print from the Lauren's Lovely Landscapes app
you deployed.
a. In the form on the home page, specify the name for the print ("Antarctica"), the URL for
the print from your online store, (Hint: Look for something similar to
"http://laurenslovelylandscapes-some-long-string-of-random-
characters.mybluemix.net/antarctica"), and the id of the price field for the print
("price").
b. Click Submit.
10. 9
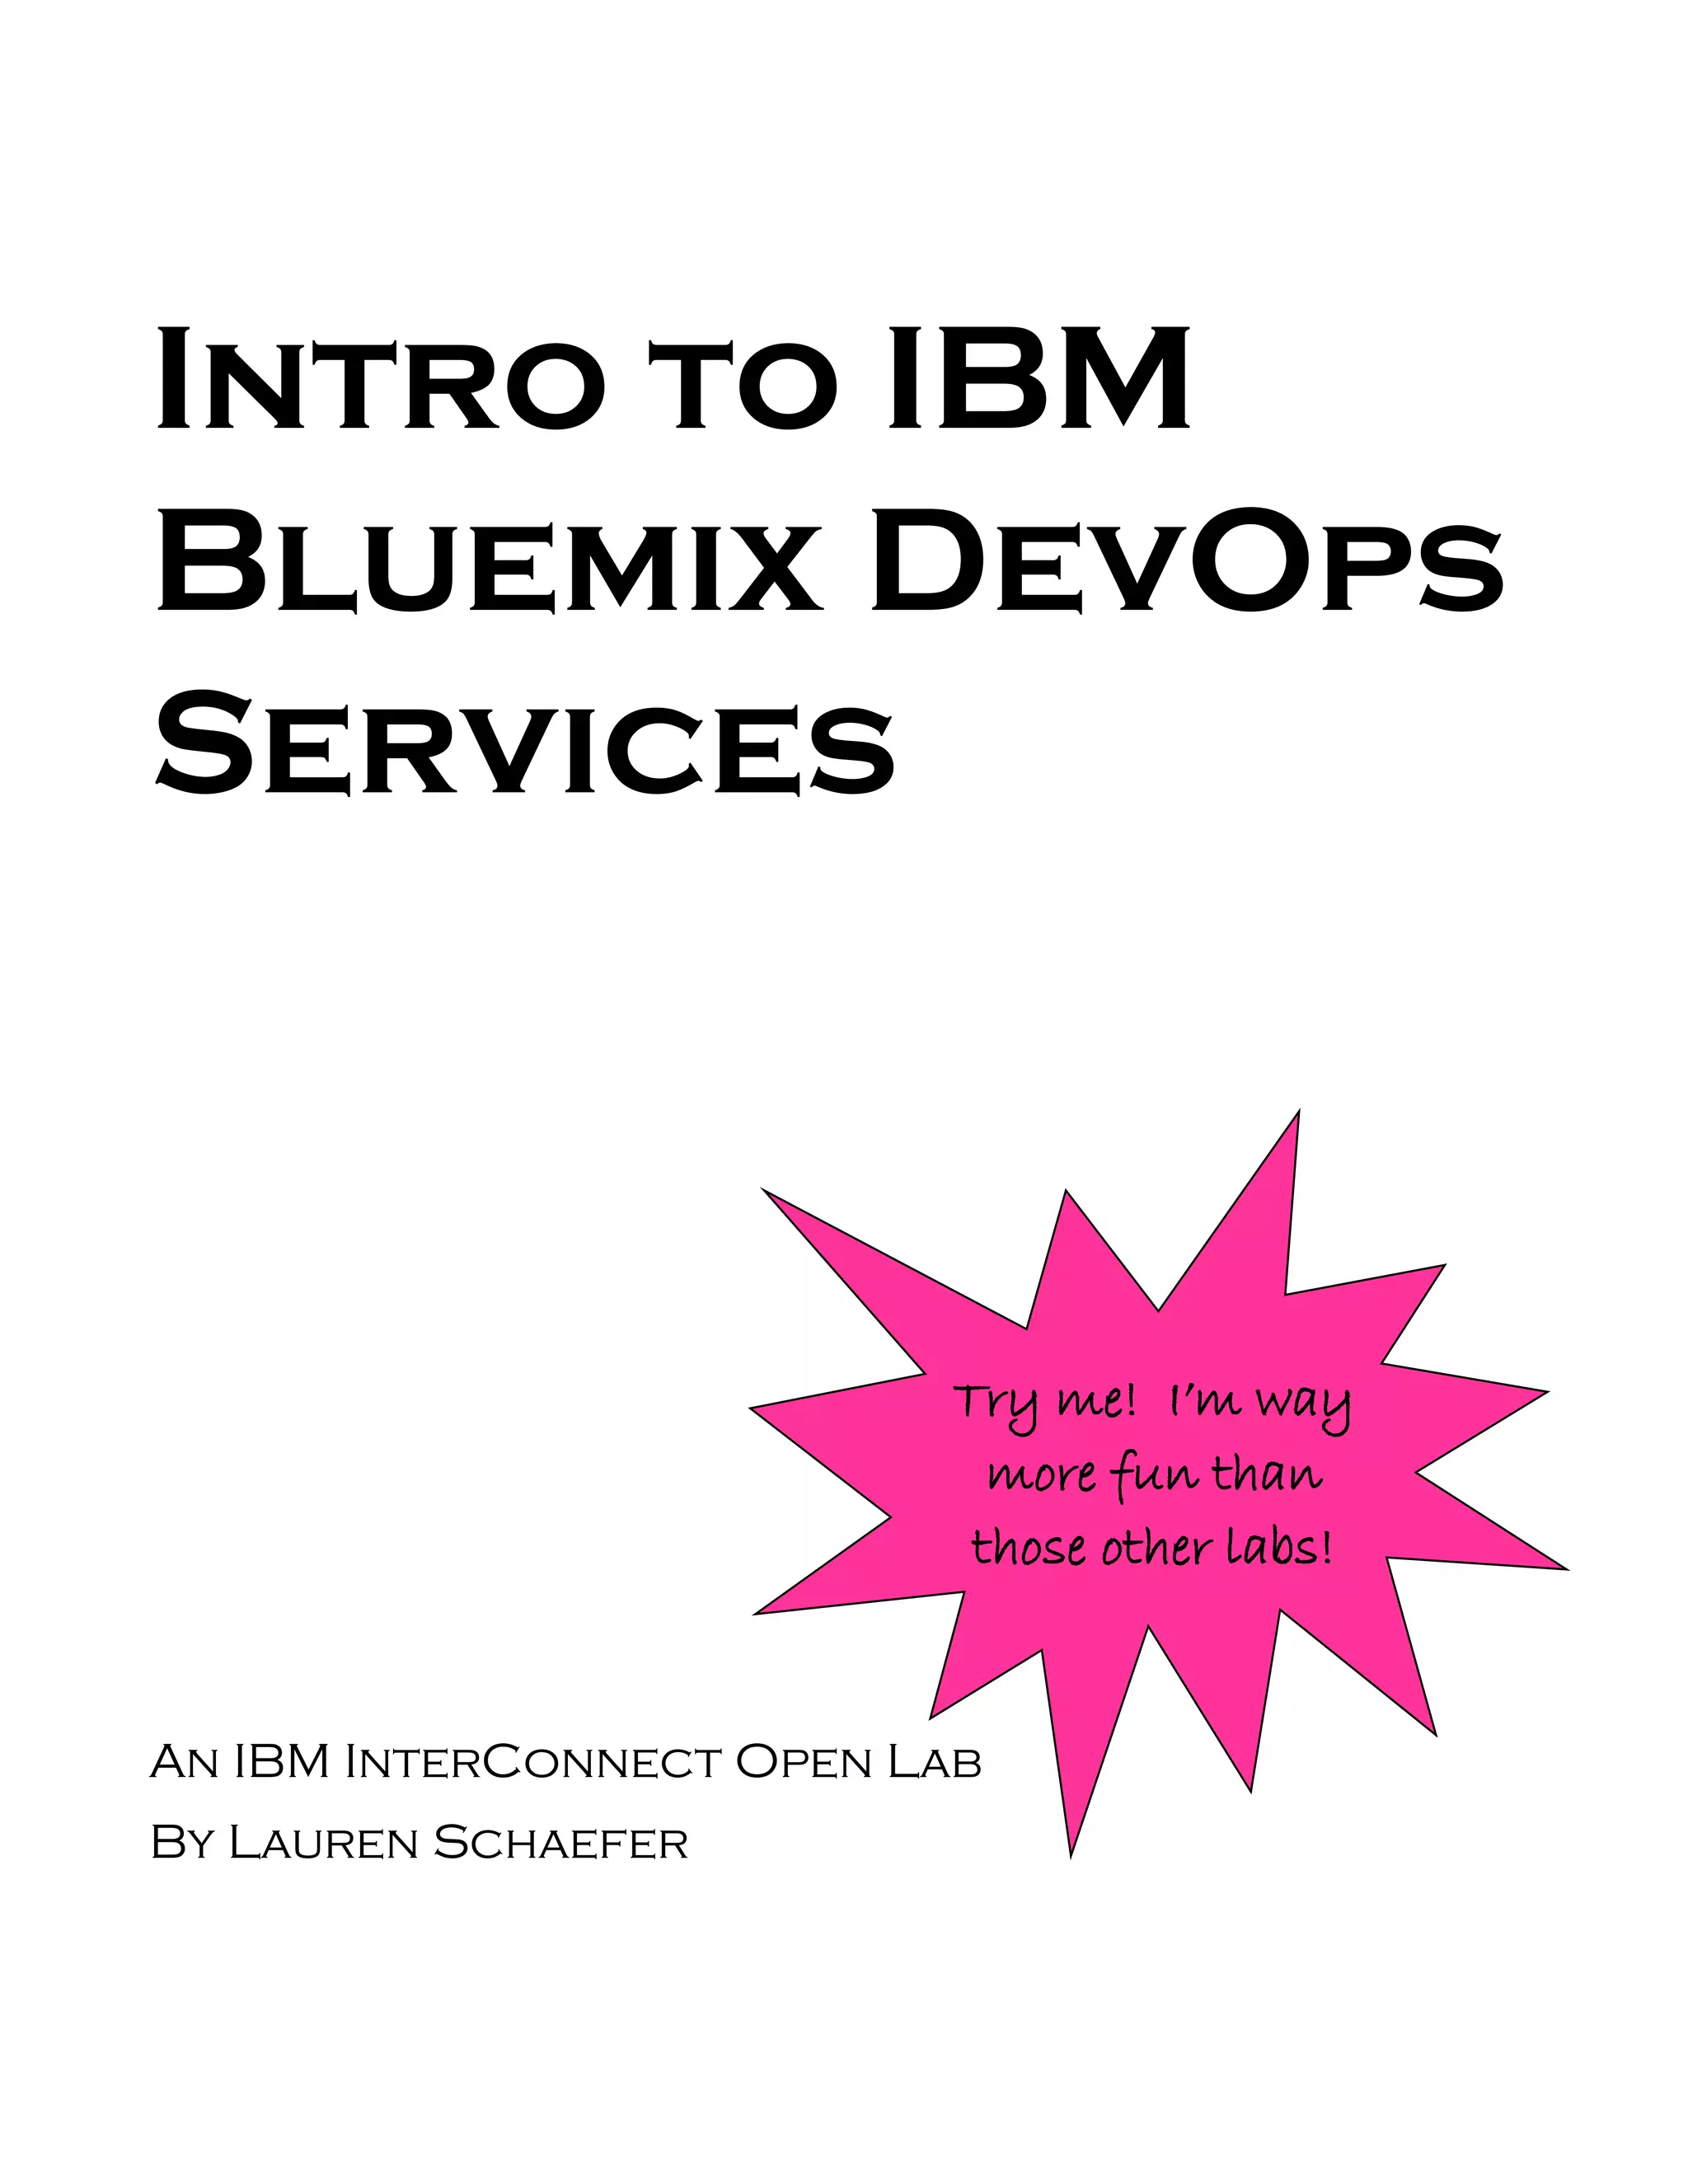
You are redirected to the View Database page where you can see information about the item
you just stored. You can record the details for other items if you like.
4. Get Prices
After you have stored information about an item, you can check its price.
a. On the home page, click Get Prices.
b. On the Success page, click View the database.
Notice that the price of your item is now stored in the database. If you like, go back to your
Lauren's Lovely Lanscapes project, update the price of the Antarctica print (don't forget to
deploy your change), and click Get Prices again. Note that the database reflects the new price of
the print.
5. Explore the MongoLab Database
You can browse and update the contents of your MongoLab database, which can be helpful
when debugging and working with your app.
a. Go to the Bluemix dashboard.
b. Log in if you are not already authenticated.
c. On the dashboard, click on your FabulousPriceFinder app to open it.
d. Click your MongoLab service tile to open it.
e. Click OPEN MONGOLAB DASHBOARD.
f. In the MongoDB Deployments section, click on your database to open it.
g. In the Collections section, click ItemCollection.
h. Browse the records you've added to your collection.
Tweet this!
Check out the app I just deployed that leverages a #MongoLab database on #Bluemix: [insert
link to your app]! #ibminterconnect
Get creative
Enhance the app’s navigation so it is easier to move around the site, or change the name of the
app to be less “fabulous” and more you. Make it your own!
Additional resources
Trying out MongoLab – MongoDB in the cloud https://www.youtube.com/watch?v=aZyTNrenygI
Develop and manage Java apps with IBM Bluemix and DevOps Services
http://www.ibm.com/developerworks/library/d-Bluemix-javadevops/index.html
11. 10
Part 1C: Planning, Tracking, & Leveraging New Bluemix Services
Learn this!
Leveraging software as a service that works well with the platform as a service of your choice
can greatly speed up your software delivery lifecycle.
Agile planning and tracking is simple in the cloud and creates built-in traceability for all of your
teammates…whether they are collocated or distributed.
Writing code that leverages a Bluemix service can be fast and significantly reduce development
time.
Try this!
1. Plan a new feature to add to the Fabulous Price Finder
So far, you have made use of existing code, but you haven't created anything new. Time to
change that!
When working with teammates or even by yourself, organizing your ideas into user stories and
then organizing your user stories into a plan can be incredibly valuable.
a. Open Track & Plan
i. Open the Fabulous Price Finder project you created in the previous section by
navigating to DevOps Services, signing in if you're not already authenticated,
and clicking on your project on the My Projects page.
ii. Click the gear button ( ) in the upper-right corner to open the Project
Settings page.
iii. Click OPTIONS.
iv. On the page that loads, select the Enable Track & Plan checkbox (if it is not
already enabled) and click SAVE.
v. Click TRACK & PLAN in the upper-right corner. The Track & Plan section is your
place to organize your ideas.
b. Create work items in your backlog
i. On the left pane, click Backlog.
ii. On the right pane, type the following in the Create a work item… field: As a
shopper, I want a text message sent to me with the
price of each item so that I don't have to check the
website to view the prices.
12. 11
iii. The tool will automatically detect the work item type is story and set the type
for you.
iv. In the icon bar below, click the Owned By icon and select your username.
v. Click CREATE.
vi. Repeat Steps 2-5 to create work items for the following stories:
1. As a shopper, I want to organize my items by
store so that I only have to input the field ID
once per store instead of every item.
2. As a shopper, I want to see a graph of the price
of the items I'm watching over time so I can
judge if it's a good time to buy the items.
3. As a shopper, I want the prices to be retrieved
automatically for me on a daily basis so I don't
have to log in manually and click Get Prices.
4. As a shopper, I want the prices to be texted to
me only when the price has changed so I'm not
getting inundated with text messages.
vii. Create a work item of type defect with the following summary: The View
Database page fails to load when the database is empty.
c. Plan your work
Now that you have filled your backlog with stories, it's time to plan your first sprint.
i. On the left pane, click Sprint Planning. A sprint represents a period of time.
Organize your user stories in sprints.
ii. Click Add Sprints.
iii. Configure the sprints so you have at least two and click Create.
iv. In the Backlog section, rearrange your stories so they are in a ranked order by
dragging and dropping them. Put As a shopper, I want a text
message sent to me with the price of each item so that
I don't have to check the website to view the prices as
the top item in the list, and As a shopper, I want the prices to
be retrieved automatically for me on a daily basis so
I don't have to log in manually and click Get Prices as
the second highest item in the list.
v. Click the Sprint 1 dropbdown box and select Sprint 1 so that Sprint 1 appears to
the right of the backlog. (You may need to click Sprint 2 and then click Sprint 1
in order for the sprint to appear.)
13. 12
vi. Assume you have time to complete one user story per sprint. Drag the topmost
item in the list to Sprint 1 (on the right).
vii. In the sprint dropdown box, select Sprint 2.
viii. Drag the new top most item to Sprint 2.
d. Track your work
Sprint 1 has begun. Indicate that you have started working on the first work item by
marking it as In Progress.
i. In the sprint dropdown box, select Sprint 1.
ii. In the Sprint 1 section, click the Status: New icon for the story planned for
Sprint 1.
iii. In the Status dialog, click Start Working.
iv. Note the work item ID for your work item because you will need it later in this
lab.
2. Implement the feature
Next, implement the work item As a shopper, I want a text message sent to
me with the price of each item so that I don't have to check the
website to view the prices. The idea of implementing a text messaging feature
might sound a bit daunting to you. Fortunately, Bluemix provides a Twilio service you can use
that handles sending the text message, so you can implement this feature with only nine lines of
code!
a. Register with Twilio
If you do not already have an account with Twilio, you need to register. You also need
your Twilio AccountSID, Auth Token, and phone number.
1. Go to https://www.twilio.com and sign up.
2. Follow the on-screen instructions to verify your account.
3. Note your Twilio phone number.
4. After you have authenticated and are viewing your account, click your ID in the
right corner and select Account.
5. In the API Credentials section, note your AccountSID and AuthToken. (You
might want to leave this page open as you continue, so you can easily copy the
credentials.)
b. If you do not want to receive text messages
If you do not want to receive text messages to your phone because your carrier charges
ridiculous amounts, you can instead send the text messages to your Twilio account
14. 13
phone number. If you’re ok with receiving text messages on your phone, skip this
section and continue on to step c.
i. In Twilio, click NUMBERS in the top navigation bar.
ii. Click your phone number in the Number table.
iii. In the Messaging section, replace the Request URL with any valid url (this
prevents a never ending loop of your phone number sending a response to the
text message it just received). For example, you might replace the Request URL
with a link to your Lauren’s Lovely Landscapes app.
iv. Click Save.
v. Click Numbers in the top navigation bar.
vi. Click Verify a number.
vii. Click text you instead.
viii. Input your Twilio phone number in the Phone Number box.
ix. Click Text Me.
x. In a new tab or window, navigate to twilio.com and click Account.
xi. Click NUMBERS in the top navigation bar.
xii. Click your number in the Number table.
xiii. Click Inbound in the Messaging section.
xiv. Hover over the text message in the table to see the incoming message. Note
the verification number in the text message’s body.
xv. Return to your original tab or window and input the verification number.
xvi. Click Submit.
When you want to view incoming text messages for your Twilio number, return to the
details page for your number and click Inbound.
c. Add the Twilio service to the app
Begin by adding the Bluemix Twilio service to your app.
i. In DevOps Services, click EDIT CODE in the upper-right corner.
ii. Click the Open application dashboard button ( ). The Bluemix page for your
app opens.
iii. Click ADD A SERVICE.
15. 14
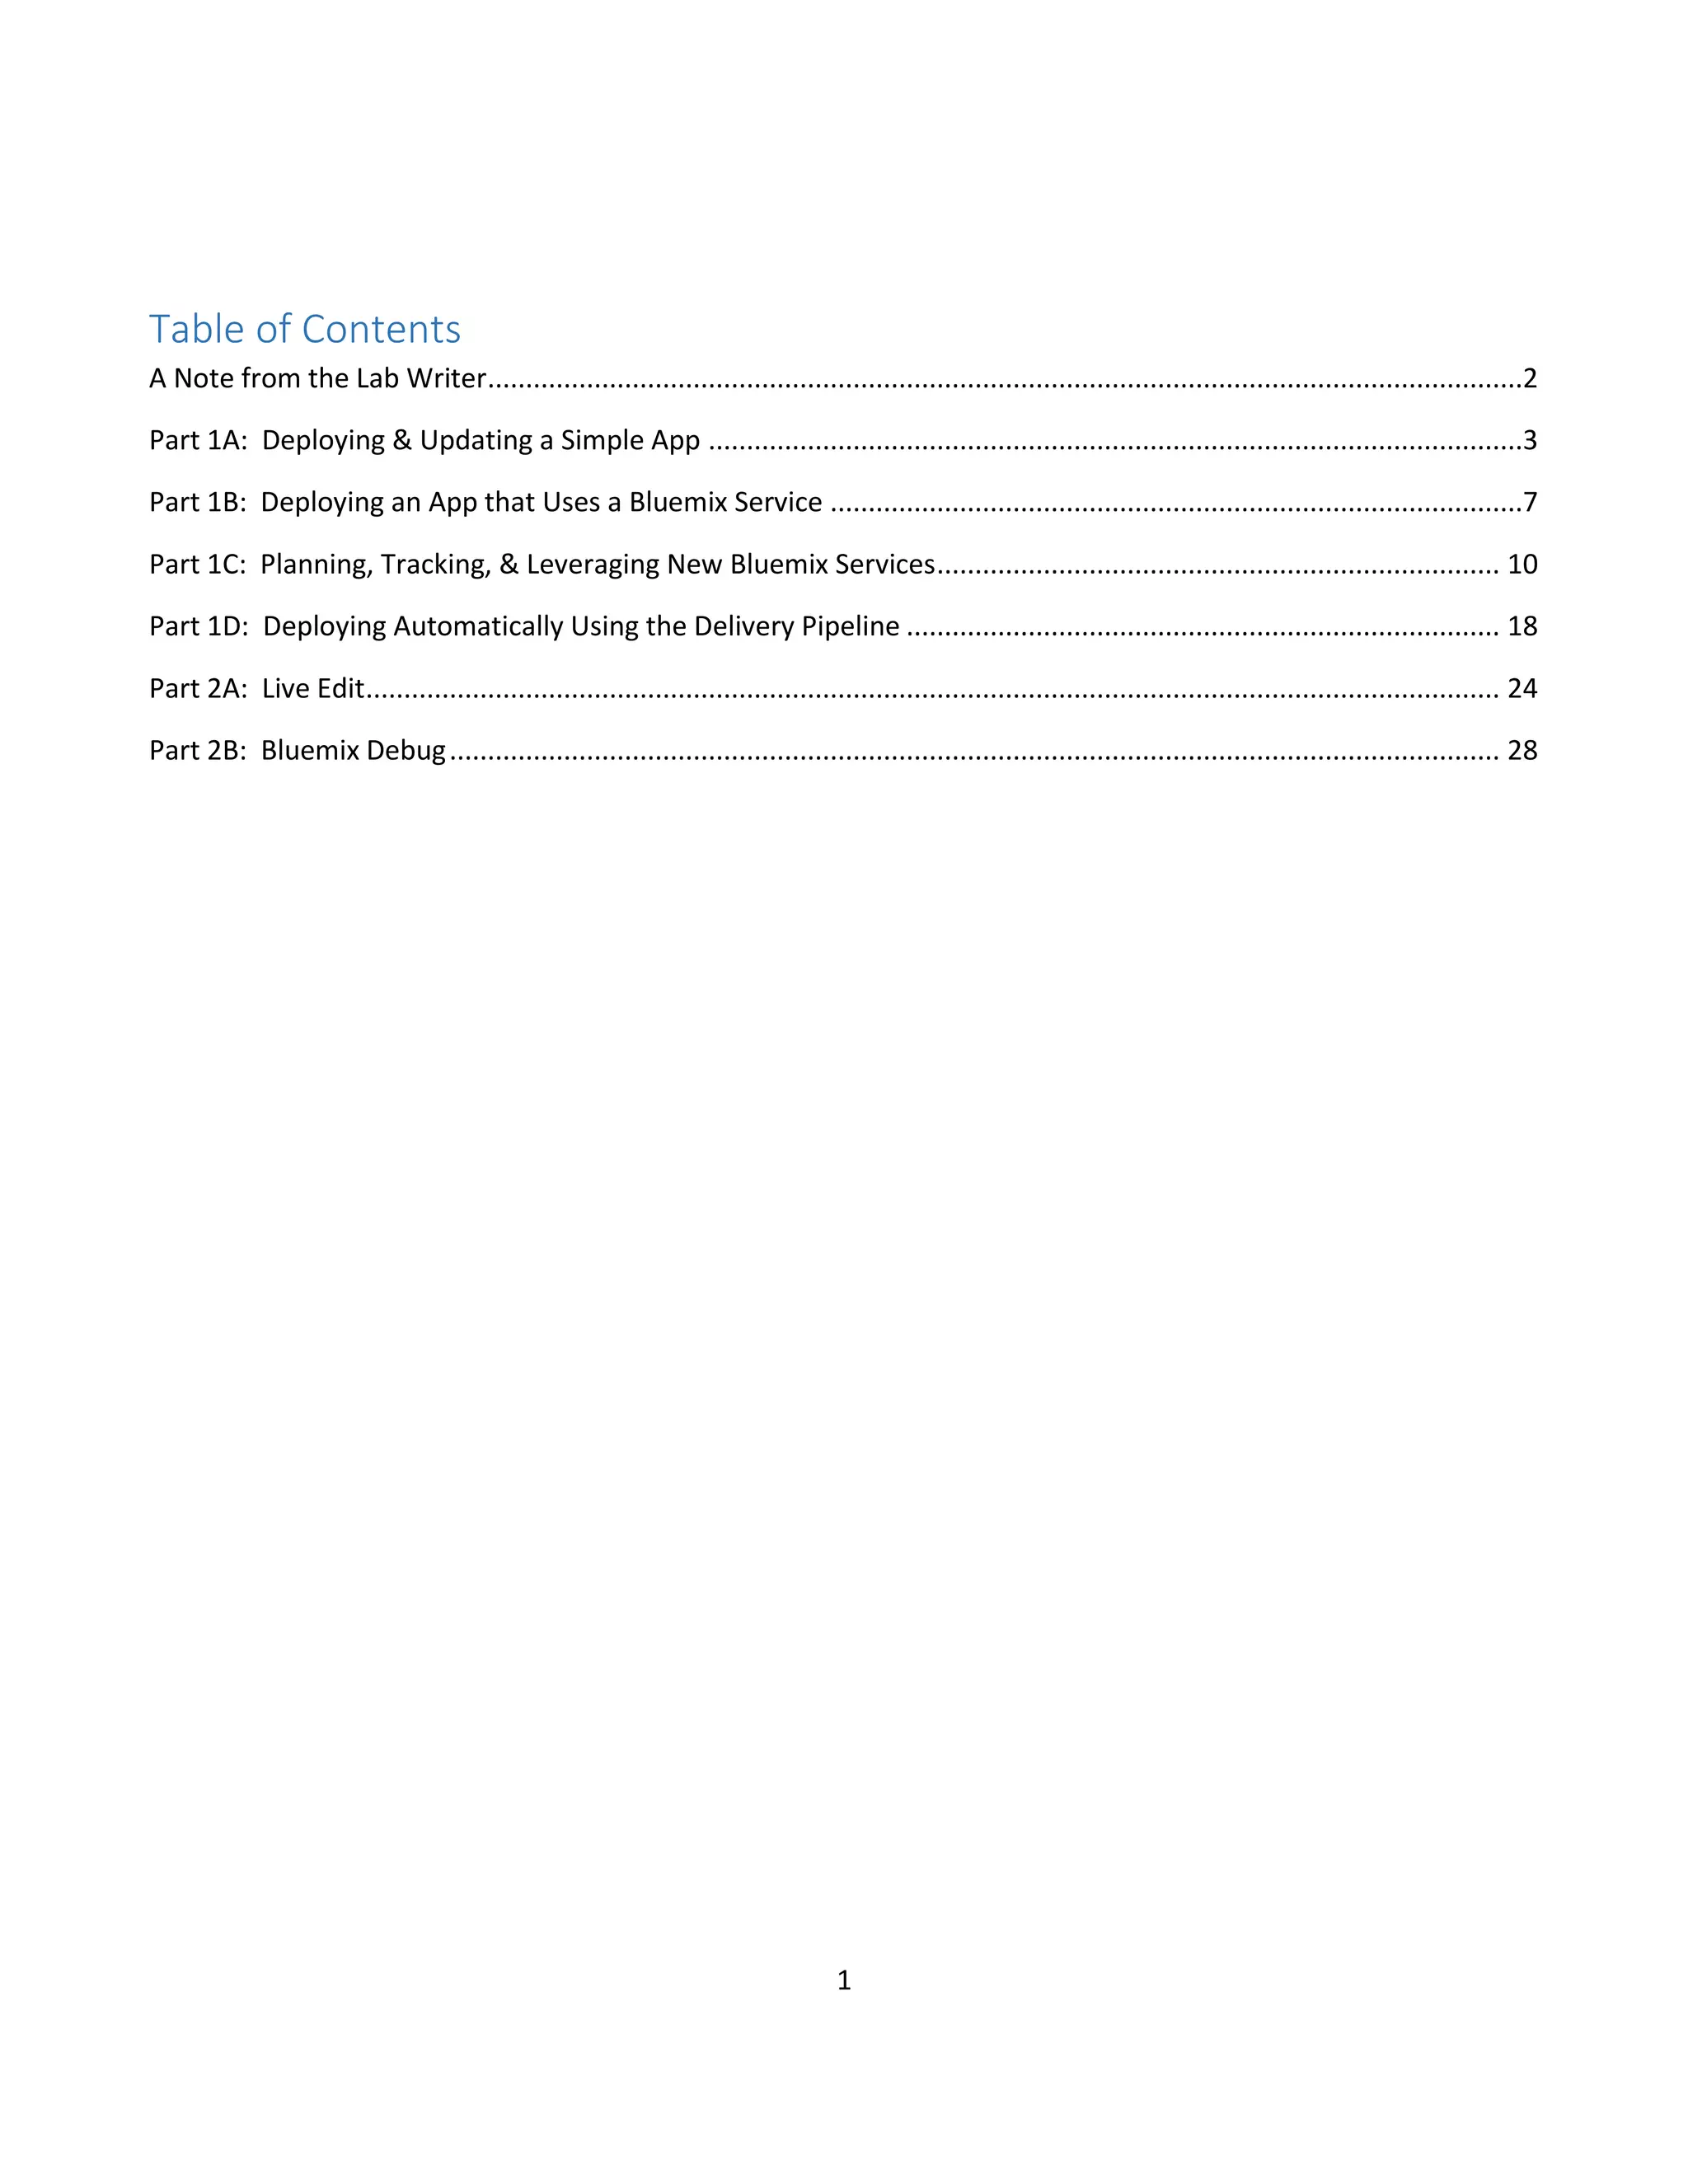
iv. Scroll down until you see the Twilio service. Hint: Check the Mobile section. The
catalog is constantly being updated with new services.
v. Click the Twilio service.
vi. In the Account SID and Auth Token fields, paste your Twilio AccountSID and
AuthToken from your Twilio Account Settings page.
vii. Click CREATE.
viii. When prompted, restage your application now by clicking RESTAGE.
ix. Your application is restaged and running successfully when the APP HEALTH box
reports “Your app is running.”
d. Add code that uses the Twilio service
Add code to your app that sends a text message whenever a price is retrieved for an
item. Use the Twilio service to actually send the text message.
i. Add Twilio to requirements.txt
Your app needs the Twilio module, so you must add it to the requirements.txt
file.
1. In the Web IDE, open requirements.txt.
2. Add a new line to the end of the file and type twilio
3. Select File > Save.
ii. Connect to the Twilio service
To effectively use your Twilio service, you must connect to it.
1. In the Web IDE, open the wsgi.py file.
2. In the Imports section around Line 55, add the following line.
from twilio.rest import TwilioRestClient
3. As part of the for loop that begins around Line 62, add the following
lines.
Note: Be sure your spacing before these two lines (spaces and tabs) is
identical to the if statement that checks if the key starts with
“mongo.”
if decoded_config[key][0]['name'].startswith('Twilio'):
twilio_creds = decoded_config[key][0]['credentials']
twilio_authToken = twilio_creds['authToken']
twilio_accountSID = twilio_creds['accountSID']
twilioClient = TwilioRestClient(twilio_accountSID, twilio_authToken)
4. Your Twilio credentials are now stored in twilio_creds. Your code
should now look like the following listing.
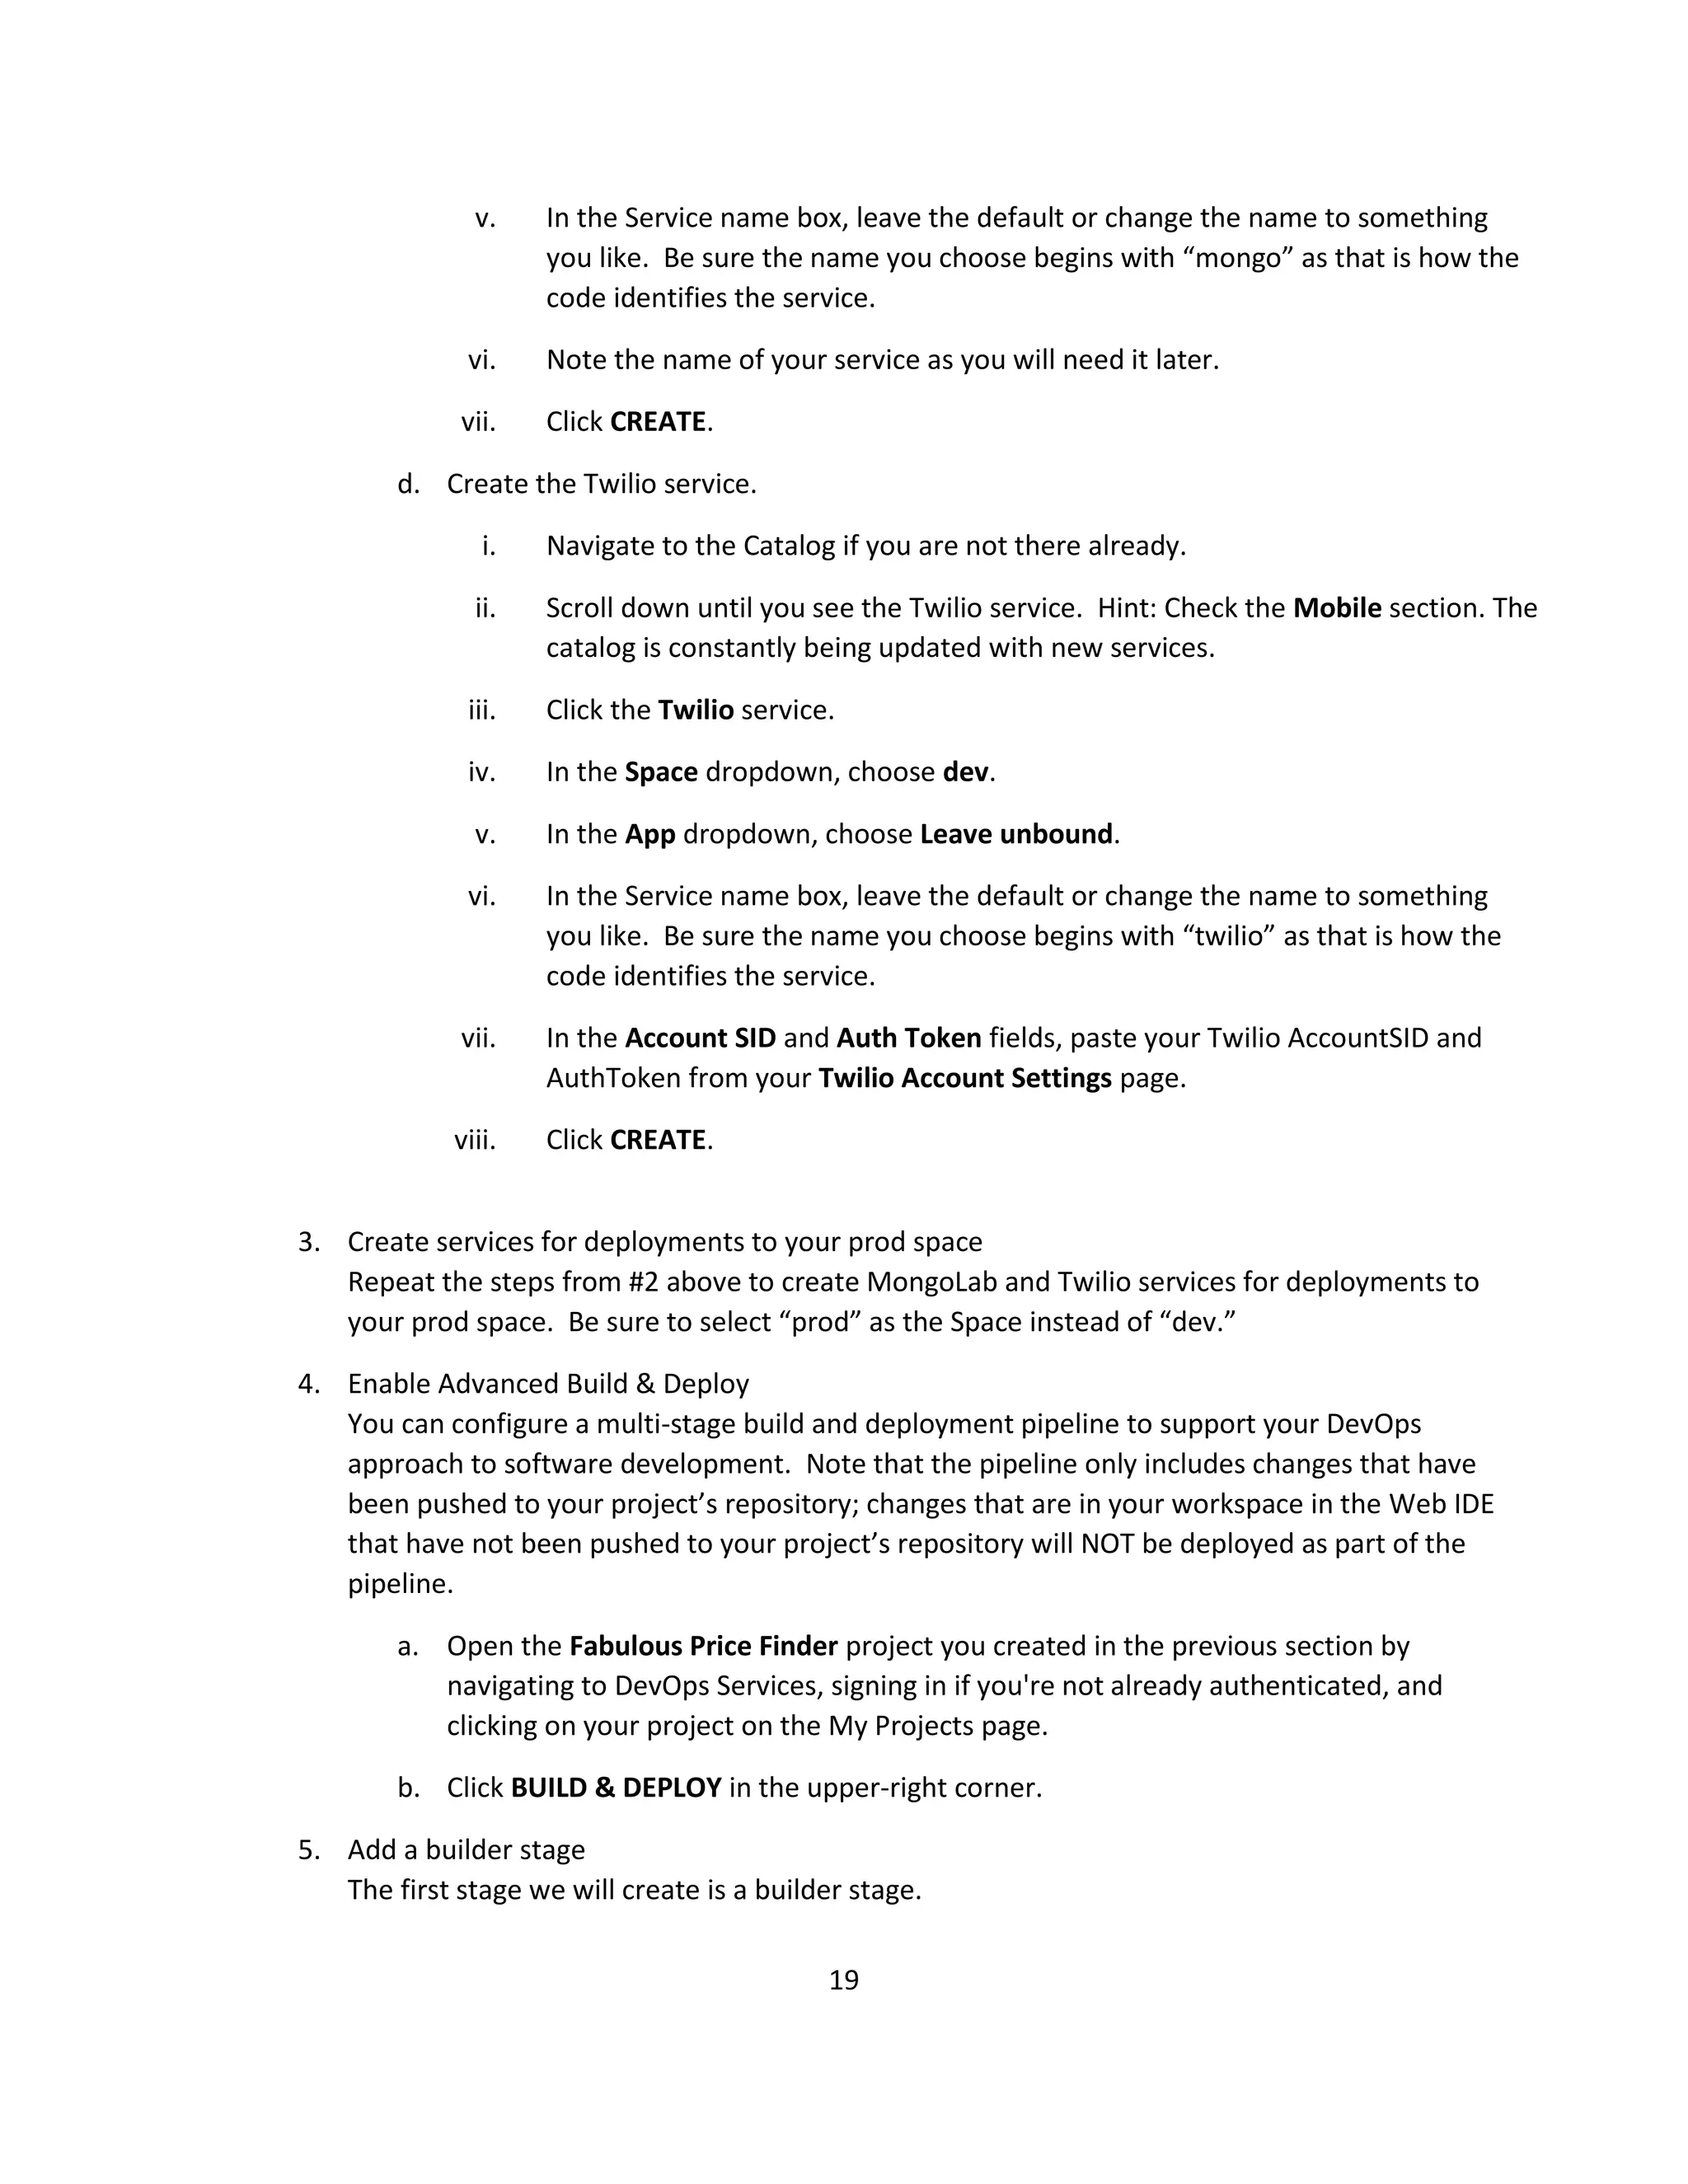
for key, value in decoded_config.iteritems():
if key.startswith('mongo'):
mongo_creds = decoded_config[key][0]['credentials']
16. 15
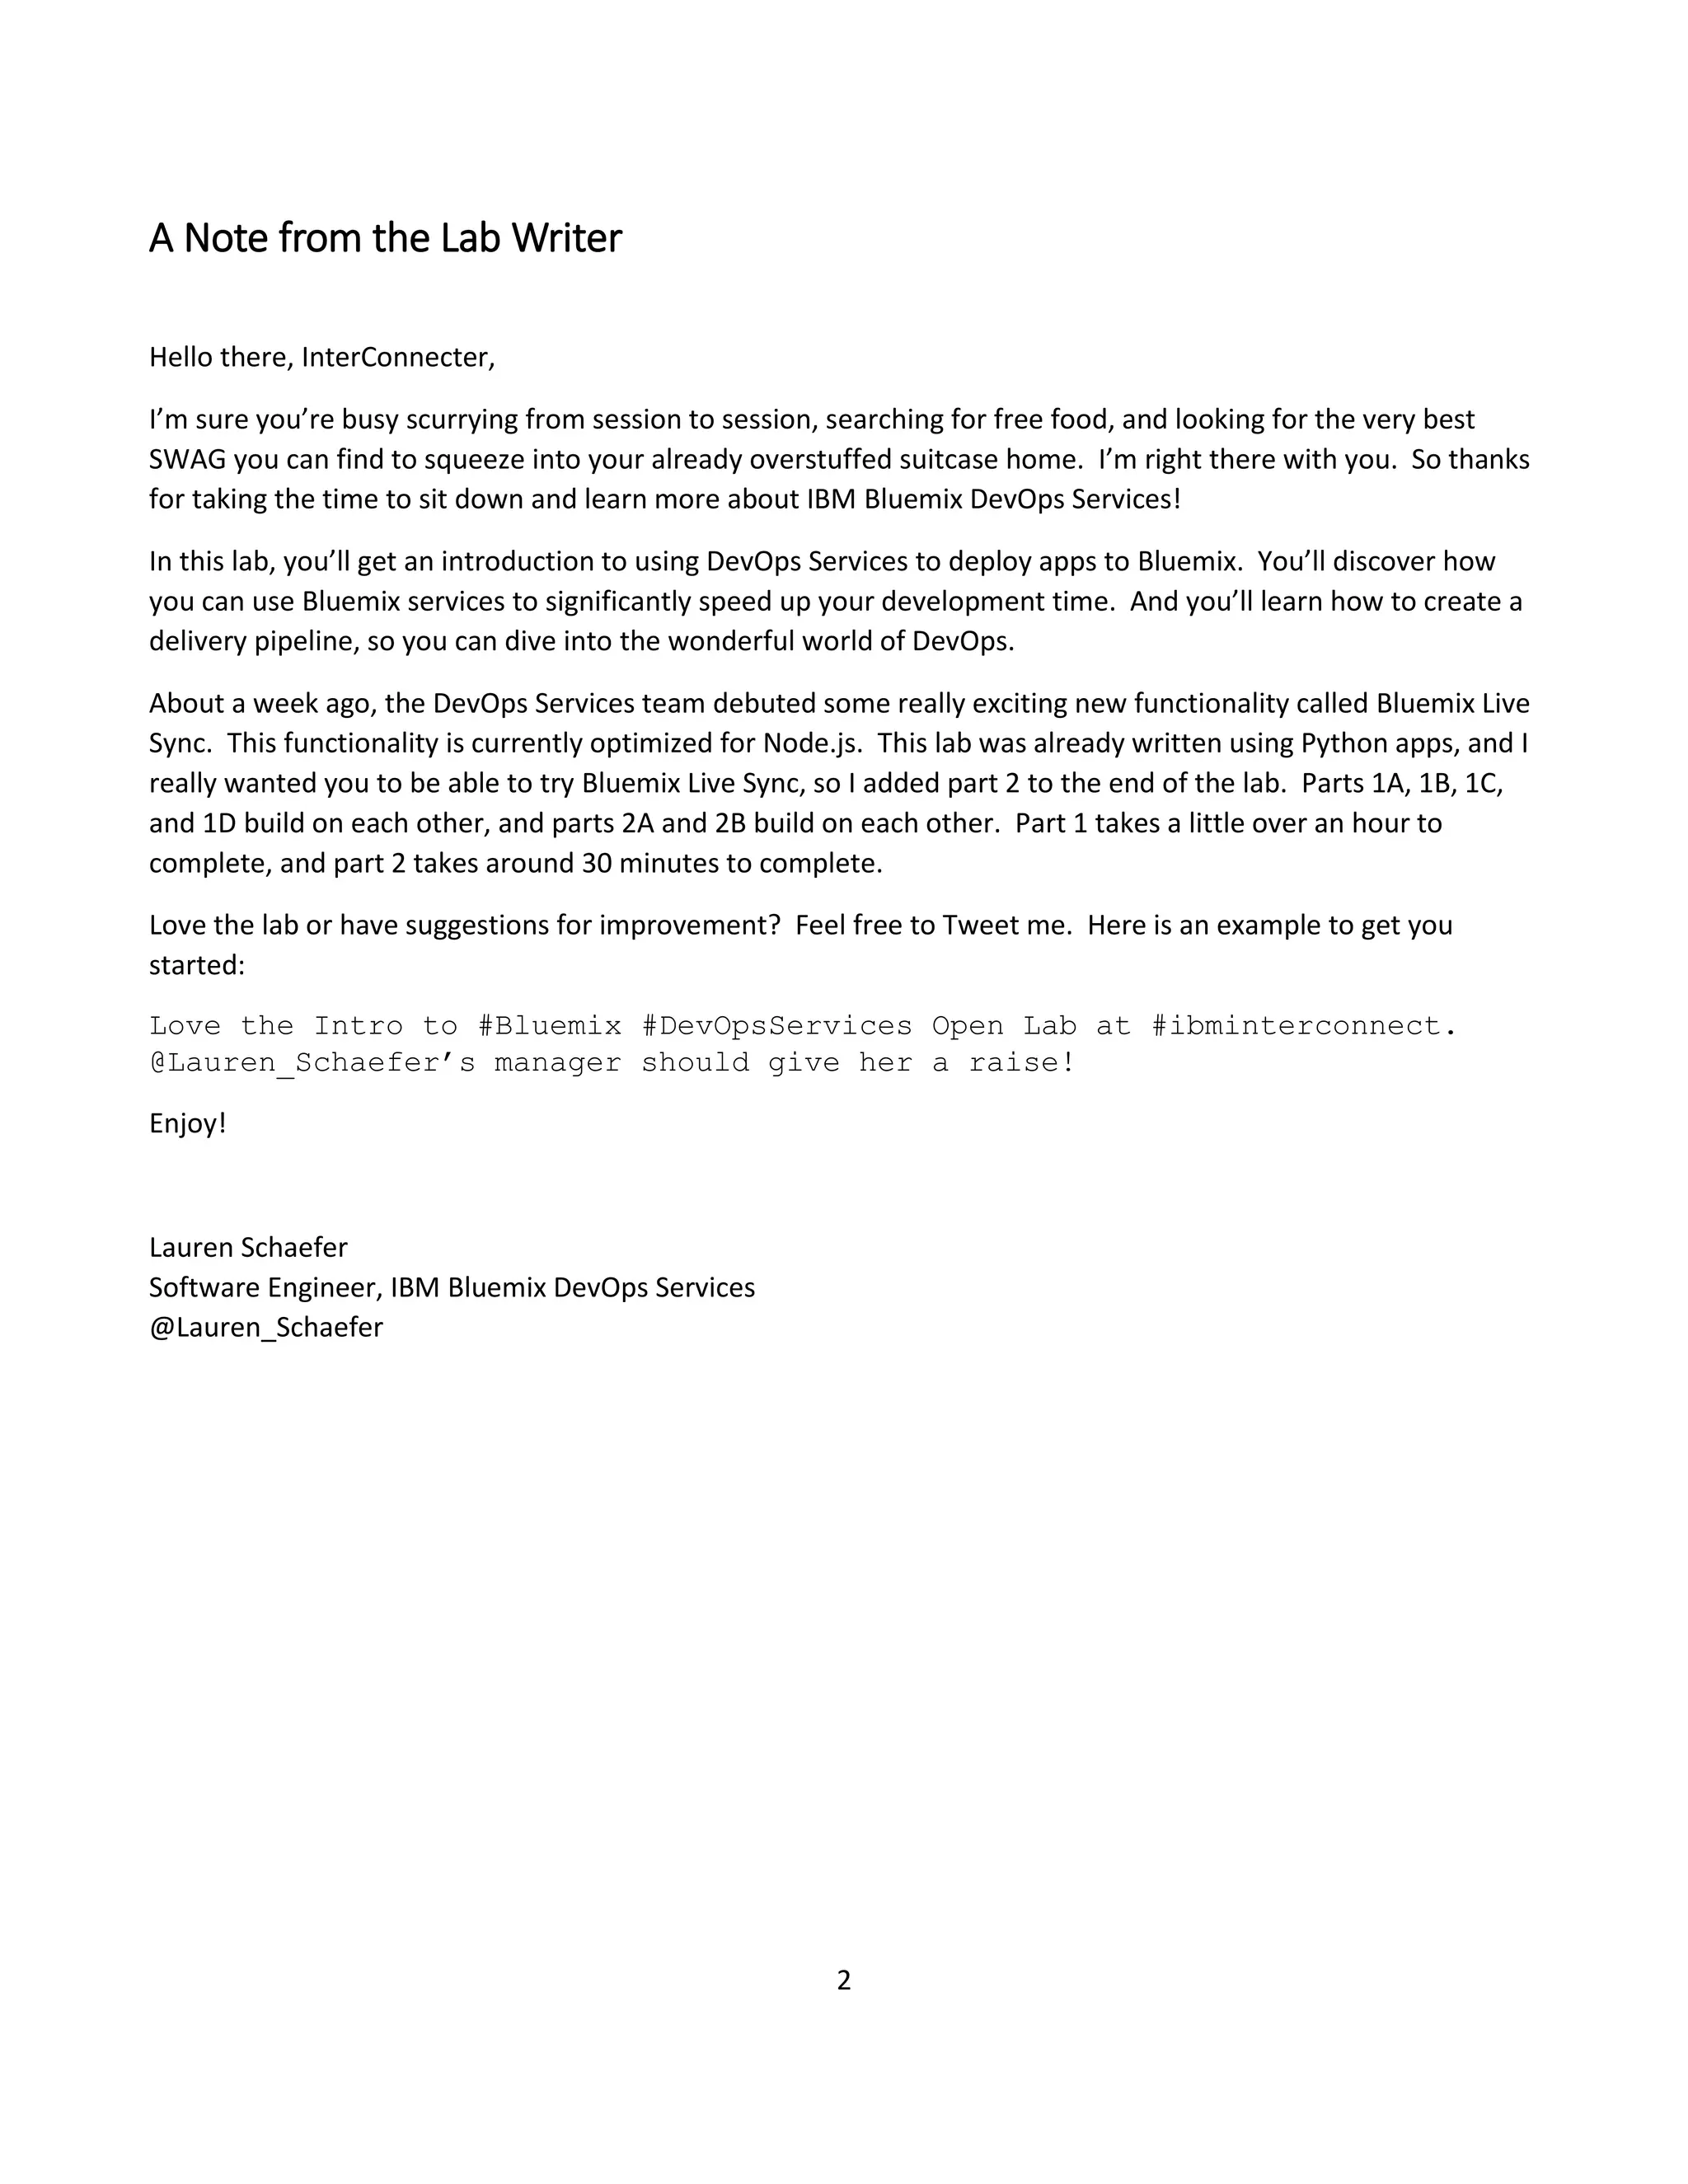
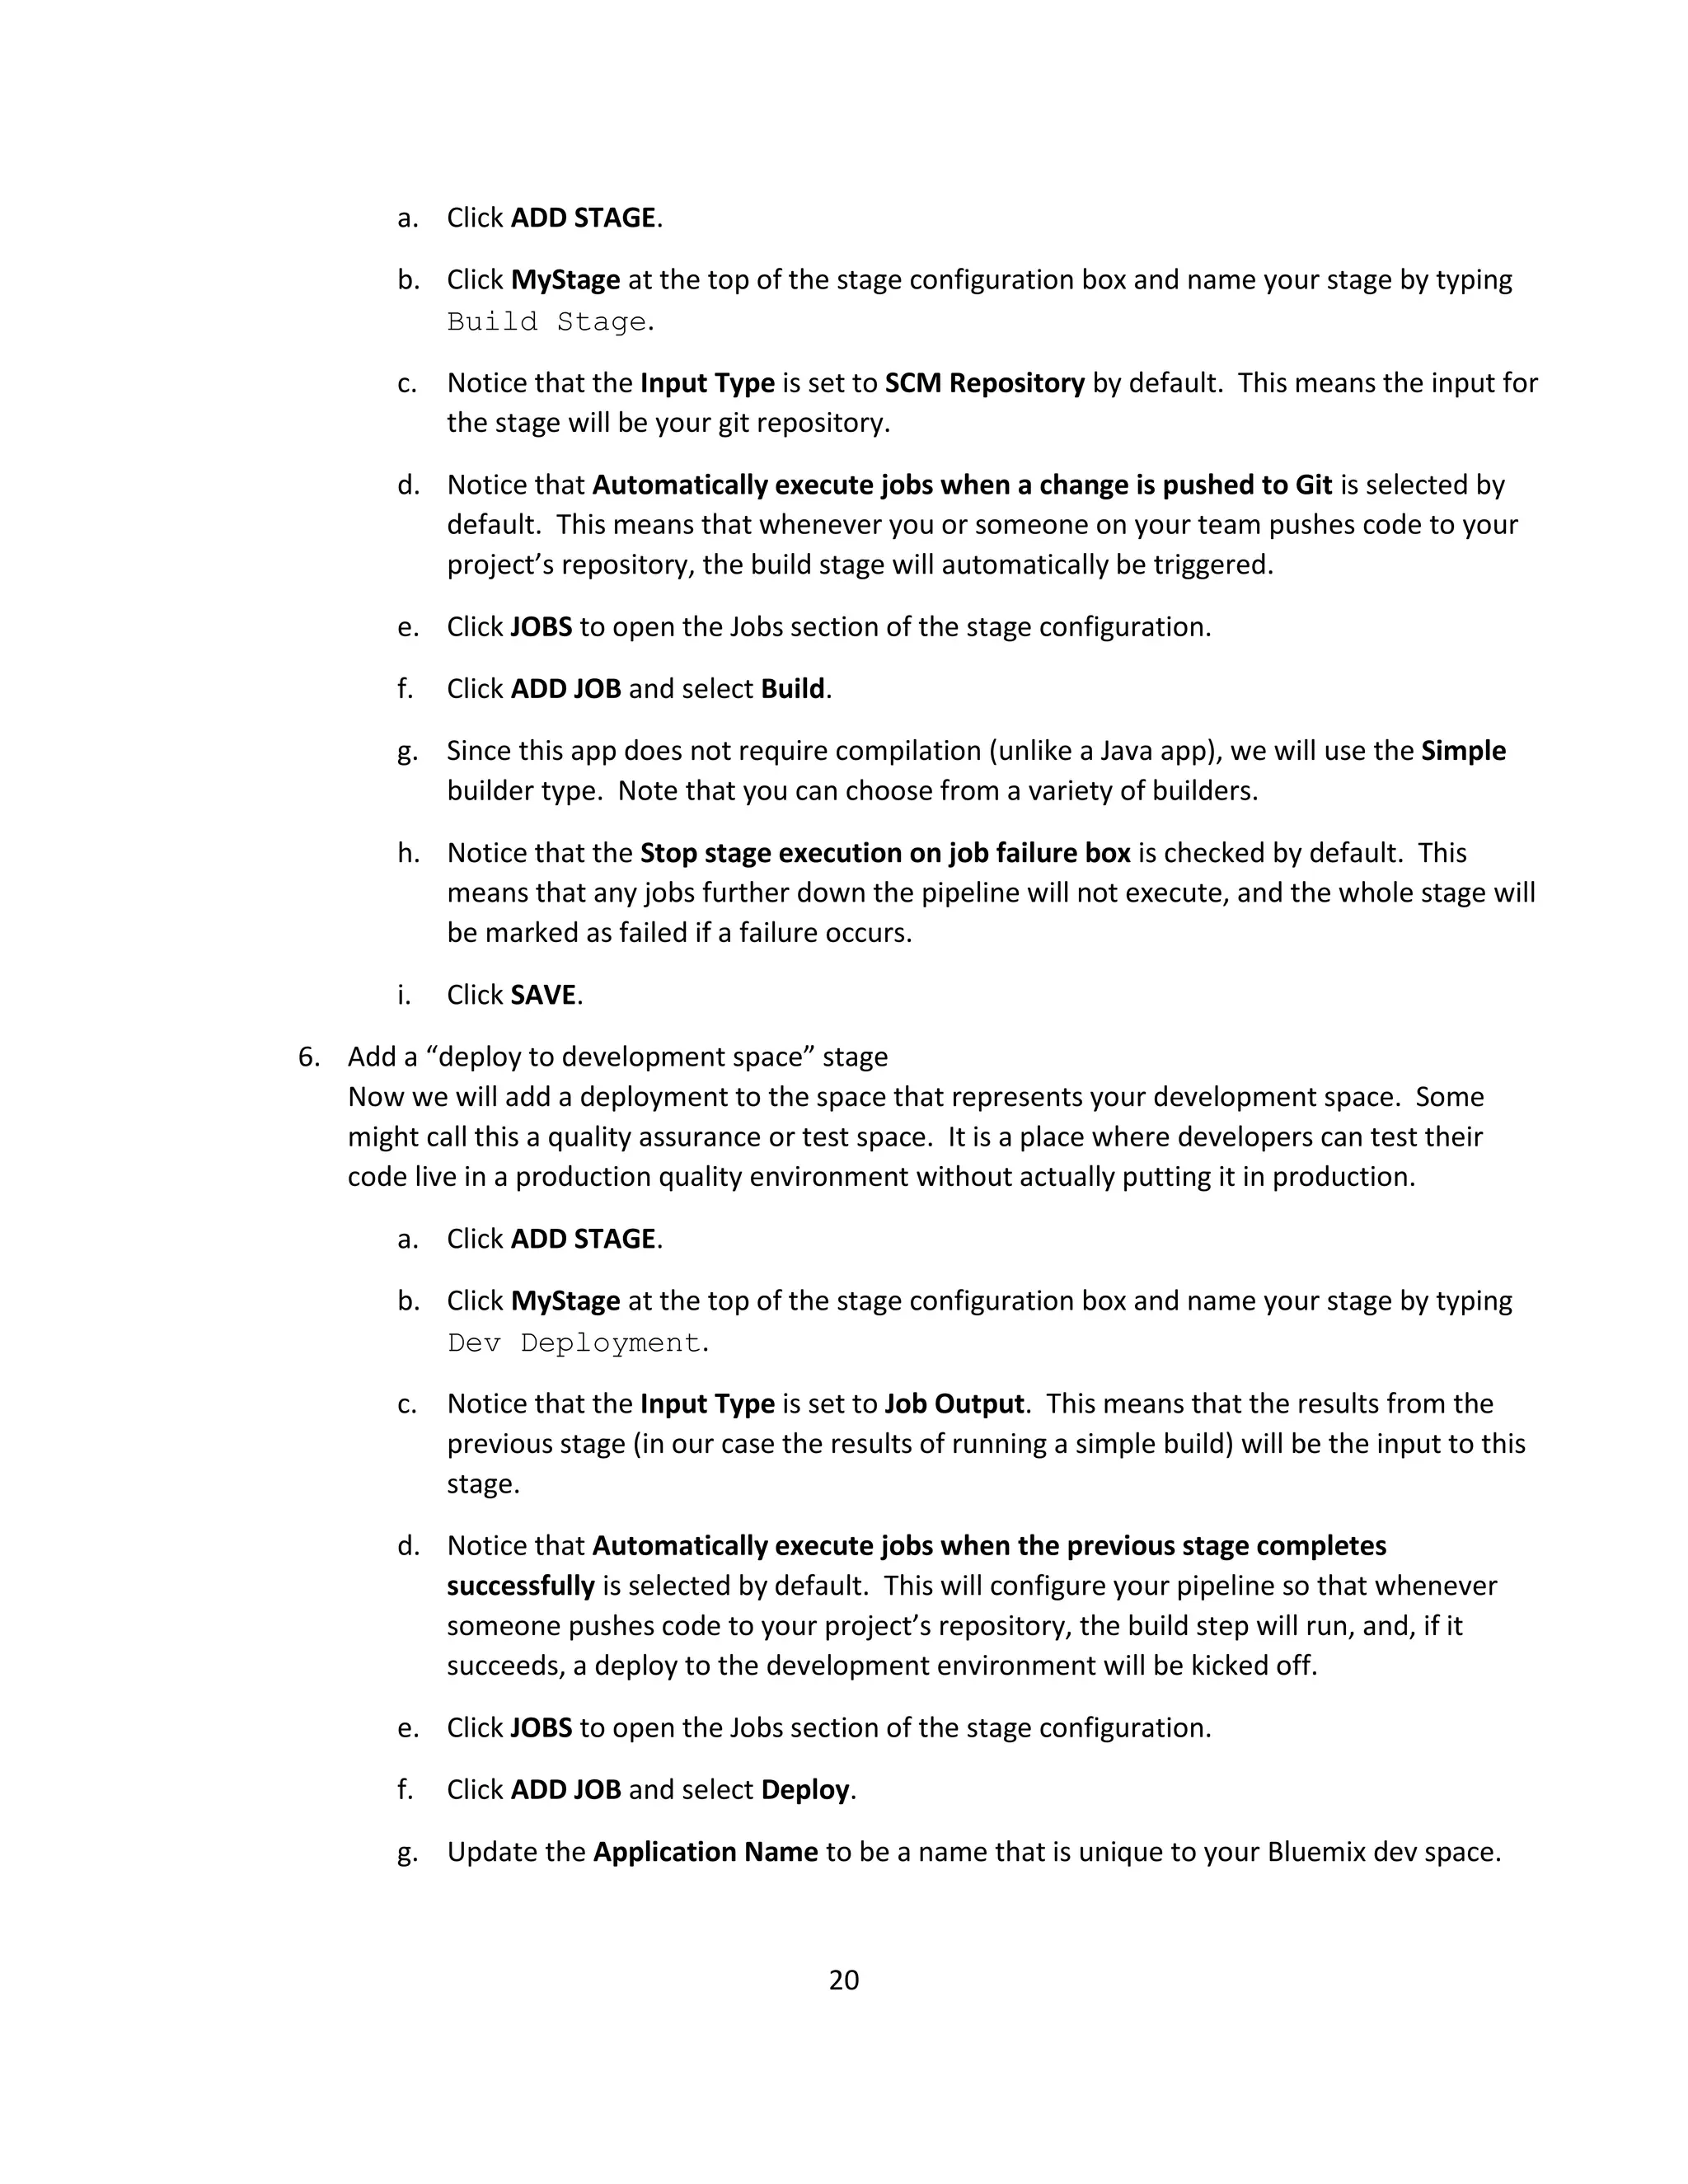
mongo_url = str(mongo_creds['uri'])
client = pymongo.Connection(mongo_url)
mongo_db = mongo_url.split('@')[1].split('/')[1]
mongoDB = client[mongo_db]
itemCollection = mongoDB["ItemCollection"]
if decoded_config[key][0]['name'].startswith('Twilio'):
twilio_creds = decoded_config[key][0]['credentials']
twilio_authToken = twilio_creds['authToken']
twilio_accountSID = twilio_creds['accountSID']
twilioClient = TwilioRestClient(twilio_accountSID, twilio_authToken)
5. Save your changes by selecting File > Save.
e. Add code to send the text message
Now comes the fun part! It's time to code!
Continue to work in the wsgi.py file and create a new function around Line 79 that
sends a text message:
def sendTextWithMessage(message):
message = twilioClient.messages.create(to="+15555555555", from_="+15555555555",
body=message)
f. Replace the to number with the cell phone number or Twilio number where you want
the text messages to be sent (don't forget the country code.)
g. Replace the from number with your Twilio phone number (don't forget the country
code.)
h. In the getCurrentPrice function, inside of the if statement that checks if the
price is not None, add the following line of code.
sendTextWithMessage("The current price of %s is %s" % (item["name"], price))
i. Save your changes by selecting File > Save.
That's it! You've implemented your feature with only nine lines of code!
3. Deploy and test the feature
Now it's time to deploy your application to Bluemix so you can test it.
a. Click the Deploy button ( ).
b. If prompted if you want to stop and redeploy, click OK.
c. After your application has finished deploying, click the Open URL button ( ) in the top
gray bar.
d. In your app, click Get Prices.
e. Check your phone or Twilio number for a text message!
If you like, update the prices of the items in the store and get the prices again.
4. Push the feature to the repository
Now that your feature is tested, it's time to push your changes to the Git repository.
17. 16
a. In the leftmost bar of icons, click the Git Repository button ( ).
b. In the box in the Working Directory Changes section, type a comment similar to the
following, being sure to replace 20 with the work item ID associated with the work item
you created: Changes to implement the text messaging feature as
described in work item 20.
c. Select each change in the Changed Files section and click the COMMIT button.
d. In the OUTGOING section, click PUSH.
e. If you are prompted for your committer information, enter it and click OK.
5. Complete the feature
To indicate that you have finished your feature, mark your work item as complete.
a. In the Web IDE, click TRACK & PLAN in the upper-right corner.
b. In the right pane, find your work item associated with the text messaging feature, and
click the Status: In Progress icon.
c. Click Set Done.
d. In the right pane, scroll right until you see the RESOLVED section. Notice that your work
item is now marked done.
6. Discover the traceability
When you added a comment in your commit that mentioned your work item, a link was
automatically created for you between the change and the work item.
a. In the right pane, scroll to the Resolved view if you are not currently viewing your
resolved work items.
b. Click the textual summary of the work item associated with the text messaging feature
to open it.
c. In the work item, click the Links tab.
d. In the LINKS section, notice that a link was automatically generated for you. Click the
link. The Git Log displays.
e. Observe that you have a summary of the git commit and its associated work items.
f. Click GIT LOG in the left navigation to see a list of all of your git commits.
18. 17
Tweet this!
Collaborate with me on this app I created at the #ibminterconnect! [insert link to your app!]
[include a screenshot of the Web IDE with your code—Tweets with images are more likely to get
noticed!]
Get creative
Invite a friend to join your project. Navigate to your project's home page, click Members, and
invite a friend to join.
Create new work items for features you’d like to implement or defects you find.
Implement some of the stories you created or fix the defects you recorded.
Additional resources
Twilio SMS and MMS Python Quickstart https://www.twilio.com/docs/quickstart/python/sms
Managing Distributed Teams
https://www.scrumalliance.org/community/articles/2013/july/managing-distributed-
teams.aspx
So Long Scrum, Hello Kanban https://stormpath.com/blog/so-long-scrum-hello-kanban/
19. 18
Part 1D: Deploying Automatically Using the Delivery Pipeline
Learn this!
Deployment automation is one of the keys to a successful DevOps approach.
You can create a complete delivery pipeline with multiple stages, automated tests, and
automatic deploys using DevOps Services.
Try this!
You can configure a multi-stage build and deployment pipeline to support your DevOps approach to
software development. In this section, you will configure a builder, a deployment to your
development (dev) space, and a deployment to your production (prod) space.
1. Create a production space
Organizations and spaces are organizational units in the Cloud Foundry infrastructure that can
be used to store and track application resources. An organization contains domains, spaces, and
users; a space contains applications and services. By default, a dev (development) space is
created for you.
a. Navigate to the Bluemix dashboard if you are not there already.
b. Click Create a Space in the left menu.
c. In the Create a Space dialog, input prod as your space name and click CREATE.
2. Create services for deployments to your dev space
When deploying to your dev and prod spaces, you will likely want to have services dedicated to
those deployments. For example, you want to use separate databases for each space. We’ll
begin by creating services for each space.
a. Navigate to the Bluemix dashboard if you are not there already.
b. Click CATALOG.
c. Create the MongoLab service.
i. Scroll down until you see the MongoLab service. Hint: Check the Data
Management section. The catalog is constantly being updated with new
services!
ii. Click the MongoLab service.
iii. In the Space dropdown, choose dev.
iv. In the App dropdown, choose Leave unbound.
20. 19
v. In the Service name box, leave the default or change the name to something
you like. Be sure the name you choose begins with “mongo” as that is how the
code identifies the service.
vi. Note the name of your service as you will need it later.
vii. Click CREATE.
d. Create the Twilio service.
i. Navigate to the Catalog if you are not there already.
ii. Scroll down until you see the Twilio service. Hint: Check the Mobile section. The
catalog is constantly being updated with new services.
iii. Click the Twilio service.
iv. In the Space dropdown, choose dev.
v. In the App dropdown, choose Leave unbound.
vi. In the Service name box, leave the default or change the name to something
you like. Be sure the name you choose begins with “twilio” as that is how the
code identifies the service.
vii. In the Account SID and Auth Token fields, paste your Twilio AccountSID and
AuthToken from your Twilio Account Settings page.
viii. Click CREATE.
3. Create services for deployments to your prod space
Repeat the steps from #2 above to create MongoLab and Twilio services for deployments to
your prod space. Be sure to select “prod” as the Space instead of “dev.”
4. Enable Advanced Build & Deploy
You can configure a multi-stage build and deployment pipeline to support your DevOps
approach to software development. Note that the pipeline only includes changes that have
been pushed to your project’s repository; changes that are in your workspace in the Web IDE
that have not been pushed to your project’s repository will NOT be deployed as part of the
pipeline.
a. Open the Fabulous Price Finder project you created in the previous section by
navigating to DevOps Services, signing in if you're not already authenticated, and
clicking on your project on the My Projects page.
b. Click BUILD & DEPLOY in the upper-right corner.
5. Add a builder stage
The first stage we will create is a builder stage.
21. 20
a. Click ADD STAGE.
b. Click MyStage at the top of the stage configuration box and name your stage by typing
Build Stage.
c. Notice that the Input Type is set to SCM Repository by default. This means the input for
the stage will be your git repository.
d. Notice that Automatically execute jobs when a change is pushed to Git is selected by
default. This means that whenever you or someone on your team pushes code to your
project’s repository, the build stage will automatically be triggered.
e. Click JOBS to open the Jobs section of the stage configuration.
f. Click ADD JOB and select Build.
g. Since this app does not require compilation (unlike a Java app), we will use the Simple
builder type. Note that you can choose from a variety of builders.
h. Notice that the Stop stage execution on job failure box is checked by default. This
means that any jobs further down the pipeline will not execute, and the whole stage will
be marked as failed if a failure occurs.
i. Click SAVE.
6. Add a “deploy to development space” stage
Now we will add a deployment to the space that represents your development space. Some
might call this a quality assurance or test space. It is a place where developers can test their
code live in a production quality environment without actually putting it in production.
a. Click ADD STAGE.
b. Click MyStage at the top of the stage configuration box and name your stage by typing
Dev Deployment.
c. Notice that the Input Type is set to Job Output. This means that the results from the
previous stage (in our case the results of running a simple build) will be the input to this
stage.
d. Notice that Automatically execute jobs when the previous stage completes
successfully is selected by default. This will configure your pipeline so that whenever
someone pushes code to your project’s repository, the build step will run, and, if it
succeeds, a deploy to the development environment will be kicked off.
e. Click JOBS to open the Jobs section of the stage configuration.
f. Click ADD JOB and select Deploy.
g. Update the Application Name to be a name that is unique to your Bluemix dev space.
22. 21
h. By default, the deployer will use the instructions in the manifest. Rather than deploying
to a url with a random string of characters, we want this to be a consistent place where
developers on your team will be able to test their code. In the Script section, after
cf push “${CF_APP}”
add -n whateverYouWantYourUrlToBe. Note: the url needs to be unique across
all Bluemix apps, so be creative.
i. Under the cf push command, add two lines that bind the services in your dev space
to the app. The command should be the following:
cf bind-service "${CF_APP}" nameOfYourMongoLabService
cf bind-service "${CF_APP}" nameOfYourTwilioService
j. Next add a command to restage your app with the newly bound services:
cf restage "${CF_APP}"
k. The script section should now look similar to the following:
cf push "${CF_APP}" -n fbf-lauren-dev
cf bind-service "${CF_APP}" MongoLab-dev
cf bind-service "${CF_APP}" Twilio-dev
cf restage "${CF_APP}"
# View logs
#cf logs "${CF_APP}" --recent
l. Note that if we had automated tests associated with this project, we could add a test
job to this stage so that the deploy would run and then tests could be executed against
that deployment.
m. Click SAVE.
7. Add a deploy to production space stage
Now we will add a deployment to the space that represents your production space. This space
is where you keep apps that your end users will use.
a. Click ADD STAGE.
b. Click MyStage at the top of the stage configuration box and name your stage by typing
Prod Deployment.
c. Notice that the Input Type is set to Job Output. This means that the results from
running our simple build will be the input to this stage.
d. Notice that Automatically execute jobs when the previous stage completes
successfully is selected by default. Since we don’t have any automated tests included in
this pipeline, automatically deploying to production is probably not safe. Select Only
execute jobs when a user manually runs this stage.
e. Click JOBS to open the Jobs section of the stage configuration.
f. Click ADD JOB and select Deploy.
23. 22
g. Update the Space to be prod.
h. Update the Application Name to be a name that is unique to your Bluemix prod space.
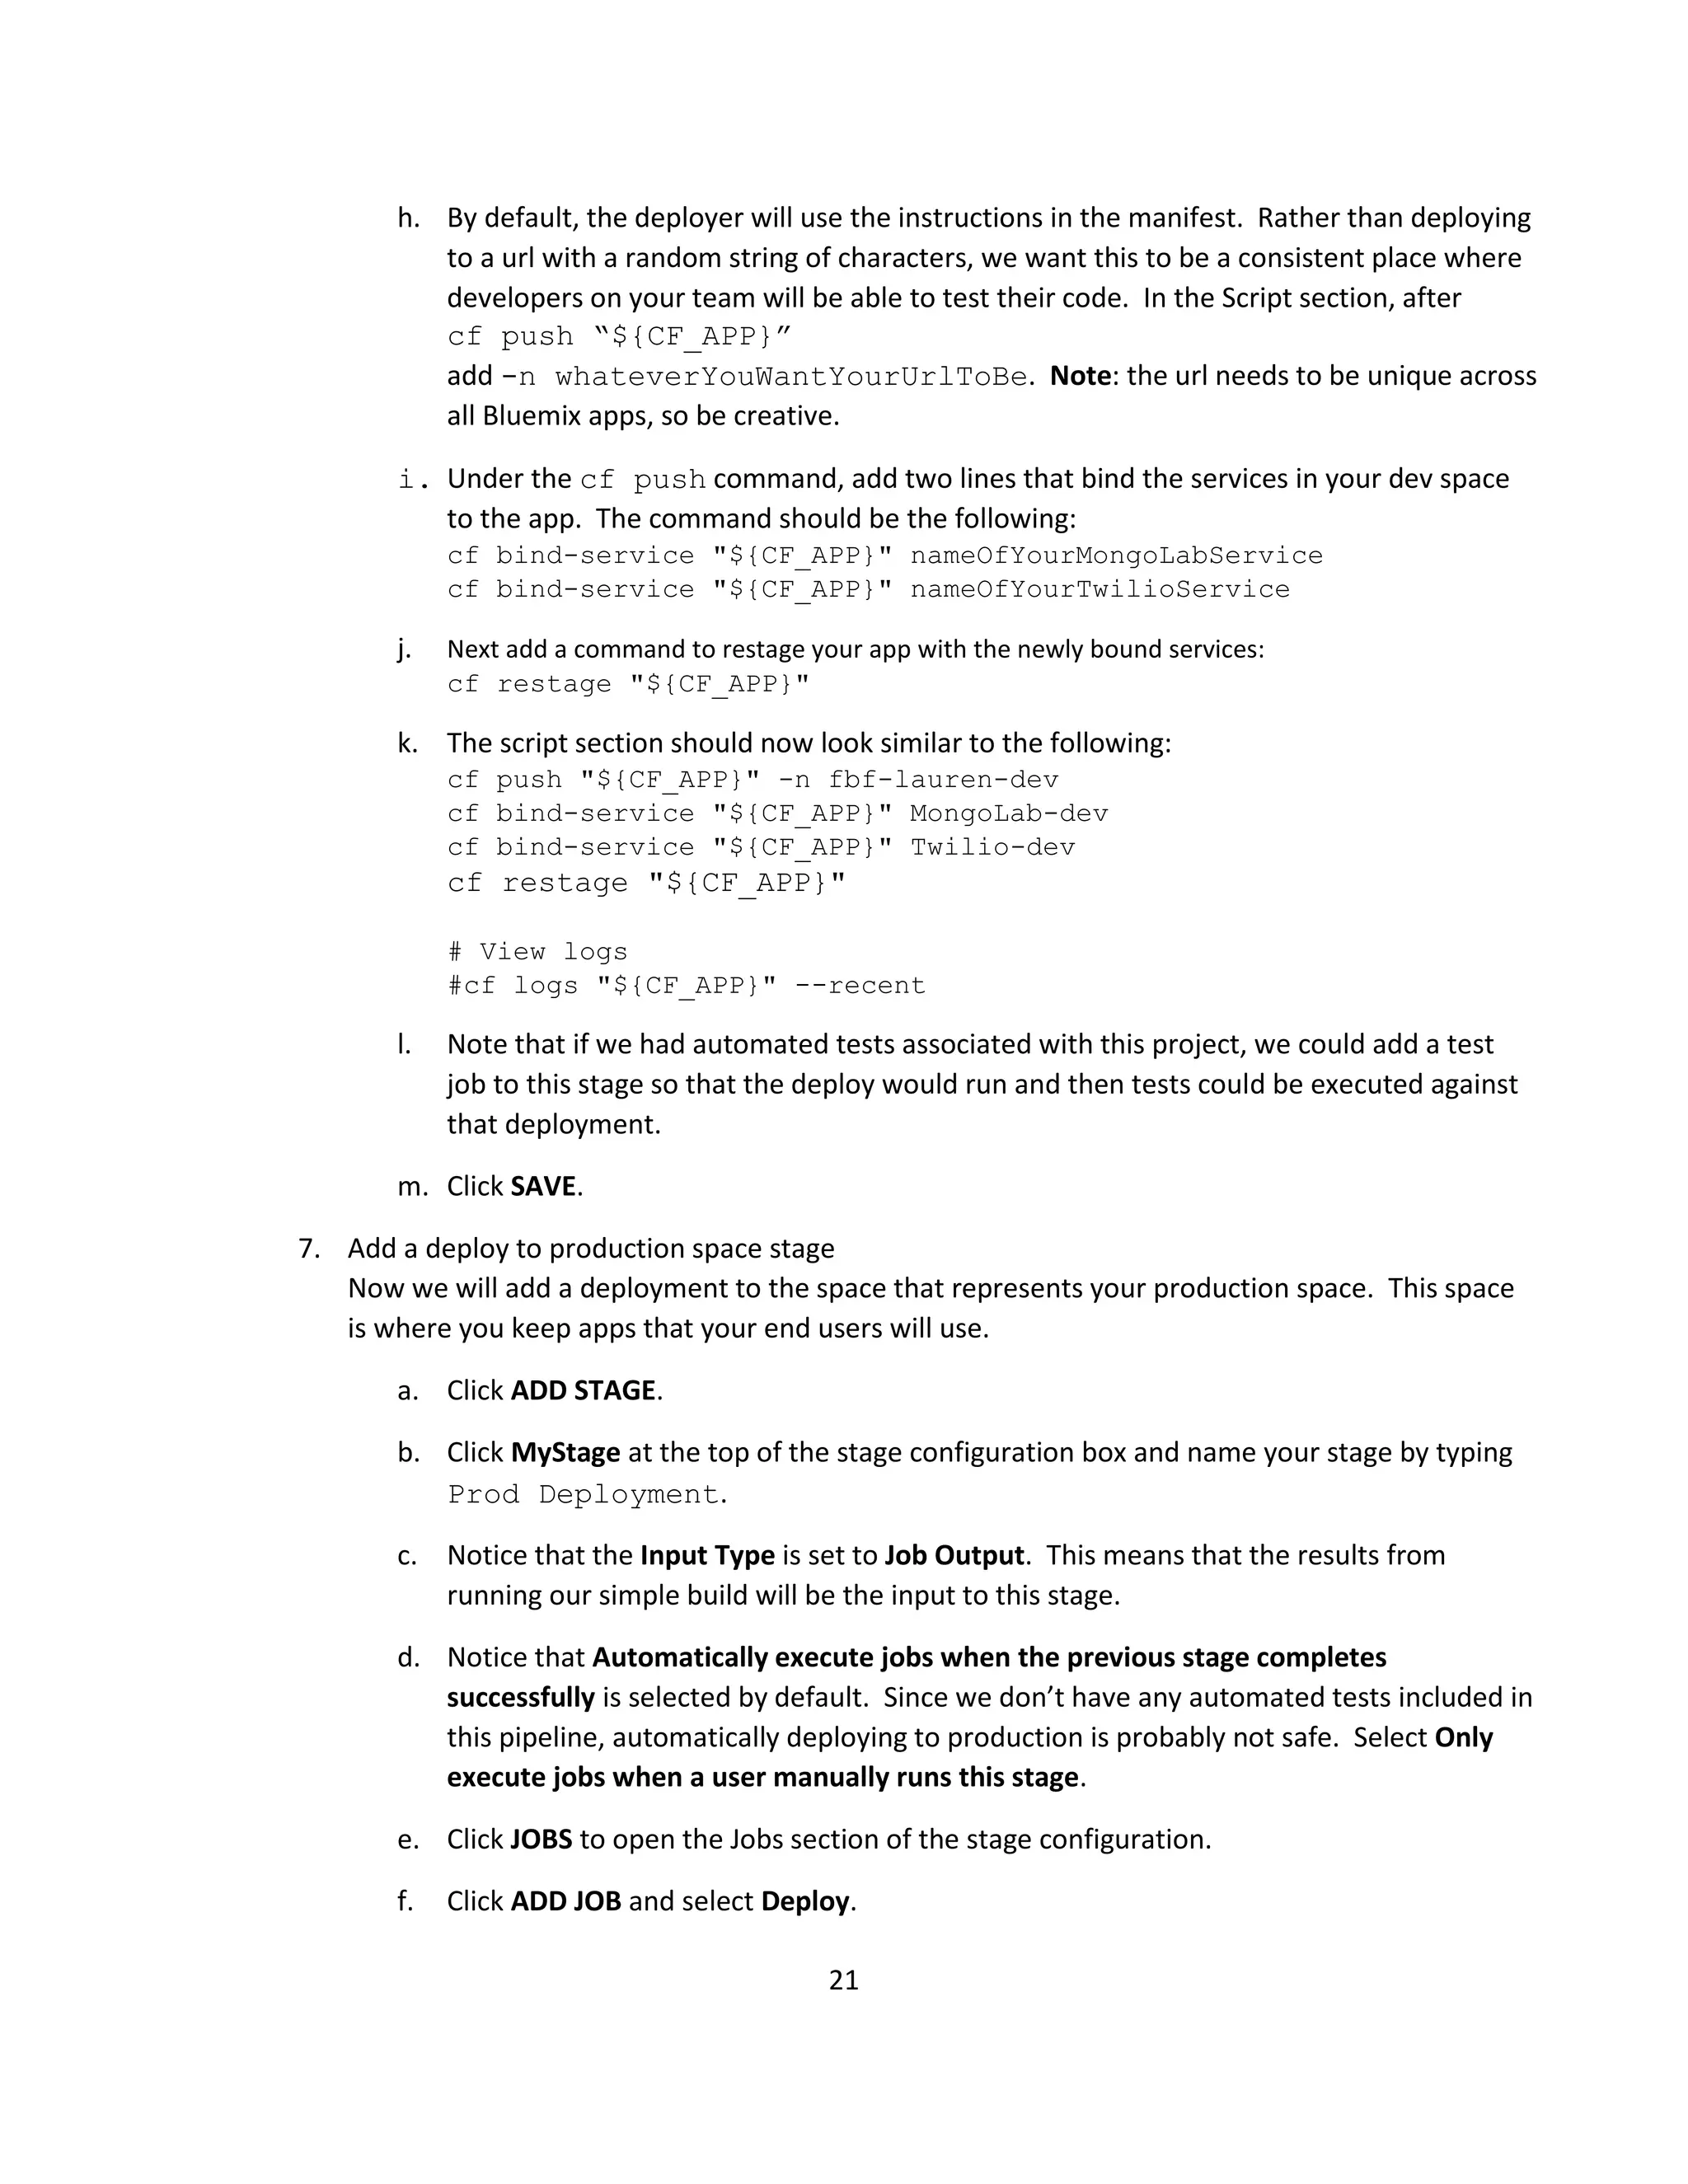
i. By default, the deployer will use the instructions in the manifest. Rather than deploying
to a url with a random string of characters, we want this to be a consistent place where
your end users will be able to access your app. In the Script section, after
cf push “${CF_APP}”
add -n whateveryouwantyoururltobe. Note: the url needs to be unique across
all Bluemix apps, so be creative.
j. Under the cf push command, add two lines that bind the services in your dev space
to the app. The command should be the following:
cf bind-service "${CF_APP}" nameOfYourMongoLabService
cf bind-service "${CF_APP}" nameOfYourTwilioService
k. Next add a command to restage your app with the newly bound services:
cf restage "${CF_APP}"
l. The script section should now look similar to the following:
cf push "${CF_APP}" -n fbf-lauren
cf bind-service "${CF_APP}" MongoLab-prod
cf bind-service "${CF_APP}" Twilio-prod
cf restage "${CF_APP}"
# View logs
#cf logs "${CF_APP}" --recent
m. Click SAVE.
8. Kick off the pipeline.
Now that we have the build pipeline configured, it’s time to try it out! To trigger the pipeline,
we could make a change to our project’s code and push the change to our Git repository, or we
could manually request a build.
a. On the Pipeline page, click the Play button ( ) in the Build Stage to kick off the first
stage of the pipeline manually.
The build pipeline will go through the build and deploy to dev steps. If you like what was
deployed to dev, you can drag and drop the build from the Build Stage tile to the Prod
Deployment tile to deploy it there.
Tweet this!
Dove into #DevOps by creating a release pipeline for my app. [attach a screenshot of the Build &
Deploy page for your app] #ibminterconnect
24. 23
Get creative
Make a change to your code and watch the build pipeline automatically deploy it for you.
Zero downtime deployments are very important to web applications. Design and implement a
strategy to deploy your app to your production space without any downtime. Hint: check out
this article: http://www.ibm.com/developerworks/cloud/library/cl-Bluemix-rollingpipeline/.
Additional resources
DevOps for Dummies ebook http://ibm.co/devopsfordummies
Top 10 Practices for Effective DevOps http://www.drdobbs.com/architecture-and-design/top-
10-practices-for-effective-devops/240149363
Cloud Computing Trends: 2014 State of the Cloud Survey
http://www.rightscale.com/blog/cloud-industry-insights/cloud-computing-trends-2014-state-
cloud-survey
DevOps Embracing Cloud Services http://www.midsizeinsider.com/en-us/article/devops-
embracing-cloud-services#.VJmrScABg
25. 24
Part 2A: Live Edit
Hot off the press (or maybe the delivery pipeline?), we released a brand new feature, Live Edit, that we are
really excited about. The Live Edit feature allows you to make changes to your application and have them
deployed nearly instantaneously to your deployed app. It’s just like editing files locally…except you don’t have
to set up a development environment!
Since the Live Edit feature is currently optimized for Node.js, we will create a new app using the User Modeling
Node.js Web Starter boilerplate (what a concise name!). The exciting thing about this boilerplate is that it uses
IBM Watson (remember Watson, the supercomputer that beat Jeopardy champions a few years ago???)
services.
In this part, you will create a new Bluemix app and leverage the Live Edit feature to see the changes you make
be deployed almost instantly to your running app.
Learn this!
Live Edit allows you to see changes you make in the DevOps Services Web IDE reflected in real-
time to your app deployed on Bluemix. It’s just like editing files locally…except you don’t have
to set up a development environment!
Changes you make to static files (for example, Jade or CSS files) will be reflected almost
instantaneously in your deployed app. Changes you make in Node modules (like JavaScript files)
will require a fast restart of the app in order to be reflected in your deployed app.
Try this!
1. Sign up for DevOps Services if you have not done so already.
a. Navigate to http://ibm.biz/ic-devops and sign up.
b. After you complete the 3 step sign up process, you will be prompted to begin your free
Bluemix trial. Check the Begin your free Bluemix trial box, input your phone number,
and click Continue.
c. You will receive an e-mail asking you to confirm your Bluemix trial. Click the link in the
e-mail to complete your Bluemix registration.
2. Create a Node.js app using a Bluemix boilerplate
The first thing we need is a Node.js app. One of the fastest ways to get a new app is to use a
Bluemix boilerplate.
a. Navigate to http://ibm.biz/ic-Bluemix.
b. Log in if you are not already authenticated.
c. Click CATALOG. The Catalog is your place to browse the available boilerplates (sample
applications) runtimes, and services.
d. In the Boilerplates section, click User Modeling Node.js Web Starter.
26. 25
e. Input a name for the app (what the app will be referred to in Bluemix) and a host for the
app (the part of the url that will go before mybluemix.net). Note that the host must be
globally unique across all of Bluemix, so be creative.
f. Click CREATE. A copy of the boilerplate code will be put in to a new app for you and
then deployed to Bluemix. In the APP HEALTH section, wait for the message, “Your app
is running” to be displayed.
g. When your app is running, click on your route (toward the top of the page) to open your
running app.
3. Explore the Node.js app
Now that your app is running, let’s take a moment to explore it. The User Modeling app uses
the Watson User Modeling service to analyze text and determine personality traits of the text’s
author.
a. The app includes sample text from Moby Dick. Click ANALYZE to learn about the
personality of Moby Dick’s author, Herman Melville. Textual output as well as a
graphical visualization are displayed.
b. Navigate to one of your favorite websites with English text (keep it office-friendly…so
perhaps choose your favorite news site) and copy a block of text.
c. Return to your User Modeling App and paste the text in the Try the Service box.
d. Click ANALYZE. View the textual output as well as the graphical visualization.
4. Prepare for Live Edit
We’ve tested the app, and now we’ll prep to make some changes to it.
a. Return to the Bluemix page for your User Modeling app. If your app is not in a separate
window or tab, right-click on your app’s route and choose an option to open the link in a
new window or tab.
b. Click ADD GIT in the upper-right corner.
c. Click CONTINUE in the Create Git Repository dialog. Bluemix will take a copy of your
app’s code and put it in a Git repository hosted at DevOps Services.
d. Click CLOSE once the Git Repository has been successfully created.
e. Click EDIT CODE in the upper-right corner to open the DevOps Services Web IDE.
f. Toggle the Live Edit option to on: .
g. If prompted to redeploy, click OK. The app will redeploy so changes can be made live to
your deployed app. When the app finishes deploying, a green dot will be displayed in
the run bar:
27. 26
When the app finishes deploying, you are ready to make live edits!
5. Change a static file
Changes you make to static files (for example, Jade or CSS files) will be reflected almost
instantaneously in your deployed app.
a. In the navigator view on the left, expand views.
b. Select layout.jade.
c. Update the h2 to say something like, “This open lab is so great that I’m going to Tweet
about it!”
d. Switch to your tab or window that has your running app.
e. Refresh the page.
f. Note that the heading of your app was changed instantly! You didn’t have to wait for
the app to redeploy!
g. Make a few more changes to static files and watch your app update in real time.
6. Change a node module
Changes to node modules require a fast app restart (not a full redeploy) in order to be deployed
because the server caches node modules in memory.
a. In the navigator view on the left of the Web IDE for your project, select dummy-text.js.
b. In the text, change “Ishmael” to your name.
c. Because this is a change to a node module, we need to restart the app. In the Web IDE’s
top bar, click the Restart button ( ).
d. When the app finishes restarting (only takes a few seconds), a green dot will be
displayed in the run bar:
e. When the app has finished restarting, switch to your tab or window that has your
running app.
f. Refresh the page. If your browser has cached the page and you don’t see the update,
navigate to your app’s url again, and the change should be displayed.
28. 27
Tweet this!
Developing in the cloud using #Bluemix #DevOpsServices is now as fast and easy as developing
locally. #WhoKnew #ibminterconnect
Get creative
Create a new look for the User Modeling app. Open the CSS files located in the public/css
directory and have fun making changes to the files. Watch as your changes are deployed live.
Additional resources
Everything AND the kitchen sync: Bluemix Live Sync is here! https://developer.ibm.com/devops-
services/2015/02/13/everything-kitchen-sync-Bluemix-live-sync/
Bluemix Live Sync documentation
https://www.ng.bluemix.net/docs/?cm_mmc=developerWorks-_-dWdevcenter-_-devops-
services-_-lp#manageapps/bluemixlive.html#bluemixlive
29. 28
Part 2B: Bluemix Debug
Sometimes staring at the code to figure out what’s going wrong just doesn’t work. Sometimes you really need
to debug the code or access the environment where the app is running. This is where Bluemix Debug comes in.
Bluemix Debug allows you to restart, get shell access, and use the Node Inspector Debugger for your Node.js
apps.
In this part, you’ll continue on with the User Modeling Node.js app you created in part 2A.
Learn this!
Bluemix Debug allows you to restart, get shell access, and use the Node Inspector Debugger for
your Node.js apps.
Try this!
Note: The Node Inspector Debugger currently only works in Chrome. You may want to take this
opportunity to change browsers if you are not already using Chrome.
1. Open the IBM Bluemix Debugger
a. Navigate to http://ibm.biz/ic-devops and sign in if you are not already authenticated.
b. In My Projects, locate the tile for your User Modeling app. Click the Edit Code icon ( )
to open the Web IDE for your project.
c. In the Web IDE’s top bar, click the Debug button ( ).
d. When prompted for credentials, input your IBM id and password.
2. Use the shell
The Bluemix Shell allows you to explore and interact with the Bluemix environment where your
app is running by using a built-in bash shell.
a. On the IBM Bluemix Debugger page for your project, click Open Shell. A shell client
opens in your browser.
b. View the processes running in your Bluemix environment by inputting the following
command:
top
c. Click NEW WINDOW.
d. Drag and drop the new window so that you can continue to observe your processes
while you explore the log files.
e. In the new window, change directory to the log files by inputting the following
command:
cd ../logs
30. 29
f. View a list of the files in the logs directory by inputting the following command:
ls
g. Notice that staging_task.log is a file in your logs directory. View the last 10 lines of the
log file by inputting the following command:
tail staging_task.log
3. Use the Debugger
The Debugger allows you to debug Node.js apps.
a. On the IBM Bluemix Debugger page for your project, click Open Debugger. The
Debugger takes about 30 seconds to load.
b. If the Navigator is not displayed on the left, click the Expand Navigator button:
c. Select flatten.js in the Navigator to open the file.
d. Add a breakpoint on line 17 by clicking 17.
e. In a different tab or window, navigate to your running app.
f. Click Analyze.
g. Switch back to the tab or window with your Debugger. Notice that the breakpoint has
been hit. On the right, you can view the Call Stack and Variables. You can also use
buttons on the right to step over the next function call, step into the next function call,
and step out of the next function call.
h. When you have finished exploring your running app, click the Resume script execution
button ( ) on the right.
Note that from the IBM Bluemix Debugger page, you can choose to suspend the app, which will
restart the app and break at the first line of the app.
31. 30
Tweet this!
#Bluemix + #DevOpsServices + #Shell = a happy developer! #ibminterconnect
#NoDownloadsRequired [include a screenshot of the shell in your browser]
Just debugged my #Bluemix app by using the debugger in #DevOpsServices.
#NoDownloadsRequired #ibminterconnect [take a selfie of you in front of your debugger looking
very excited]
Get creative
Use some of your favorite commands to explore the Bluemix environment where your app runs.
Additional resources
Bluemix Live Sync
https://www.ng.Bluemix.net/docs/#manageapps/Bluemixlive.html#Bluemixlivedebugger
Learning the Shell http://linuxcommand.org/lc3_learning_the_shell.php