First Aid
Is immediatehelp provided to a sick or injured person until
professional medical help arrives or becomes available.
Basic Life Support
Are emergency procedure that consists of recognizing respiratory
or cardiac arrest or both and the proper application of CPR to
maintain life until a victim recovers or advanced life support is
available.
Definition of terms:
5.
Objectives of FirstAid
Preserve life.
Prevent further harm and complications.
Seek immediate medical help.
Provide reassurance.
6.
Roles and Responsibilitiesof a First Aider
1. Bridge that fills the gap between the
victim and the physician.
2. Ensures personal safety, patient and the
by-stander.
3. Summon advanced medical care as needed.
4. Provide needed care for the patient.
5. Ends when medical assistance begins.
7.
6. Respectable
Characteristics ofa Good First Aider
1. Gentle
2. Resourceful
3. Observant
4. Tactful
5. Empathetic
- should not cause pain.
- should make the best use of things
at hand.
- should notice all signs.
- should maintain a professional &
caring attitude.
- should be comforting.
- should not alarm the victim.
Are precautions takento isolate or prevent risk of exposure from any
other type of bodily substance.
BODY SUBSTANCE ISOLATION (BSI)
Personal Hygiene Personal Protective Equipment
Equipment Cleaning &
Disinfecting
BASIC PRECAUTIONS AND PRACTICES
10.
BASIC FIRST AIDEQUIPMENT AND SUPPLIES
Forceps Alcohol Povidone
Iodine
Cotton Penligh
t
Triangular
Bandage
Gauge
Pads
Band
Aid
Elastic roller
bandage
Plaster Gloves Occlusive
Dressing
Scissor Cotton Tongue
Depressor
• Sets of splint
• Poles
• Blankets
• Spine board
• Sets of splint
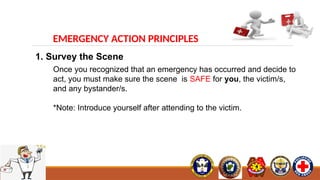
EMERGENCY ACTION PRINCIPLES
1.Survey the Scene
Once you recognized that an emergency has occurred and decide to
act, you must make sure the scene is SAFE for you, the victim/s,
and any bystander/s.
*Note: Introduce yourself after attending to the victim.
13.
EMERGENCY ACTION PRINCIPLES
.
2.Do Primary Assessment
A. Assess responsiveness tap shoulder “hey sir , are you ok?”
Gently try to see if the injured
person can respond. You can do
this by calling out to him and
gently tapping his shoulders.
14.
EMERGENCY ACTION PRINCIPLES
3.Activate Medical Assistance and Transport Facility
In some emergency, you will have enough time to call for specific
medical advice before administering first aid. But in some
situations, you will need to attend to the victim first.
- Care First And Call First Situation-
A. Check for Airway Head Tilt-Chin Lift Maneuver
Jaw-Thrust Maneuver
B. Check for Breathing
- Look, Listen, Feel (LLF) technique
C. Check for Circulation
15.
EMERGENCY ACTION PRINCIPLES
4.Do a Secondary Survey
A. Interview the victim. B. Head to Toe examination.
It is a systematic method of gathering
additional information about injuries or
conditions that may need care.
S
A
M
P
L
E
igns and symptoms
llergies
edication
ertinent past medical history
ast oral intake and output
vent leading to the episode
D
O
T
S
eformities
pen wounds
enderness
welling
16.
5. REFFER TOADVANCE CARDIAC LIFE SUPPORT/ DOCTORS/ ADVANCE HEALTH
HEALTH CARE PROVIDERS.
E
M
E
R
G
E
N
C
Y
A
C
T
I
O
N
P
R
I
N
C
I
P
L
E
S
WOUNDS
Is a breakin the continuity of a tissue of the body either internal or
external.
19.
Two Classifications ofWound
1. Closed Wound
the soft tissue damage occurs beneath the surface of the skin,
leaving the outer layer intact, such as contusion, and crushing
injuries.
First Aid Management
1. Apply ICE PACK
2. Elevate injured part
3. Apply Splint/ bandage
4. Provide comfort and reassure the person
20.
Two Types ofWounds cont…
2. Open Wound
it is a break in the outer layer of the skin
Types of OPEN WOUND
Puncture Abrasion Laceration Avulsion Incision
21.
First Aid Management
Woundswith Severe Bleeding
Wounds with Bleeding not severe (Home Care)
- Clean the wound with soap and water
- Apply mild antiseptics (Povidone-iodine)
- Cover wound with dressing and bandage
- Apply direct pressure - Control Bleeding by applying
pressure
- Cover the wound with dressing and
secure with a bandage
- Care for shock
- Consult or refer to physician
22.
BURNS
Is an injuryinvolving the skin, including muscles, bones,
nerves and blood vessels. This results from heat,
chemicals, electricity or solar or other forms of
radiation.
Common Causes
1. Carelessness with match and cigarette smoking
2. Scald from hot liquid or object
3. Defective heating, cooking and electrical equipment.
5. Use of such chemicals, as lye, strong acids and strong
detergents
Most common house hold
injury especially among
children.
23.
TYPES OF BURNINJURIES
1. Thermal Burns
2. Chemical Burns
3. Electrical Burns
4. Radiation Burns
CLASSIFICATION OF BURNS
1. First degree burn
-involve only the top layer
2. Second degree burn
-involve the top layer of the skin
3. Third degree burn
-involve all layers of the skin
( outer layer, fat, muscle, bones)
24.
First Aid Management
THERMALBURN
- Relieve pain by immersing the burned
area in cold water for five minutes
- Cover the burn with a dry, non-sticking, sterile
dressing or clean cloth
- Treat the victim for shock and keep the victim warm
CHEMICAL BURN
- Immediately remove the chemical by flushing of water
- Flush with large amount of water for 20 minutes.
- If the chemical is in the eye, flush the affected by using
low pressure
- Seek medical attention immediately
ELECTRICAL BURN
- Unplug, disconnect, or turn off the power
- Check the ABC
- Treat the victim for shock
- Seek medical attention immediately.
- Call local emergency number
RADIATION BURN
- Care as you would with thermal burn.
BANDAGING TECHNIQUE
Open Phase
1.Head (Topside)
2. Face; Back of the
Face
3. Chest; Back of the Chest
4. Hand ; Foot
Cravat Phase
1. Forehead; eye
2. Ear; Cheek; Jaw
5. Elbow; knee (Straight,
bent)
6. Palm Pressure Bandage
3. Shoulder; hip
4. Arm; leg
7. Palm bandage of open
hand
TRANSFER
Is moving apatient from one place to another after giving first aid
Selection of transfer method will depend on the following:
1. Nature and severity of the injury.
2. Size of the victim.
3. Physical capabilities of the first aider.
4. Number of personnel and equipment available.
5. Nature of evacuation route.
6. Distance to be covered.
7. Sex of the victim (Last Consideration).
33.
Methods of Transfer
1.One – Man Assist / Carries / Drags
- Assist to Walk
- Carry in arms (Cradle)
- Pack Strap Carry
- Fireman’s Carry
2. Two – Man Assist / Carries
- Assist to Walk
- Four – Hand Seat
- Hand as a litter
- Carry By Extremities
- Fireman’s Carry with Assistance
3. Three – Man Carries
- Bearers Alongside (for narrow alleys)
- Hammock Carry
- Blanket
- Empty Sack
- Shirts or Coats
4. Improvised Stretcher using Two Poles with:
Chain of Survival
INHOSPITAL CARDIAC ARREST (IHCA)
1. Surveillance and Prevention
2. Recognition and activation of the Emergency Response System
3. Immediate High-quality CPR
4. Rapid Defibrillation
5. Advanced life support and post arrest care
36.
Chain of Survival
OUTOF HOSPITAL CARDIAC ARREST (OHCA)
1. Recognition and activation of the Emergency Response System
2. Immediate High-quality CPR
3. Rapid Defibrillation
4. Basic and advanced emergency medical services
5. Advanced life support and post arrest care
37.
Heart Attack
Also calledmyocardial infarction occurs when the blood and oxygen supply to the
heart is reduced causing damage to the heart muscle and preventing blood from
circulating effectively. It is usually caused by coronary heart disease.
38.
Cardiac Arrest
Is acondition occurs when the heart stops contracting and no blood
circulates thru the blood vessels and vital organs are deprived of
oxygen.
39.
CARDIO-PULMONARY RESUSCITATION
-Is acombination of chest compression and rescue breathing.
-is series of assessments and interventions using techniques and
maneuvers made to bring victims of cardiac and respiratory arrest
back to life.
40.
WHEN NOT TOSTART CPR
All victims of cardiac arrest should receive CPR unless:
1. Patient has a valid DNAR (Do Not Attempt Resuscitation)
order.
2. Patient has signs of irreversible death (Rigor Mortis,
Decapitation, Dependent Lividity/livor mortis).
3. No physiological benefit can be expected because the vital
functions have deteriorated as in septic or cardiogenic
shock.
41.
WHEN TO STOPCPR
Once you begin CPR, do not stop unless:
S - pontaneous (normal) breathing and circulation
has been restored.
T - urned over to a medical services, or trained
and authorized personnel (EMS, paramedic, etc).
O - perator/ rescuer is exhausted and can’t
performed effective CPR.
P - hysician assumes responsibility.
S - cene becomes unsafe.
42.
COMPONENT OF CPR
1.You should be on your knees squarely at
the patient’s side.
2. Place your hand on the center of the chest
and place the other hand over the first (and
interlock your fingers)
3. Maintain compression rate of
100-120/minute
4. allow full chest recoil after each
compression
5. minimize interruptions
6. Avoid over ventilation
43.
DONT's in ExternalChest
Compression
1. Jerker
2. Massager
3. Bender
4. Rocker and Head Banger
5. Bouncer
6. Double Crosser and Crosser
7. Star Gazer
DO NOT BE A
44.
COMPONENT ADULT CHILDINFANT
SEQUENCE Compression – Airway - Breathing
Checking of breathing
and circulation
Carotid pulse Brachial pulse
COMPRESSION RATE 100-120 per minute
DEPTH 2 Inches (5 cm) About 2 inches (5cm) About 1 ½ inches
counting 1, 2, 3, 4, 5, 6, 7, 8, 9, 10, 11, 12, 13, 14, 15, 16, 17, 18,
19, 20, 1, 2, 3, 4, 5, 6, 7, 8, 9 1 breath, breath, (repeat up
to 5 cycle.)
45.
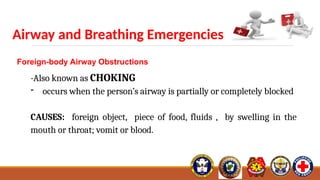
Airway and BreathingEmergencies
Foreign-body Airway Obstructions
-Also known as CHOKING
- occurs when the person’s airway is partially or completely blocked
CAUSES: foreign object, piece of food, fluids , by swelling in the
mouth or throat; vomit or blood.
46.
Two Types ofObstruction
1. Anatomical Obstruction. When tongue drops back
and obstructs the throat.
2. Mechanical Obstruction. When foreign objects
lodged in the airway.
Simple Anchors
Prepareand pad anchor points.
Use the Tensionless Hitch or Figure 8 Follow Through
if utilizing one end of the main line rope as the anchor.
If using webbing, create runners or anchor slings by
tying it into a loop using a water knot or overhand
bend, then clip the two ends of the sling together with a
carabiner.
Do not use girth hitch when tying an anchor sling
around an anchor point. Girth hitch will reduce the
web strength by 75% to 80%. Tie using an interior loop
instead.
53.
BELAYING
A Belayis a safety to catch persons should they fall.
The ability to belay is a critical skill for anyone operating in the high
angle environment. To function as a belayer means that the well-being,
perhaps even the life of the person at the end of the rope is in the
belayer’s hands.
When to belay:
When a person is unsure of himself, such as during first time rappels.
When there is a real danger of falling, such as climbing, mountaineering,
etc.
When environmental factors increase the danger of falling, such as rockfalls,
etc.
When one or more persons are being lowered or raised by rope, such as in
rescues.
A belay may not be necessary when:
An experience rappeler may feel that a belay would be a hindrance.
A belay line might cause entanglement with other ropes, such as in free
drops, or if multiple line are involved.
54.
Belaying Signals
Climber BelayerMeaning
“On Belay.”
“I am about to climb (or rappel), are you ready to
catch me if I fall?”
“Belay On.” “I am ready to catch you if you fall.”
“Climbing.”
(or “Rappeling.”)
“I am starting to climb (or rappel).”
“Climb.”
(or “Rappel.”)
“Go ahead.”
“Off Belay.”
“I am in a secure place now, I no longer need the
belay.”
“Belay Off.” “I am no longer belaying you.”
55.
Belaying Signals
Climber BelayerMeaning
“Slack.”
“There is too much tension on the rope. I cannot
move as well as I would like.”
Note: This does not require a verbal response from the
belayer, only the action of letting enough slack into the
rope.
“Tension.”
“Hold the rope tightly for a bit; this might be a
difficult move.”
Note: Requires no verbal response, only the action of
taking slack out of the rope
Belay signals should be
consistent. Once
agreed upon, there
must be no changes
without prior
agreement.
Belay signals should be
loud. At least shouting,
perhaps yelling to be
effective.
56.
Rappeling Techniques
AttachingThe Descender
The Brake Hand is the hand, usually the dominant one, that grasps
the rope to help control the speed of descent during rappel.
The Guide Hand is the hand, usually the non-dominant one, that
cradles the rope above the descender to help in balancing the
rappeler. It may also assist in controlling the descent in some
rappel device.
The Rappel Stance
Getting Over The Edge
The Butt Thrust
Kneeling Entry
Locking Off and Tying Off
Unlocking
Extra Friction
Getting Off Rope