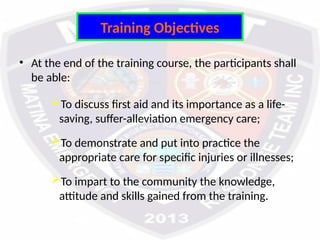
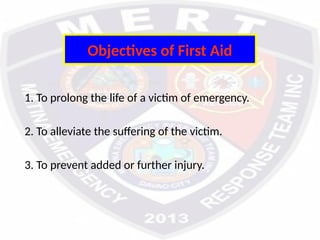
BASIC FIRST AID
TRAINING COURSE
Advocacy, Organizing & Training Unit
Disaster Operations Center
MATINA EMERGENCY RESPONSE TEAM/
MATINA SEARCH AND RESCUE TEAM
(MERT/MSART)
Training Objectives
• At the end of the training course, the participants shall
be able:
To discuss first aid and its importance as a life-
saving, suffer-alleviation emergency care;
To demonstrate and put into practice the
appropriate care for specific injuries or illnesses;
To impart to the community the knowledge,
attitude and skills gained from the training.
Training Rules
 Participants must comply the prescribed no. of training
hours.
 Participants must be at the training venue always on
time.
 Name tags must be worn at all times.
 Using cell phones during sessions is prohibited.
 Dress code must be observed.
 Any problem or concern of the participants shall be
referred to the training secretariat or trainers.
BASIC FIRST AID TRAINING
Topic 1
Introduction to First Aid
FIRST AID
• is the immediate and temporary care given to a person
who has been injured or has been suddenly taken ill
• it includes self-help and home care if medical assistance is
not available or is delayed
• also includes well-selected words of encouragement,
evidence of willingness to help, and promotion of
confidence by demonstration of competence
Objectives of First Aid
1. To prolong the life of a victim of emergency.
2. To alleviate the suffering of the victim.
3. To prevent added or further injury.
Roles of First Aid
1. Bridge that fills the gap between the victim and
the physician
2. It is not intended to compete with nor to take
the place of a physician
3. It ends when the services of a physician begins
The FIRST AIDER, or the person giving first aid,
deals with the whole situation, the injured person, and
the injury or illness.
• He/She knows what to do as well as what not
to do.
• He/She avoids errors that are frequently made
by untrained persons through well-meant but
misguided efforts.
• He/She knows too that his/her first aid
knowledge and skills could mean the difference
between life and death, between temporary and
permanent disability, and between rapid
recovery and long hospitalization.
Characteristics of a Good First Aider
 Observant (should notice all signs)
 Resourceful (should make the best use
of things at hand)
 Gentle (should not cause pain)
 Tactful (should not alarm the victim)
 Sympathetic (should be comforting)
Golden Rules of Emergency Care
What to do:
• Obtain consent whenever possible
• Think of the worst
• Call or send for help
• Care for the more serious injuries first
• Respect victim’s modesty and physical
privacy
• Provide comfort and emotional support
• Assist the victim with his or her prescribed
medication
• Handle victim to a minimum
What not to do:
• Do not harm
• Do not let victim see his/her own injury
• Do not leave victim except to get help
• Do not assume that the victim’s obvious
injuries are the only ones
• Do not deny a victim’s physical or emotional
coping limitation
• Do not make unrealistic promises
• Do not trust the judgment of a confused
victim
• Do not require the victim to make decisions
Permission to Provide Care
Before giving first aid, the first aider must get from
the victim of injury or illness or from his/her companion,
permission to give care. This permission is referred to as
consent. To get consent, the first aider must tell the victim
or supervising adult:
Who he/she is
His/Her level of training
What it is he/she would like to do
Types of Consent
1. Actual Consent
• Consent given by a conscious victim to a first aider
to provide care
2. Parental Consent
• Consent obtained from the supervising adult if the
victim is an infant or child
3. Implied Consent
• If the victim is unconscious or unable to respond
because of the illness or injury, consent is implied.
Consent is also implied for an infant or a child if a
supervising adult is not present
Hindrances in/Barriers to
Giving First Aid
1. Unfavorable surroundings
2. The presence of crowd/bystanders
3. Pressure from victim or kin/relative
4. Uncertainty about the victim
5. Fear of doing something wrong
Transmission of Diseases
and the First Aiders
How diseases are transmitted:
1. Direct Contact
• occurs when a person touches an infected
person’s body fluids.
2. Indirect Contact
• occurs when a person touches objects that
have been contaminated by blood or other body
fluids of an infected person.
3. Airborne
• occurs when a person inhales droplets that
have become airborne when an infected person
coughs or sneezes.
4. Vector
• occurs when an animal such as a dog or an
insect transmits a pathogen into the body
through a bite.
First Aid Equipment and Supplies
1. Basic Equipment
 first aid kit
 spine board
 triangular bandages
 sets of splints
 poles
 blankets
2. Suggested First Aid Kit Contents (Basic)
 alcohol (70% solution)
 absorbent cotton
 povidone iodine
 hydrogen peroxide
 gauze pads/sterile cloth
 elastic roller bandage
 plaster/adhesive tape
 scissors
 gloves
 antiseptic soap
QUESTIONS?
BASIC FIRST AID TRAINING
Topic 2
Guidelines in Giving
Emergency Care
A. Getting Started
• Plan your action
• Gather needed materials
• Perform initial response as follows:
 A - Ask for help
 I - Intervene
 D - Do no further harm
• Instruct helpers
B. Emergency Action Principles (EAP)
 Refer to a four-step plan of action in handling
emergency situations.
A first aider should follow these steps so that
he/she does not forget anything that might affect
personal safety and the victim’s survival.
The 4-steps of the EAP should always be
performed in this order:
I Survey the Scene
• Is the scene safe?
• What happened?
• How many people are injured?
• Are there bystanders who can help?
• Identify yourself as a trained first
aider.
II Do a Primary Survey
Check for life-threatening conditions. Begin
by checking for responsiveness. If victim is
unresponsive, check his/her Airway (A), Breathing
(B), and Circulation (C). As you are checking, identify
the problems and give the appropriate first aide care.
“A primary survey is a process of finding out if there
are conditions that are an immediate threat to the
life of a victim of emergency”.
PRIMARY SURVEY CHECKLIST
Elements
Life-Threatening
Condition/s
First Aid Care
Airway
Obstruction:
Tongue
Foreign Body
Head-Tilt, Chin lift
Heimlich Maneuver
Breathing Respiratory Arrest Rescue Breathing
Circulation Cardiac Arrest
Cardio-Pulmonary
Resuscitation
Severe Bleeding Bleeding Control
III Activate Medical Assistance or
Transfer Facility
When to activate MA/arrange TF:
• Unconsciousness or altered level of
consciousness
• Breathing problems
• Persistent chest or abdominal pain
• Absence of pulse
• Severe bleeding
• Vomiting of blood
• Poisoning
• Seizures, severe headache or slurred
speech
• Head, neck or back injuries
• Possible broken bones
Making the call
Relay the following salient information:
• Exact location of the emergency
• Number of the phone being used
• Name of caller
• What happened
• Number of victims involved, their
conditions and the help being given
Remember: DO NOT HANG UP FIRST!
IV Do a Secondary Survey
• Interview the victim (if victim is conscious)
- ask the victim’s name
- ask what happened
- assess using SAMPLE history (for medical cases)
S - signs and symptoms
A - allergies
M - medications
P - pertinent past illness
L - last oral intake
E - events leading to injury or illness
• Check the vital signs
- determine radial or carotid pulse (pulse rate)
- determine the breathing (respiratory rate)
- determine body temperature
- determine skin appearance
• Do head-to-toe examination (for trauma cases) to
check for:
D - Deformity
C - Contusion
A - Abrasion
P - Puncture
B - Burn/Bleeding
T - Tenderness
L - Laceration
S - Swelling
“A secondary survey is a systematic method of finding
other injuries or conditions that may become life-
threatening if not cared for.”
Survey the Scene • Is the scene safe?
Do a Primary
Survey
• Is the victim conscious?
• Does the victim have an open airway?
• Is the victim breathing?
• Does the victim have a pulse?
• Is the victim bleeding severely?
Activate Medical
Assistance
• Send someone to call for an
ambulance
Do a Secondary
Survey
• Interview the victim
• Check vital signs
• Perform a head-to-toe examination
QUESTIONS?
BASIC FIRST AID TRAINING
Topic 3
Soft Tissue Injuries
Soft Tissues
• include the layer of skin, fat and muscle that protect
the underlying body structures
Skin
• largest single organ of the human body
Functions of the Skin
 Provides a protective barrier for the body
 prevents invasion of bacteria
 water tight to maintain body fluids
 Helps regulate the body’s temperature
 sweating cools the body when sweat evaporate
 blood vessels in the skin dilate (increase heat loss)
and constrict (decrease heat loss)
 Absorbs information about the environment by way
of the nerves
 pain, heat, cold and other sensation are
transmitted to the brain by the skin
Layers of the Skin
• Epidermis
• the tough outer
layer, where cells
are constantly
being replaced
• deeper cells
contain skin
pigment
• provides a barrier
to bacteria and
other organisms
that can cause
infection
• Dermis
• the deeper layer
• contains the
important
structures of the
nerves, the sweat
and oil glands,
and the blood
vessels
• Subcutaneous
tissue
(Hypodermis)
• the layer that
connects the bones
and muscles to the
skin
• helps insulate the
body to help
maintain body
temperature
• stores energy
Soft Tissue Injuries
• any injury to the skin or the soft tissues beneath
Wound
• a break in the continuity of the skin
• is further classified as either closed wound or open
wound
a. Closed Wound
• a wound is closed when the soft tissue damage
occurs beneath the surface of the skin leaving the
outer layer (epidermis) intact.
Cause of Closed Wounds
– When the body is subjected to external forces (e.g.
vehicular accident, impact from blunt objects,
contact sports)
Signs & Symptoms of Closed Wounds
 Pain and tenderness
 Swelling
 Discoloration (black and blue ecchymosis)
 Hematoma (pool of blood collected within the
damaged tissue)
 Uncontrolled restlessness
 Excessive thirst
 Vomiting or coughing up of blood
 Passage of blood in the urine or feces
First Aid Management for Closed Wounds
I - ice application (putting ice cold packs
over the injured area)
C - compression (manual compression on
injured part)
E - elevation (elevating the injured part)
S - splinting (immobilizing the injured part)
• Be alert for signs of shock.
b. Open Wound
• an injury that breaks the outer layer
(epidermis) of the skin
• any break in the skin provides an entry
point for disease-producing microorganisms
Common Causes of Open Wounds
• External physical forces
• Mishandling of sharp objects, tool
machinery, weapon and equipment
• Explosion
OPEN WOUNDS
Types of Bleeding
Arterial Bleeding
Venous Bleeding
Capillary Bleeding
Dangers of Open Wounds
1. Hemorrhage (loss of blood)
 1 - 2 glasses : normal (no effect)
 3 - 4 glasses : anemic (predisposes
body to infection)
 5 or more glasses : fatal
2. Infection
• whenever skin integrity is breached, bacterial
contamination may result
 delays healing of wound
 gangrene (decay of tissues) may develop
 may lead to amputation to prolong life
 may lead to unnecessary death
3. Shock
• severe blood loss can lead to hypo perfusion
 predisposes body to infection
 may lead to loss of body part
 may lead to death
Types of Open Wounds
• Abrasion
• Puncture
• Incision
• Laceration
• Avulsion
• Amputation
Abrasion
• Caused by scraping or
rubbing of skin against
rough surfaces
 loss of part of
epidermis and
dermis
 injury to capillaries
 extremely painful
• Danger: Infection
Puncture
• Caused by sharp pointed
objects (e.g. ice pick, nail,
pin, dagger or bullet)
 external damage usually
minimal
 internal damage may be
extensive
 always look for an exit
wound
• Dangers: Internal
Hemorrhage
Infection (Tetanus)
Shock
Incision
• Caused by sharp bladed
objects
–
degree of bleeding
depends on the
depth and extent of
the cut/incision
–
extremely painful
• Dangers: Hemorrhage
Infection
Shock
Laceration
• Caused by blunt or
rough-edge objects
(e.g. rocks, broken
glasses, tin cans,
barbed wire)
 may penetrate
through all skin
layers into muscle
• Dangers:
Hemorrhage
Infection
Shock
Avulsion
• Caused by motor
vehicle accidents,
mishandling of tools,
animal bites
 piece of skin
completely loose or
left as flap
 bleeds a lot
 circulation in flap
usually in jeopardy
• Dangers:
Hemorrhage
Infection
Shock
Amputation
• Caused by explosion,
vehicular accident,
chopping using bladed
weapon
 complete removal of
a body extremity
such as an arm or a
leg
 massive bleeding
may be present or
bleeding may be
limited
• Dangers: Hemorrhage
Infection
First Aid Management for Open Wounds
a. Open Wounds with Minimal Bleeding:
• Wash or clean the wound with soap and water.
• Blot the wound dry.
• Apply an antiseptic.
• Cover wound with dressing (sterile or clean
cloth) then tape or bandage.
First Aid Management for Open Wounds
b. Open Wounds with Severe Bleeding:
1. Control or stop the bleeding.
• Direct Pressure
 Pressing the palm of the hand over the
wound, with or without compress or cloth,
prevents loss of blood from the body without
interfering with normal blood circulation.
• Elevation
 Elevating the wounded part above the level
of the victim’s heart reduces blood pressure
on the injured area hence would aid in
slowing down the loss of blood through the
wound opening.
• Pressure Point Technique
 Applying pressure at specific point
(supplying artery) on the arm (brachial artery)
or leg (femoral artery) compresses the main
artery supplying blood to the affected limb
thus slowing down the flow of blood.
• Tourniquet
 Applying tightly a wide band of cloth or
other material just above an amputated
extremity would stop all flow of blood.
Employing tourniquet, however, is a decision
to risk or sacrifice a limb in order to save a
life.
 Tourniquet must only be applied as a last
resort.
2. Cover the wound with dressing and bandage.
3. Care for shock.
4. Consult or refer to physician.
(Seek medical help immediately)
QUESTIONS?
BASIC FIRST AID TRAINING
Topic 6
BANDAGING
Uses of a triangular bandage
• to control bleeding
• to tie or secure splints in place
• to immobilize injured body part
• to serve as arm support (sling)
TRIANGULAR BANDAGE
• any cloth material, sterile or unsterile, that is
used to hold a dressing/compress in place.
Uses of a dressing/compress
• to protect the wound from infection
• to absorb fluid from the wound such as blood,
plasma, water and pus
• to control bleeding
DRESSING
• also called compress, is a protective cover
placed over a wound
• sterile dressings are those that are free from
germs before use
Parts of a Triangular Bandage
apex
side side
tail tail
base
face
Principles/Rules
in
Bandaging Application
• Application must be proper, neat and correct
• Apply bandage snugly (not too tight, not too loose)
• Always check for tightness that might cause swelling
later on
• All foldings must be outward
• Tail or ends of the triangular bandage must be tied
with square knot
• Secure the tails or ends
SQUARE KNOT
• also called Relf Knot or Sailor’s Knot
• is used in tying the tails or ends of a triangular
bandage
Rule in Tying the Square Knot:
“Right end/tail over left end/tail, then left
end/tail over right end/tail”
Advantages of Using Square Knot:
– easy to tie, easy to untie
– once secured, it does not slip or tighten nor loosen
– it is neat and has a comfortable flat surface
Phases of a Triangular Bandage
a. Open Phase
b. Cravat Phase
• Broad Cravat
• Semi-Broad Cravat
• Narrow Cravat
Open Phase
• Top of the Head Bandage
• Front and Back of the Face Bandage
• Front and Back of the Chest Bandage
• Arm Sling
• Hand and Foot Bandage
• Knee Bandage
Cravat Phase
• Forehead Bandage
• Eye Bandage
• Neck Bandage
• Ear, Cheek and Jaw Bandage
• Shoulder Bandage
• Elbow Bandage
• Forearm/Arm Bandage
• Hip Bandage
• Thigh, Knee, Foreleg Bandage
• Palm Pressure Bandage
• Palm with Open Hand Bandage
• Sprained Ankle Bandage (shoe on, shoe off)
• Crotch (Genital) Application
QUESTIONS?
BASIC FIRST AID TRAINING
Topic 5
Musculoskeletal Injuries
MUSCULOSKELETAL INJURIES
The musculoskeletal system is made up of
muscles and bones that form the skeleton, and the
connective tissues, the tendons and ligaments.
Together, these structures give the body shape, form
and stability. Bones and muscles connect to form
various body segments. They work to provide body
movements.
Injuries to the musculoskeletal system are
common. Anybody at home, at work or at play, may
injure their muscles, bones and joints. No age group is
immune. Although musculoskeletal injuries are almost
always painful, they are rarely life-threatening.
However, when not recognized and taken care of
properly, they can have serious consequences and
even result in permanent disability.
Muscles
 are soft tissues that lengthen (relax) and shorten
(contract) to create movement
 most muscles are skeletal which attach to the
bones
 skeletal muscles account for most of a person’s
body weight
 all body movements result from skeletal muscles
contracting and relaxing
 the human body has over 600 muscles
Skeleton
 is formed by over 200 bones of various sizes and
shapes
 gives the body its shape
 protects vital organs and other soft tissues (the
skull protects the brain, rib cage protects the lungs
and heart, and the spinal cord is protected by the
vertebrae)
Bones
 are hard, dense tissues that have a rich supply of
blood and nerves
 they store and manufacture red blood cells (RBC)
and supply them to the circulating blood
 a bone’s strong, rigid structure helps them to
withstand stresses that cause injuries
 bone injuries bleed and are usually painful and can
become life-threatening if not properly cared for
 bones heal by forming new bone cells hence they
are the only body tissues that can regenerate
Joints
 are structures formed by the ends of two or more
bones coming together at a place
 they are held together by tough, fibrous connective
tissues called ligaments
Musculoskeletal Injuries
• are injuries to the muscles, bones and joints
Common Causes
• vehicular accidents
• falls
• physical sports
• mishandling of tools and equipment
Common Signs and Symptoms
• pain
• swelling
• deformity
• discoloration of the skin
• inability to move or use the affected part normally
• bone fragments protruding from a wound
Types of Musculoskeletal Injuries
and
Corresponding First Aid Management
1. Fracture: a break or disruption in the bone tissue.
Types of Fracture
 Closed (Simple) – bone is broken but there is no
connecting wound from the break area to the skin
 Open (Compound) – broken bone has connecting
wound to the skin surface
Open or Compound Fracture
Closed or Simple Fracture
Causes of Fractures
 Direct Force: when an object penetrates the skin
and breaks the bone (e.g. when a person’s limb
smashes into a hard object or is struck by a blunt
object)
 Indirect Force: when the limb is severely angulated
or bent (e.g. when a person falls on an outstretched
arm)
 Abnormal Muscle Action: bone is broken due to
twisting forces and strong muscle contractions (e.g.
the kneecap can be fractured by sudden contraction
of skeletal muscles)
FA Management for Fracture
• Keep the victim still.
• If the skin is pierced by a broken bone, cover the
wound with a sterile dressing to prevent infection
and apply pressure to control or stop the bleeding.
• Immobilize. Apply splints in the injured part in the
position you found it.
• Check the circulation of the affected area after
immobilizing.
• Elevate the splinted injured part.
• Care for shock.
• Transport victim to nearest medical facility.
2. Dislocation: a displacement or separation of a bone
from its normal position at a joint tearing surrounding
tissues to some extent.
First Aid Management
• Keep the victim still.
• Apply ice or cold pack on the injured site to reduce
swelling and ease the pain and discomfort.
• Immobilize. Apply splints in the injured part in the
position you found it.
• Elevate the splinted injured part.
• Care for shock.
• Transport victim to nearest medical facility.
3. Sprain (lisa): the partial or complete tearing of
ligaments and other tissues at a joint. Usually results
when the bones that form a joint are forced beyond
their normal range of motion.
First Aid Management
• Help the victim rest or find the most comfortable
position.
• Apply ice or cold pack on the injured site at once.
(At least 4 times for the first 24 hours at least 15
minutes per application)
“Cold helps control internal bleeding and reduces
pain. It causes the broken blood vessels to constrict,
limiting the blood and fluid that seep out. Cold also
reduces muscle spasms and numbs the nerve
endings”.
• Elevate the injured part (if possible, above the level
of the heart) to slow the flow of blood and reduce
swelling.
• When the swelling reduces or goes away, apply hot
compress on the injured site.
“Heat speeds up chemical reaction needed to repair
damaged tissues. White blood cells move in to rid
the body of infections, and other cells begin the
repair process. This process enhances proper
healing of the injury”.
4. Strain (pamaol): the stretching and tearing of muscles
or tendon fibers. Also called a muscle “pull” or “tear”.
They are often the result of overexertion or from
sudden or uncoordinated movement.
First Aid Management
• Help the victim rest or find the most comfortable
position.
• Apply ice or cold pack on the injured site at once.
(At least 4 times for the first 24 hours at least 15
minutes per application)
• Elevate the injured part (if possible, above the level
of the heart) to slow the flow of blood and reduce
swelling.
• When the swelling reduces or goes away, apply hot
compress on the injured site.
5. Muscle Cramps (bikog): the sudden painful,
tightening (contraction) of a muscle usually caused
by fatigue or overexertion of the muscle.
First Aid Management
• Help the victim rest or find the most comfortable
position.
• Stretch out the cramped muscle to counteract the
cramp.
• Massage the cramped muscle firmly but gently.
• Give fluids to drink.
QUESTIONS?
BASIC FIRST AID TRAINING
Topic 7
Immobilization
(Splinting)
Immobilization
• is the use of a splint or other method to keep an
injured body part from moving.
Objectives of Immobilizing/Splinting
• To lessen pain.
• To prevent further damage to soft tissues.
• To reduce the risk of serious bleeding.
• To reduce the possibility of loss of circulation to the
injured part.
• To prevent closed fractures from becoming open
fractures.
Basic Principles of Splinting
• Splint only if you can do it without causing more
pain or discomfort to the victim.
• Splint the injured part in the position you found it.
• Splint the fracture and the joints above and below
the injury site.
• Check for proper circulation before and after
splinting.
• Secure the splints above and below but not directly
on the injured part.
Types of Splints
• Splints, whether commercially-made or improvised,
are of three (3) types.
a. Soft Splints : include folded blankets, towels, pillows
and a sling or cravat.
(A sling is a triangular bandage tied to support an arm,
wrist, or hand. A cravat is a folded triangular bandage
used to hold dressing or splints in a place. A wad of
cloth and bandages can serve as effective splints for
small body parts such as the hands or fingers.)
b. Rigid Splints : include boards, metal strips and folded
magazines or newspapers.
c. Anatomic Splints : refer to the use of other body parts
as a splint.
(e.g. An arm can be splinted to the chest. An injured leg
can be splinted to the uninjured leg.)
QUESTIONS?
BASIC FIRST AID TRAINING
Topic 11
Emergency Rescue
and
Transfer
Indications for Emergency Rescue
• Danger of fire or explosion
• Danger of toxic gases
• Serious traffic hazards
• Risk of drowning
• Danger of electrocution
• Danger of collapsing walls
Emergency Rescue
• a procedure of moving a patient/victim from
an unsafe place to a place of safety
Methods of Rescue
• For immediate rescue without any assistance, drag or
pull the victim .
• Most one-rescuer carries and drags and other
transfer methods can be used as methods of
emergency rescue
Factors to be considered in the selection
of transfer methods
• Nature and severity of the victim’s injury
• Size of the victim
• Physical capabilities of the first aider/s
• Number of personnel and equipment available
• Nature of evacuation route
• Distance to be covered
• Gender of the patient/victim
Transfer
• is a procedure of moving a patient/victim
from one place to another after giving first
aid or stabilizing the patient/victim
Pointers to be Observed during Transfer:
• Victim’s airway must be maintained open
• Hemorrhage is controlled
• Victim is safely maintained in the correct position
• Regular checking of the victim’s condition is done
• Supporting bandages and dressings remain effectively applied
• The method of transfer is safe, comfortable and speedy as
circumstances permit
• The patient’s body is moved as a unit
• Taller first aiders/rescuers must always be at the head side of
the victim
• First aiders/rescuers must observe ergonomics in lifting and
moving of patient
a. One-Rescuer Techniques
• Assist to Walk
• Pack Strap Carry
• Piggy Back Carry
• Lovers Carry
• Fireman’s Carry
• Fireman’s Drag
• Collar Drag
• Foot Drag
• Armpit Drag
• Blanket Drag
Emergency Rescue and Transfer Methods
b. Two-Rescuer Techniques
• Assist to Walk
• Carry by Extremities
• Four Hand Seat
• Three Hand Seat
• Hand as Litter
• Chair as Litter
Emergency Rescue and Transfer Methods
c. Three/Four/Six-Rescuer Techniques
• Bearers Alongside
• Hammock Carry
• Blanket Carry
• Improvised Stretcher
Emergency Rescue and Transfer Methods
QUESTIONS?
BASIC FIRST AID TRAINING
Topic 4
Burns
Burns
• is a type of soft tissue injury involving the skin,
blood vessels, nerves, muscles and bones and
caused primarily by heat.
• can also occur when the body is exposed to
certain chemicals, electricity, solar or other
forms of radiation
Factors that Determine the Severity of Burns
1. The length of exposure to the source.
2. The temperature of the object or gas causing
the burn.
3. The depth.
4. The extent.
5. The involvement of critical areas.
6. The victim’s (patient’s) age.
7. The victim’s (patient’s) general health.
1. Length of exposure to the source
• The more prolonged the victim’s exposure to the
heat source or the longer the contact, the more
severe the burn.
2. Temperature of the object or gas causing
the burn
• The higher the degree of heat of the object or
gas the victim comes into contact will clearly
result to severe or critical burns.
3. Depth Classification
a. Superficial (1st
Degree) Burns
 involve only the top layer of the skin, the
epidermis
 skin is red and dry, painful and sensitive to
touch
 generally heal in five (5) to six (6) days
without permanent scarring
 result from overexposure to the sun, light
contact with hot objects and scalding by hot
water or steam
b. Partial-thickness (2nd
Degree) Burns
 involve both the epidermis and the dermis
 burned area has redness and blisters that may
open and weep clear fluid making the skin
surface wet
 usually painful and the burned area often swells
 generally heal in three (3) to four (4) weeks and
scarring may occur
 result from moderate contact with hot liquids or
objects, flames (from gasoline, kerosene, etc.)
and too much exposure to solar radiation
c. Full-thickness (3rd
Degree) Burns
 involve both the epidermis and the dermis as
well as any or all of the underlying structures –
fat, muscles, bones and nerves
 burned area looks brown or charred (black), with
tissues underneath sometimes appearing white
 either extremely painful or relatively painless
 scarring occurs and maybe severe
 life-threatening burns
 burn sites eventually require skin grafts
 caused by flame, ignited clothing, prolonged
contact with hot liquids or objects, or electricity
BURNS : Depth Classification
4. Extent of Burns
The Rule of Nine is used to measure or assess
the extent or size of burns in a victim’s (patient’s) body.
 Head : 9%
 Upper Chest: 9%
 Upper Back : 9%
 Abdomen : 9%
 Lower Back : 9%
 Left Arm : 9%
 Right Arm : 9%
 Left Thigh : 9%
 Right Thigh : 9%
 Left Leg : 9%
 Right Leg : 9%
 Genitals : 1%
BURNS : The Rule of 9
5. Critical Areas Involved
The parts of the human body considered critical
when burned:
 Face
 Hands
 Feet
 Genitalia
6. Victim’s (Patient’s) Age
• Victims younger than age 5 or older than 55
years are vulnerable to critical or life-threatening
burns. They have thinner skin thus may often
burn severely.
7. Victim’s (Patient’s) General Health
• Victims with pre-existing medical conditions are
vulnerable to critical or life-threatening burns.
They tend to complicate severe burns especially
if they have heart or kidney problems or
respiratory illness.
Classification of Burns According to Severity
a. Critical Burns
• All burns complicated by fractures.
• Any degree of respiratory injury.
• Full-thickness (third degree) burns with more
than 10% of the body surface area (BSA).
• Partial-thickness (second degree) burns with
more than 25% of the body surface area.
• Moderate burns in an elderly or critically-ill
patient.
• For children: any full-thickness or partial-
thickness burn with more than 20% of the body
surface area.
b. Moderate Burns
• Full-thickness (third degree) burns with 2% to
10% of the body surface area (BSA).
• Partial-thickness (second degree) burns that
involve 15% to 25% of the body surface area.
• Superficial (first degree) burns with 50% or more
of the body surface area.
• For children: partial-thickness burns with 10% to
20% of the body surface area.
c. Minor Burns
• Full-thickness (third degree) burns of less than
2% of the body surface area (BSA).
• Partial-thickness (second degree) burns of less
than 15% of the body surface area.
• For children: a partial-thickness burn less than
10% of the body surface area.
General First Aid Management for Burns
Objectives of Giving First Aid for Burns
• To relieve pain.
• To prevent contamination or infection.
• To treat for shock.
“Burns can cause shock as a result of pain, loss of
body fluids and loss of temperature control.”
a. FA Management for Superficial Burns
 Immerse the affected part in cool water or any cool
liquid for about 2 – 5 minutes or until the pain
diminishes.
 Cover the affected part with a sterile or clean cloth
(dressing or compress).
 If the burning sensation won’t go away, continue to
put cool water over the dressing.
“Cooling superficial burns with water would lessen
pain and minimize additional tissue destruction.”
b. FA Management for Partial-thickness Burns
 Immerse the affected part in cool water or any cool
liquid for about 1 – 2 hours or until the pain
diminishes.
 Apply sterile or clean cloth wrung out in ice water
over affected part.
 Do not break blisters.
 Gently blot the affected area dry with a sterile or
clean cloth.
 Apply dry, sterile gauze or clean cloth as a protective
bandage.
 If the legs or arms are affected, keep them elevated.
“Cooling partial-thickness burns with water would
lessen pain and minimize additional tissue
destruction.”
c. FA Management for Full-thickness Burns
 Remove victim from heat source.
 If victim is on fire, stop the burning process:
 smother the flames with a heavy cloth
 prevent victim from running and instead
direct him/her to stop, drop and roll
 Do not remove adhered particles of charred clothing
or attempt to clean the burned area.
 If fingers or toes have been burned, separate them
with dry, sterile and non-adhesive dressing.
 Do not apply cold water or ice on the burned area.
(It will cause critical body heat loss and would
intensify the shock reaction)
 Do not apply ointment, oil or other burn remedies
on the affected part. (Ointment and oil seal in heat
and may cause further complications and interfere
with treatment by the physician)
 Treat the victim for shock:
 keep the victim lying down
 elevate the feet unless he/she is unconscious
or has neck, back, head or other severe
injuries
 help the victim maintain body temperature
(burn victims have a tendency to chill)
 Transport victim to nearest medical facility.
Flame Burns
• Remove victim from heat source and stop the
burning process.
• Immerse in or irrigate with cool water superficial and
partial-thickness burns.
• Cover superficial and partial thickness burns with cool, moist
and sterile dressing.
• Cover full-thickness burns with dry, sterile cloth or dressing.
• Do not break blisters.
• Do not apply ice or cold water or ointments, creams lotions
and other burn remedies on full-thickness burns.
• Transport victim to the nearest medical facility if burns are
severe or critical upon assessment.
Scald Burns
• Immediately flush or irrigate the burned area
with cool water or immerse on cool water.
• Remove any clothing immediately as clothing soaked with hot
liquid retains heat.
• Cover superficial and partial thickness burns with cool, moist
and sterile dressing.
• Cover full-thickness burns with dry, sterile cloth or dressing.
• Do not break blisters.
• Do not apply ice or cold water or ointments, creams lotions
and other burn remedies on full-thickness burns.
• Transport victim to the nearest medical facility if burns are
severe or critical upon assessment.
Airway Burns
• Burns in the face or front of the trunk indicate there
could be burns the airway.
• There is risk of swelling of air passages that would lead
to difficulty breathing.
• Immediately call for help or transport victim to nearest
medical facility.
Electrical Burns
• Electrical burns can be
more severe than they
first appear, with
extensive damage to
deeper tissues
• They frequently show
“entry” and “exit” burns
at the point of contact
Electrical Burns
• Immediately call for help.
• Check for scene safety.
• Avoid any direct contact with the victim’s skin or any
electrical conducting material the victim got in contact
with.
• If possible, make sure electrical power is turned off.
• Once the scene is safe, check the ABCs of the victim.
• Perform Rescue Breathing of CPR if victim is not
breathing or has no pulse.
• Look for two burn sites as victims of electrocution will
have both entrance and exit wounds. Cover the burn
injuries with dry, sterile dressing.
Chemical Burns
• Flush the affected part with cool
running water.
• Do not use a forceful flow of water from a hose.
(The force may further damage burned skin)
• Have the victim remove contaminated clothing, if able to
do so.
• If possible, identify the chemical that caused the burn for
subsequent neutralization.
• Transport victim to the nearest medical facility if burns
are severe or critical upon assessment.
Sunburns
• Sunburn is basically caused by prolonged exposure to
ultraviolet rays in sunlight.
• Signs and symptoms include pain, redness and fever.
• There is general skin damage and may eventually
develop into skin cancer.
• Cool the affected area with water until pain is relieved.
QUESTIONS?
BASIC FIRST AID TRAINING
Topic 7
Shock
(Hypo perfusion)
Shock (Hypo perfusion)
• is a depressed condition of the many body functions
due to the inadequate supply of blood that
circulates throughout the body following serious
injury or illness.
• is a medical term used to describe the body’s
reaction to lack of oxygen as a result of blood loss
and a reduced rate of blood flow.
• is not a specific disease but a dangerous condition
that results in the inadequate flow of oxygen-rich
blood to the body’s cells and failure of the body to
rid cells of metabolic wastes.
Effects of Shock on Vital Organs
“The heart requires constant perfusion or it
will not function properly”.
“The brain and spinal cord cannot go more
than 4 to 6 minutes without perfusion or the
nerve cells will be permanently damaged”.
“The kidneys will be permanently damaged
after 45 minutes of inadequate perfusion”.
Effects of Shock on Vital Organs
“The skeletal muscles cannot tolerate more
than 2 hours of inadequate perfusion”.
“The gastrointestinal tract can exist with
limited perfusion only for several hours.”
Physiology of Shock
Death of Cell
Death of Tissue
Death of Organ
Death of Patient
Basic Causes of Shock
• Pump failure (When the heart fails to pump
blood or has reduced its pumping ability)
• Hypovolemia (When blood or fluid is lost as a
result of trauma to blood vessels or tissues such as
loss of plasma (as in burns) or loss of fluids (as in
vomiting or dehydration)
• Relative hypovolemia (When blood vessels
dilate as a result of spinal injury, infection or drug
overdose that blood within the blood vessels is
insufficient to fill the vascular system and provide
efficient perfusion)
Injuries/Conditions that Could
Lead to Shock
• Wounds with severe bleeding
• Crushing Injuries
• Heart attack
• Perforation of stomach ulcer
• Rupture of tubal pregnancy
• Anaphylaxis
• Starvation
Factors that Contribute to Shock
• P : pain
• R : rough handling
• I : improper transfer
• C : continuous bleeding
• E : exposure to extreme cold
or excessive heat
• F : fatigue
Progression of Shock
1. Compensatory Stage
• The body can still compensate for blood loss
2. Progressive Stage
• Late stage when blood pressure is falling
3. Irreversible Stage
• Last stage when shock has progressed to terminal
stage
General Signs & Symptoms of Shock
• Pale appearance
• Cool, clammy (moist) skin
• Rapid and weak pulse
• Change in the conscious state (AMS)
• Abnormal breathing (air hunger)
Types of Shock
• Anaphylactic Shock
• Cardiogenic Shock
• Hypovolemic Shock
• Metabolic Shock
• Neurogenic Shock
• Psychogenic Shock
• Septic Shock
Types of Shock
1. Anaphylactic Shock
• Cause : allergic reaction
• Signs & Symptoms : generalized edema
burning skin sensation
mild itching
• FA Management : Determine cause.
Monitor ABC.
Transport victim immediately.
ANAPHYLACTIC SHOCK
Types of Shock
2. Cardiogenic Shock
• Causes : cardiovascular diseases
inadequate heart function
impaired electrical system
• Signs & Symptoms : chest pain
irregular pulse (weak, rapid)
low blood pressure
cyanosis (lips, nails)
• FA Management : Position victim comfortably.
Monitor ABC.
Transport victim immediately.
CARDIOGENIC SHOCK
Types of Shock
3. Hypovolemic Shock
• Cause : loss of blood
• Signs & Symptoms : rapid and weak pulse
low blood pressure
cyanosis
cool, clammy skin
change in mental status
• FA Management : Monitor ABC.
Control external bleeding.
Elevate the legs.
Transport victim immediately.
HYPOVOLEMIC SHOCK
Types of Shock
4. Metabolic Shock
• Cause : excessive loss of fluid and electrolyte due
to vomiting, diarrhea
• Signs & Symptoms : low blood pressure
cyanosis
cool, clammy skin
change in mental status
• FA Management : Determine illness.
Monitor ABC.
Transport victim immediately.
Types of Shock
5. Neurogenic Shock
• Cause : damaged cervical spine which causes
blood vessels to dilate widely
• Signs & Symptoms : slow pulse (bradycardia)
low blood pressure
signs of neck injury
• FA Management : Monitor ABC.
Conserve body heat.
Transport victim immediately.
Types of Shock
6. Psychogenic Shock
– Cause : temporary, generalized vascular dilation;
anxiety; bad news; sight of injury; tiredness
– Signs & Symptoms : rapid pulse (tachycardia)
normal or low blood pressure
– FA Management : Determine duration of unconsciousness.
Record vital signs and mental status.
Suspect head injury if patient is
confused or slow to regain
consciousness.
Monitor ABC.
Transport victim immediately.
PSYCHOGENIC SHOCK
Types of Shock
7. Septic Shock
• Cause : severe bacterial infection
• Signs & Symptoms : warm skin
rapid pulse (tachycardia)
low blood pressure
• FA Management : Monitor ABC.
Elevate legs.
Keep the patient warm.
TRENDELENBERG (SHOCK POSITION)
First Aid and Preventive Management
for Shock
• Keep the victim lying down flat.
(Safe position)
• Elevate legs of victim at least 8 to 12 inches.
(Improves blood circulation)
• Place victim on his/her back with head and shoulder
raised.
(If victim has difficulty breathing)
• Keep victim lying on his/her side opposite his/her
injury.
(For nauseated or vomiting victim)
• Maintain body temperature of victim.
(Victim must not be perspiring nor chilling)
• Reassure the victim.
(Comforting the victim would somehow lessen
his/her pain)
• Transport victim to nearest medical facility.
(If victim’s condition would warrant immediate
transport upon assessment)
QUESTIONS?
BASIC FIRST AID TRAINING
Topic 8
Poisoning
Poisoning
Poison
• is any substance - solid, liquid or gas - that tends to
impair health or cause death when introduced to the
body or onto the skin surface
• can be introduced to the body through a variety of
means
• acts by changing the normal metabolism of cells or by
actually destroying them
Causes
• common in suicidal attempts among adults
• occasionally accidental among children or even
adults
Ways in Which Poisoning may Occur
 Ingestion (through the mouth)
 Inhalation (through the nose)
 Injection (through insect or animal bites)
 Absorption (through skin contact)
Poisoning by Ingestion
a. Common Causes
– Overdose of medicine
– Taking drugs with alcohol
– Storing cleaning products and other chemicals in
unlabelled food containers
– Improper placement of medicines, cleaning
products and other chemicals and plants in areas
within children’s reach
Poisoning by Ingestion
Common Poisons in the Household
– Insecticides
– Detergents and cleaning products
– Medicines
– Ornamental plants
– Paint, thinner
– Gasoline, kerosene, alcohol
– Cosmetics
Can you identify the household poison?
Poisoning by Ingestion
b. Manifestations (Signs & Symptoms)
– Evidence of an opened container or parts of plants
within scene of emergency
– Nausea, vomiting and diarrhea
– Abnormal, difficulty breathing
– Burns around lips or mouth
– Unusual breath or body odor
– Drowsiness or unconsciousness
– Convulsion
Poisoning by Ingestion
c. FA Management for Ingested Poisoning
If victim is conscious…
• Calm and reassure the victim and keep him/her
comfortable.
• If victim is having seizure, protect him/her from
injury.
• Identify the poison and the time elapsed since the
ingestion.
• Call local Poison Control Center or physician for
advise.
• If the ingested poison is non-corrosive, dilute with
water (3-4 glasses) and induce vomiting.
• If the ingested poison is corrosive, dilute with egg
white (6-8 pieces) but do not induce vomiting.
• If available, administer activated charcoal.
• Transport victim immediately to nearest medical
facility.
• Bring container of the poison ingested or sample of
the vomitus.
Poisoning by Ingestion
c. FA Management for Ingested Poisoning
If victim is unconscious…
• Do not give anything by mouth (NPO).
• Position the victim on his/her side. If he/she vomits,
it will drain out.
• Check and monitor the victim’s ABC. If he/she stops
breathing, do AR/RB with a barrier device. If victim
loses pulse and is breathless, perform CPR.
• Transport victim immediately to the nearest medical
facility.
Poisoning by Inhalation
a. Common Causes/Sources
– Carbon monoxide (from cars, defective cooking
equipment, fire and charcoal grills)
– Carbon dioxide (from wells, sewers and industrial
chemicals)
– Fumes from spray, industrial and home chemicals
– Solvents, chlorine and other related compounds
Poisoning by Inhalation
b. Manifestations (Signs & Symptoms)
 Dizziness
 Weakness
 Headache
 Difficulty breathing
 Discoloration of lips and mucous

Poisoning by Inhalation
c. FA Management for Inhaled Poisoning
• Remove victim from source of poison (toxic smoke, gas,
fume) but protect yourself from exposure.
• Transfer victim to a well-ventilated area.
• Loosen all tight clothing.
• Check victim’s ABC. Perform AR/CPR, if necessary.
• If the victim is having seizure, protect him/her from injury.
• If he/she throws up (vomits), protect his/her airway.
• If victim loses consciousness, NPO.
• Transport victim immediately to the nearest medical
facility.
Poisoning by Injection
a. Common Causes
– Animal and insect bites and stings
“When an insect or animal bites you and inject the
bite with its venom, it is called envenomation.”
b. Manifestations (Signs & Symptoms)
Manifestations may vary according to the kind
of insect or animal but may include:
• Swelling and itchiness in the bitten area (local
reaction) or the entire body (systemic reaction)
• Pain and discoloration in the bitten area
• Tightness of the chest
• Difficulty breathing
Poisoning by Injection
• Muscle contraction or rigidity in the abdominal
muscles
• Paralysis of the nervous system
• Victim may exhibit a bizarre behavior
• Excessive salivation
• Convulsion
• An insect or animal bite may bring about
circulatory collapse, hypertension, respiratory
distress/arrest and cardiac arrest
Poisoning by Injection
c. FA Management for Injected Poisoning
• Calm and reassure the victim. Anxiety aggravates all
reactions.
• Discourage victim from making unnecessary
movements.
• Remove any constricting item/s in the body near the
bitten area to prevent swelling.
• Wash the bitten area with soap and water. Insect
and animal bites (except for venomous snakes) must
be treated as a wound.
• Observe for signs of shock.
• NPO. Do not give anything by mouth.
• If victim is having a severe reaction, immediately
transport him/her to the nearest medical facility.
If victim is bitten by a venomous snake...
• Take steps to slow the rate at which the venom
spread in the victim’s body. Have the victim lie still.
Place the bitten part below the level of the victim’s
heart and immobilize it in a comfortable position.
• Look for signs of shock such as decreased alertness
or paleness. If shock develops, lay the victim flat;
raise his/her feet about 8 to 12 inches and cover
him/her with a blanket.
• Stay with the victim until a physician arrives or until
he/she is transported to the nearest medical facility.
Poisoning by Absorption
a. Common Causes
– Skin contact with chemical, either powder or liquid
– Skin contact with sap, juice, leaf of a poisonous
plant
b. Signs & Symptoms
– Chemical burn in the skin
– Allergic reactions (skin itching and redness; skin
rashes; headache and fever)
– For severe reaction: blisters; swelling; intense
burning sensation; itching and redness
Poisoning by Absorption
c. FA Management for Absorbed Poisoning
• Remove contaminated clothing.
• In case of poisonous chemical contact, flush the
affected skin with running water for at least 5-10
minutes and at least 10-15 minutes for the eye, if
affected.
• In case of skin contact with poisonous plants, wash
all affected areas thoroughly with soap and water.
• Do not rub or apply pressure on the affected part of
the body.
• In case severe reaction occurs, transport victim
immediately to the nearest medical facility.
QUESTIONS?
BASIC FIRST AID TRAINING
Topic 9
Common
Environmental Emergencies
Heat Illnesses
• are emergencies that can result from overexposure to
heat
• these conditions develop after a strenuous exercise or
work outdoors in warm or moderate temperatures
Types of Heat Illnesses
• Heat Cramps
• Heat Exhaustion
• Heat Stroke
A. Heat Cramps
• a muscular pain and spasm due to largely loss of
salt from the body in sweating or to inadequate
intake of salt
Signs & Symptoms
• muscle pain/cramps particularly in the calves or
abdomen
• heavy perspiration
• lightheadedness; weakness
First Aid Management
• Help the victim move to a cool, shaded spot.
• Have him/her rest with his/her feet elevated 8 to 12
inches.
• Gently massage the cramped muscles to help relieve
spasm.
• As long as the victim is not vomiting, give him/her
electrolyte beverages to sip.
(Salt water will do: 1 teaspoon of salt per glass;
half a glass of water every 15 minutes over a
period of 1 hour)
B. Heat Exhaustion
• a response to heat characterized by fatigue,
weakness and collapse due to inadequate intake
of water to compensate for loss of fluids through
sweating
• typically occurs to persons who are not used to
hot weather and are more common among
people who tend to perspire a lot
• a minor form of heat stroke
• the body temperature may be in the vicinity of
38.5 degrees Celsius or 39 degrees Celsius
Signs & Symptoms
• cool, pale or red, moist skin
• nausea; vomiting
• extreme thirst
• headache
• weakness; dizziness
• unconsciousness
• dilated pupils
• irrational behavior
First Aid Management
• Help the victim move to a cool, shaded spot.
• Have him/her rest with his/her feet elevated 8 to
12 inches.
• Loosen or remove his/her clothing.
• Place cool, wet clothes on the forehead and
wrists.
• If victim has fainted and does not respond
promptly, hold aromatic spirits of ammonia
under his/her nose.
• If the victim is having seizure, protect him/her
from injury.
• If the victim is conscious, give him/her
electrolyte beverages to sip.
• Make sure the victim continues to rest until fully
recovered.
• If the above measures do not work or if
symptoms last longer than one hour, seek
medical help immediately.
C. Heat Stroke
• a potentially life-threatening condition that
occurs when the body temperature rises
dangerously high as a result of prolonged heat
exposure
Signs & Symptoms
• high body temperature (above 106 degrees
Fahrenheit/41.11 degrees Celsius)
• red, hot, dry skin (no sweating)
• rapid, strong pulse
• altered level of consciousness
First Aid Management
Do not waste any time, cooling down the victim’s body
temperature!
• Move victim to a cool shaded spot or area.
• Have him/her rest with his/her feet elevated 8 to
12 inches.
• Using cool cloths, bathe the victim’s body.
• If a fan is available, use it to blow air across
his/her body.
• If ice is available, place ice packs or ice wrapped
in a cloth on the victim’s neck, armpits and groin
area.
• If victim is conscious, give him/her cool liquids to
drink. (Salt water will do: 1 teaspoon of salt per
glass; half a glass of water every 15 minutes over a
period of 1 hour)
• If a thermometer is available, monitor the victim’s
body temperature and continue treatment until
temperature drops below 102 degrees
Fahrenheit/38.89 degrees Celsius.
• Once the temperature has dropped, keep the
victim’s body cool with wet cloths.
• Get medical help or take the victim to the nearest
medical facility immediately.
QUESTIONS?
BASIC FIRST AID TRAINING
Topic 10
Common Medical
Emergencies
Fainting
• a partial or complete loss of consciousness due to
temporary insufficiency of blood supply to the brain
• usually preceded by paleness, sweating, coldness of
skin, dizziness, numbness, nausea and tingling of hands
and feet
• results from fatigue, hunger, prolonged standing, fear
or emotional upset
First Aid Management
• Keep the victim lying down (supine position) with lower
extremities (feet) elevated.
• Keep crowd/bystanders away.
• Loosen any tight clothing.
• Do not pour water over victim’s face instead bath his/her face
gently with cool water.
• If the victim vomits, roll him/her to his/her side or turn
his/her head to the side.
• Examine victim to determine whether he/she has suffered an
injury from falling.
• Maintain open airway.
• If victim does not regain consciousness immediately, call or
seek medical help. (Prolonged unconsciousness may be an
indication of a more serious condition)
Nose Bleeding
• a condition in which bleeding usually occurs from just
inside the nose on the central partition
• blood flow from the nostrils and into the back of the
throat
Causes of Nose Bleed
• Increase in body temperature
• Hypertension
• Blunt trauma to the head
• Head injury
• Cervical spine injury
First Aid Management
• Calm and reassure the victim and encourage him/her
to breathe thru the mouth.
• Have the victim sit down and lean forward.
• Apply pressure at bleeding site by pressing/ pinching the
nostrils toward the midline (just below the hard part).
• Apply cold compress at the forehead of the victim.
• If bleeding is uncontrolled, insert a small, clean pad of
gauze/cotton (but extend a free end of the pad outside the
nostril) and apply external pressure using thumb and
forefinger.
• If bleeding persists, seek medical help.
Stroke
• also called apoplexy and cerebrovascular accident
(CVA)
• is an interruption of blood flow to the brain that results
to loss of brain function
• interruption of blood flow may result from clotting of
the cerebral arteries (thrombosis) ; rupture of the
cerebral artery (arterial rupture) or obstruction of the
cerebral artery by a blood clot (cerebral embolism)
• the common cause of stroke is high blood pressure
Signs and Symptoms of Stroke
S & S may vary from the area of the brain damaged:
• Difficulty in speaking (slurred speech)
• Loss of movement or strength in one or more parts of
the body
• Numbness of body parts
• Confusion
• Difficulty in swallowing
• Problems of the eyesight (temporary or permanent
blindness; blurred vision)
• Sudden collapse
• Unconsciousness
First Aid Management
• Put victim in a supine position.
• Maintain an open airway.
• Assess level of consciousness (AVPU).
• Monitor the ABCs of life.
• Treat injuries, if there is any, due to fall.
• Transport the victim immediately to the nearest
hospital
Seizure
• is characterized by unconsciousness and generalized
severe twitching of the body’s muscles (sudden spasm
of muscles)
• is an attack of unconsciousness, usually of violent
onset, accompanied by rigidity of the muscles lasting
from few seconds to few minutes followed by jerky
movements, bluish discoloration of the face and lips,
foaming/drooling of the mouth, drowsiness and
disorientation
• seizures or convulsions are precipitated by abnormal,
excessive neuronal discharges within the brain
commonly called a “fit” or “attack”
Types of Seizure
• Grand Mal Seizure
 generalized twitching of all the muscles in the
body
 person suddenly loses consciousness, falls to
the floor, becomes cyanotic and experiences
rhythmic contractions of the extremities
• Petit Mal Seizure
 a brief lapse of attention in which the patient
seems to stare and does not seem to respond
to anyone
• Status Epilepticus Seizure
 seizure that recur every few minutes
• Febrile Seizure
 seizure that results from high fever
Causes of Seizure
• Epilepsy (congenital)
• Head injury
• Tetanus
• Substance abuse (drug overdose)
• Inadequate blood supply to the brain
• High fever (body temperature is more than 39
degrees Celsius)
Signs and Symptoms of Seizure
• Unconsciousness
• Noisy breathing
• Excessive salivation
• Urinary incontinence
• Difficulty in swallowing
“A seizure may lasts 2 to 3 minutes or longer. Patient
may be dazed or confused for some time and may
sleep.”
First Aid Management
• Move the victim away from the area that would
become dangerous to him.
• Remove any object that might cause injury to the
victim.
• Do not put anything in the mouth or forcibly open
the mouth of the patient with any hard object as this
may cause more damage than tongue biting.
• If the seizure lasts longer than 5 minutes, transport
the victim immediately to the nearest hospital.
QUESTIONS?
Basic First Aid training Course for the beginners

Basic First Aid training Course for the beginners

  • 1.
    BASIC FIRST AID TRAININGCOURSE Advocacy, Organizing & Training Unit Disaster Operations Center MATINA EMERGENCY RESPONSE TEAM/ MATINA SEARCH AND RESCUE TEAM (MERT/MSART)
  • 2.
    Training Objectives • Atthe end of the training course, the participants shall be able: To discuss first aid and its importance as a life- saving, suffer-alleviation emergency care; To demonstrate and put into practice the appropriate care for specific injuries or illnesses; To impart to the community the knowledge, attitude and skills gained from the training.
  • 3.
    Training Rules  Participantsmust comply the prescribed no. of training hours.  Participants must be at the training venue always on time.  Name tags must be worn at all times.  Using cell phones during sessions is prohibited.  Dress code must be observed.  Any problem or concern of the participants shall be referred to the training secretariat or trainers.
  • 4.
    BASIC FIRST AIDTRAINING Topic 1 Introduction to First Aid
  • 5.
    FIRST AID • isthe immediate and temporary care given to a person who has been injured or has been suddenly taken ill • it includes self-help and home care if medical assistance is not available or is delayed • also includes well-selected words of encouragement, evidence of willingness to help, and promotion of confidence by demonstration of competence
  • 6.
    Objectives of FirstAid 1. To prolong the life of a victim of emergency. 2. To alleviate the suffering of the victim. 3. To prevent added or further injury.
  • 7.
    Roles of FirstAid 1. Bridge that fills the gap between the victim and the physician 2. It is not intended to compete with nor to take the place of a physician 3. It ends when the services of a physician begins
  • 8.
    The FIRST AIDER,or the person giving first aid, deals with the whole situation, the injured person, and the injury or illness. • He/She knows what to do as well as what not to do. • He/She avoids errors that are frequently made by untrained persons through well-meant but misguided efforts. • He/She knows too that his/her first aid knowledge and skills could mean the difference between life and death, between temporary and permanent disability, and between rapid recovery and long hospitalization.
  • 9.
    Characteristics of aGood First Aider  Observant (should notice all signs)  Resourceful (should make the best use of things at hand)  Gentle (should not cause pain)  Tactful (should not alarm the victim)  Sympathetic (should be comforting)
  • 10.
    Golden Rules ofEmergency Care What to do: • Obtain consent whenever possible • Think of the worst • Call or send for help • Care for the more serious injuries first • Respect victim’s modesty and physical privacy • Provide comfort and emotional support • Assist the victim with his or her prescribed medication • Handle victim to a minimum
  • 11.
    What not todo: • Do not harm • Do not let victim see his/her own injury • Do not leave victim except to get help • Do not assume that the victim’s obvious injuries are the only ones • Do not deny a victim’s physical or emotional coping limitation • Do not make unrealistic promises • Do not trust the judgment of a confused victim • Do not require the victim to make decisions
  • 12.
    Permission to ProvideCare Before giving first aid, the first aider must get from the victim of injury or illness or from his/her companion, permission to give care. This permission is referred to as consent. To get consent, the first aider must tell the victim or supervising adult: Who he/she is His/Her level of training What it is he/she would like to do
  • 13.
    Types of Consent 1.Actual Consent • Consent given by a conscious victim to a first aider to provide care 2. Parental Consent • Consent obtained from the supervising adult if the victim is an infant or child 3. Implied Consent • If the victim is unconscious or unable to respond because of the illness or injury, consent is implied. Consent is also implied for an infant or a child if a supervising adult is not present
  • 14.
    Hindrances in/Barriers to GivingFirst Aid 1. Unfavorable surroundings 2. The presence of crowd/bystanders 3. Pressure from victim or kin/relative 4. Uncertainty about the victim 5. Fear of doing something wrong
  • 15.
    Transmission of Diseases andthe First Aiders How diseases are transmitted: 1. Direct Contact • occurs when a person touches an infected person’s body fluids.
  • 16.
    2. Indirect Contact •occurs when a person touches objects that have been contaminated by blood or other body fluids of an infected person. 3. Airborne • occurs when a person inhales droplets that have become airborne when an infected person coughs or sneezes. 4. Vector • occurs when an animal such as a dog or an insect transmits a pathogen into the body through a bite.
  • 17.
    First Aid Equipmentand Supplies 1. Basic Equipment  first aid kit  spine board  triangular bandages  sets of splints  poles  blankets
  • 18.
    2. Suggested FirstAid Kit Contents (Basic)  alcohol (70% solution)  absorbent cotton  povidone iodine  hydrogen peroxide  gauze pads/sterile cloth  elastic roller bandage  plaster/adhesive tape  scissors  gloves  antiseptic soap
  • 19.
  • 22.
    BASIC FIRST AIDTRAINING Topic 2 Guidelines in Giving Emergency Care
  • 23.
    A. Getting Started •Plan your action • Gather needed materials • Perform initial response as follows:  A - Ask for help  I - Intervene  D - Do no further harm • Instruct helpers
  • 24.
    B. Emergency ActionPrinciples (EAP)  Refer to a four-step plan of action in handling emergency situations. A first aider should follow these steps so that he/she does not forget anything that might affect personal safety and the victim’s survival.
  • 25.
    The 4-steps ofthe EAP should always be performed in this order: I Survey the Scene • Is the scene safe? • What happened? • How many people are injured? • Are there bystanders who can help? • Identify yourself as a trained first aider.
  • 26.
    II Do aPrimary Survey Check for life-threatening conditions. Begin by checking for responsiveness. If victim is unresponsive, check his/her Airway (A), Breathing (B), and Circulation (C). As you are checking, identify the problems and give the appropriate first aide care. “A primary survey is a process of finding out if there are conditions that are an immediate threat to the life of a victim of emergency”.
  • 27.
    PRIMARY SURVEY CHECKLIST Elements Life-Threatening Condition/s FirstAid Care Airway Obstruction: Tongue Foreign Body Head-Tilt, Chin lift Heimlich Maneuver Breathing Respiratory Arrest Rescue Breathing Circulation Cardiac Arrest Cardio-Pulmonary Resuscitation Severe Bleeding Bleeding Control
  • 28.
    III Activate MedicalAssistance or Transfer Facility When to activate MA/arrange TF: • Unconsciousness or altered level of consciousness • Breathing problems • Persistent chest or abdominal pain • Absence of pulse • Severe bleeding
  • 29.
    • Vomiting ofblood • Poisoning • Seizures, severe headache or slurred speech • Head, neck or back injuries • Possible broken bones
  • 30.
    Making the call Relaythe following salient information: • Exact location of the emergency • Number of the phone being used • Name of caller • What happened • Number of victims involved, their conditions and the help being given Remember: DO NOT HANG UP FIRST!
  • 31.
    IV Do aSecondary Survey • Interview the victim (if victim is conscious) - ask the victim’s name - ask what happened - assess using SAMPLE history (for medical cases) S - signs and symptoms A - allergies M - medications P - pertinent past illness L - last oral intake E - events leading to injury or illness
  • 32.
    • Check thevital signs - determine radial or carotid pulse (pulse rate) - determine the breathing (respiratory rate) - determine body temperature - determine skin appearance
  • 33.
    • Do head-to-toeexamination (for trauma cases) to check for: D - Deformity C - Contusion A - Abrasion P - Puncture B - Burn/Bleeding T - Tenderness L - Laceration S - Swelling
  • 34.
    “A secondary surveyis a systematic method of finding other injuries or conditions that may become life- threatening if not cared for.”
  • 35.
    Survey the Scene• Is the scene safe? Do a Primary Survey • Is the victim conscious? • Does the victim have an open airway? • Is the victim breathing? • Does the victim have a pulse? • Is the victim bleeding severely? Activate Medical Assistance • Send someone to call for an ambulance Do a Secondary Survey • Interview the victim • Check vital signs • Perform a head-to-toe examination
  • 36.
  • 39.
    BASIC FIRST AIDTRAINING Topic 3 Soft Tissue Injuries
  • 40.
    Soft Tissues • includethe layer of skin, fat and muscle that protect the underlying body structures Skin • largest single organ of the human body
  • 41.
    Functions of theSkin  Provides a protective barrier for the body  prevents invasion of bacteria  water tight to maintain body fluids  Helps regulate the body’s temperature  sweating cools the body when sweat evaporate  blood vessels in the skin dilate (increase heat loss) and constrict (decrease heat loss)  Absorbs information about the environment by way of the nerves  pain, heat, cold and other sensation are transmitted to the brain by the skin
  • 42.
    Layers of theSkin • Epidermis • the tough outer layer, where cells are constantly being replaced • deeper cells contain skin pigment • provides a barrier to bacteria and other organisms that can cause infection
  • 43.
    • Dermis • thedeeper layer • contains the important structures of the nerves, the sweat and oil glands, and the blood vessels
  • 44.
    • Subcutaneous tissue (Hypodermis) • thelayer that connects the bones and muscles to the skin • helps insulate the body to help maintain body temperature • stores energy
  • 45.
    Soft Tissue Injuries •any injury to the skin or the soft tissues beneath Wound • a break in the continuity of the skin • is further classified as either closed wound or open wound
  • 46.
    a. Closed Wound •a wound is closed when the soft tissue damage occurs beneath the surface of the skin leaving the outer layer (epidermis) intact.
  • 47.
    Cause of ClosedWounds – When the body is subjected to external forces (e.g. vehicular accident, impact from blunt objects, contact sports)
  • 48.
    Signs & Symptomsof Closed Wounds  Pain and tenderness  Swelling  Discoloration (black and blue ecchymosis)  Hematoma (pool of blood collected within the damaged tissue)  Uncontrolled restlessness  Excessive thirst  Vomiting or coughing up of blood  Passage of blood in the urine or feces
  • 49.
    First Aid Managementfor Closed Wounds I - ice application (putting ice cold packs over the injured area) C - compression (manual compression on injured part) E - elevation (elevating the injured part) S - splinting (immobilizing the injured part) • Be alert for signs of shock.
  • 50.
    b. Open Wound •an injury that breaks the outer layer (epidermis) of the skin • any break in the skin provides an entry point for disease-producing microorganisms Common Causes of Open Wounds • External physical forces • Mishandling of sharp objects, tool machinery, weapon and equipment • Explosion
  • 51.
    OPEN WOUNDS Types ofBleeding Arterial Bleeding Venous Bleeding Capillary Bleeding
  • 52.
    Dangers of OpenWounds 1. Hemorrhage (loss of blood)  1 - 2 glasses : normal (no effect)  3 - 4 glasses : anemic (predisposes body to infection)  5 or more glasses : fatal
  • 53.
    2. Infection • wheneverskin integrity is breached, bacterial contamination may result  delays healing of wound  gangrene (decay of tissues) may develop  may lead to amputation to prolong life  may lead to unnecessary death 3. Shock • severe blood loss can lead to hypo perfusion  predisposes body to infection  may lead to loss of body part  may lead to death
  • 54.
    Types of OpenWounds • Abrasion • Puncture • Incision • Laceration • Avulsion • Amputation
  • 55.
    Abrasion • Caused byscraping or rubbing of skin against rough surfaces  loss of part of epidermis and dermis  injury to capillaries  extremely painful • Danger: Infection
  • 56.
    Puncture • Caused bysharp pointed objects (e.g. ice pick, nail, pin, dagger or bullet)  external damage usually minimal  internal damage may be extensive  always look for an exit wound • Dangers: Internal Hemorrhage Infection (Tetanus) Shock
  • 57.
    Incision • Caused bysharp bladed objects – degree of bleeding depends on the depth and extent of the cut/incision – extremely painful • Dangers: Hemorrhage Infection Shock
  • 58.
    Laceration • Caused byblunt or rough-edge objects (e.g. rocks, broken glasses, tin cans, barbed wire)  may penetrate through all skin layers into muscle • Dangers: Hemorrhage Infection Shock
  • 59.
    Avulsion • Caused bymotor vehicle accidents, mishandling of tools, animal bites  piece of skin completely loose or left as flap  bleeds a lot  circulation in flap usually in jeopardy • Dangers: Hemorrhage Infection Shock
  • 60.
    Amputation • Caused byexplosion, vehicular accident, chopping using bladed weapon  complete removal of a body extremity such as an arm or a leg  massive bleeding may be present or bleeding may be limited • Dangers: Hemorrhage Infection
  • 61.
    First Aid Managementfor Open Wounds a. Open Wounds with Minimal Bleeding: • Wash or clean the wound with soap and water. • Blot the wound dry. • Apply an antiseptic. • Cover wound with dressing (sterile or clean cloth) then tape or bandage.
  • 62.
    First Aid Managementfor Open Wounds b. Open Wounds with Severe Bleeding: 1. Control or stop the bleeding. • Direct Pressure  Pressing the palm of the hand over the wound, with or without compress or cloth, prevents loss of blood from the body without interfering with normal blood circulation.
  • 63.
    • Elevation  Elevatingthe wounded part above the level of the victim’s heart reduces blood pressure on the injured area hence would aid in slowing down the loss of blood through the wound opening. • Pressure Point Technique  Applying pressure at specific point (supplying artery) on the arm (brachial artery) or leg (femoral artery) compresses the main artery supplying blood to the affected limb thus slowing down the flow of blood.
  • 64.
    • Tourniquet  Applyingtightly a wide band of cloth or other material just above an amputated extremity would stop all flow of blood. Employing tourniquet, however, is a decision to risk or sacrifice a limb in order to save a life.  Tourniquet must only be applied as a last resort.
  • 65.
    2. Cover thewound with dressing and bandage. 3. Care for shock. 4. Consult or refer to physician. (Seek medical help immediately)
  • 66.
  • 69.
    BASIC FIRST AIDTRAINING Topic 6 BANDAGING
  • 70.
    Uses of atriangular bandage • to control bleeding • to tie or secure splints in place • to immobilize injured body part • to serve as arm support (sling) TRIANGULAR BANDAGE • any cloth material, sterile or unsterile, that is used to hold a dressing/compress in place.
  • 71.
    Uses of adressing/compress • to protect the wound from infection • to absorb fluid from the wound such as blood, plasma, water and pus • to control bleeding DRESSING • also called compress, is a protective cover placed over a wound • sterile dressings are those that are free from germs before use
  • 72.
    Parts of aTriangular Bandage apex side side tail tail base face
  • 73.
    Principles/Rules in Bandaging Application • Applicationmust be proper, neat and correct • Apply bandage snugly (not too tight, not too loose) • Always check for tightness that might cause swelling later on • All foldings must be outward • Tail or ends of the triangular bandage must be tied with square knot • Secure the tails or ends
  • 74.
    SQUARE KNOT • alsocalled Relf Knot or Sailor’s Knot • is used in tying the tails or ends of a triangular bandage Rule in Tying the Square Knot: “Right end/tail over left end/tail, then left end/tail over right end/tail”
  • 75.
    Advantages of UsingSquare Knot: – easy to tie, easy to untie – once secured, it does not slip or tighten nor loosen – it is neat and has a comfortable flat surface
  • 76.
    Phases of aTriangular Bandage a. Open Phase b. Cravat Phase • Broad Cravat • Semi-Broad Cravat • Narrow Cravat
  • 77.
    Open Phase • Topof the Head Bandage • Front and Back of the Face Bandage • Front and Back of the Chest Bandage • Arm Sling • Hand and Foot Bandage • Knee Bandage
  • 78.
    Cravat Phase • ForeheadBandage • Eye Bandage • Neck Bandage • Ear, Cheek and Jaw Bandage • Shoulder Bandage • Elbow Bandage • Forearm/Arm Bandage • Hip Bandage • Thigh, Knee, Foreleg Bandage • Palm Pressure Bandage • Palm with Open Hand Bandage • Sprained Ankle Bandage (shoe on, shoe off) • Crotch (Genital) Application
  • 79.
  • 82.
    BASIC FIRST AIDTRAINING Topic 5 Musculoskeletal Injuries
  • 83.
    MUSCULOSKELETAL INJURIES The musculoskeletalsystem is made up of muscles and bones that form the skeleton, and the connective tissues, the tendons and ligaments. Together, these structures give the body shape, form and stability. Bones and muscles connect to form various body segments. They work to provide body movements. Injuries to the musculoskeletal system are common. Anybody at home, at work or at play, may injure their muscles, bones and joints. No age group is immune. Although musculoskeletal injuries are almost always painful, they are rarely life-threatening. However, when not recognized and taken care of properly, they can have serious consequences and even result in permanent disability.
  • 84.
    Muscles  are softtissues that lengthen (relax) and shorten (contract) to create movement  most muscles are skeletal which attach to the bones  skeletal muscles account for most of a person’s body weight  all body movements result from skeletal muscles contracting and relaxing  the human body has over 600 muscles
  • 85.
    Skeleton  is formedby over 200 bones of various sizes and shapes  gives the body its shape  protects vital organs and other soft tissues (the skull protects the brain, rib cage protects the lungs and heart, and the spinal cord is protected by the vertebrae)
  • 86.
    Bones  are hard,dense tissues that have a rich supply of blood and nerves  they store and manufacture red blood cells (RBC) and supply them to the circulating blood  a bone’s strong, rigid structure helps them to withstand stresses that cause injuries  bone injuries bleed and are usually painful and can become life-threatening if not properly cared for  bones heal by forming new bone cells hence they are the only body tissues that can regenerate
  • 87.
    Joints  are structuresformed by the ends of two or more bones coming together at a place  they are held together by tough, fibrous connective tissues called ligaments
  • 88.
    Musculoskeletal Injuries • areinjuries to the muscles, bones and joints Common Causes • vehicular accidents • falls • physical sports • mishandling of tools and equipment
  • 89.
    Common Signs andSymptoms • pain • swelling • deformity • discoloration of the skin • inability to move or use the affected part normally • bone fragments protruding from a wound
  • 90.
    Types of MusculoskeletalInjuries and Corresponding First Aid Management 1. Fracture: a break or disruption in the bone tissue. Types of Fracture  Closed (Simple) – bone is broken but there is no connecting wound from the break area to the skin  Open (Compound) – broken bone has connecting wound to the skin surface
  • 91.
    Open or CompoundFracture Closed or Simple Fracture
  • 92.
    Causes of Fractures Direct Force: when an object penetrates the skin and breaks the bone (e.g. when a person’s limb smashes into a hard object or is struck by a blunt object)  Indirect Force: when the limb is severely angulated or bent (e.g. when a person falls on an outstretched arm)  Abnormal Muscle Action: bone is broken due to twisting forces and strong muscle contractions (e.g. the kneecap can be fractured by sudden contraction of skeletal muscles)
  • 93.
    FA Management forFracture • Keep the victim still. • If the skin is pierced by a broken bone, cover the wound with a sterile dressing to prevent infection and apply pressure to control or stop the bleeding. • Immobilize. Apply splints in the injured part in the position you found it. • Check the circulation of the affected area after immobilizing. • Elevate the splinted injured part. • Care for shock. • Transport victim to nearest medical facility.
  • 94.
    2. Dislocation: adisplacement or separation of a bone from its normal position at a joint tearing surrounding tissues to some extent. First Aid Management • Keep the victim still. • Apply ice or cold pack on the injured site to reduce swelling and ease the pain and discomfort. • Immobilize. Apply splints in the injured part in the position you found it. • Elevate the splinted injured part. • Care for shock. • Transport victim to nearest medical facility.
  • 95.
    3. Sprain (lisa):the partial or complete tearing of ligaments and other tissues at a joint. Usually results when the bones that form a joint are forced beyond their normal range of motion. First Aid Management • Help the victim rest or find the most comfortable position. • Apply ice or cold pack on the injured site at once. (At least 4 times for the first 24 hours at least 15 minutes per application) “Cold helps control internal bleeding and reduces pain. It causes the broken blood vessels to constrict, limiting the blood and fluid that seep out. Cold also reduces muscle spasms and numbs the nerve endings”.
  • 96.
    • Elevate theinjured part (if possible, above the level of the heart) to slow the flow of blood and reduce swelling. • When the swelling reduces or goes away, apply hot compress on the injured site. “Heat speeds up chemical reaction needed to repair damaged tissues. White blood cells move in to rid the body of infections, and other cells begin the repair process. This process enhances proper healing of the injury”.
  • 97.
    4. Strain (pamaol):the stretching and tearing of muscles or tendon fibers. Also called a muscle “pull” or “tear”. They are often the result of overexertion or from sudden or uncoordinated movement. First Aid Management • Help the victim rest or find the most comfortable position. • Apply ice or cold pack on the injured site at once. (At least 4 times for the first 24 hours at least 15 minutes per application)
  • 98.
    • Elevate theinjured part (if possible, above the level of the heart) to slow the flow of blood and reduce swelling. • When the swelling reduces or goes away, apply hot compress on the injured site.
  • 99.
    5. Muscle Cramps(bikog): the sudden painful, tightening (contraction) of a muscle usually caused by fatigue or overexertion of the muscle. First Aid Management • Help the victim rest or find the most comfortable position. • Stretch out the cramped muscle to counteract the cramp. • Massage the cramped muscle firmly but gently. • Give fluids to drink.
  • 100.
  • 103.
    BASIC FIRST AIDTRAINING Topic 7 Immobilization (Splinting)
  • 104.
    Immobilization • is theuse of a splint or other method to keep an injured body part from moving. Objectives of Immobilizing/Splinting • To lessen pain. • To prevent further damage to soft tissues. • To reduce the risk of serious bleeding. • To reduce the possibility of loss of circulation to the injured part. • To prevent closed fractures from becoming open fractures.
  • 105.
    Basic Principles ofSplinting • Splint only if you can do it without causing more pain or discomfort to the victim. • Splint the injured part in the position you found it. • Splint the fracture and the joints above and below the injury site. • Check for proper circulation before and after splinting. • Secure the splints above and below but not directly on the injured part.
  • 106.
    Types of Splints •Splints, whether commercially-made or improvised, are of three (3) types. a. Soft Splints : include folded blankets, towels, pillows and a sling or cravat. (A sling is a triangular bandage tied to support an arm, wrist, or hand. A cravat is a folded triangular bandage used to hold dressing or splints in a place. A wad of cloth and bandages can serve as effective splints for small body parts such as the hands or fingers.)
  • 107.
    b. Rigid Splints: include boards, metal strips and folded magazines or newspapers. c. Anatomic Splints : refer to the use of other body parts as a splint. (e.g. An arm can be splinted to the chest. An injured leg can be splinted to the uninjured leg.)
  • 108.
  • 111.
    BASIC FIRST AIDTRAINING Topic 11 Emergency Rescue and Transfer
  • 112.
    Indications for EmergencyRescue • Danger of fire or explosion • Danger of toxic gases • Serious traffic hazards • Risk of drowning • Danger of electrocution • Danger of collapsing walls Emergency Rescue • a procedure of moving a patient/victim from an unsafe place to a place of safety
  • 113.
    Methods of Rescue •For immediate rescue without any assistance, drag or pull the victim . • Most one-rescuer carries and drags and other transfer methods can be used as methods of emergency rescue
  • 114.
    Factors to beconsidered in the selection of transfer methods • Nature and severity of the victim’s injury • Size of the victim • Physical capabilities of the first aider/s • Number of personnel and equipment available • Nature of evacuation route • Distance to be covered • Gender of the patient/victim Transfer • is a procedure of moving a patient/victim from one place to another after giving first aid or stabilizing the patient/victim
  • 115.
    Pointers to beObserved during Transfer: • Victim’s airway must be maintained open • Hemorrhage is controlled • Victim is safely maintained in the correct position • Regular checking of the victim’s condition is done • Supporting bandages and dressings remain effectively applied • The method of transfer is safe, comfortable and speedy as circumstances permit • The patient’s body is moved as a unit • Taller first aiders/rescuers must always be at the head side of the victim • First aiders/rescuers must observe ergonomics in lifting and moving of patient
  • 116.
    a. One-Rescuer Techniques •Assist to Walk • Pack Strap Carry • Piggy Back Carry • Lovers Carry • Fireman’s Carry • Fireman’s Drag • Collar Drag • Foot Drag • Armpit Drag • Blanket Drag Emergency Rescue and Transfer Methods
  • 117.
    b. Two-Rescuer Techniques •Assist to Walk • Carry by Extremities • Four Hand Seat • Three Hand Seat • Hand as Litter • Chair as Litter Emergency Rescue and Transfer Methods
  • 118.
    c. Three/Four/Six-Rescuer Techniques •Bearers Alongside • Hammock Carry • Blanket Carry • Improvised Stretcher Emergency Rescue and Transfer Methods
  • 119.
  • 122.
    BASIC FIRST AIDTRAINING Topic 4 Burns
  • 123.
    Burns • is atype of soft tissue injury involving the skin, blood vessels, nerves, muscles and bones and caused primarily by heat. • can also occur when the body is exposed to certain chemicals, electricity, solar or other forms of radiation
  • 124.
    Factors that Determinethe Severity of Burns 1. The length of exposure to the source. 2. The temperature of the object or gas causing the burn. 3. The depth. 4. The extent. 5. The involvement of critical areas. 6. The victim’s (patient’s) age. 7. The victim’s (patient’s) general health.
  • 125.
    1. Length ofexposure to the source • The more prolonged the victim’s exposure to the heat source or the longer the contact, the more severe the burn. 2. Temperature of the object or gas causing the burn • The higher the degree of heat of the object or gas the victim comes into contact will clearly result to severe or critical burns.
  • 126.
    3. Depth Classification a.Superficial (1st Degree) Burns  involve only the top layer of the skin, the epidermis  skin is red and dry, painful and sensitive to touch  generally heal in five (5) to six (6) days without permanent scarring  result from overexposure to the sun, light contact with hot objects and scalding by hot water or steam
  • 127.
    b. Partial-thickness (2nd Degree)Burns  involve both the epidermis and the dermis  burned area has redness and blisters that may open and weep clear fluid making the skin surface wet  usually painful and the burned area often swells  generally heal in three (3) to four (4) weeks and scarring may occur  result from moderate contact with hot liquids or objects, flames (from gasoline, kerosene, etc.) and too much exposure to solar radiation
  • 128.
    c. Full-thickness (3rd Degree)Burns  involve both the epidermis and the dermis as well as any or all of the underlying structures – fat, muscles, bones and nerves  burned area looks brown or charred (black), with tissues underneath sometimes appearing white  either extremely painful or relatively painless  scarring occurs and maybe severe  life-threatening burns  burn sites eventually require skin grafts  caused by flame, ignited clothing, prolonged contact with hot liquids or objects, or electricity
  • 129.
    BURNS : DepthClassification
  • 130.
    4. Extent ofBurns The Rule of Nine is used to measure or assess the extent or size of burns in a victim’s (patient’s) body.
  • 131.
     Head :9%  Upper Chest: 9%  Upper Back : 9%  Abdomen : 9%  Lower Back : 9%  Left Arm : 9%  Right Arm : 9%  Left Thigh : 9%  Right Thigh : 9%  Left Leg : 9%  Right Leg : 9%  Genitals : 1%
  • 132.
    BURNS : TheRule of 9
  • 133.
    5. Critical AreasInvolved The parts of the human body considered critical when burned:  Face  Hands  Feet  Genitalia
  • 134.
    6. Victim’s (Patient’s)Age • Victims younger than age 5 or older than 55 years are vulnerable to critical or life-threatening burns. They have thinner skin thus may often burn severely. 7. Victim’s (Patient’s) General Health • Victims with pre-existing medical conditions are vulnerable to critical or life-threatening burns. They tend to complicate severe burns especially if they have heart or kidney problems or respiratory illness.
  • 135.
    Classification of BurnsAccording to Severity a. Critical Burns • All burns complicated by fractures. • Any degree of respiratory injury. • Full-thickness (third degree) burns with more than 10% of the body surface area (BSA). • Partial-thickness (second degree) burns with more than 25% of the body surface area. • Moderate burns in an elderly or critically-ill patient. • For children: any full-thickness or partial- thickness burn with more than 20% of the body surface area.
  • 136.
    b. Moderate Burns •Full-thickness (third degree) burns with 2% to 10% of the body surface area (BSA). • Partial-thickness (second degree) burns that involve 15% to 25% of the body surface area. • Superficial (first degree) burns with 50% or more of the body surface area. • For children: partial-thickness burns with 10% to 20% of the body surface area.
  • 137.
    c. Minor Burns •Full-thickness (third degree) burns of less than 2% of the body surface area (BSA). • Partial-thickness (second degree) burns of less than 15% of the body surface area. • For children: a partial-thickness burn less than 10% of the body surface area.
  • 138.
    General First AidManagement for Burns Objectives of Giving First Aid for Burns • To relieve pain. • To prevent contamination or infection. • To treat for shock. “Burns can cause shock as a result of pain, loss of body fluids and loss of temperature control.”
  • 139.
    a. FA Managementfor Superficial Burns  Immerse the affected part in cool water or any cool liquid for about 2 – 5 minutes or until the pain diminishes.  Cover the affected part with a sterile or clean cloth (dressing or compress).  If the burning sensation won’t go away, continue to put cool water over the dressing. “Cooling superficial burns with water would lessen pain and minimize additional tissue destruction.”
  • 140.
    b. FA Managementfor Partial-thickness Burns  Immerse the affected part in cool water or any cool liquid for about 1 – 2 hours or until the pain diminishes.  Apply sterile or clean cloth wrung out in ice water over affected part.  Do not break blisters.  Gently blot the affected area dry with a sterile or clean cloth.  Apply dry, sterile gauze or clean cloth as a protective bandage.  If the legs or arms are affected, keep them elevated. “Cooling partial-thickness burns with water would lessen pain and minimize additional tissue destruction.”
  • 141.
    c. FA Managementfor Full-thickness Burns  Remove victim from heat source.  If victim is on fire, stop the burning process:  smother the flames with a heavy cloth  prevent victim from running and instead direct him/her to stop, drop and roll  Do not remove adhered particles of charred clothing or attempt to clean the burned area.  If fingers or toes have been burned, separate them with dry, sterile and non-adhesive dressing.
  • 142.
     Do notapply cold water or ice on the burned area. (It will cause critical body heat loss and would intensify the shock reaction)  Do not apply ointment, oil or other burn remedies on the affected part. (Ointment and oil seal in heat and may cause further complications and interfere with treatment by the physician)
  • 143.
     Treat thevictim for shock:  keep the victim lying down  elevate the feet unless he/she is unconscious or has neck, back, head or other severe injuries  help the victim maintain body temperature (burn victims have a tendency to chill)  Transport victim to nearest medical facility.
  • 144.
    Flame Burns • Removevictim from heat source and stop the burning process. • Immerse in or irrigate with cool water superficial and partial-thickness burns. • Cover superficial and partial thickness burns with cool, moist and sterile dressing. • Cover full-thickness burns with dry, sterile cloth or dressing. • Do not break blisters. • Do not apply ice or cold water or ointments, creams lotions and other burn remedies on full-thickness burns. • Transport victim to the nearest medical facility if burns are severe or critical upon assessment.
  • 145.
    Scald Burns • Immediatelyflush or irrigate the burned area with cool water or immerse on cool water. • Remove any clothing immediately as clothing soaked with hot liquid retains heat. • Cover superficial and partial thickness burns with cool, moist and sterile dressing. • Cover full-thickness burns with dry, sterile cloth or dressing. • Do not break blisters. • Do not apply ice or cold water or ointments, creams lotions and other burn remedies on full-thickness burns. • Transport victim to the nearest medical facility if burns are severe or critical upon assessment.
  • 146.
    Airway Burns • Burnsin the face or front of the trunk indicate there could be burns the airway. • There is risk of swelling of air passages that would lead to difficulty breathing. • Immediately call for help or transport victim to nearest medical facility.
  • 147.
    Electrical Burns • Electricalburns can be more severe than they first appear, with extensive damage to deeper tissues • They frequently show “entry” and “exit” burns at the point of contact
  • 148.
    Electrical Burns • Immediatelycall for help. • Check for scene safety. • Avoid any direct contact with the victim’s skin or any electrical conducting material the victim got in contact with. • If possible, make sure electrical power is turned off. • Once the scene is safe, check the ABCs of the victim. • Perform Rescue Breathing of CPR if victim is not breathing or has no pulse. • Look for two burn sites as victims of electrocution will have both entrance and exit wounds. Cover the burn injuries with dry, sterile dressing.
  • 149.
    Chemical Burns • Flushthe affected part with cool running water. • Do not use a forceful flow of water from a hose. (The force may further damage burned skin) • Have the victim remove contaminated clothing, if able to do so. • If possible, identify the chemical that caused the burn for subsequent neutralization. • Transport victim to the nearest medical facility if burns are severe or critical upon assessment.
  • 150.
    Sunburns • Sunburn isbasically caused by prolonged exposure to ultraviolet rays in sunlight. • Signs and symptoms include pain, redness and fever. • There is general skin damage and may eventually develop into skin cancer. • Cool the affected area with water until pain is relieved.
  • 151.
  • 154.
    BASIC FIRST AIDTRAINING Topic 7 Shock (Hypo perfusion)
  • 155.
    Shock (Hypo perfusion) •is a depressed condition of the many body functions due to the inadequate supply of blood that circulates throughout the body following serious injury or illness. • is a medical term used to describe the body’s reaction to lack of oxygen as a result of blood loss and a reduced rate of blood flow. • is not a specific disease but a dangerous condition that results in the inadequate flow of oxygen-rich blood to the body’s cells and failure of the body to rid cells of metabolic wastes.
  • 156.
    Effects of Shockon Vital Organs “The heart requires constant perfusion or it will not function properly”. “The brain and spinal cord cannot go more than 4 to 6 minutes without perfusion or the nerve cells will be permanently damaged”. “The kidneys will be permanently damaged after 45 minutes of inadequate perfusion”.
  • 157.
    Effects of Shockon Vital Organs “The skeletal muscles cannot tolerate more than 2 hours of inadequate perfusion”. “The gastrointestinal tract can exist with limited perfusion only for several hours.”
  • 158.
    Physiology of Shock Deathof Cell Death of Tissue Death of Organ Death of Patient
  • 159.
    Basic Causes ofShock • Pump failure (When the heart fails to pump blood or has reduced its pumping ability) • Hypovolemia (When blood or fluid is lost as a result of trauma to blood vessels or tissues such as loss of plasma (as in burns) or loss of fluids (as in vomiting or dehydration) • Relative hypovolemia (When blood vessels dilate as a result of spinal injury, infection or drug overdose that blood within the blood vessels is insufficient to fill the vascular system and provide efficient perfusion)
  • 160.
    Injuries/Conditions that Could Leadto Shock • Wounds with severe bleeding • Crushing Injuries • Heart attack • Perforation of stomach ulcer • Rupture of tubal pregnancy • Anaphylaxis • Starvation
  • 161.
    Factors that Contributeto Shock • P : pain • R : rough handling • I : improper transfer • C : continuous bleeding • E : exposure to extreme cold or excessive heat • F : fatigue
  • 162.
    Progression of Shock 1.Compensatory Stage • The body can still compensate for blood loss 2. Progressive Stage • Late stage when blood pressure is falling 3. Irreversible Stage • Last stage when shock has progressed to terminal stage
  • 163.
    General Signs &Symptoms of Shock • Pale appearance • Cool, clammy (moist) skin • Rapid and weak pulse • Change in the conscious state (AMS) • Abnormal breathing (air hunger)
  • 164.
    Types of Shock •Anaphylactic Shock • Cardiogenic Shock • Hypovolemic Shock • Metabolic Shock • Neurogenic Shock • Psychogenic Shock • Septic Shock
  • 165.
    Types of Shock 1.Anaphylactic Shock • Cause : allergic reaction • Signs & Symptoms : generalized edema burning skin sensation mild itching • FA Management : Determine cause. Monitor ABC. Transport victim immediately.
  • 166.
  • 167.
    Types of Shock 2.Cardiogenic Shock • Causes : cardiovascular diseases inadequate heart function impaired electrical system • Signs & Symptoms : chest pain irregular pulse (weak, rapid) low blood pressure cyanosis (lips, nails) • FA Management : Position victim comfortably. Monitor ABC. Transport victim immediately.
  • 168.
  • 169.
    Types of Shock 3.Hypovolemic Shock • Cause : loss of blood • Signs & Symptoms : rapid and weak pulse low blood pressure cyanosis cool, clammy skin change in mental status • FA Management : Monitor ABC. Control external bleeding. Elevate the legs. Transport victim immediately.
  • 170.
  • 171.
    Types of Shock 4.Metabolic Shock • Cause : excessive loss of fluid and electrolyte due to vomiting, diarrhea • Signs & Symptoms : low blood pressure cyanosis cool, clammy skin change in mental status • FA Management : Determine illness. Monitor ABC. Transport victim immediately.
  • 172.
    Types of Shock 5.Neurogenic Shock • Cause : damaged cervical spine which causes blood vessels to dilate widely • Signs & Symptoms : slow pulse (bradycardia) low blood pressure signs of neck injury • FA Management : Monitor ABC. Conserve body heat. Transport victim immediately.
  • 173.
    Types of Shock 6.Psychogenic Shock – Cause : temporary, generalized vascular dilation; anxiety; bad news; sight of injury; tiredness – Signs & Symptoms : rapid pulse (tachycardia) normal or low blood pressure – FA Management : Determine duration of unconsciousness. Record vital signs and mental status. Suspect head injury if patient is confused or slow to regain consciousness. Monitor ABC. Transport victim immediately.
  • 174.
  • 175.
    Types of Shock 7.Septic Shock • Cause : severe bacterial infection • Signs & Symptoms : warm skin rapid pulse (tachycardia) low blood pressure • FA Management : Monitor ABC. Elevate legs. Keep the patient warm.
  • 176.
  • 177.
    First Aid andPreventive Management for Shock • Keep the victim lying down flat. (Safe position) • Elevate legs of victim at least 8 to 12 inches. (Improves blood circulation) • Place victim on his/her back with head and shoulder raised. (If victim has difficulty breathing)
  • 178.
    • Keep victimlying on his/her side opposite his/her injury. (For nauseated or vomiting victim) • Maintain body temperature of victim. (Victim must not be perspiring nor chilling) • Reassure the victim. (Comforting the victim would somehow lessen his/her pain) • Transport victim to nearest medical facility. (If victim’s condition would warrant immediate transport upon assessment)
  • 179.
  • 182.
    BASIC FIRST AIDTRAINING Topic 8 Poisoning
  • 183.
    Poisoning Poison • is anysubstance - solid, liquid or gas - that tends to impair health or cause death when introduced to the body or onto the skin surface • can be introduced to the body through a variety of means • acts by changing the normal metabolism of cells or by actually destroying them
  • 184.
    Causes • common insuicidal attempts among adults • occasionally accidental among children or even adults
  • 185.
    Ways in WhichPoisoning may Occur  Ingestion (through the mouth)  Inhalation (through the nose)  Injection (through insect or animal bites)  Absorption (through skin contact)
  • 186.
    Poisoning by Ingestion a.Common Causes – Overdose of medicine – Taking drugs with alcohol – Storing cleaning products and other chemicals in unlabelled food containers – Improper placement of medicines, cleaning products and other chemicals and plants in areas within children’s reach
  • 187.
    Poisoning by Ingestion CommonPoisons in the Household – Insecticides – Detergents and cleaning products – Medicines – Ornamental plants – Paint, thinner – Gasoline, kerosene, alcohol – Cosmetics
  • 188.
    Can you identifythe household poison?
  • 190.
    Can you identifythe household poison?
  • 194.
    Poisoning by Ingestion b.Manifestations (Signs & Symptoms) – Evidence of an opened container or parts of plants within scene of emergency – Nausea, vomiting and diarrhea – Abnormal, difficulty breathing – Burns around lips or mouth – Unusual breath or body odor – Drowsiness or unconsciousness – Convulsion
  • 195.
    Poisoning by Ingestion c.FA Management for Ingested Poisoning If victim is conscious… • Calm and reassure the victim and keep him/her comfortable. • If victim is having seizure, protect him/her from injury. • Identify the poison and the time elapsed since the ingestion. • Call local Poison Control Center or physician for advise.
  • 196.
    • If theingested poison is non-corrosive, dilute with water (3-4 glasses) and induce vomiting. • If the ingested poison is corrosive, dilute with egg white (6-8 pieces) but do not induce vomiting. • If available, administer activated charcoal. • Transport victim immediately to nearest medical facility. • Bring container of the poison ingested or sample of the vomitus.
  • 197.
    Poisoning by Ingestion c.FA Management for Ingested Poisoning If victim is unconscious… • Do not give anything by mouth (NPO). • Position the victim on his/her side. If he/she vomits, it will drain out. • Check and monitor the victim’s ABC. If he/she stops breathing, do AR/RB with a barrier device. If victim loses pulse and is breathless, perform CPR. • Transport victim immediately to the nearest medical facility.
  • 198.
    Poisoning by Inhalation a.Common Causes/Sources – Carbon monoxide (from cars, defective cooking equipment, fire and charcoal grills) – Carbon dioxide (from wells, sewers and industrial chemicals) – Fumes from spray, industrial and home chemicals – Solvents, chlorine and other related compounds
  • 199.
    Poisoning by Inhalation b.Manifestations (Signs & Symptoms)  Dizziness  Weakness  Headache  Difficulty breathing  Discoloration of lips and mucous 
  • 200.
    Poisoning by Inhalation c.FA Management for Inhaled Poisoning • Remove victim from source of poison (toxic smoke, gas, fume) but protect yourself from exposure. • Transfer victim to a well-ventilated area. • Loosen all tight clothing. • Check victim’s ABC. Perform AR/CPR, if necessary. • If the victim is having seizure, protect him/her from injury. • If he/she throws up (vomits), protect his/her airway. • If victim loses consciousness, NPO. • Transport victim immediately to the nearest medical facility.
  • 201.
    Poisoning by Injection a.Common Causes – Animal and insect bites and stings “When an insect or animal bites you and inject the bite with its venom, it is called envenomation.”
  • 202.
    b. Manifestations (Signs& Symptoms) Manifestations may vary according to the kind of insect or animal but may include: • Swelling and itchiness in the bitten area (local reaction) or the entire body (systemic reaction) • Pain and discoloration in the bitten area • Tightness of the chest • Difficulty breathing Poisoning by Injection
  • 203.
    • Muscle contractionor rigidity in the abdominal muscles • Paralysis of the nervous system • Victim may exhibit a bizarre behavior • Excessive salivation • Convulsion • An insect or animal bite may bring about circulatory collapse, hypertension, respiratory distress/arrest and cardiac arrest
  • 204.
    Poisoning by Injection c.FA Management for Injected Poisoning • Calm and reassure the victim. Anxiety aggravates all reactions. • Discourage victim from making unnecessary movements. • Remove any constricting item/s in the body near the bitten area to prevent swelling.
  • 205.
    • Wash thebitten area with soap and water. Insect and animal bites (except for venomous snakes) must be treated as a wound. • Observe for signs of shock. • NPO. Do not give anything by mouth. • If victim is having a severe reaction, immediately transport him/her to the nearest medical facility.
  • 206.
    If victim isbitten by a venomous snake... • Take steps to slow the rate at which the venom spread in the victim’s body. Have the victim lie still. Place the bitten part below the level of the victim’s heart and immobilize it in a comfortable position. • Look for signs of shock such as decreased alertness or paleness. If shock develops, lay the victim flat; raise his/her feet about 8 to 12 inches and cover him/her with a blanket. • Stay with the victim until a physician arrives or until he/she is transported to the nearest medical facility.
  • 207.
    Poisoning by Absorption a.Common Causes – Skin contact with chemical, either powder or liquid – Skin contact with sap, juice, leaf of a poisonous plant
  • 208.
    b. Signs &Symptoms – Chemical burn in the skin – Allergic reactions (skin itching and redness; skin rashes; headache and fever) – For severe reaction: blisters; swelling; intense burning sensation; itching and redness Poisoning by Absorption
  • 209.
    Poisoning by Absorption c.FA Management for Absorbed Poisoning • Remove contaminated clothing. • In case of poisonous chemical contact, flush the affected skin with running water for at least 5-10 minutes and at least 10-15 minutes for the eye, if affected. • In case of skin contact with poisonous plants, wash all affected areas thoroughly with soap and water.
  • 210.
    • Do notrub or apply pressure on the affected part of the body. • In case severe reaction occurs, transport victim immediately to the nearest medical facility.
  • 211.
  • 214.
    BASIC FIRST AIDTRAINING Topic 9 Common Environmental Emergencies
  • 215.
    Heat Illnesses • areemergencies that can result from overexposure to heat • these conditions develop after a strenuous exercise or work outdoors in warm or moderate temperatures
  • 216.
    Types of HeatIllnesses • Heat Cramps • Heat Exhaustion • Heat Stroke
  • 217.
    A. Heat Cramps •a muscular pain and spasm due to largely loss of salt from the body in sweating or to inadequate intake of salt Signs & Symptoms • muscle pain/cramps particularly in the calves or abdomen • heavy perspiration • lightheadedness; weakness
  • 218.
    First Aid Management •Help the victim move to a cool, shaded spot. • Have him/her rest with his/her feet elevated 8 to 12 inches. • Gently massage the cramped muscles to help relieve spasm. • As long as the victim is not vomiting, give him/her electrolyte beverages to sip. (Salt water will do: 1 teaspoon of salt per glass; half a glass of water every 15 minutes over a period of 1 hour)
  • 219.
    B. Heat Exhaustion •a response to heat characterized by fatigue, weakness and collapse due to inadequate intake of water to compensate for loss of fluids through sweating • typically occurs to persons who are not used to hot weather and are more common among people who tend to perspire a lot • a minor form of heat stroke • the body temperature may be in the vicinity of 38.5 degrees Celsius or 39 degrees Celsius
  • 220.
    Signs & Symptoms •cool, pale or red, moist skin • nausea; vomiting • extreme thirst • headache • weakness; dizziness • unconsciousness • dilated pupils • irrational behavior
  • 221.
    First Aid Management •Help the victim move to a cool, shaded spot. • Have him/her rest with his/her feet elevated 8 to 12 inches. • Loosen or remove his/her clothing. • Place cool, wet clothes on the forehead and wrists. • If victim has fainted and does not respond promptly, hold aromatic spirits of ammonia under his/her nose.
  • 222.
    • If thevictim is having seizure, protect him/her from injury. • If the victim is conscious, give him/her electrolyte beverages to sip. • Make sure the victim continues to rest until fully recovered. • If the above measures do not work or if symptoms last longer than one hour, seek medical help immediately.
  • 223.
    C. Heat Stroke •a potentially life-threatening condition that occurs when the body temperature rises dangerously high as a result of prolonged heat exposure Signs & Symptoms • high body temperature (above 106 degrees Fahrenheit/41.11 degrees Celsius) • red, hot, dry skin (no sweating) • rapid, strong pulse • altered level of consciousness
  • 224.
    First Aid Management Donot waste any time, cooling down the victim’s body temperature! • Move victim to a cool shaded spot or area. • Have him/her rest with his/her feet elevated 8 to 12 inches. • Using cool cloths, bathe the victim’s body. • If a fan is available, use it to blow air across his/her body. • If ice is available, place ice packs or ice wrapped in a cloth on the victim’s neck, armpits and groin area.
  • 225.
    • If victimis conscious, give him/her cool liquids to drink. (Salt water will do: 1 teaspoon of salt per glass; half a glass of water every 15 minutes over a period of 1 hour) • If a thermometer is available, monitor the victim’s body temperature and continue treatment until temperature drops below 102 degrees Fahrenheit/38.89 degrees Celsius. • Once the temperature has dropped, keep the victim’s body cool with wet cloths. • Get medical help or take the victim to the nearest medical facility immediately.
  • 226.
  • 229.
    BASIC FIRST AIDTRAINING Topic 10 Common Medical Emergencies
  • 230.
    Fainting • a partialor complete loss of consciousness due to temporary insufficiency of blood supply to the brain • usually preceded by paleness, sweating, coldness of skin, dizziness, numbness, nausea and tingling of hands and feet • results from fatigue, hunger, prolonged standing, fear or emotional upset
  • 231.
    First Aid Management •Keep the victim lying down (supine position) with lower extremities (feet) elevated. • Keep crowd/bystanders away. • Loosen any tight clothing. • Do not pour water over victim’s face instead bath his/her face gently with cool water. • If the victim vomits, roll him/her to his/her side or turn his/her head to the side. • Examine victim to determine whether he/she has suffered an injury from falling. • Maintain open airway. • If victim does not regain consciousness immediately, call or seek medical help. (Prolonged unconsciousness may be an indication of a more serious condition)
  • 232.
    Nose Bleeding • acondition in which bleeding usually occurs from just inside the nose on the central partition • blood flow from the nostrils and into the back of the throat
  • 233.
    Causes of NoseBleed • Increase in body temperature • Hypertension • Blunt trauma to the head • Head injury • Cervical spine injury
  • 234.
    First Aid Management •Calm and reassure the victim and encourage him/her to breathe thru the mouth. • Have the victim sit down and lean forward. • Apply pressure at bleeding site by pressing/ pinching the nostrils toward the midline (just below the hard part). • Apply cold compress at the forehead of the victim. • If bleeding is uncontrolled, insert a small, clean pad of gauze/cotton (but extend a free end of the pad outside the nostril) and apply external pressure using thumb and forefinger. • If bleeding persists, seek medical help.
  • 235.
    Stroke • also calledapoplexy and cerebrovascular accident (CVA) • is an interruption of blood flow to the brain that results to loss of brain function • interruption of blood flow may result from clotting of the cerebral arteries (thrombosis) ; rupture of the cerebral artery (arterial rupture) or obstruction of the cerebral artery by a blood clot (cerebral embolism) • the common cause of stroke is high blood pressure
  • 237.
    Signs and Symptomsof Stroke S & S may vary from the area of the brain damaged: • Difficulty in speaking (slurred speech) • Loss of movement or strength in one or more parts of the body • Numbness of body parts • Confusion • Difficulty in swallowing • Problems of the eyesight (temporary or permanent blindness; blurred vision) • Sudden collapse • Unconsciousness
  • 238.
    First Aid Management •Put victim in a supine position. • Maintain an open airway. • Assess level of consciousness (AVPU). • Monitor the ABCs of life. • Treat injuries, if there is any, due to fall. • Transport the victim immediately to the nearest hospital
  • 239.
    Seizure • is characterizedby unconsciousness and generalized severe twitching of the body’s muscles (sudden spasm of muscles) • is an attack of unconsciousness, usually of violent onset, accompanied by rigidity of the muscles lasting from few seconds to few minutes followed by jerky movements, bluish discoloration of the face and lips, foaming/drooling of the mouth, drowsiness and disorientation • seizures or convulsions are precipitated by abnormal, excessive neuronal discharges within the brain commonly called a “fit” or “attack”
  • 240.
    Types of Seizure •Grand Mal Seizure  generalized twitching of all the muscles in the body  person suddenly loses consciousness, falls to the floor, becomes cyanotic and experiences rhythmic contractions of the extremities • Petit Mal Seizure  a brief lapse of attention in which the patient seems to stare and does not seem to respond to anyone
  • 241.
    • Status EpilepticusSeizure  seizure that recur every few minutes • Febrile Seizure  seizure that results from high fever
  • 242.
    Causes of Seizure •Epilepsy (congenital) • Head injury • Tetanus • Substance abuse (drug overdose) • Inadequate blood supply to the brain • High fever (body temperature is more than 39 degrees Celsius)
  • 243.
    Signs and Symptomsof Seizure • Unconsciousness • Noisy breathing • Excessive salivation • Urinary incontinence • Difficulty in swallowing “A seizure may lasts 2 to 3 minutes or longer. Patient may be dazed or confused for some time and may sleep.”
  • 244.
    First Aid Management •Move the victim away from the area that would become dangerous to him. • Remove any object that might cause injury to the victim. • Do not put anything in the mouth or forcibly open the mouth of the patient with any hard object as this may cause more damage than tongue biting. • If the seizure lasts longer than 5 minutes, transport the victim immediately to the nearest hospital.
  • 245.