Exquisite Copper Wire Earrings With Crystal Beads
•
20 likes•29,680 views

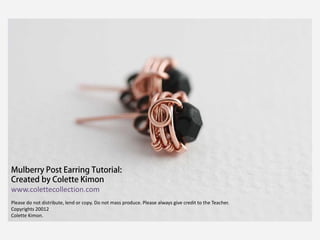
These darling post earrings are made from two gauges of copper wire and crystal beads. Experiment with materials to make the design your own!

Recommended
Recommended
More Related Content
What's hot
What's hot (20)
Similar to Exquisite Copper Wire Earrings With Crystal Beads
Similar to Exquisite Copper Wire Earrings With Crystal Beads (20)
More from HouseofGems.com
More from HouseofGems.com (9)
Recently uploaded
Recently uploaded (7)
Exquisite Copper Wire Earrings With Crystal Beads
- 1. www.colettecollection.com Please do not distribute, lend or copy. Do not mass produce. Please always give credit to the Teacher. Copyrights 20012 Colette Kimon.
- 2. • • • • • • • • • • • • • Materials: 14 inch of 20gauge soft copper wire 13 inch of 26 gauge soft copper wire 2 ear nuts for the earrings 2 6mm beads Tools: Round nose pliers Chain nose pliers Flush wire cutters A metal file A polishing cloth A 6 to 6.5mm mandrel: I am using a 6.5mm jump ring mandrel. You can also use a wooden mandrel, an UN-sharpen round pencil or a pen. • A hammer and anvil
- 3. Step 1: Use your polishing cloth and run your 20 ga wire through to straighten it. Position your chain nose pliers an inch from one end and bend the wire at a 90o angle.
- 4. Step 2: Grab the angle with the tip of your round nose pliers. We are going to start creating a spiral that will be the bottom of our wire bezel for our earrings.
- 5. Step 3: Bring the longer end of the wire around the jaw of the pliers to form a small loop.
- 6. Step 4: You should have something like this.
- 7. Step 5: In this step, we will start wrapping the small loop we just created. We will be wrapping the branches of the spirals as we create them because it is easier to work this way, rather than creating the whole spiral and then wrapping. Take your 13 inch of 26 ga wire and slightly bend it in the middle. Using the bend as a starting point, wrap one side of the small loop 3 times.
- 8. Step 6: With the other half of the wire, wrap the opposite side of the small loop 3 times as well.
- 9. Step 7: Now we will continue forming our spiral. Grab the small loop with your round nose or chain nose pliers, and bring the longer end of the wire around the inner loop to create the turn of the spiral
- 10. Step 8: Your work should look like this. Make sure the different rounds of the spirals are not spread out too far apart.
- 11. Step 9: Now wrap the second turn of the spiral 3 times on each side, just like you did in steps 5 and 6.
- 12. Step 10: Now create the third turn of the spiral like you did in step 7. Your work should look like the one in the picture.
- 13. Step 11: Once again wrap the third round 3 times on each side. You should have something similar to the picture on the left. This is the bottom of the earrings. It should be approximately the same size in diameter than your mandrel. If the base is too big, use the tip of your chain nose pliers to GENTLY squeeze all the branches of the spiral a little bit closer together, starting in the middle.
- 14. Step 12: This step is a little bit tricky. You need to position the bottom of your mandrel on top of the base, and then bring the wire up against the mandrel. Place your index finger (dominant hand) under the base of the earrings and push it up against the bottom of the mandrel while your other fingers hold the mandrel. With your non dominant hand, bring the wire around the mandrel in a slight upward motion, and make a complete turn. We are now building the sides of our wire bezel.
- 15. Step 13: You should have something similar to this.
- 16. Step 14: Once again, we will continue with the wrapping, like we did previously. Wrap the newly creating branch 3 times on each side
- 17. Step 15: Like you did on step 12, create the second round of the bezel wall using your mandrel.
- 18. Step 16: Wrap each side 3 times.
- 19. Step 17: With your chain nose pliers, grab the 20 ga wire at about 2mm from your last wraps and bend the wire across the middle top of the bezel wall.
- 20. Step 18: Take your 6mm bead and slide it into the 20 ga wire and position it inside the bezel cup. If necessary, slightly press the bead down, inside the bezel cup so it is not sticking out too much.
- 21. Step 19: With the tip of your chain nose pliers, grab the 20 ga wire very close to the bead and bend the wire straight down. Trim it to 0.5 inch and file the end with your metal file.
- 22. Step 20: Use your chain nose pliers to create a small loop with the wire you just trimmed. Make sure the loop is snug against the bezel wall. Trim the excess wrapping wire and use the tip of your chain nose pliers to tuck the ends. Put the post portion of the earrings on your anvil and slightly hammer it to harden the wire.
- 23. Step 21: Cut 0.25 inch from the post of the earrings. The remaining length will be then being 0.75inch. File the end of the post with your metal file to make is really smooth. Repeat to create the other earring. If you have a jewelry tumbler, put your earrings into the tumbler and tumble for about an hour. Not only this will make the earrings shinier, it will further harden the wire, and the earrings posts will be sturdier.