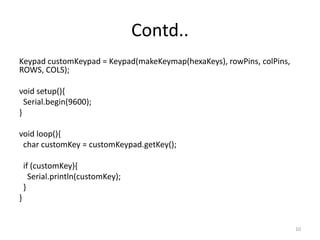
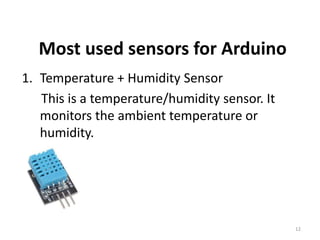
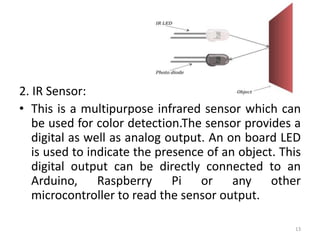
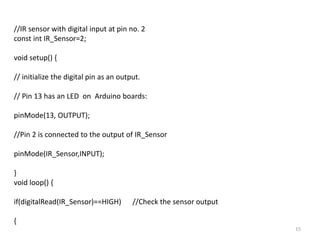
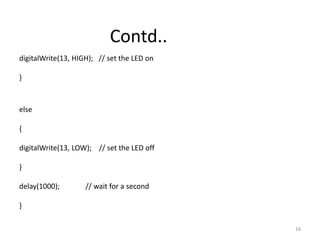
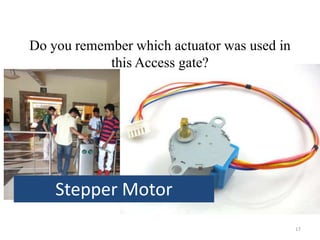
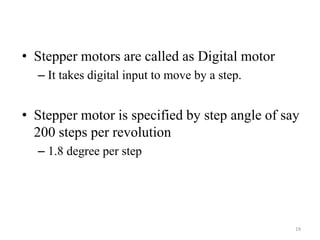
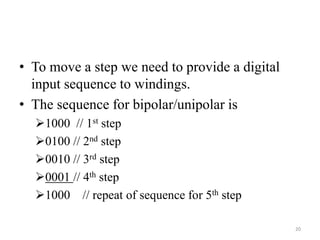
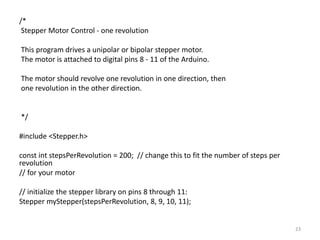
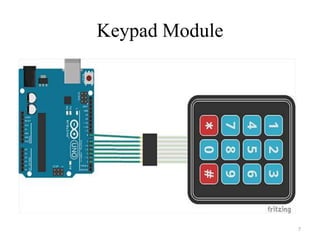
Keypad Module
7
Keypad Program
8
#include <Keypad.h>
const byte ROWS = 4;
const byte COLS = 4;
char hexaKeys[ROWS][COLS] = {
{'1', '2', '3', 'A'},
{'4', '5', '6', 'B'},
{'7', '8', '9', 'C'},
{'*', '0', '#', 'D'}
};
byte rowPins[ROWS] = {9, 8, 7, 6};
byte colPins[COLS] = {5, 4, 3, 2};
9
Contd..
Keypad customKeypad = Keypad(makeKeymap(hexaKeys), rowPins, colPins,
ROWS, COLS);
void setup(){
Serial.begin(9600);
}
void loop(){
char customKey = customKeypad.getKey();
if (customKey){
Serial.println(customKey);
}
}
10
SENSORS
What is a sensor?
“A sensor is an object whose purpose is to detect events
or changes in its environment, and then provide a
corresponding output”.
Why do we need sensor?
• A sensor is the guy who provides data to the a system
via its input.
• We need sensor to feed data to the system and tells
the controller when to take action
11
Most used sensors for Arduino
1. Temperature + Humidity Sensor
This is a temperature/humidity sensor. It
monitors the ambient temperature or
humidity.
12
2. IR Sensor:
• This is a multipurpose infrared sensor which can
be used for color detection.The sensor provides a
digital as well as analog output. An on board LED
is used to indicate the presence of an object. This
digital output can be directly connected to an
Arduino, Raspberry Pi or any other
microcontroller to read the sensor output.
13
IR sensor Program
14
//IR sensor with digital input at pin no. 2
const int IR_Sensor=2;
void setup() {
// initialize the digital pin as an output.
// Pin 13 has an LED on Arduino boards:
pinMode(13, OUTPUT);
//Pin 2 is connected to the output of IR_Sensor
pinMode(IR_Sensor,INPUT);
}
void loop() {
if(digitalRead(IR_Sensor)==HIGH) //Check the sensor output
{
15
digitalWrite(13, HIGH); // set the LED on
}
else
{
digitalWrite(13, LOW); // set the LED off
}
delay(1000); // wait for a second
}
Contd..
16
Do you remember which actuator was used in
this Access gate?
Stepper Motor
17
Working principle
18
• Stepper motors are called as Digital motor
– It takes digital input to move by a step.
• Stepper motor is specified by step angle of say
200 steps per revolution
– 1.8 degree per step
19
• To move a step we need to provide a digital
input sequence to windings.
• The sequence for bipolar/unipolar is
1000 // 1st step
0100 // 2nd step
0010 // 3rd step
0001 // 4th step
1000 // repeat of sequence for 5th step
20
Stepper Motor Speed Control
22
/*
Stepper Motor Control - one revolution
This program drives a unipolar or bipolar stepper motor.
The motor is attached to digital pins 8 - 11 of the Arduino.
The motor should revolve one revolution in one direction, then
one revolution in the other direction.
*/
#include <Stepper.h>
const int stepsPerRevolution = 200; // change this to fit the number of steps per
revolution
// for your motor
// initialize the stepper library on pins 8 through 11:
Stepper myStepper(stepsPerRevolution, 8, 9, 10, 11);
23
Contd..
void setup() {
// set the speed at 60 rpm:
myStepper.setSpeed(60);
// initialize the serial port:
Serial.begin(9600);
}
void loop() {
// step one revolution in one direction:
Serial.println("clockwise");
myStepper.step(stepsPerRevolution);
delay(500);//Without delay stepper motor will rotate continuosly
}
24

Edge_AI_Assignment_3.pdf

  • 1.
  • 2.
  • 3.
    #include <Keypad.h> const byteROWS = 4; const byte COLS = 4; char hexaKeys[ROWS][COLS] = { {'1', '2', '3', 'A'}, {'4', '5', '6', 'B'}, {'7', '8', '9', 'C'}, {'*', '0', '#', 'D'} }; byte rowPins[ROWS] = {9, 8, 7, 6}; byte colPins[COLS] = {5, 4, 3, 2}; 9
  • 4.
    Contd.. Keypad customKeypad =Keypad(makeKeymap(hexaKeys), rowPins, colPins, ROWS, COLS); void setup(){ Serial.begin(9600); } void loop(){ char customKey = customKeypad.getKey(); if (customKey){ Serial.println(customKey); } } 10
  • 5.
    SENSORS What is asensor? “A sensor is an object whose purpose is to detect events or changes in its environment, and then provide a corresponding output”. Why do we need sensor? • A sensor is the guy who provides data to the a system via its input. • We need sensor to feed data to the system and tells the controller when to take action 11
  • 6.
    Most used sensorsfor Arduino 1. Temperature + Humidity Sensor This is a temperature/humidity sensor. It monitors the ambient temperature or humidity. 12
  • 7.
    2. IR Sensor: •This is a multipurpose infrared sensor which can be used for color detection.The sensor provides a digital as well as analog output. An on board LED is used to indicate the presence of an object. This digital output can be directly connected to an Arduino, Raspberry Pi or any other microcontroller to read the sensor output. 13
  • 8.
  • 9.
    //IR sensor withdigital input at pin no. 2 const int IR_Sensor=2; void setup() { // initialize the digital pin as an output. // Pin 13 has an LED on Arduino boards: pinMode(13, OUTPUT); //Pin 2 is connected to the output of IR_Sensor pinMode(IR_Sensor,INPUT); } void loop() { if(digitalRead(IR_Sensor)==HIGH) //Check the sensor output { 15
  • 10.
    digitalWrite(13, HIGH); //set the LED on } else { digitalWrite(13, LOW); // set the LED off } delay(1000); // wait for a second } Contd.. 16
  • 11.
    Do you rememberwhich actuator was used in this Access gate? Stepper Motor 17
  • 12.
  • 13.
    • Stepper motorsare called as Digital motor – It takes digital input to move by a step. • Stepper motor is specified by step angle of say 200 steps per revolution – 1.8 degree per step 19
  • 14.
    • To movea step we need to provide a digital input sequence to windings. • The sequence for bipolar/unipolar is 1000 // 1st step 0100 // 2nd step 0010 // 3rd step 0001 // 4th step 1000 // repeat of sequence for 5th step 20
  • 15.
  • 16.
    /* Stepper Motor Control- one revolution This program drives a unipolar or bipolar stepper motor. The motor is attached to digital pins 8 - 11 of the Arduino. The motor should revolve one revolution in one direction, then one revolution in the other direction. */ #include <Stepper.h> const int stepsPerRevolution = 200; // change this to fit the number of steps per revolution // for your motor // initialize the stepper library on pins 8 through 11: Stepper myStepper(stepsPerRevolution, 8, 9, 10, 11); 23
  • 17.
    Contd.. void setup() { //set the speed at 60 rpm: myStepper.setSpeed(60); // initialize the serial port: Serial.begin(9600); } void loop() { // step one revolution in one direction: Serial.println("clockwise"); myStepper.step(stepsPerRevolution); delay(500);//Without delay stepper motor will rotate continuosly } 24