This document provides an introduction and overview of the DB-WEAVE software for shaft weaving. Some key points:
- DB-WEAVE allows users to design weaving patterns and control computerized looms.
- It has modern Windows-based interface and requires a PC running Windows 95 or newer with at least 10MB of storage and 24MB of RAM.
- The tutorial section provides lessons on the basics of using DB-WEAVE to design patterns, set threading and treadling, and control looms.


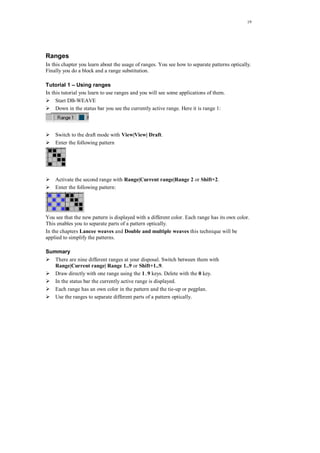


![Getting Started with Apache Spark: Big Data Made Simple [Free Meetup]](https://cdn.slidesharecdn.com/ss_thumbnails/apachesparkgettingstarted-260203175547-8361bcc3-thumbnail.jpg?width=640&height=640&fit=bounds)
