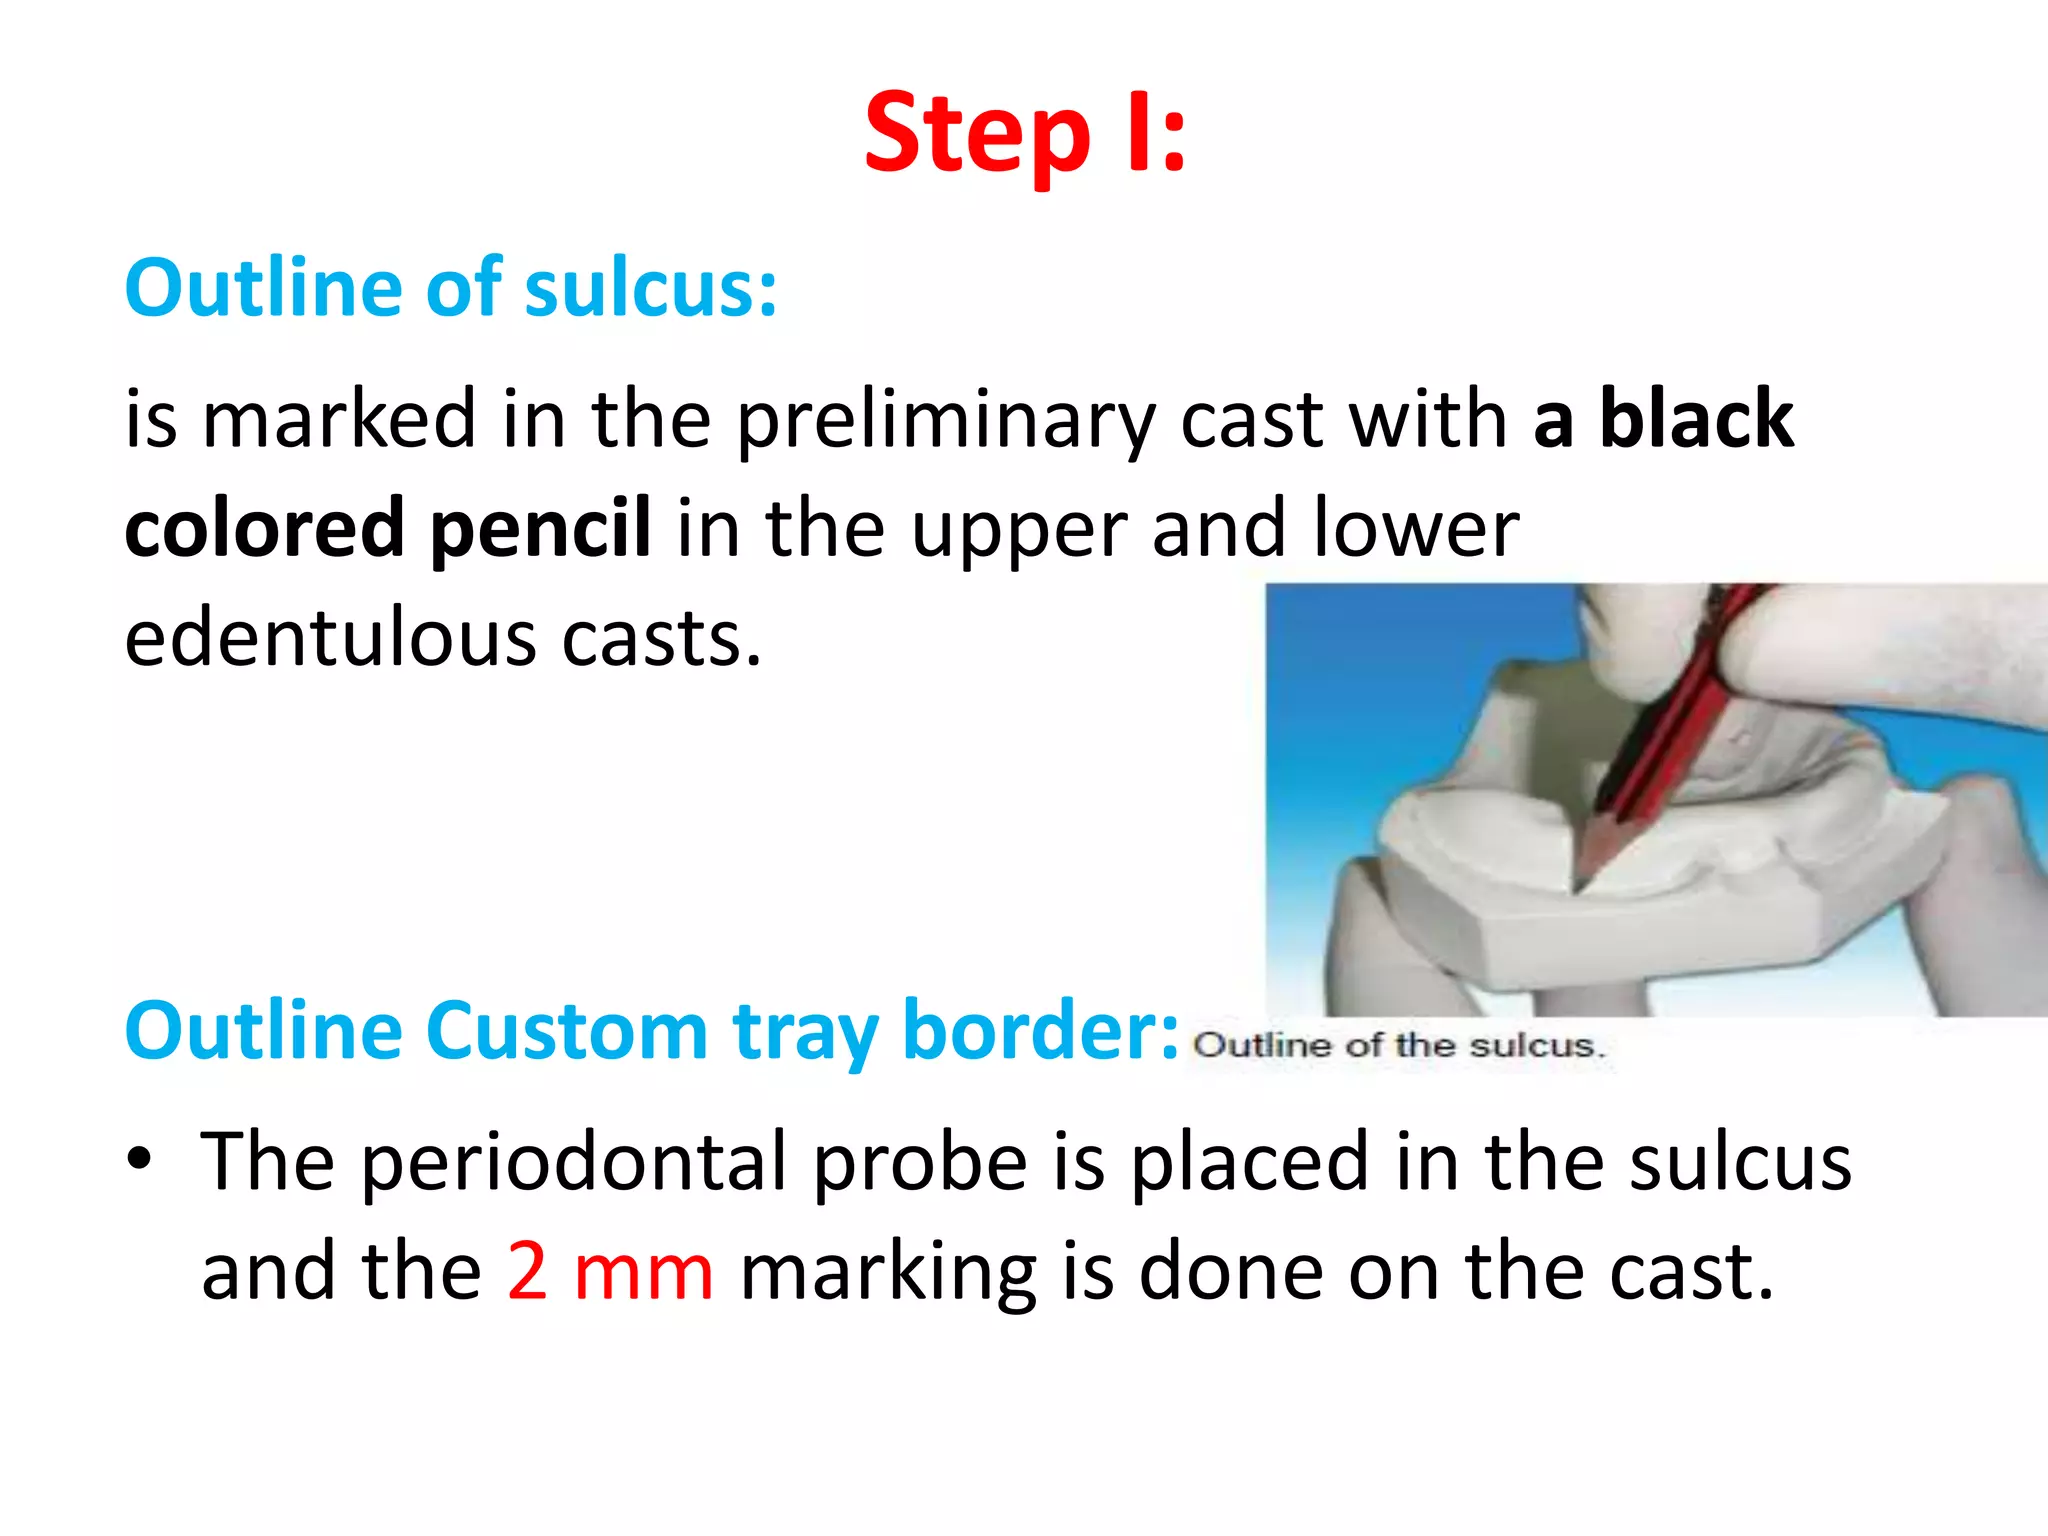
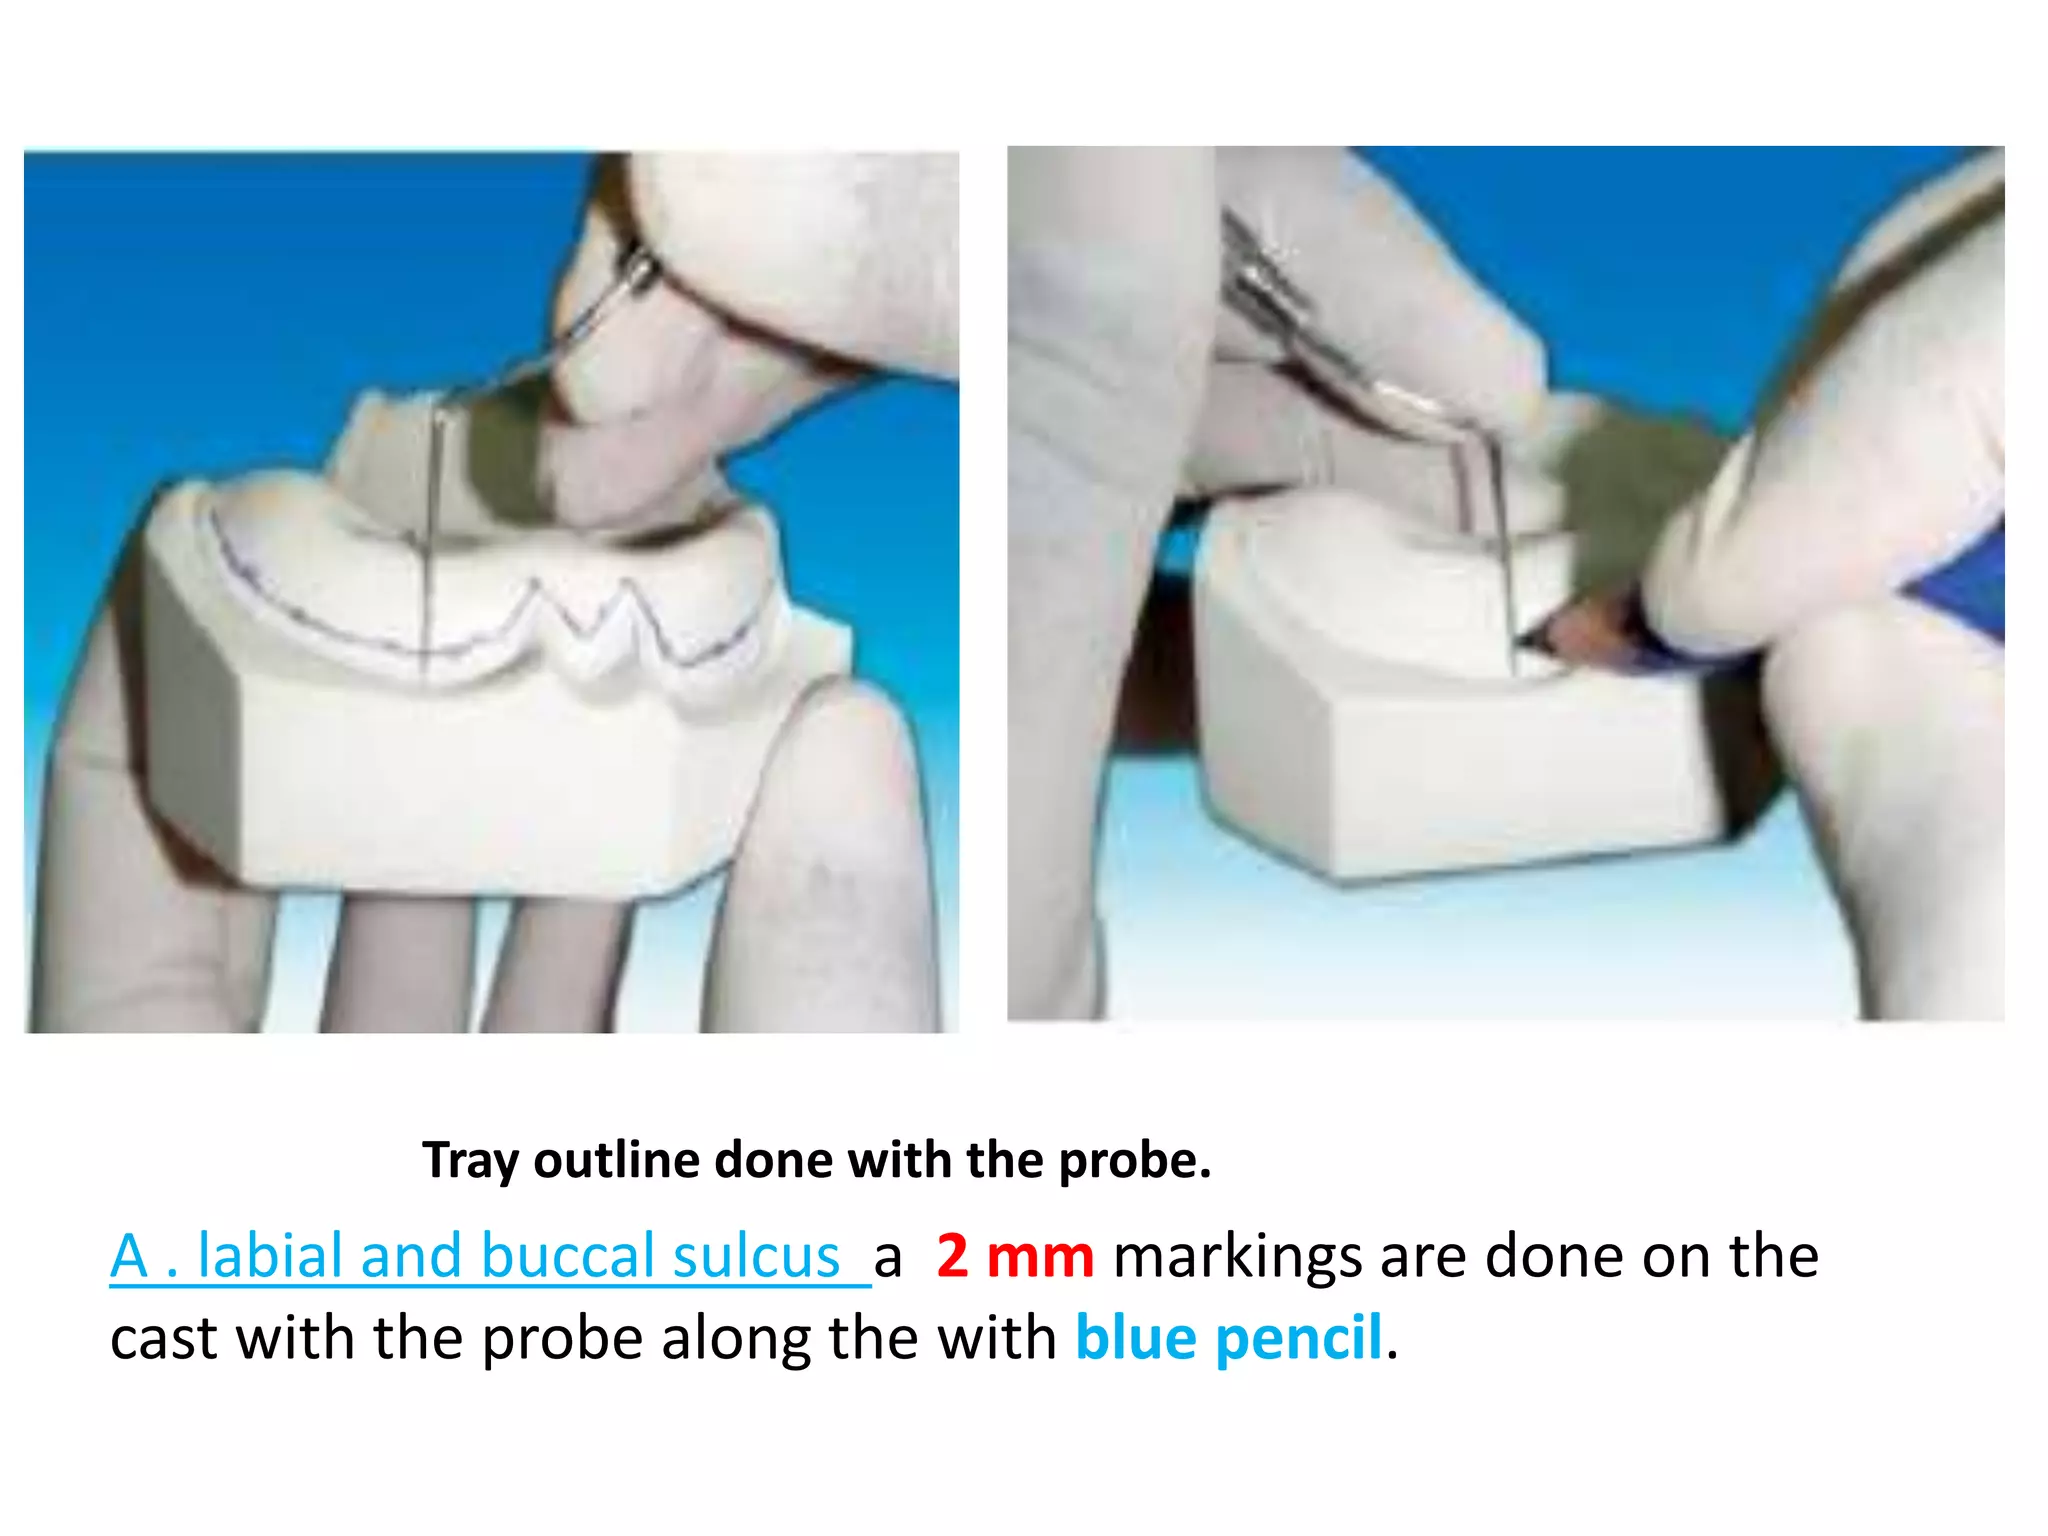
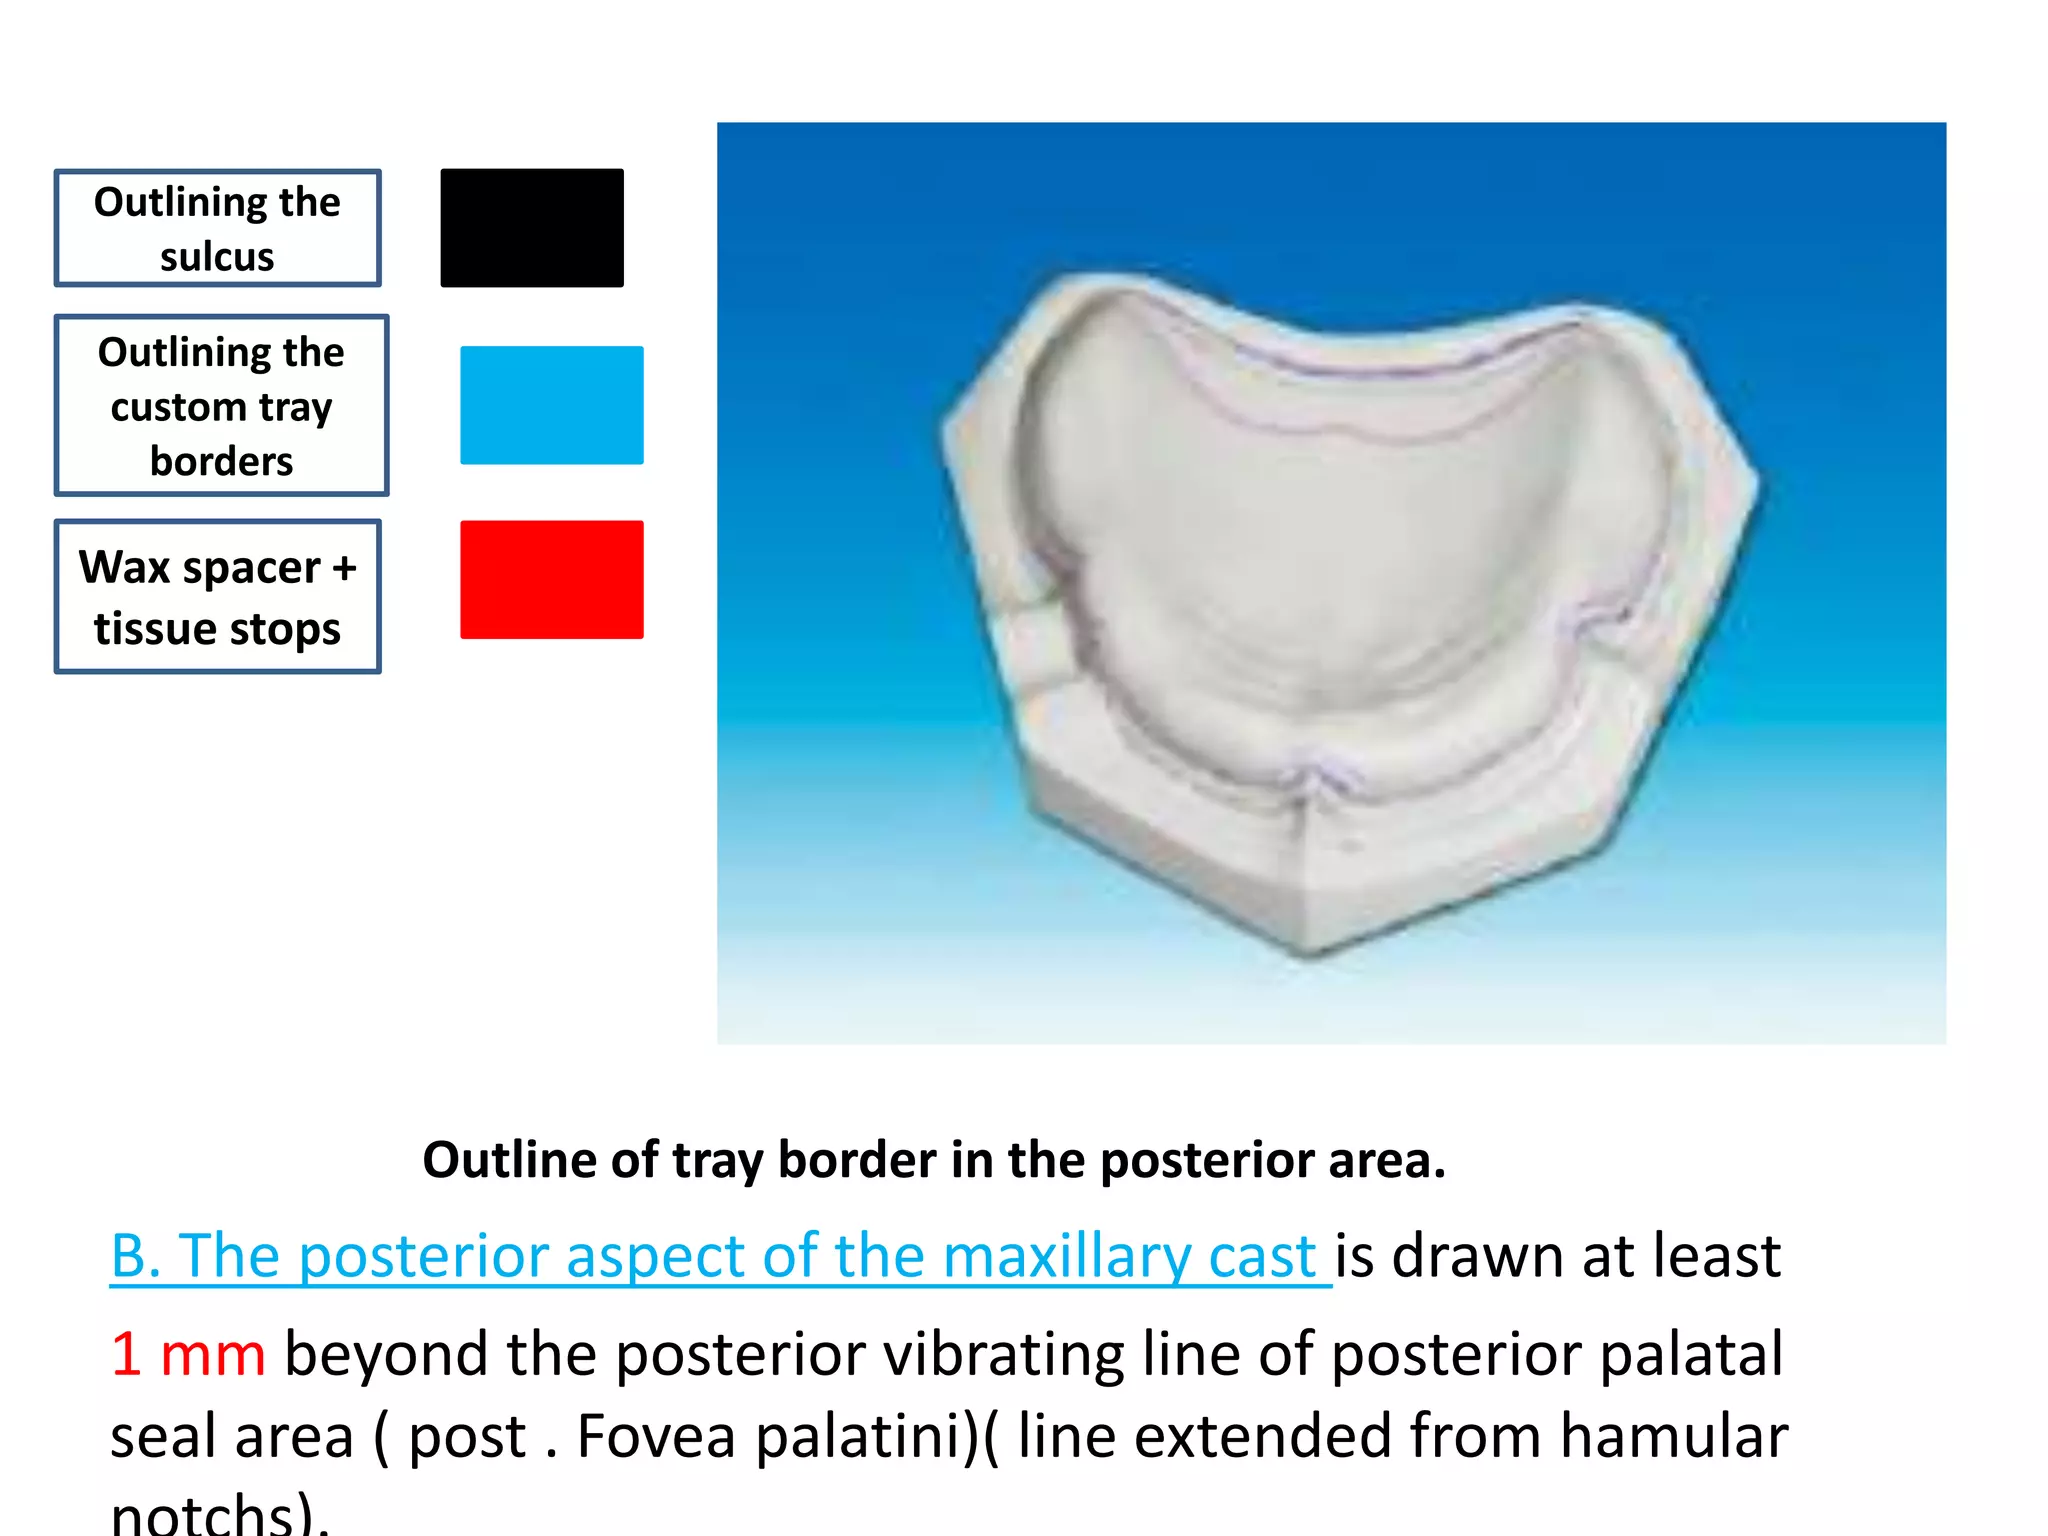
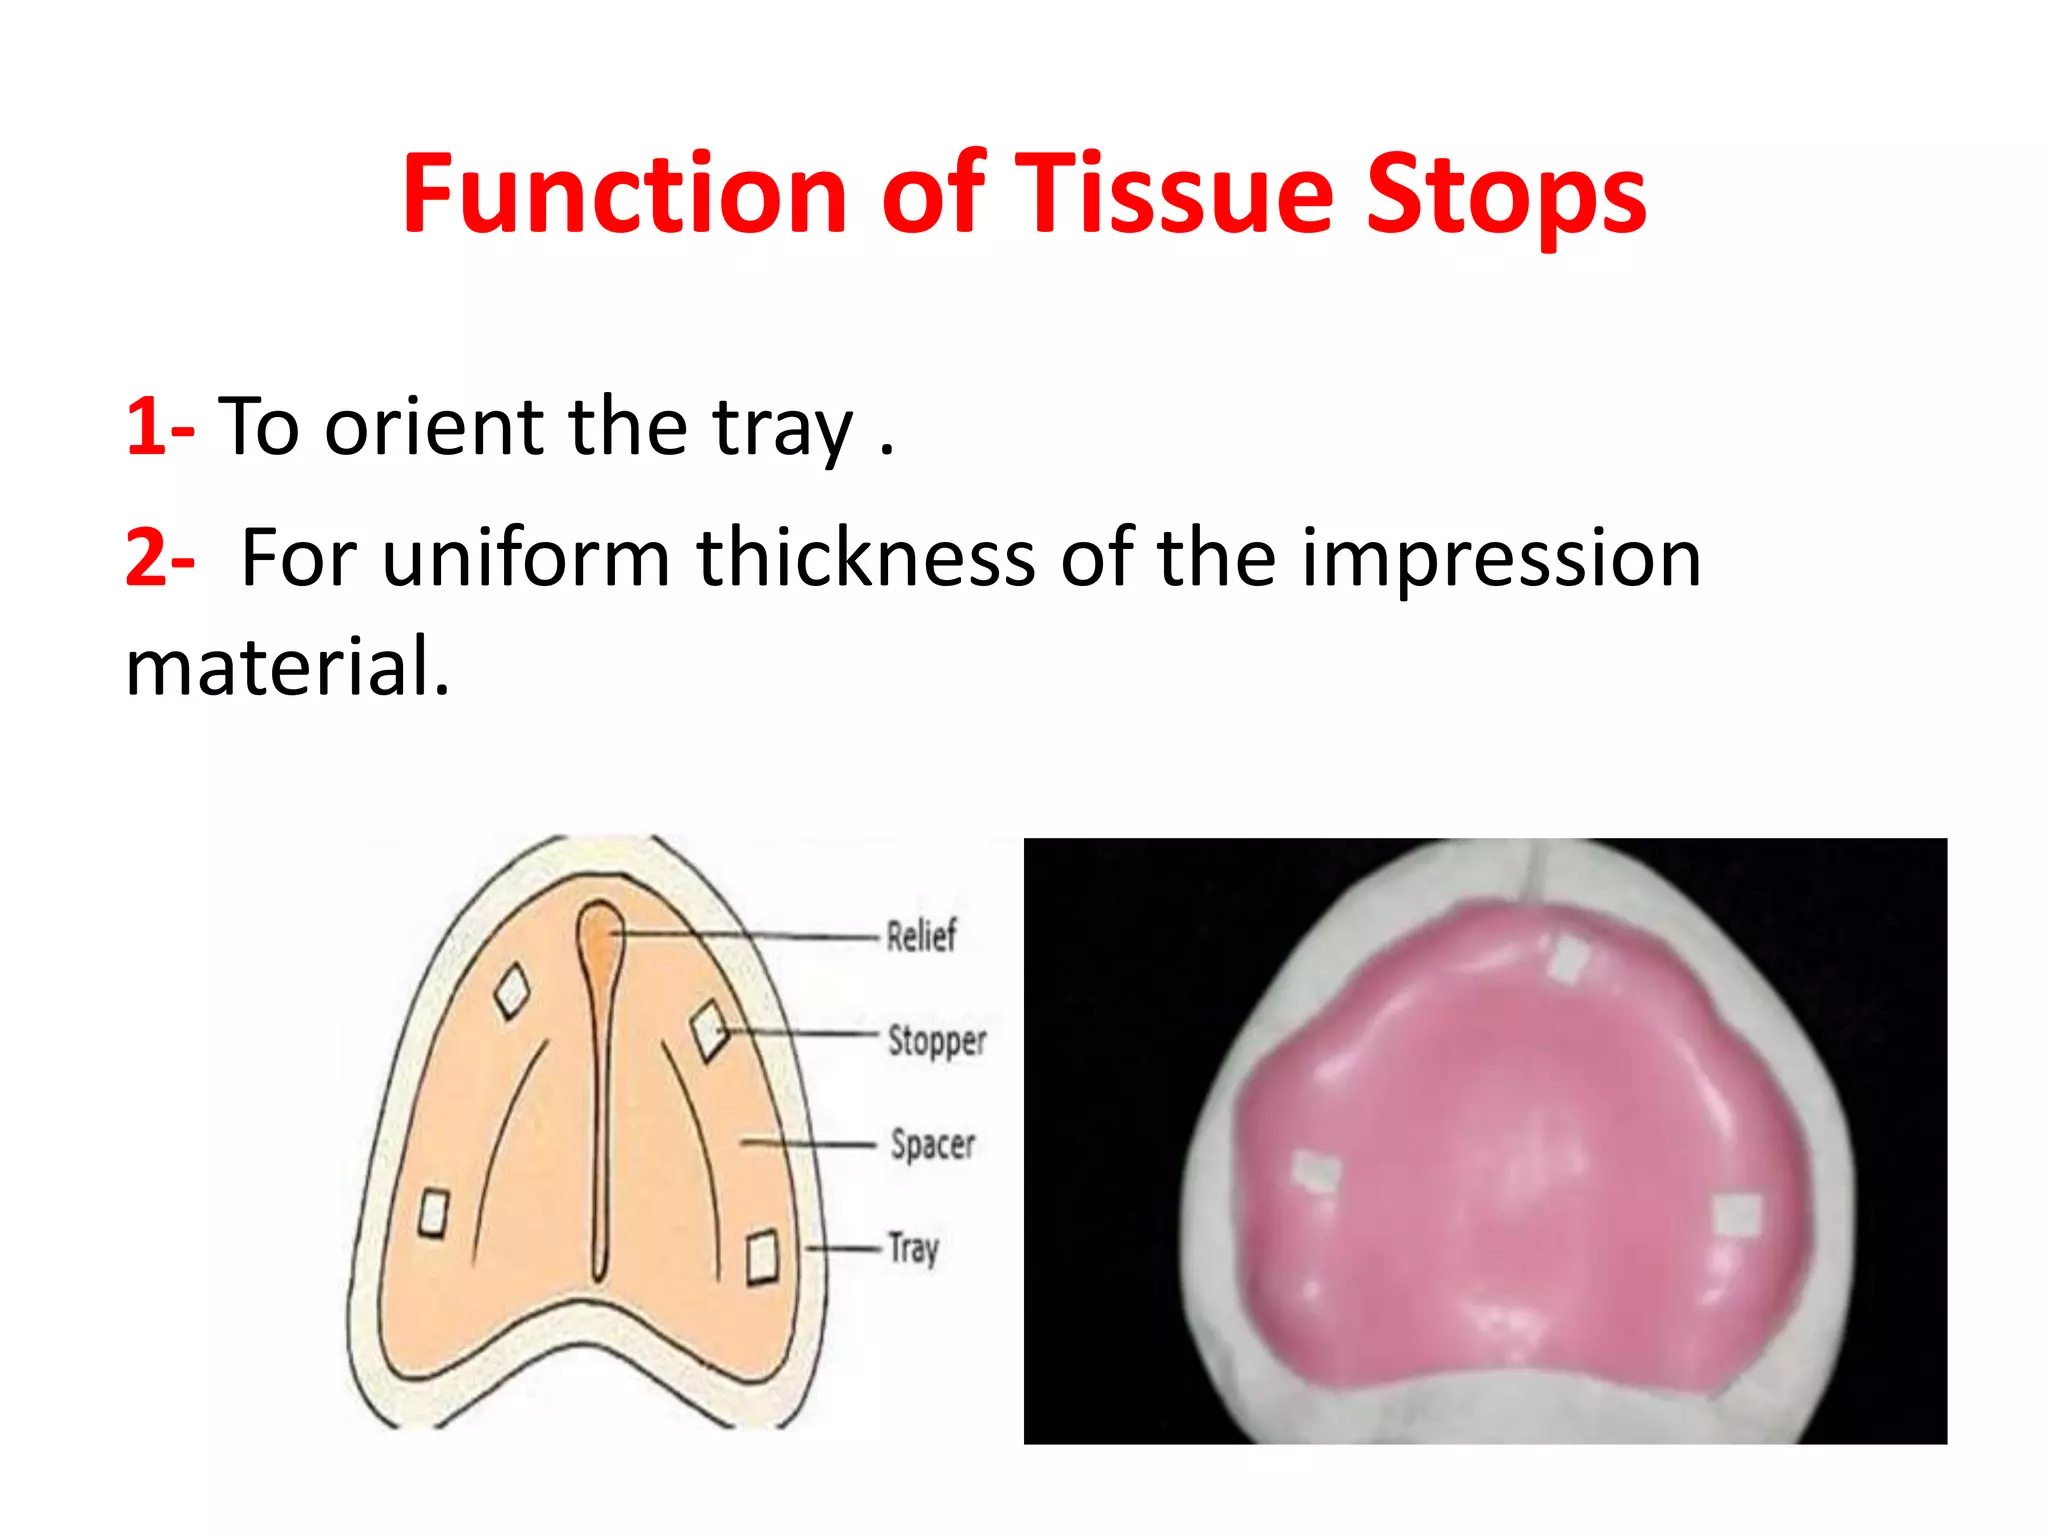
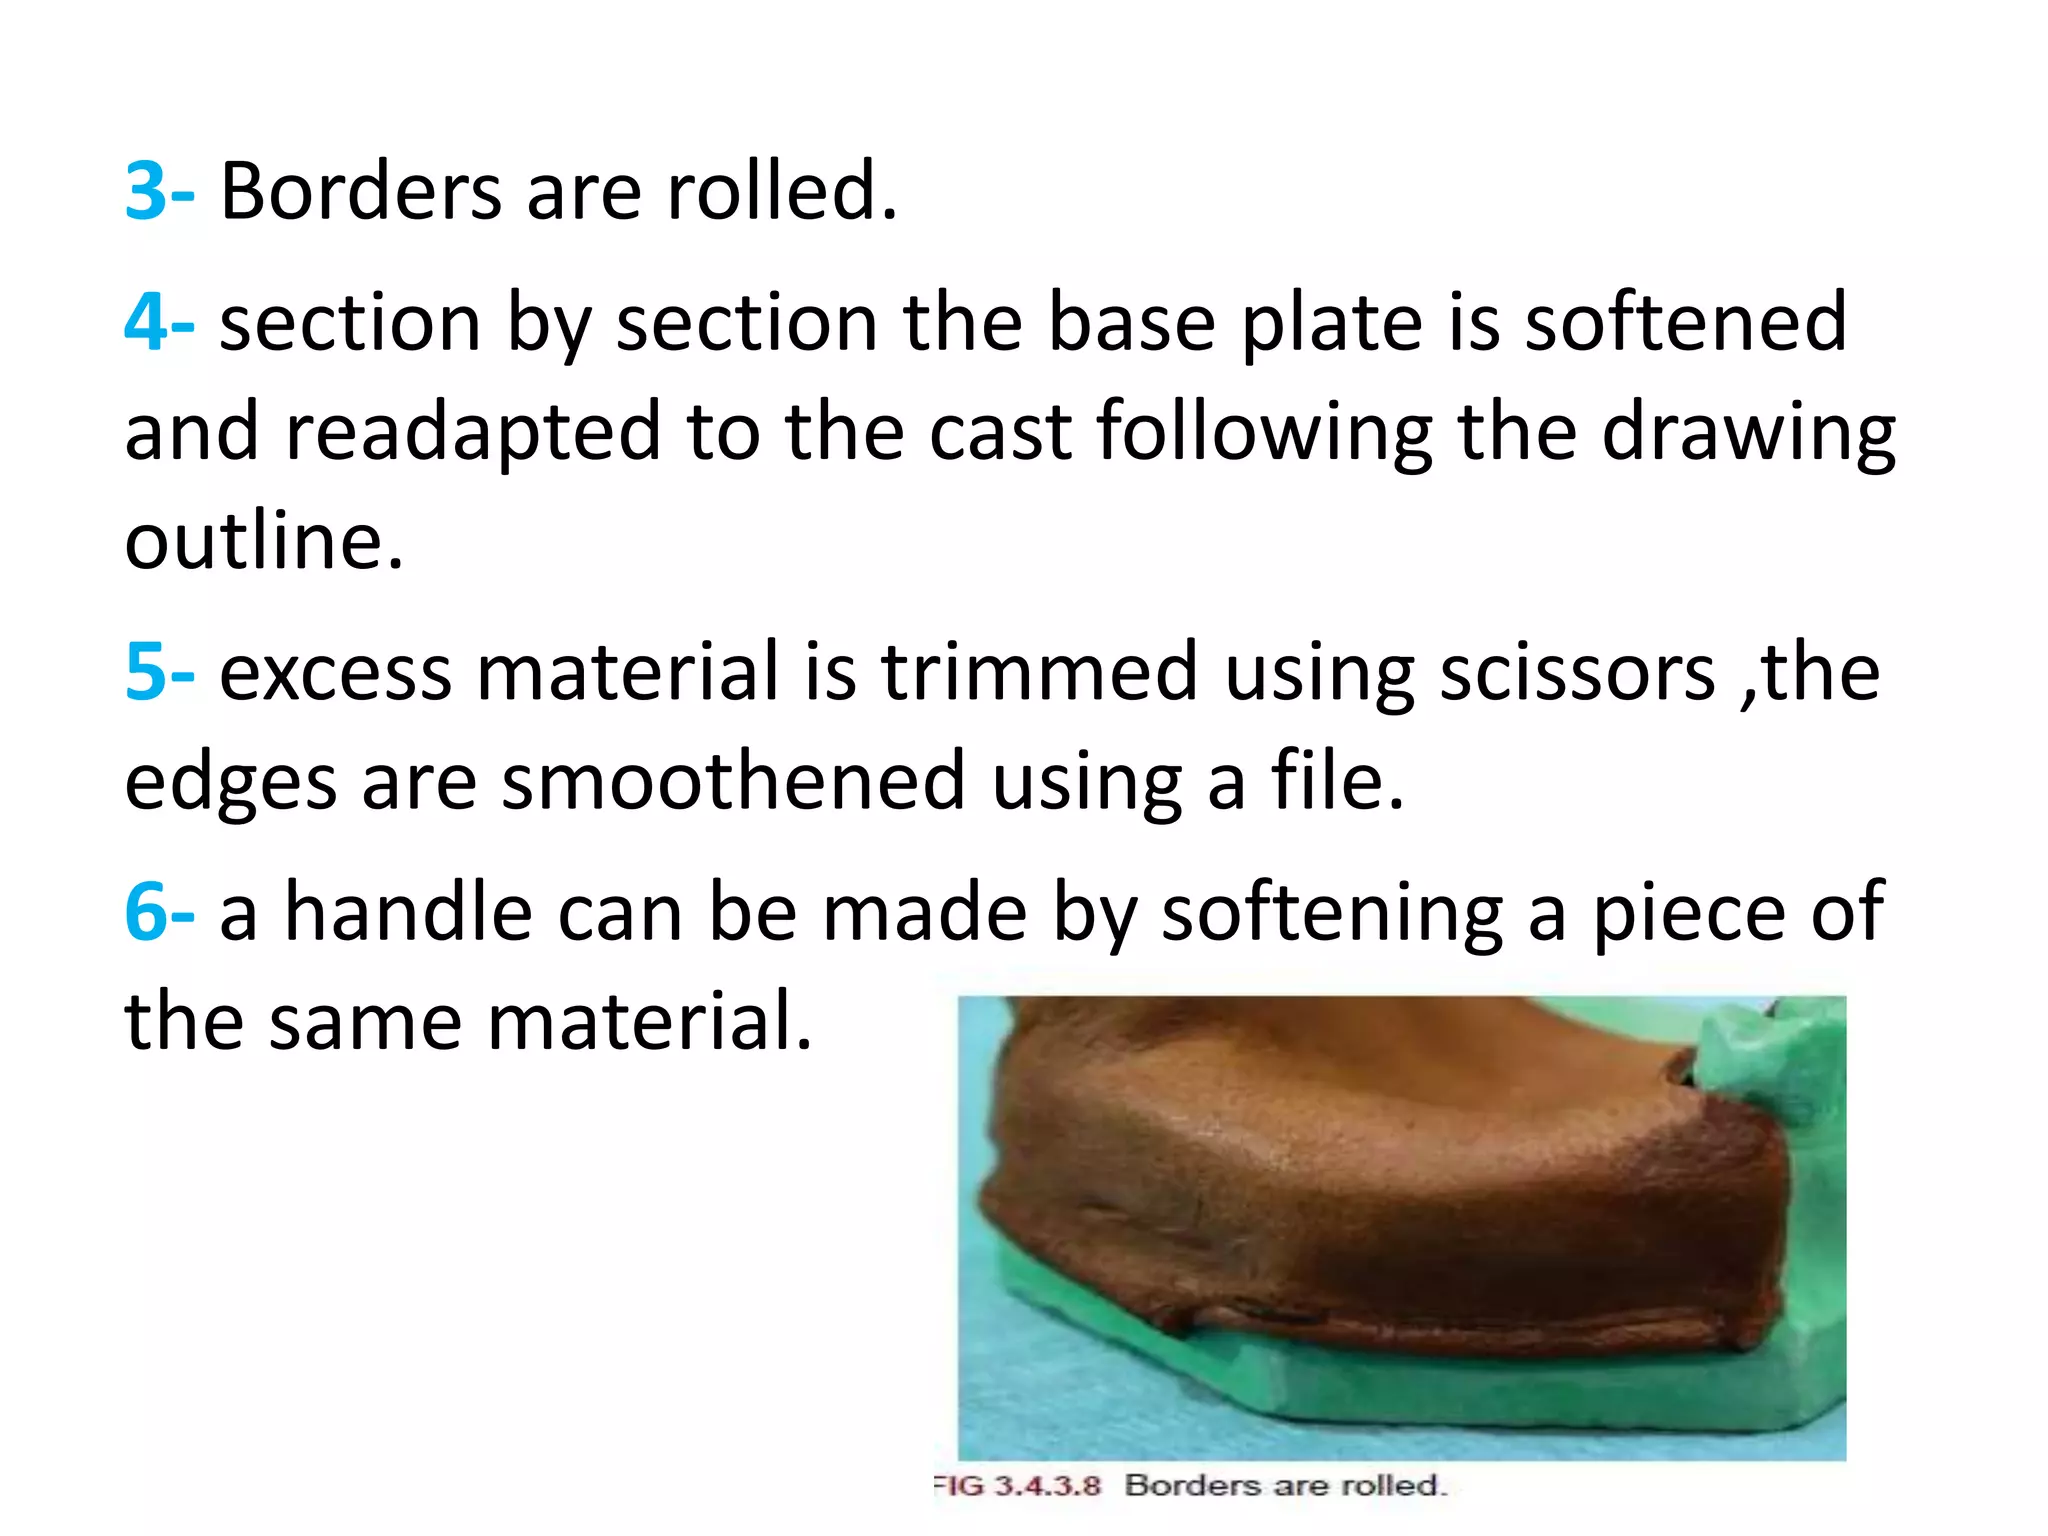
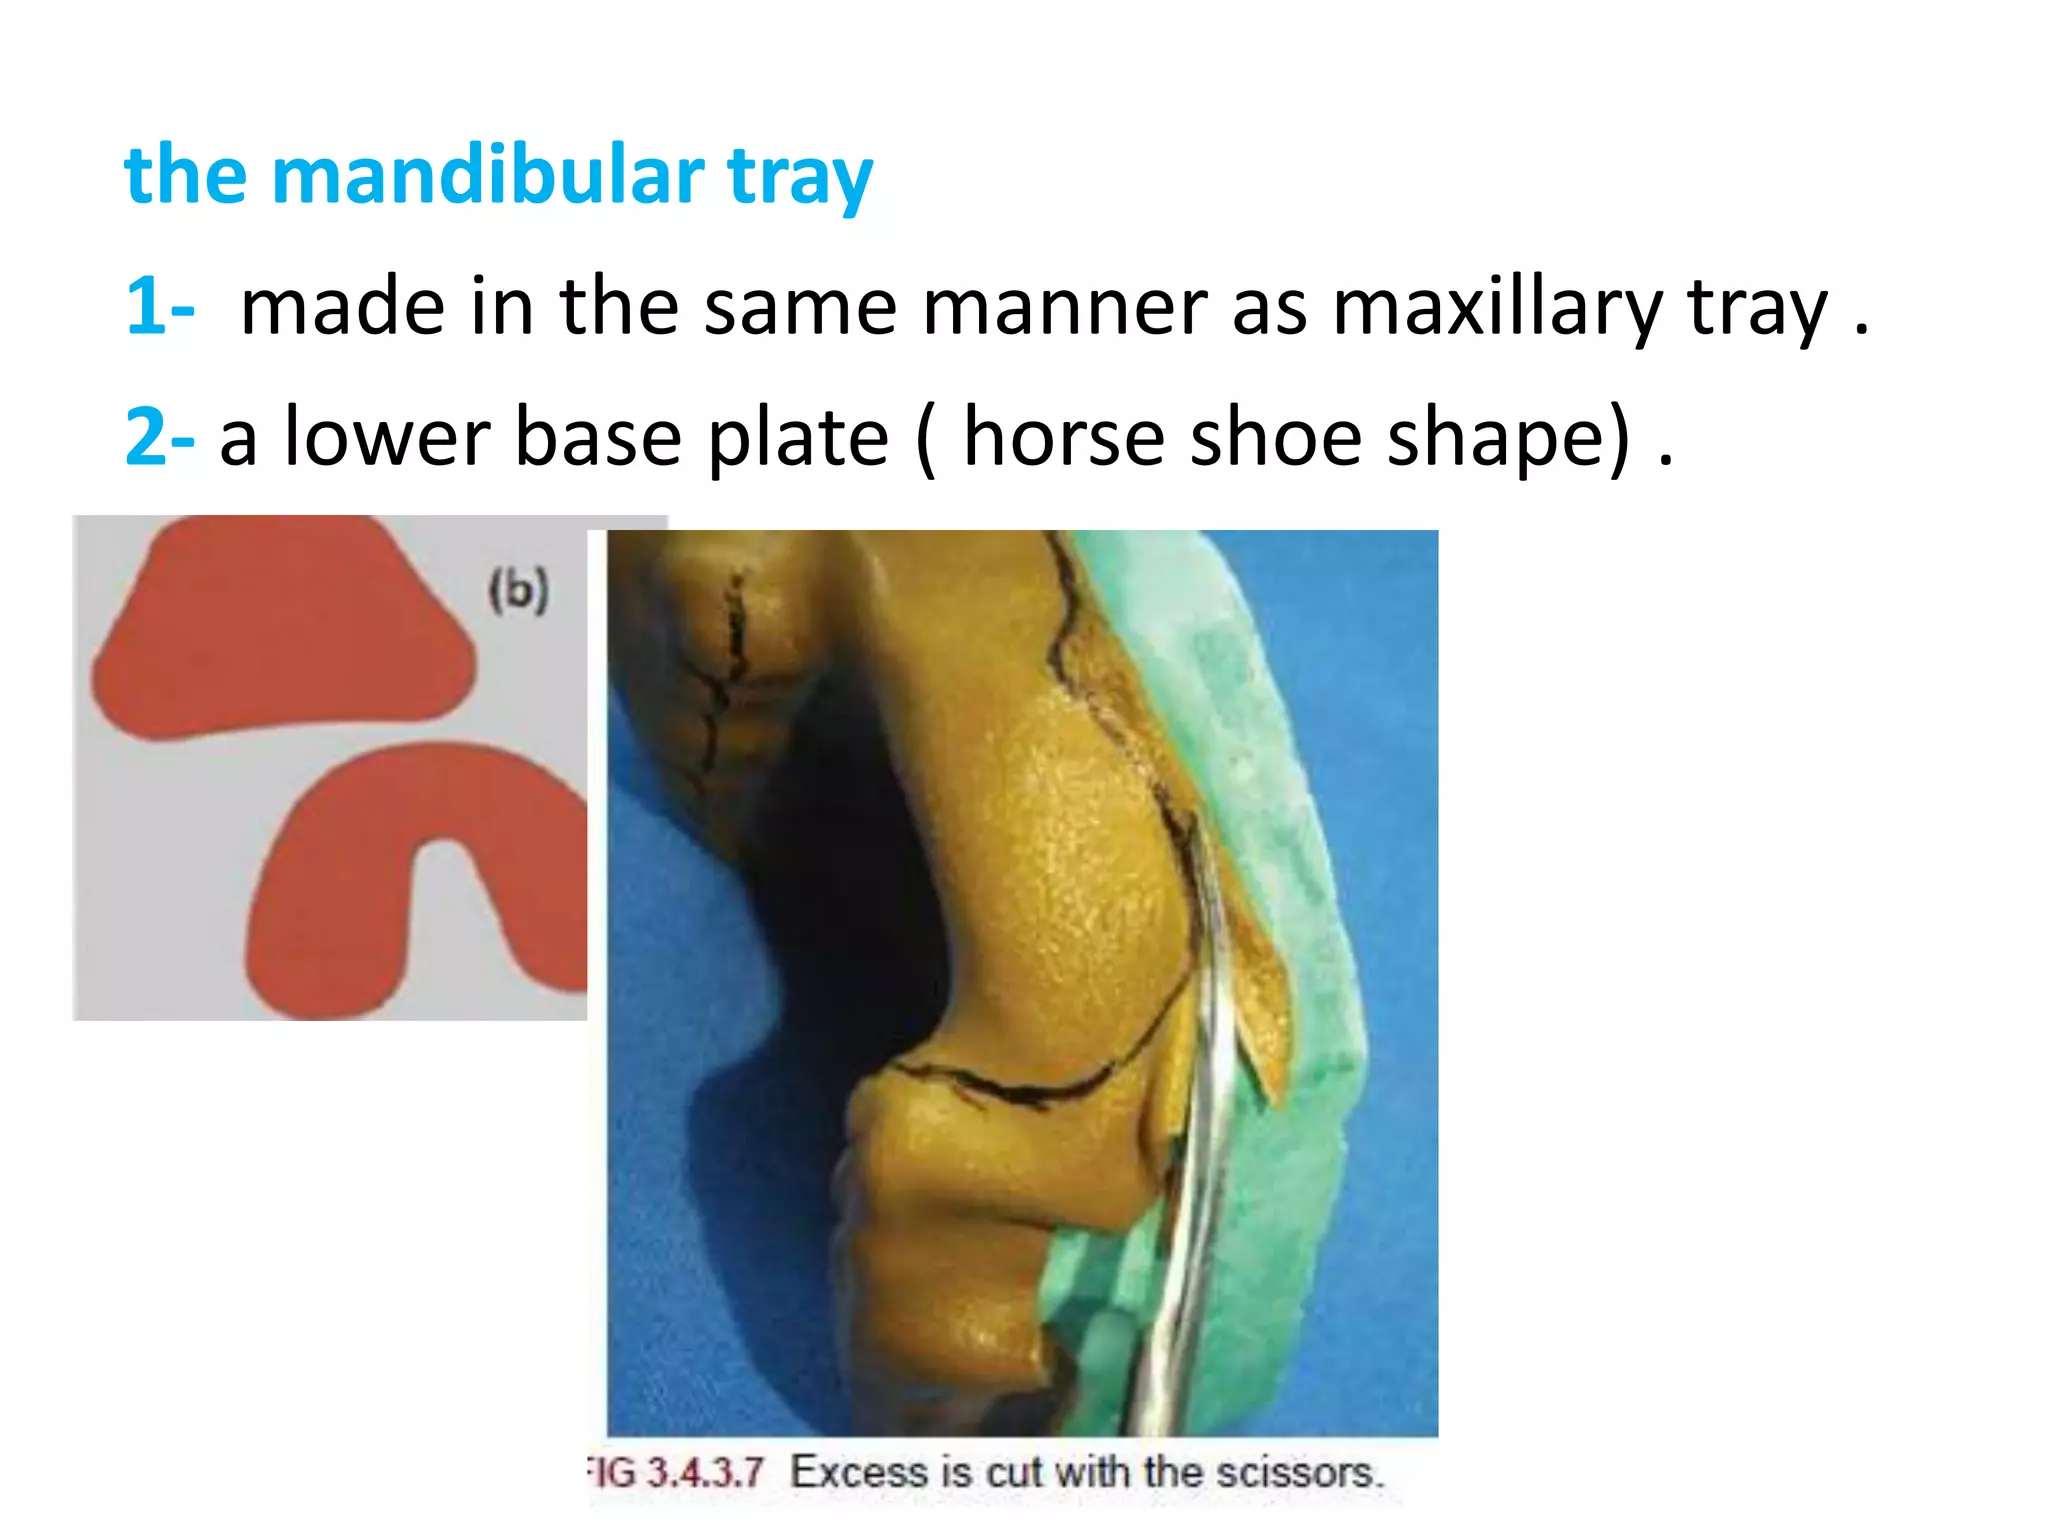
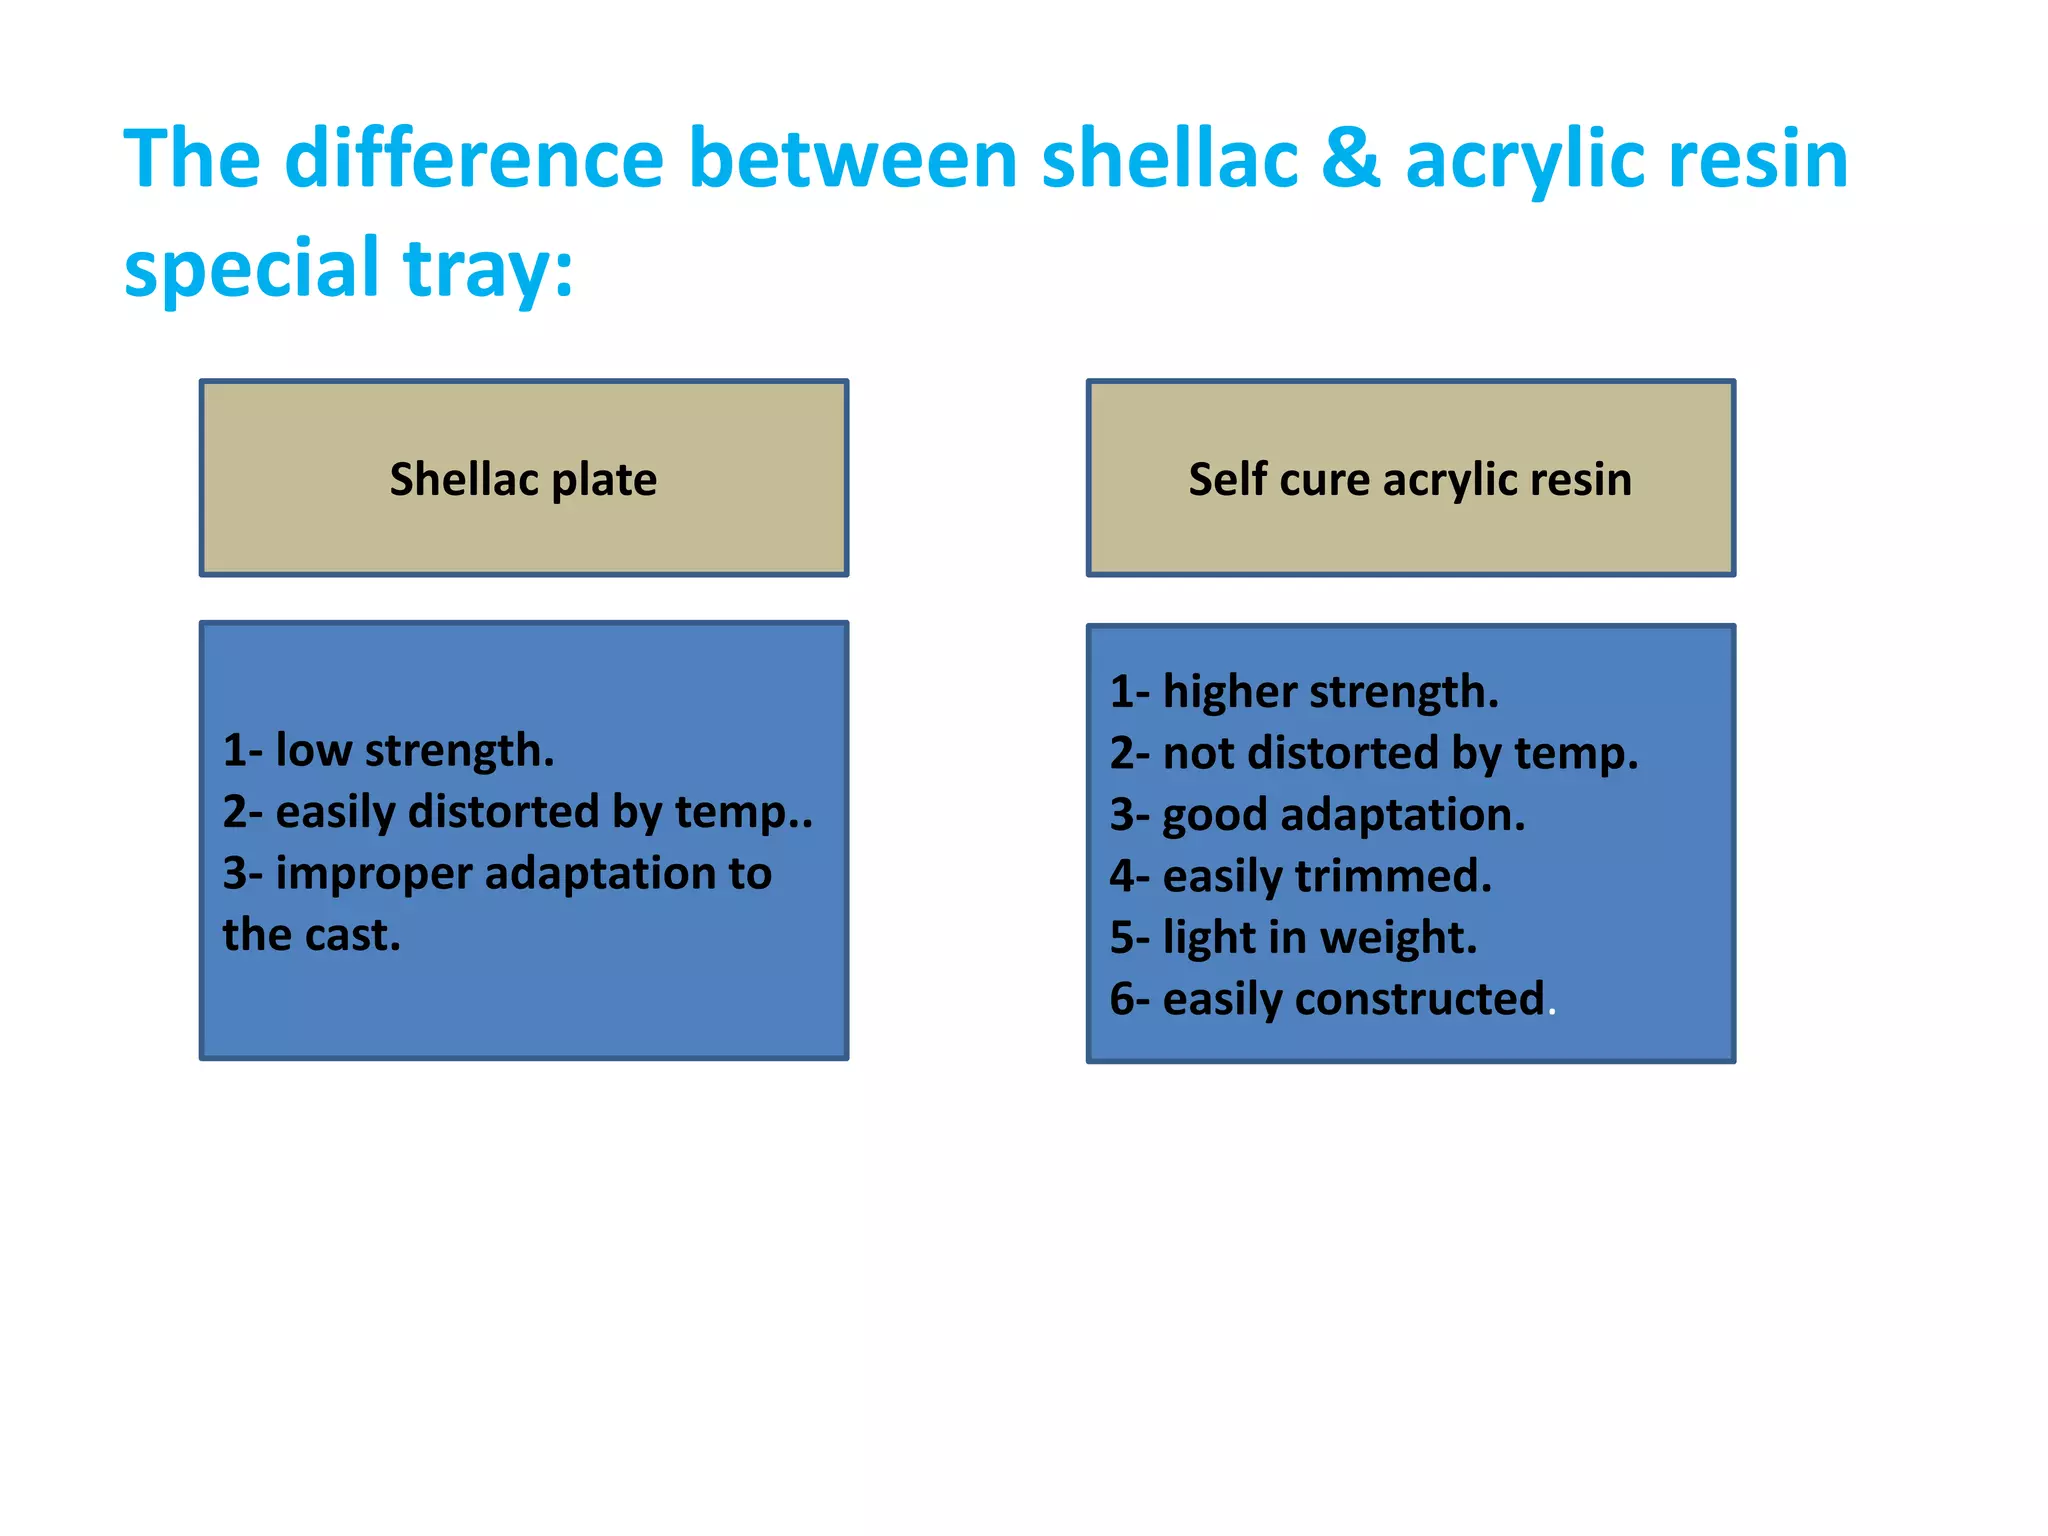
This document discusses the process of fabricating custom trays for dental impressions. It begins by defining a custom tray and listing criteria for their construction. There are two main methods described - constructing a resin tray using a finger adaptation or sprinkle-on technique, or a shellac tray. For resin trays, the process involves outlining features on the preliminary cast like sulci and borders, adapting a wax spacer, and then applying resin to the cast. For shellac trays, a preformed base is softened and adapted to the cast, with borders rolled and excess trimmed. The document compares advantages of resin versus shellac trays.
3. Custom ( Special ) Tray
Definition :
Is an individualized tray made from a cast
recovered from a preliminary impression.it used
in making a final impression.
4. Custom tray
Criteria for Special tray construction:
1. The tray should retain its shape throughout the
impression procedure and pouring of impression.
2. The borders must be under extended (2 mm)
from the vestibular.
3. The tray should be simple to construct in
minimal amount of time at reasonable cost.
4. The tray should be rigid and of sufficient
thickness (2-3 mm) that it will not fracture during
its use.
5. 5. The tray must have a handle for manipulation
and the handle (L-shape) must not interfere with
functional movement of the oral structures.
6. The tray must be smooth on its exposed
surfaces, and should have no sharp edges which
would injury the patient.
7. The tray should simulate the finished denture
in size and shape.
6. Advantages of special trays
1- More accurate impression.
2- less impression material required ( economy).
3- provides even thickness of impression material.
4- The work with special tray is more easier &
quicker than stock tray.
5- Special tray is more accurately adapted to the
oral vestibules.
6- Special tray are less bulky than stock tray
( comfortable for the pt).
7- it allows minimum thickness of imp. M.
7. Types of custom trays
the primary considerations are the amount of
undercut present and whether any areas of the
mucosa are mobile or unsupported:
1- Close-fitting trays.
2- Spaced trays( with or without stoppers).
3- Windowed trays.
8.
9.
10. Function of spacer
1- The spacer allows the tray to be properly
positioned in the mouth during border molding
procedure.
2- To allow the impression to have an even
thickness of impression material.
3- Prevent distortion of the material at final
stage.
12. Custom impression tray fabrication
for upper and lower edentulous
arches
Step I :
Outline of sulcus, relief & block out, custom tray
border, wax spacer and tissue stops.
Step II:
Adaptation of wax spacer.
Step III:
1- Fabrication of resin custom tray.
2- Fabrication of shellac custom tray.
13. Step I:
Outline of sulcus:
is marked in the preliminary cast with a black
colored pencil in the upper and lower
edentulous casts.
Outline Custom tray border:
• The periodontal probe is placed in the sulcus
and the 2 mm marking is done on the cast.
14. Tray outline done with the probe.
A . labial and buccal sulcus a 2 mm markings are done on the
cast with the probe along the with blue pencil.
15. Outline of tray border in the posterior area.
B. The posterior aspect of the maxillary cast is drawn at least
1 mm beyond the posterior vibrating line of posterior palatal
seal area ( post . Fovea palatini)( line extended from hamular
Outlining the
sulcus
Outlining the
custom tray
borders
Wax spacer +
tissue stops
16. Outline of the wax spacer:
• with a red- colored pencil the spacer outline is
done at a level of 2 mm short of the tray
outline.
A- in the maxillary cast:
the posterior aspect of it is limited to the
anterior vibrating line of the PPSA.
B- In the mandibular cast:
the buccal shelf area is not included in the
spacer design.
17. Outline of tissue stops:
In the maxillary cast:
• Four tissue stops are outlined.
• two in the anterior canine region and two in
the posterior molar region.
• A 4 × 4 mm square is outlined with a red-
coloured pencil.
In the mandibular cast:
• two tissue stops are outlined in the anterior
canine region only.
18.
19. Function of Tissue Stops
1- To orient the tray .
2- For uniform thickness of the impression
material.
20. Step II:
Adaptation of wax spacer
A- In the maxillary cast:
1- A half sheet of modelling wax is softened over
a Bunsen burner and is adapted on the cast
without any wrinkles.
21. 2- The wax spacer is
trimmed on the cast to
the derived outline with
a blade .
The tissue stop area is
also cut along the
outline drawn of 4 × 4
square dimensions.
22. 3- The outline of wax
spacer is done at a level
of 4 mm short of the
sulcus and in the
posterior aspect is
limited to the anterior
vibrating line.
23. Adaptation of wax spacer
B- in the mandibular cast:
• Same as in maxillary cast except in the tissue
stop area is cut along the outline drawn of 4 ×
4 square dimensions + the wax spacer is not
included in the buccal shelf area.
• the relief areas are covered with the wax
spacer. *To this step the same for close fit and
spaced special tray.
• Severe undercuts should be blocked out using
wax.
24.
25. Fabrication of resin custom tray
Armamentarium:
1. Maxillary and mandibular preliminary edentulous cast
2. Three coloured pencils
3. Modelling wax sheet
4. Wax carver
5. Wax knife
6. BP handle and blade no. 15
7. Separating medium like sodium alginate solution
8. Brush
9. Dappen dish
10. Self-cure resin
11. Cellophane sheet
12. Template
13. Roller or a glass plate
14. Porcelain cup with lid
15. Micromotor
16. Tungsten carbide bur
17. Sandpaper and mandrels
26. Step III:
1- Fabrication of resin custom tray
The technique of fabrication of resin custom tray
can be done by two Methods:
1. Finger adapted method.
2. Sprinkle on method.
27. 1- Finger adapted method
• is the most widely used technique of making
impression trays.
1- A separating medium of sodium alginate (cold
mould seal) is applied on them cast with a brush
in unidirectional stroke ….. to aid in easy
removal of the tray from the cast.
28. 2- The resin is mixed in the form of dough and is
rolled to the desired thickness ( 2mm) by either
pressing the material between two glass slabs or
by plastic roll .
29.
30. 3- adapted to the cast with finger pressure over
the cast from the center to the periphery to
prevent the formation of wrinkles.
4- Then cut the excess material with blade
before setting the material.
5- Then the material should be held in position
until complete polymerization.
6- the excess dough material is used to handle
fabrication.
31. 7- The handle :
• 3–4 mm thick, 8 mm in length , 8 mm in height.
• should be inclined at an angle of 45degrees.
• should not interfere with the lip movements of
the patients.
• The handle for the lower tray should be straight.
• Stabilizing handles one on either side are
positioned posteriorly.
8- The borders of the tray should be smoothened
with tungsten carbide bur followed by using
sandpaper.
35. 2-Sprinkle on method
• this technique is not widely used?!
there is no control of uniform thickness of resin
impression tray.
1- the polymer powder and the liquid monomer
are added in incremental layers.
36. 2- A small quantity of powder is sprinkled on a
particular area over the cast and liquid is
sprinkled over the powder.
3- Sprinkling drops of the liquid polymerizes the
powder.
4- This is continued till the entire ridge and the
associated landmarks are covered.
38. 2- Fabrication of shellac custom tray:
the maxillary tray
1- An upper base plate ( D shaped)
Is softened by passing both sides
Through the flame of a Bunsen
Burner.
2- it is then centered over the cast and middle
portion is closely adapted to the surface of the
cast & allowed to harden.
39. 3- Borders are rolled.
4- section by section the base plate is softened
and readapted to the cast following the drawing
outline.
5- excess material is trimmed using scissors ,the
edges are smoothened using a file.
6- a handle can be made by softening a piece of
the same material.
40. the mandibular tray
1- made in the same manner as maxillary tray .
2- a lower base plate ( horse shoe shape) .
41. The difference between shellac & acrylic resin
special tray:
Shellac plate Self cure acrylic resin
1- low strength.
2- easily distorted by temp..
3- improper adaptation to
the cast.
1- higher strength.
2- not distorted by temp.
3- good adaptation.
4- easily trimmed.
5- light in weight.
6- easily constructed.