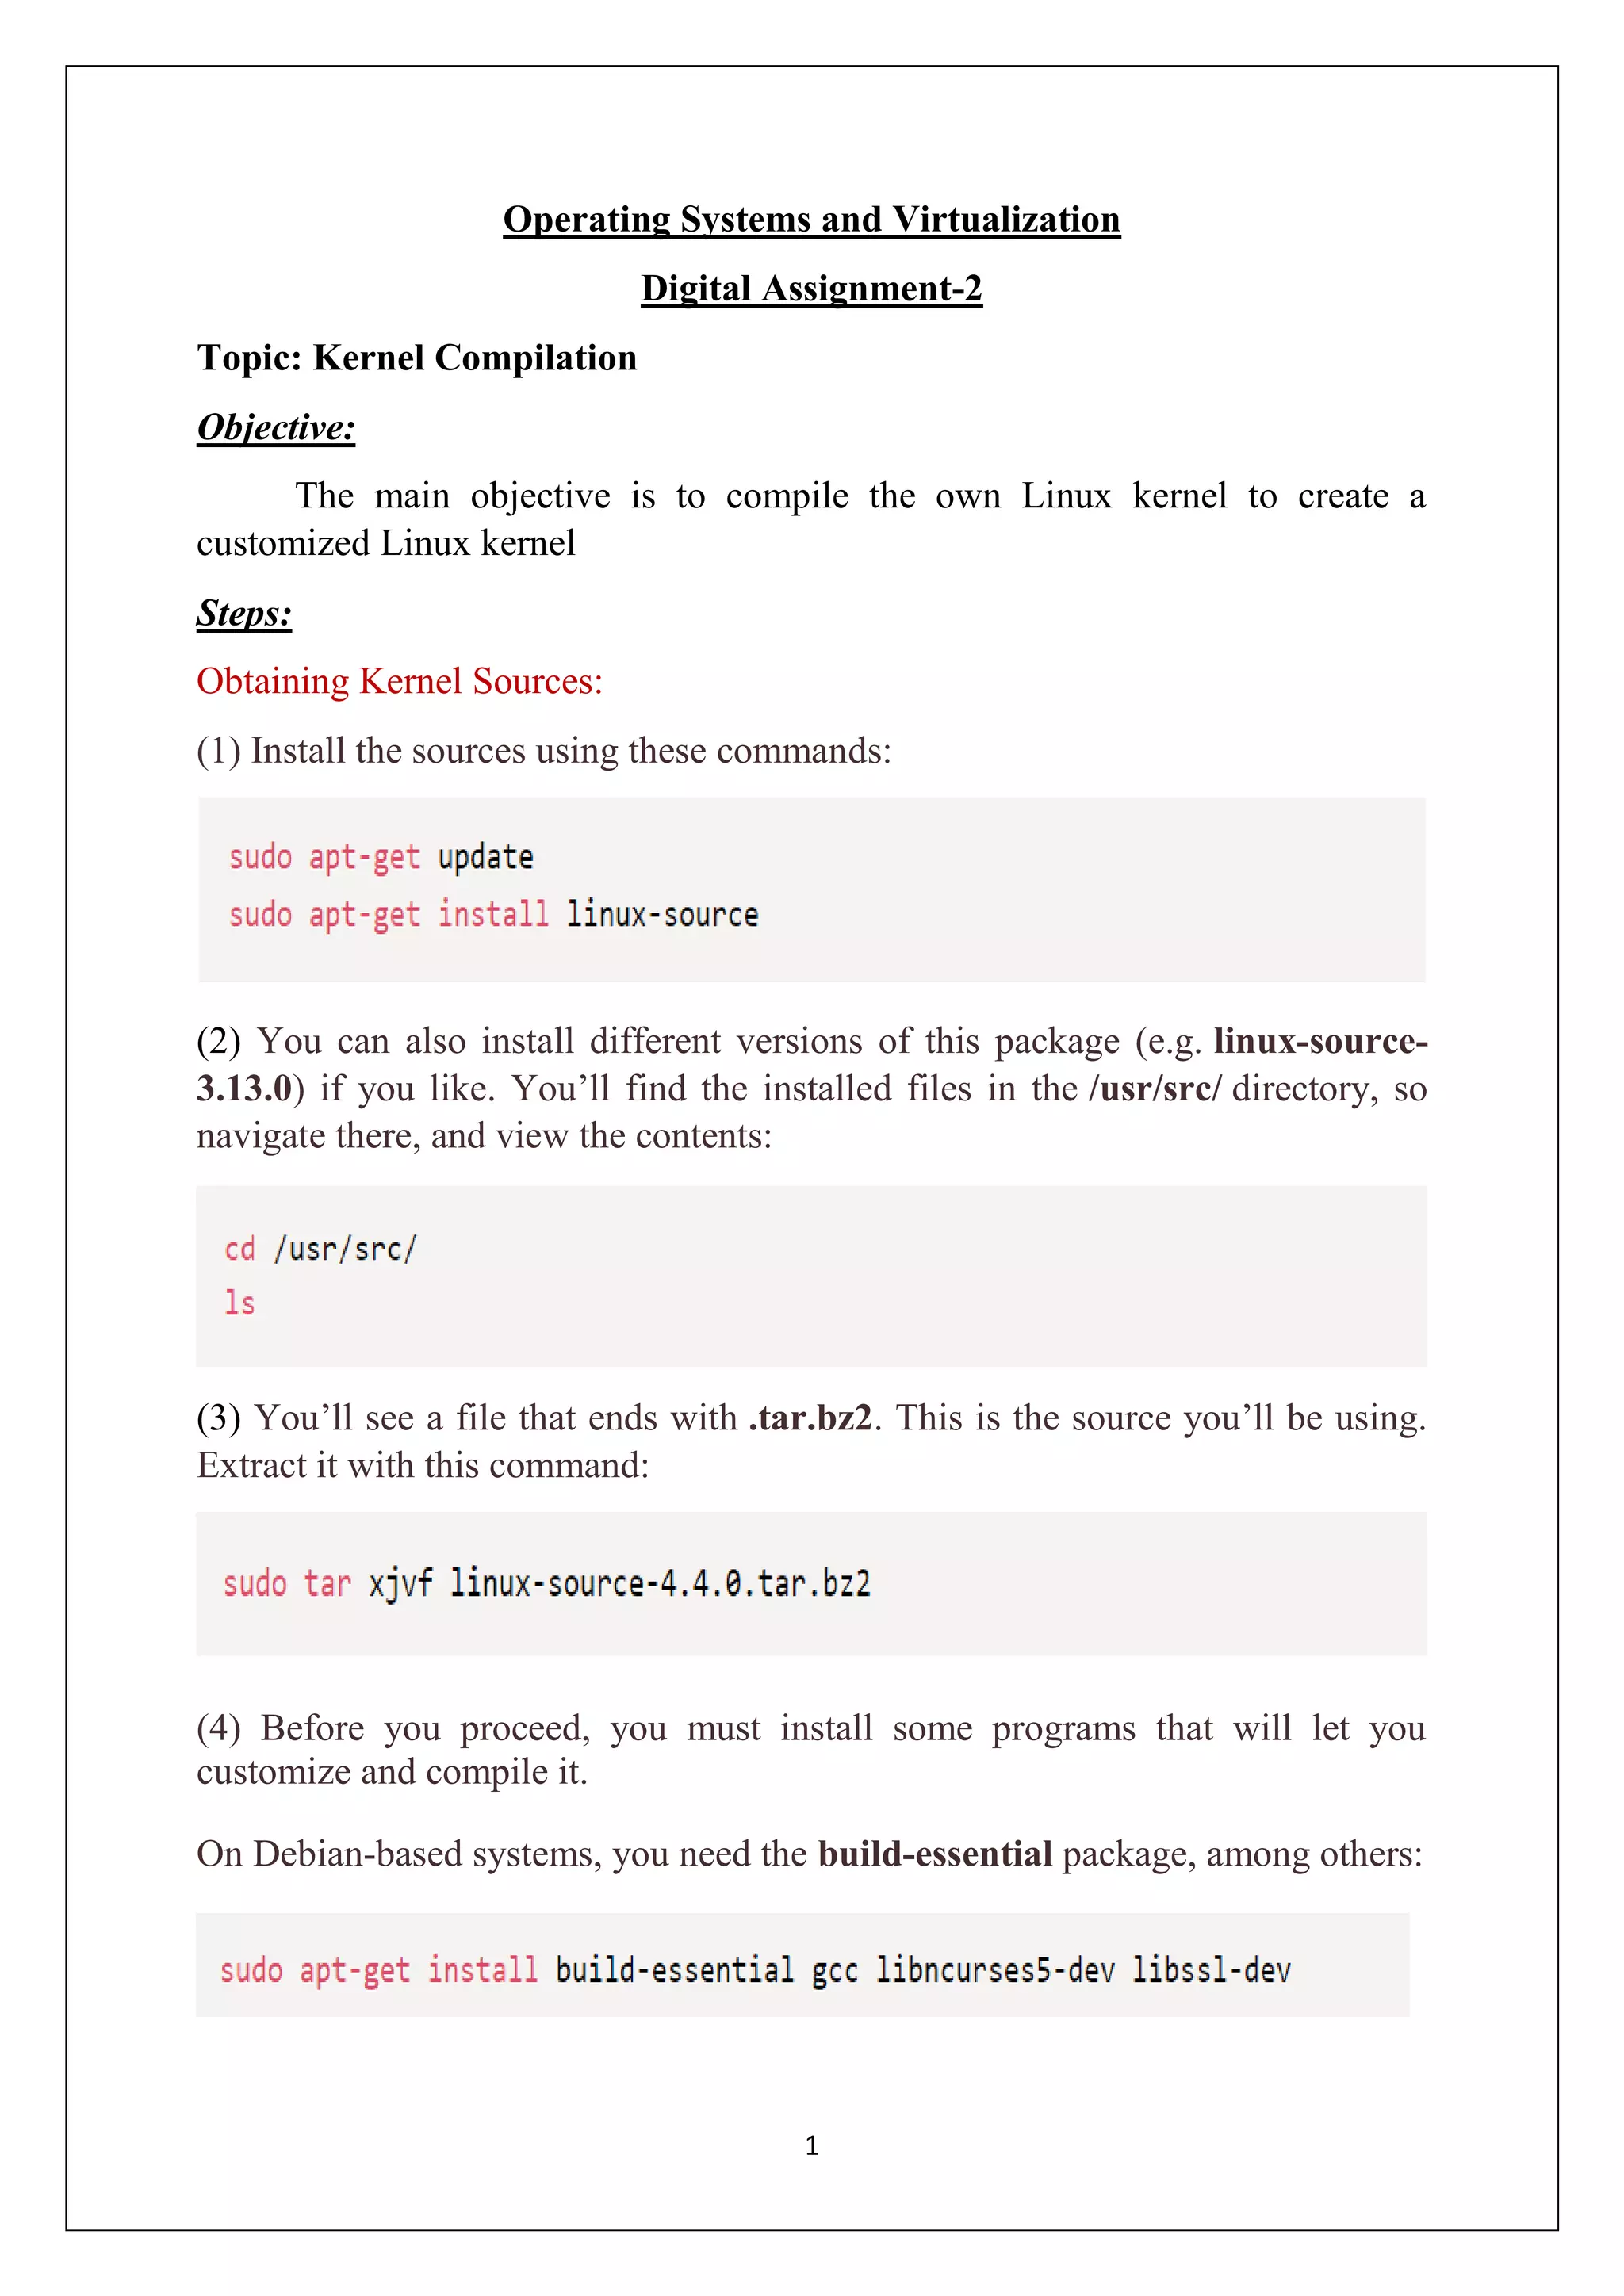
This document provides steps for compiling a custom Linux kernel from source. It outlines downloading kernel sources, installing necessary build tools, running make commands to configure and compile the kernel, and installing the new kernel so it can be selected at boot via GRUB. Key steps include using make localmodconfig to generate a .config file, navigating the kernel configuration menu to select options, compiling with make and make modules_install, and updating GRUB to add the new kernel to boot options. Testing showed the customized kernel did not detect USB devices whereas the existing kernel did.

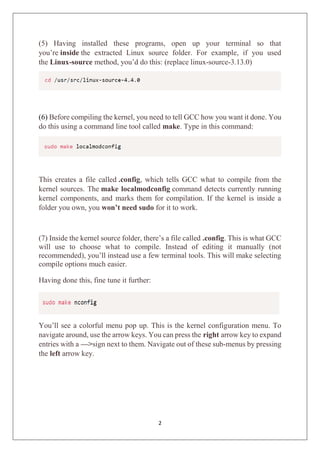
![3
You can toggle menu entries that have the <> or [] sign next to them by pressing
the space bar. This will cycle through the different menu options. If you see
a * or M inside, that specific kernel component will be compiled. The only
difference between them is that the M option will be loaded when it’s needed.
This can be useful if you’re compiling a driver for example, that won’t be used
often. In this exercise, We removed Plug and Play Support in Custom Kernel.
If you want to know more about what a specific switch does, press F2 over it.
You’ll see a helpful description of what you’re compiling.](https://image.slidesharecdn.com/customkernelcreation-181010234314/85/Custom-kernel-creation-3-320.jpg)


![Unix environment [autosaved]](https://cdn.slidesharecdn.com/ss_thumbnails/unixenvironmentautosaved-151015111303-lva1-app6892-thumbnail.jpg?width=640&height=640&fit=bounds)