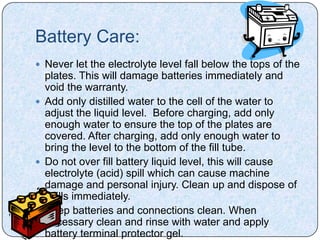
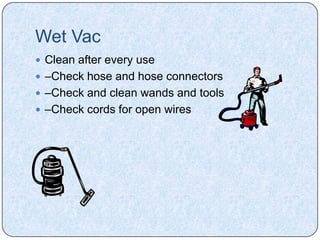
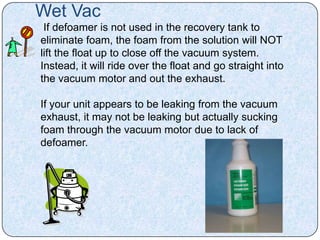
Custodial Equipment


         Take care of them,
         and they will take
            care of you
Equipment
 Equipment can cost hundreds of dollars, in some
  instances thousands of dollars, and for that
  reason is not something that can or will be
  replaced on a routine basis.
 The most common reason for equipment failure is
  user abuse and the lack of care and
  maintenance.
 If your equipment is being used properly and
  maintained before and after each use, you can
  expect to use your equipment for years without
  problems.
 Your equipment is the tool of your profession. You
  need to care for and protect what makes your
Safety
 Make sure the placement of your equipment or
  the electrical cord will not block a path and
  become a tripping hazard.
 Keep you equipment cleaned and maintained.
  Wipe down after every use, wind cords back in
  place, rinse out dirty water etc.
 Make sure cords are in good working order. DO
  NOT USE IF FRAYED OR DAMAGED. Report
  any maintenance issues to head custodian/plant
  manager.
 Make sure equipment nuts and bolts are
  tightened. If loose, UN PLUG MACHINE, and
  tighten bolts.
Safety
 Make sure electrical cords are grounded;
 beware of use of electrical equipment in
 water.

 Make sure ladders are in good repair.


 Do not use if bolts are loose or if ladder is
 bent and does not sit right.

 Do not step on top step.
Safety
 Disconnect any equipment when not in use.
  Disconnect other electrical devices when using
  liquids in area.
 Turn equipment OFF before disconnecting from
  electrical socket.
 When using floor machines, place handle in the
  lower position before starting.
 Make sure attachments are secure on machine
  before use.
Safety
 Use machinery only when authorized. Do not use
 a machine you have not been trained on.
Safety
 Use the right tools for the job. Do not use
 something for which it is not intended.
Safety
 Handle tools with care. Do not horseplay with
 them or throw them around.
Vacuums
Operating instructions:
 with the vacuum unplugged
  from the power source, turn
  vacuum on its side and check
  brush assembly for buildup of
  lint, hair or materials, remove as
  needed. Check belt, replace as
  needed.
 Inspect electrical cord for
  cracks or damage, also check
  plug for grounding prong, if
  missing or damaged inform your
  supervisor.
 Check dust collecting bag to
  insure it has been emptied.
 Make sure that large pieces of
  debris and metal objects have
Vacuums
 Turn on vacuum and proceed with vacuuming.
 After completion of your assignment, unplug the
 cord and wind it up loosely.

 DO NOT wind the cord up by wrapping it around
 your hand and elbow. DO NOT wind tightly
 around cord hooks.

 Empty dust collector bag daily.
Vacuums
 Never use a vacuum on wet or damp surfaces.
 Replace worn or frayed power cords
  immediately.
 Never allow someone to use vacuum without
  proper training.
 When vacuum is running, keep fingers, eyes,
  hair, clothing, etc., away from the intake suction
  ports or revolving brushes.
 Never leave vacuum running if unattended.
Vacuums
 Make sure plug is
  properly grounded.
 Always unplug
  vacuum from outlet
  prior to servicing or
  attaching accessories.
 Never yank a cord
  from the wall
  outlet.
 Always go to the wall
  to remove the
  plug from the wall.
AUTOMATIC SCRUBBER

 Auto Scrubbers are a fast and economical way to
scrub large area floors, such as, hallways,
cafeterias, and gymnasiums. This machine
removes the top layers of dirt that accumulates
on the floor surfaces during the day. In one simple
step, the floor may be cleaned, rinsed and
prepared for burnishing, polishing, or immediate
use.
AUTOMATIC SCRUBBER
 Sweep and dust mop the floor to remove dirt and debris before
    scrubbing. Accumulation of dust and debris on the floor will
    reduce cleaning performance.
   Place ―WET FLOOR‖ signs in area.
    Watch the level of liquid in recovery tank. When the vacuum air
    flow stops, you must turn off the vacuum motor and empty the
    recovery tank.
   Take the machine to an approved
    disposal drain and turn off all switches.
   Carefully lower and direct the drain hose into
    the drain. When the recovery tank is empty,
    rinse with water to get all of the dirt out of
    the tank then replace and tighten the drain plug.
   Place the drain hose back into the machine and
    secure the plug end into the clamp.
    Do not obstruct the lift
    mechanism or brush motors.
Safety Instructions:

 Always make sure the main switch and the
  vacuum motor switch are off before any
  inspections.
 Do not use hot water, over 125 degrees, in the
  tank.
 Never restrict the wet float shut off or vacuum
  motor; flooding and damage may occur.
 Be careful not to have hands or body parts
  between the machine and walls or other objects.
  Stay a safe distance away and slow when coming
  near solid objects or making sharp turns.
Use of the battery charger:

 Open the battery compartment lid. Do not close
  during charging operation. Hydrogen gas is
  formed when the batteries approach the full
  charge stage. This gas is explosive. Avoid any
  open flame or electric sparks near the batteries.
  To avoid accumulation of gas, be sure that the
  batteries receive good air circulation.
 Connect the charger plug into the machine firmly.
 Plug the battery charger into a normal electrical
  outlet. Note: The battery charger should be set on
  a flat, hard surface to insure that cooling air can
  circulate through the bottom louvers.
Battery Care:
 Never let the electrolyte level fall below the tops of the
  plates. This will damage batteries immediately and
  void the warranty.
 Add only distilled water to the cell of the water to
  adjust the liquid level. Before charging, add only
  enough water to ensure the top of the plates are
  covered. After charging, add only enough water to
  bring the level to the bottom of the fill tube.
 Do not over fill battery liquid level, this will cause
  electrolyte (acid) spill which can cause machine
  damage and personal injury. Clean up and dispose of
  spills immediately.
 Keep batteries and connections clean. When
  necessary clean and rinse with water and apply
  battery terminal protector gel.
Solution and recovery tanks:

 At the end of the day, empty all liquids from both
  the solution and recovery tank and rinse with
  clean water to prevent chemical residue buildup.
 Allow to air dry to prevent odors.
 Remove any residue from screen and float ball to
  ensure proper operation.
 Check clear lid for air tight seal—leave open to
  allow tank to air dry.
Pad Drivers or brushes

 Remove pads driver (brush) from machine after
  use.
 Rinse with clean water to prevent chemical
  residue buildup.
 Allow to air dry on a shelf or rack.
Squeegee Assembly
 Remove squeegee from machine.
 Rinse with clean water to prevent chemical
  residue buildup.
 Inspect the assembly, linkage and vacuum hose
  for wear, damage or obstruction. Repair or
  replace as needed.
 Remove debris from squeegee hose and entry to
  recovery tank.
 Allow to air dry on a shelf or rack.
Side-by-Side (SCRUBBER)

 The purpose of the floor machine is to maintain
 hard surface floors surfaces in a number of ways.
 It is most often used to scrub or strip tile floors in
 our schools but it is also used to polish floors,
 abrade hard wood surfaces and scrub concrete.
Operating Instructions:

 To attach brush, tilt machine back so that the bottom
    of the machine is exposed. Position the brushes’ three
    slots over the three lugs of the drive plate.
    Adjust handle height to the correct height for
    operator.
    To stat machine, hold the handle with both hands and
    depress start lever
    This machine is designed to move side to side. To
    move or guide to the right, raise the handle slightly.
    The higher the handle is raised, the faster the
    machine will move to the right. To move to the left,
    lower the handle.
    The electrical cord should be held over your shoulder
    to keep the cord out of the way of the machine.
    When storing your machine, always remove the pad
    and brush (driver).
Safety Instructions

 Never try to attach the brush when the motor is
    already engaged.
    Never turn on the machine when the handle is in
    the locked upright position.
    Do not leave the machine plugged in while it is
    unattended.
    Never plug into a wall socket with wet hands.
    Never plug into a wall socket when the balance
    of the cord is wrapped around the handle and
    switch lever.
Safety Instructions
 Never let an inexperienced person operate the
    machine without proper training.
   Never use an extension cord.
   Never put weights on the floor machine to
    increase the scrubbing affect.
   Never run the floor machine without a scrub pad
    or scrubbing brush.
   Never rest the machine in an upright position with
    the pad in place.
    Always unplug the machine before putting the
    drive block or scrubbing brush on, or when
    working on the machine.
ELECTRIC HIGH SPEED
BURNISHER

 The purpose of the high speed burnisher is to
 restore the gloss of the finish on the floor. This
 burnishing process fills in light scratches and
 imperfections in the finish as well s hardens the
 top coat of finish making it more durable and long
 lasting.
Operating Instructions:

 Adjust the handle to a comfortable working
    height.
   Make sure a buffing or finishing pad is installed
    before operating the machine.
    To start the machine, place both hands firmly on
    the handle grips with fingers around both triggers.
    Squeeze the triggers toward the hand grip. To
    stop machine, simply release triggers.
   When in operation, the machine should be guided
    gradually and smoothly without sudden or rough
    movements.
   Do not run over power cord.
Safety Instructions
 Do not use this machine for purposes other than
    buffing.
    The weight of the machine remains on the rear
    wheels during operation.
   Do not attempt to guide the machine from left to
    right as is done with a normal scrub machine.
    Move the machine forward at an even continuous
    rate.
   Do not hold the machine running in one spot too
    long or damages may result from heat.
   When not in use, loosely wind the power cord
    around the cord storage hook on the handle shaft
Safety Instructions:

Never start the machine without adjusting the
 handle and following starting instructions.
Safety Instructions
 Be very cautious of the fact that when the machine starts, handle
  must be secure in the operator’s hands to avoid losing control of
  the machine.
 Never operate the machine in a wet area and check that the
  machine is properly grounded.
 Never by pass the safety lock switch.
 Always disconnect the floor machine from the electrical outlet
  before servicing the machine or changing the pads. Replace
  damaged or exposed cord.
Wet Vac
Standard vacuum cleaners are not meant to be used on liquid spills. While you can
use them to vacuum up dirt, dust and other debris, liquids will often lead to issues
with the vacuum's internal workings.
Wet dry vacuums, however, are designed to be used with both wet and dry items.
Whether you need to clean up food crumbs or spilled liquids, a wet dry vac will do
the job.
Wet Vac
 Clean after every use
 –Check hose and hose connectors
 –Check and clean wands and tools
 –Check cords for open wires
Wet Vac
 If defoamer is not used in the recovery tank to
eliminate foam, the foam from the solution will NOT
lift the float up to close off the vacuum system.
Instead, it will ride over the float and go straight into
the vacuum motor and out the exhaust.

If your unit appears to be leaking from the vacuum
exhaust, it may not be leaking but actually sucking
foam through the vacuum motor due to lack of
defoamer.
Do not use,
unless you have been Trained

               The awkward
               moment when you
               realize they were
               never trained on
               the side-by-side.
All the equipment is clean and
          maintained

Custodial equipment

  • 1.
    Custodial Equipment Take care of them, and they will take care of you
  • 2.
    Equipment  Equipment cancost hundreds of dollars, in some instances thousands of dollars, and for that reason is not something that can or will be replaced on a routine basis.  The most common reason for equipment failure is user abuse and the lack of care and maintenance.  If your equipment is being used properly and maintained before and after each use, you can expect to use your equipment for years without problems.  Your equipment is the tool of your profession. You need to care for and protect what makes your
  • 3.
    Safety  Make surethe placement of your equipment or the electrical cord will not block a path and become a tripping hazard.  Keep you equipment cleaned and maintained. Wipe down after every use, wind cords back in place, rinse out dirty water etc.  Make sure cords are in good working order. DO NOT USE IF FRAYED OR DAMAGED. Report any maintenance issues to head custodian/plant manager.  Make sure equipment nuts and bolts are tightened. If loose, UN PLUG MACHINE, and tighten bolts.
  • 4.
    Safety  Make sureelectrical cords are grounded; beware of use of electrical equipment in water.  Make sure ladders are in good repair.  Do not use if bolts are loose or if ladder is bent and does not sit right.  Do not step on top step.
  • 5.
    Safety  Disconnect anyequipment when not in use. Disconnect other electrical devices when using liquids in area.  Turn equipment OFF before disconnecting from electrical socket.  When using floor machines, place handle in the lower position before starting.  Make sure attachments are secure on machine before use.
  • 6.
    Safety  Use machineryonly when authorized. Do not use a machine you have not been trained on.
  • 7.
    Safety  Use theright tools for the job. Do not use something for which it is not intended.
  • 8.
    Safety  Handle toolswith care. Do not horseplay with them or throw them around.
  • 9.
    Vacuums Operating instructions:  withthe vacuum unplugged from the power source, turn vacuum on its side and check brush assembly for buildup of lint, hair or materials, remove as needed. Check belt, replace as needed.  Inspect electrical cord for cracks or damage, also check plug for grounding prong, if missing or damaged inform your supervisor.  Check dust collecting bag to insure it has been emptied.  Make sure that large pieces of debris and metal objects have
  • 10.
    Vacuums  Turn onvacuum and proceed with vacuuming. After completion of your assignment, unplug the cord and wind it up loosely.  DO NOT wind the cord up by wrapping it around your hand and elbow. DO NOT wind tightly around cord hooks.  Empty dust collector bag daily.
  • 11.
    Vacuums  Never usea vacuum on wet or damp surfaces.  Replace worn or frayed power cords immediately.  Never allow someone to use vacuum without proper training.  When vacuum is running, keep fingers, eyes, hair, clothing, etc., away from the intake suction ports or revolving brushes.  Never leave vacuum running if unattended.
  • 12.
    Vacuums  Make sureplug is properly grounded.  Always unplug vacuum from outlet prior to servicing or attaching accessories.  Never yank a cord from the wall outlet.  Always go to the wall to remove the plug from the wall.
  • 13.
    AUTOMATIC SCRUBBER AutoScrubbers are a fast and economical way to scrub large area floors, such as, hallways, cafeterias, and gymnasiums. This machine removes the top layers of dirt that accumulates on the floor surfaces during the day. In one simple step, the floor may be cleaned, rinsed and prepared for burnishing, polishing, or immediate use.
  • 14.
    AUTOMATIC SCRUBBER  Sweepand dust mop the floor to remove dirt and debris before scrubbing. Accumulation of dust and debris on the floor will reduce cleaning performance.  Place ―WET FLOOR‖ signs in area.  Watch the level of liquid in recovery tank. When the vacuum air flow stops, you must turn off the vacuum motor and empty the recovery tank.  Take the machine to an approved disposal drain and turn off all switches.  Carefully lower and direct the drain hose into the drain. When the recovery tank is empty, rinse with water to get all of the dirt out of the tank then replace and tighten the drain plug.  Place the drain hose back into the machine and secure the plug end into the clamp.  Do not obstruct the lift mechanism or brush motors.
  • 15.
    Safety Instructions:  Alwaysmake sure the main switch and the vacuum motor switch are off before any inspections.  Do not use hot water, over 125 degrees, in the tank.  Never restrict the wet float shut off or vacuum motor; flooding and damage may occur.  Be careful not to have hands or body parts between the machine and walls or other objects. Stay a safe distance away and slow when coming near solid objects or making sharp turns.
  • 16.
    Use of thebattery charger:  Open the battery compartment lid. Do not close during charging operation. Hydrogen gas is formed when the batteries approach the full charge stage. This gas is explosive. Avoid any open flame or electric sparks near the batteries. To avoid accumulation of gas, be sure that the batteries receive good air circulation.  Connect the charger plug into the machine firmly.  Plug the battery charger into a normal electrical outlet. Note: The battery charger should be set on a flat, hard surface to insure that cooling air can circulate through the bottom louvers.
  • 17.
    Battery Care:  Neverlet the electrolyte level fall below the tops of the plates. This will damage batteries immediately and void the warranty.  Add only distilled water to the cell of the water to adjust the liquid level. Before charging, add only enough water to ensure the top of the plates are covered. After charging, add only enough water to bring the level to the bottom of the fill tube.  Do not over fill battery liquid level, this will cause electrolyte (acid) spill which can cause machine damage and personal injury. Clean up and dispose of spills immediately.  Keep batteries and connections clean. When necessary clean and rinse with water and apply battery terminal protector gel.
  • 18.
    Solution and recoverytanks:  At the end of the day, empty all liquids from both the solution and recovery tank and rinse with clean water to prevent chemical residue buildup.  Allow to air dry to prevent odors.  Remove any residue from screen and float ball to ensure proper operation.  Check clear lid for air tight seal—leave open to allow tank to air dry.
  • 19.
    Pad Drivers orbrushes  Remove pads driver (brush) from machine after use.  Rinse with clean water to prevent chemical residue buildup.  Allow to air dry on a shelf or rack.
  • 20.
    Squeegee Assembly  Removesqueegee from machine.  Rinse with clean water to prevent chemical residue buildup.  Inspect the assembly, linkage and vacuum hose for wear, damage or obstruction. Repair or replace as needed.  Remove debris from squeegee hose and entry to recovery tank.  Allow to air dry on a shelf or rack.
  • 21.
    Side-by-Side (SCRUBBER)  Thepurpose of the floor machine is to maintain hard surface floors surfaces in a number of ways. It is most often used to scrub or strip tile floors in our schools but it is also used to polish floors, abrade hard wood surfaces and scrub concrete.
  • 22.
    Operating Instructions:  Toattach brush, tilt machine back so that the bottom of the machine is exposed. Position the brushes’ three slots over the three lugs of the drive plate.  Adjust handle height to the correct height for operator.  To stat machine, hold the handle with both hands and depress start lever  This machine is designed to move side to side. To move or guide to the right, raise the handle slightly. The higher the handle is raised, the faster the machine will move to the right. To move to the left, lower the handle.  The electrical cord should be held over your shoulder to keep the cord out of the way of the machine.  When storing your machine, always remove the pad and brush (driver).
  • 23.
    Safety Instructions  Nevertry to attach the brush when the motor is already engaged.  Never turn on the machine when the handle is in the locked upright position.  Do not leave the machine plugged in while it is unattended.  Never plug into a wall socket with wet hands.  Never plug into a wall socket when the balance of the cord is wrapped around the handle and switch lever.
  • 24.
    Safety Instructions  Neverlet an inexperienced person operate the machine without proper training.  Never use an extension cord.  Never put weights on the floor machine to increase the scrubbing affect.  Never run the floor machine without a scrub pad or scrubbing brush.  Never rest the machine in an upright position with the pad in place.  Always unplug the machine before putting the drive block or scrubbing brush on, or when working on the machine.
  • 25.
    ELECTRIC HIGH SPEED BURNISHER The purpose of the high speed burnisher is to restore the gloss of the finish on the floor. This burnishing process fills in light scratches and imperfections in the finish as well s hardens the top coat of finish making it more durable and long lasting.
  • 26.
    Operating Instructions:  Adjustthe handle to a comfortable working height.  Make sure a buffing or finishing pad is installed before operating the machine.  To start the machine, place both hands firmly on the handle grips with fingers around both triggers. Squeeze the triggers toward the hand grip. To stop machine, simply release triggers.  When in operation, the machine should be guided gradually and smoothly without sudden or rough movements.  Do not run over power cord.
  • 27.
    Safety Instructions  Donot use this machine for purposes other than buffing.  The weight of the machine remains on the rear wheels during operation.  Do not attempt to guide the machine from left to right as is done with a normal scrub machine. Move the machine forward at an even continuous rate.  Do not hold the machine running in one spot too long or damages may result from heat.  When not in use, loosely wind the power cord around the cord storage hook on the handle shaft
  • 28.
    Safety Instructions: Never startthe machine without adjusting the handle and following starting instructions.
  • 29.
    Safety Instructions  Bevery cautious of the fact that when the machine starts, handle must be secure in the operator’s hands to avoid losing control of the machine.  Never operate the machine in a wet area and check that the machine is properly grounded.  Never by pass the safety lock switch.  Always disconnect the floor machine from the electrical outlet before servicing the machine or changing the pads. Replace damaged or exposed cord.
  • 30.
    Wet Vac Standard vacuumcleaners are not meant to be used on liquid spills. While you can use them to vacuum up dirt, dust and other debris, liquids will often lead to issues with the vacuum's internal workings. Wet dry vacuums, however, are designed to be used with both wet and dry items. Whether you need to clean up food crumbs or spilled liquids, a wet dry vac will do the job.
  • 31.
    Wet Vac  Cleanafter every use  –Check hose and hose connectors  –Check and clean wands and tools  –Check cords for open wires
  • 32.
    Wet Vac Ifdefoamer is not used in the recovery tank to eliminate foam, the foam from the solution will NOT lift the float up to close off the vacuum system. Instead, it will ride over the float and go straight into the vacuum motor and out the exhaust. If your unit appears to be leaking from the vacuum exhaust, it may not be leaking but actually sucking foam through the vacuum motor due to lack of defoamer.
  • 33.
    Do not use, unlessyou have been Trained The awkward moment when you realize they were never trained on the side-by-side.
  • 34.
    All the equipmentis clean and maintained