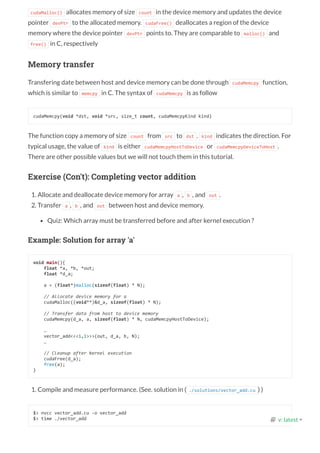
/
C
void c_hello(){
printf("Hello World!n");
}
int main() {
c_hello();
return 0;
}
Docs » Tutorials » Tutorial 01: Say Hello to CUDA
Tutorial 01: Say Hello to CUDA
Introduction
This tutorial is an introduction for writing your rst CUDA C program and of oad computation
to a GPU. We will use CUDA runtime API throughout this tutorial.
CUDA is a platform and programming model for CUDA-enabled GPUs. The platform exposes
GPUs for general purpose computing. CUDA provides C/C++ language extension and APIs for
programming and managing GPUs.
In CUDA programming, both CPUs and GPUs are used for computing. Typically, we refer to
CPU and GPU system as host and device, respectively. CPUs and GPUs are separated
platforms with their own memory space. Typically, we run serial workload on CPU and of oad
parallel computation to GPUs.
A quick comparison between CUDA and C
Following table compares a hello world program in C and CUDA side-by-side.
CUDA
__global__ void cuda_hello(){
printf("Hello World from GPU!n");
}
int main() {
cuda_hello<<<1,1>>>();
return 0;
}
The major difference between C and CUDA implementation is __global__ speci er and
<<<...>>> syntax. The __global__ speci er indicates a function that runs on device (GPU).
Such function can be called through host code, e.g. the main() function in the example, and is
also known as "kernels".
When a kernel is called, its execution con guration is provided through <<<...>>> syntax, e.g.
cuda_hello<<<1,1>>>() . In CUDA terminology, this is called "kernel launch". We will discuss
about the parameter (1,1) later in this tutorial 02.
Compiling CUDA programs
  v: latest 
/
Compiling a CUDA program is similar to C program. NVIDIA provides a CUDA compiler called
nvcc in the CUDA toolkit to compile CUDA code, typically stored in a le with extension .cu .
For example
$> nvcc hello.cu -o hello
You might see following warning when compiling a CUDA program using above command
This warning can be ignored as of now.
Putting things in actions.
The CUDA hello world example does nothing, and even if the program is compiled, nothing will
show up on screen. To get things into action, we will looks at vector addition.
Following is an example of vector addition implemented in C ( ./vector_add.c ). The example
computes the addtion of two vectors stored in array a and b and put the result in array out .
#define N 10000000
void vector_add(float *out, float *a, float *b, int n) {
for(int i = 0; i < n; i++){
out[i] = a[i] + b[i];
}
}
int main(){
float *a, *b, *out;
// Allocate memory
a = (float*)malloc(sizeof(float) * N);
b = (float*)malloc(sizeof(float) * N);
out = (float*)malloc(sizeof(float) * N);
// Initialize array
for(int i = 0; i < N; i++){
a[i] = 1.0f; b[i] = 2.0f;
}
// Main function
vector_add(out, a, b, N);
}
Exercise: Converting vector addition to CUDA
In the rst exercise, we will convert vector_add.c to CUDA program vector_add.cu by using
the hello world as example.
1. Copy vector_add.c to vector_add.cu
nvcc warning : The 'compute_20', 'sm_20', and 'sm_21' architectures are deprecated, and may be re
  v: latest 
/
$> cp vector_add.c vector_add.cu
1. Convert vector_add() to GPU kernel
__global__ void vector_add(float *out, float *a, float *b, int n) {
for(int i = 0; i < n; i++){
out[i] = a[i] + b[i];
}
}
1. Change vector_add() call in main() to kernel call
vector_add<<<1,1>>>(out, a, b, N);
1. Compile and run the program
$> nvcc vector_add.c -o vector_add
$> ./vector_add
You will notice that the program does not work correctly. The reason is CPU and GPUs are
separate entities. Both have their own memory space. CPU cannot directly access GPU
memory, and vice versa. In CUDA terminology, CPU memory is called host memory and GPU
memory is called device memory. Pointers to CPU and GPU memory are called host pointer
and device pointer, respectively.
For data to be accessible by GPU, it must be presented in the device memory. CUDA provides
APIs for allocating device memory and data transfer between host and device memory.
Following is the common work ow of CUDA programs.
1. Allocate host memory and initialized host data
2. Allocate device memory
3. Transfer input data from host to device memory
4. Execute kernels
5. Transfer output from device memory to host
So far, we have done step 1 and 4. We will add step 2, 3, and 5 to our vector addition program
and nish this exercise.
Device memory management
CUDA provides several functions for allocating device memory. The most common ones are
cudaMalloc() and cudaFree() . The syntax for both functions are as follow
cudaMalloc(void **devPtr, size_t count);
cudaFree(void *devPtr);
  v: latest 
/
cudaMalloc() allocates memory of size count in the device memory and updates the device
pointer devPtr to the allocated memory. cudaFree() deallocates a region of the device
memory where the device pointer devPtr points to. They are comparable to malloc() and
free() in C, respectively
Memory transfer
Transfering date between host and device memory can be done through cudaMemcpy function,
which is similar to memcpy in C. The syntax of cudaMemcpy is as follow
cudaMemcpy(void *dst, void *src, size_t count, cudaMemcpyKind kind)
The function copy a memory of size count from src to dst . kind indicates the direction. For
typical usage, the value of kind is either cudaMemcpyHostToDevice or cudaMemcpyDeviceToHost .
There are other possible values but we will not touch them in this tutorial.
Exercise (Con't): Completing vector addition
1. Allocate and deallocate device memory for array a , b , and out .
2. Transfer a , b , and out between host and device memory.
Quiz: Which array must be transferred before and after kernel execution ?
Example: Solution for array 'a'
void main(){
float *a, *b, *out;
float *d_a;
a = (float*)malloc(sizeof(float) * N);
// Allocate device memory for a
cudaMalloc((void**)&d_a, sizeof(float) * N);
// Transfer data from host to device memory
cudaMemcpy(d_a, a, sizeof(float) * N, cudaMemcpyHostToDevice);
…
vector_add<<<1,1>>>(out, d_a, b, N);
…
// Cleanup after kernel execution
cudaFree(d_a);
free(a);
}
1. Compile and measure performance. (See. solution in ( ./solutions/vector_add.cu ) )
$> nvcc vector_add.cu -o vector_add
$> time ./vector_add   v: latest 
/
Pro ling performance
Using time does not give much information about the program performance. NVIDIA
provides a commandline pro ler tool called nvprof , which give a more insight information of
CUDA program performance.
To pro le our vector addition, use following command
$> nvprof ./vector_add
Following is an example pro ling result on Tesla M2050
Wrap up
In this tutorial, we demonstrate how to write a simple vector addition in CUDA. We
introduced GPU kernels and its execution from host code. Moreover, we introduced the
concept of separated memory space between CPU and GPU. We also demonstrate how to
manage the device memory.
However, we still not run program in parallel. The kernel execution con guration <<<1,1>>>
indicates that the kernel is launched with only 1 thread. In the next tutorial, we will modify
vector addition to run in parallel.
Acknowledgments
Contents are adopted from An Even Easier Introduction to CUDA by Mark Harris, NVIDIA
and CUDA C/C++ Basics by Cyril Zeller, NVIDIA.
==6326== Profiling application: ./vector_add
==6326== Profiling result:
Time(%) Time Calls Avg Min Max Name
97.55% 1.42529s 1 1.42529s 1.42529s 1.42529s vector_add(float*, float*, float*, int
1.39% 20.318ms 2 10.159ms 10.126ms 10.192ms [CUDA memcpy HtoD]
1.06% 15.549ms 1 15.549ms 15.549ms 15.549ms [CUDA memcpy DtoH]
  v: latest 

CUDA Tutorial 01 : Say Hello to CUDA : Notes

  • 1.
    / C void c_hello(){ printf("Hello World!n"); } intmain() { c_hello(); return 0; } Docs » Tutorials » Tutorial 01: Say Hello to CUDA Tutorial 01: Say Hello to CUDA Introduction This tutorial is an introduction for writing your rst CUDA C program and of oad computation to a GPU. We will use CUDA runtime API throughout this tutorial. CUDA is a platform and programming model for CUDA-enabled GPUs. The platform exposes GPUs for general purpose computing. CUDA provides C/C++ language extension and APIs for programming and managing GPUs. In CUDA programming, both CPUs and GPUs are used for computing. Typically, we refer to CPU and GPU system as host and device, respectively. CPUs and GPUs are separated platforms with their own memory space. Typically, we run serial workload on CPU and of oad parallel computation to GPUs. A quick comparison between CUDA and C Following table compares a hello world program in C and CUDA side-by-side. CUDA __global__ void cuda_hello(){ printf("Hello World from GPU!n"); } int main() { cuda_hello<<<1,1>>>(); return 0; } The major difference between C and CUDA implementation is __global__ speci er and <<<...>>> syntax. The __global__ speci er indicates a function that runs on device (GPU). Such function can be called through host code, e.g. the main() function in the example, and is also known as "kernels". When a kernel is called, its execution con guration is provided through <<<...>>> syntax, e.g. cuda_hello<<<1,1>>>() . In CUDA terminology, this is called "kernel launch". We will discuss about the parameter (1,1) later in this tutorial 02. Compiling CUDA programs   v: latest 
  • 2.
    / Compiling a CUDAprogram is similar to C program. NVIDIA provides a CUDA compiler called nvcc in the CUDA toolkit to compile CUDA code, typically stored in a le with extension .cu . For example $> nvcc hello.cu -o hello You might see following warning when compiling a CUDA program using above command This warning can be ignored as of now. Putting things in actions. The CUDA hello world example does nothing, and even if the program is compiled, nothing will show up on screen. To get things into action, we will looks at vector addition. Following is an example of vector addition implemented in C ( ./vector_add.c ). The example computes the addtion of two vectors stored in array a and b and put the result in array out . #define N 10000000 void vector_add(float *out, float *a, float *b, int n) { for(int i = 0; i < n; i++){ out[i] = a[i] + b[i]; } } int main(){ float *a, *b, *out; // Allocate memory a = (float*)malloc(sizeof(float) * N); b = (float*)malloc(sizeof(float) * N); out = (float*)malloc(sizeof(float) * N); // Initialize array for(int i = 0; i < N; i++){ a[i] = 1.0f; b[i] = 2.0f; } // Main function vector_add(out, a, b, N); } Exercise: Converting vector addition to CUDA In the rst exercise, we will convert vector_add.c to CUDA program vector_add.cu by using the hello world as example. 1. Copy vector_add.c to vector_add.cu nvcc warning : The 'compute_20', 'sm_20', and 'sm_21' architectures are deprecated, and may be re   v: latest 
  • 3.
    / $> cp vector_add.cvector_add.cu 1. Convert vector_add() to GPU kernel __global__ void vector_add(float *out, float *a, float *b, int n) { for(int i = 0; i < n; i++){ out[i] = a[i] + b[i]; } } 1. Change vector_add() call in main() to kernel call vector_add<<<1,1>>>(out, a, b, N); 1. Compile and run the program $> nvcc vector_add.c -o vector_add $> ./vector_add You will notice that the program does not work correctly. The reason is CPU and GPUs are separate entities. Both have their own memory space. CPU cannot directly access GPU memory, and vice versa. In CUDA terminology, CPU memory is called host memory and GPU memory is called device memory. Pointers to CPU and GPU memory are called host pointer and device pointer, respectively. For data to be accessible by GPU, it must be presented in the device memory. CUDA provides APIs for allocating device memory and data transfer between host and device memory. Following is the common work ow of CUDA programs. 1. Allocate host memory and initialized host data 2. Allocate device memory 3. Transfer input data from host to device memory 4. Execute kernels 5. Transfer output from device memory to host So far, we have done step 1 and 4. We will add step 2, 3, and 5 to our vector addition program and nish this exercise. Device memory management CUDA provides several functions for allocating device memory. The most common ones are cudaMalloc() and cudaFree() . The syntax for both functions are as follow cudaMalloc(void **devPtr, size_t count); cudaFree(void *devPtr);   v: latest 
  • 4.
    / cudaMalloc() allocates memoryof size count in the device memory and updates the device pointer devPtr to the allocated memory. cudaFree() deallocates a region of the device memory where the device pointer devPtr points to. They are comparable to malloc() and free() in C, respectively Memory transfer Transfering date between host and device memory can be done through cudaMemcpy function, which is similar to memcpy in C. The syntax of cudaMemcpy is as follow cudaMemcpy(void *dst, void *src, size_t count, cudaMemcpyKind kind) The function copy a memory of size count from src to dst . kind indicates the direction. For typical usage, the value of kind is either cudaMemcpyHostToDevice or cudaMemcpyDeviceToHost . There are other possible values but we will not touch them in this tutorial. Exercise (Con't): Completing vector addition 1. Allocate and deallocate device memory for array a , b , and out . 2. Transfer a , b , and out between host and device memory. Quiz: Which array must be transferred before and after kernel execution ? Example: Solution for array 'a' void main(){ float *a, *b, *out; float *d_a; a = (float*)malloc(sizeof(float) * N); // Allocate device memory for a cudaMalloc((void**)&d_a, sizeof(float) * N); // Transfer data from host to device memory cudaMemcpy(d_a, a, sizeof(float) * N, cudaMemcpyHostToDevice); … vector_add<<<1,1>>>(out, d_a, b, N); … // Cleanup after kernel execution cudaFree(d_a); free(a); } 1. Compile and measure performance. (See. solution in ( ./solutions/vector_add.cu ) ) $> nvcc vector_add.cu -o vector_add $> time ./vector_add   v: latest 
  • 5.
    / Pro ling performance Usingtime does not give much information about the program performance. NVIDIA provides a commandline pro ler tool called nvprof , which give a more insight information of CUDA program performance. To pro le our vector addition, use following command $> nvprof ./vector_add Following is an example pro ling result on Tesla M2050 Wrap up In this tutorial, we demonstrate how to write a simple vector addition in CUDA. We introduced GPU kernels and its execution from host code. Moreover, we introduced the concept of separated memory space between CPU and GPU. We also demonstrate how to manage the device memory. However, we still not run program in parallel. The kernel execution con guration <<<1,1>>> indicates that the kernel is launched with only 1 thread. In the next tutorial, we will modify vector addition to run in parallel. Acknowledgments Contents are adopted from An Even Easier Introduction to CUDA by Mark Harris, NVIDIA and CUDA C/C++ Basics by Cyril Zeller, NVIDIA. ==6326== Profiling application: ./vector_add ==6326== Profiling result: Time(%) Time Calls Avg Min Max Name 97.55% 1.42529s 1 1.42529s 1.42529s 1.42529s vector_add(float*, float*, float*, int 1.39% 20.318ms 2 10.159ms 10.126ms 10.192ms [CUDA memcpy HtoD] 1.06% 15.549ms 1 15.549ms 15.549ms 15.549ms [CUDA memcpy DtoH]   v: latest 