Consolidation test of soil
•
3 likes•417 views

The consolidation test determines key characteristics of soil consolidation from water expulsion under load, including: - Coefficient of compressibility (rate of volume change with pressure) - Coefficient of consolidation (rate at which pore water is expelled) - Compression index (compressibility of soil) The test involves carefully loading a saturated soil sample in a consolidometer apparatus and taking dial gauge readings over time under increasing loads up to 640kPa. Data is plotted to determine consolidation properties.

Recommended
More Related Content
What's hot
What's hot (20)
Similar to Consolidation test of soil
Similar to Consolidation test of soil (20)
Recently uploaded
Recently uploaded (20)
Consolidation test of soil
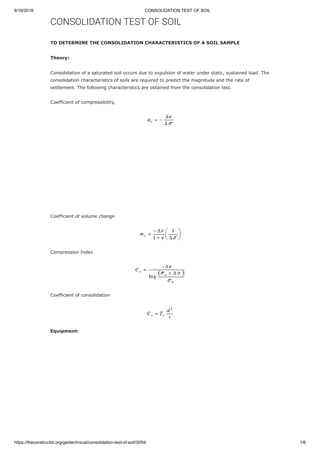
- 1. 9/16/2018 CONSOLIDATION TEST OF SOIL https://theconstructor.org/geotechnical/consolidation-test-of-soil/3054/ 1/6 CONSOLIDATION TEST OF SOIL TO DETERMINE THE CONSOLIDATION CHARACTERISTICS OF A SOIL SAMPLE Theory: Consolidation of a saturated soil occurs due to expulsion of water under static, sustained load. The consolidation characteristics of soils are required to predict the magnitude and the rate of settlement. The following characteristics are obtained from the consolidation test. Coefficient of compressibility, Coefficient of volume change Compression Index Coefficient of consolidation Equipment:
- 2. 9/16/2018 CONSOLIDATION TEST OF SOIL https://theconstructor.org/geotechnical/consolidation-test-of-soil/3054/ 2/6 1. Consolidometer with a loading device 2. Specimen ring made of a non-corroding material 3. Water reservoir to saturate the sample 4. Porous stones 5. Soil trimming tools like fine wire saw, knife, spatula, etc 6. Dial gauge, accuracy 0.002mm 7. Water content cans 8. Large container 9. Steel ball 10. Weighing balance, accuracy 0.01 g. 11. Oven 12. Desiccator 13. Pressure pad Procedure: 1. Clean and dry the metal ring. Measure its diameter and height. Take the mass of the empty ring. 2. Press the ring into the soil sample contained in a large container at the desired density and water content. The ring is to be pressed with hands. 3. Remove the soil around the ring. The soil specimen should project about 10mm on either side of the ring. Any voids in the specimen due to the removal of large size particles should be filled back by pressing the soil lightly. 4. Trim the specimen flush with the top and bottom of the ring. 5. Remove any soil particles sticking to the outside of the ring. Weigh the ring with the specimen. 6. Take a small quantity of the soil removed during trimming for the water content determination. 7. Saturate the porous stones by boiling them in distilled water for about 15min. 8. Assemble the Consolidometer. Place the bottom porous stone, bottom filter paper, specimen, top filter paper and the top porous stone, one by one. 9. Position the loading block centrally on the top porous stone. Mount the assembly on the loading frame. Centre it such that the load applied is axial. In the case of the lever loading system, counterbalance the system. 10. Set the dial gauge in position. Allow sufficient margin for the swelling of the soil.
- 3. 9/16/2018 CONSOLIDATION TEST OF SOIL https://theconstructor.org/geotechnical/consolidation-test-of-soil/3054/ 3/6 11. Connect the mould assembly to the water reservoir having the water level at about the same as the soil specimen. Allow the water to flow into the specimen till it is fully saturated. 12. Take the initial reading of the dial gauge. 13. Apply an initial setting load to give a pressure of 5 (2.5 for very soft soils) to the assembly so that there is no swelling. Allow the setting load to stand till there is no change in the dial gauge reading or for 24 hours. 14. Take the final gauge reading under the initial setting load. 15. Apply the first load increment to apply a pressure of 10 , and start the stop watch. Record the dial gauge readings at 0, 0.25, 1, 2.25, 4.0, 6.25, 9.0, 12.25, 16.00, 20.25, 25.00, 36, 49, 64, 81, 100, 121, 144, 169, 196, 225, 256, 289, 324, 361, 400, 500, 600, and 1440 minutes. 16. Increase the load to apply a pressure of 20 and repeat the step (15). Likewise increase the load to apply a pressure of 40, 80, 160, 320 and 640 or upto the desired pressure. 17. After the last load increment had been applied and the readings taken, decrease the load to 1/4 of the last load and allow it to stand for 24 hours. Take the dial gauge reading after 24 hours. Further reduce the load to 1/4 of the previous load and repeat the above procedure. Likewise, further reduce the load to 1/4 previous and repeat the procedure. Finally reduce the load to the initial setting load and keep it for 24 hours and take the final dial gauge reading. 18. Dismantle the assembly. Take out the ring with the specimen. Wipe out the excess surface water using a blotting paper. 19. Take the mass of the ring with the specimen. 20. Dry the specimen in the oven for 24 hours and determine the dry mass of specimen.
- 4. 9/16/2018 CONSOLIDATION TEST OF SOIL https://theconstructor.org/geotechnical/consolidation-test-of-soil/3054/ 4/6 Fig: Consolidation Test of Soil DATA SHEET FOR CONSOLIDATION TEST Specific gravity of solids = Diameter of ring= Area of the ring (A)= Volume of the ring = Mass of ring +wet soil = Mass of ring + dry soil = Mass of water – Initial height , = Water content before test = Mass of dry soil (Ms)= Height of solids = Initial void ratio Height of ring = Mass of ring = Degree of saturation Water content after test = (a) Coefficient of compressibility
- 5. 9/16/2018 CONSOLIDATION TEST OF SOIL https://theconstructor.org/geotechnical/consolidation-test-of-soil/3054/ 5/6 Plot a curve between as abscissa and final void ratio (e) as ordinate for determination of and . Plot a graph between log as abscissa and final void ratio as ordinate for examination of . (b) Coefficient of consolidation Dial gauge readings For each load increment, plot as abscissa and the dial gauge reading (R) as ordinate. Determine the value of from the plot. Now