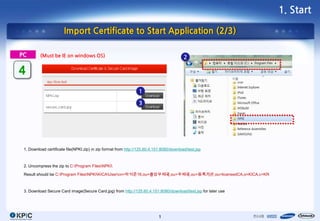
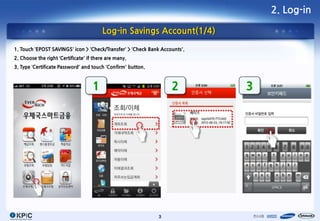
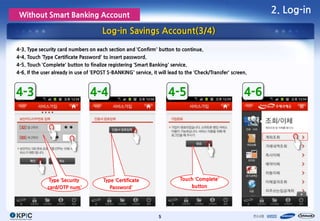
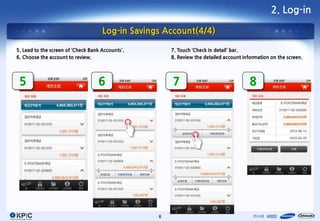
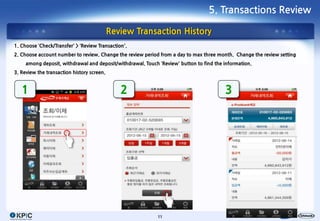
This document provides step-by-step instructions for using an application to access banking services, pay bills, and review insurance policies. It describes how to import a certificate, log in to savings accounts, transfer funds between accounts, review transactions, pay public taxes or utilities, and view insurance policy details. The instructions include screenshots and descriptions of each step and screen.

![1. Start
Import Certificate to Start Application (3/3)
Type in SN Number and Authenticaton Number from phone and tab [Next] to finish process
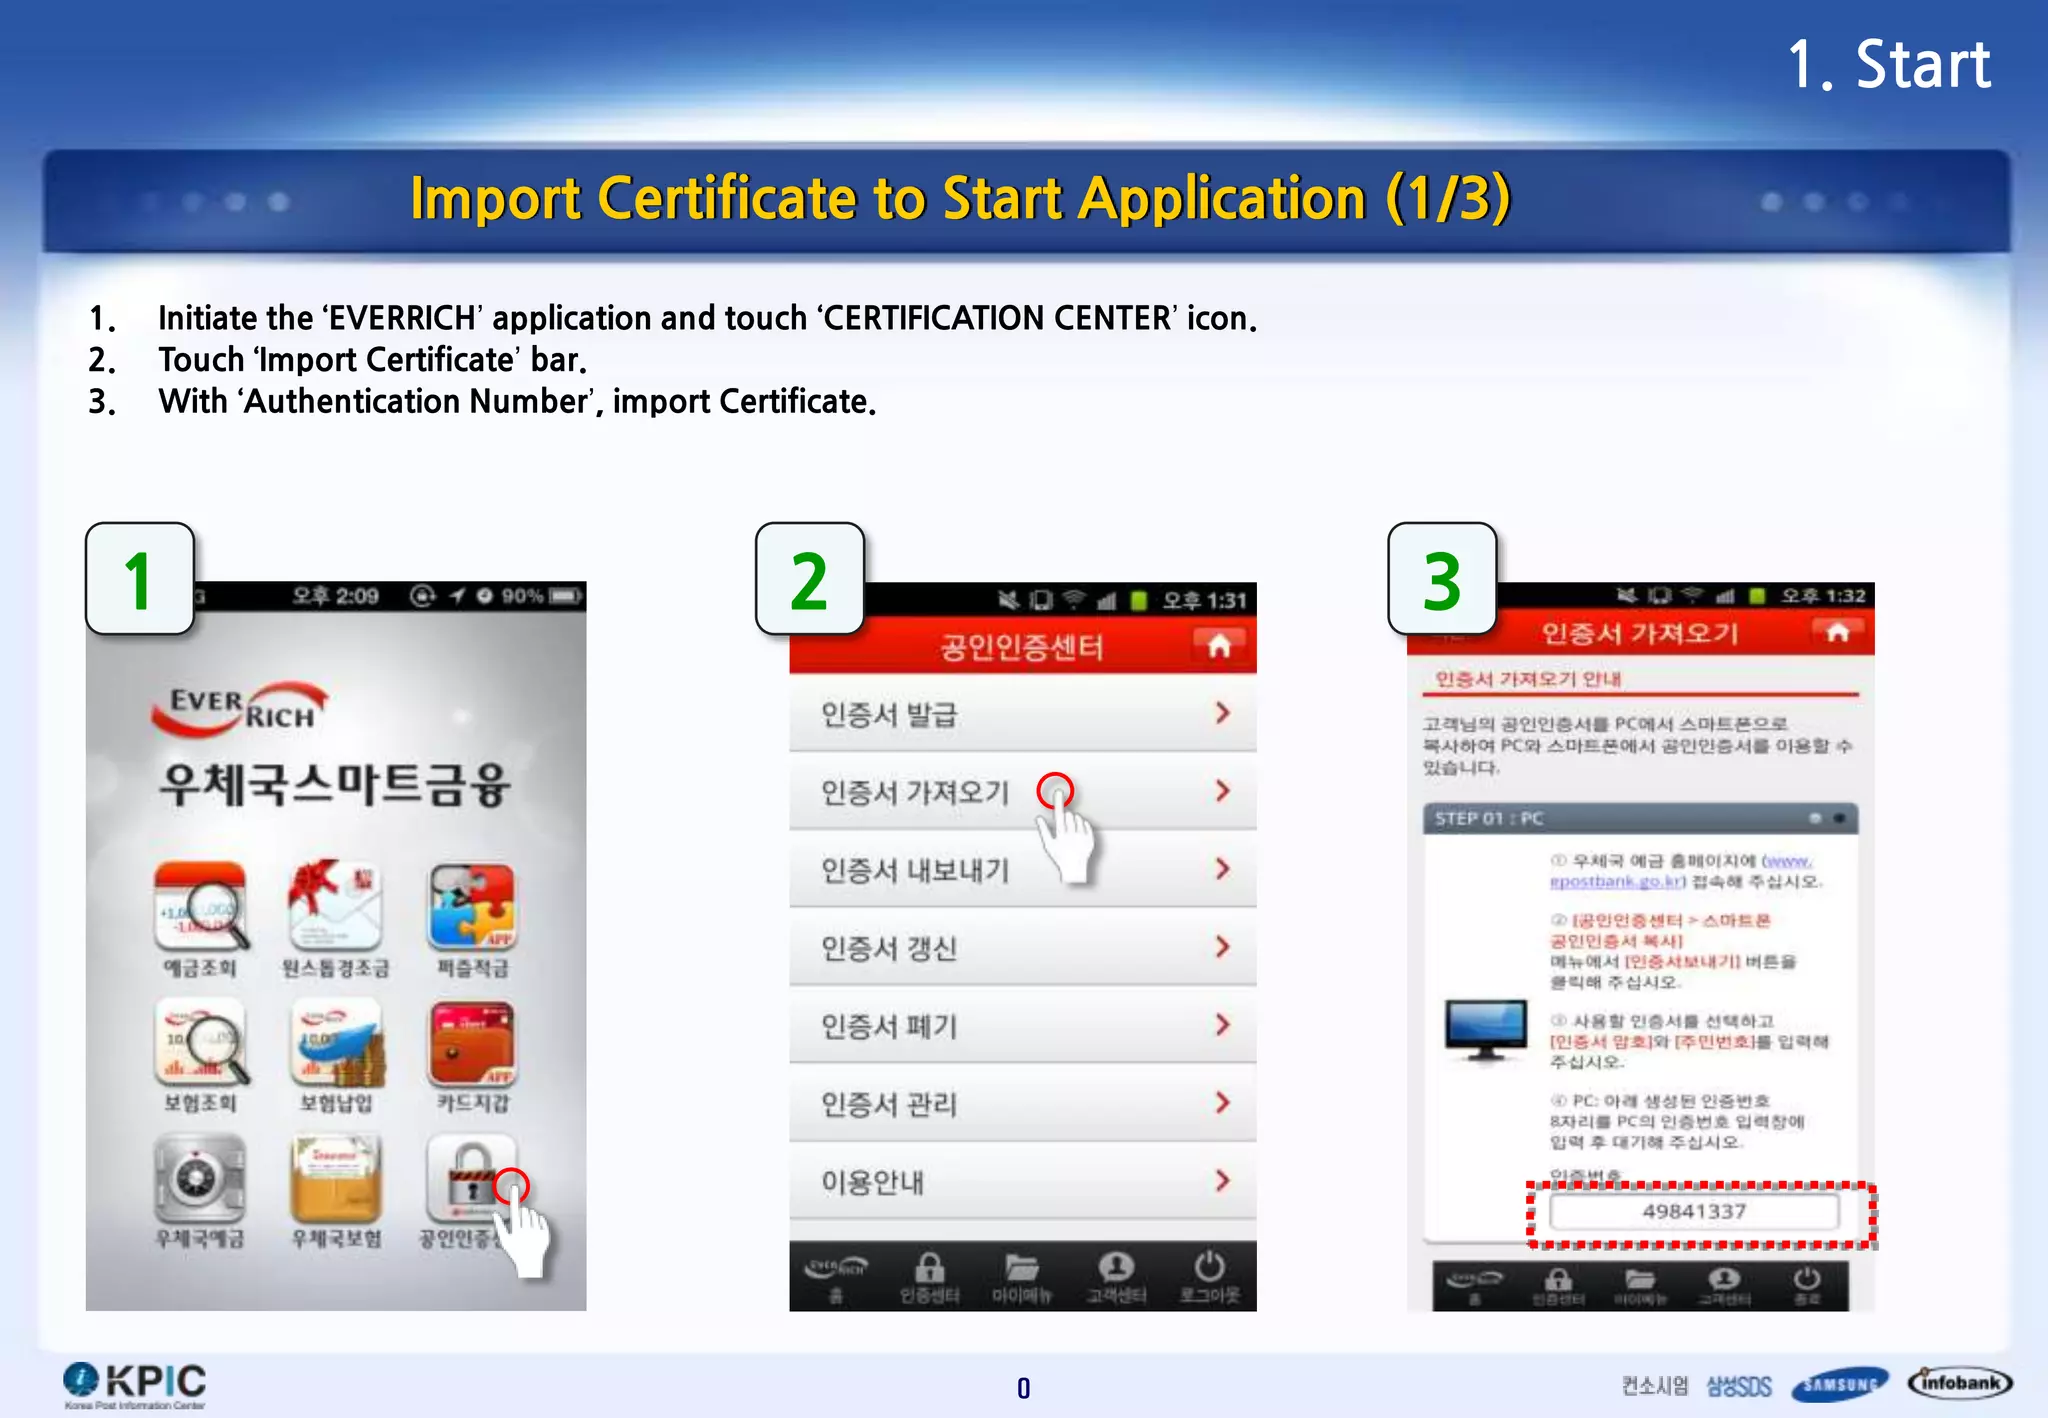
PC
Connect to http://125.60.4.19:8080/smart/index.htm
5 (Must be IE on windows OS)
7509051540716
Authentication Number
(from iPhone App)
6
a1234567
2](https://image.slidesharecdn.com/com-epost-psf-sd-120906012845-phpapp01/85/Com-epost-psf-sd-3-320.jpg)
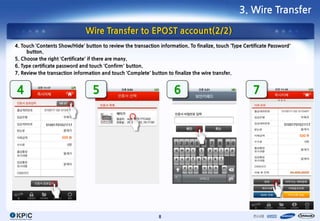
![3. Wire Transfer
Wire Transfer to EPOST account(1/2)
1. Choose ‘Check/Transfer’ > ‘Transfer Now’ bar.
2. Choose [originated-account], type [account password], choose [destination account], type the amount to wire, and touch
‘Confirm to Wire’ button.
3. Type security card numbers on each section and touch ‘Confirm’ button.
1 2 3
01001701021117
*
* 500
*
*
01001701021117
Type ‘EPOST
Account’
500
Transfer
‘$0.50’
7](https://image.slidesharecdn.com/com-epost-psf-sd-120906012845-phpapp01/85/Com-epost-psf-sd-8-320.jpg)
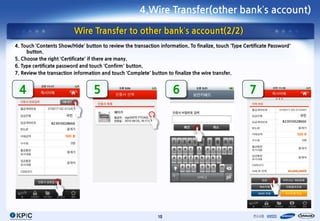
![4.Wire Transfer(other bank’s account)
Wire Transfer to other bank’s account(1/2)
1. Choose ‘Check/Transfer’ > ‘Transfer Now’ bar.
2. Choose [originated-account], type [account password], type other bank’s account number into the [destination account],
type the amount to wire, and touch ‘Confirm to Wire’.
3. Type security card numbers on each section and touch ‘Confirm’ button.
1 2 3
국민
823010028666
*
* 500
국민
*
*
823010028666 Type other
bank’s account
500
Transfer
‘$0.50’
9](https://image.slidesharecdn.com/com-epost-psf-sd-120906012845-phpapp01/85/Com-epost-psf-sd-10-320.jpg)
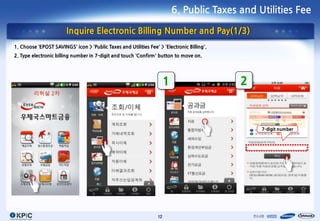
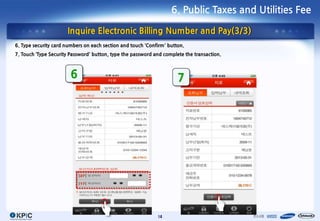
![6. Public Taxes and Utilities Fee
Inquire Electronic Billing Number and Pay(2/3)
3. Type ‘Authorization Code’ to identify payer.
4. Review public tax or utility fee lists in due. Touch the screen to pay.
5. Type [account information], [account password], [amount to pay], and [payer’s mobile number]. Touch ‘Pay’ to complete the
transaction.
5
3 4
Type ‘Authorization Code’
13](https://image.slidesharecdn.com/com-epost-psf-sd-120906012845-phpapp01/85/Com-epost-psf-sd-14-320.jpg)


![USSD PRE[1].pptx](https://cdn.slidesharecdn.com/ss_thumbnails/ussdpre1-220901093915-e65937ca-thumbnail.jpg?width=640&height=640&fit=bounds)


