The document provides a comprehensive overview of catheterization procedures, including types of catheters, indications, and detailed steps for both indwelling and intermittent catheterizations for male and female patients. It emphasizes the importance of sterile techniques, proper patient positioning, and care guidelines to minimize risks such as infection and trauma. Additionally, it outlines necessary materials and handling procedures to ensure safe and effective catheter use.


![EQUIPMENT
Sterile catheter kit that contains:
Sterile gloves
Sterile drapes (one of which is fenestrated [having a window-like opening])
Sterile catheter (Use the smallest appropriate-size catheter, usually a 14F to 16F catheter with a 5-
to 10-mL balloon .
Antiseptic cleansing solution and cotton balls or gauze squares; antiseptic swabs
Lubricant
Forceps
Prefilled syringe with sterile water (sufficient to inflate indwelling catheter balloon)
Sterile basin (usually base of kit serves as this)
Sterile specimen container (if specimen is required)](https://image.slidesharecdn.com/catheterization-240517154401-eab5a949/75/Catheterization-Procedure-by-Anushri-Srivastav-pptx-12-2048.jpg)


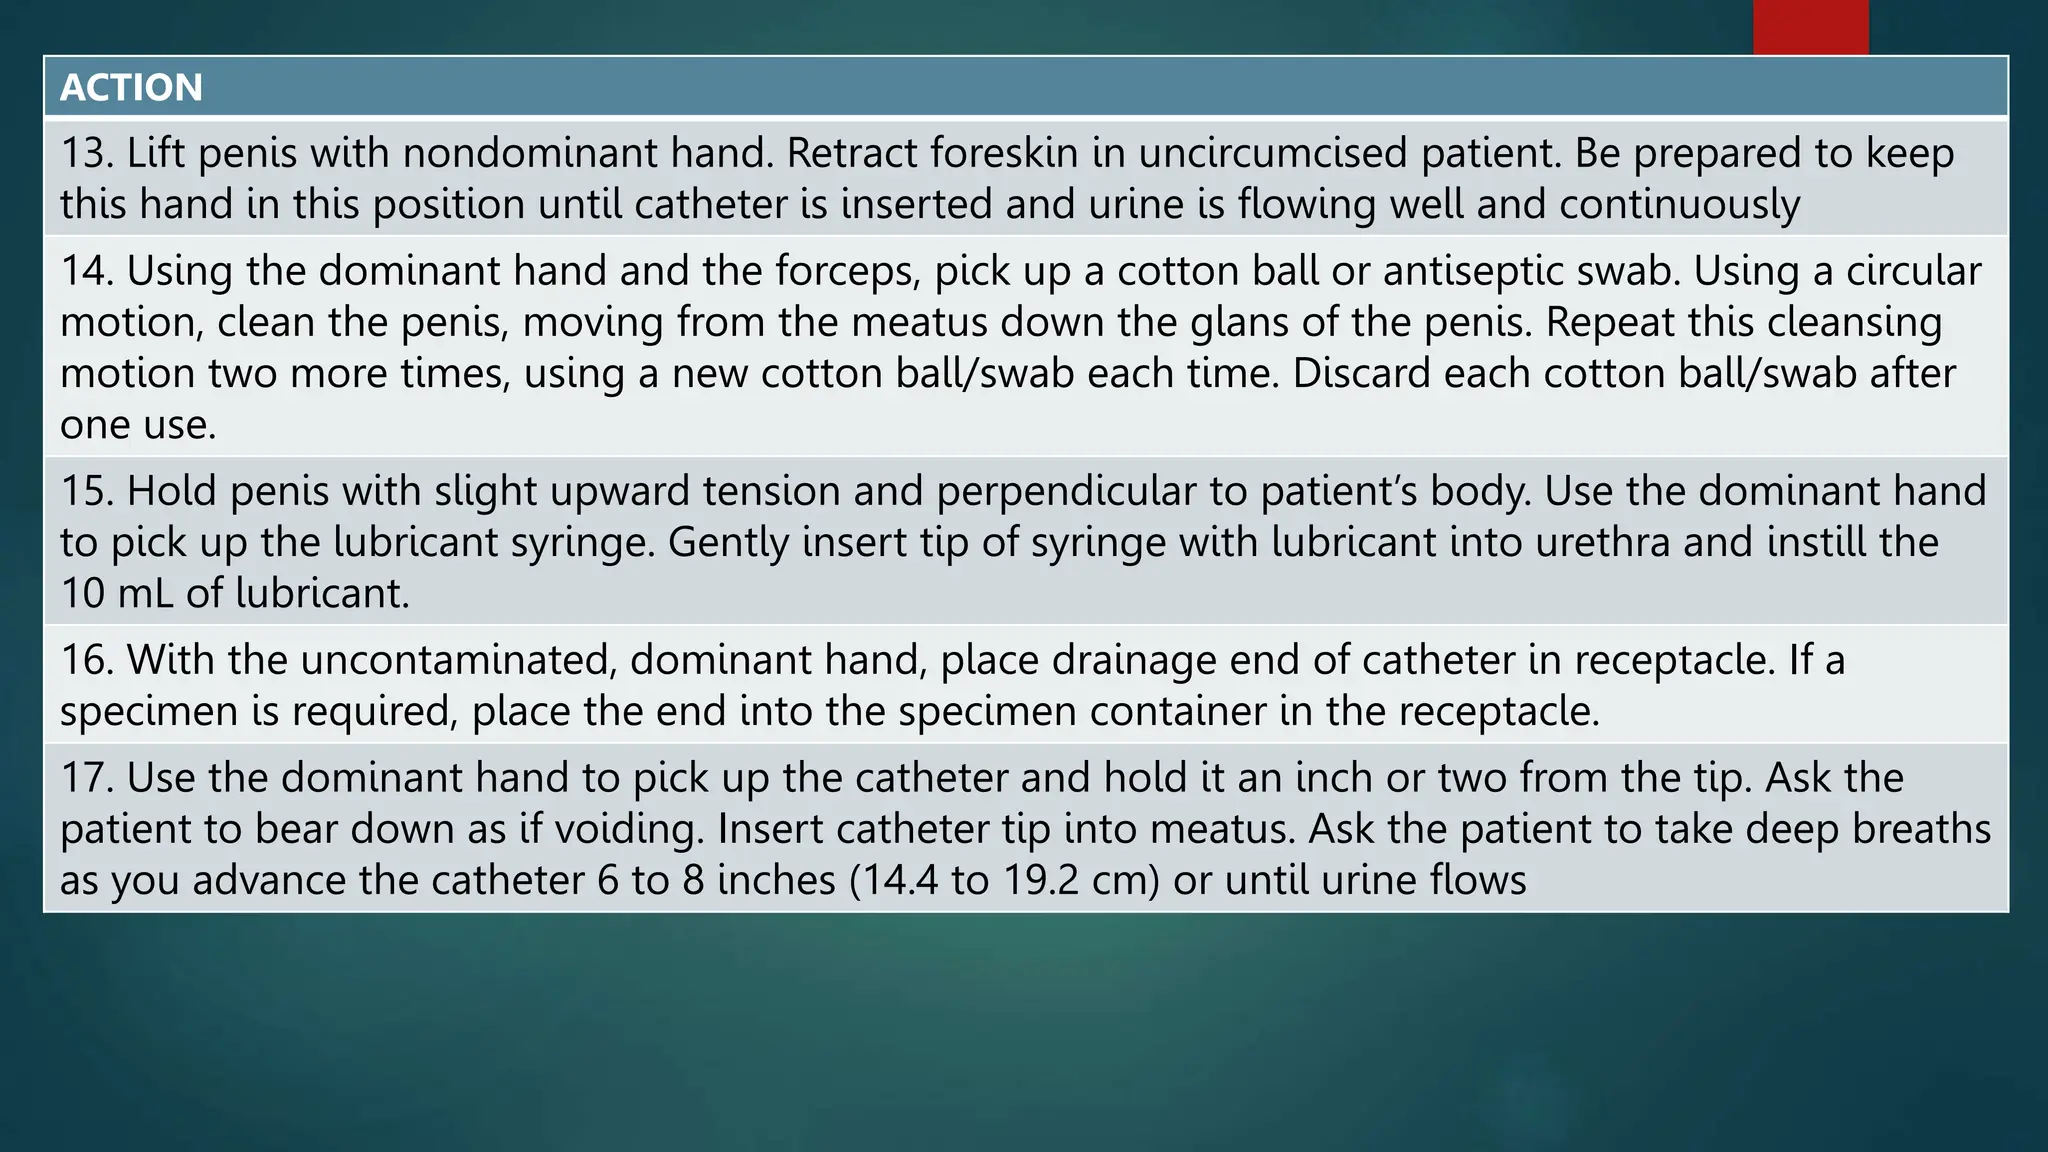
![ACTION RATIONALE
19. With your uncontaminated, dominant hand, place the
drainage end of the catheter in receptacle. If the catheter
is preattached to sterile tubing and drainage container
(closed drainage system), position catheter and setup
within easy reach on sterile field. Ensure that clamp on
drainage bag is closed
This facilitates drainage of urine and minimizes risk of
contaminating sterile equipment.
20. Using your dominant hand, hold the catheter 2 to 3
inches from the tip and insert slowly into the urethra .
Advance the catheter until there is a return of urine
(approximately 2 to 3 inches [4.8 to 7.2 cm]). Once urine
drains, advance catheter another 2 to 3 inches (4.8 to 7.2
cm). Do not force catheter through urethra into bladder.
Ask patient to breathe deeply, and rotate catheter gently if
slight resistance is met as catheter reaches external
sphincter
The female urethra is about 1.5 to 2.5 inches (3.6 to 6.0
cm) long. Applying force on the catheter is likely to injure
mucous membranes. The sphincter relaxes and the
catheter can enter the bladder easily when the patient
relaxes. Advancing an indwelling catheter an additional 2
to 3 inches (4.8 to 7.2 cm) ensures placement in the
bladder and facilitates inflation of the balloon without
damaging the urethra
21. Hold the catheter securely at the meatus with your
nondominant hand. Use your dominant hand to inflate the
catheter balloon . Inject entire volume of sterile water
supplied in prefilled syringe.
Bladder or sphincter contraction could push the catheter
out. The balloon anchors the catheter in place in the
bladder. Manufacturer provides appropriate amount of
sterile water for the size of catheter in the kit; as a result,
use entire syringe provided in the kit](https://image.slidesharecdn.com/catheterization-240517154401-eab5a949/75/Catheterization-Procedure-by-Anushri-Srivastav-pptx-18-2048.jpg)


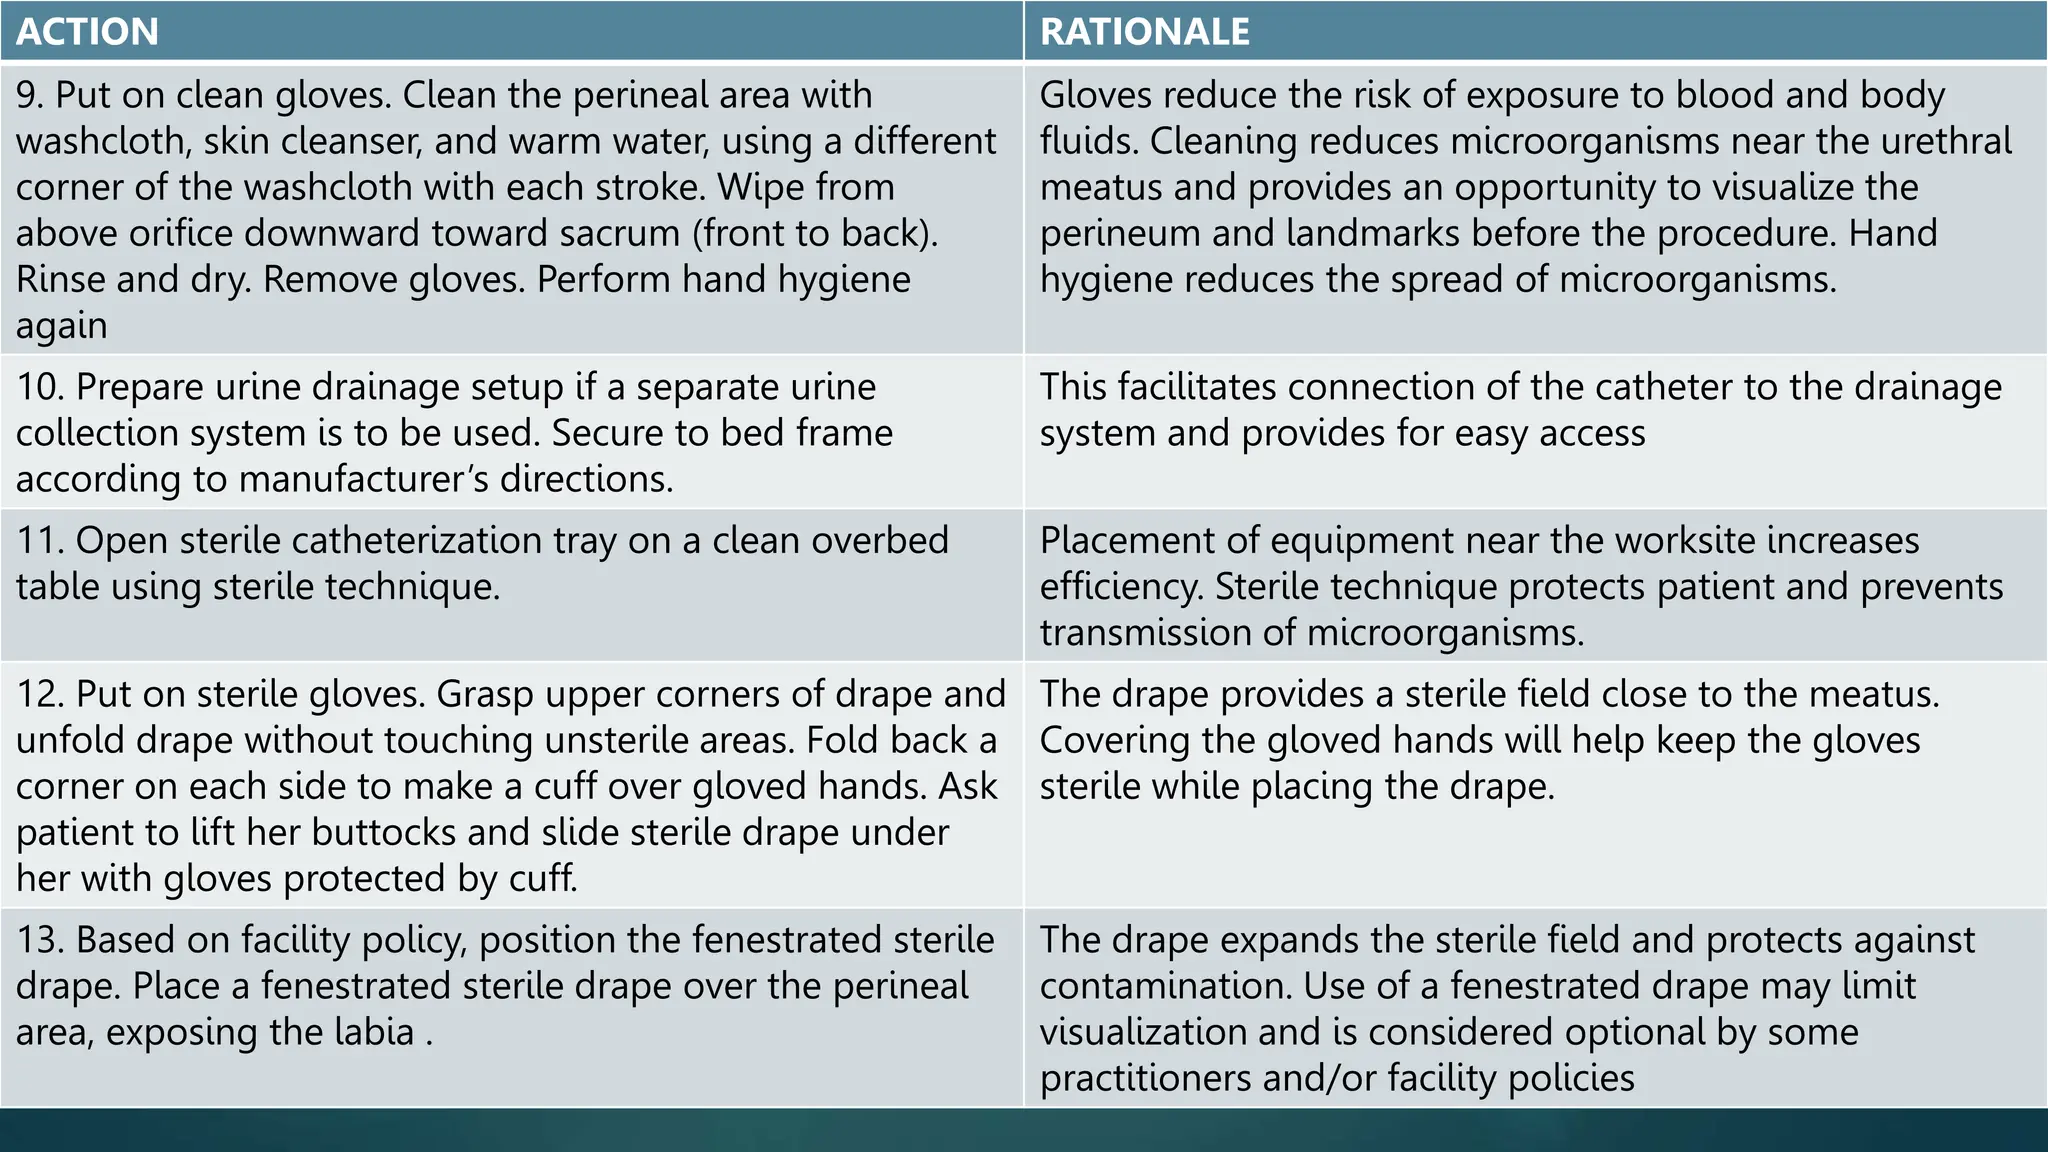
![ACTION
15. Use the dominant hand to pick up a cotton ball. Clean one labial fold, top to bottom (from above the
meatus down toward the rectum), then discard the cotton ball. Using a new cotton ball for each stroke,
continue to clean the other labial fold, then directly over the meatus
16. With the uncontaminated, dominant hand, place drainage end of catheter in receptacle. If a specimen
is required, place the end into the specimen container in the receptacle
17. Using the dominant hand, hold the catheter 2 to 3 inches from the tip and insert slowly into the
urethra. Advance the catheter until there is a return of urine (approximately 2 to 3 inches [4.8 to 7.2 cm]).
Do not force the catheter through the urethra into the bladder. Ask the patient to breathe deeply, and
rotate the catheter gently if slight resistance is met as the catheter reaches external sphincter
18. Hold the catheter securely at the meatus with the nondominant hand while the bladder empties. If a
specimen is being collected, remove the drainage end of the tubing from the specimen container after
required amount is obtained and allow urine to flow into receptacle. Set specimen container aside and
place lid on container](https://image.slidesharecdn.com/catheterization-240517154401-eab5a949/75/Catheterization-Procedure-by-Anushri-Srivastav-pptx-25-2048.jpg)

![Catheterizing the Male Urinary Bladder
Sterile catheter kit that contains:
Sterile gloves
Sterile drapes (one of which is fenestrated [having a window-like opening])
Sterile catheter (Use the smallest appropriate-size catheter, usually a 14F to 16F
catheter with a 5- to 10-mL balloon
Antiseptic cleansing solution and cotton balls or gauze squares; antiseptic swabs
Lubricant
Forceps
Prefilled syringe with sterile water (sufficient to inflate indwelling catheter balloon)
Sterile basin (usually base of kit serves as this)
Sterile specimen container (if specimen is required)](https://image.slidesharecdn.com/catheterization-240517154401-eab5a949/75/Catheterization-Procedure-by-Anushri-Srivastav-pptx-27-2048.jpg)