This document provides an introduction to getting started with Apache Camel, including:
- An overview of the Enterprise Integration Patterns (EIP) book that Camel is based on.
- Details on Camel's implementation of many EIP patterns.
- Guidance on key Camel documentation resources like the online documentation, Javadocs, and recommended book.
- Explanations of fundamental Camel concepts like endpoints and terminology.
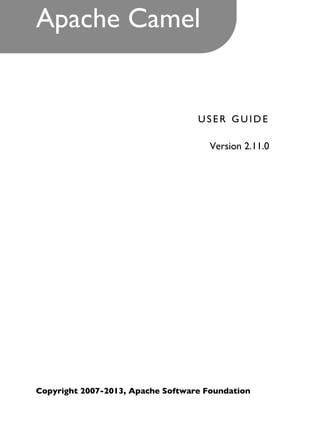


![• Tokenizer
• XPath
• XQuery
• VTD-XML
Most of these languages is also supported used as Annotation Based Expression Language.
For a full details of the individual languages see the Language Appendix
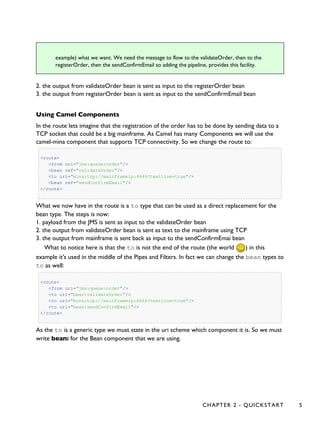
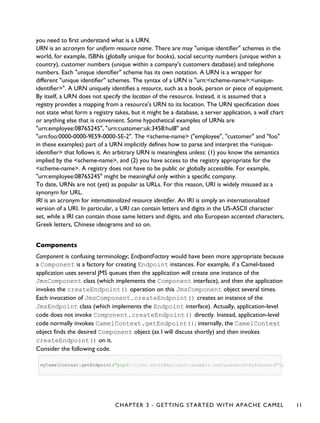
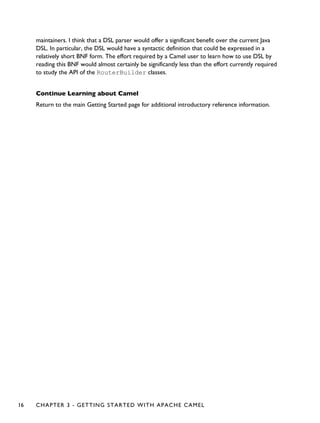
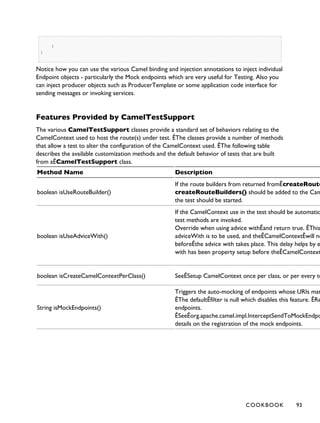
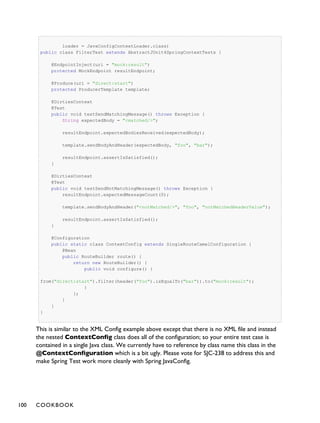
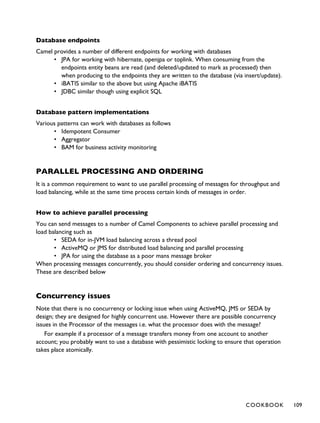
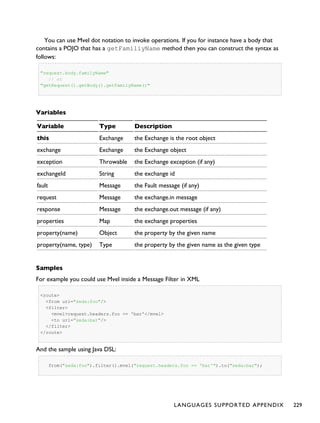
URIS
Camel makes extensive use of URIs to allow you to refer to endpoints which are lazily created
by a Component if you refer to them within Routes.
Current Supported URIs
Component / ArtifactId / URI Description
AHC / camel-ahc
ahc:hostname:[port]
To call external HTTP services
using Async Http Client
AMQP / camel-amqp
amqp:[topic:]destinationName
For Messaging with AMQP
protocol
APNS / camel-apns
apns:notify[?options]
For sending notifications to Apple
iOS devices
Atom / camel-atom
atom:uri
Working with Apache Abdera for
atom integration, such as
consuming an atom feed.
Avro / camel-avro
avro:http://hostname[:port][?options]
Working with Apache Avro for
data serialization.
18 CHAPTER 4 - ARCHITECTURE](https://image.slidesharecdn.com/camel-manual-2-130809102054-phpapp01/85/Camel-manual-2-11-0-22-320.jpg)
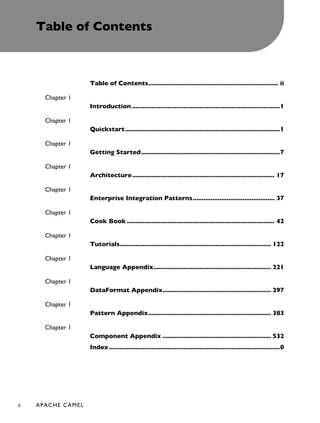
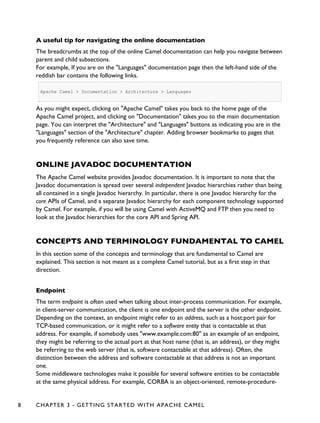
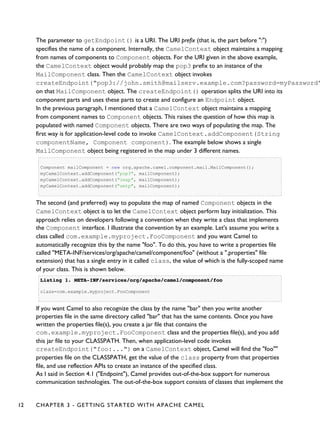
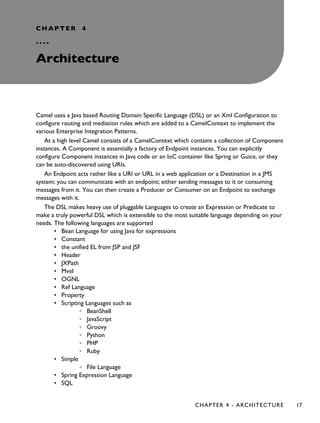
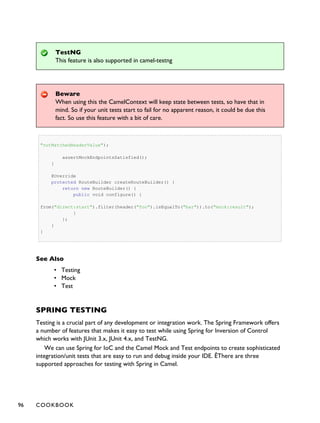
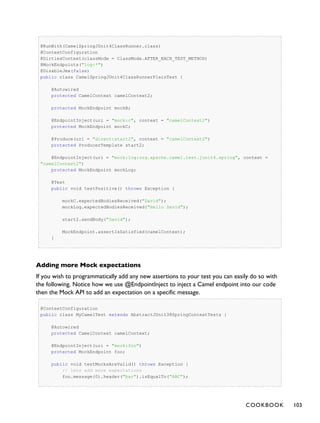
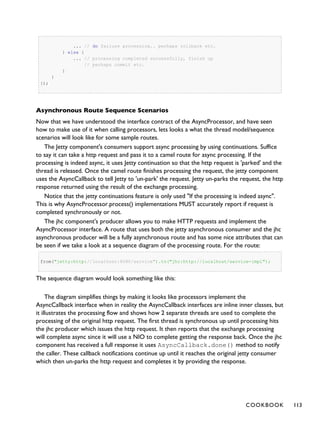
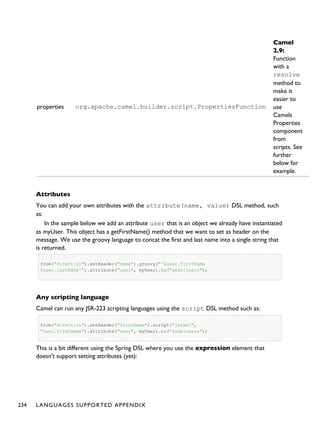
![important
Make sure to read How do I configure endpoints to learn more about configuring
endpoints. For example how to refer to beans in the Registry or how to use raw
values for password options, and using property placeholders etc.
AWS-CW / camel-aws
aws-cw://namespace[?options]
For working with Amazon's
CloudWatch (CW).
AWS-DDB / camel-aws
aws-ddb://tableName[?options]
For working with Amazon's
DynamoDB (DDB).
AWS-SDB / camel-aws
aws-sdb://domainName[?options]
For working with Amazon's
SimpleDB (SDB).
AWS-SES / camel-aws
aws-ses://from[?options]
For working with Amazon's
Simple Email Service (SES).
AWS-SNS / camel-aws
aws-sns://topicname[?options]
For Messaging with Amazon's
Simple Notification Service (SNS).
AWS-SQS / camel-aws
aws-sqs://queuename[?options]
For Messaging with Amazon's
Simple Queue Service (SQS).
AWS-S3 / camel-aws
aws-s3://bucketname[?options]
For working with Amazon's
Simple Storage Service (S3).
CHAPTER 4 - ARCHITECTURE 19](https://image.slidesharecdn.com/camel-manual-2-130809102054-phpapp01/85/Camel-manual-2-11-0-23-320.jpg)
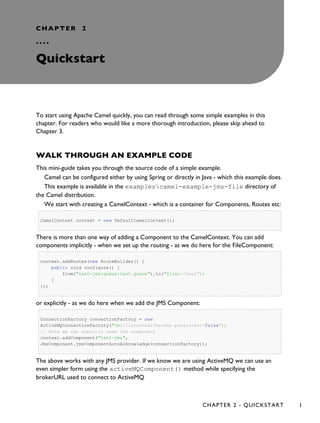
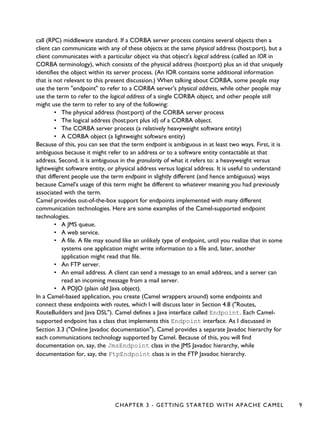
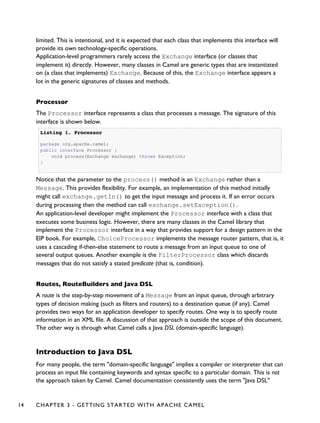
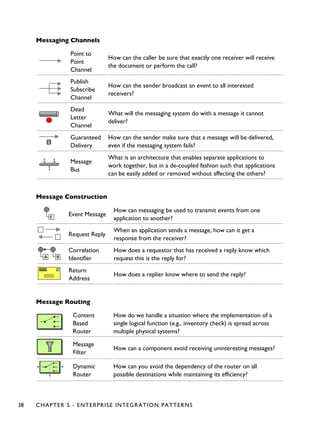
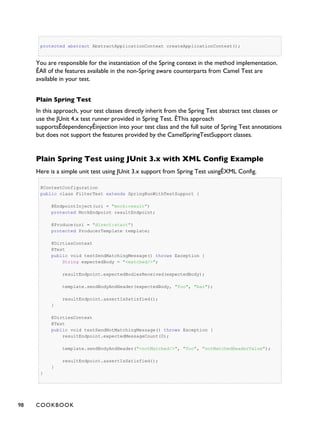
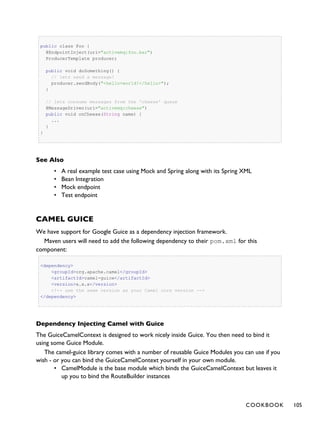
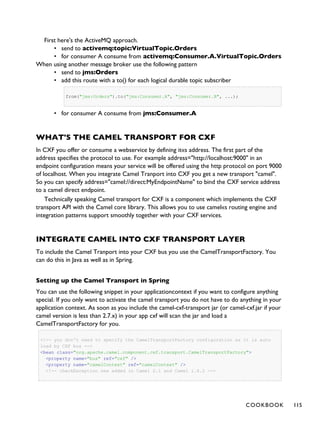
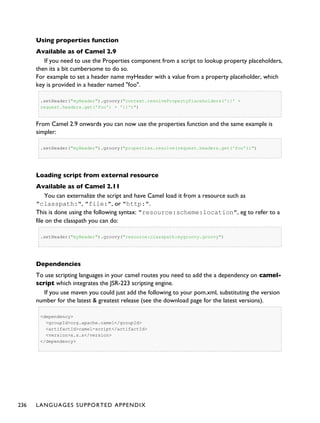
![Bean / camel-core
bean:beanName[?method=someMethod]
Uses the Bean Binding to bind
message exchanges to beans in the
Registry. Is also used for exposing
and invoking POJO (Plain Old Java
Objects).
Bean Validation / camel-bean-validator
bean-validator:something
Validates the payload of a message
using the Java Validation API (JSR
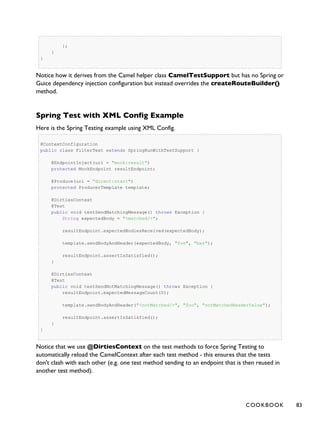
303 and JAXP Validation) and its
reference implementation
Hibernate Validator
Browse / camel-core
browse:someName
Provides a simple
BrowsableEndpoint which can be
useful for testing, visualisation
tools or debugging. The exchanges
sent to the endpoint are all
available to be browsed.
Cache / camel-cache
cache://cachename[?options]
The cache component facilitates
creation of caching endpoints and
processors using EHCache as the
cache implementation.
Class / camel-core
class:className[?method=someMethod]
Uses the Bean Binding to bind
message exchanges to beans in the
Registry. Is also used for exposing
and invoking POJO (Plain Old Java
Objects).
CMIS / camel-cmis
cmis://cmisServerUrl[?options]
Uses the Apache Chemistry client
API to interface with CMIS
supporting CMS
Cometd / camel-cometd
cometd://host:port/channelname
Used to deliver messages using
the jetty cometd implementation
of the bayeux protocol
20 CHAPTER 4 - ARCHITECTURE](https://image.slidesharecdn.com/camel-manual-2-130809102054-phpapp01/85/Camel-manual-2-11-0-24-320.jpg)
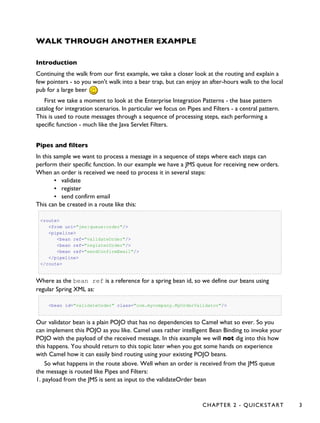
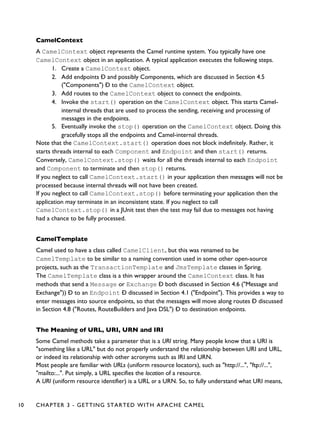
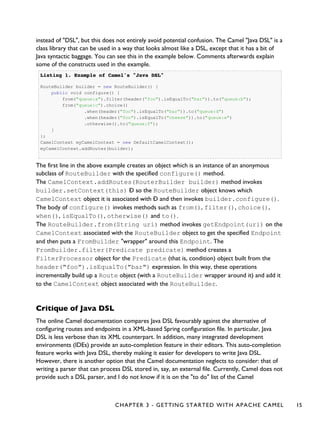
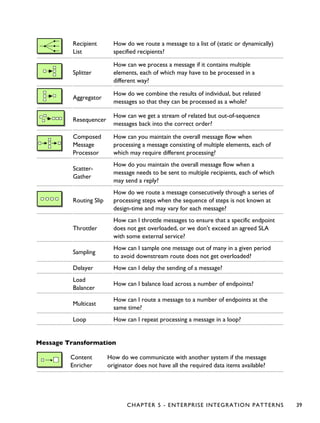
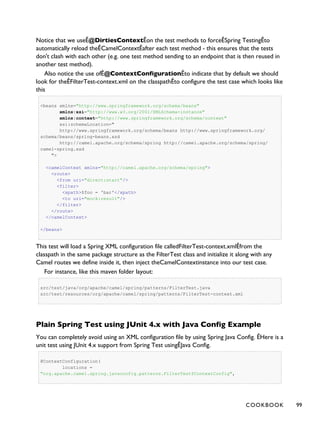
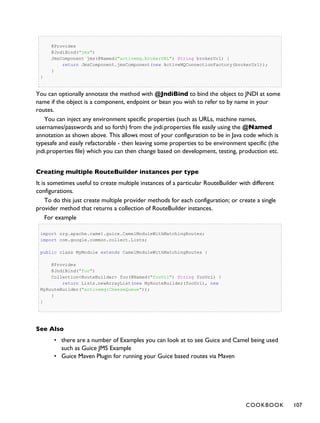
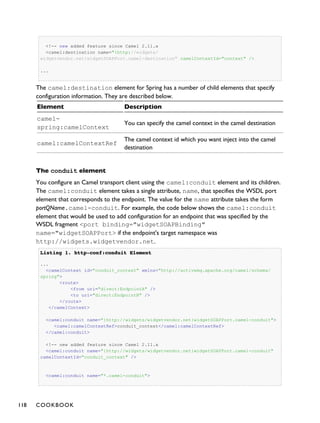
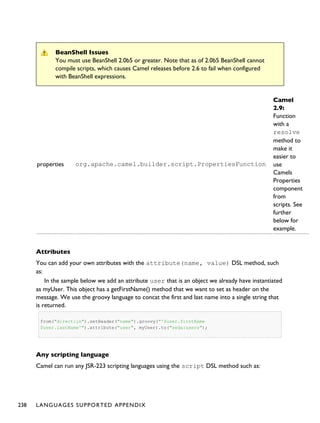
![Context / camel-context
context:camelContextId:localEndpointName
Used to refer to endpoints within
a separate CamelContext to
provide a simple black box
composition approach so that
routes can be combined into a
CamelContext and then used as a
black box component inside other
routes in other CamelContexts
ControlBus / camel-core
controlbus:command[?options]
ControlBus EIP that allows to
send messages to Endpoints for
managing and monitoring your
Camel applications.
CouchDB / camel-couchdb
couchdb:http://hostname[:port]/database[?options]
To integrate with Apache
CouchDB.
Crypto (Digital Signatures) / camel-crypto
crypto:sign:name[?options]
crypto:verify:name[?options]
Used to sign and verify exchanges
using the Signature Service of the
Java Cryptographic Extension.
CXF / camel-cxf
cxf:address[?serviceClass=...]
Working with Apache CXF for
web services integration
CXF Bean / camel-cxf
cxf:bean name
Proceess the exchange using a
JAX WS or JAX RS annotated
bean from the registry. Requires
less configuration than the above
CXF Component
CXFRS / camel-cxf
cxfrs:address[?resourcesClasses=...]
Working with Apache CXF for
REST services integration
CHAPTER 4 - ARCHITECTURE 21](https://image.slidesharecdn.com/camel-manual-2-130809102054-phpapp01/85/Camel-manual-2-11-0-25-320.jpg)
![DataSet / camel-core
dataset:name
For load & soak testing the
DataSet provides a way to create
huge numbers of messages for
sending to Components or
asserting that they are consumed
correctly
Direct / camel-core
direct:name
Synchronous call to another
endpoint from same
CamelContext.
Direct-VM / camel-core
direct-vm:name
Synchronous call to another
endpoint in another
CamelContext running in the
same JVM.
DNS / camel-dns
dns:operation
To lookup domain information
and run DNS queries using
DNSJava
EJB / camel-ejb
ejb:ejbName[?method=someMethod]
Uses the Bean Binding to bind
message exchanges to EJBs. It
works like the Bean component
but just for accessing EJBs.
Supports EJB 3.0 onwards.
ElasticSearch / camel-elasticsearch
elasticsearch://clusterName
For interfacing with an
ElasticSearch server.
Event / camel-spring
event://default
spring-event://default
Working with Spring
ApplicationEvents
EventAdmin / camel-eventadmin
eventadmin:topic
Receiving OSGi EventAdmin
events
22 CHAPTER 4 - ARCHITECTURE](https://image.slidesharecdn.com/camel-manual-2-130809102054-phpapp01/85/Camel-manual-2-11-0-26-320.jpg)
![Exec / camel-exec
exec://executable[?options]
For executing system commands
File / camel-core
file://nameOfFileOrDirectory
Sending messages to a file or
polling a file or directory.
Flatpack / camel-flatpack
flatpack:[fixed|delim]:configFile
Processing fixed width or
delimited files or messages using
the FlatPack library
FOP / camel-fop
fop:outputFormat
Renders the message into
different output formats using
Apache FOP
FreeMarker / camel-freemarker
freemarker:someTemplateResource
Generates a response using a
FreeMarker template
FTP / camel-ftp
ftp://host[:port]/fileName
Sending and receiving files over
FTP.
FTPS / camel-ftp
ftps://host[:port]/fileName
Sending and receiving files over
FTP Secure (TLS and SSL).
GAuth / camel-gae
gauth://name[?options]
Used by web applications to
implement an OAuth consumer.
See also Camel Components for
Google App Engine.
GHttp / camel-gae
ghttp://hostname[:port][/path][?options]
ghttp:///path[?options]
Provides connectivity to the URL
fetch service of Google App
Engine but can also be used to
receive messages from servlets.
See also Camel Components for
Google App Engine.
CHAPTER 4 - ARCHITECTURE 23](https://image.slidesharecdn.com/camel-manual-2-130809102054-phpapp01/85/Camel-manual-2-11-0-27-320.jpg)
![GLogin / camel-gae
glogin://hostname[:port][?options]
Used by Camel applications
outside Google App Engine (GAE)
for programmatic login to GAE
applications. See also Camel
Components for Google App
Engine.
GTask / camel-gae
gtask://queue-name
Supports asynchronous message
processing on Google App Engine
by using the task queueing service
as message queue. See also Camel
Components for Google App
Engine.
GMail / camel-gae
gmail://user@gmail.com[?options]
gmail://user@googlemail.com[?options]
Supports sending of emails via the
mail service of Google App
Engine. See also Camel
Components for Google App
Engine.
Google Guava EventBus / camel-guava-eventbus
guava-eventbus:busName[?eventClass=className]
The Google Guava EventBus
allows publish-subscribe-style
communication between
components without requiring the
components to explicitly register
with one another (and thus be
aware of each other). This
component provides integration
bridge between Camel and
Google Guava EventBus
infrastructure.
Hazelcast / camel-hazelcast
hazelcast://[type]:cachename[?options]
Hazelcast is a data grid entirely
implemented in Java (single jar).
This component supports map,
multimap, seda, queue, set, atomic
number and simple cluster
support.
HBase / camel-hbase
hbase://table[?options]
For reading/writing from/to an
HBase store (Hadoop database)
24 CHAPTER 4 - ARCHITECTURE](https://image.slidesharecdn.com/camel-manual-2-130809102054-phpapp01/85/Camel-manual-2-11-0-28-320.jpg)
![HDFS / camel-hdfs
hdfs://path[?options]
For reading/writing from/to an
HDFS filesystem
HL7 / camel-hl7
mina:tcp://hostname[:port]
For working with the HL7 MLLP
protocol and the HL7 model using
the HAPI library
HTTP / camel-http
http://hostname[:port]
For calling out to external HTTP
servers using Apache HTTP Client
3.x
HTTP4 / camel-http4
http4://hostname[:port]
For calling out to external HTTP
servers using Apache HTTP Client
4.x
iBATIS / camel-ibatis
ibatis://statementName
Performs a query, poll, insert,
update or delete in a relational
database using Apache iBATIS
IMAP / camel-mail
imap://hostname[:port]
Receiving email using IMAP
IRC / camel-irc
irc:host[:port]/#room
For IRC communication
JavaSpace / camel-javaspace
javaspace:jini://host?spaceName=mySpace?...
Sending and receiving messages
through JavaSpace
JBI / servicemix-camel
jbi:serviceName
For JBI integration such as
working with Apache ServiceMix
CHAPTER 4 - ARCHITECTURE 25](https://image.slidesharecdn.com/camel-manual-2-130809102054-phpapp01/85/Camel-manual-2-11-0-29-320.jpg)
![jclouds / jclouds
jclouds:[blobstore|computservice]:provider
For interacting with cloud
compute & blobstore service via
jclouds
JCR / camel-jcr
jcr://user:password@repository/path/to/node
Storing a message in a JCR
compliant repository like Apache
Jackrabbit
JDBC / camel-jdbc
jdbc:dataSourceName?options
For performing JDBC queries and
operations
Jetty / camel-jetty
jetty:url
For exposing services over HTTP
JMS / camel-jms
jms:[topic:]destinationName
Working with JMS providers
JMX / camel-jmx
jmx://platform?options
For working with JMX notification
listeners
JPA / camel-jpa
jpa://entityName
For using a database as a queue via
the JPA specification for working
with OpenJPA, Hibernate or
TopLink
Jsch / camel-jsch
scp://localhost/destination
Support for the scp protocol
JT/400 / camel-jt400
jt400://user:pwd@system/<path_to_dtaq>
For integrating with data queues
on an AS/400 (aka System i, IBM i,
i5, ...) system
26 CHAPTER 4 - ARCHITECTURE](https://image.slidesharecdn.com/camel-manual-2-130809102054-phpapp01/85/Camel-manual-2-11-0-30-320.jpg)
![Kestrel / camel-kestrel
kestrel://[addresslist/]queuename[?options]
For producing to or consuming
from Kestrel queues
Krati / camel-krati
krati://[path to datastore/][?options]
For producing to or consuming to
Krati datastores
Language / camel-core
language://languageName[:script][?options]
Executes Languages scripts
LDAP / camel-ldap
ldap:host[:port]?base=...[&scope=<scope>]
Performing searches on LDAP
servers (<scope> must be one of
object|onelevel|subtree)
Log / camel-core
log:loggingCategory[?level=ERROR]
Uses Jakarta Commons Logging to
log the message exchange to some
underlying logging system like
log4j
Lucene / camel-lucene
lucene:searcherName:insert[?analyzer=<analyzer>]
lucene:searcherName:query[?analyzer=<analyzer>]
Uses Apache Lucene to perform
Java-based indexing and full text
based searches using advanced
analysis/tokenization capabilities
Mail / camel-mail
mail://user-info@host:port
Sending and receiving email
MINA / camel-mina
[tcp|udp|vm]:host[:port]
Working with Apache MINA
Mock / camel-core
mock:name
For testing routes and mediation
rules using mocks
CHAPTER 4 - ARCHITECTURE 27](https://image.slidesharecdn.com/camel-manual-2-130809102054-phpapp01/85/Camel-manual-2-11-0-31-320.jpg)
![MongoDB / camel-mongodb
mongodb:connection?options
Interacts with MongoDB
databases and collections. Offers
producer endpoints to perform
CRUD-style operations and more
against databases and collections,
as well as consumer endpoints to
listen on collections and dispatch
objects to Camel routes
MQTT / camel-mqtt
mqtt:name
Component for communicating
with MQTT M2M message
brokers
MSV / camel-msv
msv:someLocalOrRemoteResource
Validates the payload of a message
using the MSV Library
MyBatis / camel-mybatis
mybatis://statementName
Performs a query, poll, insert,
update or delete in a relational
database using MyBatis
Nagios / camel-nagios
nagios://host[:port]?options
Sending passive checks to Nagios
using JSendNSCA
Netty / camel-netty
netty:tcp//host[:port]?options
netty:udp//host[:port]?options
Working with TCP and UDP
protocols using Java NIO based
capabilities offered by the JBoss
Netty community project
Pax-Logging / camel-paxlogging
paxlogging:appender
Receiving Pax-Logging events in
OSGi
POP / camel-mail
pop3://user-info@host:port
Receiving email using POP3 and
JavaMail
28 CHAPTER 4 - ARCHITECTURE](https://image.slidesharecdn.com/camel-manual-2-130809102054-phpapp01/85/Camel-manual-2-11-0-32-320.jpg)
![Printer / camel-printer
lpr://host:port/path/to/printer[?options]
The printer component facilitates
creation of printer endpoints to
local, remote and wireless
printers. The endpoints provide
the ability to print camel directed
payloads when utilized on camel
routes.
Properties / camel-core
properties://key[?options]
The properties component
facilitates using property
placeholders directly in endpoint
uri definitions.
Quartz / camel-quartz
quartz://groupName/timerName
Provides a scheduled delivery of
messages using the Quartz
scheduler
Quickfix / camel-quickfix
quickfix-server:config file
quickfix-client:config-file
Implementation of the QuickFix
for Java engine which allow to
send/receive FIX messages
Ref / camel-core
ref:name
Component for lookup of existing
endpoints bound in the Registry.
Restlet / camel-restlet
restlet:restletUrl[?options]
Component for consuming and
producing Restful resources using
Restlet
RMI / camel-rmi
rmi://host[:port]
Working with RMI
RNC / camel-jing
rnc:/relativeOrAbsoluteUri
Validates the payload of a message
using RelaxNG Compact Syntax
CHAPTER 4 - ARCHITECTURE 29](https://image.slidesharecdn.com/camel-manual-2-130809102054-phpapp01/85/Camel-manual-2-11-0-33-320.jpg)
![RNG / camel-jing
rng:/relativeOrAbsoluteUri
Validates the payload of a message
using RelaxNG
Routebox / camel-routebox
routebox:routeboxName[?options]
Facilitates the creation of
specialized endpoints that offer
encapsulation and a strategy/map
based indirection service to a
collection of camel routes hosted
in an automatically created or
user injected camel context
RSS / camel-rss
rss:uri
Working with ROME for RSS
integration, such as consuming an
RSS feed.
SEDA / camel-core
seda:name
Asynchronous call to another
endpoint in the same Camel
Context
SERVLET / camel-servlet
servlet:uri
For exposing services over HTTP
through the servlet which is
deployed into the Web container.
SFTP / camel-ftp
sftp://host[:port]/fileName
Sending and receiving files over
SFTP (FTP over SSH).
Sip / camel-sip
sip://user@host[:port]?[options]
sips://user@host[:port]?[options]
Publish/Subscribe communication
capability using the Telecom SIP
protocol. RFC3903 - Session
Initiation Protocol (SIP) Extension
for Event
SJMS / camel-sjms
sjms:[topic:]destinationName?[options]
A ground up implementation of a
JMS client
30 CHAPTER 4 - ARCHITECTURE](https://image.slidesharecdn.com/camel-manual-2-130809102054-phpapp01/85/Camel-manual-2-11-0-34-320.jpg)
![SMTP / camel-mail
smtp://user-info@host[:port]
Sending email using SMTP and
JavaMail
SMPP / camel-smpp
smpp://user-info@host[:port]?options
To send and receive SMS using
Short Messaging Service Center
using the JSMPP library
SNMP / camel-snmp
snmp://host[:port]?options
Polling OID values and receiving
traps using SNMP via SNMP4J
library
Solr / camel-solr
solr://host[:port]/solr?[options]
Uses the Solrj client API to
interface with an Apache Lucene
Solr server
SpringBatch / camel-spring-batch
spring-batch:job[?options]
To bridge Camel and Spring Batch
SpringIntegration / camel-spring-integration
spring-integration:defaultChannelName
The bridge component of Camel
and Spring Integration
Spring LDAP / camel-spring-ldap
spring-ldap:spring-ldap-template-bean?options
Camel wrapper for Spring LDAP
Spring Redis / camel-spring-redis
spring-redis:restletUrl[?options]
Component for consuming and
producing from Redis key-value
store Redis
Spring Web Services / camel-spring-ws
spring-ws:[mapping-type:]address[?options]
Client-side support for accessing
web services, and server-side
support for creating your own
contract-first web services using
Spring Web Services
CHAPTER 4 - ARCHITECTURE 31](https://image.slidesharecdn.com/camel-manual-2-130809102054-phpapp01/85/Camel-manual-2-11-0-35-320.jpg)
![SQL / camel-sql
sql:select * from table where id=#
Performing SQL queries using
JDBC
SSH component / camel-ssh
ssh:[username[:password]@]host[:port][?options]
For sending commands to a SSH
server
StAX / camel-stax
stax:contentHandlerClassName
Process messages through a SAX
ContentHandler.
Stream / camel-stream
stream:[in|out|err|file]
Read or write to an input/output/
error/file stream rather like unix
pipes
StringTemplate / camel-stringtemplate
string-template:someTemplateResource
Generates a response using a
String Template
Stub / camel-core
stub:someOtherCamelUri
Allows you to stub out some
physical middleware endpoint for
easier testing or debugging
TCP / camel-mina
mina:tcp://host:port
Working with TCP protocols
using Apache MINA
Test / camel-spring
test:expectedMessagesEndpointUri
Creates a Mock endpoint which
expects to receive all the message
bodies that could be polled from
the given underlying endpoint
Timer / camel-core
timer://name
A timer endpoint
32 CHAPTER 4 - ARCHITECTURE](https://image.slidesharecdn.com/camel-manual-2-130809102054-phpapp01/85/Camel-manual-2-11-0-36-320.jpg)
![Twitter / camel-twitter
twitter://[endpoint]?[options]
A twitter endpoint
UDP / camel-mina
mina:udp://host:port
Working with UDP protocols
using Apache MINA
Validation / camel-core (camel-spring for Camel 2.8 or
older)
validation:someLocalOrRemoteResource
Validates the payload of a message
using XML Schema and JAXP
Validation
Velocity / camel-velocity
velocity:someTemplateResource
Generates a response using an
Apache Velocity template
VM / camel-core
vm:name
Asynchronous call to another
endpoint in the same JVM
Websocket / camel-websocket
websocket://host:port/path
Communicating with Websocket
clients
XMPP / camel-xmpp
xmpp://host:port/room
Working with XMPP and Jabber
XQuery / camel-saxon
xquery:someXQueryResource
Generates a response using an
XQuery template
XSLT / camel-core (camel-spring for Camel 2.8 or
older)
xslt:someTemplateResource
Generates a response using an
XSLT template
CHAPTER 4 - ARCHITECTURE 33](https://image.slidesharecdn.com/camel-manual-2-130809102054-phpapp01/85/Camel-manual-2-11-0-37-320.jpg)
![Zookeeper / camel-zookeeper
zookeeper://host:port/path
Working with ZooKeeper
cluster(s)
URI's for external components
Other projects and companies have also created Camel components to integrate additional
functionality into Camel. These components may be provided under licenses that are not
compatible with the Apache License, use libraries that are not compatible, etc... These
components are not supported by the Camel team, but we provide links here to help users find
the additional functionality.
Component / ArtifactId / URI License Description
ActiveMQ / activemq-camel
activemq:[topic:]destinationName
Apache
For JMS
Messaging with
Apache
ActiveMQ
ActiveMQ Journal / activemq-core
activemq.journal:directory-on-filesystem
Apache
Uses ActiveMQ's
fast disk
journaling
implementation
to store message
bodies in a
rolling log file
Activiti / activiti-camel
activiti:camelProcess:serviceTask
Apache
For working
with Activiti, a
light-weight
workflow and
Business Process
Management
(BPM) platform
which supports
BPMN 2
Db4o / camel-db4o in camel-extra
db4o://className
GPL
For using a db4o
datastore as a
queue via the
db4o library
34 CHAPTER 4 - ARCHITECTURE](https://image.slidesharecdn.com/camel-manual-2-130809102054-phpapp01/85/Camel-manual-2-11-0-38-320.jpg)

![Spring Neo4j / camel-spring-neo4j in camel-extra
spring-neo4j:http://hostname[:port]/database[?options]
to bee
clarified
Component for
producing to
Neo4j datastore
using the Spring
Data Neo4j
library
ZeroMQ / camel-zeromq in camel-extra.
zeromq:(tcp|ipc)://hostname:port
LGPL
The ZeroMQ
component
allows you to
consumer or
produce
messages using
ZeroMQ.
For a full details of the individual components see the Component Appendix
36 CHAPTER 4 - ARCHITECTURE](https://image.slidesharecdn.com/camel-manual-2-130809102054-phpapp01/85/Camel-manual-2-11-0-40-320.jpg)


![String id = userId + generateHashCodeForPayload(payload);
return id;
}
}
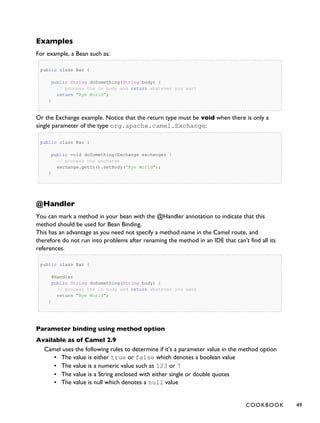
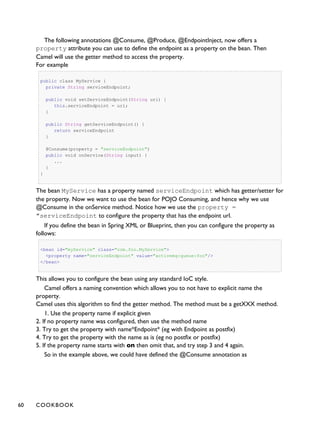
The Pojo MyIdGenerator has one public method that accepts two parameters. However we
have also annotated this one with the @Header and @Body annotation to help Camel know
what to bind here from the Message from the Exchange being processed.
Of course this could be simplified a lot if you for instance just have a simple id generator.
But we wanted to demonstrate that you can use the Bean Binding annotations anywhere.
public class MySimpleIdGenerator {
public static int generate() {
// generate a unique id
return 123;
}
}
And finally we just need to remember to have our bean registered in the Spring Registry:
<bean id="myCorrelationIdGenerator" class="com.mycompany.MySimpleIdGenerator"/>
Example using Groovy
In this example we have an Exchange that has a User object stored in the in header. This User
object has methods to get some user information. We want to use Groovy to inject an
expression that extracts and concats the fullname of the user into the fullName parameter.
public void doSomething(@Groovy("$request.header['user'].firstName
$request.header['user'].familyName) String fullName, @Body String body) {
// process the inbound message here
}
Groovy supports GStrings that is like a template where we can insert $ placeholders that will
be evaluated by Groovy.
BEAN BINDING
Bean Binding in Camel defines both which methods are invoked and also how the Message is
converted into the parameters of the method when it is invoked.
46 COOKBOOK](https://image.slidesharecdn.com/camel-manual-2-130809102054-phpapp01/85/Camel-manual-2-11-0-50-320.jpg)


![return sb.toString();
}
public String times(byte[] data, @Header("times") int times) {
String s = new String(data);
StringBuilder sb = new StringBuilder();
for (int i = 0; i < times; i++) {
sb.append(s);
if (i < times - 1) {
sb.append(",");
}
}
return sb.toString();
}
public String times(String name, int times, char separator) {
StringBuilder sb = new StringBuilder();
for (int i = 0; i < times; i++) {
sb.append(name);
if (i < times - 1) {
sb.append(separator);
}
}
return sb.toString();
}
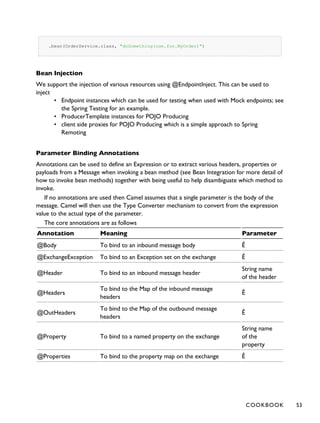
}
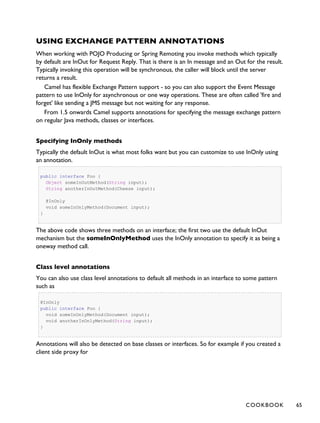
Then the MyBean has 2 overloaded methods with the names hello and times. So if we
want to use the method which has 2 parameters we can do as follows in the Camel route:
Listing 1.Listing 1. Invoke 2 parameter methodInvoke 2 parameter method
from("direct:start")
.bean(MyBean.class, "hello(String,String)")
.to("mock:result");
We can also use a * as wildcard so we can just say we want to execute the method with 2
parameters we do
Listing 1.Listing 1. Invoke 2 parameter method using wildcardInvoke 2 parameter method using wildcard
from("direct:start")
.bean(MyBean.class, "hello(*,*)")
.to("mock:result");
By default Camel will match the type name using the simple name, e.g. any leading package name
will be disregarded. However if you want to match using the FQN, then specify the FQN type
and Camel will leverage that. So if you have a com.foo.MyOrder and you want to match
against the FQN, and not the simple name "MyOrder", then follow this example:
52 COOKBOOK](https://image.slidesharecdn.com/camel-manual-2-130809102054-phpapp01/85/Camel-manual-2-11-0-56-320.jpg)


![Example using Groovy
In this example we have an Exchange that has a User object stored in the in header. This User
object has methods to get some user information. We want to use Groovy to inject an
expression that extracts and concats the fullname of the user into the fullName parameter.
public void doSomething(@Groovy("$request.header['user'].firstName
$request.header['user'].familyName) String fullName, @Body String body) {
// process the inbound message here
}
Groovy supports GStrings that is like a template where we can insert $ placeholders that will
be evaluated by Groovy.
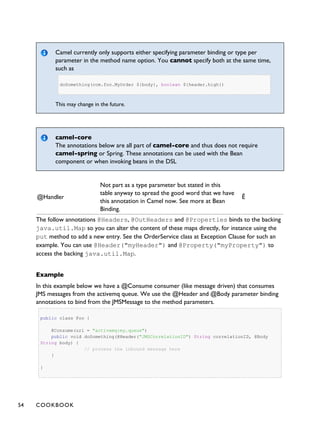
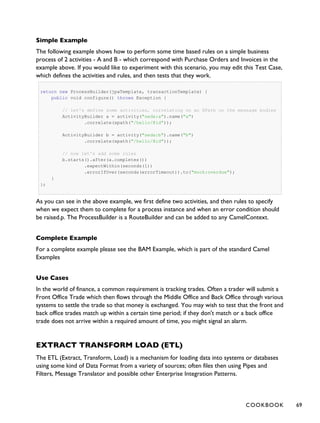
@Consume
To consume a message you use the @Consume annotation to mark a particular method of a
bean as being a consumer method. The uri of the annotation defines the Camel Endpoint to
consume from.
e.g. lets invoke the onCheese() method with the String body of the inbound JMS message
from ActiveMQ on the cheese queue; this will use the Type Converter to convert the JMS
ObjectMessage or BytesMessage to a String - or just use a TextMessage from JMS
public class Foo {
@Consume(uri="activemq:cheese")
public void onCheese(String name) {
...
}
}
The Bean Binding is then used to convert the inbound Message to the parameter list used to
invoke the method .
What this does is basically create a route that looks kinda like this
from(uri).bean(theBean, "methodName");
Using context option to apply only a certain CamelContext
See the warning above.
You can use the context option to specify which CamelContext the consumer should
only apply for. For example:
58 COOKBOOK](https://image.slidesharecdn.com/camel-manual-2-130809102054-phpapp01/85/Camel-manual-2-11-0-62-320.jpg)


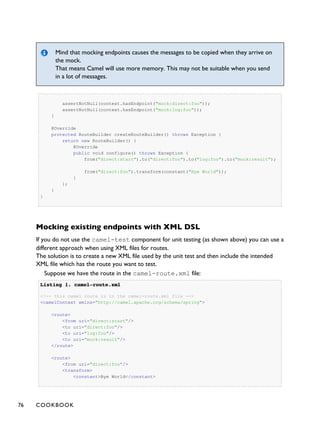
![See POJO Consuming for how to use a property on the bean as endpoint
configuration, eg using the property attribute on @Produce, @EndpointInject.
Simple Example using @Consume and @RecipientList
package com.acme.foo;
public class RouterBean {
@Consume(uri = "activemq:foo")
@RecipientList
public String[] route(String body) {
return new String[]{"activemq:bar", "activemq:whatnot"};
}
}
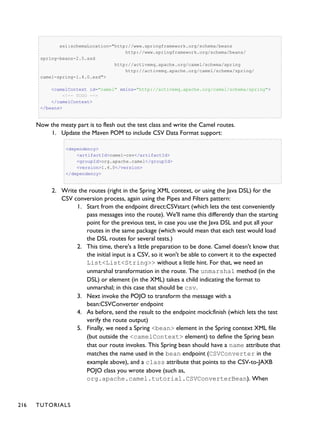
For example if the above bean is configured in Spring when using a <camelContext>
element as follows
<?xml version="1.0" encoding="UTF-8"?>
<beans xmlns="http://www.springframework.org/schema/beans"
xmlns:xsi="http://www.w3.org/2001/XMLSchema-instance"
xsi:schemaLocation="
http://www.springframework.org/schema/beans http://www.springframework.org/
schema/beans/spring-beans.xsd
http://camel.apache.org/schema/spring http://camel.apache.org/schema/spring/
camel-spring.xsd
">
<camelContext xmlns="http://activemq.apache.org/camel/schema/spring"/>
<bean id="myRecipientList" class="com.acme.foo.RouterBean"/>
</beans>
then a route will be created consuming from the foo queue on the ActiveMQ component
which when a message is received the message will be forwarded to the endpoints defined by
the result of this method call - namely the bar and whatnot queues.
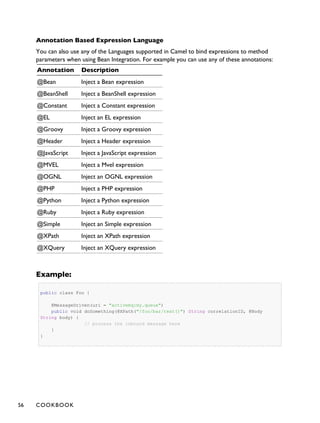
How it works
The return value of the @RecipientList method is converted to either a java.util.Collection /
java.util.Iterator or array of objects where each element is converted to an Endpoint or a String,
or if you are only going to route to a single endpoint then just return either an Endpoint object
or an object that can be converted to a String. So the following methods are all valid
COOKBOOK 63](https://image.slidesharecdn.com/camel-manual-2-130809102054-phpapp01/85/Camel-manual-2-11-0-67-320.jpg)
![@RecipientList
public String[] route(String body) { ... }
@RecipientList
public List<String> route(String body) { ... }
@RecipientList
public Endpoint route(String body) { ... }
@RecipientList
public Endpoint[] route(String body) { ... }
@RecipientList
public Collection<Endpoint> route(String body) { ... }
@RecipientList
public URI route(String body) { ... }
@RecipientList
public URI[] route(String body) { ... }
Then for each endpoint or URI the message is forwarded a separate copy to that endpoint.
You can then use whatever Java code you wish to figure out what endpoints to route to; for
example you can use the Bean Binding annotations to inject parts of the message body or
headers or use Expression values on the message.
More Complex Example Using DSL
In this example we will use more complex Bean Binding, plus we will use a separate route to
invoke the Recipient List
public class RouterBean2 {
@RecipientList
public String route(@Header("customerID") String custID String body) {
if (custID == null) return null;
return "activemq:Customers.Orders." + custID;
}
}
public class MyRouteBuilder extends RouteBuilder {
protected void configure() {
from("activemq:Orders.Incoming").recipientList(bean("myRouterBean", "route"));
}
}
Notice how we are injecting some headers or expressions and using them to determine the
recipients using Recipient List EIP.
See the Bean Integration for more details.
64 COOKBOOK](https://image.slidesharecdn.com/camel-manual-2-130809102054-phpapp01/85/Camel-manual-2-11-0-68-320.jpg)


![So you could query data from various Camel Components such as File, HTTP or JPA,
perform multiple patterns such as Splitter or Message Translator then send the messages to
some other Component.
To show how this all fits together, try the ETL Example
MOCK COMPONENT
Testing of distributed and asynchronous processing is notoriously difficult. The Mock, Test and
DataSet endpoints work great with the Camel Testing Framework to simplify your unit and
integration testing using Enterprise Integration Patterns and Camel's large range of Components
together with the powerful Bean Integration.
The Mock component provides a powerful declarative testing mechanism, which is similar to
jMock in that it allows declarative expectations to be created on any Mock endpoint before a
test begins. Then the test is run, which typically fires messages to one or more endpoints, and
finally the expectations can be asserted in a test case to ensure the system worked as expected.
This allows you to test various things like:
• The correct number of messages are received on each endpoint,
• The correct payloads are received, in the right order,
• Messages arrive on an endpoint in order, using some Expression to create an order
testing function,
• Messages arrive match some kind of Predicate such as that specific headers have
certain values, or that parts of the messages match some predicate, such as by
evaluating an XPath or XQuery Expression.
Note that there is also the Test endpoint which is a Mock endpoint, but which uses a second
endpoint to provide the list of expected message bodies and automatically sets up the Mock
endpoint assertions. In other words, it's a Mock endpoint that automatically sets up its
assertions from some sample messages in a File or database, for example.
URI format
mock:someName[?options]
Where someName can be any string that uniquely identifies the endpoint.
You can append query options to the URI in the following format,
?option=value&option=value&...
Options
Option Default Description
reportGroup null A size to use a throughput logger for reporting
70 COOKBOOK](https://image.slidesharecdn.com/camel-manual-2-130809102054-phpapp01/85/Camel-manual-2-11-0-74-320.jpg)


![assertNotNull(context.hasEndpoint("direct:foo"));
assertNotNull(context.hasEndpoint("log:foo"));
assertNotNull(context.hasEndpoint("mock:result"));
// all the endpoints was mocked
assertNotNull(context.hasEndpoint("mock:direct:start"));
assertNotNull(context.hasEndpoint("mock:direct:foo"));
assertNotNull(context.hasEndpoint("mock:log:foo"));
}
Notice that the mock endpoints is given the uri mock:<endpoint>, for example
mock:direct:foo. Camel logs at INFO level the endpoints being mocked:
INFO Adviced endpoint [direct://foo] with mock endpoint [mock:direct:foo]
Its also possible to only mock certain endpoints using a pattern. For example to mock all log
endpoints you do as shown:
Listing 1.Listing 1. adviceWith mocking only log endpoints using a patternadviceWith mocking only log endpoints using a pattern
public void testAdvisedMockEndpointsWithPattern() throws Exception {
// advice the first route using the inlined AdviceWith route builder
// which has extended capabilities than the regular route builder
context.getRouteDefinitions().get(0).adviceWith(context, new
AdviceWithRouteBuilder() {
@Override
public void configure() throws Exception {
// mock only log endpoints
mockEndpoints("log*");
}
});
// now we can refer to log:foo as a mock and set our expectations
getMockEndpoint("mock:log:foo").expectedBodiesReceived("Bye World");
getMockEndpoint("mock:result").expectedBodiesReceived("Bye World");
template.sendBody("direct:start", "Hello World");
assertMockEndpointsSatisfied();
// additional test to ensure correct endpoints in registry
assertNotNull(context.hasEndpoint("direct:start"));
assertNotNull(context.hasEndpoint("direct:foo"));
assertNotNull(context.hasEndpoint("log:foo"));
assertNotNull(context.hasEndpoint("mock:result"));
// only the log:foo endpoint was mocked
assertNotNull(context.hasEndpoint("mock:log:foo"));
assertNull(context.hasEndpoint("mock:direct:start"));
assertNull(context.hasEndpoint("mock:direct:foo"));
}
74 COOKBOOK](https://image.slidesharecdn.com/camel-manual-2-130809102054-phpapp01/85/Camel-manual-2-11-0-78-320.jpg)

![</transform>
</route>
</camelContext>
Then we create a new XML file as follows, where we include the camel-route.xml file and
define a spring bean with the class
org.apache.camel.impl.InterceptSendToMockEndpointStrategy which tells
Camel to mock all endpoints:
Listing 1.Listing 1. test-camel-route.xmltest-camel-route.xml
<!-- the Camel route is defined in another XML file -->
<import resource="camel-route.xml"/>
<!-- bean which enables mocking all endpoints -->
<bean id="mockAllEndpoints"
class="org.apache.camel.impl.InterceptSendToMockEndpointStrategy"/>
Then in your unit test you load the new XML file (test-camel-route.xml) instead of
camel-route.xml.
To only mock all Log endpoints you can define the pattern in the constructor for the bean:
<bean id="mockAllEndpoints"
class="org.apache.camel.impl.InterceptSendToMockEndpointStrategy">
<constructor-arg index="0" value="log*"/>
</bean>
Mocking endpoints and skip sending to original endpoint
Available as of Camel 2.10
Sometimes you want to easily mock and skip sending to a certain endpoints. So the message
is detoured and send to the mock endpoint only. From Camel 2.10 onwards you can now use
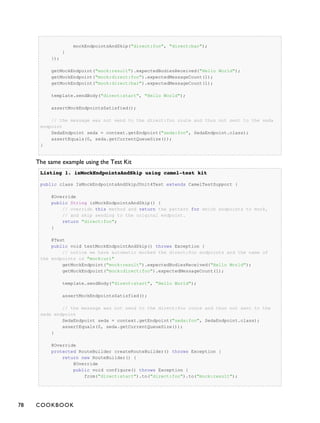
the mockEndpointsAndSkip method using AdviceWith or the [Test Kit]. The example
below will skip sending to the two endpoints "direct:foo", and "direct:bar".
Listing 1.Listing 1. adviceWith mock and skip sending to endpointsadviceWith mock and skip sending to endpoints
public void testAdvisedMockEndpointsWithSkip() throws Exception {
// advice the first route using the inlined AdviceWith route builder
// which has extended capabilities than the regular route builder
context.getRouteDefinitions().get(0).adviceWith(context, new
AdviceWithRouteBuilder() {
@Override
public void configure() throws Exception {
// mock sending to direct:foo and direct:bar and skip send to it
COOKBOOK 77](https://image.slidesharecdn.com/camel-manual-2-130809102054-phpapp01/85/Camel-manual-2-11-0-81-320.jpg)


![Its important to start the CamelContext manually from the unit test after you are
done doing all the advice with.
boolean isUseDebugger()
If this method returns true, theÊdebugBefore(Excha
Processor processor, ProcessorDefinition<?>
definition,ÊString id, String label)ÊandÊ
debugAfter(Exchange exchange, Processor pr
ProcessorDefinition<?> definition,ÊString id,
timeTaken)Êmethods are invoked for each processor
routes.
int getShutdownTimeout()
Returns the number of seconds that Camel should wait f
shutdown. ÊUseful for decreasing test times when a mes
the end of the test.
boolean useJmx() If JMX should be disabled on the CamelContext used in
JndiRegistry createRegistry()
Provides a hook for adding objects into the registry. ÊOv
to bind objects to the registry before test methods are in
useOverridePropertiesWithPropertiesComponent
Camel 2.10: Allows to add/override properties when U
PropertyPlaceholder in Camel.
ignoreMissingLocationWithPropertiesComponent
Camel 2.10: Allows to control if Camel should ignore
properties.
JNDI
Camel uses a Registry to allow you to configure Component or Endpoint instances or Beans
used in your routes. If you are not using Spring or [OSGi] then JNDI is used as the default
registry implementation.
So you will also need to create a jndi.properties file in your src/test/resources
directory so that there is a default registry available to initialise the CamelContext.
Here is an example jndi.properties file
java.naming.factory.initial = org.apache.camel.util.jndi.CamelInitialContextFactory
Dynamically assigning ports
Available as of Camel 2.7
Tests that use port numbers will fail if that port is already on use.
AvailablePortFinder provides methods for finding unused port numbers at runtime.
94 COOKBOOK](https://image.slidesharecdn.com/camel-manual-2-130809102054-phpapp01/85/Camel-manual-2-11-0-98-320.jpg)


![<property name="brokerURL" value="tcp://localhost:${tcp.port}"/>
</bean>
The client will not use the Camel Maven Plugin so the Spring XML has been placed in src/main/
resources to not conflict with the server configs.
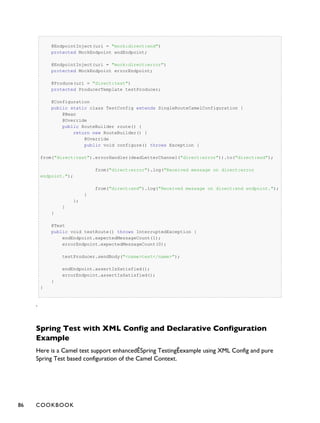
camelContext The Camel context is defined but does not contain any routes
template The ProducerTemplate is used to place messages onto the JMS queue
jms bean
This initialises the Camel JMS component, allowing us to place messages
onto the queue
And the CamelClient source code:
public static void main(final String[] args) throws Exception {
System.out.println("Notice this client requires that the CamelServer is already
running!");
ApplicationContext context = new
ClassPathXmlApplicationContext("camel-client.xml");
// get the camel template for Spring template style sending of messages (=
producer)
ProducerTemplate camelTemplate = context.getBean("camelTemplate",
ProducerTemplate.class);
System.out.println("Invoking the multiply with 22");
// as opposed to the CamelClientRemoting example we need to define the service URI
in this java code
int response = (Integer)camelTemplate.sendBody("jms:queue:numbers",
ExchangePattern.InOut, 22);
System.out.println("... the result is: " + response);
System.exit(0);
}
The ProducerTemplate is retrieved from a Spring ApplicationContext and used to
manually place a message on the "numbers" JMS queue. The requestBody method will use
the exchange pattern InOut, which states that the call should be synchronous, and that the
caller expects a response.
Before running the client be sure that both the ActiveMQ broker and the CamelServer
are running.
Client Using Spring Remoting
Spring Remoting "eases the development of remote-enabled services". It does this by allowing
you to invoke remote services through your regular Java interface, masking that a remote
service is being called.
TUTORIALS 131](https://image.slidesharecdn.com/camel-manual-2-130809102054-phpapp01/85/Camel-manual-2-11-0-135-320.jpg)
![<!-- Camel proxy for a given service, in this case the JMS queue -->
<camel:proxy
id="multiplierProxy"
serviceInterface="org.apache.camel.example.server.Multiplier"
serviceUrl="jms:queue:numbers"/>
The snippet above only illustrates the different and how Camel easily can setup and use Spring
Remoting in one line configurations.
The proxy will create a proxy service bean for you to use to make the remote invocations.
The serviceInterface property details which Java interface is to be implemented by the
proxy. serviceUrl defines where messages sent to this proxy bean will be directed. Here we
define the JMS endpoint with the "numbers" queue we used when working with Camel template
directly. The value of the id property is the name that will be the given to the bean when it is
exposed through the Spring ApplicationContext. We will use this name to retrieve the
service in our client. I have named the bean multiplierProxy simply to highlight that it is not the
same multiplier bean as is being used by CamelServer. They are in completely independent
contexts and have no knowledge of each other. As you are trying to mask the fact that
remoting is being used in a real application you would generally not include proxy in the name.
And the Java client source code:
public static void main(final String[] args) {
System.out.println("Notice this client requires that the CamelServer is already
running!");
ApplicationContext context = new
ClassPathXmlApplicationContext("camel-client-remoting.xml");
// just get the proxy to the service and we as the client can use the "proxy" as
it was
// a local object we are invoking. Camel will under the covers do the remote
communication
// to the remote ActiveMQ server and fetch the response.
Multiplier multiplier = context.getBean("multiplierProxy", Multiplier.class);
System.out.println("Invoking the multiply with 33");
int response = multiplier.multiply(33);
System.out.println("... the result is: " + response);
System.exit(0);
}
Again, the client is similar to the original client, but with some important differences.
1. The Spring context is created with the new camel-client-remoting.xml
2. We retrieve the proxy bean instead of a ProducerTemplate. In a non-trivial
example you would have the bean injected as in the standard Spring manner.
3. The multiply method is then called directly. In the client we are now working to an
interface. There is no mention of Camel or JMS inside our Java code.
132 TUTORIALS](https://image.slidesharecdn.com/camel-manual-2-130809102054-phpapp01/85/Camel-manual-2-11-0-136-320.jpg)
![Client Using Message Endpoint EIP Pattern
This client uses the Message Endpoint EIP pattern to hide the complexity to communicate to
the Server. The Client uses the same simple API to get hold of the endpoint, create an
exchange that holds the message, set the payload and create a producer that does the send and
receive. All done using the same neutral Camel API for all the components in Camel. So if the
communication was socket TCP based you just get hold of a different endpoint and all the java
code stays the same. That is really powerful.
Okay enough talk, show me the code!
public static void main(final String[] args) throws Exception {
System.out.println("Notice this client requires that the CamelServer is already
running!");
ApplicationContext context = new
ClassPathXmlApplicationContext("camel-client.xml");
CamelContext camel = context.getBean("camel-client", CamelContext.class);
// get the endpoint from the camel context
Endpoint endpoint = camel.getEndpoint("jms:queue:numbers");
// create the exchange used for the communication
// we use the in out pattern for a synchronized exchange where we expect a response
Exchange exchange = endpoint.createExchange(ExchangePattern.InOut);
// set the input on the in body
// must be correct type to match the expected type of an Integer object
exchange.getIn().setBody(11);
// to send the exchange we need an producer to do it for us
Producer producer = endpoint.createProducer();
// start the producer so it can operate
producer.start();
// let the producer process the exchange where it does all the work in this
oneline of code
System.out.println("Invoking the multiply with 11");
producer.process(exchange);
// get the response from the out body and cast it to an integer
int response = exchange.getOut().getBody(Integer.class);
System.out.println("... the result is: " + response);
// stop and exit the client
producer.stop();
System.exit(0);
}
Switching to a different component is just a matter of using the correct endpoint. So if we had
defined a TCP endpoint as: "mina:tcp://localhost:61610" then its just a matter of
getting hold of this endpoint instead of the JMS and all the rest of the java code is exactly the
same.
TUTORIALS 133](https://image.slidesharecdn.com/camel-manual-2-130809102054-phpapp01/85/Camel-manual-2-11-0-137-320.jpg)


![assertEquals("Response code is wrong", "OK", out.getCode());
}
Now we are nearly there. But if you run the unit test with mvn test then it will fail. Why!!!
Well its because that CXF needs is missing some dependencies during unit testing. In fact it
needs the web container, so we need to add this to our pom.xml.
<!-- cxf web container for unit testing -->
<dependency>
<groupId>org.apache.cxf</groupId>
<artifactId>cxf-rt-transports-http-jetty</artifactId>
<version>${cxf-version}</version>
<scope>test</scope>
</dependency>
Well what is that, CXF also uses Jetty for unit test - well its just shows how agile, embedable
and popular Jetty is.
So lets run our junit test with, and it reports:
mvn test
Tests run: 1, Failures: 0, Errors: 0, Skipped: 0
[INFO] BUILD SUCCESSFUL
Yep thats it for now. We have a basic project setup.
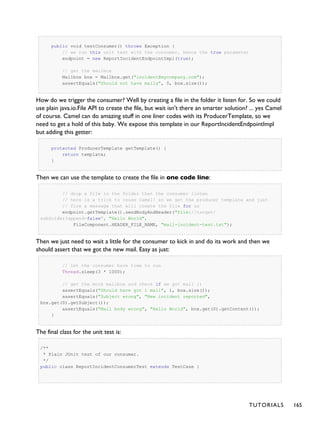
END OF PART 1
Thanks for being patient and reading all this more or less standard Maven, Spring, JAXWS and
Apache CXF stuff. Its stuff that is well covered on the net, but I wanted a full fledged tutorial on
a maven project setup that is web service ready with Apache CXF. We will use this as a base
for the next part where we demonstrate how Camel can be digested slowly and piece by piece
just as it was back in the times when was introduced and was learning the Spring framework
that we take for granted today.
RESOURCES
• Apache CXF user guide
LINKS
▪ Introduction
▪ Part 1
148 TUTORIALS](https://image.slidesharecdn.com/camel-manual-2-130809102054-phpapp01/85/Camel-manual-2-11-0-152-320.jpg)


![Component Documentation
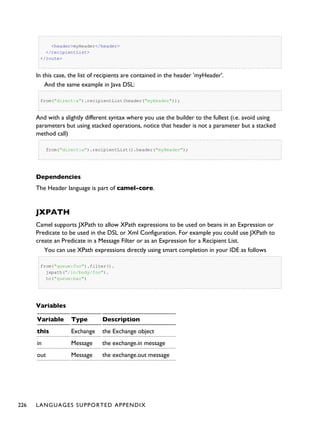
The Log and File components is documented as well, just click on the links. Just
return to this documentation later when you must use these components for real.
// create an Exchange that we want to send to the endpoint
Exchange exchange = endpoint.createExchange();
// set the in message payload (=body) with the name parameter
exchange.getIn().setBody(name);
// now we want to send the exchange to this endpoint and we then need a
producer
// for this, so we create and start the producer.
Producer producer = endpoint.createProducer();
producer.start();
// process the exchange will send the exchange to the log component, that
will process
// the exchange and yes log the payload
producer.process(exchange);
// stop the producer, we want to be nice and cleanup
producer.stop();
} catch (Exception e) {
// we ignore any exceptions and just rethrow as runtime
throw new RuntimeException(e);
}
}
Okay there are code comments in the code block above that should explain what is happening.
We run the code by invoking our unit test with maven mvn test, and we should get this log
line:
INFO: Exchange[BodyType:String, Body:Claus Ibsen]
WRITE TO FILE - EASY WITH THE SAME CODE STYLE
Okay that isn't to impressive, Camel can log Well I promised that the above code style can
be used for any component, so let's store the payload in a file. We do this by adding the file
component to the Camel context
TUTORIALS 151](https://image.slidesharecdn.com/camel-manual-2-130809102054-phpapp01/85/Camel-manual-2-11-0-155-320.jpg)


![URL Configuration
The URL configuration in Camel endpoints is just like regular URL we know from
the Internet. You use ? and & to set the options.
Camel Type Converter
Why don't we just cast it as we always do in Java? Well the biggest advantage when
you provide the type as a parameter you tell Camel what type you want and Camel
can automatically convert it for you, using its flexible Type Converter mechanism.
This is a great advantage, and you should try to use this instead of regular type
casting.
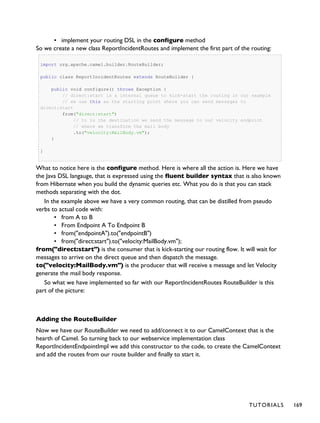
in action, we just do a common trick adding some sleep in our unit test, that gives our Event
Driven Consumer time to react and print to System.out. We will later refine the test:
public void testRendportIncident() throws Exception {
...
OutputReportIncident out = client.reportIncident(input);
assertEquals("Response code is wrong", "OK", out.getCode());
// give the event driven consumer time to react
Thread.sleep(10 * 1000);
}
We run the test with mvn clean test and have eyes fixed on the console output.
During all the output in the console, we see that our consumer has been triggered, as we want.
2008-07-19 12:09:24,140 [mponent@1f12c4e] DEBUG FileProcessStrategySupport - Locking
the file: targetsubfoldermail-incident-123.txt ...
Sending email...Incident 123 has been reported on the 2008-07-16 by Claus Ibsen.
The person can be contact by:
- email: davsclaus@apache.org
- phone: +45 2962 7576
Summary: bla bla
Details:
more bla bla
This is an auto generated email. You can not reply.
2008-07-19 12:09:24,156 [mponent@1f12c4e] DEBUG FileConsumer - Done processing file:
targetsubfoldermail-incident-123.txt. Status is: OK
162 TUTORIALS](https://image.slidesharecdn.com/camel-manual-2-130809102054-phpapp01/85/Camel-manual-2-11-0-166-320.jpg)


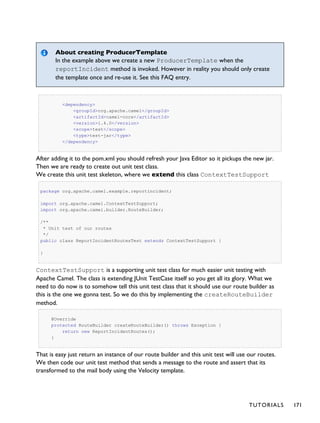


![return out;
}
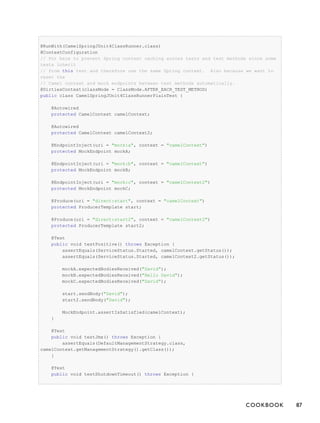
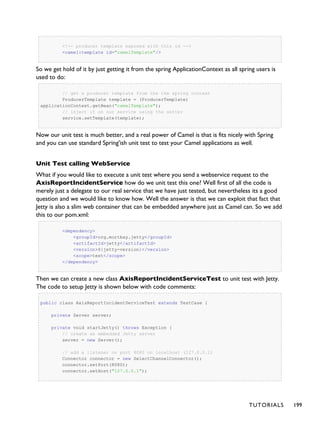
The template in the code above uses 4 parameters:
▪ the endpoint name, in this case the id referring to the endpoint defined in Spring XML
in the camelContext element.
▪ the payload, can be any kind of object
▪ the key for the header, in this case a Camel keyword to set the filename
▪ and the value for the header
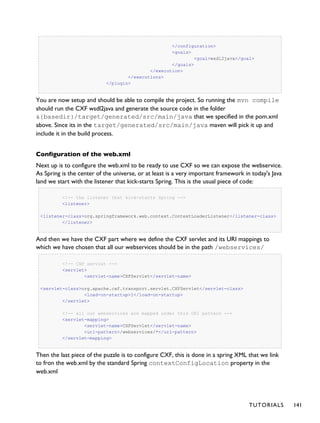
Running the example
We start our integration with maven using mvn jetty:run. Then we open a browser and
hit http://localhost:8080. Jetty is so smart that it display a frontpage with links to the
deployed application so just hit the link and you get our application. Now we hit append
/services to the URL to access the Axis frontpage. The URL should be
http://localhost:8080/camel-example-axis/services.
You can then test it using a web service test tools such as SoapUI.
Hitting the service will output to the console
2008-09-06 15:01:41.718::INFO: Started SelectChannelConnector @ 0.0.0.0:8080
[INFO] Started Jetty Server
Hello ReportIncidentService is called from Ibsen
And there should be a file in the target subfolder.
dir target /b
123.txt
Unit Testing
We would like to be able to unit test our ReportIncidentService class. So we add junit to
the maven dependency:
<dependency>
<groupId>junit</groupId>
<artifactId>junit</artifactId>
<version>3.8.2</version>
<scope>test</scope>
</dependency>
And then we create a plain junit testcase for our service class.
TUTORIALS 195](https://image.slidesharecdn.com/camel-manual-2-130809102054-phpapp01/85/Camel-manual-2-11-0-199-320.jpg)


![<from uri="seda:foo"/>
<to uri="mock:results"/>
</route>
</camelContext>
</beans>
Then boot up your web application and you're good to go!
Hints and Tips
If you use Maven to build your application your directory tree will look like this...
src/main/webapp/WEB-INF
web.xml
applicationContext.xml
You should update your Maven pom.xml to enable WAR packaging/naming like this...
<project>
...
<packaging>war</packaging>
...
<build>
<finalName>[desired WAR file name]</finalName>
...
</build>
To enable more rapid development we highly recommend the jetty:run maven plugin.
Please refer to the help for more information on using jetty:run - but briefly if you add the
following to your pom.xml
<build>
<plugins>
<plugin>
<groupId>org.mortbay.jetty</groupId>
<artifactId>maven-jetty-plugin</artifactId>
<configuration>
<webAppConfig>
<contextPath>/</contextPath>
</webAppConfig>
<scanIntervalSeconds>10</scanIntervalSeconds>
</configuration>
</plugin>
</plugins>
</build>
Then you can run your web application as follows
204 TUTORIALS](https://image.slidesharecdn.com/camel-manual-2-130809102054-phpapp01/85/Camel-manual-2-11-0-208-320.jpg)
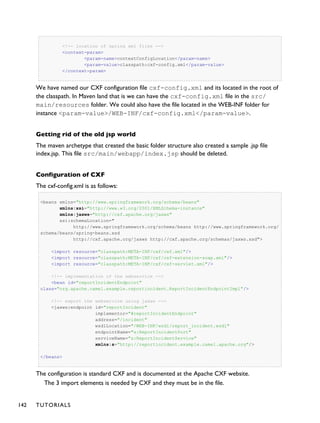
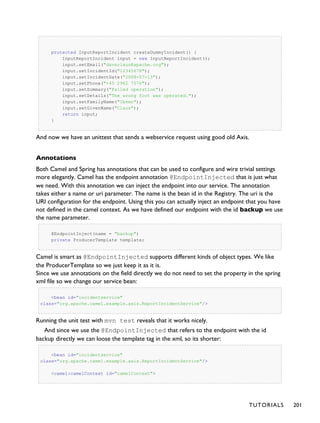
![mvn jetty:run
Then Jetty will also monitor your target/classes directory and your src/main/webapp directory
so that if you modify your spring XML, your web.xml or your java code the web application will
be restarted, re-creating your Camel routes.
If your unit tests take a while to run, you could miss them out when running your web
application via
mvn -Dtest=false jetty:run
TUTORIAL BUSINESS PARTNERS
BACKGROUND AND INTRODUCTION
Business Background
So there's a company, which we'll call Acme. Acme sells widgets, in a fairly unusual way. Their
customers are responsible for telling Acme what they purchased. The customer enters into
their own systems (ERP or whatever) which widgets they bought from Acme. Then at some
point, their systems emit a record of the sale which needs to go to Acme so Acme can bill them
for it. Obviously, everyone wants this to be as automated as possible, so there needs to be
integration between the customer's system and Acme.
Sadly, Acme's sales people are, technically speaking, doormats. They tell all their prospects,
"you can send us the data in whatever format, using whatever protocols, whatever. You just
can't change once it's up and running."
The result is pretty much what you'd expect. Taking a random sample of 3 customers:
• Customer 1: XML over FTP
• Customer 2: CSV over HTTP
• Customer 3: Excel via e-mail
Now on the Acme side, all this has to be converted to a canonical XML format and submitted
to the Acme accounting system via JMS. Then the Acme accounting system does its stuff and
sends an XML reply via JMS, with a summary of what it processed (e.g. 3 line items accepted,
line item #2 in error, total invoice $123.45). Finally, that data needs to be formatted into an e-
mail, and sent to a contact at the customer in question ("Dear Joyce, we received an invoice on
1/2/08. We accepted 3 line items totaling $123.45, though there was an error with line items
#2 [invalid quantity ordered]. Thank you for your business. Love, Acme.").
So it turns out Camel can handle all this:
• Listen for HTTP, e-mail, and FTP files
• Grab attachments from the e-mail messages
TUTORIALS 205](https://image.slidesharecdn.com/camel-manual-2-130809102054-phpapp01/85/Camel-manual-2-11-0-209-320.jpg)


![Spring is in the picture, any bean endpoints look up Spring beans with the
specified name.
3. Write a test method in the test class, which should look very similar to the previous
test class:
1. Get the MockEndpoint for the final endpoint, and tell it to expect one
message
2. Load the Partner 2 sample CSV file from the ClassPath, and send it as the
body of a message to the starting endpoint
3. Verify that the final MockEndpoint is satisfied (that is, it received one
message) and examine the message body if you like
▪ Note that we didn't marshal the JAXB POJOs to XML in this test,
so the final message should contain an Invoice as the body. You
could write a simple line of code to get the Exchange (and
Message) from the MockEndpoint to confirm that.
4. Run this new test with mvn install and make sure it passes and the build completes
successfully.
Solution: Your finished test might look something like this:
• src/test/java/org/apache/camel/tutorial/CSVInputTest.java
• For XML Configuration:
◦ src/test/resources/CSVInputTest-context.xml
• Or, for Java DSL Configuration:
◦ src/test/resources/CSVInputTest-dsl-context.xml
◦ src/test/java/org/apache/camel/tutorial/routes/CSVInputTestRoute.java
Step 6: Initial Work on Customer 3 Input (Excel over e-mail)
To get a start on Customer 3, we'll create a POJO to convert the Customer 3 sample Excel
data into the JAXB POJOs representing the canonical XML format, write a small Camel route
to test it, and build that into a unit test. If we get through this, we can be pretty sure that the
Excel conversion and JAXB handling is valid and can be run safely in Camel.
Create an Excel-handling POJO
Camel does not have a data format handler for Excel by default. We have two options Ð create
an Excel DataFormat (so Camel can convert Excel spreadsheets to something like the CSV
List<List<String>> automatically), or create a POJO that can translate Excel data
manually. For now, the second approach is easier (if we go the DataFormat route, we need
code to both read and write Excel files, whereas otherwise read-only will do).
So, we need a POJO with a method that takes something like an InputStream or
byte[] as an argument, and returns in Invoice as before. The process should look
something like this:
1. Update the Maven POM to include POI support:
TUTORIALS 217](https://image.slidesharecdn.com/camel-manual-2-130809102054-phpapp01/85/Camel-manual-2-11-0-221-320.jpg)


![<setHeader headerName="theHeader">
<constant>the value</constant>
</setHeader>
<to uri="mock:b"/>
</route>
in this case, the Message coming from the seda:a Endpoint will have 'theHeader' header set to
the constant value 'the value'.
And the same example using Java DSL:
from("seda:a").setHeader("theHeader", constant("the value")).to("mock:b");
Dependencies
The Constant language is part of camel-core.
EL
Camel supports the unified JSP and JSF Expression Language via the JUEL to allow an Expression
or Predicate to be used in the DSL or Xml Configuration.
For example you could use EL inside a Message Filter in XML
<route>
<from uri="seda:foo"/>
<filter>
<el>${in.headers.foo == 'bar'}</el>
<to uri="seda:bar"/>
</filter>
</route>
You could also use slightly different syntax, e.g. if the header name is not a valid identifier:
<route>
<from uri="seda:foo"/>
<filter>
<el>${in.headers['My Header'] == 'bar'}</el>
<to uri="seda:bar"/>
</filter>
</route>
You could use EL to create an Predicate in a Message Filter or as an Expression for a Recipient
List
224 LANGUAGES SUPPORTED APPENDIX](https://image.slidesharecdn.com/camel-manual-2-130809102054-phpapp01/85/Camel-manual-2-11-0-228-320.jpg)


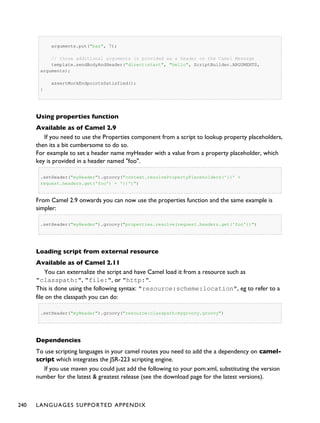


![.setHeader("myHeader").groovy("resource:classpath:mygroovy.groovy")
Dependencies
To use scripting languages in your camel routes you need to add the a dependency on camel-
script which integrates the JSR-223 scripting engine.
If you use maven you could just add the following to your pom.xml, substituting the version
number for the latest & greatest release (see the download page for the latest versions).
<dependency>
<groupId>org.apache.camel</groupId>
<artifactId>camel-script</artifactId>
<version>x.x.x</version>
</dependency>
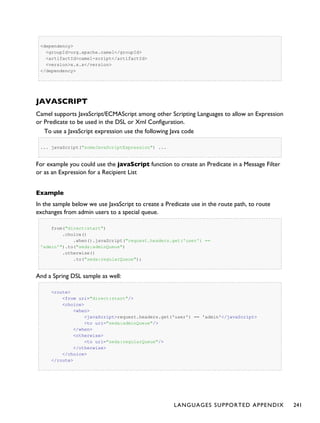
PYTHON
Camel supports Python among other Scripting Languages to allow an Expression or Predicate
to be used in the DSL or Xml Configuration.
To use a Python expression use the following Java code
... python("somePythonExpression") ...
For example you could use the python function to create an Predicate in a Message Filter or
as an Expression for a Recipient List
Example
In the sample below we use Python to create a Predicate use in the route path, to route
exchanges from admin users to a special queue.
from("direct:start")
.choice()
.when().python("request.headers['user'] == 'admin'").to("seda:adminQueue")
.otherwise()
.to("seda:regularQueue");
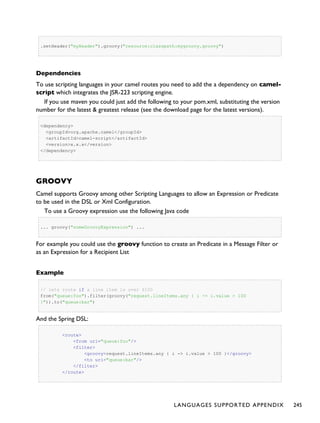
And a Spring DSL sample as well:
<route>
<from uri="direct:start"/>
LANGUAGES SUPPORTED APPENDIX 249](https://image.slidesharecdn.com/camel-manual-2-130809102054-phpapp01/85/Camel-manual-2-11-0-253-320.jpg)
![<choice>
<when>
<python>request.headers['user'] == 'admin'</python>
<to uri="seda:adminQueue"/>
</when>
<otherwise>
<to uri="seda:regularQueue"/>
</otherwise>
</choice>
</route>
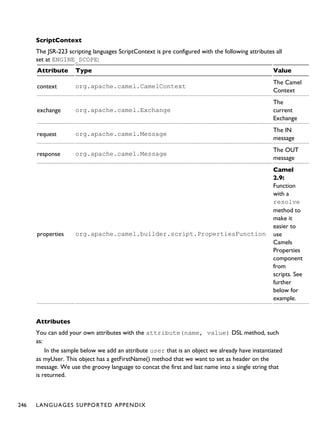
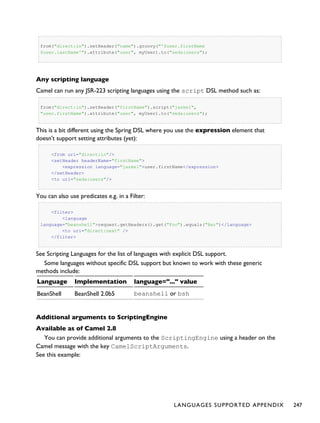
ScriptContext
The JSR-223 scripting languages ScriptContext is pre configured with the following attributes all
set at ENGINE_SCOPE:
Attribute Type Value
context org.apache.camel.CamelContext
The Camel
Context
exchange org.apache.camel.Exchange
The
current
Exchange
request org.apache.camel.Message
The IN
message
response org.apache.camel.Message
The OUT
message
250 LANGUAGES SUPPORTED APPENDIX](https://image.slidesharecdn.com/camel-manual-2-130809102054-phpapp01/85/Camel-manual-2-11-0-254-320.jpg)


![RUBY
Camel supports Ruby among other Scripting Languages to allow an Expression or Predicate to
be used in the DSL or Xml Configuration.
To use a Ruby expression use the following Java code
... ruby("someRubyExpression") ...
For example you could use the ruby function to create an Predicate in a Message Filter or as
an Expression for a Recipient List
Example
In the sample below we use Ruby to create a Predicate use in the route path, to route
exchanges from admin users to a special queue.
from("direct:start")
.choice()
.when().ruby("$request.headers['user'] == 'admin'").to("seda:adminQueue")
.otherwise()
.to("seda:regularQueue");
And a Spring DSL sample as well:
<route>
<from uri="direct:start"/>
<choice>
<when>
<ruby>$request.headers['user'] == 'admin'</ruby>
<to uri="seda:adminQueue"/>
</when>
<otherwise>
<to uri="seda:regularQueue"/>
</otherwise>
</choice>
</route>
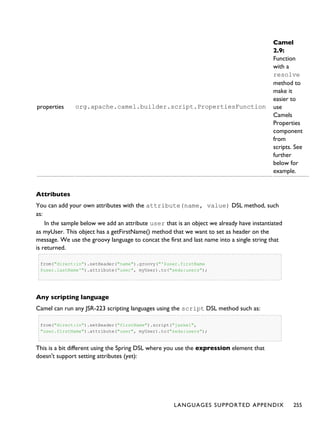
ScriptContext
The JSR-223 scripting languages ScriptContext is pre configured with the following attributes all
set at ENGINE_SCOPE:
Attribute Type Value
context org.apache.camel.CamelContext
The Camel
Context
258 LANGUAGES SUPPORTED APPENDIX](https://image.slidesharecdn.com/camel-manual-2-130809102054-phpapp01/85/Camel-manual-2-11-0-262-320.jpg)


![out.body Object the output body
header.foo Object refer to the input foo header
header[foo] Object Camel 2.9.2: refer to the input foo header
headers.foo Object refer to the input foo header
headers[foo] Object Camel 2.9.2: refer to the input foo header
in.header.foo Object refer to the input foo header
in.header[foo] Object Camel 2.9.2: refer to the input foo header
in.headers.foo Object refer to the input foo header
in.headers[foo] Object Camel 2.9.2: refer to the input foo header
header.foo[bar] Object Camel 2.3: regard input foo header as a map and perform lookup on the map with bar as key
in.header.foo[bar] Object Camel 2.3: regard input foo header as a map and perform lookup on the map with bar as key
in.headers.foo[bar] Object Camel 2.3: regard input foo header as a map and perform lookup on the map with bar as key
header.foo.OGNL Object Camel 2.3: refer to the input foo header and invoke its value using a Camel OGNL expression.
in.header.foo.OGNL Object Camel 2.3: refer to the input foo header and invoke its value using a Camel OGNL expression.
in.headers.foo.OGNL Object Camel 2.3: refer to the input foo header and invoke its value using a Camel OGNL expression.
out.header.foo Object refer to the out header foo
out.header[foo] Object Camel 2.9.2: refer to the out header foo
out.headers.foo Object refer to the out header foo
out.headers[foo] Object Camel 2.9.2: refer to the out header foo
headerAs(key,type) Type Camel 2.5: Converts the header to the given type determined by its classname
headers Map Camel 2.9: refer to the input headers
in.headers Map Camel 2.9: refer to the input headers
property.foo Object refer to the foo property on the exchange
property[foo] Object Camel 2.9.2: refer to the foo property on the exchange
property.foo.OGNL Object Camel 2.8: refer to the foo property on the exchange and invoke its value using a Camel OGNL expression.
sys.foo String refer to the system property
sysenv.foo String Camel 2.3: refer to the system environment
exception Object
Camel 2.4: Refer to the exception object on the exchange, is null if no exception set on exchange. Will fallback and grab caught
exceptions (Exchange.EXCEPTION_CAUGHT) if the Exchange has any.
exception.OGNL Object Camel 2.4: Refer to the exchange exception invoked using a Camel OGNL expression object
exception.message String
Refer to the exception.message on the exchange, is null if no exception set on exchange. Will fallback and grab caught exceptions
(Exchange.EXCEPTION_CAUGHT) if the Exchange has any.
exception.stacktrace String
Camel 2.6. Refer to the exception.stracktrace on the exchange, is null if no exception set on exchange. Will fallback and grab
caught exceptions (Exchange.EXCEPTION_CAUGHT) if the Exchange has any.
date:command:pattern String
Date formatting using the java.text.SimpleDataFormat patterns. Supported commands are: now for current timestamp,
in.header.xxx or header.xxx to use the Date object in the IN header with the key xxx. out.header.xxx to use the Date
object in the OUT header with the key xxx.
bean:bean expression Object
Invoking a bean expression using the Bean language. Specifying a method name you must use dot as separator. We also support the
?method=methodname syntax that is used by the Bean component.
properties:locations:key String Camel 2.3: Lookup a property with the given key. The locations option is optional. See more at Using PropertyPlaceholder.
routeId String Camel 2.11: Returns the id of the current route the Exchange is being routed.
threadName String Camel 2.3: Returns the name of the current thread. Can be used for logging purpose.
ref:xxx Object Camel 2.6: To lookup a bean from the Registry with the given id.
type:name.field Object
Camel 2.11: To refer to a type or field by its FQN name. To refer to a field you can append .FIELD_NAME. For example you can
refer to the constant field from Exchange as: org.apache.camel.Exchange.FILE_NAME
.
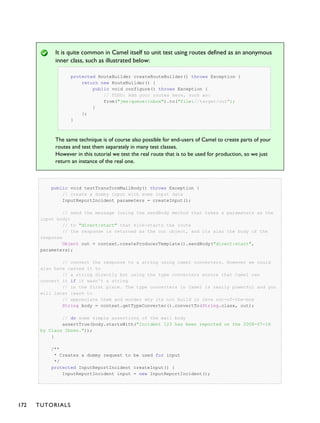
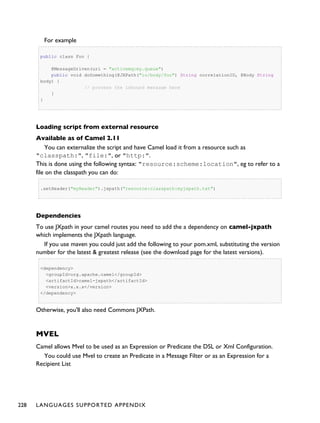
OGNL expression support
Available as of Camel 2.3
The Simple and Bean language now supports a Camel OGNL notation for invoking beans in
a chain like fashion.
Suppose the Message IN body contains a POJO which has a getAddress() method.
264 LANGUAGES SUPPORTED APPENDIX](https://image.slidesharecdn.com/camel-manual-2-130809102054-phpapp01/85/Camel-manual-2-11-0-268-320.jpg)
![Then you can use Camel OGNL notation to access the address object:
simple("${body.address}")
simple("${body.address.street}")
simple("${body.address.zip}")
Camel understands the shorthand names for getters, but you can invoke any method or use the
real name such as:
simple("${body.address}")
simple("${body.getAddress.getStreet}")
simple("${body.address.getZip}")
simple("${body.doSomething}")
You can also use the null safe operator (?.) to avoid NPE if for example the body does NOT
have an address
simple("${body?.address?.street}")
Its also possible to index in Map or List types, so you can do:
simple("${body[foo].name}")
To assume the body is Map based and lookup the value with foo as key, and invoke the
getName method on that value.
You can access the Map or List objects directly using their key name (with or without dots) :
simple("${body[foo]}")
simple("${body[this.is.foo]}")
Suppose there was no value with the key foo then you can use the null safe operator to avoid
the NPE as shown:
simple("${body[foo]?.name}")
You can also access List types, for example to get lines from the address you can do:
simple("${body.address.lines[0]}")
simple("${body.address.lines[1]}")
simple("${body.address.lines[2]}")
There is a special last keyword which can be used to get the last value from a list.
LANGUAGES SUPPORTED APPENDIX 265](https://image.slidesharecdn.com/camel-manual-2-130809102054-phpapp01/85/Camel-manual-2-11-0-269-320.jpg)
![If the key has space, then you must enclose the key with quotes, for example 'foo
bar':
simple("${body['foo bar'].name}")
simple("${body.address.lines[last]}")
And to get the 2nd last you can subtract a number, so we can use last-1 to indicate this:
simple("${body.address.lines[last-1]}")
And the 3rd last is of course:
simple("${body.address.lines[last-2]}")
And yes you can combine this with the operator support as shown below:
simple("${body.address.zip} > 1000")
Operator support
The parser is limited to only support a single operator.
To enable it the left value must be enclosed in ${ }. The syntax is:
${leftValue} OP rightValue
Where the rightValue can be a String literal enclosed in ' ', null, a constant value or
another expression enclosed in ${ }.
Camel will automatically type convert the rightValue type to the leftValue type, so its able to eg.
convert a string into a numeric so you can use > comparison for numeric values.
The following operators are supported:
Operator Description
== equals
> greater than
>= greater than or equals
266 LANGUAGES SUPPORTED APPENDIX](https://image.slidesharecdn.com/camel-manual-2-130809102054-phpapp01/85/Camel-manual-2-11-0-270-320.jpg)


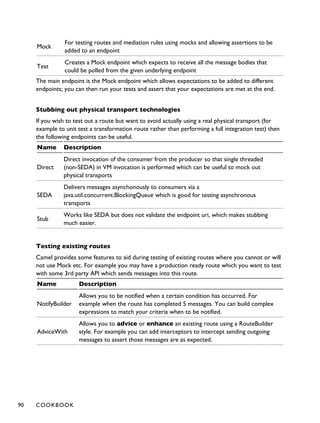
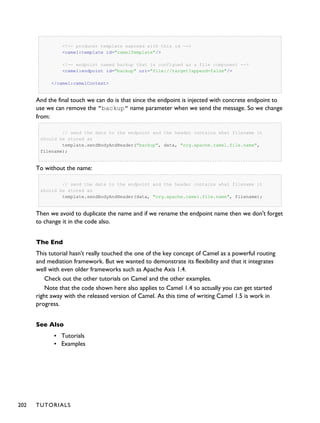
![There are a few types which have a shorthand notation, so we can use String instead of
java.lang.String. These are: byte[], String, Integer, Long. All other types
must use their FQN name, e.g. org.w3c.dom.Document.
Its also possible to lookup a value from a header Map in Camel 2.3 onwards:
<transform>
<simple>The gold value is ${header.type[gold]}</simple>
</transform>
In the code above we lookup the header with name type and regard it as a java.util.Map
and we then lookup with the key gold and return the value.
If the header is not convertible to Map an exception is thrown. If the header with name type
does not exist null is returned.
From Camel 2.9 onwards you can nest functions, such as shown below:
<setHeader headerName="myHeader">
<simple>${properties:${header.someKey}}</simple>
</setHeader>
Referring to constants or enums
Available as of Camel 2.11
Suppose you have an enum for customers
public enum Customer {
GOLD, SILVER, BRONZE
}
And in a Content Based Router we can use the Simple language to refer to this enum, to check
the message which enum it matches.
from("direct:start")
.choice()
.when().simple("${header.customer} ==
${type:org.apache.camel.processor.Customer.GOLD}")
.to("mock:gold")
.when().simple("${header.customer} ==
${type:org.apache.camel.processor.Customer.SILVER}")
.to("mock:silver")
.otherwise()
.to("mock:other");
LANGUAGES SUPPORTED APPENDIX 273](https://image.slidesharecdn.com/camel-manual-2-130809102054-phpapp01/85/Camel-manual-2-11-0-277-320.jpg)
![Using new lines or tabs in XML DSLs
Available as of Camel 2.9.3
From Camel 2.9.3 onwards its easier to specify new lines or tabs in XML DSLs as you can
escape the value now
<transform>
<simple>The following textnis on a new line</simple>
</transform>
Setting result type
Available as of Camel 2.8
You can now provide a result type to the Simple expression, which means the result of the
evaluation will be converted to the desired type. This is most useable to define types such as
booleans, integers, etc.
For example to set a header as a boolean type you can do:
.setHeader("cool", simple("true", Boolean.class))
And in XML DSL
<setHeader headerName="cool">
<!-- use resultType to indicate that the type should be a java.lang.Boolean -->
<simple resultType="java.lang.Boolean">true</simple>
</setHeader>
Changing function start and end tokens
Available as of Camel 2.9.1
You can configure the function start and end tokens - ${ } using the setters
changeFunctionStartToken and changeFunctionEndToken on
SimpleLanguage, using Java code. From Spring XML you can define a <bean> tag with the
new changed tokens in the properties as shown below:
<!-- configure Simple to use custom prefix/suffix tokens -->
<bean id="simple" class="org.apache.camel.language.simple.SimpleLanguage">
<property name="functionStartToken" value="["/>
<property name="functionEndToken" value="]"/>
</bean>
In the example above we use [ ] as the changed tokens.
274 LANGUAGES SUPPORTED APPENDIX](https://image.slidesharecdn.com/camel-manual-2-130809102054-phpapp01/85/Camel-manual-2-11-0-278-320.jpg)


![<to uri="bean:orderService?method=handleXmlFiles"/>
</when>
<otherwise>
<to uri="bean:orderService?method=handleOtherFiles"/>
</otherwise>
</choice>
If you use the fileName option on the File endpoint to set a dynamic filename using the File
Language then make sure you
use the alternative syntax (available from Camel 2.5 onwards) to avoid clashing with Springs
PropertyPlaceholderConfigurer.
Listing 1.Listing 1. bundle-context.xmlbundle-context.xml
<bean id="propertyPlaceholder"
class="org.springframework.beans.factory.config.PropertyPlaceholderConfigurer">
<property name="location" value="classpath:bundle-context.cfg" />
</bean>
<bean id="sampleRoute" class="SampleRoute">
<property name="fromEndpoint" value="${fromEndpoint}" />
<property name="toEndpoint" value="${toEndpoint}" />
</bean>
Listing 1.Listing 1. bundle-context.cfgbundle-context.cfg
fromEndpoint=activemq:queue:test
toEndpoint=file://fileRoute/out?fileName=test-$simple{date:now:yyyyMMdd}.txt
Notice how we use the $simple{ } syntax in the toEndpoint above.
If you don't do this, there is a clash and Spring will throw an exception like
org.springframework.beans.factory.BeanDefinitionStoreException:
Invalid bean definition with name 'sampleRoute' defined in class path resource
[bundle-context.xml]:
Could not resolve placeholder 'date:now:yyyyMMdd'
Dependencies
The File language is part of camel-core.
SQL LANGUAGE
The SQL support is added by JoSQL and is primarily used for performing SQL queries on in-
memory objects. If you prefer to perform actual database queries then check out the JPA
component.
LANGUAGES SUPPORTED APPENDIX 279](https://image.slidesharecdn.com/camel-manual-2-130809102054-phpapp01/85/Camel-manual-2-11-0-283-320.jpg)
![the variable key Object
if any additional variables is added using setVariables
method
Loading script from external resource
Available as of Camel 2.11
You can externalize the script and have Camel load it from a resource such as
"classpath:", "file:", or "http:".
This is done using the following syntax: "resource:scheme:location", eg to refer to a
file on the classpath you can do:
.setHeader("myHeader").sql("resource:classpath:mysql.sql")
XPATH
Camel supports XPath to allow an Expression or Predicate to be used in the DSL or Xml
Configuration. For example you could use XPath to create an Predicate in a Message Filter or
as an Expression for a Recipient List.
from("queue:foo").
filter().xpath("//foo")).
to("queue:bar")
from("queue:foo").
choice().xpath("//foo")).to("queue:bar").
otherwise().to("queue:others");
Namespaces
You can easily use namespaces with XPath expressions using the Namespaces helper class.
Namespaces ns = new Namespaces("c", "http://acme.com/cheese");
from("direct:start").filter().
xpath("/c:person[@name='James']", ns).
to("mock:result");
LANGUAGES SUPPORTED APPENDIX 281](https://image.slidesharecdn.com/camel-manual-2-130809102054-phpapp01/85/Camel-manual-2-11-0-285-320.jpg)

![.to("mock:donkey")
.otherwise()
.to("mock:other")
.end();
Using XML configuration
If you prefer to configure your routes in your Spring XML file then you can use XPath
expressions as follows
<beans xmlns="http://www.springframework.org/schema/beans"
xmlns:xsi="http://www.w3.org/2001/XMLSchema-instance"
xsi:schemaLocation="
http://www.springframework.org/schema/beans http://www.springframework.org/
schema/beans/spring-beans.xsd
http://camel.apache.org/schema/spring http://camel.apache.org/schema/spring/
camel-spring.xsd">
<camelContext id="camel" xmlns="http://activemq.apache.org/camel/schema/spring"
xmlns:foo="http://example.com/person">
<route>
<from uri="activemq:MyQueue"/>
<filter>
<xpath>/foo:person[@name='James']</xpath>
<to uri="mqseries:SomeOtherQueue"/>
</filter>
</route>
</camelContext>
</beans>
Notice how we can reuse the namespace prefixes, foo in this case, in the XPath expression for
easier namespace based XPath expressions!
See also this discussion on the mailinglist about using your own namespaces with xpath
Setting result type
The XPath expression will return a result type using native XML objects such as
org.w3c.dom.NodeList. But many times you want a result type to be a String. To do this
you have to instruct the XPath which result type to use.
In Java DSL:
xpath("/foo:person/@id", String.class)
In Spring DSL you use the resultType attribute to provide a fully qualified classname:
284 LANGUAGES SUPPORTED APPENDIX](https://image.slidesharecdn.com/camel-manual-2-130809102054-phpapp01/85/Camel-manual-2-11-0-288-320.jpg)

![from("direct:start").
filter().xpath("/person[@name='James']").
to("mock:result");
If you have a standard set of namespaces you wish to work with and wish to share them across
many different XPath expressions you can use the NamespaceBuilder as shown in this example
// lets define the namespaces we'll need in our filters
Namespaces ns = new Namespaces("c", "http://acme.com/cheese")
.add("xsd", "http://www.w3.org/2001/XMLSchema");
// now lets create an xpath based Message Filter
from("direct:start").
filter(ns.xpath("/c:person[@name='James']")).
to("mock:result");
In this sample we have a choice construct. The first choice evaulates if the message has a header
key type that has the value Camel.
The 2nd choice evaluates if the message body has a name tag <name> which values is Kong.
If neither is true the message is routed in the otherwise block:
from("direct:in").choice()
// using $headerName is special notation in Camel to get the header key
.when().xpath("$type = 'Camel'")
.to("mock:camel")
// here we test for the body name tag
.when().xpath("//name = 'Kong'")
.to("mock:donkey")
.otherwise()
.to("mock:other")
.end();
And the spring XML equivalent of the route:
<camelContext xmlns="http://camel.apache.org/schema/spring">
<route>
<from uri="direct:in"/>
<choice>
<when>
<xpath>$type = 'Camel'</xpath>
<to uri="mock:camel"/>
</when>
<when>
<xpath>//name = 'Kong'</xpath>
<to uri="mock:donkey"/>
</when>
<otherwise>
<to uri="mock:other"/>
</otherwise>
286 LANGUAGES SUPPORTED APPENDIX](https://image.slidesharecdn.com/camel-manual-2-130809102054-phpapp01/85/Camel-manual-2-11-0-290-320.jpg)
![</choice>
</route>
</camelContext>
XPATH INJECTION
You can use Bean Integration to invoke a method on a bean and use various languages such as
XPath to extract a value from the message and bind it to a method parameter.
The default XPath annotation has SOAP and XML namespaces available. If you want to use
your own namespace URIs in an XPath expression you can use your own copy of the XPath
annotation to create whatever namespace prefixes you want to use.
import java.lang.annotation.ElementType;
import java.lang.annotation.Retention;
import java.lang.annotation.RetentionPolicy;
import java.lang.annotation.Target;
import org.w3c.dom.NodeList;
import org.apache.camel.component.bean.XPathAnnotationExpressionFactory;
import org.apache.camel.language.LanguageAnnotation;
import org.apache.camel.language.NamespacePrefix;
@Retention(RetentionPolicy.RUNTIME)
@Target({ElementType.FIELD, ElementType.METHOD, ElementType.PARAMETER})
@LanguageAnnotation(language = "xpath", factory =
XPathAnnotationExpressionFactory.class)
public @interface MyXPath {
String value();
// You can add the namespaces as the default value of the annotation
NamespacePrefix[] namespaces() default {
@NamespacePrefix(prefix = "n1", uri = "http://example.org/ns1"),
@NamespacePrefix(prefix = "n2", uri = "http://example.org/ns2")};
Class<?> resultType() default NodeList.class;
}
i.e. cut and paste upper code to your own project in a different package and/or annotation
name then add whatever namespace prefix/uris you want in scope when you use your
annotation on a method parameter. Then when you use your annotation on a method
parameter all the namespaces you want will be available for use in your XPath expression.
For example
public class Foo {
LANGUAGES SUPPORTED APPENDIX 287](https://image.slidesharecdn.com/camel-manual-2-130809102054-phpapp01/85/Camel-manual-2-11-0-291-320.jpg)

![Its now easier to use Saxon with the XPathBuilder which can be done in several ways as
shown below.
Where as the latter ones are the easiest ones.
Using a factory
// create a Saxon factory
XPathFactory fac = new net.sf.saxon.xpath.XPathFactoryImpl();
// create a builder to evaluate the xpath using the saxon factory
XPathBuilder builder = XPathBuilder.xpath("tokenize(/foo/bar, '_')[2]").factory(fac);
// evaluate as a String result
String result = builder.evaluate(context, "<foo><bar>abc_def_ghi</bar></foo>");
assertEquals("def", result);
Using ObjectModel
// create a builder to evaluate the xpath using saxon based on its object model uri
XPathBuilder builder = XPathBuilder.xpath("tokenize(/foo/bar,
'_')[2]").objectModel("http://saxon.sf.net/jaxp/xpath/om");
// evaluate as a String result
String result = builder.evaluate(context, "<foo><bar>abc_def_ghi</bar></foo>");
assertEquals("def", result);
The easy one
// create a builder to evaluate the xpath using saxon
XPathBuilder builder = XPathBuilder.xpath("tokenize(/foo/bar, '_')[2]").saxon();
// evaluate as a String result
String result = builder.evaluate(context, "<foo><bar>abc_def_ghi</bar></foo>");
assertEquals("def", result);
Setting a custom XPathFactory using System Property
Available as of Camel 2.3
Camel now supports reading the JVM system property
javax.xml.xpath.XPathFactory that can be used to set a custom XPathFactory to
use.
This unit test shows how this can be done to use Saxon instead:
// set system property with the XPath factory to use which is Saxon
System.setProperty(XPathFactory.DEFAULT_PROPERTY_NAME + ":" + "http://saxon.sf.net/
jaxp/xpath/om", "net.sf.saxon.xpath.XPathFactoryImpl");
LANGUAGES SUPPORTED APPENDIX 289](https://image.slidesharecdn.com/camel-manual-2-130809102054-phpapp01/85/Camel-manual-2-11-0-293-320.jpg)
![// create a builder to evaluate the xpath using saxon
XPathBuilder builder = XPathBuilder.xpath("tokenize(/foo/bar, '_')[2]");
// evaluate as a String result
String result = builder.evaluate(context, "<foo><bar>abc_def_ghi</bar></foo>");
assertEquals("def", result);
Camel will log at INFO level if it uses a non default XPathFactory such as:
XPathBuilder INFO Using system property
javax.xml.xpath.XPathFactory:http://saxon.sf.net/jaxp/xpath/om with value:
net.sf.saxon.xpath.XPathFactoryImpl when creating XPathFactory
To use Apache Xerces you can configure the system property
-Djavax.xml.xpath.XPathFactory=org.apache.xpath.jaxp.XPathFactoryImpl
Enabling Saxon from Spring DSL
Available as of Camel 2.10
Similarly to Java DSL, to enable Saxon from Spring DSL you have three options:
Specifying the factory
<xpath factoryRef="saxonFactory"
resultType="java.lang.String">current-dateTime()</xpath>
Specifying the object model
<xpath objectModel="http://saxon.sf.net/jaxp/xpath/om"
resultType="java.lang.String">current-dateTime()</xpath>
Shortcut
<xpath saxon="true" resultType="java.lang.String">current-dateTime()</xpath>
Namespace auditing to aid debugging
Available as of Camel 2.10
A large number of XPath-related issues that users frequently face are linked to the usage of
namespaces. You may have some misalignment between the namespaces present in your
message and those that your XPath expression is aware of or referencing. XPath predicates or
expressions that are unable to locate the XML elements and attributes due to namespaces
290 LANGUAGES SUPPORTED APPENDIX](https://image.slidesharecdn.com/camel-manual-2-130809102054-phpapp01/85/Camel-manual-2-11-0-294-320.jpg)
![issues may simply look like "they are not working", when in reality all there is to it is a lack of
namespace definition.
Namespaces in XML are completely necessary, and while we would love to simplify their
usage by implementing some magic or voodoo to wire namespaces automatically, truth is that
any action down this path would disagree with the standards and would greatly hinder
interoperability.
Therefore, the utmost we can do is assist you in debugging such issues by adding two new
features to the XPath Expression Language and are thus accesible from both predicates and
expressions.
Logging the Namespace Context of your XPath expression/
predicate
Every time a new XPath expression is created in the internal pool, Camel will log the
namespace context of the expression under the
org.apache.camel.builder.xml.XPathBuilder logger. Since Camel represents
Namespace Contexts in a hierarchical fashion (parent-child relationships), the entire tree is
output in a recursive manner with the following format:
[me: {prefix -> namespace}, {prefix -> namespace}], [parent: [me: {prefix ->
namespace}, {prefix -> namespace}], [parent: [me: {prefix -> namespace}]]]
Any of these options can be used to activate this logging:
1. Enable TRACE logging on the
org.apache.camel.builder.xml.XPathBuilder logger, or some parent
logger such as org.apache.camel or the root logger
2. Enable the logNamespaces option as indicated in Auditing Namespaces, in which
case the logging will occur on the INFO level
Auditing namespaces
Camel is able to discover and dump all namespaces present on every incoming message before
evaluating an XPath expression, providing all the richness of information you need to help you
analyse and pinpoint possible namespace issues.
To achieve this, it in turn internally uses another specially tailored XPath expression to
extract all namespace mappings that appear in the message, displaying the prefix and the full
namespace URI(s) for each individual mapping.
Some points to take into account:
• The implicit XML namespace (xmlns:xml="http://www.w3.org/XML/1998/namespace")
is suppressed from the output because it adds no value
• Default namespaces are listed under the DEFAULT keyword in the output
LANGUAGES SUPPORTED APPENDIX 291](https://image.slidesharecdn.com/camel-manual-2-130809102054-phpapp01/85/Camel-manual-2-11-0-295-320.jpg)
![• Keep in mind that namespaces can be remapped under different scopes. Think of a
top-level 'a' prefix which in inner elements can be assigned a different namespace, or
the default namespace changing in inner scopes. For each discovered prefix, all
associated URIs are listed.
You can enable this option in Java DSL and Spring DSL.
Java DSL:
XPathBuilder.xpath("/foo:person/@id", String.class).logNamespaces()
Spring DSL:
<xpath logNamespaces="true" resultType="String">/foo:person/@id</xpath>
The result of the auditing will be appear at the INFO level under the
org.apache.camel.builder.xml.XPathBuilder logger and will look like the
following:
2012-01-16 13:23:45,878 [stSaxonWithFlag] INFO XPathBuilder - Namespaces discovered
in message:
{xmlns:a=[http://apache.org/camel], DEFAULT=[http://apache.org/default],
xmlns:b=[http://apache.org/camelA, http://apache.org/camelB]}
Loading script from external resource
Available as of Camel 2.11
You can externalize the script and have Camel load it from a resource such as
"classpath:", "file:", or "http:".
This is done using the following syntax: "resource:scheme:location", eg to refer to a
file on the classpath you can do:
.setHeader("myHeader").xpath("resource:classpath:myxpath.txt", String.class)
Dependencies
The XPath language is part of camel-core.
XQUERY
Camel supports XQuery to allow an Expression or Predicate to be used in the DSL or Xml
Configuration. For example you could use XQuery to create an Predicate in a Message Filter or
as an Expression for a Recipient List.
292 LANGUAGES SUPPORTED APPENDIX](https://image.slidesharecdn.com/camel-manual-2-130809102054-phpapp01/85/Camel-manual-2-11-0-296-320.jpg)
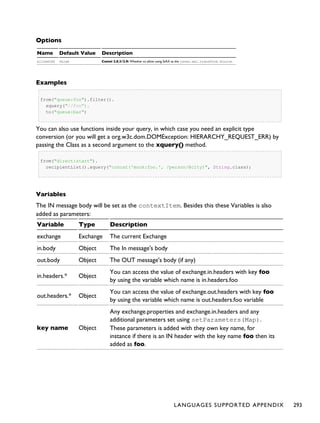
![Using XML configuration
If you prefer to configure your routes in your Spring XML file then you can use XPath
expressions as follows
<beans xmlns="http://www.springframework.org/schema/beans"
xmlns:xsi="http://www.w3.org/2001/XMLSchema-instance"
xmlns:foo="http://example.com/person"
xsi:schemaLocation="
http://www.springframework.org/schema/beans http://www.springframework.org/
schema/beans/spring-beans.xsd
http://camel.apache.org/schema/spring http://camel.apache.org/schema/spring/
camel-spring.xsd">
<camelContext id="camel" xmlns="http://activemq.apache.org/camel/schema/spring">
<route>
<from uri="activemq:MyQueue"/>
<filter>
<xquery>/foo:person[@name='James']</xquery>
<to uri="mqseries:SomeOtherQueue"/>
</filter>
</route>
</camelContext>
</beans>
Notice how we can reuse the namespace prefixes, foo in this case, in the XPath expression for
easier namespace based XQuery expressions!
When you use functions in your XQuery expression you need an explicit type conversion
which is done in the xml configuration via the @type attribute:
<xquery type="java.lang.String">concat('mock:foo.', /person/@city)</xquery>
Using XQuery as an endpoint
Sometimes an XQuery expression can be quite large; it can essentally be used for Templating.
So you may want to use an XQuery Endpoint so you can route using XQuery templates.
The following example shows how to take a message of an ActiveMQ queue (MyQueue) and
transform it using XQuery and send it to MQSeries.
<camelContext id="camel" xmlns="http://camel.apache.org/schema/spring">
<route>
<from uri="activemq:MyQueue"/>
<to uri="xquery:com/acme/someTransform.xquery"/>
<to uri="mqseries:SomeOtherQueue"/>
</route>
</camelContext>
294 LANGUAGES SUPPORTED APPENDIX](https://image.slidesharecdn.com/camel-manual-2-130809102054-phpapp01/85/Camel-manual-2-11-0-298-320.jpg)
![Examples
Here is a simple example using an XQuery expression as a predicate in a Message Filter
from("direct:start").filter().xquery("/person[@name='James']").to("mock:result");
This example uses XQuery with namespaces as a predicate in a Message Filter
Namespaces ns = new Namespaces("c", "http://acme.com/cheese");
from("direct:start").
filter().xquery("/c:person[@name='James']", ns).
to("mock:result");
Learning XQuery
XQuery is a very powerful language for querying, searching, sorting and returning XML. For
help learning XQuery try these tutorials
• Mike Kay's XQuery Primer
• the W3Schools XQuery Tutorial
You might also find the XQuery function reference useful
Loading script from external resource
Available as of Camel 2.11
You can externalize the script and have Camel load it from a resource such as
"classpath:", "file:", or "http:".
This is done using the following syntax: "resource:scheme:location", eg to refer to a
file on the classpath you can do:
.setHeader("myHeader").xquery("resource:classpath:myxquery.txt", String.class)
Dependencies
To use XQuery in your camel routes you need to add the a dependency on camel-saxon
which implements the XQuery language.
If you use maven you could just add the following to your pom.xml, substituting the version
number for the latest & greatest release (see the download page for the latest versions).
<dependency>
<groupId>org.apache.camel</groupId>
<artifactId>camel-saxon</artifactId>
LANGUAGES SUPPORTED APPENDIX 295](https://image.slidesharecdn.com/camel-manual-2-130809102054-phpapp01/85/Camel-manual-2-11-0-299-320.jpg)


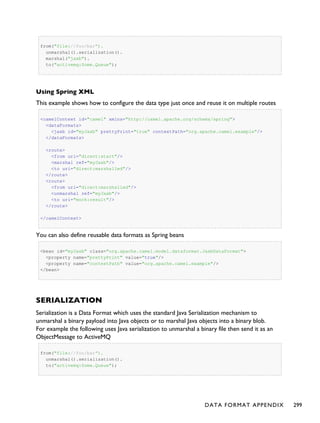

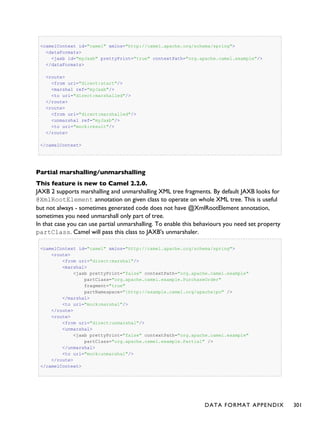
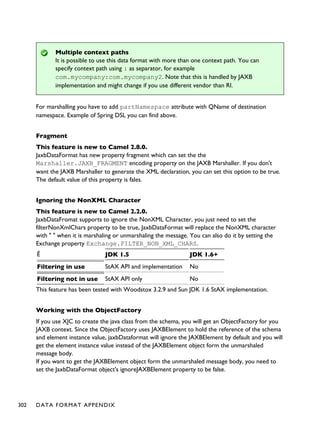


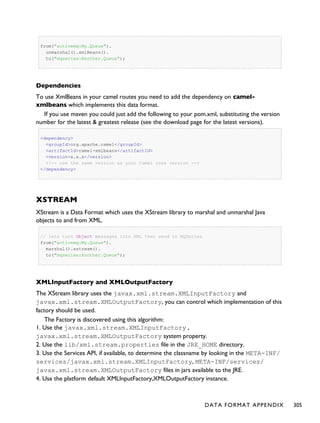


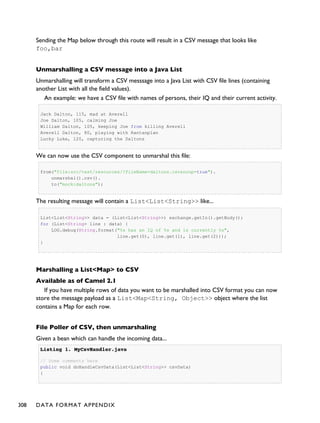
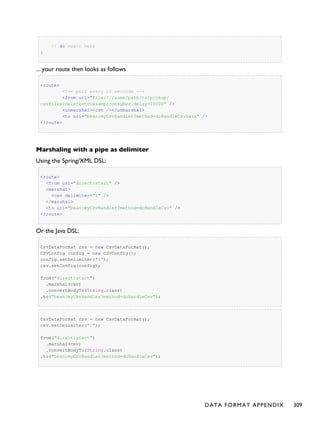
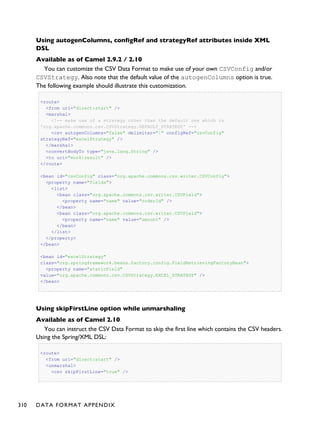
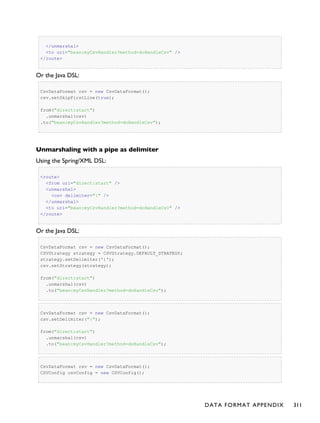

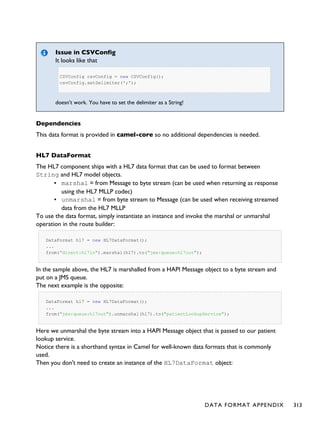

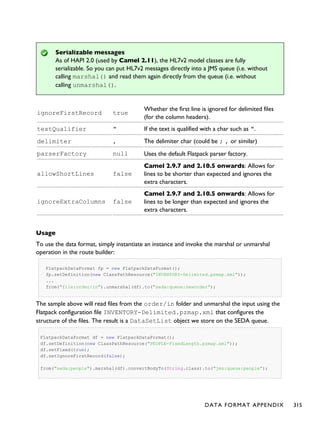


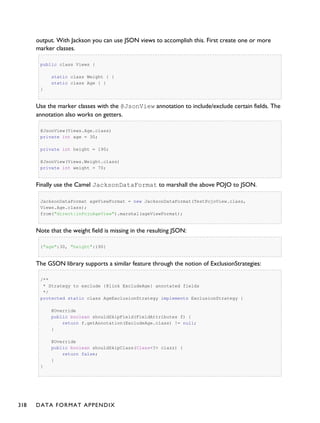


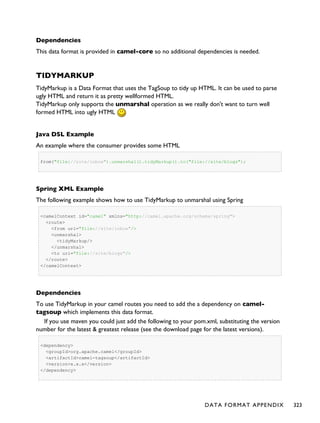
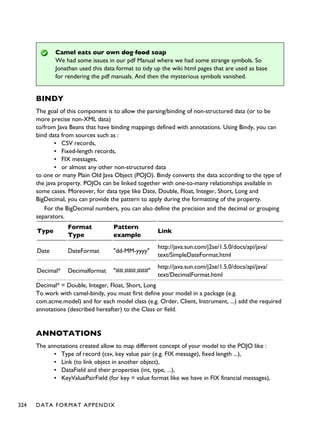


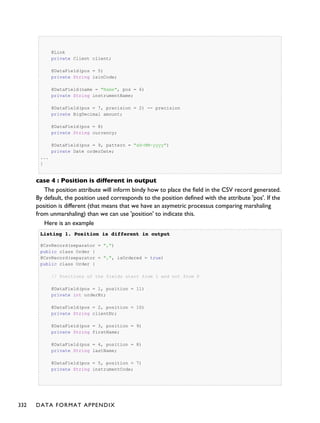

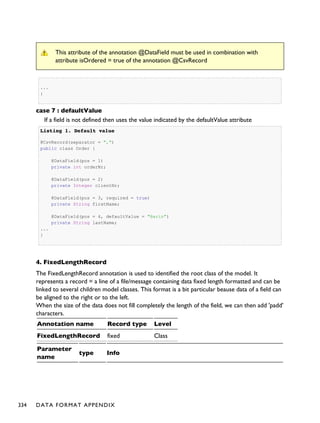
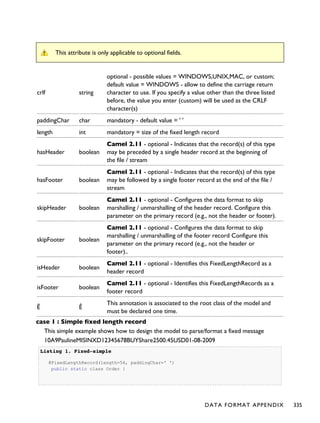
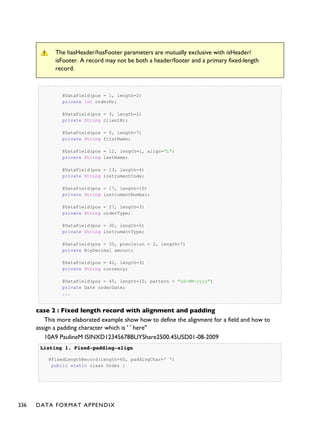


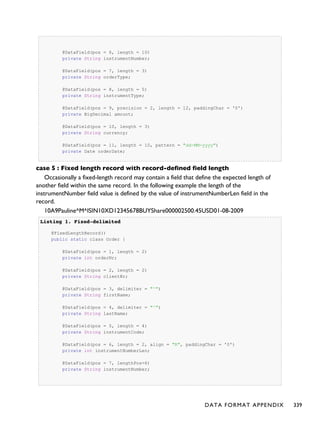


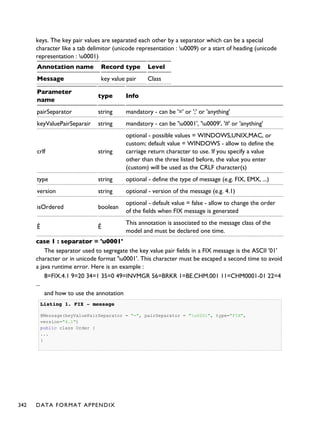


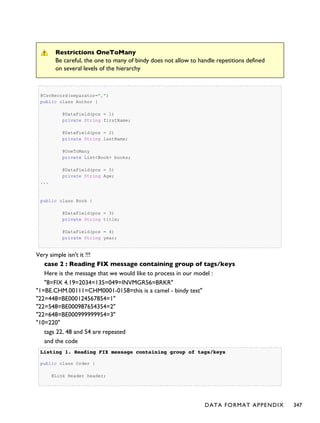


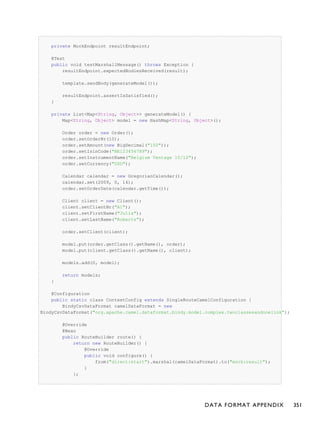


![<to uri="mock:result"/>
</route>
</camelContext>
This example shows how to configure the data type just once and reuse it on multiple routes.
You have to set the <castor> element directly in <camelContext>.
<camelContext>
<camelContext id="camel" xmlns="http://camel.apache.org/schema/spring">
<dataFormats>
<castor id="myCastor"/>
</dataFormats>
<route>
<from uri="direct:start"/>
<marshal ref="myCastor"/>
<to uri="direct:marshalled"/>
</route>
<route>
<from uri="direct:marshalled"/>
<unmarshal ref="myCastor"/>
<to uri="mock:result"/>
</route>
</camelContext>
Options
Castor supports the following options
Option Type Default Description
encoding String UTF-8 Encoding to use when marshalling an Object to XML
validation Boolean false Whether validation is turned on or off.
mappingFile String null
Path to a Castor mapping file to load from the
classpath.
packages String[] null Add additional packages to Castor XmlContext
classNames String[] null Add additional class names to Castor XmlContext
Dependencies
To use Castor in your camel routes you need to add the a dependency on camel-castor
which implements this data format.
If you use maven you could just add the following to your pom.xml, substituting the version
number for the latest & greatest release (see the download page for the latest versions).
DATA FORMAT APPENDIX 363](https://image.slidesharecdn.com/camel-manual-2-130809102054-phpapp01/85/Camel-manual-2-11-0-367-320.jpg)
![Available from Camel 2.2
}
message PhoneNumber {
required string number = 1;
optional PhoneType type = 2 [default = HOME];
}
repeated PhoneNumber phone = 4;
}
message AddressBook {
repeated Person person = 1;
}
Generating Java classes
The Protobuf SDK provides a compiler which will generate the Java classes for the format we
defined in our .proto file. You can run the compiler for any additional supported languages you
require.
protoc --java_out=. ./addressbook.proto
This will generate a single Java class named AddressBookProtos which contains inner classes
for Person and AddressBook. Builders are also implemented for you. The generated classes
implement com.google.protobuf.Message which is required by the serialisation mechanism. For
this reason it important that only these classes are used in the body of your exchanges. Camel
will throw an exception on route creation if you attempt to tell the Data Format to use a class
that does not implement com.google.protobuf.Message. Use the generated builders to translate
the data from any of your existing domain classes.
JAVA DSL
You can use create the ProtobufDataFormat instance and pass it to Camel DataFormat marshal
and unmarsha API like this.
ProtobufDataFormat format = new ProtobufDataFormat(Person.getDefaultInstance());
from("direct:in").marshal(format);
from("direct:back").unmarshal(format).to("mock:reverse");
PROTOBUF - PROTOCOL BUFFERS 365](https://image.slidesharecdn.com/camel-manual-2-130809102054-phpapp01/85/Camel-manual-2-11-0-369-320.jpg)


![product.setDescription("Useful for lots of things.");
Object[] args = new Object[] {getCustomersByName, product};
// Add the arguments to the bean invocation
beanInvocation.setArgs(args);
// Set the bean invocation object as the message body
exchange.getIn().setBody(beanInvocation);
Multi-part Response
A multi-part soap response may include an element in the soap body and will have one or more
elements in the soap header. The camel-soap DataFormat will unmarshall the element in the
soap body (if it exists) and place it onto the body of the out message in the exchange. Header
elements will not be marshaled into their JAXB mapped object types. Instead, these elements
are placed into the camel out message header
org.apache.camel.dataformat.soap.UNMARSHALLED_HEADER_LIST. The
elements will appear either as element instance values, or as JAXBElement values, depending
upon the setting for the ignoreJAXBElement property. This property is inherited from
camel-jaxb.
You can also have the camel-soap DataFormate ignore header content all-together by
setting the ignoreUnmarshalledHeaders value to true.
Holder Object mapping
JAX-WS specifies the use of a type-parameterized javax.xml.ws.Holder object for In/
Out and Out parameters. A Holder object may be used when building the
BeanInvocation, or you may use an instance of the parameterized-type directly. The
camel-soap DataFormat marshals Holder values in accordance with the JAXB mapping for the
class of the Holder's value. No mapping is provided for Holder objects in an unmarshalled
response.
Examples
Webservice client
The following route supports marshalling the request and unmarshalling a response or fault.
370 PROTOBUF - PROTOCOL BUFFERS](https://image.slidesharecdn.com/camel-manual-2-130809102054-phpapp01/85/Camel-manual-2-11-0-374-320.jpg)

![Dependencies
To use the SOAP dataformat in your camel routes you need to add the following dependency
to your pom.
<dependency>
<groupId>org.apache.camel</groupId>
<artifactId>camel-soap</artifactId>
<version>2.3.0</version>
</dependency>
CRYPTO
Available as of Camel 2.3
PGP Available as of Camel 2.9
The Crypto Data Format integrates the Java Cryptographic Extension into Camel, allowing
simple and flexible encryption and decryption of messages using Camel's familiar marshall and
unmarshal formatting mechanism. It assumes marshalling to mean encryption to cyphertext and
unmarshalling to mean decryption back to the original plaintext.
Options
Name Type Default Description
algorithm String
DES/CBC/
PKCS5Padding
The JCE algoorithm name indicating the cryptographic algorithm that will be used.
algorithmParamterSpec AlgorithmParameterSpec null A JCE AlgorithmParameterSpec used to initialize the Cipher.
bufferSize Integer 2048 the size of the buffer used in the signature process.
cryptoProvider String null The name of the JCE Security Provider that should be used.
initializationVector byte[] null
A byte array containing the Initialization Vector that will be used to initialize the
Cipher.
inline boolean false
Flag indicating that the configured IV should be inlined into the encrypted data
stream.
macAlgorithm String null The JCE algorithm name indicating the Message Authentication algorithm.
shouldAppendHMAC boolean null
Flag indicating that a Message Authentication Code should be calculated and
appended to the encrypted data.
Basic Usage
At its most basic all that is required to encrypt/decrypt an exchange is a shared secret key. If
one or more instances of the Crypto data format are configured with this key the format can
be used to encrypt the payload in one route (or part of one) and decrypted in another. For
example, using the Java DSL as follows:
KeyGenerator generator = KeyGenerator.getInstance("DES");
372 PROTOBUF - PROTOCOL BUFFERS](https://image.slidesharecdn.com/camel-manual-2-130809102054-phpapp01/85/Camel-manual-2-11-0-376-320.jpg)
![CryptoDataFormat cryptoFormat = new CryptoDataFormat("DES", generator.generateKey());
from("direct:basic-encryption")
.marshal(cryptoFormat)
.to("mock:encrypted")
.unmarshal(cryptoFormat)
.to("mock:unencrypted");
In Spring the dataformat is configured first and then used in routes
<camelContext id="camel" xmlns="http://camel.apache.org/schema/spring">
<dataFormats>
<crypto id="basic" algorithm="DES" keyRef="desKey" />
</dataFormats>
...
<route>
<from uri="direct:basic-encryption" />
<marshal ref="basic" />
<to uri="mock:encrypted" />
<unmarshal ref="basic" />
<to uri="mock:unencrypted" />
</route>
</camelContext>
Specifying the Encryption Algorithm
Changing the algorithm is a matter of supplying the JCE algorithm name. If you change the
algorithm you will need to use a compatible key.
KeyGenerator generator = KeyGenerator.getInstance("DES");
CryptoDataFormat cryptoFormat = new CryptoDataFormat("DES", generator.generateKey());
cryptoFormat.setShouldAppendHMAC(true);
cryptoFormat.setMacAlgorithm("HmacMD5");
from("direct:hmac-algorithm")
.marshal(cryptoFormat)
.to("mock:encrypted")
.unmarshal(cryptoFormat)
.to("mock:unencrypted");
Specifying an Initialization Vector
Some crypto algorhithms, particularly block algorithms, require configuration with an initial
block of data known as an Initialization Vector. In the JCE this is passed as an
AlgorithmParameterSpec when the Cipher is initialized. To use such a vector with the
CryptoDataFormat you can configure it with a byte[] contianing the required data e.g.
PROTOBUF - PROTOCOL BUFFERS 373](https://image.slidesharecdn.com/camel-manual-2-130809102054-phpapp01/85/Camel-manual-2-11-0-377-320.jpg)
![KeyGenerator generator = KeyGenerator.getInstance("DES");
byte[] initializationVector = new byte[] {0x00, 0x01, 0x02, 0x03, 0x04, 0x05, 0x06,
0x07};
CryptoDataFormat cryptoFormat = new CryptoDataFormat("DES/CBC/PKCS5Padding",
generator.generateKey());
cryptoFormat.setInitializationVector(initializationVector);
from("direct:init-vector")
.marshal(cryptoFormat)
.to("mock:encrypted")
.unmarshal(cryptoFormat)
.to("mock:unencrypted");
or with spring, suppling a reference to a byte[]
<crypto id="initvector" algorithm="DES/CBC/PKCS5Padding" keyRef="desKey"
initVectorRef="initializationVector" />
The same vector is required in both the encryption and decryption phases. As it is not
necessary to keep the IV a secret, the DataFormat allows for it to be inlined into the encrypted
data and subsequently read out in the decryption phase to initialize the Cipher. To inline the IV
set the /oinline flag.
KeyGenerator generator = KeyGenerator.getInstance("DES");
byte[] initializationVector = new byte[] {0x00, 0x01, 0x02, 0x03, 0x04, 0x05, 0x06,
0x07};
SecretKey key = generator.generateKey();
CryptoDataFormat cryptoFormat = new CryptoDataFormat("DES/CBC/PKCS5Padding", key);
cryptoFormat.setInitializationVector(initializationVector);
cryptoFormat.setShouldInlineInitializationVector(true);
CryptoDataFormat decryptFormat = new CryptoDataFormat("DES/CBC/PKCS5Padding", key);
decryptFormat.setShouldInlineInitializationVector(true);
from("direct:inline")
.marshal(cryptoFormat)
.to("mock:encrypted")
.unmarshal(decryptFormat)
.to("mock:unencrypted");
or with spring.
<crypto id="inline" algorithm="DES/CBC/PKCS5Padding" keyRef="desKey"
initVectorRef="initializationVector"
inline="true" />
<crypto id="inline-decrypt" algorithm="DES/CBC/PKCS5Padding" keyRef="desKey"
inline="true" />
374 PROTOBUF - PROTOCOL BUFFERS](https://image.slidesharecdn.com/camel-manual-2-130809102054-phpapp01/85/Camel-manual-2-11-0-378-320.jpg)
![For more information of the use of Initialization Vectors, consult
• http://en.wikipedia.org/wiki/Initialization_vector
• http://www.herongyang.com/Cryptography/
• http://en.wikipedia.org/wiki/Block_cipher_modes_of_operation
Hashed Message Authentication Codes (HMAC)
To avoid attacks against the encrypted data while it is in transit the CryptoDataFormat can also
calculate a Message Authentication Code forthe encrypted exchange contents based on a
configurable MAC algorithm. The calculated HMAC is appended to the stream after encryption.
It is separated from the stream in the decryption phase. The MAC is recalculated and verified
against the transmitted version to insure nothing was tampered with in transit.For more
information on Message Authentication Codes see http://en.wikipedia.org/wiki/HMAC
KeyGenerator generator = KeyGenerator.getInstance("DES");
CryptoDataFormat cryptoFormat = new CryptoDataFormat("DES", generator.generateKey());
cryptoFormat.setShouldAppendHMAC(true);
from("direct:hmac")
.marshal(cryptoFormat)
.to("mock:encrypted")
.unmarshal(cryptoFormat)
.to("mock:unencrypted");
or with spring.
<crypto id="hmac" algorithm="DES" keyRef="desKey" shouldAppendHMAC="true" />
By default the HMAC is calculated using the HmacSHA1 mac algorithm though this can be easily
changed by supplying a different algorithm name. See [here] for how to check what algorithms
are available through the configured security providers
KeyGenerator generator = KeyGenerator.getInstance("DES");
CryptoDataFormat cryptoFormat = new CryptoDataFormat("DES", generator.generateKey());
cryptoFormat.setShouldAppendHMAC(true);
cryptoFormat.setMacAlgorithm("HmacMD5");
from("direct:hmac-algorithm")
.marshal(cryptoFormat)
.to("mock:encrypted")
.unmarshal(cryptoFormat)
.to("mock:unencrypted");
or with spring.
PROTOBUF - PROTOCOL BUFFERS 375](https://image.slidesharecdn.com/camel-manual-2-130809102054-phpapp01/85/Camel-manual-2-11-0-379-320.jpg)

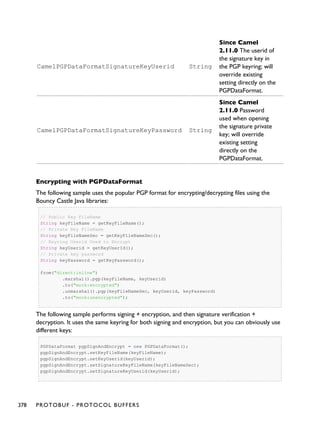
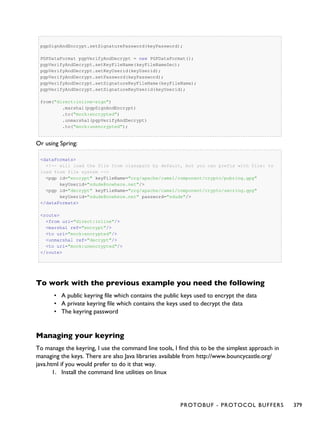
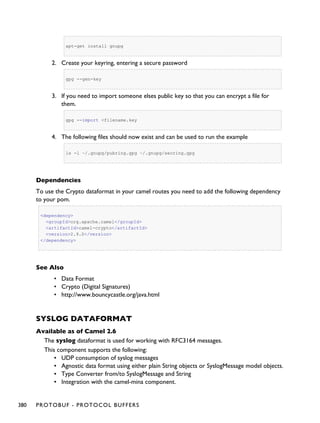
![▪ Integration with the camel-netty component.
Maven users will need to add the following dependency to their pom.xml for this component:
<dependency>
<groupId>org.apache.camel</groupId>
<artifactId>camel-syslog</artifactId>
<version>x.x.x</version>
<!-- use the same version as your Camel core version -->
</dependency>
RFC3164 Syslog protocol
Syslog uses the user datagram protocol (UDP) [1] as its underlying transport layer mechanism.
The UDP port that has been assigned to syslog is 514.
To expose a Syslog listener service we reuse the existing camel-mina component or camel-
netty where we just use the Rfc3164SyslogDataFormat to marshal and unmarshal
messages
Exposing a Syslog listener
In our Spring XML file, we configure an endpoint to listen for udp messages on port 10514,
note that in netty we disable the defaultCodec, this
will allow a fallback to a NettyTypeConverter and delivers the message as an InputStream:
<camelContext id="myCamel" xmlns="http://camel.apache.org/schema/spring">
<dataFormats>
<syslog id="mySyslog"/>
</dataFormats>
<route>
<from
uri="netty:udp://localhost:10514?sync=false&allowDefaultCodec=false"/>
<unmarshal ref="mySyslog"/>
<to uri="mock:stop1"/>
</route>
</camelContext>
The same route using camel-mina
<camelContext id="myCamel" xmlns="http://camel.apache.org/schema/spring">
<dataFormats>
<syslog id="mySyslog"/>
</dataFormats>
PROTOBUF - PROTOCOL BUFFERS 381](https://image.slidesharecdn.com/camel-manual-2-130809102054-phpapp01/85/Camel-manual-2-11-0-385-320.jpg)


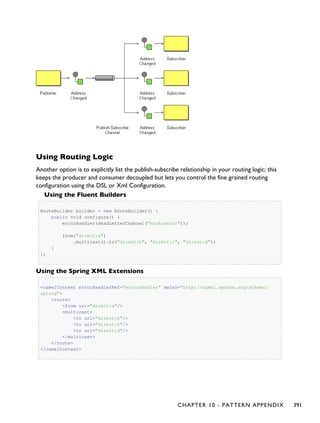


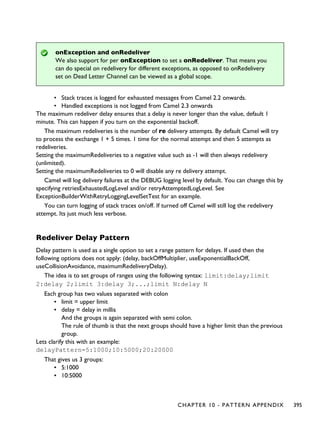

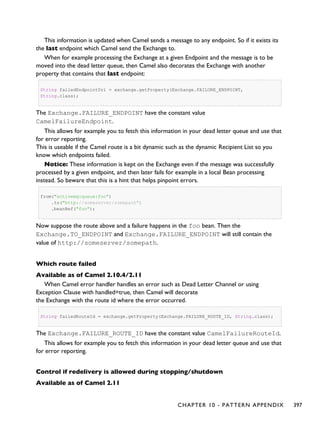
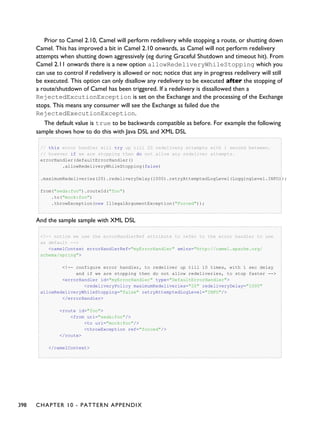


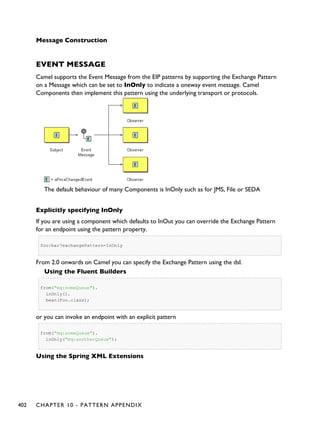
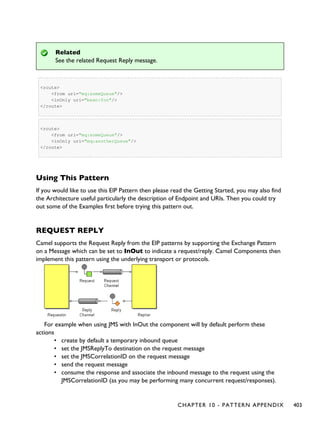
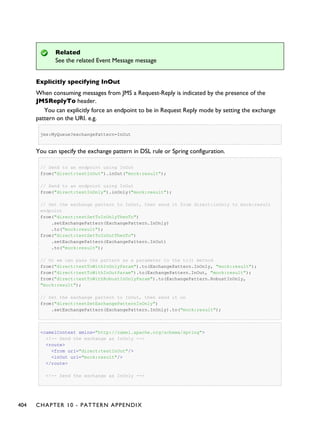


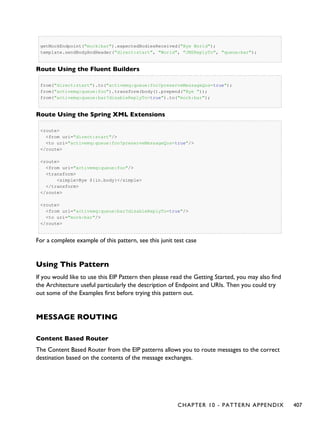

![Using This Pattern
If you would like to use this EIP Pattern then please read the Getting Started, you may also find
the Architecture useful particularly the description of Endpoint and URIs. Then you could try
out some of the Examples first before trying this pattern out.
Message Filter
The Message Filter from the EIP patterns allows you to filter messages
The following example shows how to create a Message Filter route consuming messages
from an endpoint called queue:a, which if the Predicate is true will be dispatched to queue:b
Using the Fluent Builders
RouteBuilder builder = new RouteBuilder() {
public void configure() {
errorHandler(deadLetterChannel("mock:error"));
from("direct:a")
.filter(header("foo").isEqualTo("bar"))
.to("direct:b");
}
};
You can, of course, use many different Predicate languages such as XPath, XQuery, SQL or
various Scripting Languages. Here is an XPath example
from("direct:start").
filter().xpath("/person[@name='James']").
to("mock:result");
Here is another example of using a bean to define the filter behavior
from("direct:start")
.filter().method(MyBean.class, "isGoldCustomer").to("mock:result").end()
.to("mock:end");
public static class MyBean {
public boolean isGoldCustomer(@Header("level") String level) {
return level.equals("gold");
}
}
Using the Spring XML Extensions
CHAPTER 10 - PATTERN APPENDIX 409](https://image.slidesharecdn.com/camel-manual-2-130809102054-phpapp01/85/Camel-manual-2-11-0-413-320.jpg)


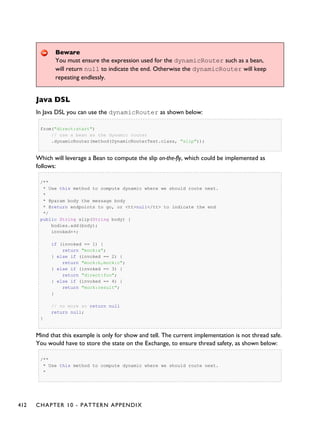


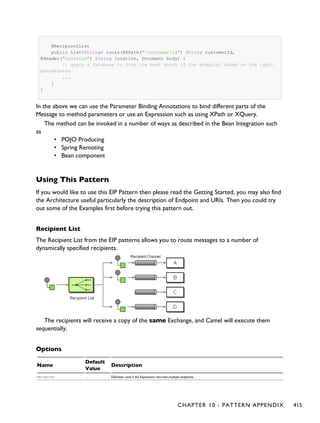


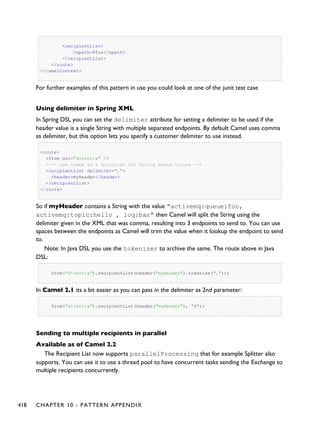
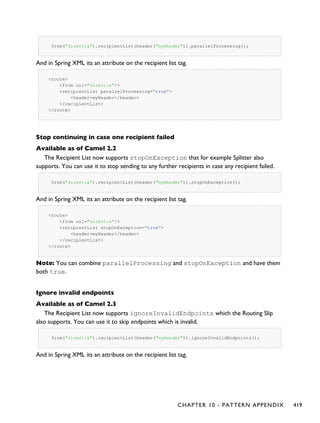
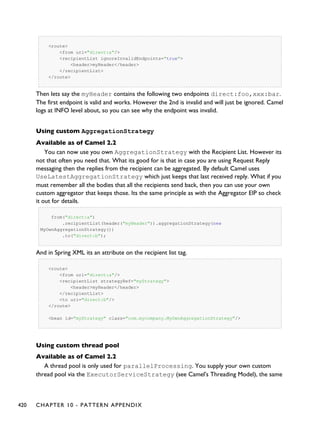
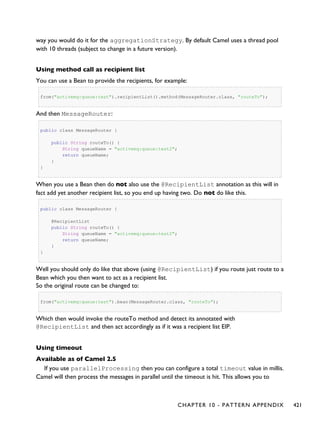
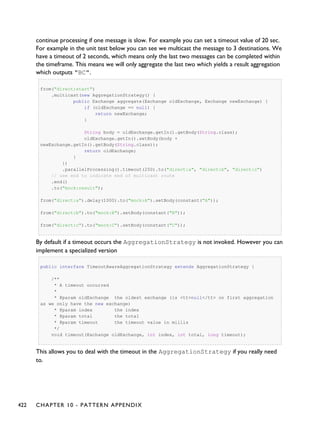

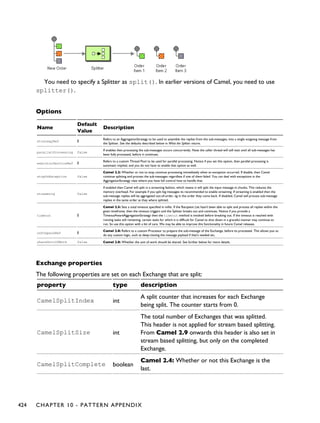


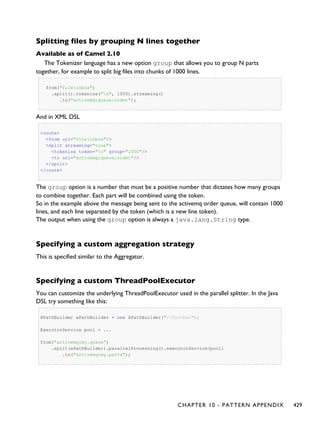
![Using a Pojo to do the splitting
As the Splitter can use any Expression to do the actual splitting we leverage this fact and use a
method expression to invoke a Bean to get the splitted parts.
The Bean should return a value that is iterable such as: java.util.Collection,
java.util.Iterator or an array.
So the returned value, will then be used by Camel at runtime, to split the message.
In the route we define the Expression as a method call to invoke our Bean that we have
registered with the id mySplitterBean in the Registry.
from("direct:body")
// here we use a POJO bean mySplitterBean to do the split of the payload
.split().method("mySplitterBean", "splitBody")
.to("mock:result");
from("direct:message")
// here we use a POJO bean mySplitterBean to do the split of the message
// with a certain header value
.split().method("mySplitterBean", "splitMessage")
.to("mock:result");
And the logic for our Bean is as simple as. Notice we use Camel Bean Binding to pass in the
message body as a String object.
public class MySplitterBean {
/**
* The split body method returns something that is iteratable such as a
java.util.List.
*
* @param body the payload of the incoming message
* @return a list containing each part splitted
*/
public List<String> splitBody(String body) {
// since this is based on an unit test you can of cause
// use different logic for splitting as Camel have out
// of the box support for splitting a String based on comma
// but this is for show and tell, since this is java code
// you have the full power how you like to split your messages
List<String> answer = new ArrayList<String>();
String[] parts = body.split(",");
for (String part : parts) {
answer.add(part);
}
return answer;
}
/**
* The split message method returns something that is iteratable such as a
java.util.List.
*
* @param header the header of the incoming message with the name user
430 CHAPTER 10 - PATTERN APPENDIX](https://image.slidesharecdn.com/camel-manual-2-130809102054-phpapp01/85/Camel-manual-2-11-0-434-320.jpg)
![Streaming mode and using pojo
When you have enabled the streaming mode, then you should return a Iterator
to ensure streamish fashion. For example if the message is a big file, then by using an
iterator, that returns a piece of the file in chunks, in the next method of the
Iterator ensures low memory footprint. This avoids the need for reading the
entire content into memory. For an example see the source code for the
TokenizePair implementation.
* @param body the payload of the incoming message
* @return a list containing each part splitted
*/
public List<Message> splitMessage(@Header(value = "user") String header, @Body
String body) {
// we can leverage the Parameter Binding Annotations
// http://camel.apache.org/parameter-binding-annotations.html
// to access the message header and body at same time,
// then create the message that we want, splitter will
// take care rest of them.
// *NOTE* this feature requires Camel version >= 1.6.1
List<Message> answer = new ArrayList<Message>();
String[] parts = header.split(",");
for (String part : parts) {
DefaultMessage message = new DefaultMessage();
message.setHeader("user", part);
message.setBody(body);
answer.add(message);
}
return answer;
}
}
Split aggregate request/reply sample
This sample shows how you can split an Exchange, process each splitted message, aggregate and
return a combined response to the original caller using request/reply.
The route below illustrates this and how the split supports a aggregationStrategy to
hold the in progress processed messages:
// this routes starts from the direct:start endpoint
// the body is then splitted based on @ separator
// the splitter in Camel supports InOut as well and for that we need
// to be able to aggregate what response we need to send back, so we provide our
// own strategy with the class MyOrderStrategy.
from("direct:start")
CHAPTER 10 - PATTERN APPENDIX 431](https://image.slidesharecdn.com/camel-manual-2-130809102054-phpapp01/85/Camel-manual-2-11-0-435-320.jpg)
![.split(body().tokenize("@"), new MyOrderStrategy())
// each splitted message is then send to this bean where we can process it
.to("bean:MyOrderService?method=handleOrder")
// this is important to end the splitter route as we do not want to do more
routing
// on each splitted message
.end()
// after we have splitted and handled each message we want to send a single
combined
// response back to the original caller, so we let this bean build it for us
// this bean will receive the result of the aggregate strategy: MyOrderStrategy
.to("bean:MyOrderService?method=buildCombinedResponse")
And the OrderService bean is as follows:
public static class MyOrderService {
private static int counter;
/**
* We just handle the order by returning a id line for the order
*/
public String handleOrder(String line) {
LOG.debug("HandleOrder: " + line);
return "(id=" + ++counter + ",item=" + line + ")";
}
/**
* We use the same bean for building the combined response to send
* back to the original caller
*/
public String buildCombinedResponse(String line) {
LOG.debug("BuildCombinedResponse: " + line);
return "Response[" + line + "]";
}
}
And our custom aggregationStrategy that is responsible for holding the in progress
aggregated message that after the splitter is ended will be sent to the
buildCombinedResponse method for final processing before the combined response can
be returned to the waiting caller.
/**
* This is our own order aggregation strategy where we can control
* how each splitted message should be combined. As we do not want to
* loos any message we copy from the new to the old to preserve the
* order lines as long we process them
*/
public static class MyOrderStrategy implements AggregationStrategy {
432 CHAPTER 10 - PATTERN APPENDIX](https://image.slidesharecdn.com/camel-manual-2-130809102054-phpapp01/85/Camel-manual-2-11-0-436-320.jpg)
![public Exchange aggregate(Exchange oldExchange, Exchange newExchange) {
// put order together in old exchange by adding the order from new exchange
if (oldExchange == null) {
// the first time we aggregate we only have the new exchange,
// so we just return it
return newExchange;
}
String orders = oldExchange.getIn().getBody(String.class);
String newLine = newExchange.getIn().getBody(String.class);
LOG.debug("Aggregate old orders: " + orders);
LOG.debug("Aggregate new order: " + newLine);
// put orders together separating by semi colon
orders = orders + ";" + newLine;
// put combined order back on old to preserve it
oldExchange.getIn().setBody(orders);
// return old as this is the one that has all the orders gathered until now
return oldExchange;
}
}
So lets run the sample and see how it works.
We send an Exchange to the direct:start endpoint containing a IN body with the String
value: A@B@C. The flow is:
HandleOrder: A
HandleOrder: B
Aggregate old orders: (id=1,item=A)
Aggregate new order: (id=2,item=B)
HandleOrder: C
Aggregate old orders: (id=1,item=A);(id=2,item=B)
Aggregate new order: (id=3,item=C)
BuildCombinedResponse: (id=1,item=A);(id=2,item=B);(id=3,item=C)
Response to caller: Response[(id=1,item=A);(id=2,item=B);(id=3,item=C)]
Stop processing in case of exception
Available as of Camel 2.1
The Splitter will by default continue to process the entire Exchange even in case of one of
the splitted message will thrown an exception during routing.
For example if you have an Exchange with 1000 rows that you split and route each sub
message. During processing of these sub messages an exception is thrown at the 17th. What
Camel does by default is to process the remainder 983 messages. You have the chance to
remedy or handle this in the AggregationStrategy.
CHAPTER 10 - PATTERN APPENDIX 433](https://image.slidesharecdn.com/camel-manual-2-130809102054-phpapp01/85/Camel-manual-2-11-0-437-320.jpg)


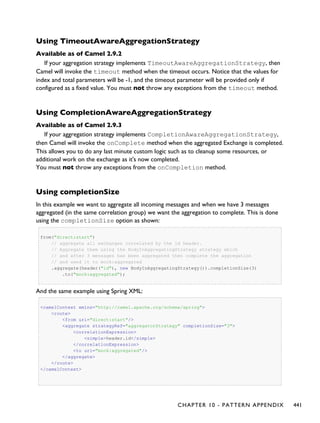


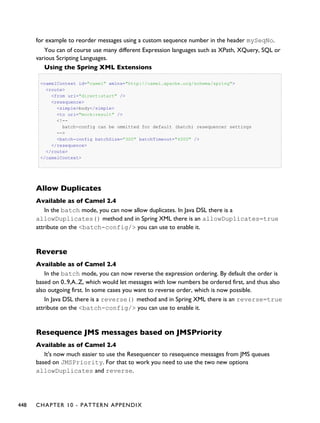


![public class MyFileNameExpression implements Expression {
public String getFileName(Exchange exchange) {
return exchange.getIn().getBody(String.class);
}
public Object evaluate(Exchange exchange) {
// parser the file name with YYYYMMDD-DNNN pattern
String fileName = getFileName(exchange);
String[] files = fileName.split("-D");
Long answer = Long.parseLong(files[0]) * 1000 + Long.parseLong(files[1]);
return answer;
}
public <T> T evaluate(Exchange exchange, Class<T> type) {
Object result = evaluate(exchange);
return exchange.getContext().getTypeConverter().convertTo(type, result);
}
}
from("direct:start").resequence(new
MyFileNameExpression()).stream().timeout(100).to("mock:result");
or custom comparator via the comparator() method
ExpressionResultComparator<Exchange> comparator = new MyComparator();
from("direct:start")
.resequence(header("seqnum")).stream().comparator(comparator)
.to("mock:result");
or via a StreamResequencerConfig object.
ExpressionResultComparator<Exchange> comparator = new MyComparator();
StreamResequencerConfig config = new StreamResequencerConfig(100, 1000L, comparator);
from("direct:start")
.resequence(header("seqnum")).stream(config)
.to("mock:result");
Using the Spring XML Extensions
<camelContext id="camel" xmlns="http://camel.apache.org/schema/spring">
<route>
<from uri="direct:start"/>
<resequence>
<simple>in.header.seqnum</simple>
CHAPTER 10 - PATTERN APPENDIX 451](https://image.slidesharecdn.com/camel-manual-2-130809102054-phpapp01/85/Camel-manual-2-11-0-455-320.jpg)
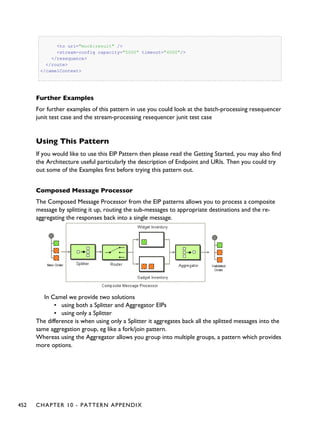


![Using XML
If you use XML, then the <split> tag offers the strategyRef attribute to refer to your
custom AggregationStrategy
/**
* We just handle the order by returning a id line for the order
*/
public String handleOrder(String line) {
LOG.debug("HandleOrder: " + line);
return "(id=" + ++counter + ",item=" + line + ")";
}
/**
* We use the same bean for building the combined response to send
* back to the original caller
*/
public String buildCombinedResponse(String line) {
LOG.debug("BuildCombinedResponse: " + line);
return "Response[" + line + "]";
}
}
And the AggregationStrategy we use with the Splitter eip to combine the orders back
again (eg fork/join):
/**
* This is our own order aggregation strategy where we can control
* how each splitted message should be combined. As we do not want to
* loos any message we copy from the new to the old to preserve the
* order lines as long we process them
*/
public static class MyOrderStrategy implements AggregationStrategy {
public Exchange aggregate(Exchange oldExchange, Exchange newExchange) {
// put order together in old exchange by adding the order from new exchange
if (oldExchange == null) {
// the first time we aggregate we only have the new exchange,
// so we just return it
return newExchange;
}
String orders = oldExchange.getIn().getBody(String.class);
String newLine = newExchange.getIn().getBody(String.class);
LOG.debug("Aggregate old orders: " + orders);
LOG.debug("Aggregate new order: " + newLine);
CHAPTER 10 - PATTERN APPENDIX 455](https://image.slidesharecdn.com/camel-manual-2-130809102054-phpapp01/85/Camel-manual-2-11-0-459-320.jpg)
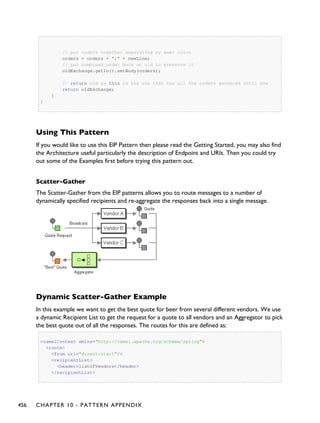


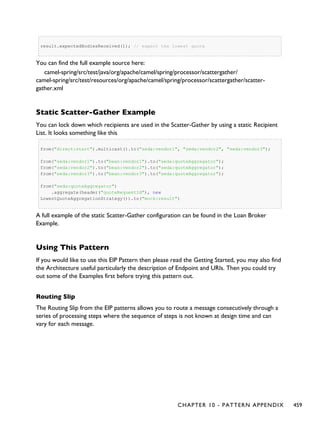
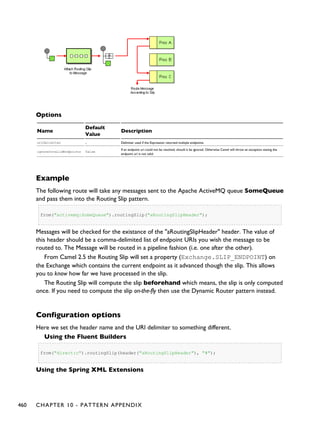
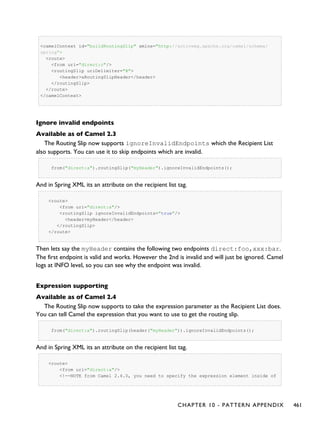

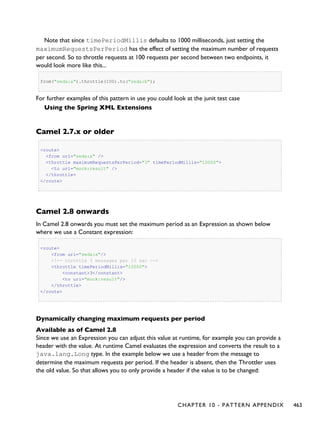


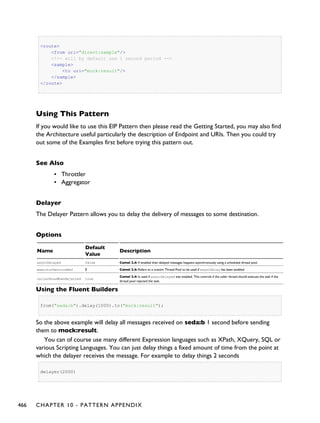


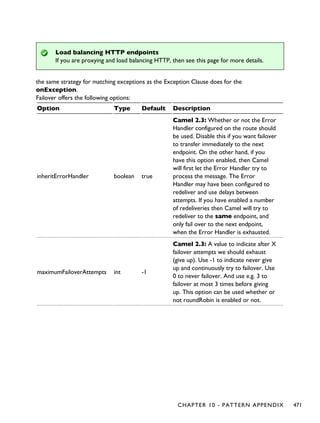
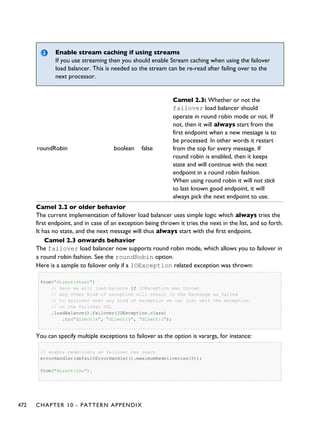
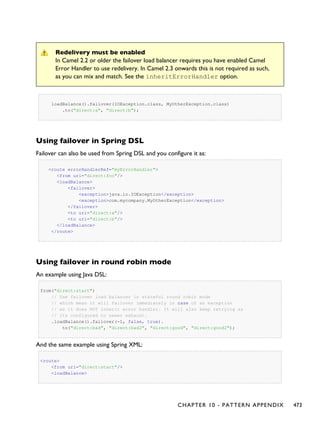
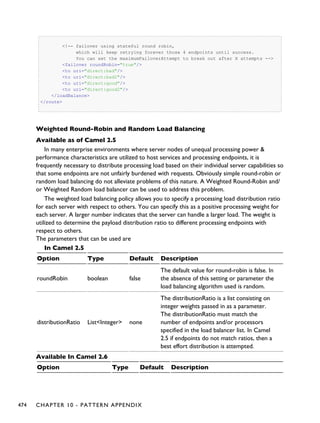


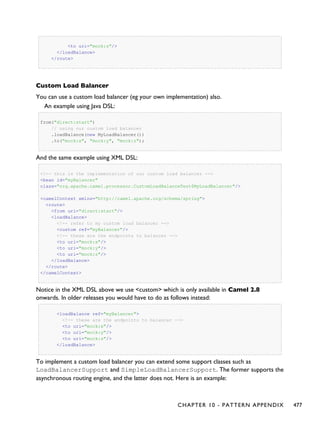


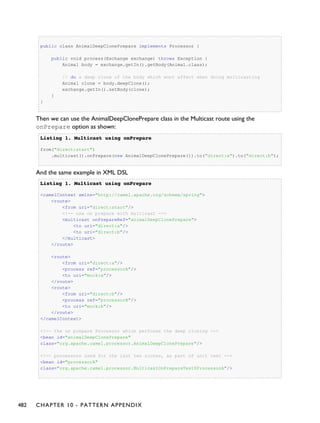
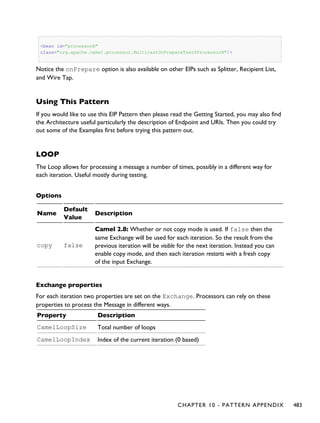


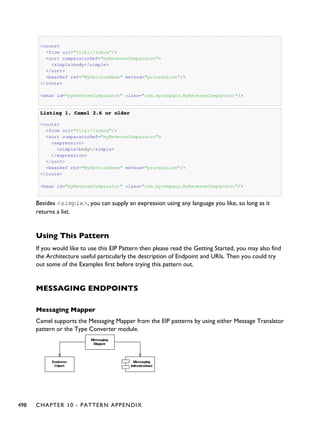


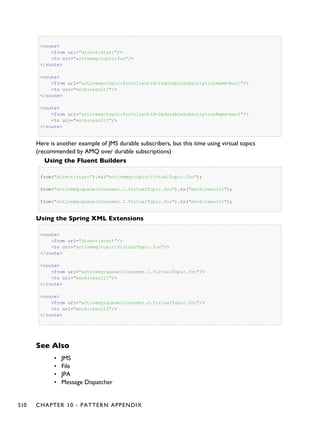


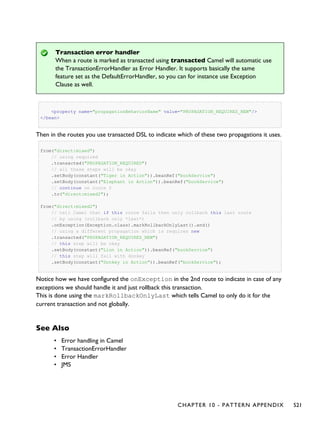

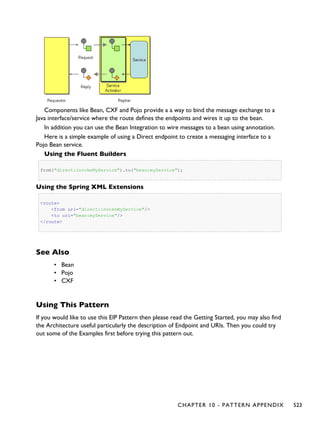


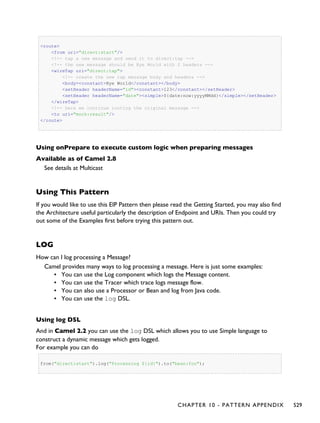


![CHAPTER 11
°°°°
Component Appendix
There now follows the documentation on each Camel component.
ACTIVEMQ COMPONENT
The ActiveMQ component allows messages to be sent to a JMS Queue or Topic or messages to
be consumed from a JMS Queue or Topic using Apache ActiveMQ.
This component is based on JMS Component and uses Spring's JMS support for declarative
transactions, using Spring's JmsTemplate for sending and a
MessageListenerContainer for consuming. All the options from the JMS component
also applies for this component.
To use this component make sure you have the activemq.jar or activemq-
core.jar on your classpath along with any Camel dependencies such as camel-core.jar,
camel-spring.jar and camel-jms.jar.
URI format
activemq:[queue:|topic:]destinationName
Where destinationName is an ActiveMQ queue or topic name. By default, the
destinationName is interpreted as a queue name. For example, to connect to the queue,
FOO.BAR, use:
activemq:FOO.BAR
You can include the optional queue: prefix, if you prefer:
activemq:queue:FOO.BAR
To connect to a topic, you must include the topic: prefix. For example, to connect to the
topic, Stocks.Prices, use:
532 CHAPTER 11 - COMPONENT APPENDIX](https://image.slidesharecdn.com/camel-manual-2-130809102054-phpapp01/85/Camel-manual-2-11-0-536-320.jpg)


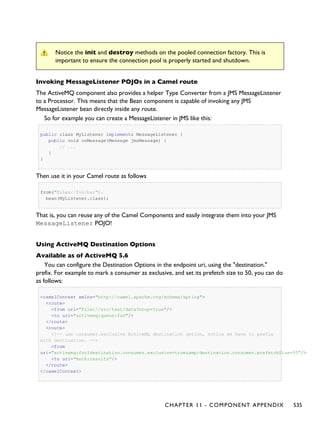
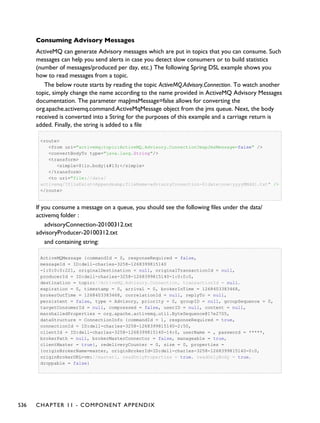
![Getting Component JAR
You will need this dependency
▪ activemq-camel
ActiveMQ is an extension of the JMS component released with the ActiveMQ project.
<dependency>
<groupId>org.apache.activemq</groupId>
<artifactId>activemq-camel</artifactId>
<version>5.6.0</version>
</dependency>
See Also
• Configuring Camel
• Component
• Endpoint
• Getting Started
ACTIVEMQ JOURNAL COMPONENT
The ActiveMQ Journal Component allows messages to be stored in a rolling log file and then
consumed from that log file. The journal aggregates and batches up concurrent writes so that
the overhead of writing and waiting for the disk sync is relatively constant regardless of how
many concurrent writes are being done. Therefore, this component supports and encourages
you to use multiple concurrent producers to the same journal endpoint.
Each journal endpoint uses a different log file and therefore write batching (and the
associated performance boost) does not occur between multiple endpoints.
This component only supports one active consumer on the endpoint. After the message is
processed by the consumer's processor, the log file is marked and only subsequent messages in
the log file will get delivered to consumers.
URI format
activemq.journal:directoryName[?options]
So for example, to send to the journal located in the /tmp/data directory you would use the
following URI:
activemq.journal:/tmp/data
CHAPTER 11 - COMPONENT APPENDIX 537](https://image.slidesharecdn.com/camel-manual-2-130809102054-phpapp01/85/Camel-manual-2-11-0-541-320.jpg)
![Options
Name
Default
Value
Description
syncConsume false
If set to true, when the journal is marked after a message is consumed, wait till the Operating System has verified the mark update
is safely stored on disk.
syncProduce true If set to true, wait till the Operating System has verified the message is safely stored on disk.
You can append query options to the URI in the following format,
?option=value&option=value&...
Expected Exchange Data Types
The consumer of a Journal endpoint generates DefaultExchange objects with the in message :
• header "journal" : set to the endpoint uri of the journal the message came from
• header "location" : set to a Location which identifies where the recored was stored
on disk
• body : set to ByteSequence which contains the byte array data of the stored message
The producer to a Journal endpoint expects an Exchange with an In message where the body
can be converted to a ByteSequence or a byte[].
See Also
• Configuring Camel
• Component
• Endpoint
• Getting Started
AMQP
The amqp: component supports the AMQP protocol using the Client API of the Qpid project.
Maven users will need to add the following dependency to their pom.xml for this
component:
<dependency>
<groupId>org.apache.camel</groupId>
<artifactId>camel-amqp</artifactId>
<version>${camel.version}</version> <!-- use the same version as your Camel core
version -->
</dependency>
538 CHAPTER 11 - COMPONENT APPENDIX](https://image.slidesharecdn.com/camel-manual-2-130809102054-phpapp01/85/Camel-manual-2-11-0-542-320.jpg)
![URI format
amqp:[queue:|topic:]destinationName[?options]
You can specify all of the various configuration options of the JMS component after the
destination name.
See Also
• Configuring Camel
• Component
• Endpoint
• Getting Started
SQS COMPONENT
Available as of Camel 2.6
The sqs component supports sending and receiving messages to Amazon's SQS service.
URI Format
aws-sqs://queue-name[?options]
The queue will be created if they don't already exists.
You can append query options to the URI in the following format,
?options=value&option2=value&...
URI Options
Name
Default
Value
Context Description
amazonSQSClient null Shared Reference to a com.amazonaws.services.sqs.AmazonSQS in the Registry.
accessKey null Shared Amazon AWS Access Key
secretKey null Shared Amazon AWS Secret Key
amazonSQSEndpoint null Shared The region with which the AWS-SQS client wants to work with.
attributeNames null Consumer
A list of attributes to set in the
com.amazonaws.services.sqs.model.ReceiveMessageRequest.
defaultVisibilityTimeout null Shared
The visibility timeout (in seconds) to set in the
com.amazonaws.services.sqs.model.CreateQueueRequest.
deleteAfterRead true Consumer Delete message from SQS after it has been read
maxMessagesPerPoll null Consumer
The maximum number of messages which can be received in one poll to set in the
com.amazonaws.services.sqs.model.ReceiveMessageRequest.
CHAPTER 11 - COMPONENT APPENDIX 539](https://image.slidesharecdn.com/camel-manual-2-130809102054-phpapp01/85/Camel-manual-2-11-0-543-320.jpg)

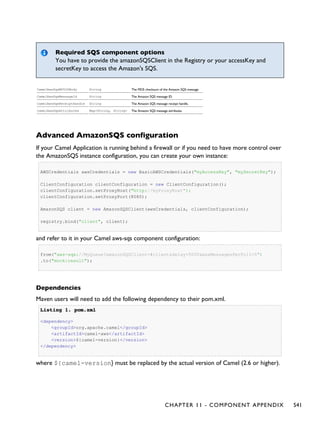
![See Also
• Configuring Camel
• Component
• Endpoint
• Getting Started
▪ AWS Component
ATOM COMPONENT
The atom: component is used for polling Atom feeds.
Camel will poll the feed every 60 seconds by default.
Note: The component currently only supports polling (consuming) feeds.
Maven users will need to add the following dependency to their pom.xml for this
component:
<dependency>
<groupId>org.apache.camel</groupId>
<artifactId>camel-atom</artifactId>
<version>x.x.x</version>
<!-- use the same version as your Camel core version -->
</dependency>
URI format
atom://atomUri[?options]
Where atomUri is the URI to the Atom feed to poll.
Options
Property Default Description
splitEntries true
If true Camel will poll the feed and for the subsequent polls return each entry poll by poll. If the feed contains 7 entries
then Camel will return the first entry on the first poll, the 2nd entry on the next poll, until no more entries where as
Camel will do a new update on the feed. If false then Camel will poll a fresh feed on every invocation.
filter true
Is only used by the split entries to filter the entries to return. Camel will default use the UpdateDateFilter that only
return new entries from the feed. So the client consuming from the feed never receives the same entry more than once.
The filter will return the entries ordered by the newest last.
lastUpdate null
Is only used by the filter, as the starting timestamp for selection never entries (uses the entry.updated timestamp).
Syntax format is: yyyy-MM-ddTHH:MM:ss. Example: 2007-12-24T17:45:59.
throttleEntries true
Camel 2.5: Sets whether all entries identified in a single feed poll should be delivered immediately. If true, only one
entry is processed per consumer.delay. Only applicable when splitEntries is set to true.
feedHeader true Sets whether to add the Abdera Feed object as a header.
sortEntries false If splitEntries is true, this sets whether to sort those entries by updated date.
consumer.delay 60000 Delay in millis between each poll.
consumer.initialDelay 1000 Millis before polling starts.
542 CHAPTER 11 - COMPONENT APPENDIX](https://image.slidesharecdn.com/camel-manual-2-130809102054-phpapp01/85/Camel-manual-2-11-0-546-320.jpg)


![// Asserts that the above expectations is true, will throw assertions exception if
it failed
// Camel will default wait max 20 seconds for the assertions to be true, if the
conditions
// is true sooner Camel will continue
mock.assertIsSatisfied();
// stop Camel after use
context.stop();
}
/**
* Services for blogs
*/
public class BlogService {
/**
* Tests the blogs if its a good blog entry or not
*/
public boolean isGoodBlog(Exchange exchange) {
Entry entry = exchange.getIn().getBody(Entry.class);
String title = entry.getTitle();
// We like blogs about Camel
boolean good = title.toLowerCase().contains("camel");
return good;
}
}
See Also
• Configuring Camel
• Component
• Endpoint
• Getting Started
▪ RSS
BEAN COMPONENT
The bean: component binds beans to Camel message exchanges.
URI format
bean:beanID[?options]
CHAPTER 11 - COMPONENT APPENDIX 545](https://image.slidesharecdn.com/camel-manual-2-130809102054-phpapp01/85/Camel-manual-2-11-0-549-320.jpg)

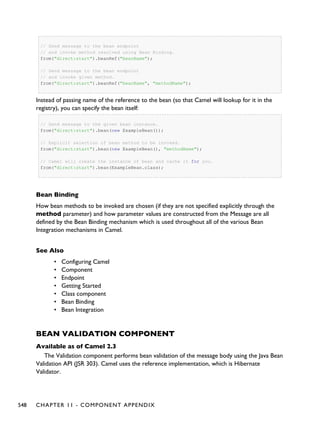
![Maven users will need to add the following dependency to their pom.xml for this
component:
<dependency>
<groupId>org.apache.camel</groupId>
<artifactId>camel-bean-validator</artifactId>
<version>x.x.x</version>
<!-- use the same version as your Camel core version -->
</dependency>
URI format
bean-validator:something[?options]
or
bean-validator://something[?options]
Where something must be present to provide a valid url
You can append query options to the URI in the following format,
?option=value&option=value&...
URI Options
Option Default Description
group javax.validation.groups.Default The custom validation group to use.
messageInterpolator
org.hibernate.validator.engine.
ResourceBundleMessageInterpolator
Reference to a custom
javax.validation.MessageInterpolator in the Registry.
traversableResolver
org.hibernate.validator.engine.resolver.
DefaultTraversableResolver
Reference to a custom
javax.validation.TraversableResolver in the Registry.
constraintValidatorFactory
org.hibernate.validator.engine.
ConstraintValidatorFactoryImpl
Reference to a custom
javax.validation.ConstraintValidatorFactory in the
Registry.
ServiceMix4/OSGi Deployment.
The bean-validator when deployed in an OSGi environment requires a little help to
accommodate the resource loading specified in JSR303, this was fixed in Servicemix-Specs
1.6-SNAPSHOT.
Example
Assumed we have a java bean with the following annotations
Listing 1.Listing 1. Car.javaCar.java
CHAPTER 11 - COMPONENT APPENDIX 549](https://image.slidesharecdn.com/camel-manual-2-130809102054-phpapp01/85/Camel-manual-2-11-0-553-320.jpg)
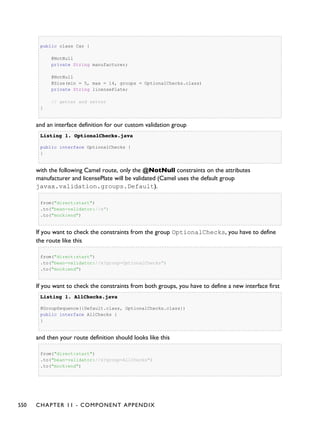

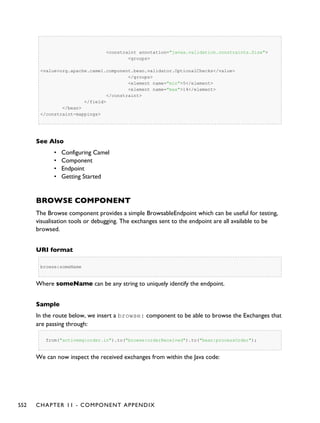

![URI format
cache://cacheName[?options]
You can append query options to the URI in the following format,
?option=value&option=#beanRef&...
Options
Name Default Value Description
maxElementsInMemory 1000 The number of elements that may be stored in the defined cache
memoryStoreEvictionPolicy MemoryStoreEvictionPolicy.LFU
The number of elements that may be stored in the defined cache. Options include
▪ MemoryStoreEvictionPolicy.LFU - Least frequently used
▪ MemoryStoreEvictionPolicy.LRU - Least recently used
▪ MemoryStoreEvictionPolicy.FIFO - first in first out, the oldest
element by creation time
overflowToDisk true Specifies whether cache may overflow to disk
eternal false
Sets whether elements are eternal. If eternal, timeouts are ignored and the
element never expires.
timeToLiveSeconds 300
The maximum time between creation time and when an element expires.
Is used only if the element is not eternal
timeToIdleSeconds 300 The maximum amount of time between accesses before an element expires
diskPersistent false Whether the disk store persists between restarts of the Virtual Machine.
diskExpiryThreadIntervalSeconds 120 The number of seconds between runs of the disk expiry thread.
cacheManagerFactory null
Camel 2.8: If you want to use a custom factory which instantiates and creates the
EHCache net.sf.ehcache.CacheManager.
Type: abstract org.apache.camel.component.cache.CacheManagerFactory
eventListenerRegistry null
Camel 2.8: Sets a list of EHCache
net.sf.ehcache.event.CacheEventListener for all new caches- no
need to define it per cache in EHCache xml config anymore.
Type: org.apache.camel.component.cache.CacheEventListenerRegistry
cacheLoaderRegistry null
Camel 2.8: Sets a list of
org.apache.camel.component.cache.CacheLoaderWrapper that
extends EHCache net.sf.ehcache.loader.CacheLoader for all new
caches- no need to define it per cache in EHCache xml config anymore.
Type: org.apache.camel.component.cache.CacheLoaderRegistry
key null
Camel 2.10: To configure using a cache key by default. If a key is provided in the
message header, then the key from the header takes precedence.
operation null
Camel 2.10: To configure using an cache operation by default. If an operation in
the message header, then the operation from the header takes precedence.
Sending/Receiving Messages to/from the cache
Message Headers up to Camel 2.7
Header Description
554 CHAPTER 11 - COMPONENT APPENDIX](https://image.slidesharecdn.com/camel-manual-2-130809102054-phpapp01/85/Camel-manual-2-11-0-558-320.jpg)

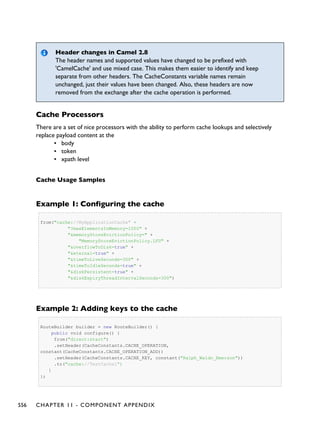
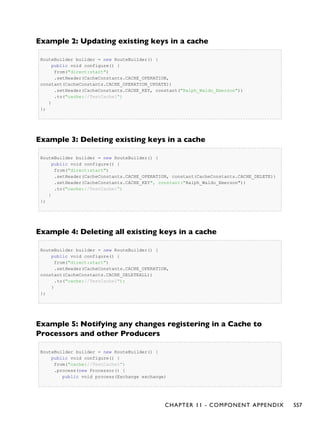


![It might be useful to read the EHCache manual to get a better understanding of the
Camel Cache replication mechanism.
CLASS COMPONENT
Available as of Camel 2.4
The class: component binds beans to Camel message exchanges. It works in the same way
as the Bean component but instead of looking up beans from a Registry it creates the bean
based on the class name.
URI format
class:className[?options]
Where className is the fully qualified class name to create and use as bean.
Options
Name Type Default Description
method String null
The method name that bean will be invoked. If not provided, Camel will try to pick the method itself. In case of
ambiguity an exception is thrown. See Bean Binding for more details.
multiParameterArray boolean false
How to treat the parameters which are passed from the message body; if it is true, the In message body should
be an array of parameters.
You can append query options to the URI in the following format,
?option=value&option=value&...
Using
You simply use the class component just as the Bean component but by specifying the fully
qualified classname instead.
For example to use the MyFooBean you have to do as follows:
from("direct:start").to("class:org.apache.camel.component.bean.MyFooBean").to("mock:result");
You can also specify which method to invoke on the MyFooBean, for example hello:
from("direct:start").to("class:org.apache.camel.component.bean.MyFooBean?method=hello").to("mock:resul
CHAPTER 11 - COMPONENT APPENDIX 561](https://image.slidesharecdn.com/camel-manual-2-130809102054-phpapp01/85/Camel-manual-2-11-0-565-320.jpg)

![See more
See more details at the Bean component as the class component works in much
the same way.
URI format
cometd://host:port/channelName[?options]
The channelName represents a topic that can be subscribed to by the Camel endpoints.
Examples
cometd://localhost:8080/service/mychannel
cometds://localhost:8443/service/mychannel
where cometds: represents an SSL configured endpoint.
See this blog entry by David Greco who contributed this component to Apache Camel, for a
full sample.
Options
Name
Default
Value
Description
resourceBase Ê
The root directory for the web resources or classpath. Use the protocol file: or classpath: depending if you want that the
component loads the resource from file system or classpath. Classpath is required for OSGI deployment where the resources
are packaged in the jar. Notice this option has been renamed to baseResource from Camel 2.7 onwards.
baseResource Ê
Camel 2.7: The root directory for the web resources or classpath. Use the protocol file: or classpath: depending if you want
that the component loads the resource from file system or classpath. Classpath is required for OSGI deployment where the
resources are packaged in the jar
timeout 240000 The server side poll timeout in milliseconds. This is how long the server will hold a reconnect request before responding.
interval 0 The client side poll timeout in milliseconds. How long a client will wait between reconnects
maxInterval 30000 The max client side poll timeout in milliseconds. A client will be removed if a connection is not received in this time.
multiFrameInterval 1500 The client side poll timeout, if multiple connections are detected from the same browser.
jsonCommented true
If true, the server will accept JSON wrapped in a comment and will generate JSON wrapped in a comment. This is a defence
against Ajax Hijacking.
logLevel 1 0=none, 1=info, 2=debug.
sslContextParameters Ê
Camel 2.9: Reference to a org.apache.camel.util.jsse.SSLContextParameters in the Registry.Ê This
reference overrides any configured SSLContextParameters at the component level.Ê See Using the JSSE Configuration Utility.
crossOriginFilterOn false Camel 2.10: If true, the server will support for cross-domain filtering
allowedOrigins * Camel 2.10: The origins domain that support to cross, if the crosssOriginFilterOn is true
filterPath Ê Camel 2.10: The filterPath will be used by the CrossOriginFilter, if the crosssOriginFilterOn is true
You can append query options to the URI in the following format,
?option=value&option=value&...
Here is some examples on How to pass the parameters
CHAPTER 11 - COMPONENT APPENDIX 563](https://image.slidesharecdn.com/camel-manual-2-130809102054-phpapp01/85/Camel-manual-2-11-0-567-320.jpg)

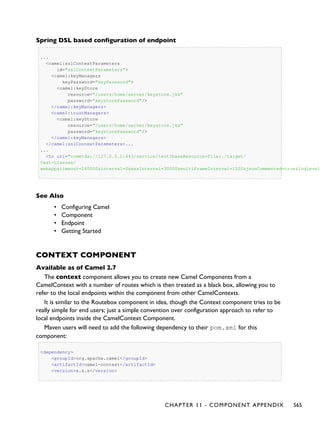
![<!-- use the same version as your Camel core version -->
</dependency>
URI format
context:camelContextId:localEndpointName[?options]
Or you can omit the "context:" prefix.
camelContextId:localEndpointName[?options]
• camelContextId is the ID you used to register the CamelContext into the
Registry.
• localEndpointName can be a valid Camel URI evaluated within the black box
CamelContext. Or it can be a logical name which is mapped to any local endpoints.
For example if you locally have endpoints like direct:invoices and
seda:purchaseOrders inside a CamelContext of id supplyChain, then you can
just use the URIs supplyChain:invoices or supplyChain:purchaseOrders to
omit the physical endpoint kind and use pure logical URIs.
You can append query options to the URI in the following format,
?option=value&option=value&...
Example
In this example we'll create a black box context, then we'll use it from another CamelContext.
Defining the context component
First you need to create a CamelContext, add some routes in it, start it and then register the
CamelContext into the Registry (JNDI, Spring, Guice or OSGi etc).
This can be done in the usual Camel way from this test case (see the createRegistry()
method); this example shows Java and JNDI being used...
// lets create our black box as a camel context and a set of routes
DefaultCamelContext blackBox = new DefaultCamelContext(registry);
blackBox.setName("blackBox");
blackBox.addRoutes(new RouteBuilder() {
@Override
public void configure() throws Exception {
// receive purchase orders, lets process it in some way then send an invoice
// to our invoice endpoint
566 CHAPTER 11 - COMPONENT APPENDIX](https://image.slidesharecdn.com/camel-manual-2-130809102054-phpapp01/85/Camel-manual-2-11-0-570-320.jpg)


![URI format
As mentioned Camel provides a pair of crypto endpoints to create and verify signatures
crypto:sign:name[?options]
crypto:verify:name[?options]
• crypto:sign creates the signature and stores it in the Header keyed by the
constant Exchange.SIGNATURE, i.e. "CamelDigitalSignature".
• crypto:verify will read in the contents of this header and do the verification
calculation.
In order to correctly function, the sign and verify process needs a pair of keys to be shared,
signing requiring a PrivateKey and verifying a PublicKey (or a Certificate containing
one). Using the JCE it is very simple to generate these key pairs but it is usually most secure to
use a KeyStore to house and share your keys. The DSL is very flexible about how keys are
supplied and provides a number of mechanisms.
Note a crypto:sign endpoint is typically defined in one route and the complimentary
crypto:verify in another, though for simplicity in the examples they appear one after the
other. It goes without saying that both signing and verifying should be configured identically.
Options
Name Type Default Description
algorithm String DSA The name of the JCE Signature algorithm that will be used.
alias String null An alias name that will be used to select a key from the keystore.
bufferSize Integer 2048 the size of the buffer used in the signature process.
certificate Certificate null A Certificate used to verify the signature of the exchange's payload. Either this or a Public Key is required.
keystore KeyStore null A reference to a JCE Keystore that stores keys and certificates used to sign and verify.
provider String null The name of the JCE Security Provider that should be used.
privateKey PrivatKey null The private key used to sign the exchange's payload.
publicKey PublicKey null The public key used to verify the signature of the exchange's payload.
secureRandom secureRandom null A reference to a SecureRandom object that will be used to initialize the Signature service.
password char[] null The password for the keystore.
clearHeaders String true Remove camel crypto headers from Message after a verify operation (value can be "true"/"false").
Using
1) Raw keys
The most basic way to way to sign and verify an exchange is with a KeyPair as follows.
from("direct:keypair").to("crypto:sign://basic?privateKey=#myPrivateKey",
"crypto:verify://basic?publicKey=#myPublicKey", "mock:result");
CHAPTER 11 - COMPONENT APPENDIX 569](https://image.slidesharecdn.com/camel-manual-2-130809102054-phpapp01/85/Camel-manual-2-11-0-573-320.jpg)


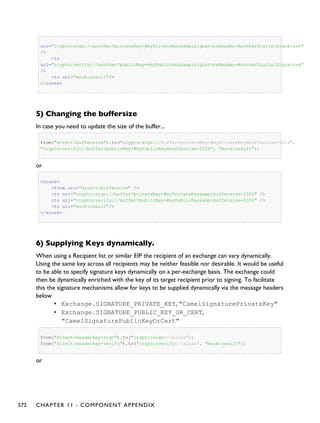

![• Getting Started
• Crypto Crypto is also available as a Data Format
CXF COMPONENT
The cxf: component provides integration with Apache CXF for connecting to JAX-WS services
hosted in CXF.
• CXF Component
• URI format
• Options
• The descriptions of the dataformats
• How to enable CXF's LoggingOutInterceptor in MESSAGE mode
• Description of relayHeaders option
• Available only in POJO mode
• Changes since Release 2.0
• Configure the CXF endpoints with Spring
• Configuring the CXF Endpoints with Apache Aries Blueprint.
• How to make the camel-cxf component use log4j instead of java.util.logging
• How to let camel-cxf response message with xml start document
• How to consume a message from a camel-cxf endpoint in POJO data format
• How to prepare the message for the camel-cxf endpoint in POJO data format
• How to deal with the message for a camel-cxf endpoint in PAYLOAD data format
• How to get and set SOAP headers in POJO mode
• How to get and set SOAP headers in PAYLOAD mode
• SOAP headers are not available in MESSAGE mode
• How to throw a SOAP Fault from Camel
• How to propagate a camel-cxf endpoint's request and response context
• Attachment Support
• Streaming Support in PAYLOAD mode
• See Also
Maven users will need to add the following dependency to their pom.xml for this component:
<dependency>
<groupId>org.apache.camel</groupId>
<artifactId>camel-cxf</artifactId>
<version>x.x.x</version>
<!-- use the same version as your Camel core version -->
</dependency>
URI format
cxf:bean:cxfEndpoint[?options]
574 CHAPTER 11 - COMPONENT APPENDIX](https://image.slidesharecdn.com/camel-manual-2-130809102054-phpapp01/85/Camel-manual-2-11-0-578-320.jpg)
![When using CXF as a consumer, the CXF Bean Component allows you to factor
out how message payloads are received from their processing as a RESTful or SOAP
web service. This has the potential of using a multitude of transports to consume
web services. The bean component's configuration is also simpler and provides the
fastest method to implement web services using Camel and CXF.
When using CXF in streaming modes (see DataFormat option), then also read
about Stream caching.
CXF dependencies
If you want to learn about CXF dependencies you can checkout the WHICH-JARS
text file.
Where cxfEndpoint represents a bean ID that references a bean in the Spring bean registry.
With this URI format, most of the endpoint details are specified in the bean definition.
cxf://someAddress[?options]
Where someAddress specifies the CXF endpoint's address. With this URI format, most of
the endpoint details are specified using options.
For either style above, you can append options to the URI as follows:
cxf:bean:cxfEndpoint?wsdlURL=wsdl/hello_world.wsdl&dataFormat=PAYLOAD
Options
Name Required Description
wsdlURL No
The location of the WSDL. It is obtained from endpoint address by default.
Example: file://local/wsdl/hello.wsdl or wsdl/hello.wsdl
CHAPTER 11 - COMPONENT APPENDIX 575](https://image.slidesharecdn.com/camel-manual-2-130809102054-phpapp01/85/Camel-manual-2-11-0-579-320.jpg)


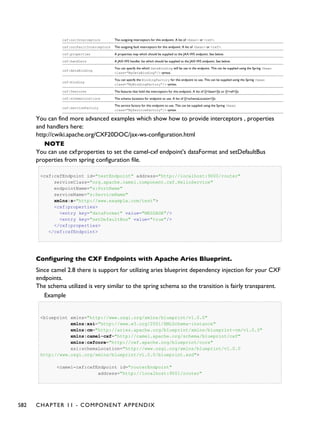

![<routeBuilder ref="reportIncidentRoutes"/>
</camelContext>
</blueprint>
How to make the camel-cxf component use log4j instead of java.util.logging
CXF's default logger is java.util.logging. If you want to change it to log4j, proceed as
follows. Create a file, in the classpath, named META-INF/cxf/
org.apache.cxf.logger. This file should contain the fully-qualified name of the class,
org.apache.cxf.common.logging.Log4jLogger, with no comments, on a single
line.
How to let camel-cxf response message with xml start document
If you are using some soap client such as PHP, you will get this kind of error, because CXF
doesn't add the XML start document "<?xml version="1.0" encoding="utf-8"?>"
Error:sendSms: SoapFault exception: [Client] looks like we got no XML document in [...]
To resolved this issue, you just need to tell StaxOutInterceptor to write the XML start
document for you.
public class WriteXmlDeclarationInterceptor extends
AbstractPhaseInterceptor<SoapMessage> {
public WriteXmlDeclarationInterceptor() {
super(Phase.PRE_STREAM);
addBefore(StaxOutInterceptor.class.getName());
}
public void handleMessage(SoapMessage message) throws Fault {
message.put("org.apache.cxf.stax.force-start-document", Boolean.TRUE);
}
}
You can add a customer interceptor like this and configure it into you camel-cxf endpont
<cxf:cxfEndpoint id="routerEndpoint"
address="http://localhost:${CXFTestSupport.port2}/CXFGreeterRouterTest/CamelContext/
RouterPort"
serviceClass="org.apache.hello_world_soap_http.GreeterImpl"
skipFaultLogging="true">
<cxf:outInterceptors>
584 CHAPTER 11 - COMPONENT APPENDIX](https://image.slidesharecdn.com/camel-manual-2-130809102054-phpapp01/85/Camel-manual-2-11-0-588-320.jpg)
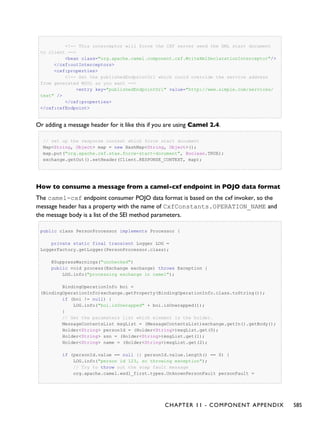
![new org.apache.camel.wsdl_first.types.UnknownPersonFault();
personFault.setPersonId("");
org.apache.camel.wsdl_first.UnknownPersonFault fault =
new org.apache.camel.wsdl_first.UnknownPersonFault("Get the null value
of person name", personFault);
// Since camel has its own exception handler framework, we can't throw the
exception to trigger it
// We just set the fault message in the exchange for camel-cxf component
handling and return
exchange.getOut().setFault(true);
exchange.getOut().setBody(fault);
return;
}
name.value = "Bonjour";
ssn.value = "123";
LOG.info("setting Bonjour as the response");
// Set the response message, first element is the return value of the
operation,
// the others are the holders of method parameters
exchange.getOut().setBody(new Object[] {null, personId, ssn, name});
}
}
How to prepare the message for the camel-cxf endpoint in POJO data
format
The camel-cxf endpoint producer is based on the cxf client API. First you need to specify
the operation name in the message header, then add the method parameters to a list, and
initialize the message with this parameter list. The response message's body is a
messageContentsList, you can get the result from that list.
If you want to get the object array from the message body, you can get the body using
message.getbody(Object[].class), as follows:
Exchange senderExchange = new DefaultExchange(context, ExchangePattern.InOut);
final List<String> params = new ArrayList<String>();
// Prepare the request message for the camel-cxf procedure
params.add(TEST_MESSAGE);
senderExchange.getIn().setBody(params);
senderExchange.getIn().setHeader(CxfConstants.OPERATION_NAME, ECHO_OPERATION);
Exchange exchange = template.send("direct:EndpointA", senderExchange);
org.apache.camel.Message out = exchange.getOut();
// The response message's body is an MessageContentsList which first element is the
return value of the operation,
// If there are some holder parameters, the holder parameter will be filled in the
reset of List.
586 CHAPTER 11 - COMPONENT APPENDIX](https://image.slidesharecdn.com/camel-manual-2-130809102054-phpapp01/85/Camel-manual-2-11-0-590-320.jpg)
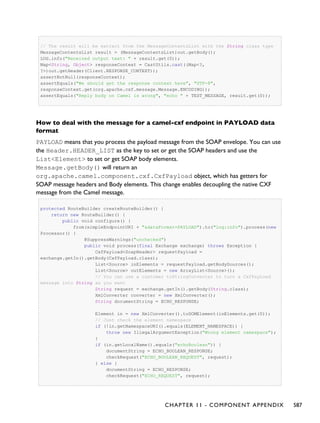
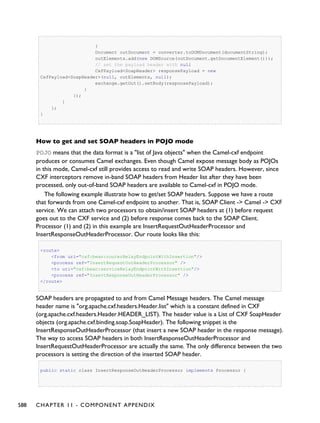


![});
Same for using POJO data format. You can set the SOAPFault on the out body and also indicate
it's a fault by calling Message.setFault(true):
from("direct:start").onException(SoapFault.class).maximumRedeliveries(0).handled(true)
.process(new Processor() {
public void process(Exchange exchange) throws Exception {
SoapFault fault = exchange
.getProperty(Exchange.EXCEPTION_CAUGHT, SoapFault.class);
exchange.getOut().setFault(true);
exchange.getOut().setBody(fault);
}
}).end().to(serviceURI);
How to propagate a camel-cxf endpoint's request and response context
cxf client API provides a way to invoke the operation with request and response context. If you
are using a camel-cxf endpoint producer to invoke the outside web service, you can set the
request context and get response context with the following code:
CxfExchange exchange = (CxfExchange)template.send(getJaxwsEndpointUri(), new
Processor() {
public void process(final Exchange exchange) {
final List<String> params = new ArrayList<String>();
params.add(TEST_MESSAGE);
// Set the request context to the inMessage
Map<String, Object> requestContext = new HashMap<String, Object>();
requestContext.put(BindingProvider.ENDPOINT_ADDRESS_PROPERTY,
JAXWS_SERVER_ADDRESS);
exchange.getIn().setBody(params);
exchange.getIn().setHeader(Client.REQUEST_CONTEXT , requestContext);
exchange.getIn().setHeader(CxfConstants.OPERATION_NAME,
GREET_ME_OPERATION);
}
});
org.apache.camel.Message out = exchange.getOut();
// The output is an object array, the first element of the array is the
return value
Object[] output = out.getBody(Object[].class);
LOG.info("Received output text: " + output[0]);
// Get the response context form outMessage
Map<String, Object> responseContext =
CastUtils.cast((Map)out.getHeader(Client.RESPONSE_CONTEXT));
assertNotNull(responseContext);
assertEquals("Get the wrong wsdl opertion name", "{http://apache.org/
CHAPTER 11 - COMPONENT APPENDIX 591](https://image.slidesharecdn.com/camel-manual-2-130809102054-phpapp01/85/Camel-manual-2-11-0-595-320.jpg)


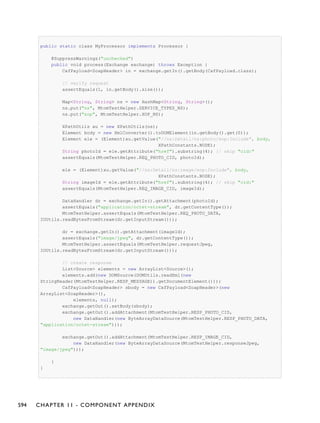
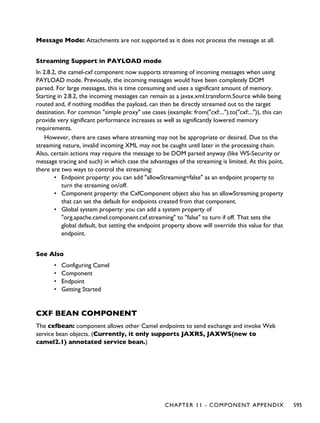
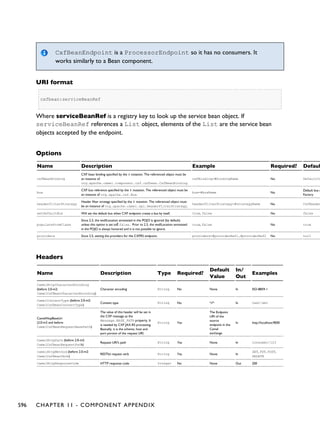


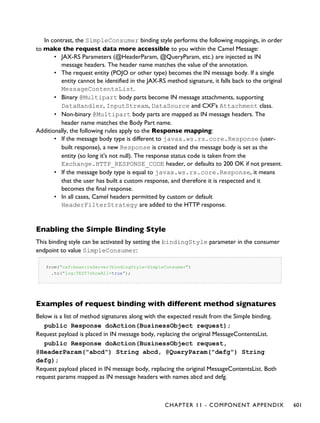


![};
}
And the corresponding resource class used to configure the endpoint...
@Path("/customerservice/")
public interface CustomerServiceResource {
@GET
@Path("/customers/{id}/")
Customer getCustomer(@PathParam("id") String id);
@PUT
@Path("/customers/")
Response updateCustomer(Customer customer);
}
How to invoke the REST service through camel-cxfrs producer
CXF JAXRS front end implements a proxy based client API, with this API you can invoke the
remote REST service through a proxy.
camel-cxfrs producer is based on this proxy API.
So, you just need to specify the operation name in the message header and prepare the
parameter in the message body, camel-cxfrs producer will generate right REST request for you.
Here is an example
Exchange exchange = template.send("direct://proxy", new Processor() {
public void process(Exchange exchange) throws Exception {
exchange.setPattern(ExchangePattern.InOut);
Message inMessage = exchange.getIn();
setupDestinationURL(inMessage);
// set the operation name
inMessage.setHeader(CxfConstants.OPERATION_NAME, "getCustomer");
// using the proxy client API
inMessage.setHeader(CxfConstants.CAMEL_CXF_RS_USING_HTTP_API, Boolean.FALSE);
// set a customer header
inMessage.setHeader("key", "value");
// set the parameters , if you just have one parameter
// camel will put this object into an Object[] itself
inMessage.setBody("123");
}
});
// get the response message
Customer response = (Customer) exchange.getOut().getBody();
assertNotNull("The response should not be null ", response);
assertEquals("Get a wrong customer id ", String.valueOf(response.getId()), "123");
CHAPTER 11 - COMPONENT APPENDIX 605](https://image.slidesharecdn.com/camel-manual-2-130809102054-phpapp01/85/Camel-manual-2-11-0-609-320.jpg)
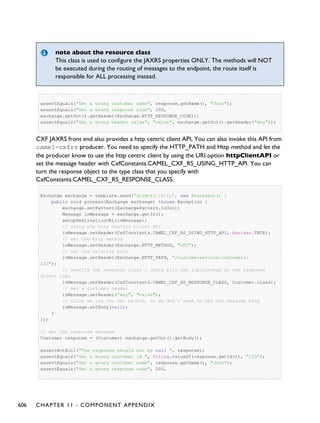
![exchange.getOut().getHeader(Exchange.HTTP_RESPONSE_CODE));
assertEquals("Get a wrong header value", "value", exchange.getOut().getHeader("key"));
From Camel 2.1, we also support to specify the query parameters from cxfrs URI for the
CXFRS http centric client.
Exchange exchange = template.send("cxfrs://http://localhost:" + getPort2() + "/" +
getClass().getSimpleName() + "/testQuery?httpClientAPI=true&q1=12&q2=13"
To support the Dynamical routing, you can override the URI's query parameters by using the
CxfConstants.CAMEL_CXF_RS_QUERY_MAP header to set the parameter map for it.
Map<String, String> queryMap = new LinkedHashMap<String, String>();
queryMap.put("q1", "new");
queryMap.put("q2", "world");
inMessage.setHeader(CxfConstants.CAMEL_CXF_RS_QUERY_MAP, queryMap);
DATASET COMPONENT
Testing of distributed and asynchronous processing is notoriously difficult. The Mock, Test and
DataSet endpoints work great with the Camel Testing Framework to simplify your unit and
integration testing using Enterprise Integration Patterns and Camel's large range of Components
together with the powerful Bean Integration.
The DataSet component provides a mechanism to easily perform load & soak testing of your
system. It works by allowing you to create DataSet instances both as a source of messages and
as a way to assert that the data set is received.
Camel will use the throughput logger when sending dataset's.
URI format
dataset:name[?options]
Where name is used to find the DataSet instance in the Registry
Camel ships with a support implementation of
org.apache.camel.component.dataset.DataSet, the
org.apache.camel.component.dataset.DataSetSupport class, that can be used
as a base for implementing your own DataSet. Camel also ships with a default implementation,
the org.apache.camel.component.dataset.SimpleDataSet that can be used for
testing.
CHAPTER 11 - COMPONENT APPENDIX 607](https://image.slidesharecdn.com/camel-manual-2-130809102054-phpapp01/85/Camel-manual-2-11-0-611-320.jpg)

![See Also
• Configuring Camel
• Component
• Endpoint
• Getting Started
• Spring Testing
DB4O COMPONENT
Available as of Camel 2.5
The db4o: component allows you to work with db4o NoSQL database. The camel-db4o
library is provided by the Camel Extra project which hosts all *GPL related components for
Camel.
Sending to the endpoint
Sending POJO object to the db4o endpoint adds and saves object into the database. The body
of the message is assumed to be a POJO that has to be saved into the db40 database store.
Consuming from the endpoint
Consuming messages removes (or updates) POJO objects in the database. This allows you to
use a Db4o datastore as a logical queue; consumers take messages from the queue and then
delete them to logically remove them from the queue.
If you do not wish to delete the object when it has been processed, you can specify
consumeDelete=false on the URI. This will result in the POJO being processed each poll.
URI format
db4o:className[?options]
You can append query options to the URI in the following format,
?option=value&option=value&...
Options
Name
Default
Value
Description
consumeDelete true Option for Db4oConsumer only. Specifies whether or not the entity is deleted after it is consumed.
consumer.delay 500 Option for HibernateConsumer only. Delay in millis between each poll.
consumer.initialDelay 1000 Option for HibernateConsumer only. Millis before polling starts.
CHAPTER 11 - COMPONENT APPENDIX 609](https://image.slidesharecdn.com/camel-manual-2-130809102054-phpapp01/85/Camel-manual-2-11-0-613-320.jpg)
![consumer.userFixedDelay false
Option for HibernateConsumer only. Set to true to use fixed delay between polls, otherwise fixed rate is used. See
ScheduledExecutorService in JDK for details.
See Also
• Configuring Camel
• Component
• Endpoint
• Getting Started
DIRECT COMPONENT
The direct: component provides direct, synchronous invocation of any consumers when a
producer sends a message exchange.
This endpoint can be used to connect existing routes in the same camel context.
URI format
direct:someName[?options]
Where someName can be any string to uniquely identify the endpoint
Options
Name
Default
Value
Description
allowMultipleConsumers true
@deprecated If set to false, then when a second consumer is started on the endpoint, an
IllegalStateException is thrown. Will be removed in Camel 2.1: Direct endpoint does not support multiple
consumers.
You can append query options to the URI in the following format,
?option=value&option=value&...
Samples
In the route below we use the direct component to link the two routes together:
from("activemq:queue:order.in")
.to("bean:orderServer?method=validate")
.to("direct:processOrder");
from("direct:processOrder")
.to("bean:orderService?method=process")
.to("activemq:queue:order.out");
610 CHAPTER 11 - COMPONENT APPENDIX](https://image.slidesharecdn.com/camel-manual-2-130809102054-phpapp01/85/Camel-manual-2-11-0-614-320.jpg)

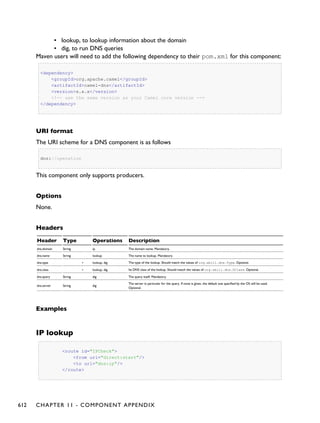
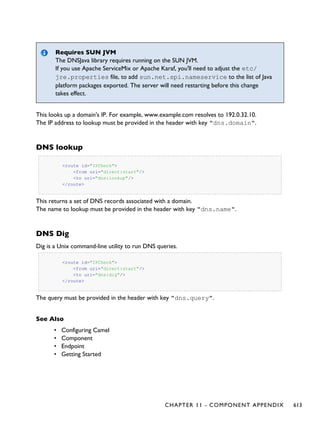
![EJB COMPONENT
Available as of Camel 2.4
The ejb: component binds EJBs to Camel message exchanges.
Maven users will need to add the following dependency to their pom.xml for this
component:
<dependency>
<groupId>org.apache.camel</groupId>
<artifactId>camel-ejb</artifactId>
<version>x.x.x</version>
<!-- use the same version as your Camel core version -->
</dependency>
URI format
ejb:ejbName[?options]
Where ejbName can be any string which is used to look up the EJB in the Application Server
JNDI Registry
Options
Name Type Default Description
method String null
The method name that bean will be invoked. If not provided, Camel will try to pick the method itself. In case of
ambiguity an exception is thrown. See Bean Binding for more details.
multiParameterArray boolean false
How to treat the parameters which are passed from the message body; if it is true, the In message body should
be an array of parameters.
You can append query options to the URI in the following format,
?option=value&option=value&...
The EJB component extends the Bean component in which most of the details from the
Bean component applies to this component as well.
Bean Binding
How bean methods to be invoked are chosen (if they are not specified explicitly through the
method parameter) and how parameter values are constructed from the Message are all
defined by the Bean Binding mechanism which is used throughout all of the various Bean
Integration mechanisms in Camel.
Examples
In the following examples we use the Greater EJB which is defined as follows:
614 CHAPTER 11 - COMPONENT APPENDIX](https://image.slidesharecdn.com/camel-manual-2-130809102054-phpapp01/85/Camel-manual-2-11-0-618-320.jpg)


![In a real application server
In a real application server you most likely do not have to setup a JndiContext
on the EJB component as it will create a default JndiContext on the same JVM
as the application server, which usually allows it to access the JNDI registry and
lookup the EJBs.
However if you need to access a application server on a remote JVM or the likes,
you have to prepare the properties beforehand.
• Bean Integration
ESPER
The Esper component supports the Esper Library for Event Stream Processing. The camel-
esper library is provided by the Camel Extra project which hosts all *GPL related components
for Camel.
URI format
esper:name[?options]
When consuming from an Esper endpoint you must specify a pattern or eql statement to
query the event stream.
For example
from("esper://cheese?pattern=every event=MyEvent(bar=5)").
to("activemq:Foo");
Options
Name Default Value Description
pattern Ê The Esper Pattern expression as a String to filter events
eql Ê The Esper EQL expression as a String to filter events
You can append query options to the URI in the following format,
?option=value&option=value&...
Demo
There is a demo which shows how to work with ActiveMQ, Camel and Esper in the Camel
Extra project
CHAPTER 11 - COMPONENT APPENDIX 617](https://image.slidesharecdn.com/camel-manual-2-130809102054-phpapp01/85/Camel-manual-2-11-0-621-320.jpg)
![See Also
• Configuring Camel
• Component
• Endpoint
• Getting Started
• Esper Camel Demo
EVENT COMPONENT
The event: component provides access to the Spring ApplicationEvent objects. This allows
you to publish ApplicationEvent objects to a Spring ApplicationContext or to consume them.
You can then use Enterprise Integration Patterns to process them such as Message Filter.
URI format
spring-event://default
See Also
• Configuring Camel
• Component
• Endpoint
• Getting Started
FILE COMPONENT
The File component provides access to file systems, allowing files to be processed by any other
Camel Components or messages from other components to be saved to disk.
URI format
file:directoryName[?options]
or
file://directoryName[?options]
Where directoryName represents the underlying file directory.
618 CHAPTER 11 - COMPONENT APPENDIX](https://image.slidesharecdn.com/camel-manual-2-130809102054-phpapp01/85/Camel-manual-2-11-0-622-320.jpg)

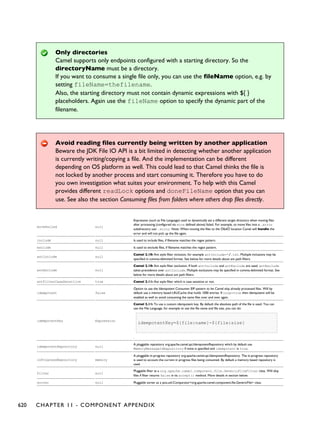


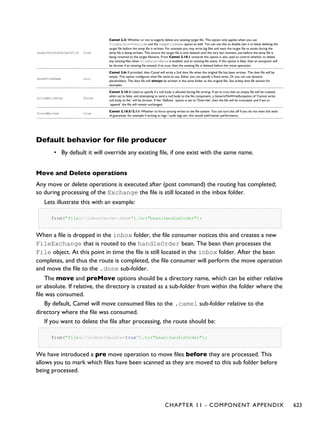
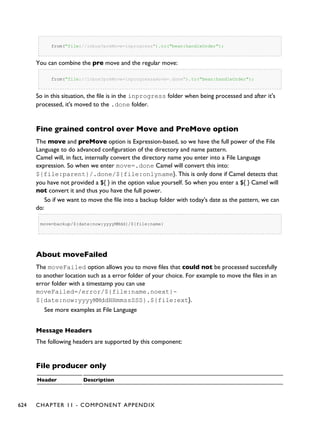

![from("file:inbox?charset=utf-8")
.to("file:outbox?charset=iso-8859-1")
You can also use the convertBodyTo in the route. In the example below we have still input
files in utf-8 format, but we want to convert the file content to a byte array in iso-8859-1
format. And then let a bean process the data. Before writing the content to the outbox folder
using the current charset.
from("file:inbox?charset=utf-8")
.convertBodyTo(byte[].class, "iso-8859-1")
.to("bean:myBean")
.to("file:outbox");
If you omit the charset on the consumer endpoint, then Camel does not know the charset of
the file, and would by default use "UTF-8". However you can configure a JVM system property
to override and use a different default encoding with the key
org.apache.camel.default.charset.
In the example below this could be a problem if the files is not in UTF-8 encoding, which
would be the default encoding for read the files.
In this example when writing the files, the content has already been converted to a byte array,
and thus would write the content directly as is (without any further encodings).
from("file:inbox")
.convertBodyTo(byte[].class, "iso-8859-1")
.to("bean:myBean")
.to("file:outbox");
You can also override and control the encoding dynamic when writing files, by setting a
property on the exchange with the key Exchange.CHARSET_NAME. For example in the
route below we set the property with a value from a message header.
from("file:inbox")
.convertBodyTo(byte[].class, "iso-8859-1")
.to("bean:myBean")
.setProperty(Exchange.CHARSET_NAME, header("someCharsetHeader"))
.to("file:outbox");
We suggest to keep things simpler, so if you pickup files with the same encoding, and want to
write the files in a specific encoding, then favor to use the charset option on the endpoints.
Notice that if you have explicit configured a charset option on the endpoint, then that
configuration is used, regardless of the Exchange.CHARSET_NAME property.
If you have some issues then you can enable DEBUG logging on
org.apache.camel.component.file, and Camel logs when it reads/write a file using a
626 CHAPTER 11 - COMPONENT APPENDIX](https://image.slidesharecdn.com/camel-manual-2-130809102054-phpapp01/85/Camel-manual-2-11-0-630-320.jpg)
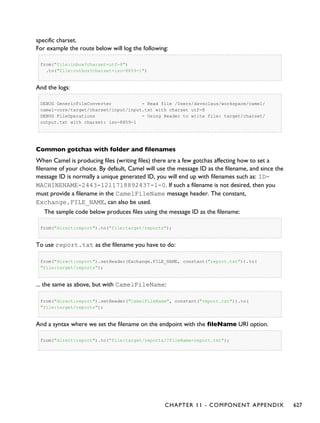


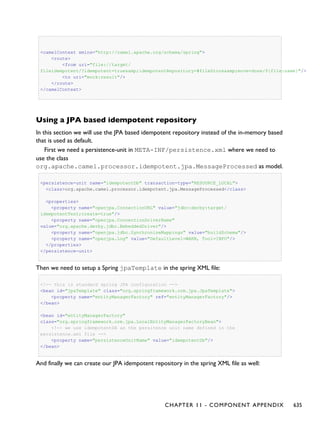


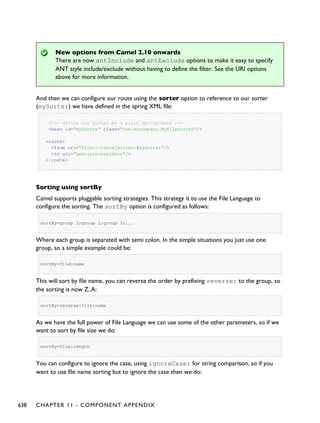
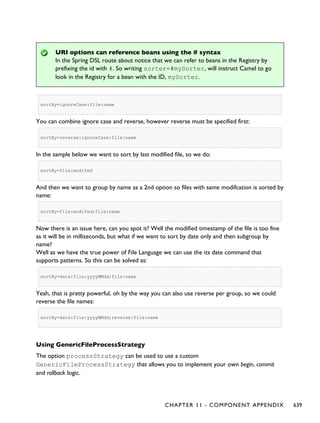
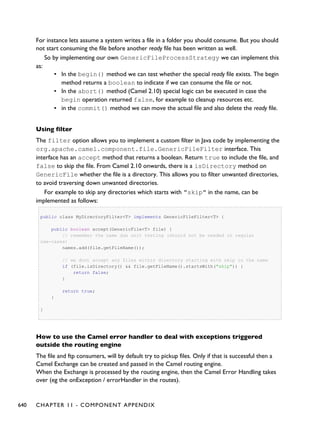

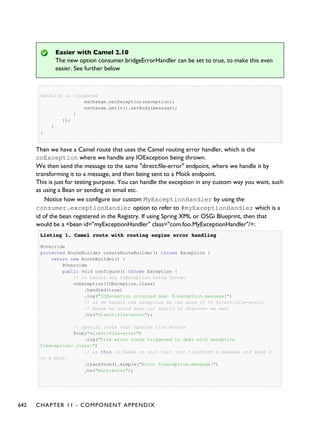

![Debug logging
This component has log level TRACE that can be helpful if you have problems.
See Also
• Configuring Camel
• Component
• Endpoint
• Getting Started
▪ File Language
▪ FTP
▪ Polling Consumer
FLATPACK COMPONENT
The Flatpack component supports fixed width and delimited file parsing via the FlatPack library.
Notice: This component only supports consuming from flatpack files to Object model. You
can not (yet) write from Object model to flatpack format.
Maven users will need to add the following dependency to their pom.xml for this
component:
<dependency>
<groupId>org.apache.camel</groupId>
<artifactId>camel-flatpack</artifactId>
<version>x.x.x</version>
<!-- use the same version as your Camel core version -->
</dependency>
URI format
flatpack:[delim|fixed]:flatPackConfig.pzmap.xml[?options]
Or for a delimited file handler with no configuration file just use
flatpack:someName[?options]
You can append query options to the URI in the following format,
?option=value&option=value&...
644 CHAPTER 11 - COMPONENT APPENDIX](https://image.slidesharecdn.com/camel-manual-2-130809102054-phpapp01/85/Camel-manual-2-11-0-648-320.jpg)
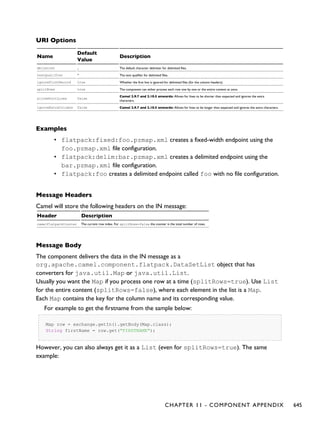

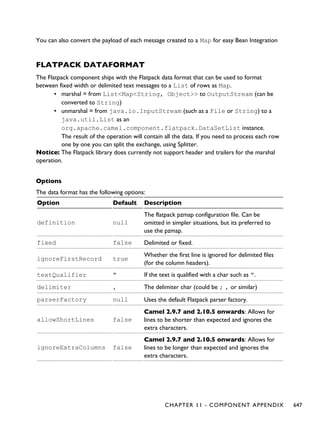
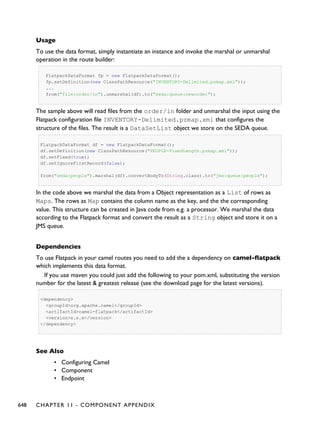
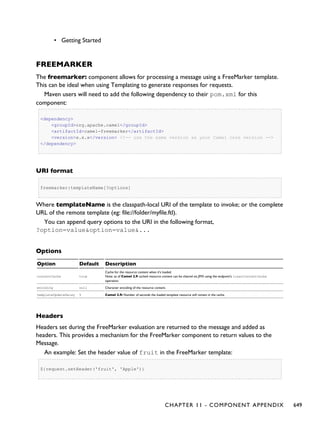

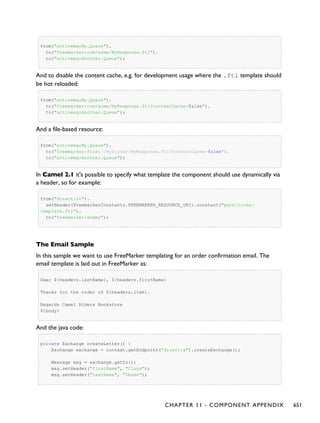
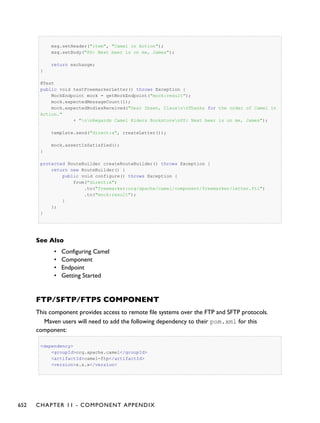


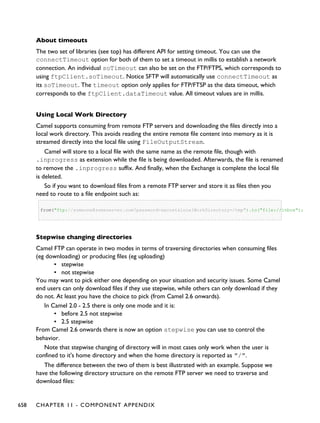


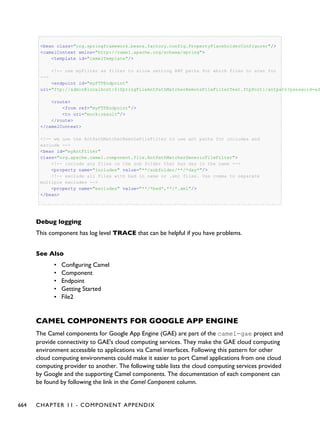


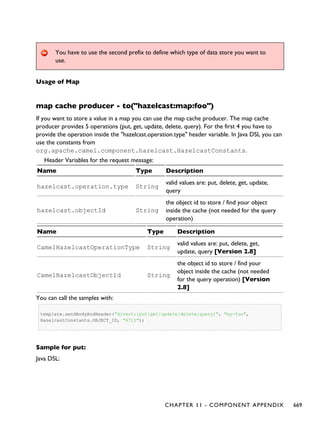
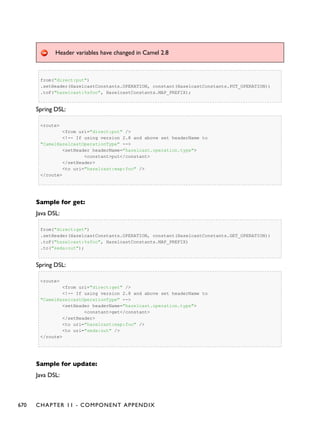

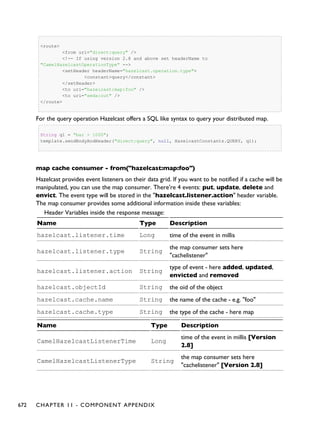

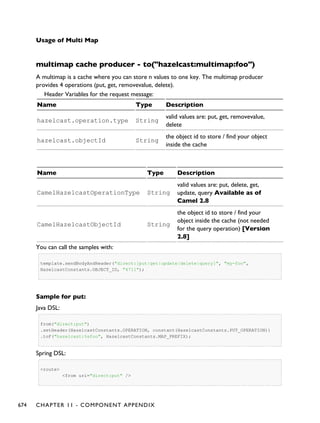

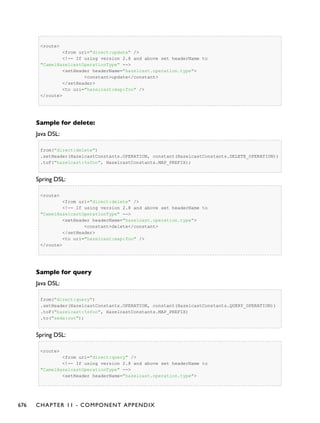

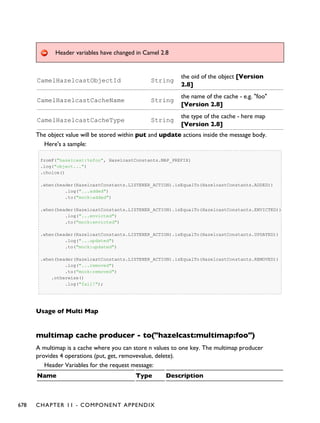
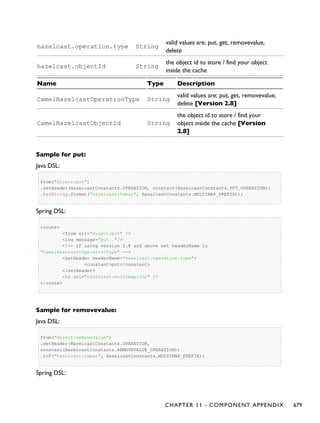


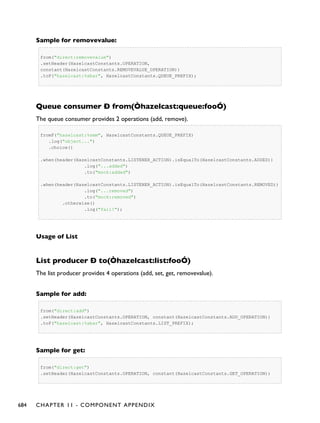


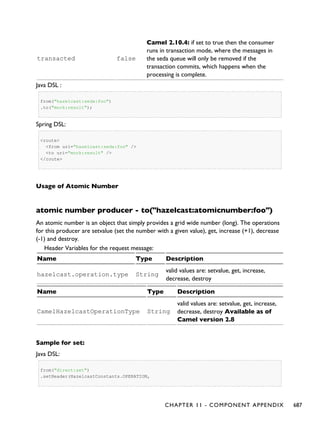
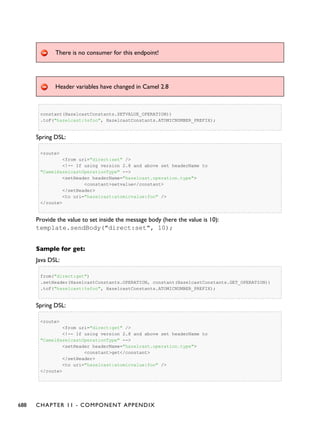


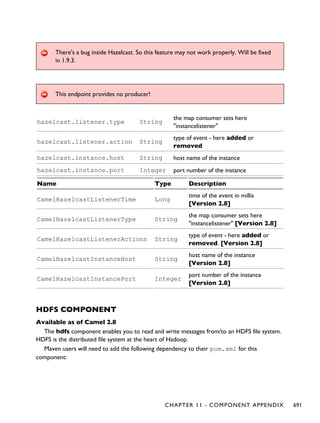


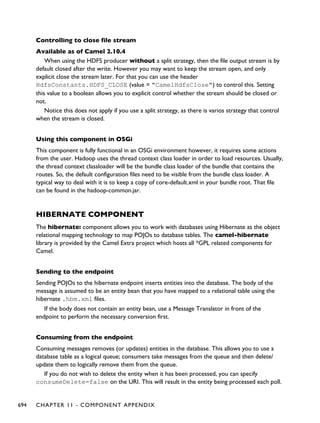
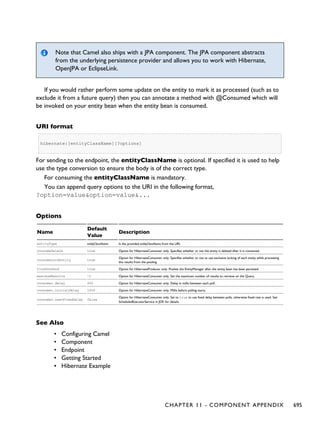
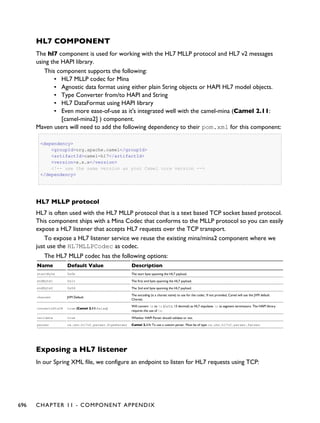
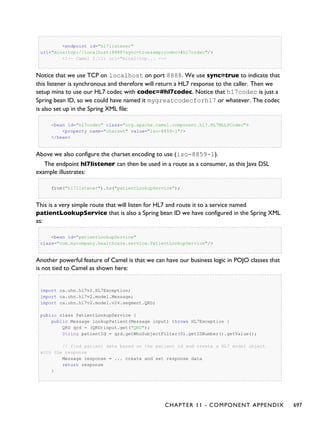
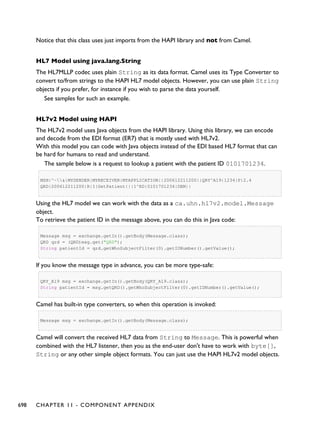

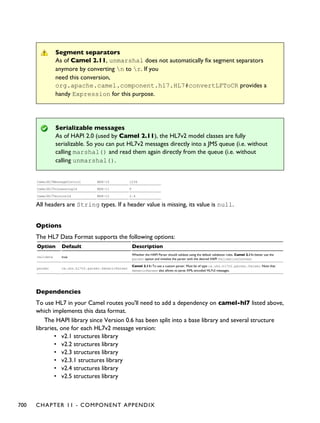


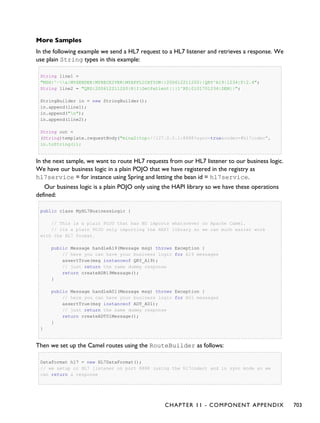


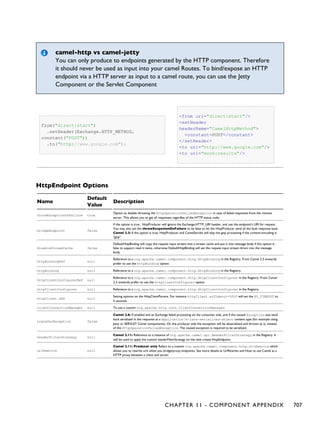
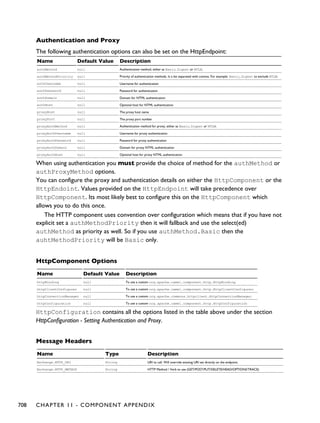

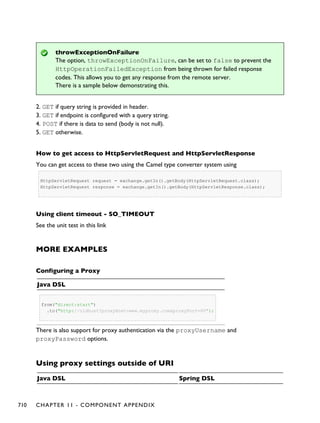


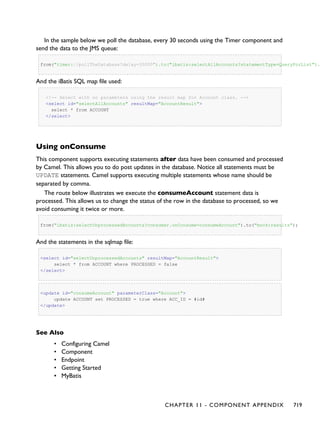
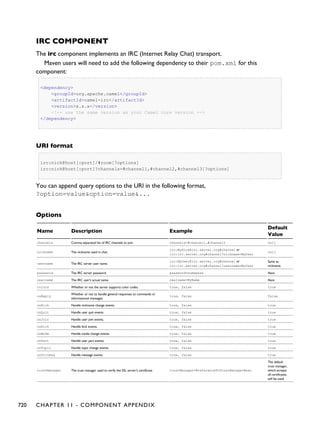


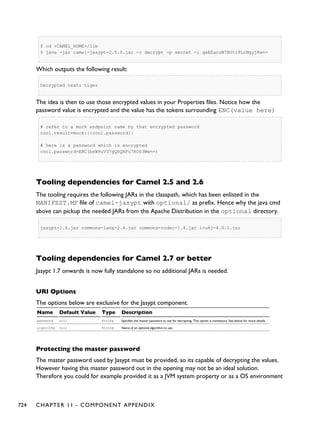


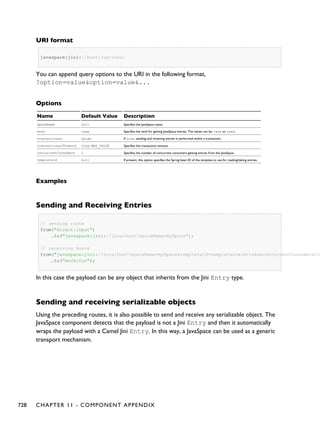
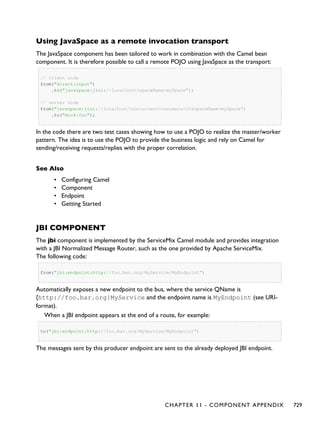

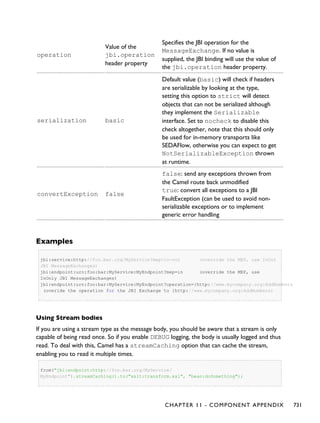
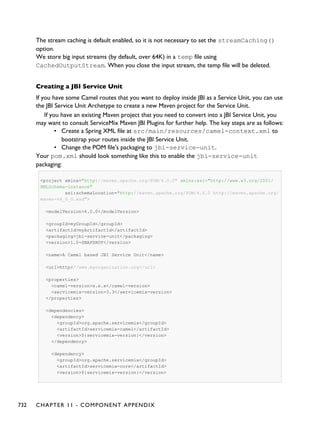

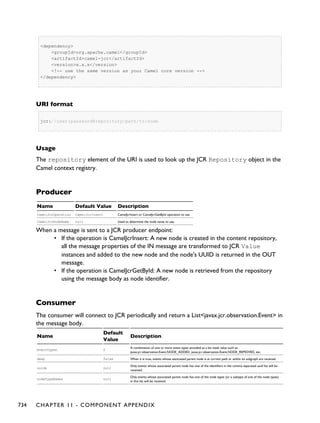
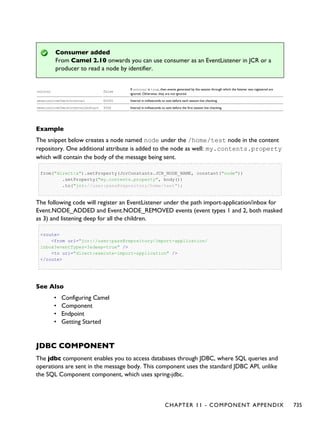


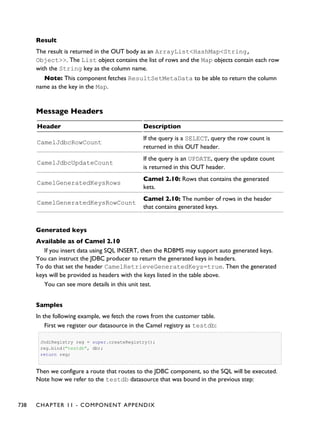

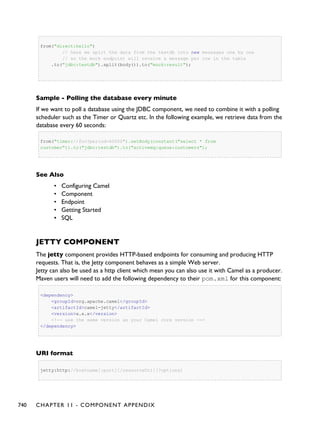


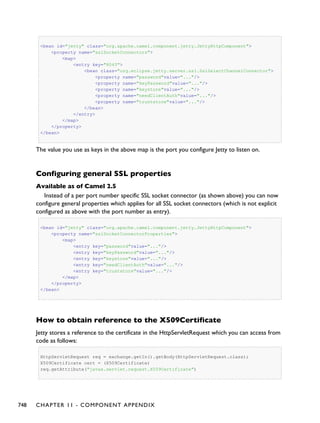
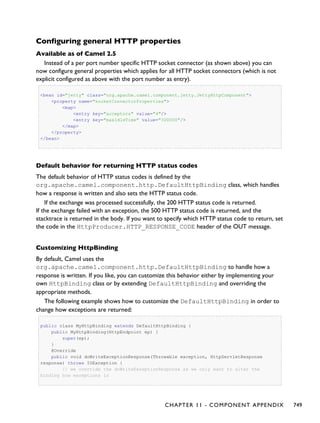

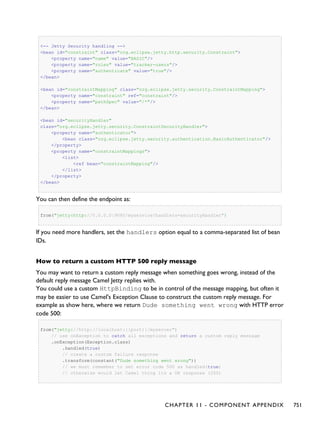
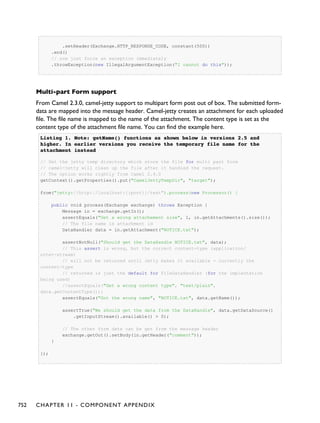


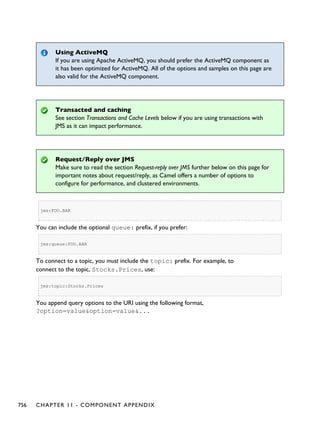

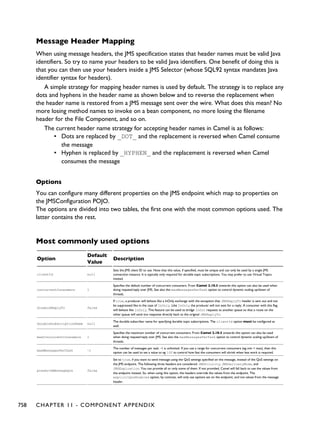

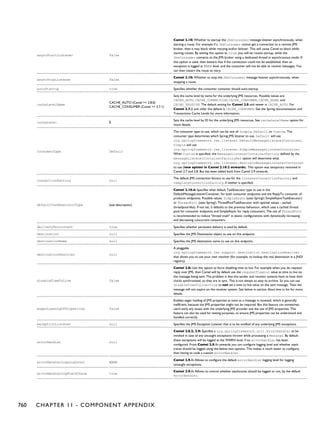


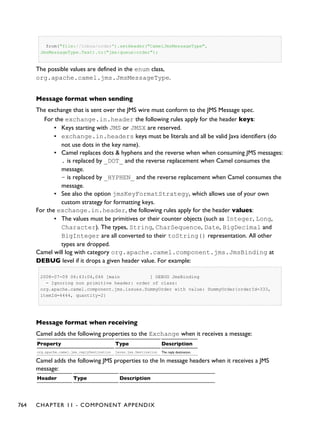


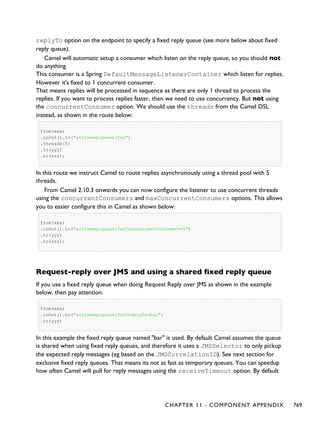
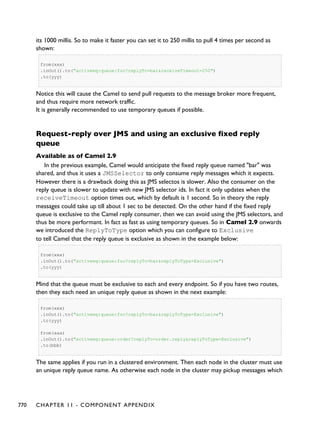
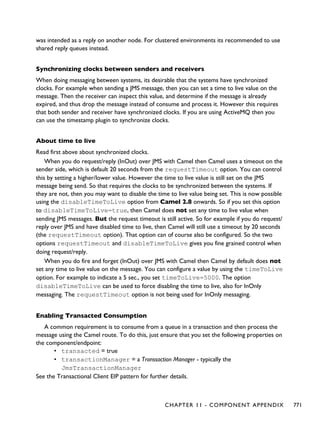
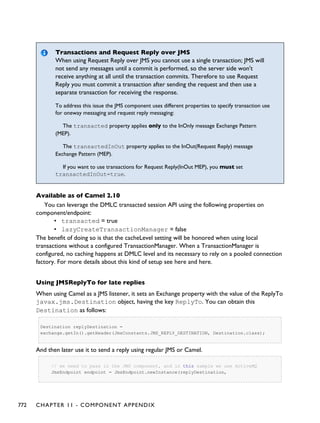


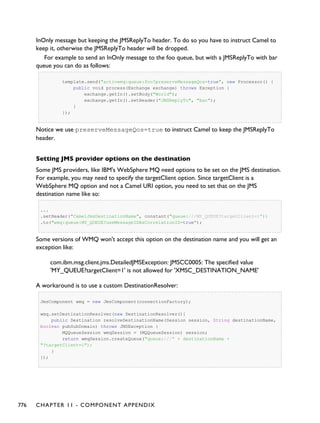


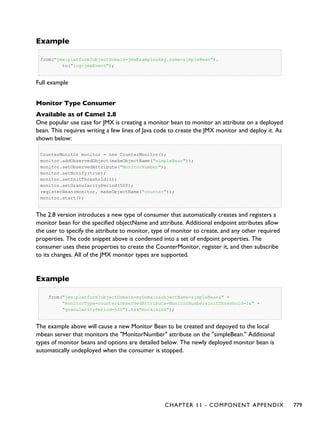
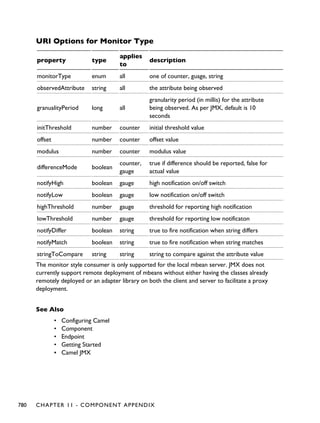
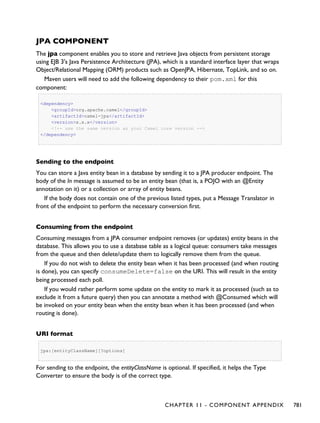


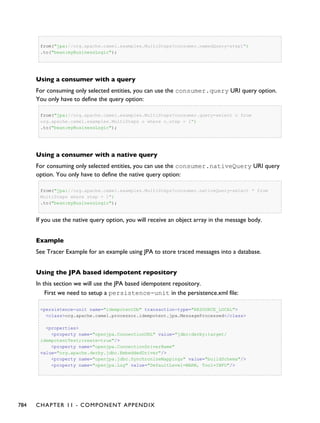

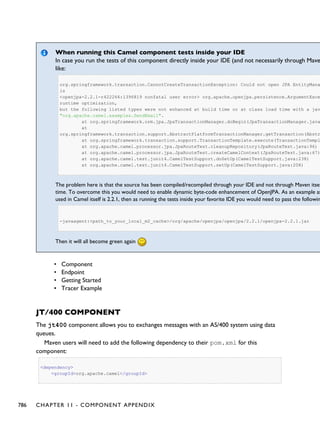
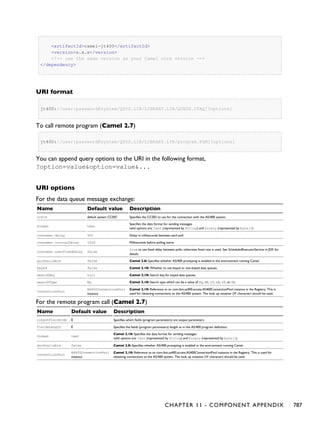


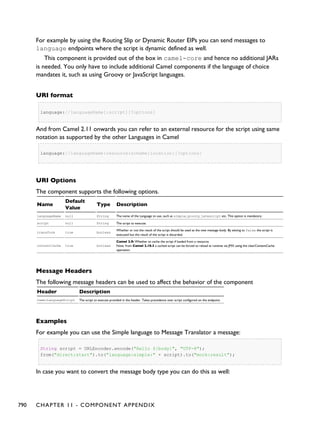
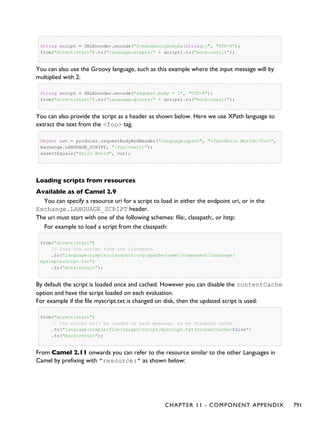

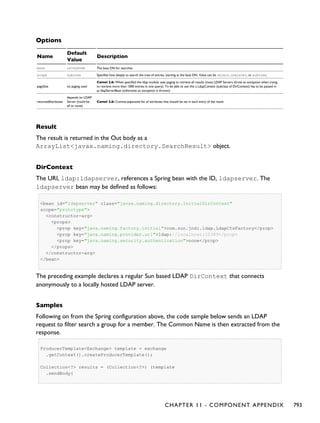

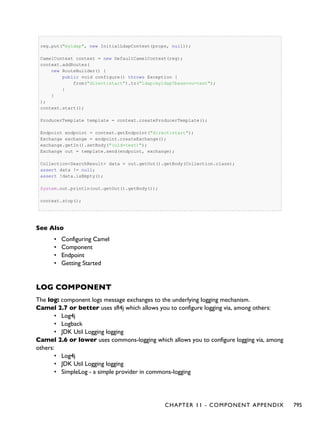

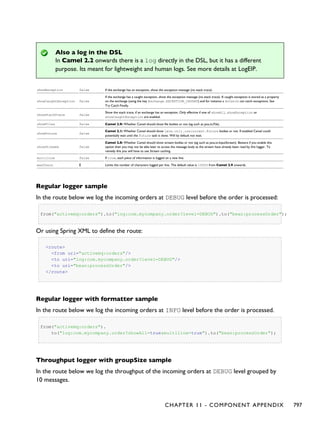
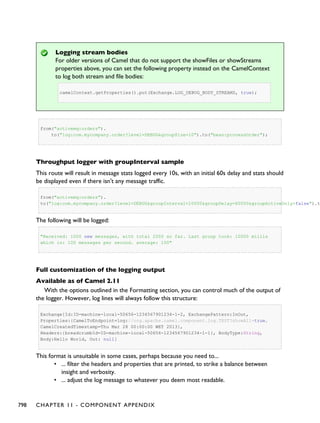

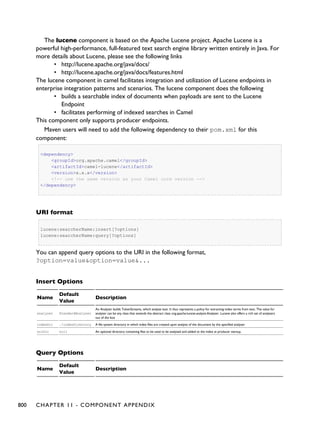
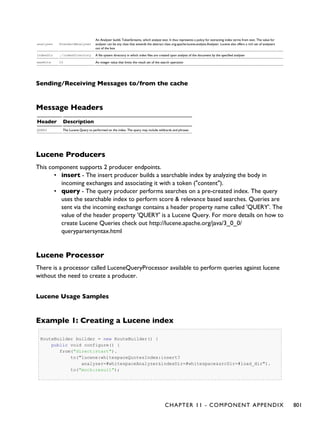


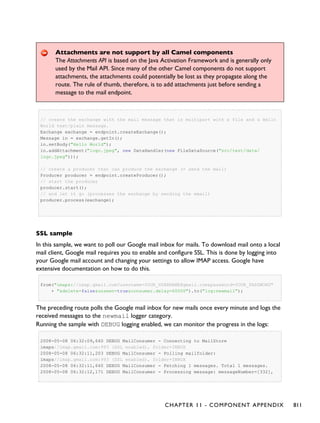

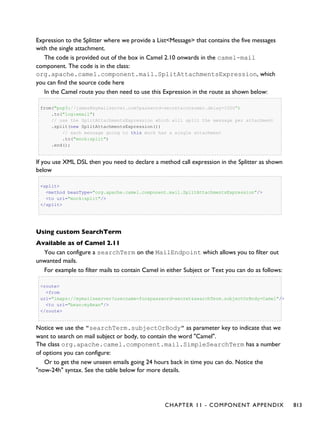

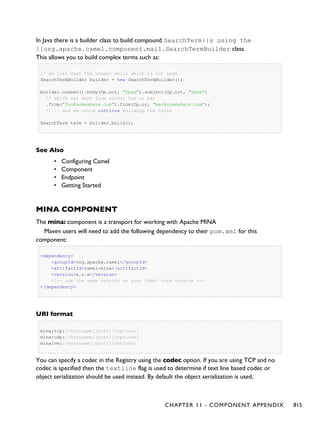


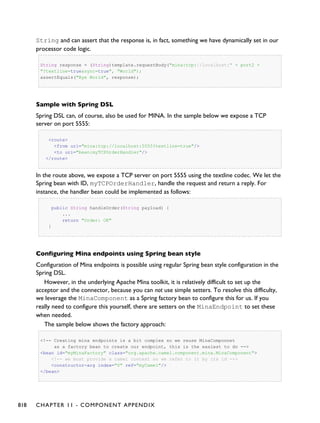


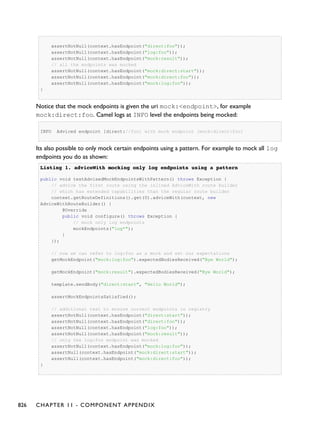


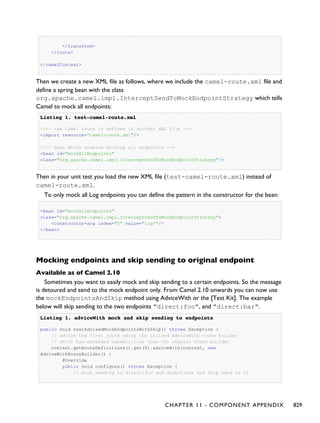
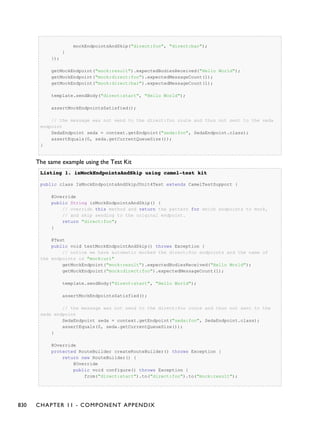


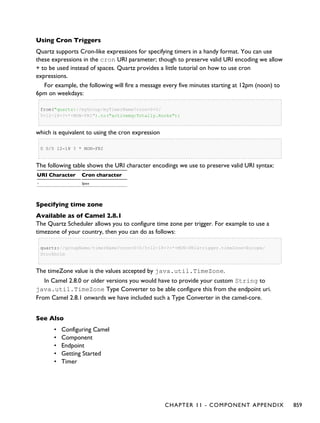


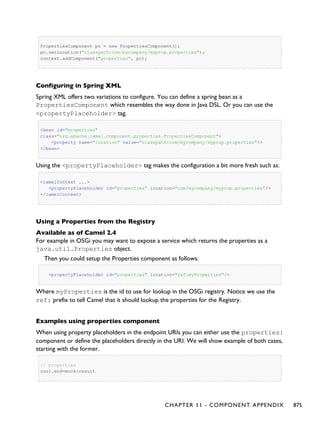

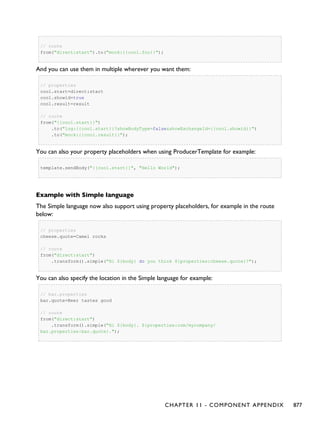

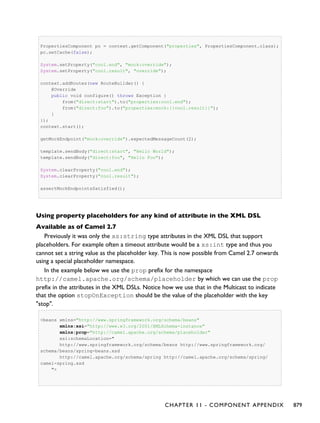


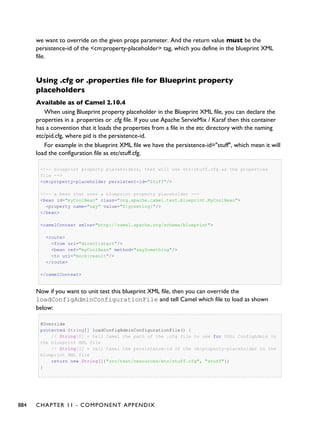


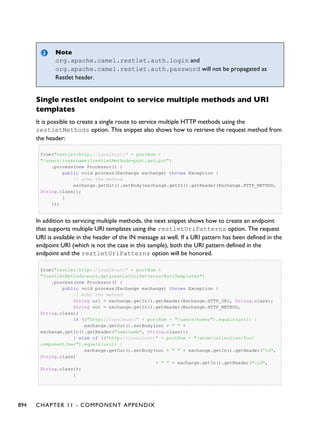
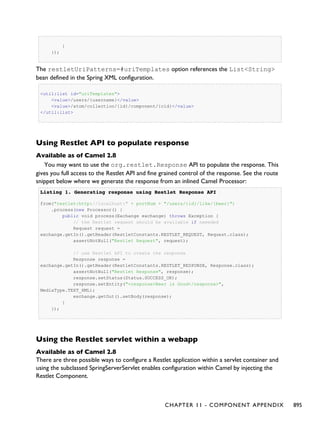
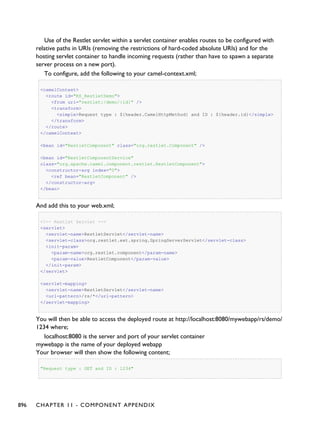
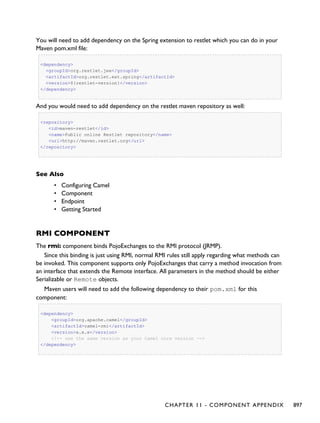


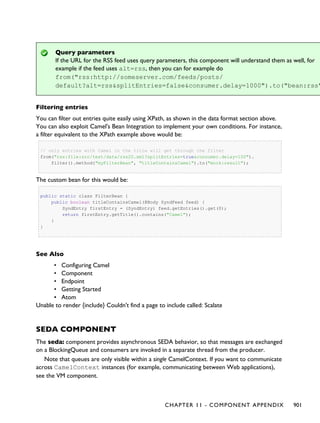


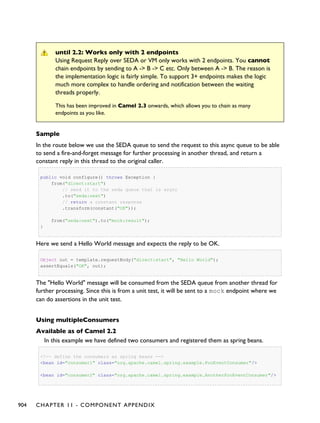


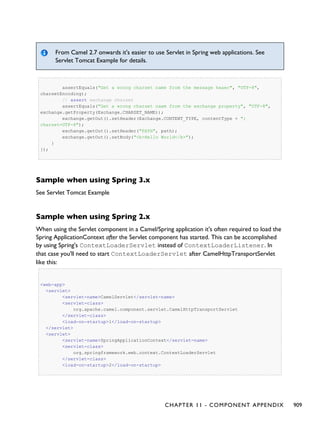

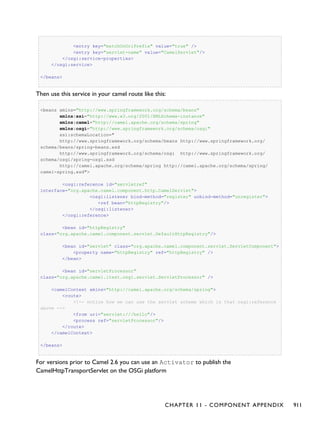

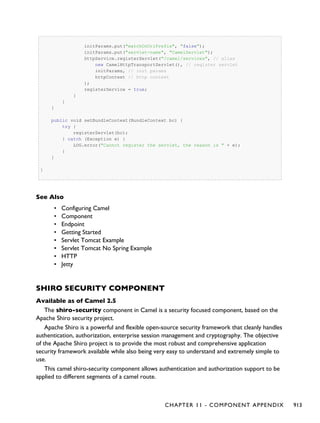


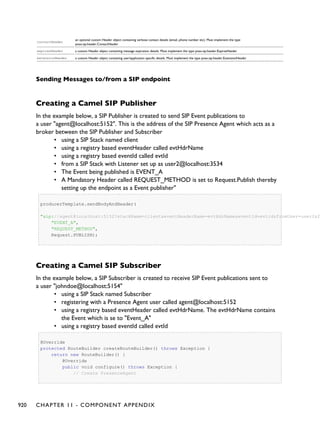
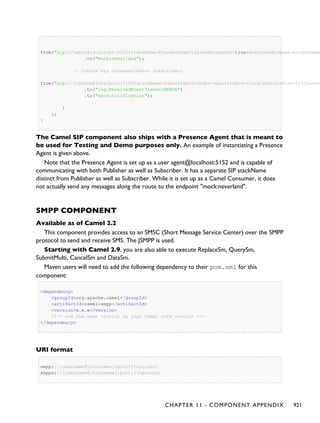
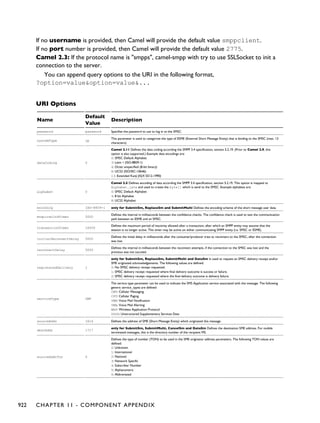

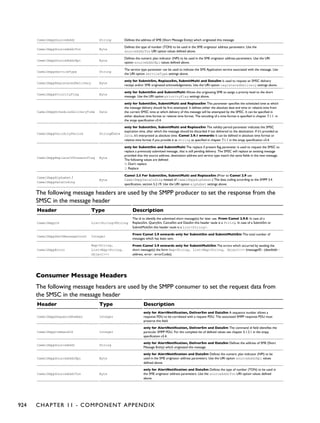


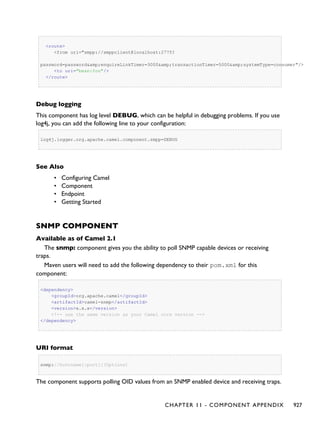


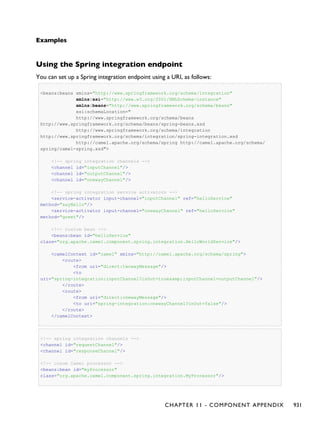

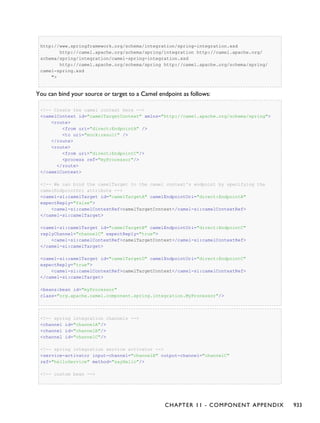
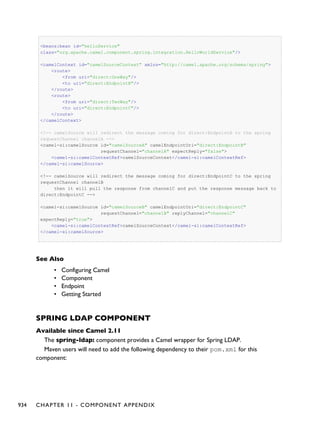


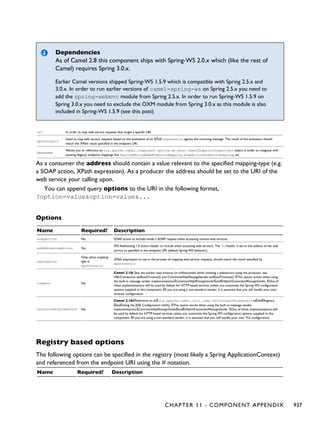
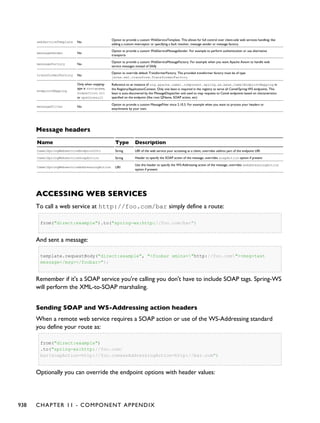
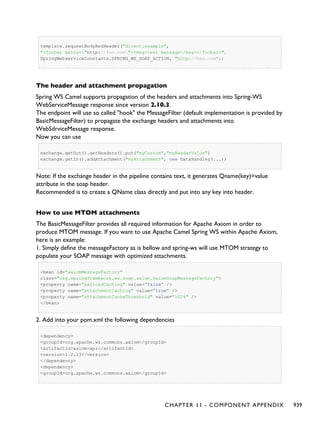


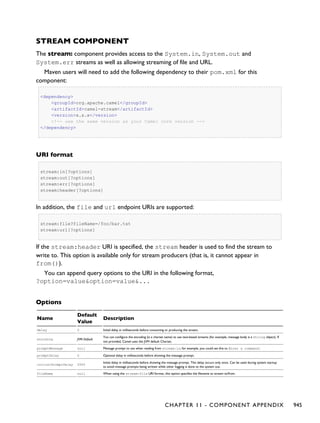


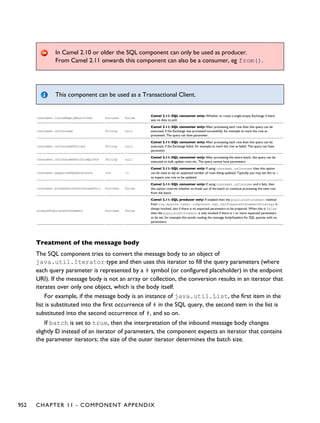

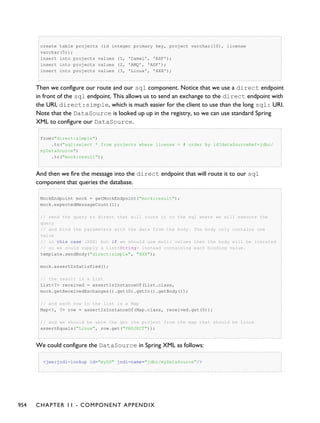
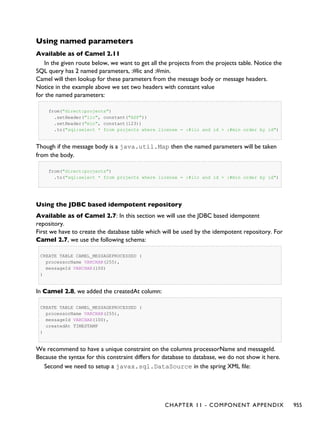


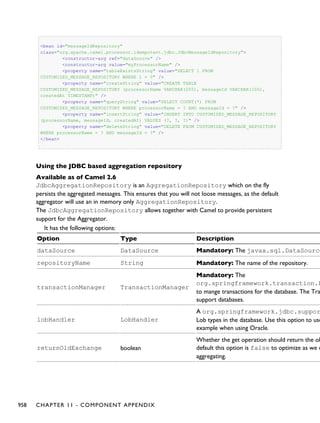
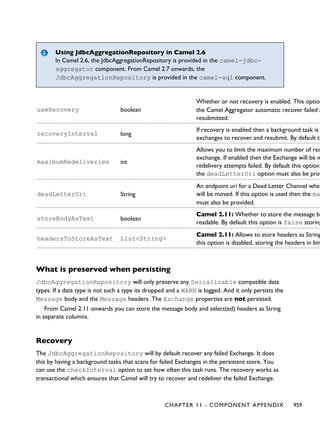
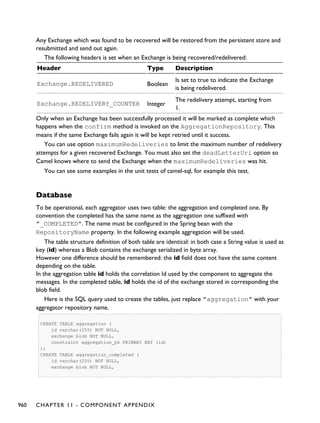

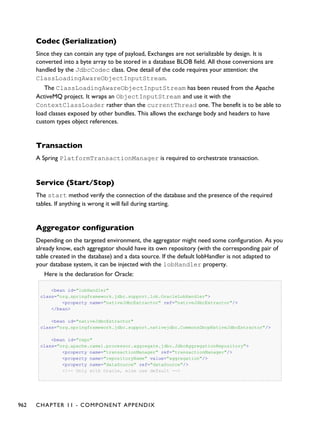


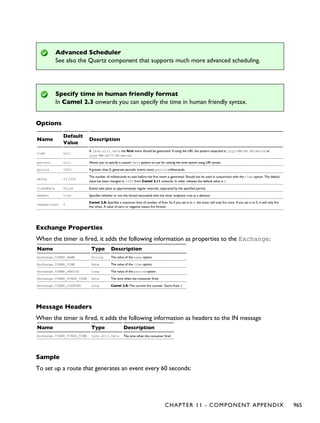
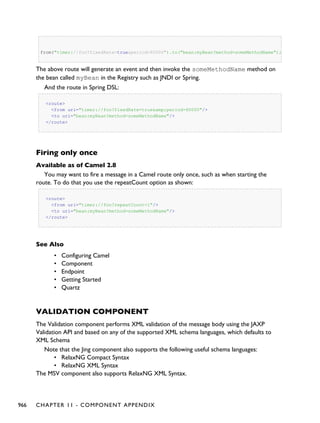
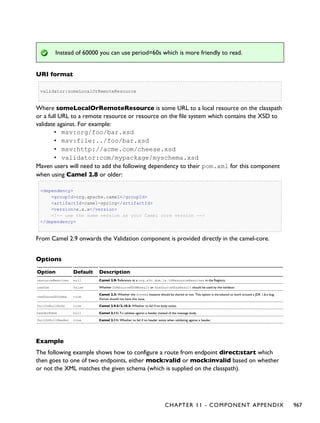

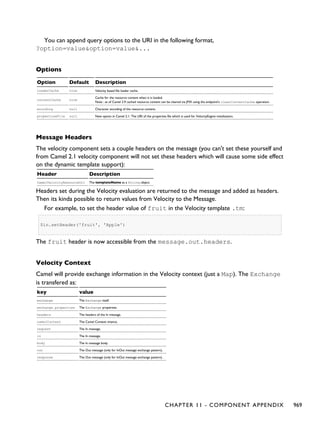


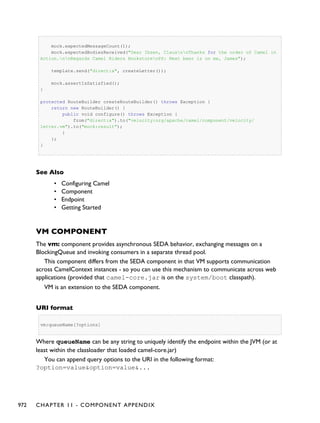


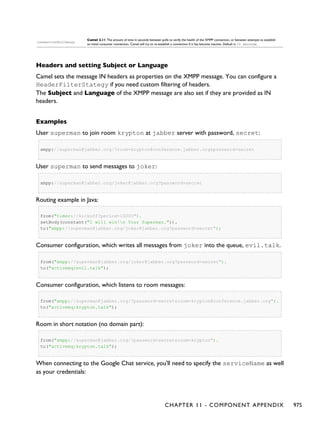


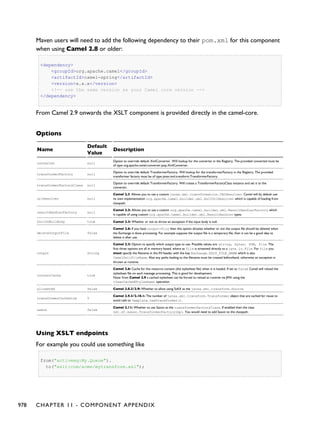


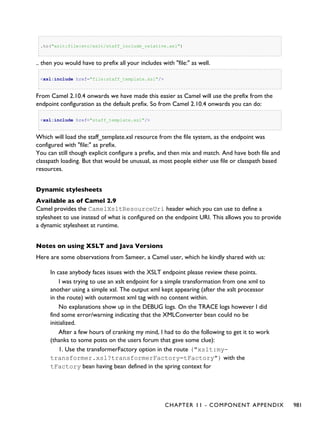
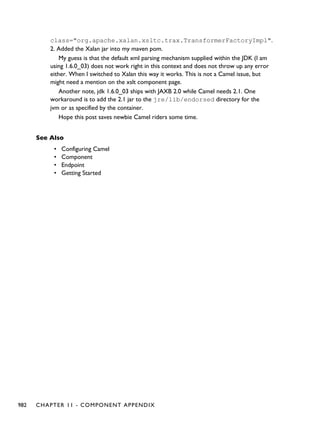


![5G Explained! A High Level Overview [Introduction]](https://cdn.slidesharecdn.com/ss_thumbnails/5gexplainedahighleveloverview-260119165306-cc137a3e-thumbnail.jpg?width=640&height=640&fit=bounds)


