SlideShare a Scribd company logo
Nishanth Ponukumatla Cloud Architect
1 Buildyourownsecure mail server
Build your own secure mail server on the
cloud using Amazon Web Services.
Services needed by amazonin order to setup the initial layout:
EC2 ( Elastic Load balancing)
RDS
Route53
Amazon SES (RELAY SERVER)
Applicationsneededby Ec2 Instances:
Ubuntu 14.4 ( Base OS forall the ec2 instances)
Postfix
Nginx
Dovecot
Amavisd
Setting up the Proxy Servers.
Nishanth Ponukumatla Cloud Architect
2 Buildyourownsecure mail server
Here is the architecture of the mail server.
Setting up the MySQL RDS | Postfix
server.
First we launch an RDS instance , I used mysql as it integrates better with postfix. !
Nishanth Ponukumatla Cloud Architect
3 Buildyourownsecure mail server
1. Select Multi-AZ deployment as it willbe more Highly Available.
2. Make it a publicly NOT available
Nishanth Ponukumatla Cloud Architect
4 Buildyourownsecure mail server
3.After launching the RDS instance , make sure to note the “ENDPOINT” of the mysql RDS instance.
Setting up the Postfix Server.
1.I chose a R3.largeUbuntu14.4 instance , as it is high on networking performance and has
enhanced networking enabled.
https://www.exratione.com/2014/05/a-mailserver-on-ubuntu-1404-postfix-dovecot-
mysql/
Thelinkabovegivesusa detailedexplanationonhowto setup a postfixserverwithmysql
backend.
In the instructions in the link above he uses a locally setup mysql server, where as in our case we
are using a RDS instance hence where ever he uses 127.0.0.1 to define the mysql server , we
replaceit with the “HOSTNAME”of theRDS instance whichwe had noted down earlier.
I am specifyingon the hostnameas weare using a private RDS instance and the IP ADDRESS will
change periodically by amazon.
Once yousetup your postfix server we have little more modification,in order to setup relaying.
Relay Configuration
Since we are using a relay server wehave to add the followingto the postfix main.cf file.
####RELAYCONFIG###
enable_original_recipient=no
relayhost=[email-smtp.us-east-1.amazonaws.com]:587
smtp_sasl_auth_enable=yes
smtp_sasl_security_options=noanonymous
smtp_sasl_password_maps =hash:/etc/postfix/sasl_passwd
smtp_use_tls=yes
smtp_tls_security_level=encrypt
smtp_tls_note_starttls_offer=yes
Nishanth Ponukumatla Cloud Architect
5 Buildyourownsecure mail server
As we can see a it is pointing towards a “sasl_passwd” filewhere weare supposed to load
credentials.
Please do not mistake these credentials with your regular iam credentials , we are supposed to
generate them using amazon SES. Youcan do it by following the steps below.
1. Open amazon SES
2. Open Smtp Settings and select Create My Smtp Credentials
3. After clickingon create youwill have your SES SMTP credentials
4. Copy access ID and secret Key Id into the SASL_Passwdfile.
5. If the sasl_passwd file doesn’t exist please create it.
6. On your mail server, open the master.cf file. On many systems, this file resides in
the/etc/postfix folder.
7. Comment out the following line of the master.cf file by putting a # in front of it: -o
smtp_fallback_relay=
Save and close the master.cf file.
8. Edit the /etc/postfix/sasl_passwd file. If the file does not exist, create it. Add the
following lines to the file, replacing USERNAME and PASSWORD with your SMTP
user name and password. If Postfix cannot authenticate with the Amazon SES SMTP
endpoint because the hostname does not match, try adding the additional line
specified in Amazon SES SMTP Issues.
Important
Use your SMTP user name and password, not your AWS access key ID and secret
access key. Your SMTP credentials and your AWS credentials are not the same. For
Nishanth Ponukumatla Cloud Architect
6 Buildyourownsecure mail server
information about how to obtain your SMTP credentials, see Obtaining Your
Amazon SES SMTP Credentials.
[email-smtp.us-east-1.amazonaws.com]:25 USERNAME:PASSWORD
Save and close the sasl_passwd file.
9. At a command prompt, issue the following command to create a hashmap database
file containing your SMTP credentials.
sudo postmap hash:/etc/postfix/sasl_passwd
10. (Optional but recommended) Remove the /etc/postfix/sasl_passwd file.
11. (Optional but recommended)
The /etc/postfix/sasl_passwd and /etc/postfix/sasl_passwd.dbfiles you created in the
previous steps are not encrypted. Because these files contain your SMTP credentials,
it is a good idea to use the following commands to change the owner to root and set
permissions to restrict access to the files as much as possible. (Note that if you
deleted /etc/postfix/sasl_passwd in the previous step, you should omit it from the
commands below.)
sudo chown root:root /etc/postfix/sasl_passwd /etc/postfix/sasl_passwd.db
sudo chmod 0600 /etc/postfix/sasl_passwd /etc/postfix/sasl_passwd.db
12. Tell Postfix where to find the CA certificate (needed to verify the Amazon SES server
certificate). You could use a self-signed certificate or you could use default
certificates as follows:
If running on the Amazon Linux AMI:
sudo postconf -e 'smtp_tls_CAfile = /etc/ssl/certs/ca-bundle.crt'
If running on Ubuntu Linux:
sudo postconf -e 'smtp_tls_CAfile = /etc/ssl/certs/ca-certificates.crt'
Nishanth Ponukumatla Cloud Architect
7 Buildyourownsecure mail server
13. When you have finished updating the configuration, stop and start Postfix by typing
the following at the command line:
sudo postfix stop
sudo postfix start
14. Send a test email by typing the following at a command line, pressing Enter after
each line. Note that you must replace from@example.com with your "From" email
address, which you must have previously verified with Amazon SES.
Replace to@example.com with your "To" address. If your account is still in the
sandbox, the "To" address must also be verified. Also note that the final line is a
single period.
sendmail -f from@example.com to@example.com
From: from@example.com
Subject: Test
This email was sent through Amazon SES!
.
15. Check your inbox for the email. If the message was not delivered, check your Junk
box, and then check your system's mail log (typically /var/log/maillog) for errors.
For example, you will get an "Email address not verified" error if you have not
verified the "From" address that follows "-f" on the command line.
Now, once the postfix server is setup we are done with 80% of the work.
Nishanth Ponukumatla Cloud Architect
8 Buildyourownsecure mail server
Setting up the Proxy Servers.
The main reason of setting up the proxy server is , it Que’s the incoming mails before it
actually hits the mail server. This helps us , if in case our “postfix server” is down for any
reason , the incoming mail will be present in the proxy server que , this helps us in a lot of
ways as there is not loss of mail.
1. I chose a m3.medium for proxy servers , as I get a average traffic (~10,000 mails
per day)
2. Please do realize this is only for the incoming mail.
3. After launching your instance, install latest nginx version (nginx/1.8.0) with the
mail module.
4. You can type apt-get install nginx* and it will show you all the nginx modules and
you can choose the mail module.
5. After install nginx with mail module , open /etc/nginx/nginx.conf
6. Paste the following configuration , and modify accordingly.
user www-data;
worker_processes 1;
error_log logs/error.log info;
events {
worker_connections 1024;
multi_accept on;
}
mail {
server_name mail.example.com;
auth_http localhost:8008/auth-smtppass.php;
server {
listen <ipaddr of the current server>:25;
Nishanth Ponukumatla Cloud Architect
9 Buildyourownsecure mail server
protocol smtp;
timeout 5s;
proxy on;
xclient off;
smtp_auth none;
}
}
http {
log_format main
'$remote_addr - $remote_user [$time_local] '
'"$request" $status $bytes_sent '
'"$http_referer" "$http_user_agent" '
'"$gzip_ratio"';
server {
listen 127.0.0.1:8008;
server_name localhost;
access_log /var/log/nginx/localhost.access_log main;
error_log /var/log/nginx/localhost.error_log info;
root /var/www/localhost/htdocs;
location ~ .php$ {
add_header Auth-Server <ipaddr of the mailserver>;
add_header Auth-Port 25;
return 200;
Nishanth Ponukumatla Cloud Architect
10 Buildyourownsecure mail server
}
}
}
7. Please make sure to change whatever is highlighted in red to its respective
IPaddress’s
8. After loading the configuration do a “ nginx –t ” if the configuration is okay.
9. Start the nginx server.
You can launch the second proxy server by following the same steps above.
Setting up the load balancer.
1. Create an external facingload balancer and add the twoReverse Proxy instance’s to the
load balancer.
2. Make sure to make the load balancer listen on port 25 and forward requests to the proxy
server on port 25.
3. Once the load balancer is created please take the DNS NAME info, whichis present in the
description of the load balancer.
Settingup Route53.
Create a MX record foryour domain and point the MX record to the External load balancer which
we created in the previous step.
We are all done !
Youcan start testing it by sending and receiving some emails.
To make it more redundant, you can deploy the same setup in other region as Ireland , Frankfurt
etc..
And youcan do a dns failoverin the route53 , whichwould take around 300 seconds to switchto
the other region whichcould result in a loss of mail sometimes.
Nishanth Ponukumatla Cloud Architect
11 Buildyourownsecure mail server
Youcan set it up in any region depending on the edge data or whicheverregion has the most traffic.
Credits:
Joel Nishanth Ponukumatla
Aleksandr Korneinko
https://www.exratione.com/2014/05/a-mailserver-on-ubuntu-1404-postfix-dovecot-
mysql/

More Related Content

What's hot

Linux Webserver Installation Command and GUI.ppt
Linux Webserver Installation Command and GUI.pptLinux Webserver Installation Command and GUI.ppt
Linux Webserver Installation Command and GUI.ppt
webhostingguy
 
grate techniques
grate techniquesgrate techniques
grate techniques
junaid novapex
 
Linux
LinuxLinux
Powershell direct
Powershell directPowershell direct
Powershell direct
Naseem Khoodoruth
 
Ansible : what's ansible & use case by REX
Ansible :  what's ansible & use case by REXAnsible :  what's ansible & use case by REX
Ansible : what's ansible & use case by REX
Saewoong Lee
 
Cluster Computing for $0.27/hr using Amazon EC2 and IPython Notebook
Cluster Computing for $0.27/hr using Amazon EC2 and IPython NotebookCluster Computing for $0.27/hr using Amazon EC2 and IPython Notebook
Cluster Computing for $0.27/hr using Amazon EC2 and IPython Notebook
Randy Zwitch
 
Basics of Ansible - Sahil Davawala
Basics of Ansible - Sahil DavawalaBasics of Ansible - Sahil Davawala
Basics of Ansible - Sahil Davawala
Sahil Davawala
 
Free ipa installation and cluster configuration, freeipa client connection
Free ipa installation and cluster configuration, freeipa client connectionFree ipa installation and cluster configuration, freeipa client connection
Free ipa installation and cluster configuration, freeipa client connection
Rustam Sariyev
 
MySQL Monitoring using Prometheus & Grafana
MySQL Monitoring using Prometheus & GrafanaMySQL Monitoring using Prometheus & Grafana
MySQL Monitoring using Prometheus & Grafana
YoungHeon (Roy) Kim
 
Nuxeo5 - Continuous Integration
Nuxeo5 - Continuous IntegrationNuxeo5 - Continuous Integration
Nuxeo5 - Continuous Integration
PASCAL Jean Marie
 
Forget MAMP and WAMP, Use Virtual Box to Have a Real Ubuntu Server
Forget MAMP and WAMP, Use Virtual Box to Have a Real Ubuntu ServerForget MAMP and WAMP, Use Virtual Box to Have a Real Ubuntu Server
Forget MAMP and WAMP, Use Virtual Box to Have a Real Ubuntu Server
aaroncouch
 
Deployment with Fabric
Deployment with FabricDeployment with Fabric
Deployment with Fabric
andymccurdy
 
10 Million hits a day with WordPress using a $15 VPS
10 Million hits a day  with WordPress using a $15 VPS10 Million hits a day  with WordPress using a $15 VPS
10 Million hits a day with WordPress using a $15 VPS
Paolo Tonin
 
Its3 Drupal
Its3 DrupalIts3 Drupal
Its3 Drupal
guest954945a
 
Apache1.ppt
Apache1.pptApache1.ppt
Apache1.ppt
webhostingguy
 
How to Install LAMP in Ubuntu 14.04
How to Install LAMP in Ubuntu 14.04How to Install LAMP in Ubuntu 14.04
How to Install LAMP in Ubuntu 14.04
Sanjary Edu
 
Apache Presentation
Apache PresentationApache Presentation
Apache Presentation
Ankush Jain
 
Mater,slave on mysql
Mater,slave on mysqlMater,slave on mysql
Mater,slave on mysql
Vasudeva Rao
 

What's hot (18)

Linux Webserver Installation Command and GUI.ppt
Linux Webserver Installation Command and GUI.pptLinux Webserver Installation Command and GUI.ppt
Linux Webserver Installation Command and GUI.ppt
 
grate techniques
grate techniquesgrate techniques
grate techniques
 
Linux
LinuxLinux
Linux
 
Powershell direct
Powershell directPowershell direct
Powershell direct
 
Ansible : what's ansible & use case by REX
Ansible :  what's ansible & use case by REXAnsible :  what's ansible & use case by REX
Ansible : what's ansible & use case by REX
 
Cluster Computing for $0.27/hr using Amazon EC2 and IPython Notebook
Cluster Computing for $0.27/hr using Amazon EC2 and IPython NotebookCluster Computing for $0.27/hr using Amazon EC2 and IPython Notebook
Cluster Computing for $0.27/hr using Amazon EC2 and IPython Notebook
 
Basics of Ansible - Sahil Davawala
Basics of Ansible - Sahil DavawalaBasics of Ansible - Sahil Davawala
Basics of Ansible - Sahil Davawala
 
Free ipa installation and cluster configuration, freeipa client connection
Free ipa installation and cluster configuration, freeipa client connectionFree ipa installation and cluster configuration, freeipa client connection
Free ipa installation and cluster configuration, freeipa client connection
 
MySQL Monitoring using Prometheus & Grafana
MySQL Monitoring using Prometheus & GrafanaMySQL Monitoring using Prometheus & Grafana
MySQL Monitoring using Prometheus & Grafana
 
Nuxeo5 - Continuous Integration
Nuxeo5 - Continuous IntegrationNuxeo5 - Continuous Integration
Nuxeo5 - Continuous Integration
 
Forget MAMP and WAMP, Use Virtual Box to Have a Real Ubuntu Server
Forget MAMP and WAMP, Use Virtual Box to Have a Real Ubuntu ServerForget MAMP and WAMP, Use Virtual Box to Have a Real Ubuntu Server
Forget MAMP and WAMP, Use Virtual Box to Have a Real Ubuntu Server
 
Deployment with Fabric
Deployment with FabricDeployment with Fabric
Deployment with Fabric
 
10 Million hits a day with WordPress using a $15 VPS
10 Million hits a day  with WordPress using a $15 VPS10 Million hits a day  with WordPress using a $15 VPS
10 Million hits a day with WordPress using a $15 VPS
 
Its3 Drupal
Its3 DrupalIts3 Drupal
Its3 Drupal
 
Apache1.ppt
Apache1.pptApache1.ppt
Apache1.ppt
 
How to Install LAMP in Ubuntu 14.04
How to Install LAMP in Ubuntu 14.04How to Install LAMP in Ubuntu 14.04
How to Install LAMP in Ubuntu 14.04
 
Apache Presentation
Apache PresentationApache Presentation
Apache Presentation
 
Mater,slave on mysql
Mater,slave on mysqlMater,slave on mysql
Mater,slave on mysql
 

Similar to Build your own secure mail server on the cloud using Amazon Web Services

Mail
MailMail
Mail
Md Shihab
 
Mail server configuration
Mail server configurationMail server configuration
Mail server configuration
chacheng oo
 
Tutorial CentOS 5 untuk Webhosting
Tutorial CentOS 5 untuk WebhostingTutorial CentOS 5 untuk Webhosting
Tutorial CentOS 5 untuk Webhosting
Beni Krisbiantoro
 
Linux corporate-training-in-mumbai
Linux corporate-training-in-mumbaiLinux corporate-training-in-mumbai
Linux corporate-training-in-mumbai
Unmesh Baile
 
Step by step_linux_guide
Step by step_linux_guideStep by step_linux_guide
Step by step_linux_guide
vinod31dec
 
Single Sign-On for APEX applications based on Kerberos (Important: latest ver...
Single Sign-On for APEX applications based on Kerberos (Important: latest ver...Single Sign-On for APEX applications based on Kerberos (Important: latest ver...
Single Sign-On for APEX applications based on Kerberos (Important: latest ver...
Niels de Bruijn
 
Configuring Your First Hadoop Cluster On EC2
Configuring Your First Hadoop Cluster On EC2Configuring Your First Hadoop Cluster On EC2
Configuring Your First Hadoop Cluster On EC2
benjaminwootton
 
mail server
mail servermail server
mail server
chacheng oo
 
Install iRedMail on Red Hat Enterprise Linux, CentOS
Install iRedMail on Red Hat Enterprise Linux, CentOSInstall iRedMail on Red Hat Enterprise Linux, CentOS
Install iRedMail on Red Hat Enterprise Linux, CentOS
InfoExcavator
 
Install iRedMail on Red Hat Enterprise Linux, CentOS
Install iRedMail on Red Hat Enterprise Linux, CentOSInstall iRedMail on Red Hat Enterprise Linux, CentOS
Install iRedMail on Red Hat Enterprise Linux, CentOS
Md Meherab Hossen
 
Mysql ppt
Mysql pptMysql ppt
Mysql ppt
Sanmuga Nathan
 
Lamp Server With Drupal Installation
Lamp Server With Drupal InstallationLamp Server With Drupal Installation
Lamp Server With Drupal Installation
franbow
 
Installing lemp with ssl and varnish on Debian 9
Installing lemp with ssl and varnish on Debian 9Installing lemp with ssl and varnish on Debian 9
Installing lemp with ssl and varnish on Debian 9
عطاءالمنعم اثیل شیخ
 
Practical solutions for connections administrators
Practical solutions for connections administratorsPractical solutions for connections administrators
Practical solutions for connections administrators
Sharon James
 
Network Manual
Network ManualNetwork Manual
Network Manual
Jason Myers
 
Scaling on EC2 in a fast-paced environment (LISA'11 - Full Paper)
Scaling on EC2 in a fast-paced environment (LISA'11 - Full Paper)Scaling on EC2 in a fast-paced environment (LISA'11 - Full Paper)
Scaling on EC2 in a fast-paced environment (LISA'11 - Full Paper)
Nicolas Brousse
 
Configuring apache, php, my sql, ftp, ssl, ip tables phpmyadmin and server mo...
Configuring apache, php, my sql, ftp, ssl, ip tables phpmyadmin and server mo...Configuring apache, php, my sql, ftp, ssl, ip tables phpmyadmin and server mo...
Configuring apache, php, my sql, ftp, ssl, ip tables phpmyadmin and server mo...
Chanaka Lasantha
 
Architecting cloud
Architecting cloudArchitecting cloud
Architecting cloud
Tahsin Hasan
 
Intrusion Detection System using Snort
Intrusion Detection System using Snort Intrusion Detection System using Snort
Intrusion Detection System using Snort
webhostingguy
 
Intrusion Detection System using Snort
Intrusion Detection System using Snort Intrusion Detection System using Snort
Intrusion Detection System using Snort
webhostingguy
 

Similar to Build your own secure mail server on the cloud using Amazon Web Services (20)

Mail
MailMail
Mail
 
Mail server configuration
Mail server configurationMail server configuration
Mail server configuration
 
Tutorial CentOS 5 untuk Webhosting
Tutorial CentOS 5 untuk WebhostingTutorial CentOS 5 untuk Webhosting
Tutorial CentOS 5 untuk Webhosting
 
Linux corporate-training-in-mumbai
Linux corporate-training-in-mumbaiLinux corporate-training-in-mumbai
Linux corporate-training-in-mumbai
 
Step by step_linux_guide
Step by step_linux_guideStep by step_linux_guide
Step by step_linux_guide
 
Single Sign-On for APEX applications based on Kerberos (Important: latest ver...
Single Sign-On for APEX applications based on Kerberos (Important: latest ver...Single Sign-On for APEX applications based on Kerberos (Important: latest ver...
Single Sign-On for APEX applications based on Kerberos (Important: latest ver...
 
Configuring Your First Hadoop Cluster On EC2
Configuring Your First Hadoop Cluster On EC2Configuring Your First Hadoop Cluster On EC2
Configuring Your First Hadoop Cluster On EC2
 
mail server
mail servermail server
mail server
 
Install iRedMail on Red Hat Enterprise Linux, CentOS
Install iRedMail on Red Hat Enterprise Linux, CentOSInstall iRedMail on Red Hat Enterprise Linux, CentOS
Install iRedMail on Red Hat Enterprise Linux, CentOS
 
Install iRedMail on Red Hat Enterprise Linux, CentOS
Install iRedMail on Red Hat Enterprise Linux, CentOSInstall iRedMail on Red Hat Enterprise Linux, CentOS
Install iRedMail on Red Hat Enterprise Linux, CentOS
 
Mysql ppt
Mysql pptMysql ppt
Mysql ppt
 
Lamp Server With Drupal Installation
Lamp Server With Drupal InstallationLamp Server With Drupal Installation
Lamp Server With Drupal Installation
 
Installing lemp with ssl and varnish on Debian 9
Installing lemp with ssl and varnish on Debian 9Installing lemp with ssl and varnish on Debian 9
Installing lemp with ssl and varnish on Debian 9
 
Practical solutions for connections administrators
Practical solutions for connections administratorsPractical solutions for connections administrators
Practical solutions for connections administrators
 
Network Manual
Network ManualNetwork Manual
Network Manual
 
Scaling on EC2 in a fast-paced environment (LISA'11 - Full Paper)
Scaling on EC2 in a fast-paced environment (LISA'11 - Full Paper)Scaling on EC2 in a fast-paced environment (LISA'11 - Full Paper)
Scaling on EC2 in a fast-paced environment (LISA'11 - Full Paper)
 
Configuring apache, php, my sql, ftp, ssl, ip tables phpmyadmin and server mo...
Configuring apache, php, my sql, ftp, ssl, ip tables phpmyadmin and server mo...Configuring apache, php, my sql, ftp, ssl, ip tables phpmyadmin and server mo...
Configuring apache, php, my sql, ftp, ssl, ip tables phpmyadmin and server mo...
 
Architecting cloud
Architecting cloudArchitecting cloud
Architecting cloud
 
Intrusion Detection System using Snort
Intrusion Detection System using Snort Intrusion Detection System using Snort
Intrusion Detection System using Snort
 
Intrusion Detection System using Snort
Intrusion Detection System using Snort Intrusion Detection System using Snort
Intrusion Detection System using Snort
 

Build your own secure mail server on the cloud using Amazon Web Services

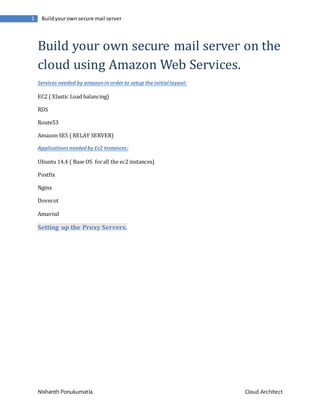
  • 1. Nishanth Ponukumatla Cloud Architect 1 Buildyourownsecure mail server Build your own secure mail server on the cloud using Amazon Web Services. Services needed by amazonin order to setup the initial layout: EC2 ( Elastic Load balancing) RDS Route53 Amazon SES (RELAY SERVER) Applicationsneededby Ec2 Instances: Ubuntu 14.4 ( Base OS forall the ec2 instances) Postfix Nginx Dovecot Amavisd Setting up the Proxy Servers.
  • 2. Nishanth Ponukumatla Cloud Architect 2 Buildyourownsecure mail server Here is the architecture of the mail server. Setting up the MySQL RDS | Postfix server. First we launch an RDS instance , I used mysql as it integrates better with postfix. !
  • 3. Nishanth Ponukumatla Cloud Architect 3 Buildyourownsecure mail server 1. Select Multi-AZ deployment as it willbe more Highly Available. 2. Make it a publicly NOT available
  • 4. Nishanth Ponukumatla Cloud Architect 4 Buildyourownsecure mail server 3.After launching the RDS instance , make sure to note the “ENDPOINT” of the mysql RDS instance. Setting up the Postfix Server. 1.I chose a R3.largeUbuntu14.4 instance , as it is high on networking performance and has enhanced networking enabled. https://www.exratione.com/2014/05/a-mailserver-on-ubuntu-1404-postfix-dovecot- mysql/ Thelinkabovegivesusa detailedexplanationonhowto setup a postfixserverwithmysql backend. In the instructions in the link above he uses a locally setup mysql server, where as in our case we are using a RDS instance hence where ever he uses 127.0.0.1 to define the mysql server , we replaceit with the “HOSTNAME”of theRDS instance whichwe had noted down earlier. I am specifyingon the hostnameas weare using a private RDS instance and the IP ADDRESS will change periodically by amazon. Once yousetup your postfix server we have little more modification,in order to setup relaying. Relay Configuration Since we are using a relay server wehave to add the followingto the postfix main.cf file. ####RELAYCONFIG### enable_original_recipient=no relayhost=[email-smtp.us-east-1.amazonaws.com]:587 smtp_sasl_auth_enable=yes smtp_sasl_security_options=noanonymous smtp_sasl_password_maps =hash:/etc/postfix/sasl_passwd smtp_use_tls=yes smtp_tls_security_level=encrypt smtp_tls_note_starttls_offer=yes
  • 5. Nishanth Ponukumatla Cloud Architect 5 Buildyourownsecure mail server As we can see a it is pointing towards a “sasl_passwd” filewhere weare supposed to load credentials. Please do not mistake these credentials with your regular iam credentials , we are supposed to generate them using amazon SES. Youcan do it by following the steps below. 1. Open amazon SES 2. Open Smtp Settings and select Create My Smtp Credentials 3. After clickingon create youwill have your SES SMTP credentials 4. Copy access ID and secret Key Id into the SASL_Passwdfile. 5. If the sasl_passwd file doesn’t exist please create it. 6. On your mail server, open the master.cf file. On many systems, this file resides in the/etc/postfix folder. 7. Comment out the following line of the master.cf file by putting a # in front of it: -o smtp_fallback_relay= Save and close the master.cf file. 8. Edit the /etc/postfix/sasl_passwd file. If the file does not exist, create it. Add the following lines to the file, replacing USERNAME and PASSWORD with your SMTP user name and password. If Postfix cannot authenticate with the Amazon SES SMTP endpoint because the hostname does not match, try adding the additional line specified in Amazon SES SMTP Issues. Important Use your SMTP user name and password, not your AWS access key ID and secret access key. Your SMTP credentials and your AWS credentials are not the same. For
  • 6. Nishanth Ponukumatla Cloud Architect 6 Buildyourownsecure mail server information about how to obtain your SMTP credentials, see Obtaining Your Amazon SES SMTP Credentials. [email-smtp.us-east-1.amazonaws.com]:25 USERNAME:PASSWORD Save and close the sasl_passwd file. 9. At a command prompt, issue the following command to create a hashmap database file containing your SMTP credentials. sudo postmap hash:/etc/postfix/sasl_passwd 10. (Optional but recommended) Remove the /etc/postfix/sasl_passwd file. 11. (Optional but recommended) The /etc/postfix/sasl_passwd and /etc/postfix/sasl_passwd.dbfiles you created in the previous steps are not encrypted. Because these files contain your SMTP credentials, it is a good idea to use the following commands to change the owner to root and set permissions to restrict access to the files as much as possible. (Note that if you deleted /etc/postfix/sasl_passwd in the previous step, you should omit it from the commands below.) sudo chown root:root /etc/postfix/sasl_passwd /etc/postfix/sasl_passwd.db sudo chmod 0600 /etc/postfix/sasl_passwd /etc/postfix/sasl_passwd.db 12. Tell Postfix where to find the CA certificate (needed to verify the Amazon SES server certificate). You could use a self-signed certificate or you could use default certificates as follows: If running on the Amazon Linux AMI: sudo postconf -e 'smtp_tls_CAfile = /etc/ssl/certs/ca-bundle.crt' If running on Ubuntu Linux: sudo postconf -e 'smtp_tls_CAfile = /etc/ssl/certs/ca-certificates.crt'
  • 7. Nishanth Ponukumatla Cloud Architect 7 Buildyourownsecure mail server 13. When you have finished updating the configuration, stop and start Postfix by typing the following at the command line: sudo postfix stop sudo postfix start 14. Send a test email by typing the following at a command line, pressing Enter after each line. Note that you must replace from@example.com with your "From" email address, which you must have previously verified with Amazon SES. Replace to@example.com with your "To" address. If your account is still in the sandbox, the "To" address must also be verified. Also note that the final line is a single period. sendmail -f from@example.com to@example.com From: from@example.com Subject: Test This email was sent through Amazon SES! . 15. Check your inbox for the email. If the message was not delivered, check your Junk box, and then check your system's mail log (typically /var/log/maillog) for errors. For example, you will get an "Email address not verified" error if you have not verified the "From" address that follows "-f" on the command line. Now, once the postfix server is setup we are done with 80% of the work.
  • 8. Nishanth Ponukumatla Cloud Architect 8 Buildyourownsecure mail server Setting up the Proxy Servers. The main reason of setting up the proxy server is , it Que’s the incoming mails before it actually hits the mail server. This helps us , if in case our “postfix server” is down for any reason , the incoming mail will be present in the proxy server que , this helps us in a lot of ways as there is not loss of mail. 1. I chose a m3.medium for proxy servers , as I get a average traffic (~10,000 mails per day) 2. Please do realize this is only for the incoming mail. 3. After launching your instance, install latest nginx version (nginx/1.8.0) with the mail module. 4. You can type apt-get install nginx* and it will show you all the nginx modules and you can choose the mail module. 5. After install nginx with mail module , open /etc/nginx/nginx.conf 6. Paste the following configuration , and modify accordingly. user www-data; worker_processes 1; error_log logs/error.log info; events { worker_connections 1024; multi_accept on; } mail { server_name mail.example.com; auth_http localhost:8008/auth-smtppass.php; server { listen <ipaddr of the current server>:25;
  • 9. Nishanth Ponukumatla Cloud Architect 9 Buildyourownsecure mail server protocol smtp; timeout 5s; proxy on; xclient off; smtp_auth none; } } http { log_format main '$remote_addr - $remote_user [$time_local] ' '"$request" $status $bytes_sent ' '"$http_referer" "$http_user_agent" ' '"$gzip_ratio"'; server { listen 127.0.0.1:8008; server_name localhost; access_log /var/log/nginx/localhost.access_log main; error_log /var/log/nginx/localhost.error_log info; root /var/www/localhost/htdocs; location ~ .php$ { add_header Auth-Server <ipaddr of the mailserver>; add_header Auth-Port 25; return 200;
  • 10. Nishanth Ponukumatla Cloud Architect 10 Buildyourownsecure mail server } } } 7. Please make sure to change whatever is highlighted in red to its respective IPaddress’s 8. After loading the configuration do a “ nginx –t ” if the configuration is okay. 9. Start the nginx server. You can launch the second proxy server by following the same steps above. Setting up the load balancer. 1. Create an external facingload balancer and add the twoReverse Proxy instance’s to the load balancer. 2. Make sure to make the load balancer listen on port 25 and forward requests to the proxy server on port 25. 3. Once the load balancer is created please take the DNS NAME info, whichis present in the description of the load balancer. Settingup Route53. Create a MX record foryour domain and point the MX record to the External load balancer which we created in the previous step. We are all done ! Youcan start testing it by sending and receiving some emails. To make it more redundant, you can deploy the same setup in other region as Ireland , Frankfurt etc.. And youcan do a dns failoverin the route53 , whichwould take around 300 seconds to switchto the other region whichcould result in a loss of mail sometimes.
  • 11. Nishanth Ponukumatla Cloud Architect 11 Buildyourownsecure mail server Youcan set it up in any region depending on the edge data or whicheverregion has the most traffic. Credits: Joel Nishanth Ponukumatla Aleksandr Korneinko https://www.exratione.com/2014/05/a-mailserver-on-ubuntu-1404-postfix-dovecot- mysql/