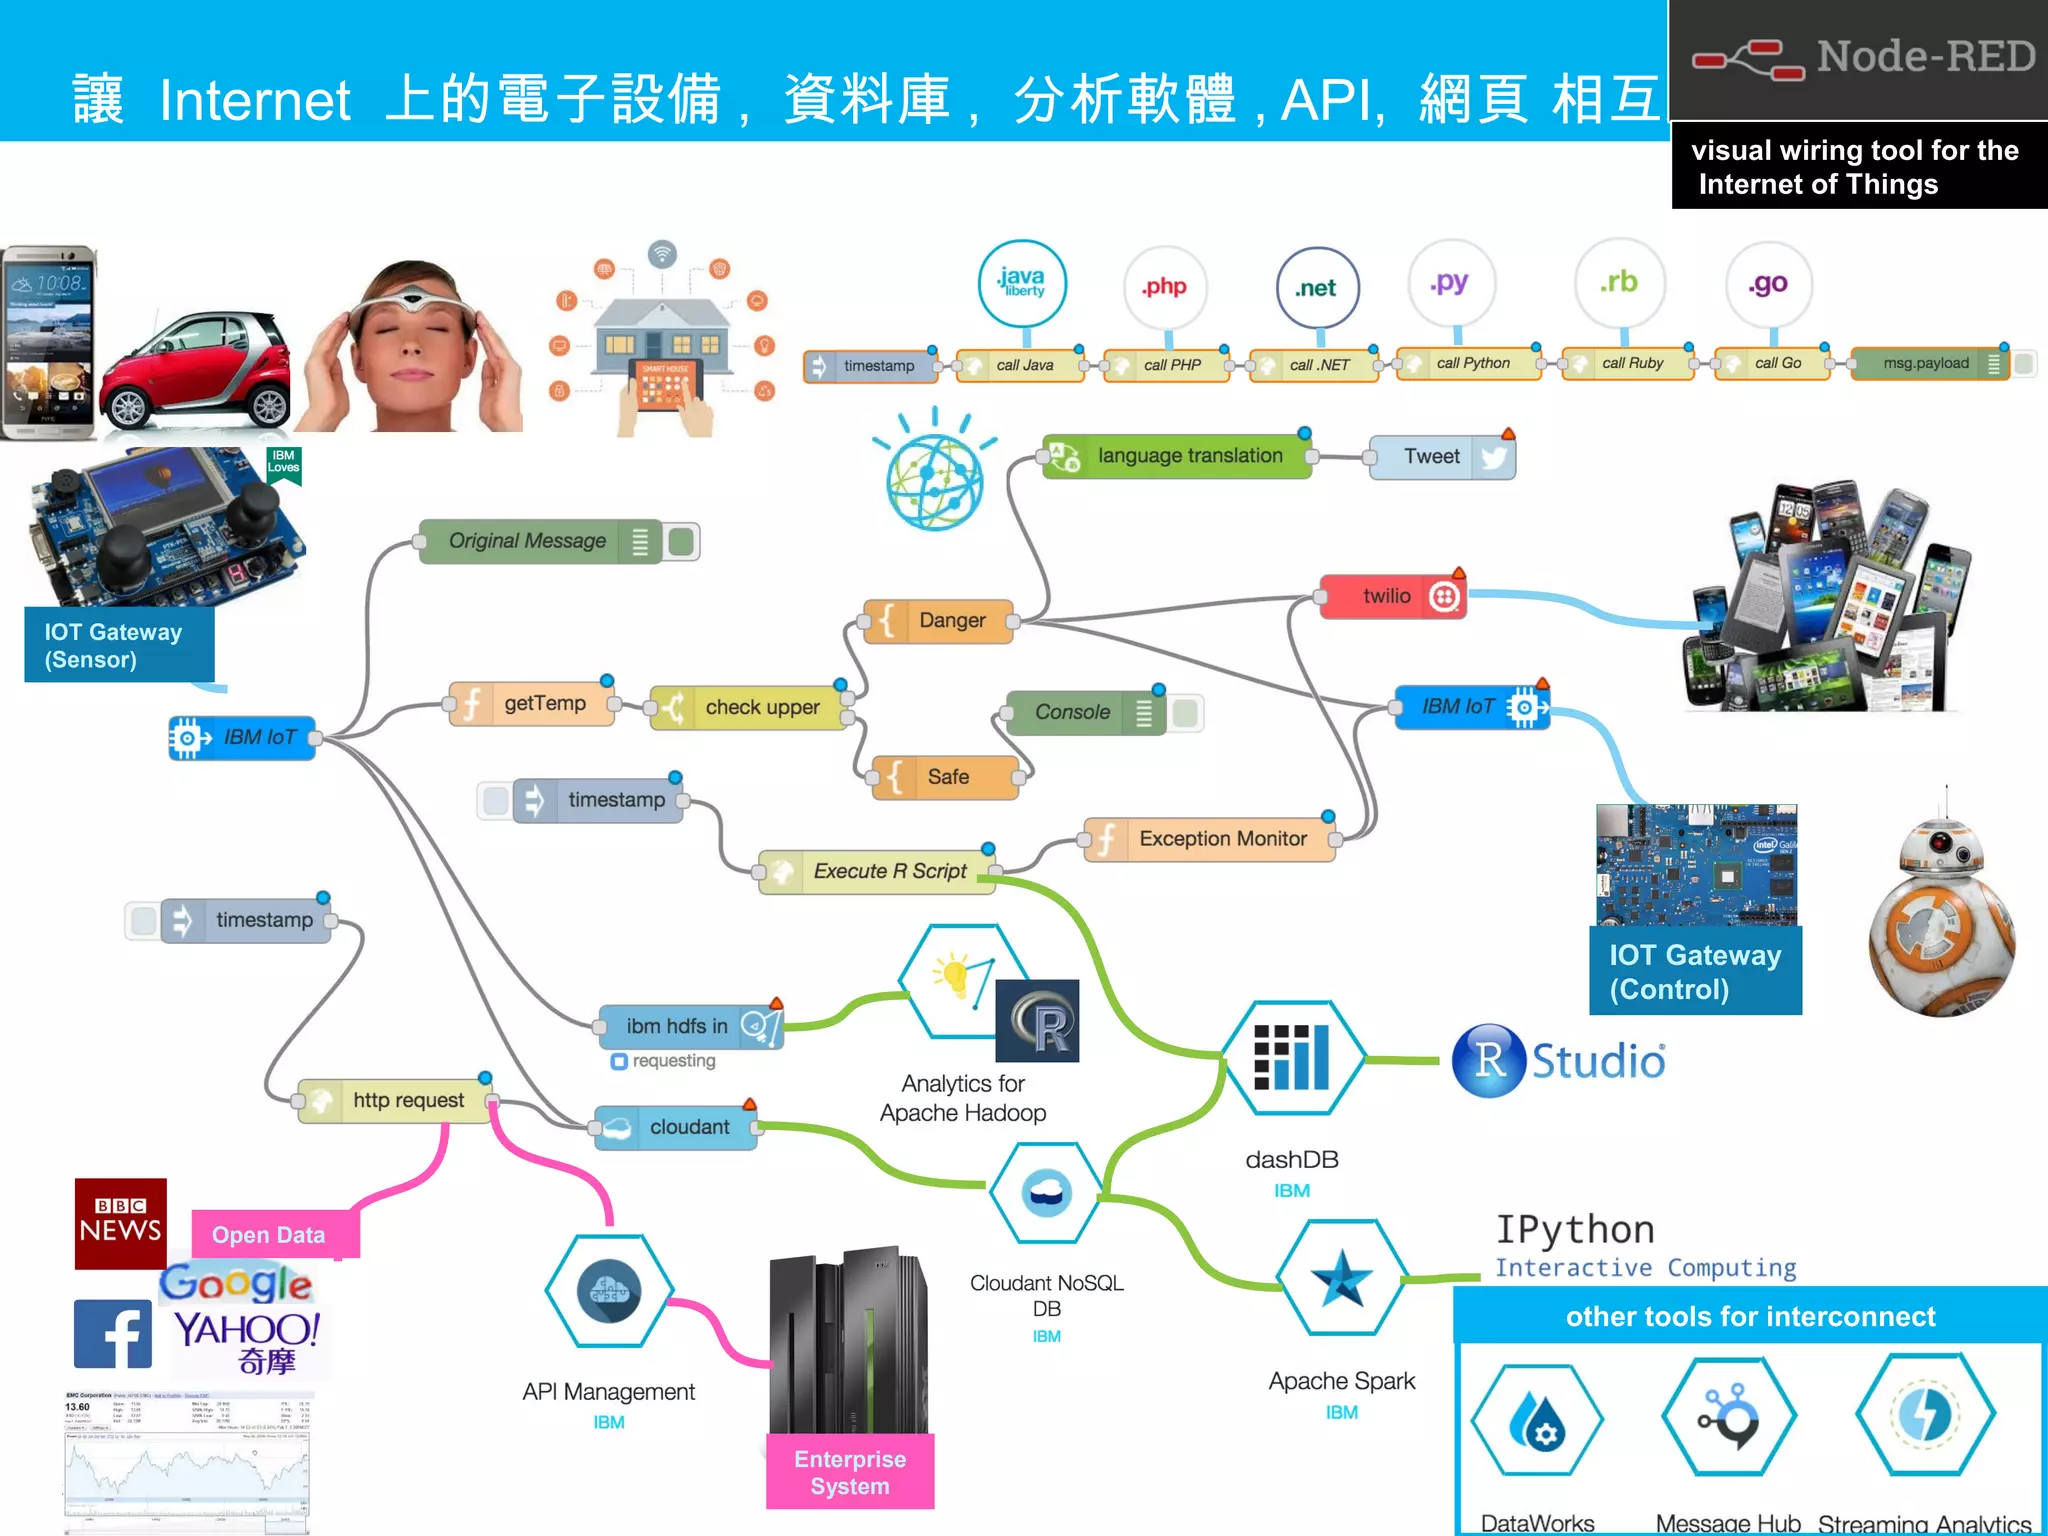
本文件介绍了如何使用IBM Bluemix的Node-RED构建智能物联网应用的多个实例,包括温度传感器、网页爬虫、REST API和WebSocket的实现。文档提供了详细的步骤和节点说明,用于设置和调试这些物联网应用。通过示例,读者可以学习如何通过Node-RED连接不同的电子设备与服务,实现数据的自动化处理和通讯。


![© 2016 IBM Corporation
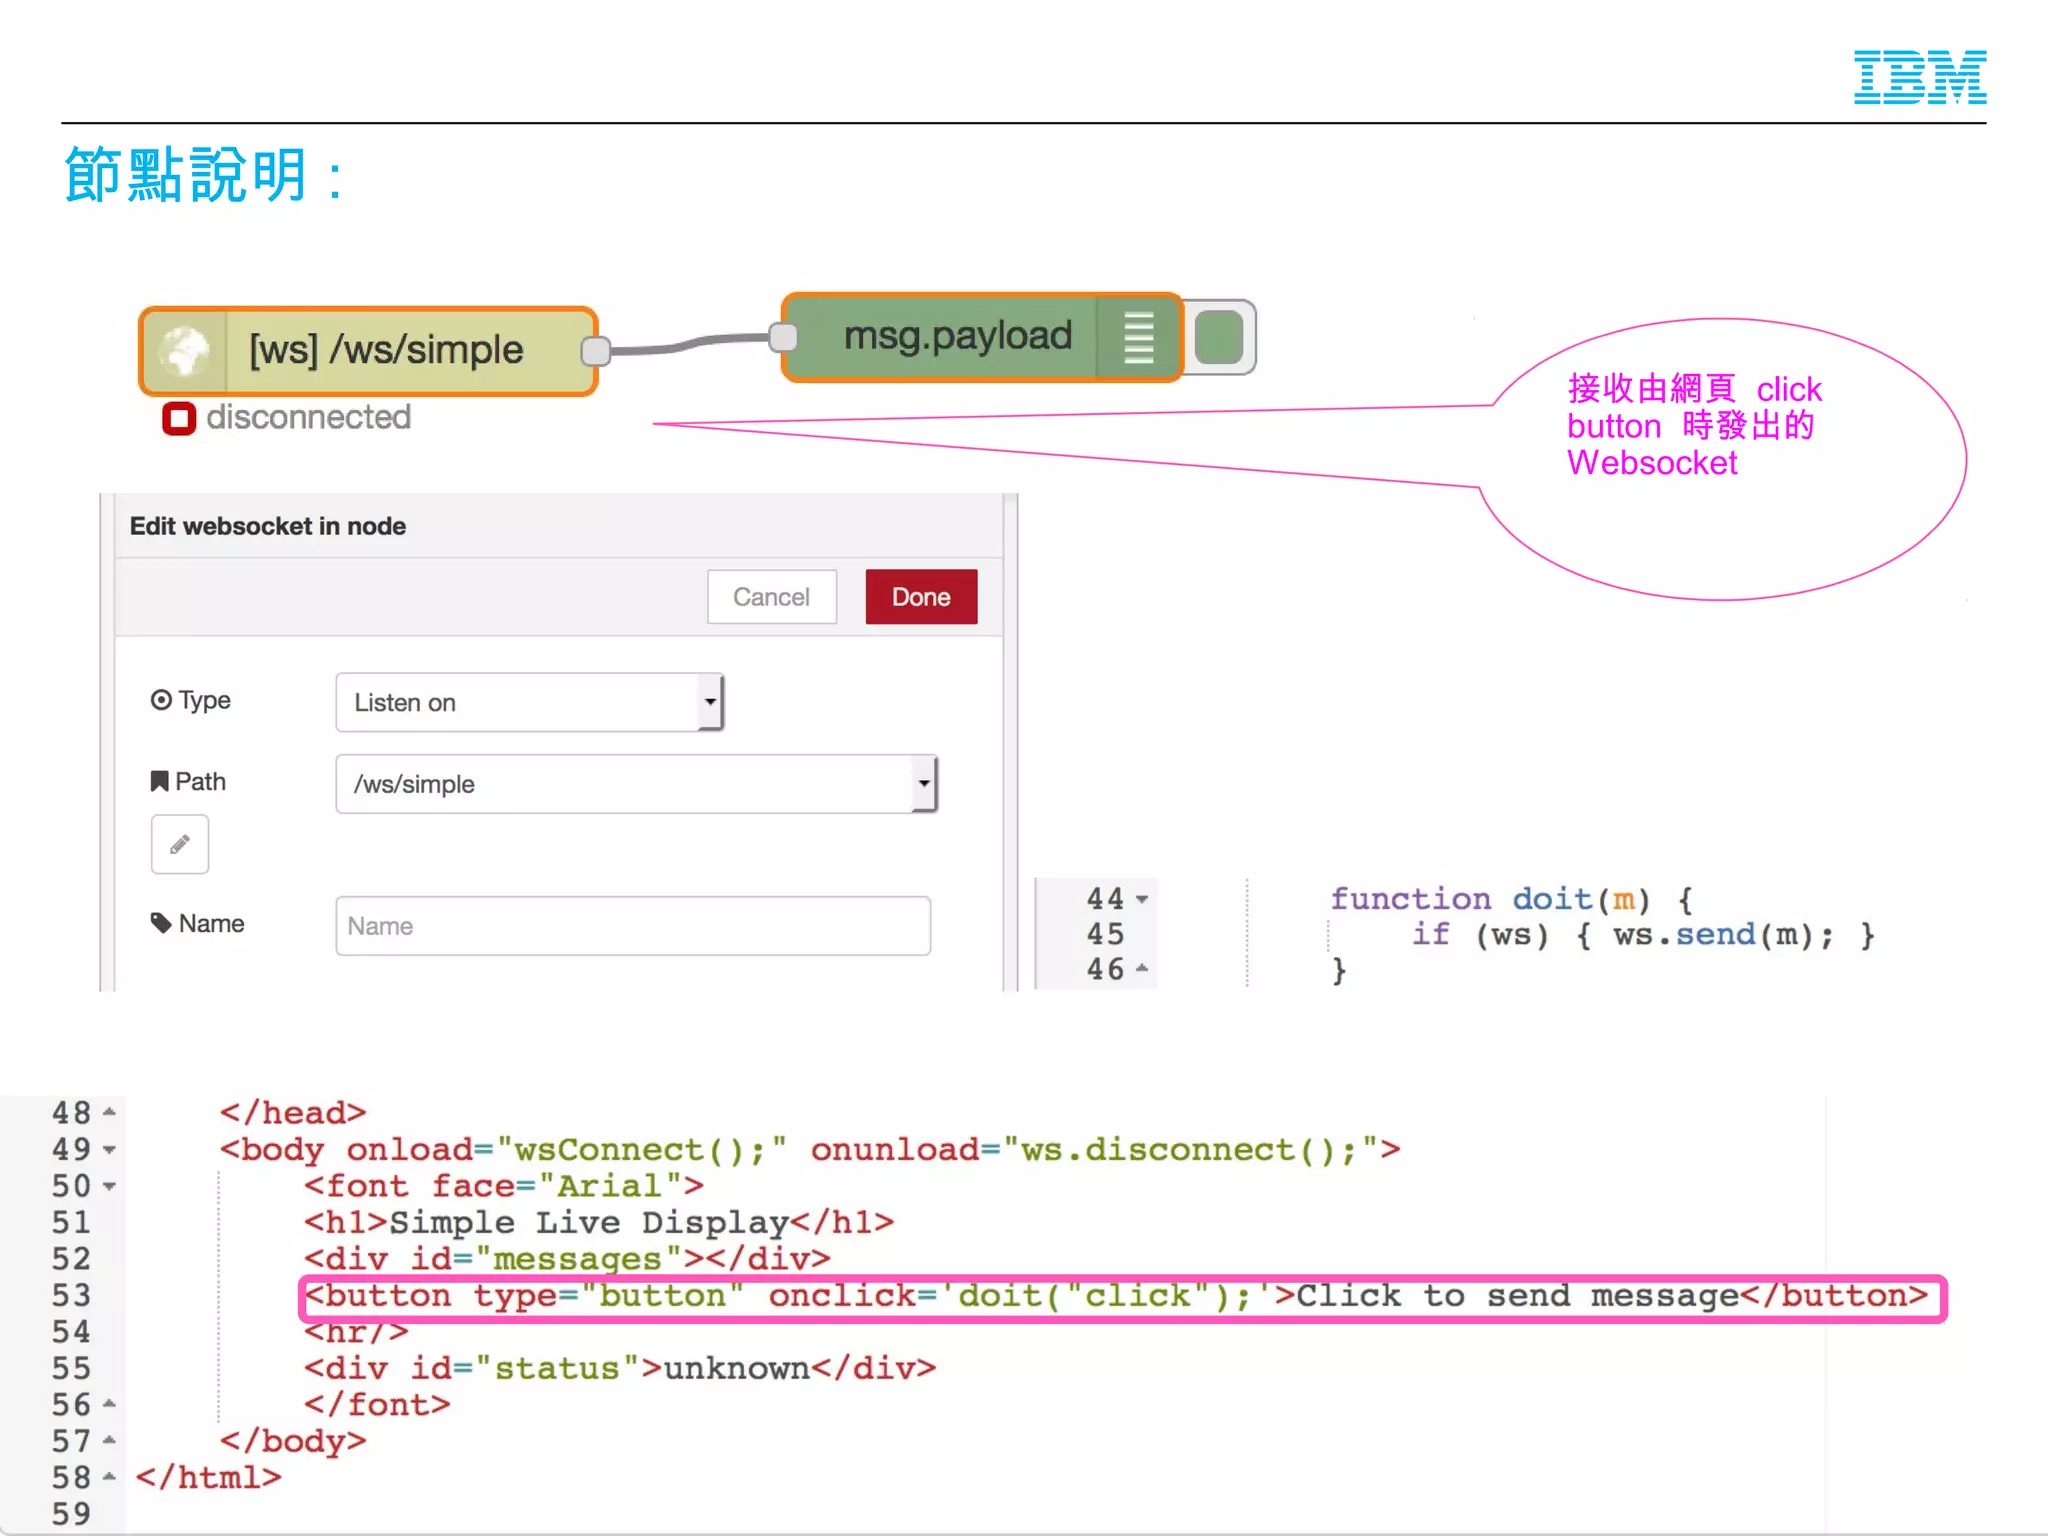
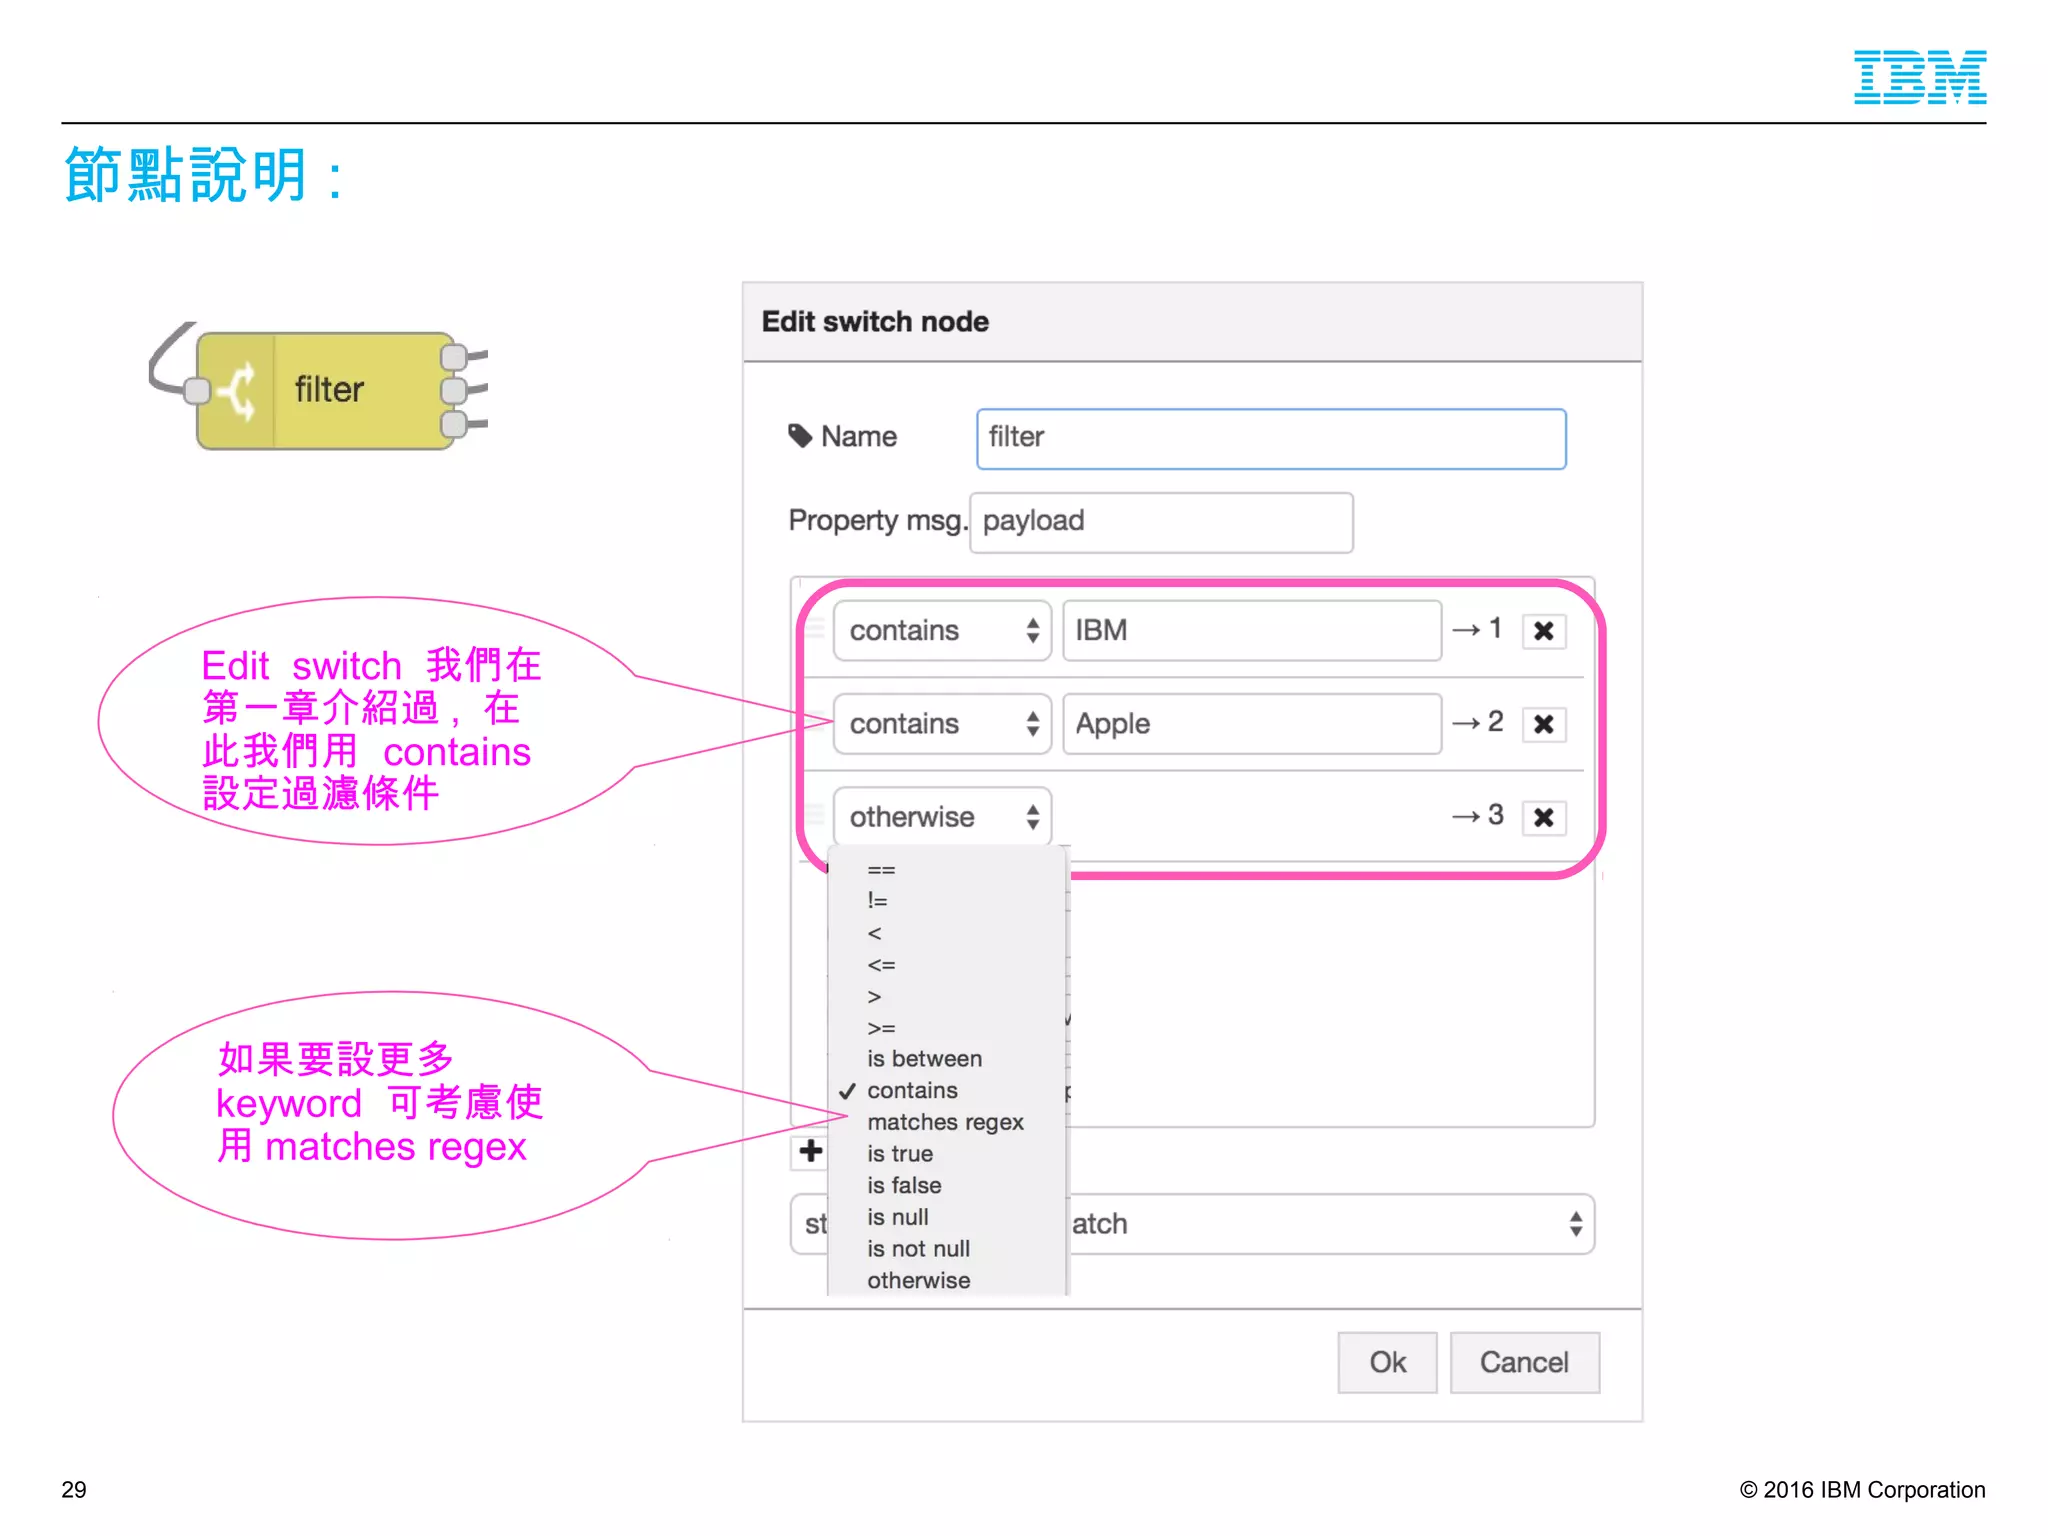
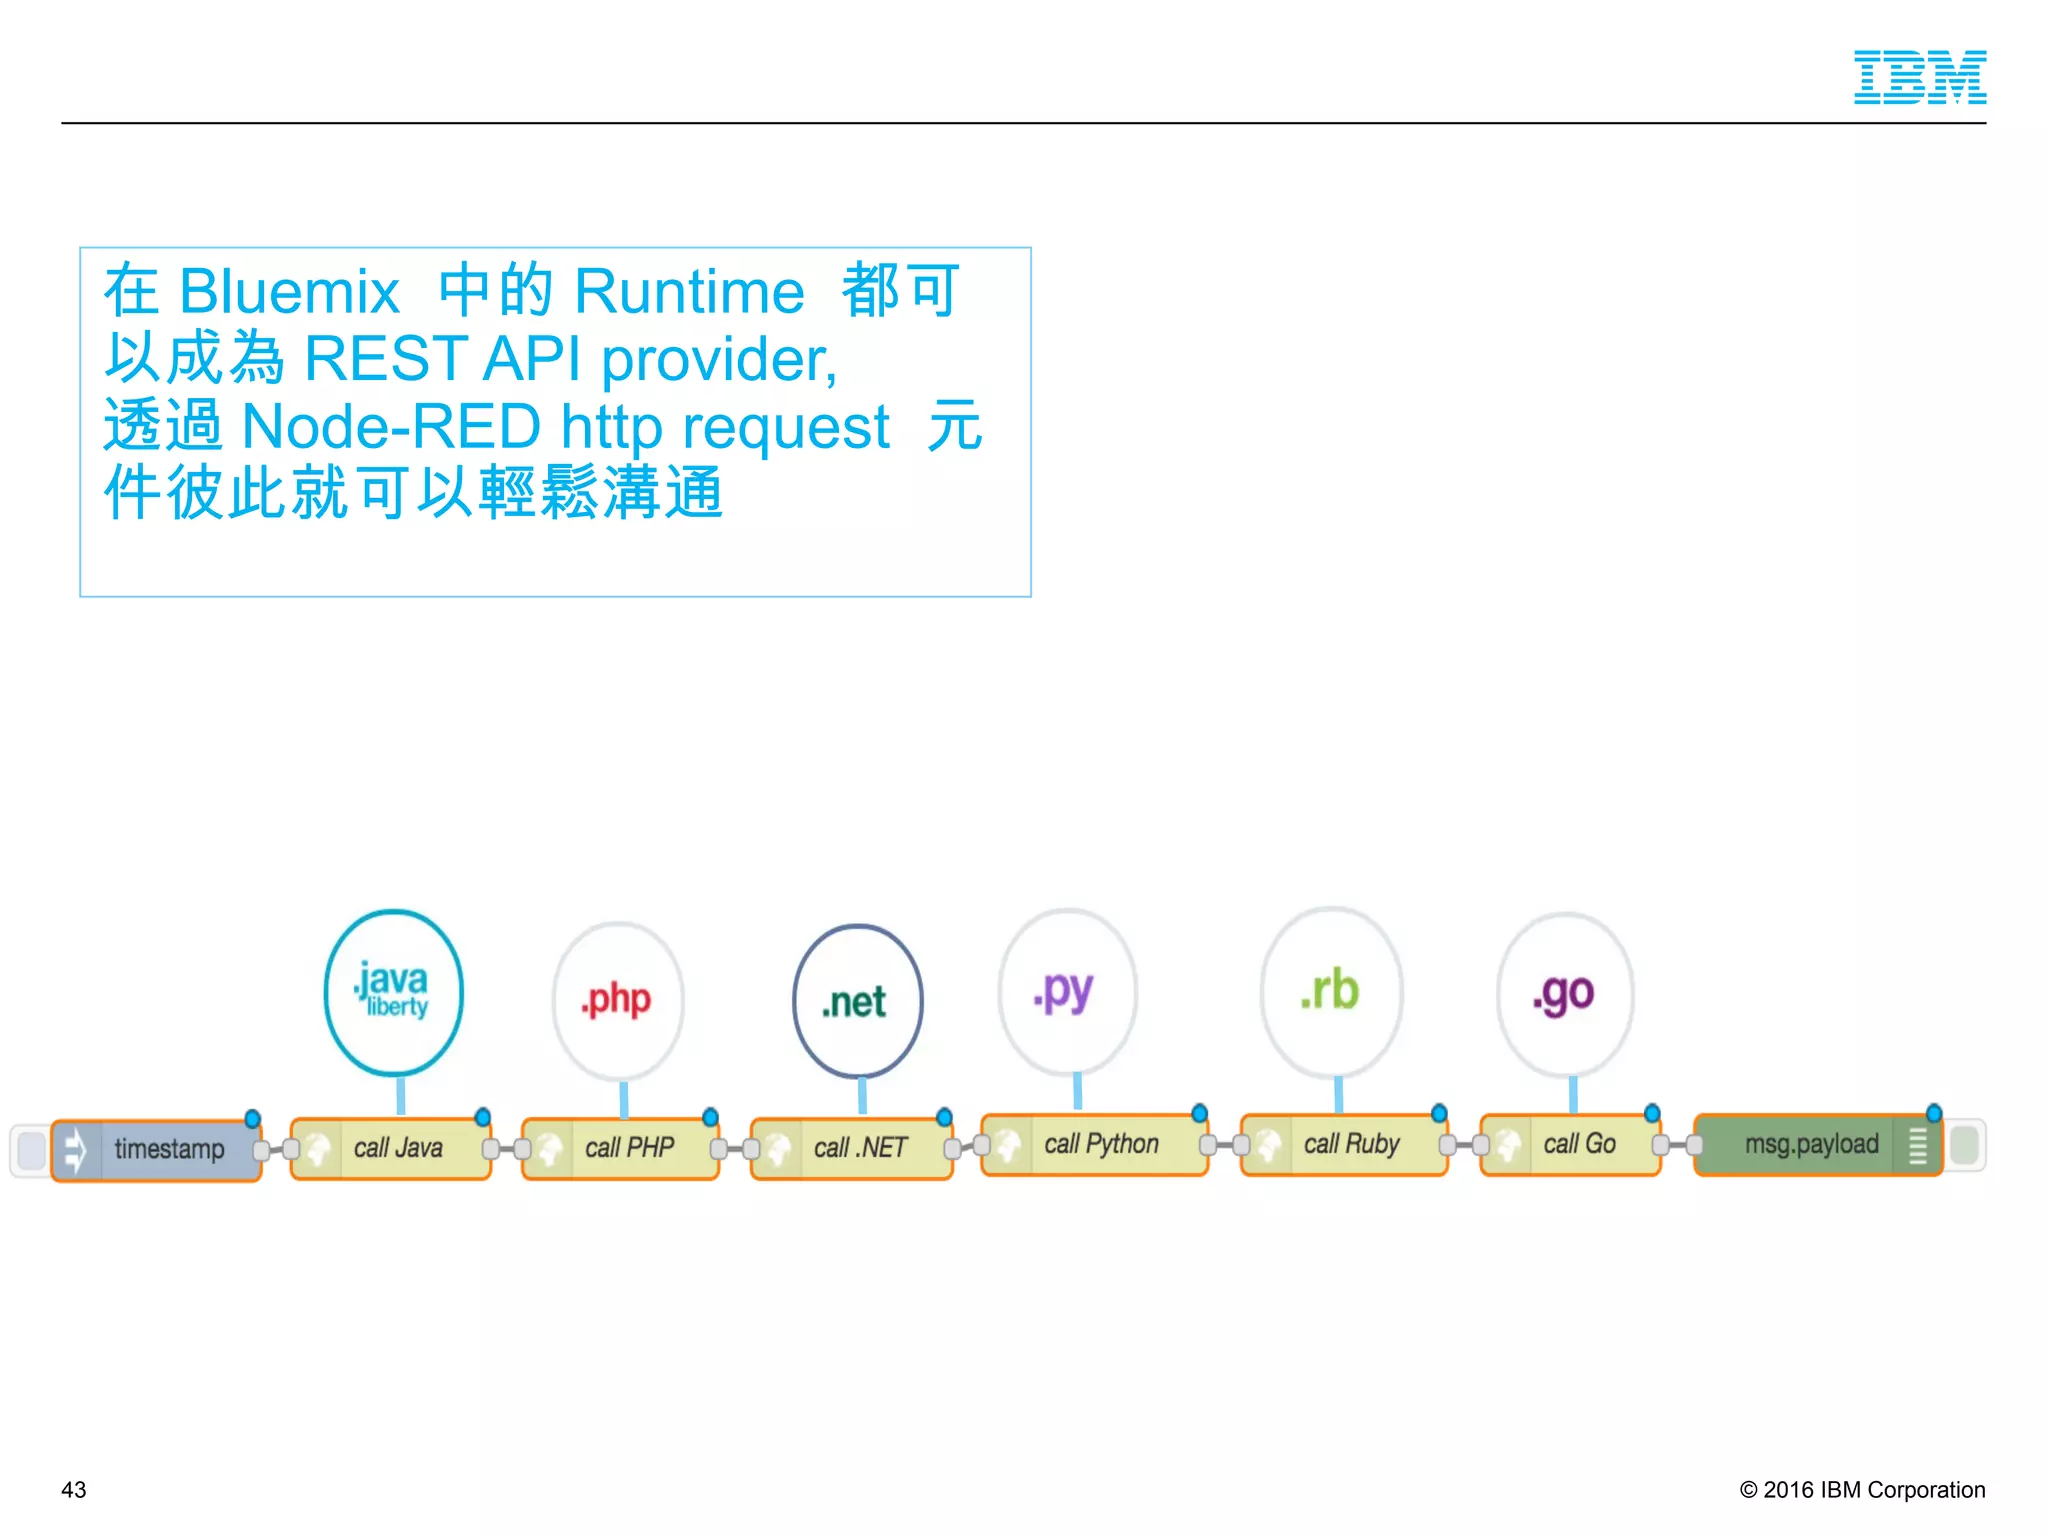
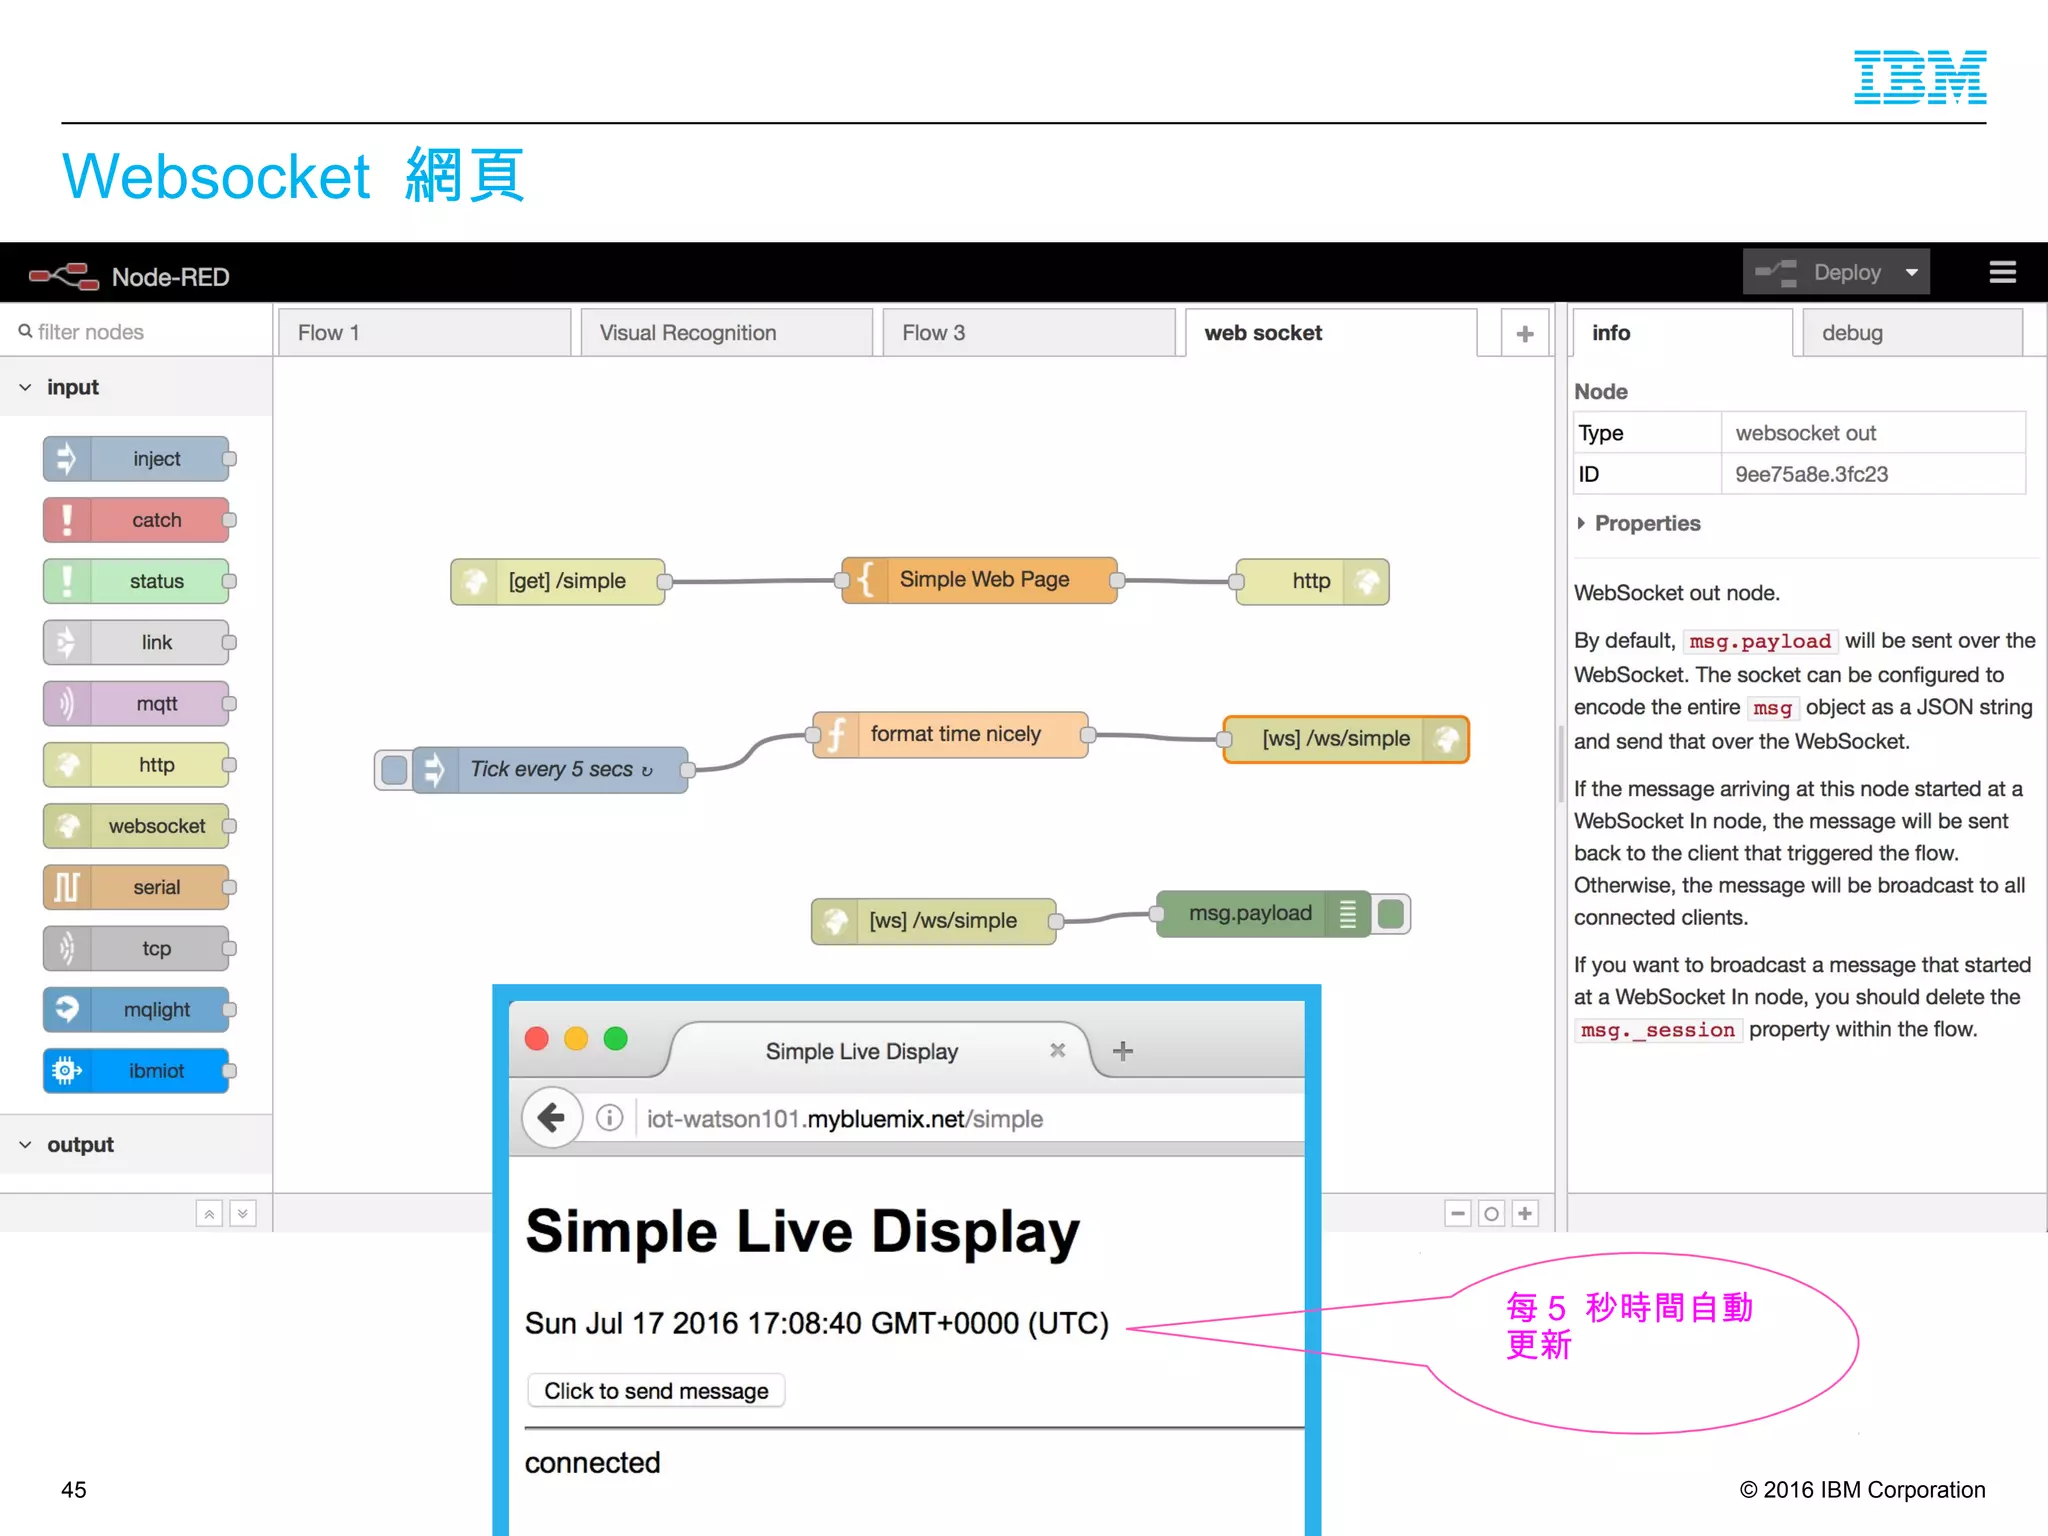
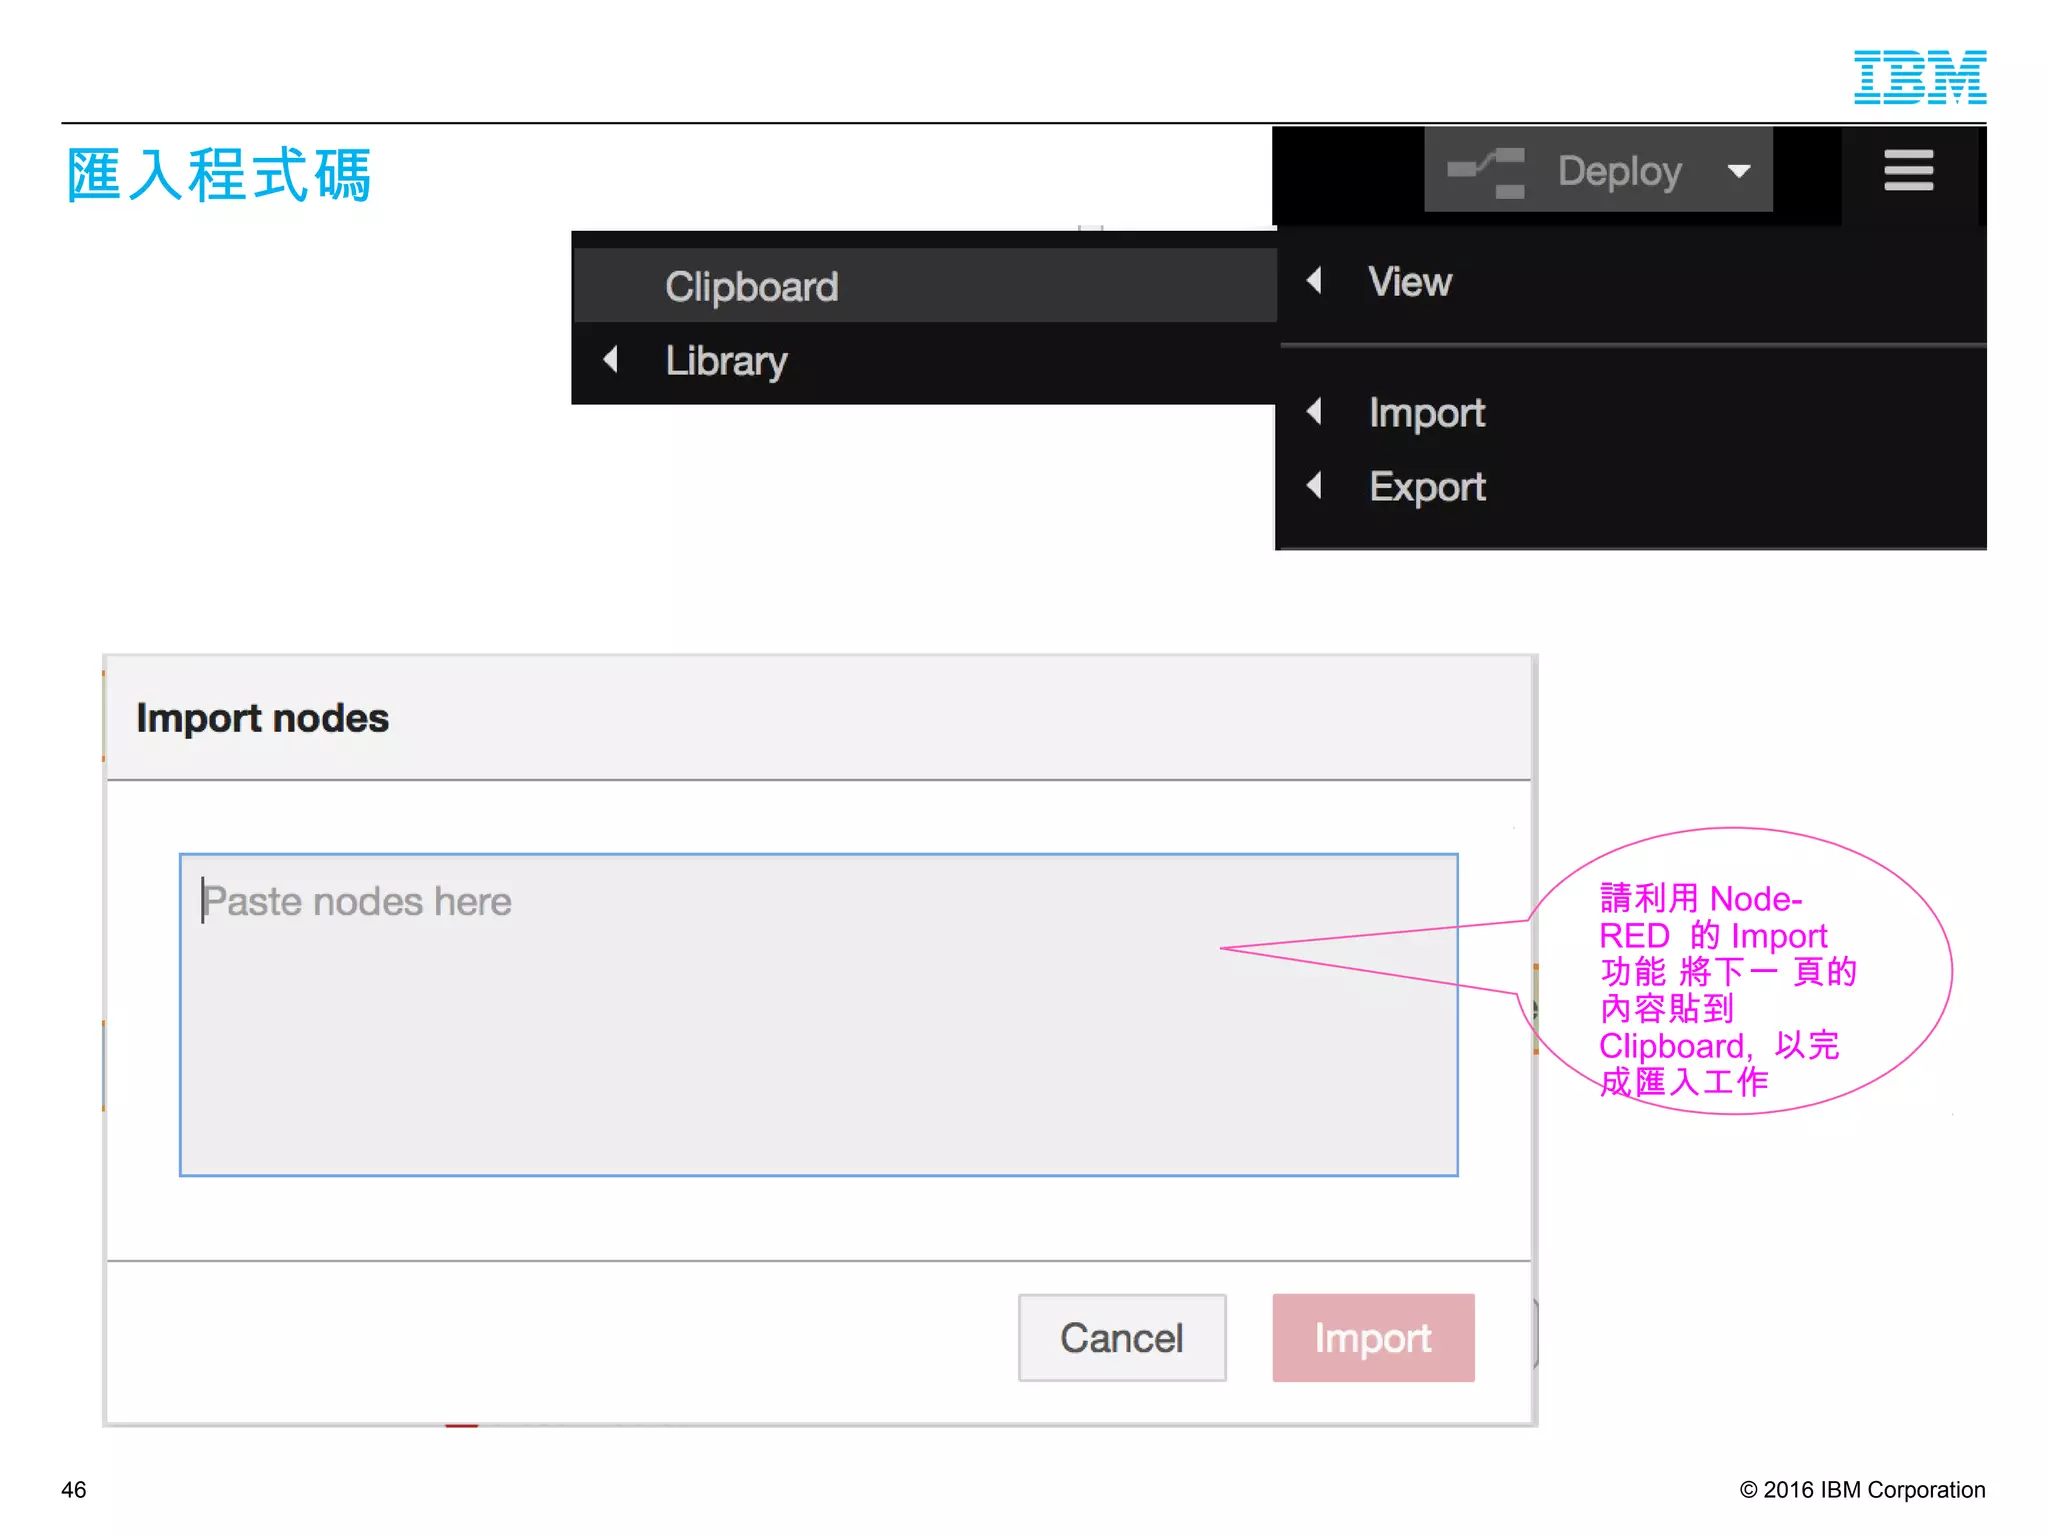
–匯入程式碼 Websocket Sample
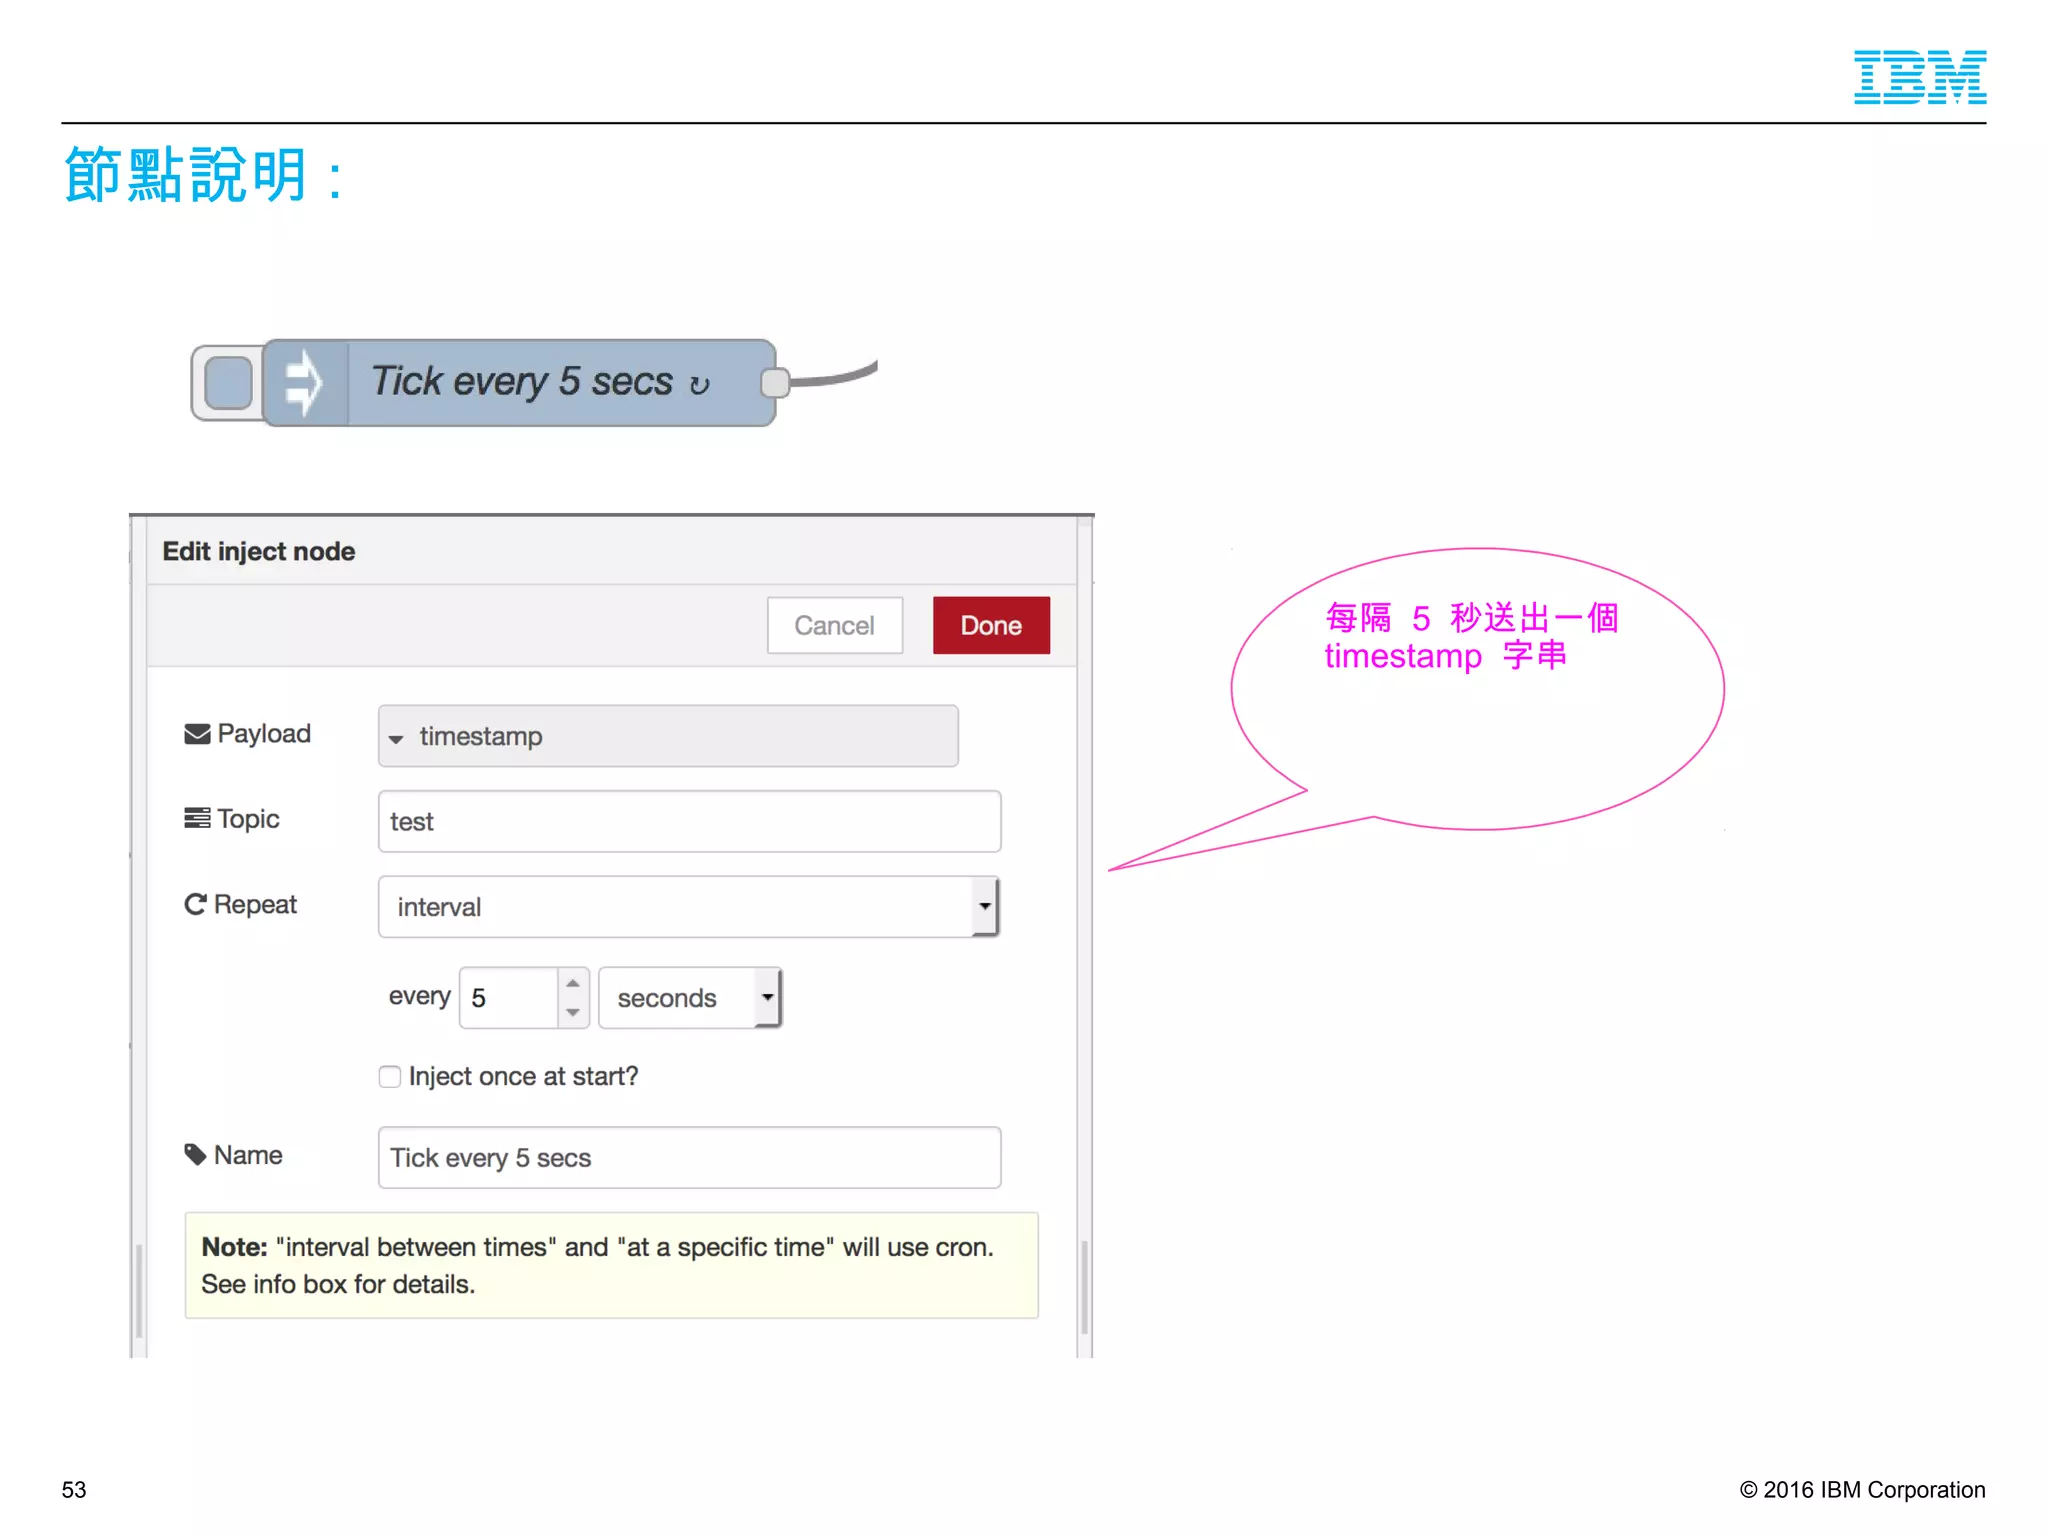
[{"id":"90b29f2a.2acff","type":"inject","z":"55fcf298.0cc50c","name":"Tick every 5
secs","topic":"test","payload":"","payloadType":"date","repeat":"5","crontab":"","once":false,"x":181,"y":270,"wires":[["6e1c0c9b.d96554"]]},
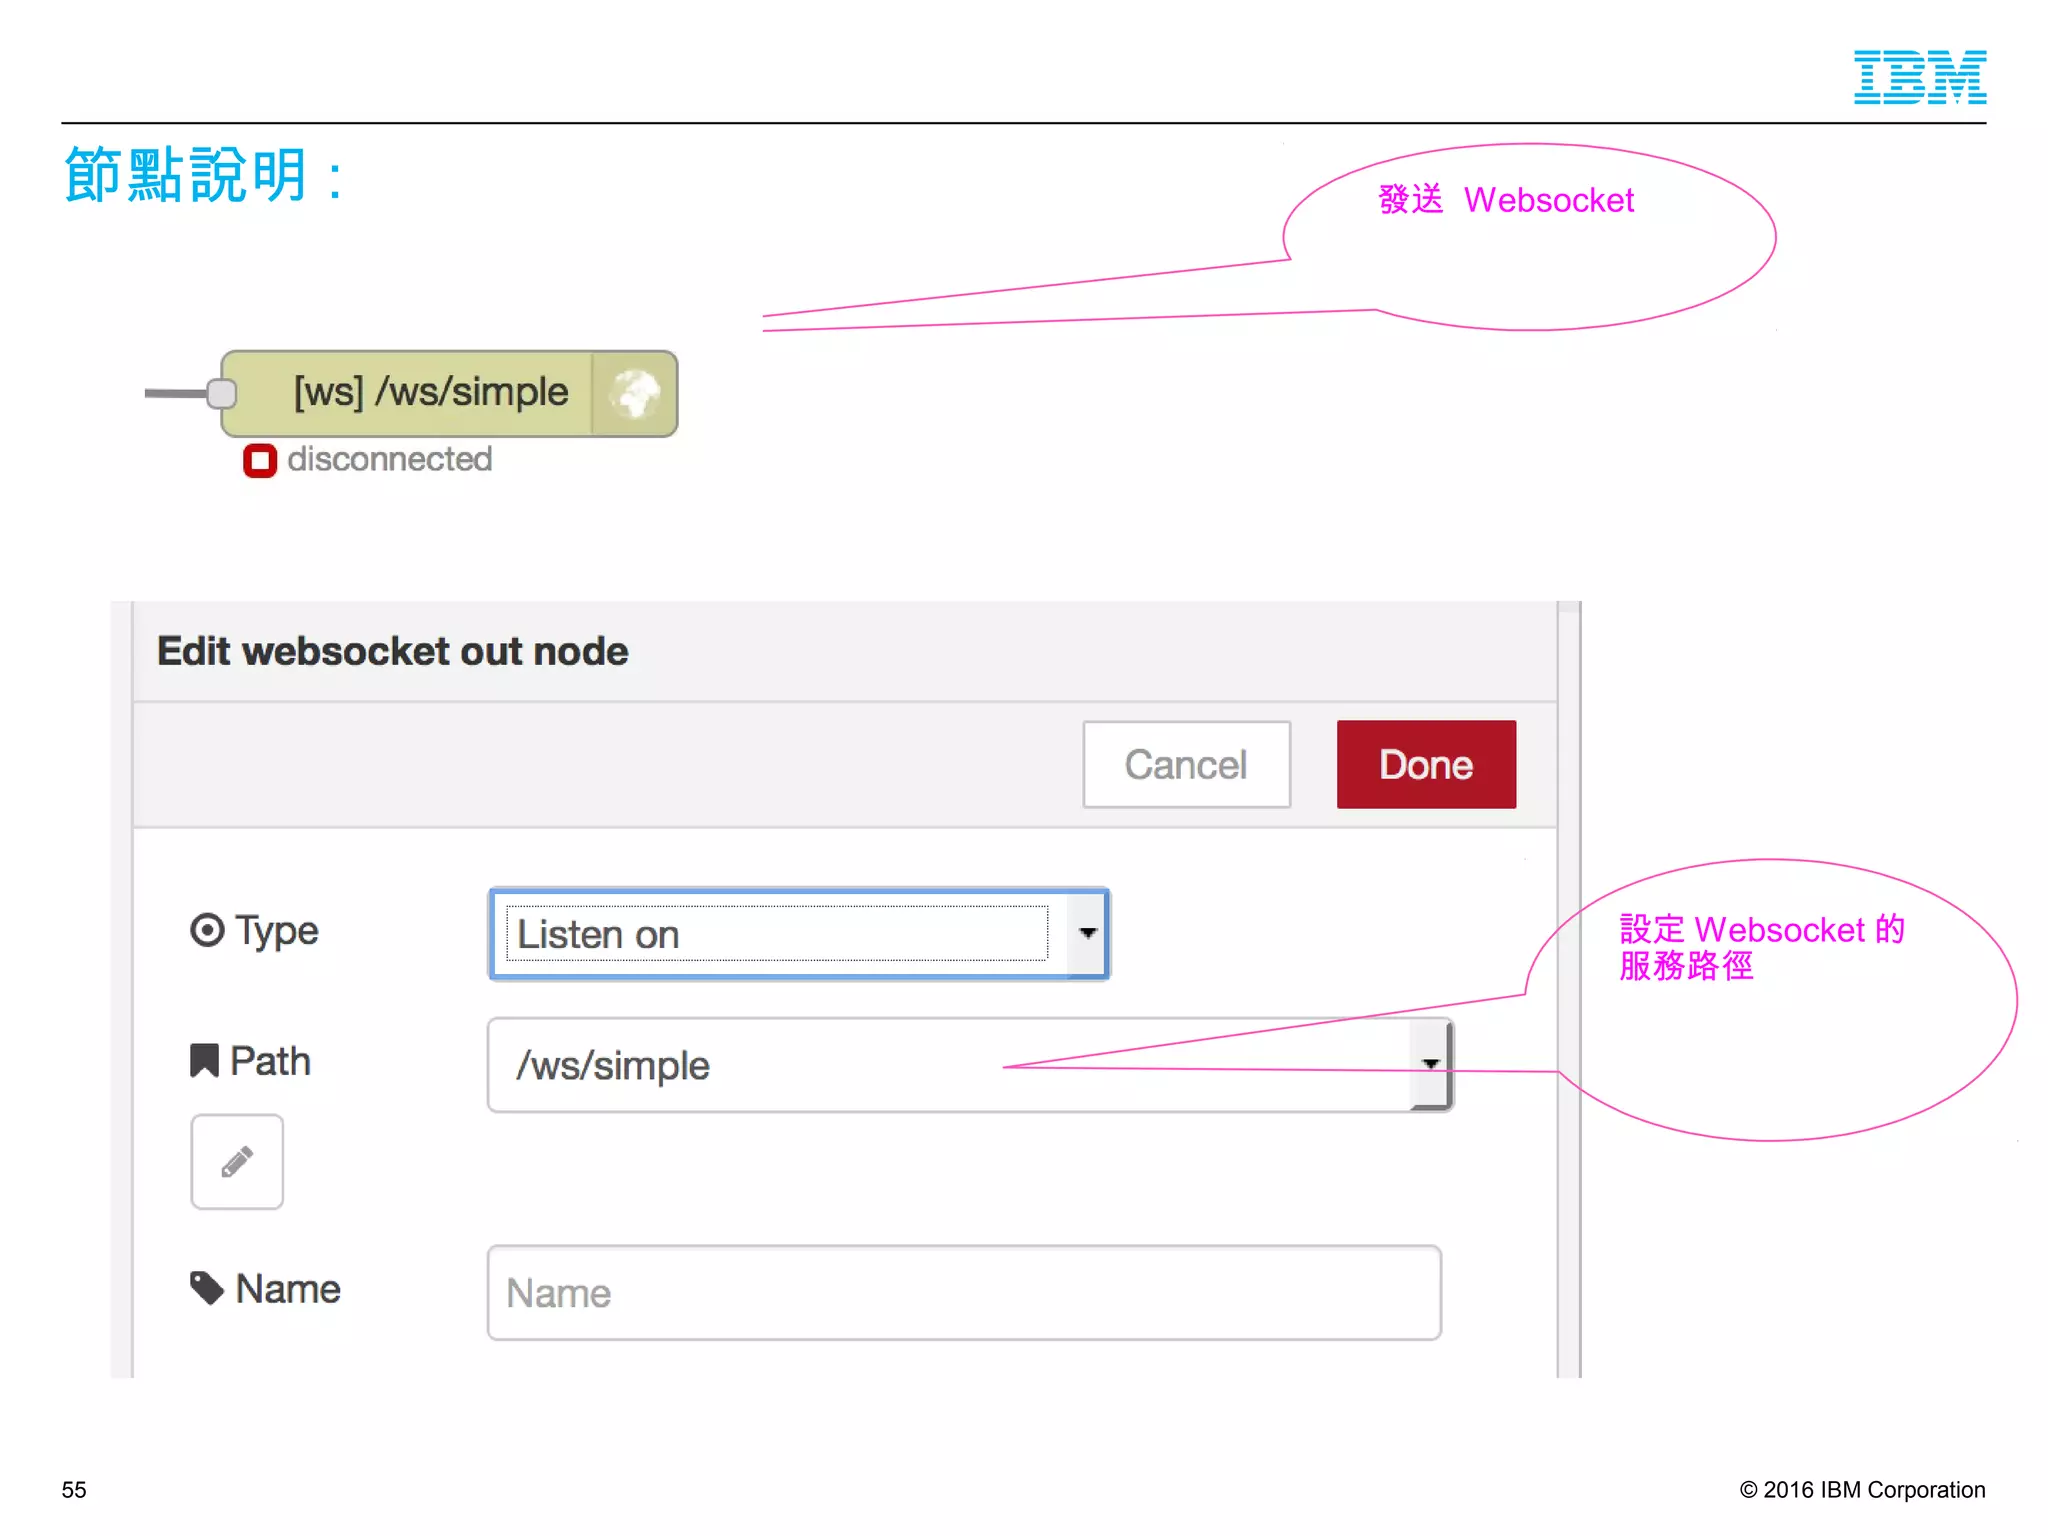
{"id":"9ee75a8e.3fc23","type":"websocket out","z":"55fcf298.0cc50c","name":"","server":"10c785bd.09c96a","client":"","x":702,"y":250,"wires":[]},
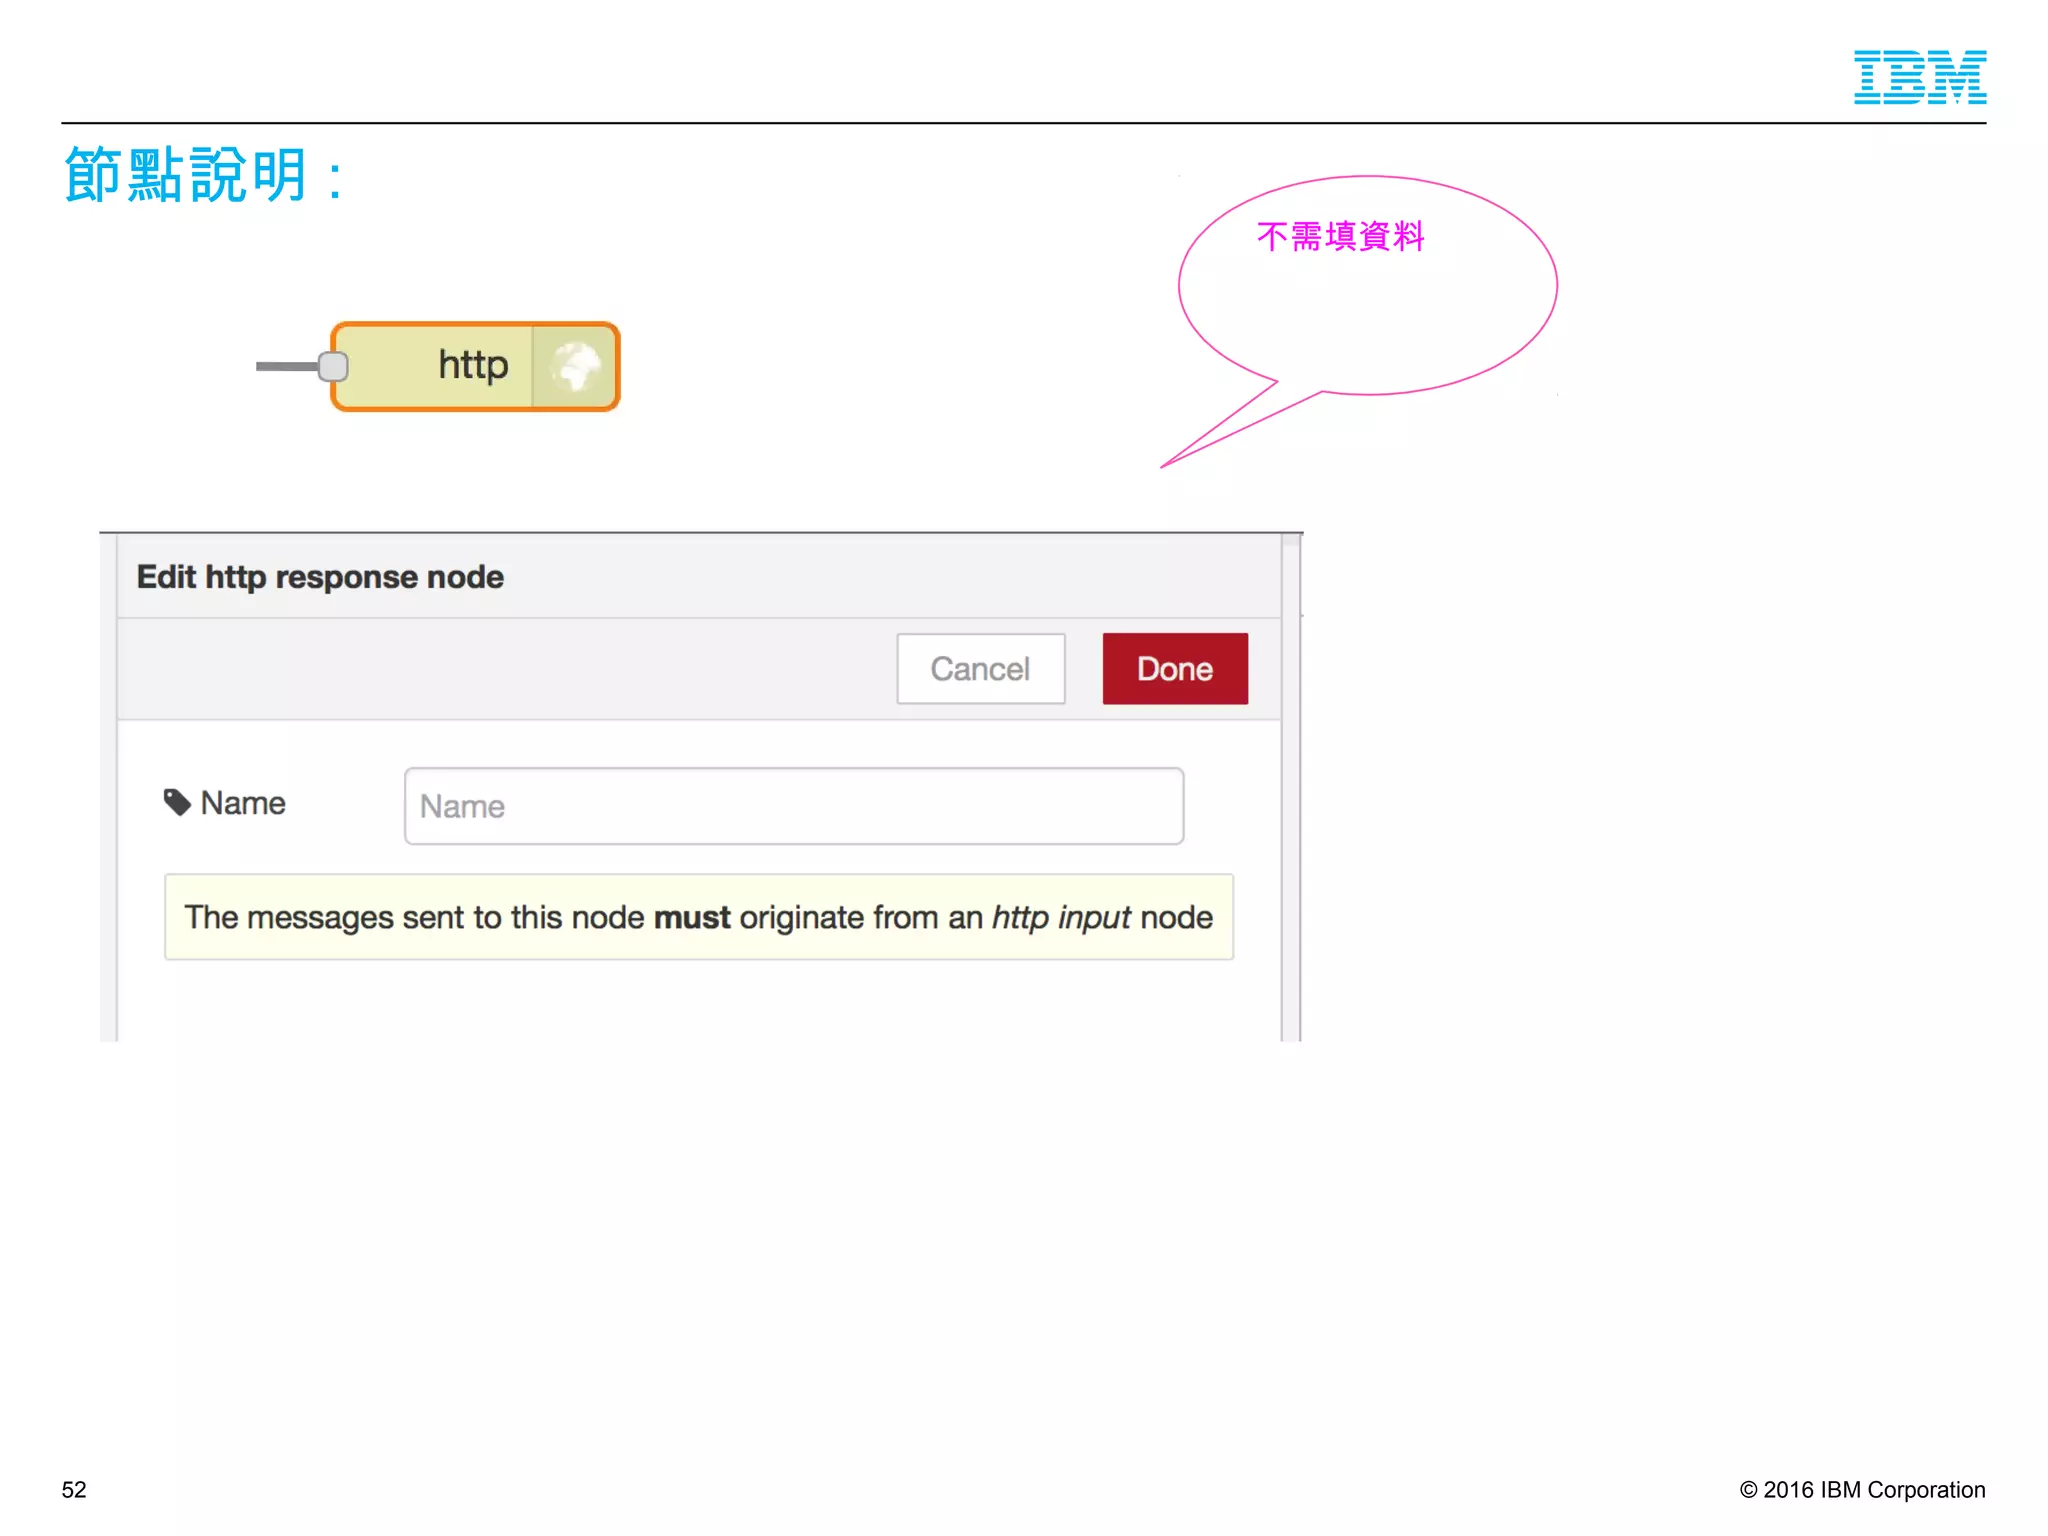
{"id":"3754bfea.ee9c38","type":"http response","z":"55fcf298.0cc50c","name":"","x":680,"y":147,"wires":[]},{"id":"e080cd3b.52c388","type":"http
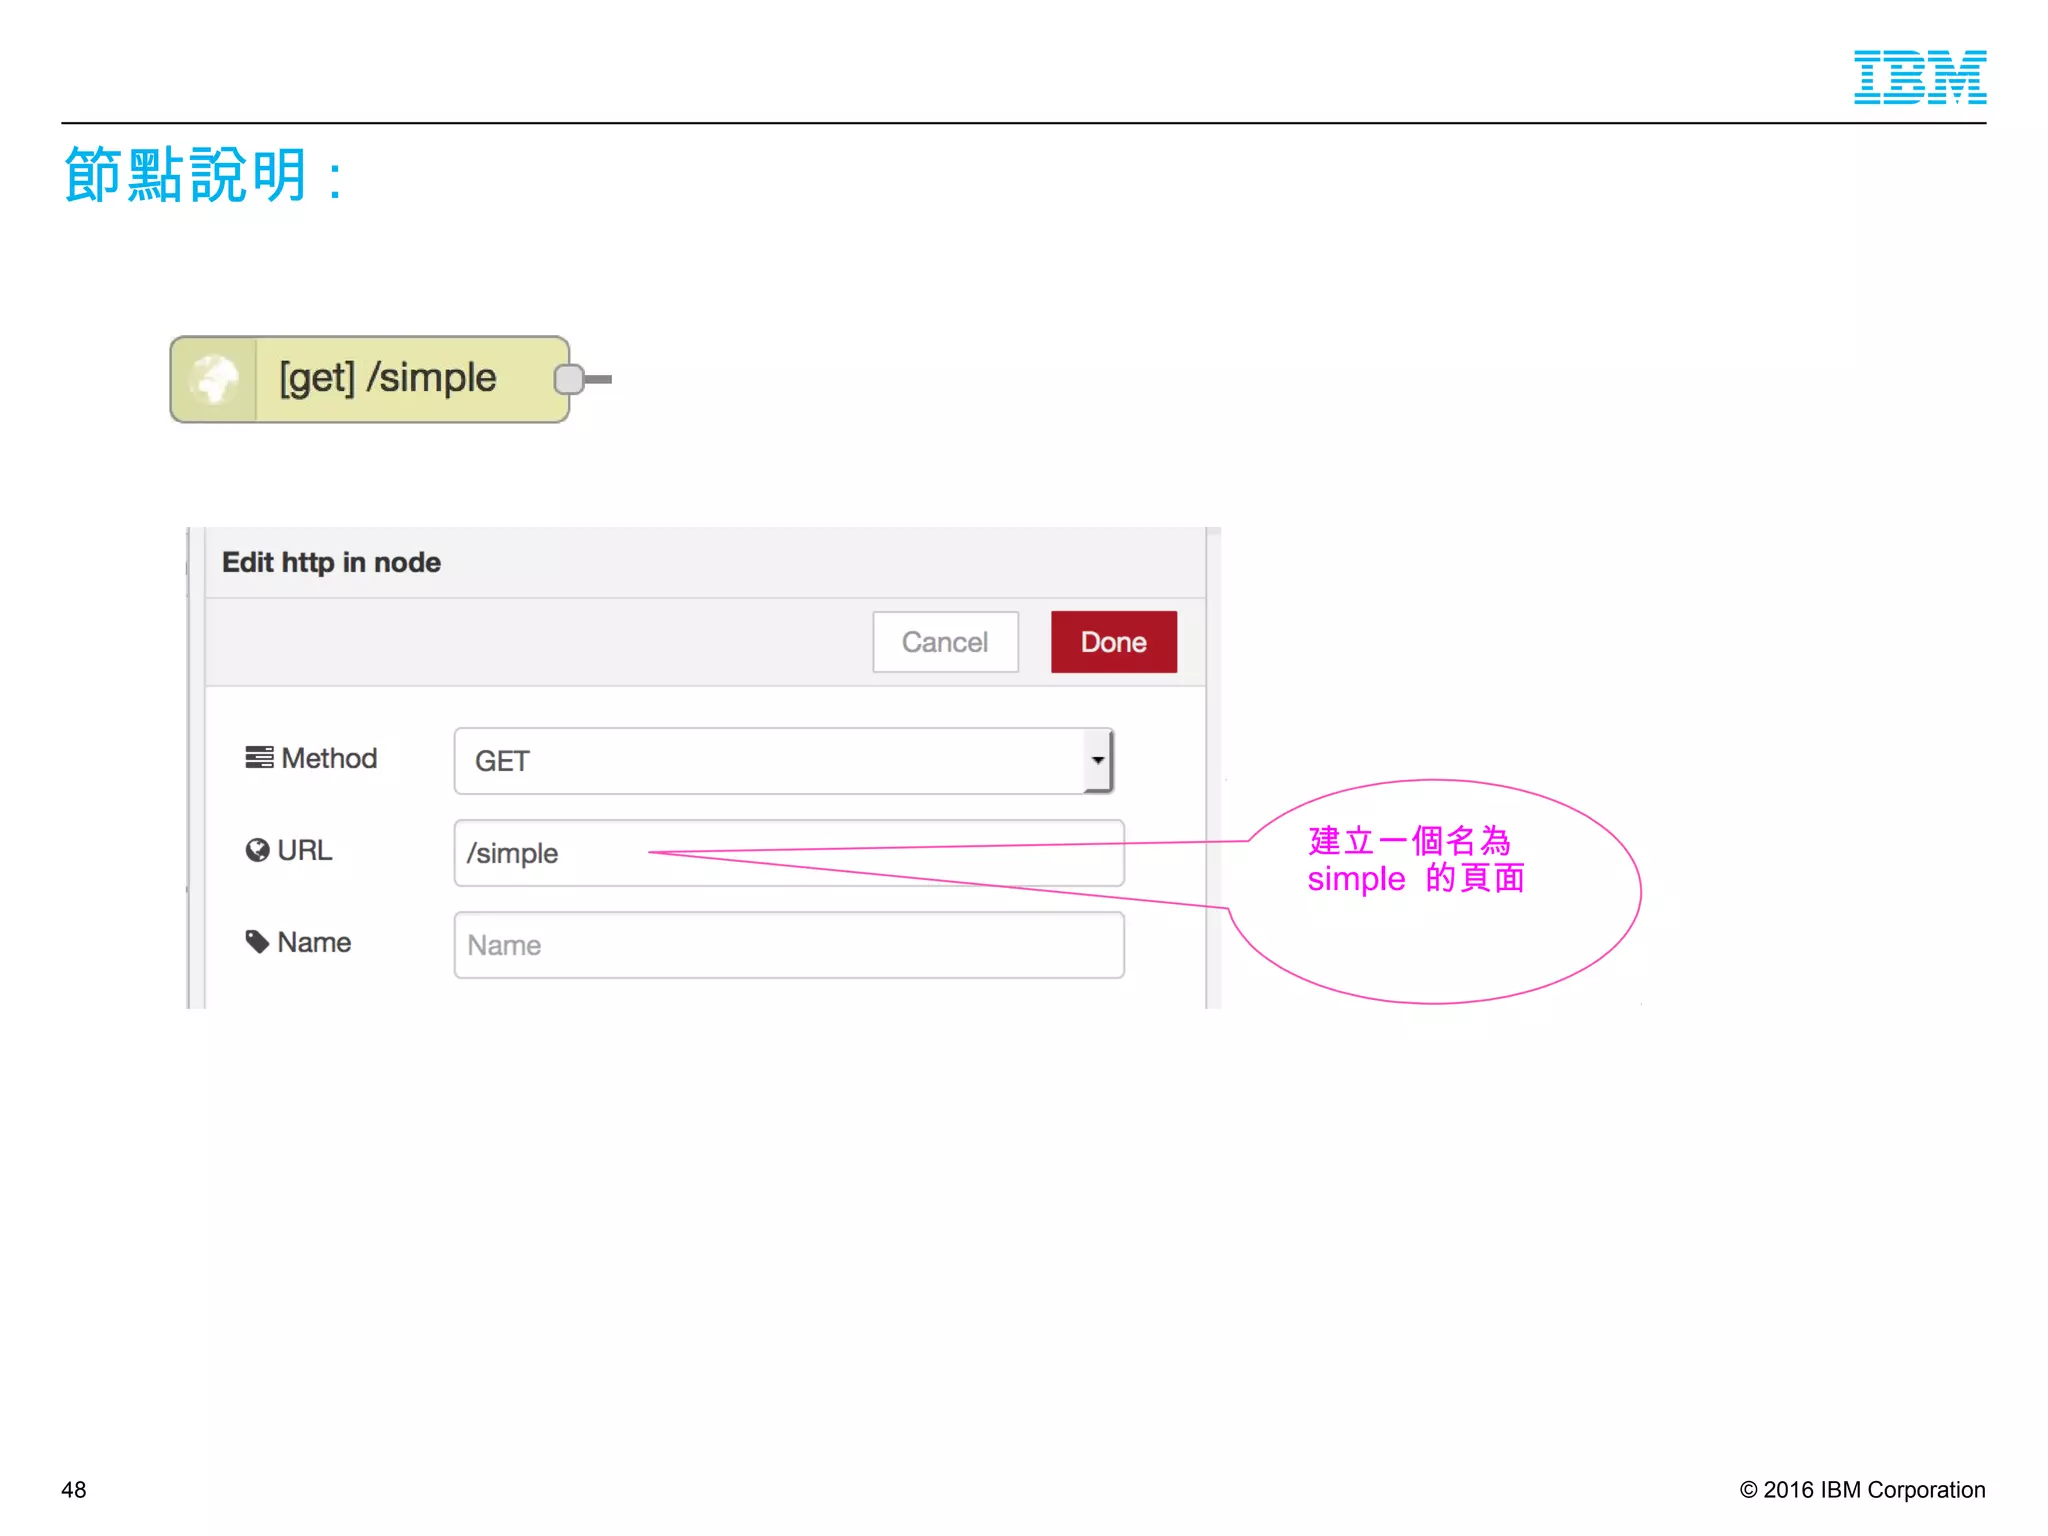
in","z":"55fcf298.0cc50c","name":"","url":"/simple","method":"get","swaggerDoc":"","x":186,"y":147,"wires":[["f36b1a3d.55ce3"]]},
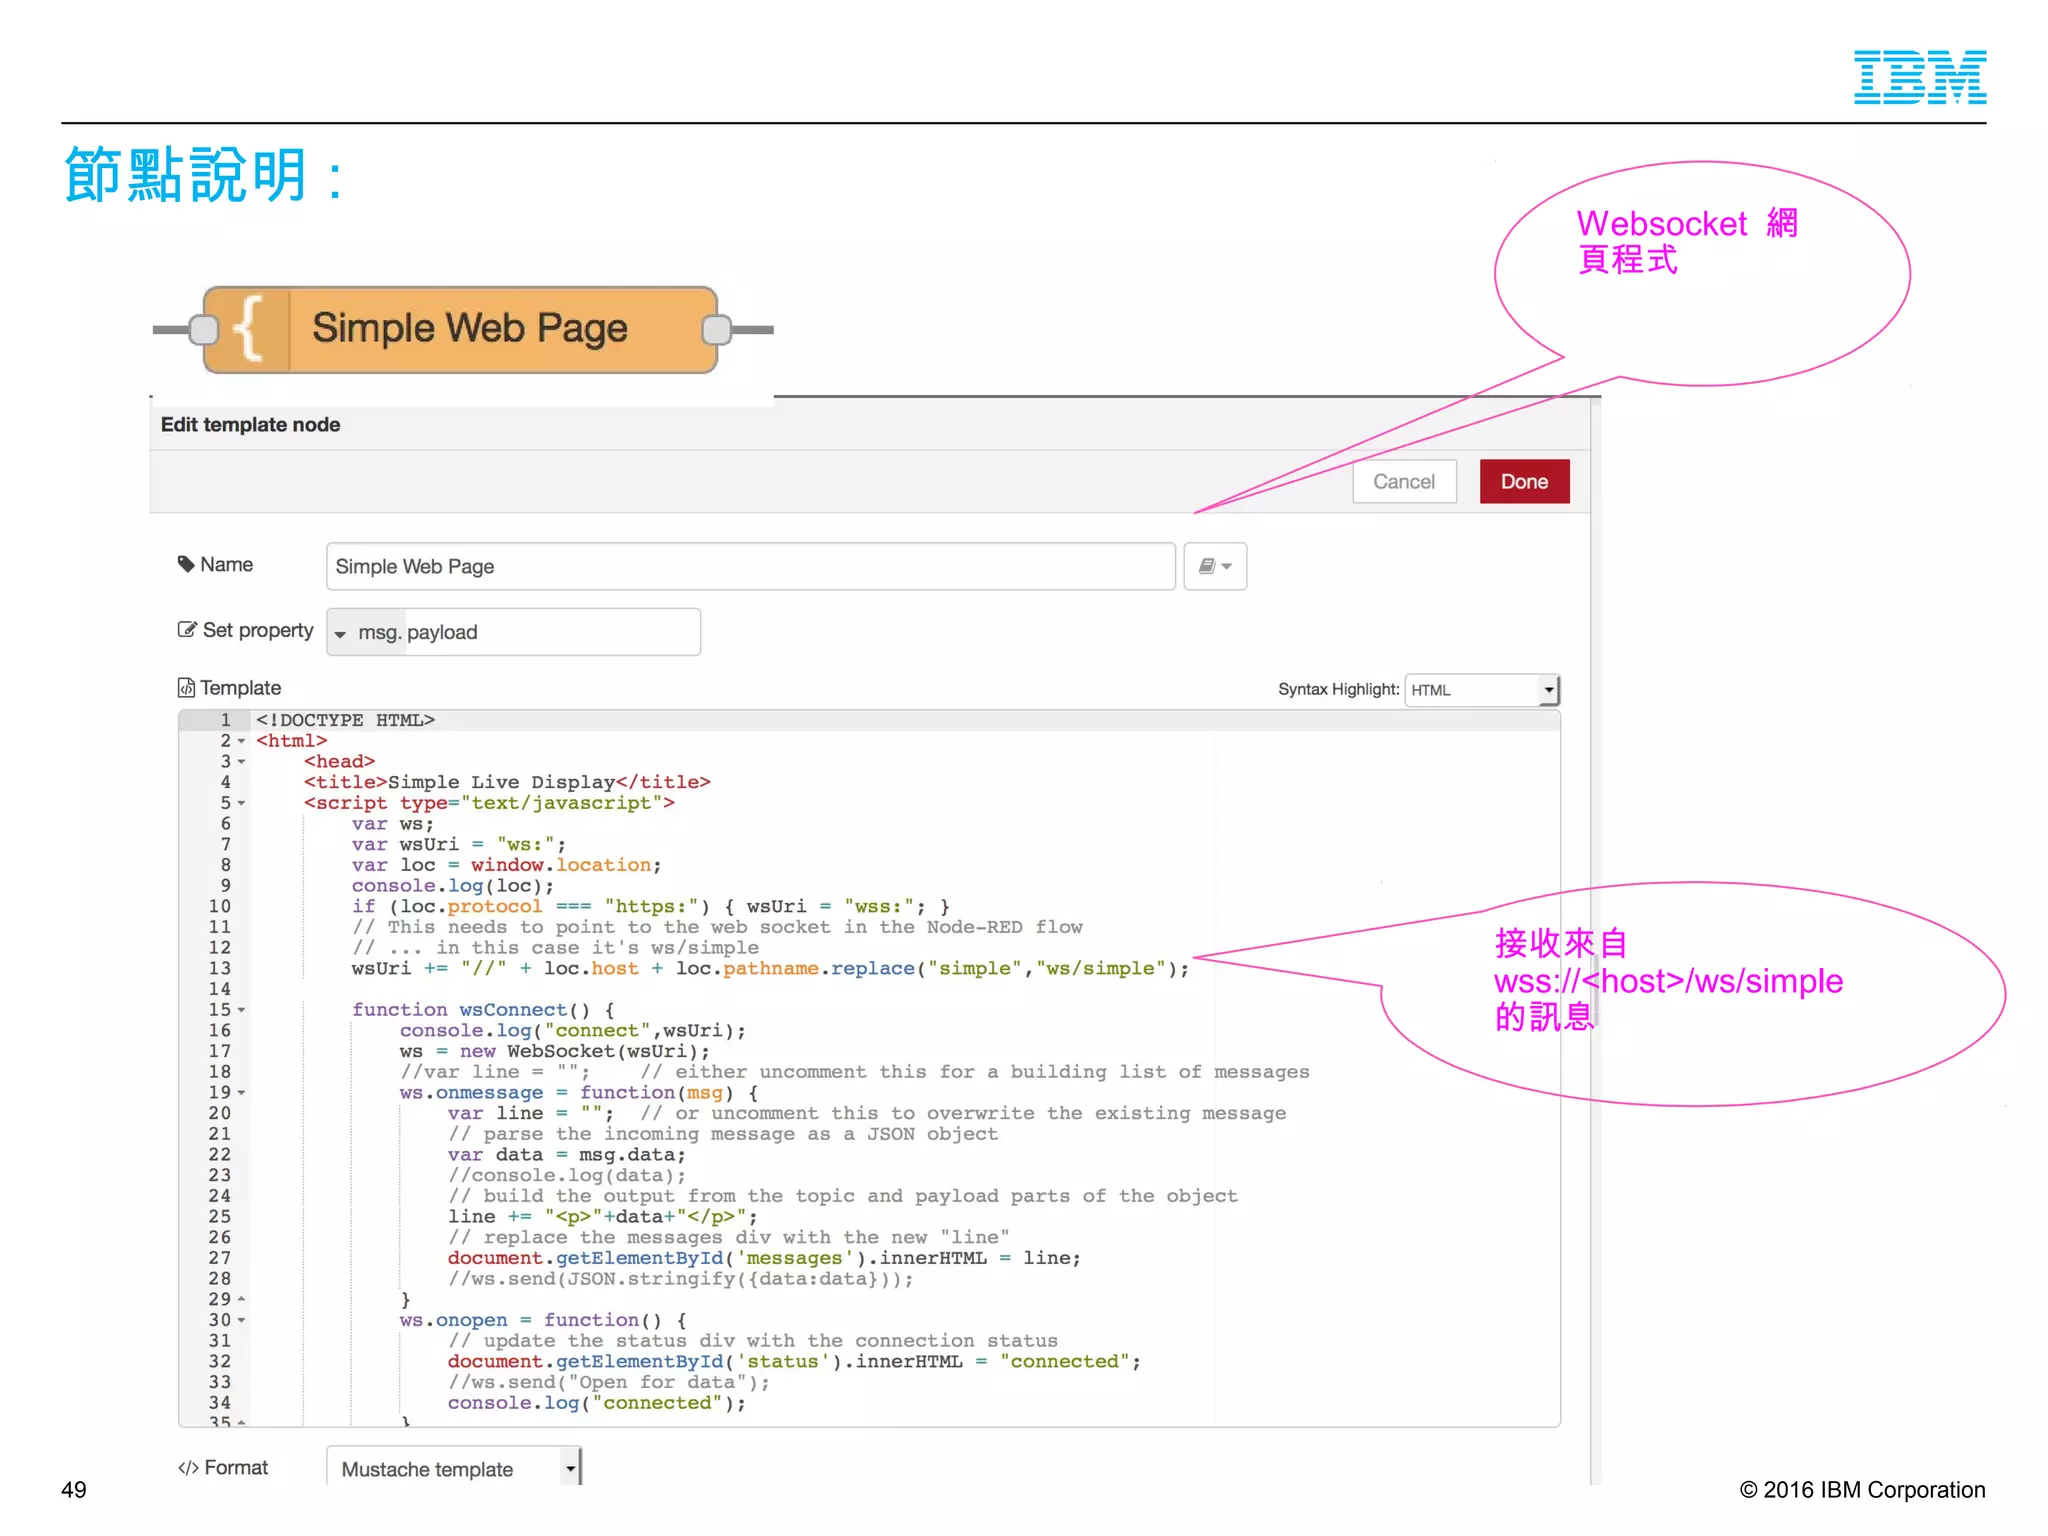
{"id":"f36b1a3d.55ce3","type":"template","z":"55fcf298.0cc50c","name":"Simple Web
Page","field":"payload","fieldType":"msg","format":"html","syntax":"mustache","template":"<!DOCTYPE HTML>n<html>n <head>n <title>Simple
Live Display</title>n <script type="text/javascript">n var ws;n var wsUri = "ws:";n var loc = window.location;n console.log(loc);n
if (loc.protocol === "https:") { wsUri = "wss:"; }n // This needs to point to the web socket in the Node-RED flown // ... in this case it's
ws/simplen wsUri += "//" + loc.host + loc.pathname.replace("simple","ws/simple");nn function wsConnect() {n
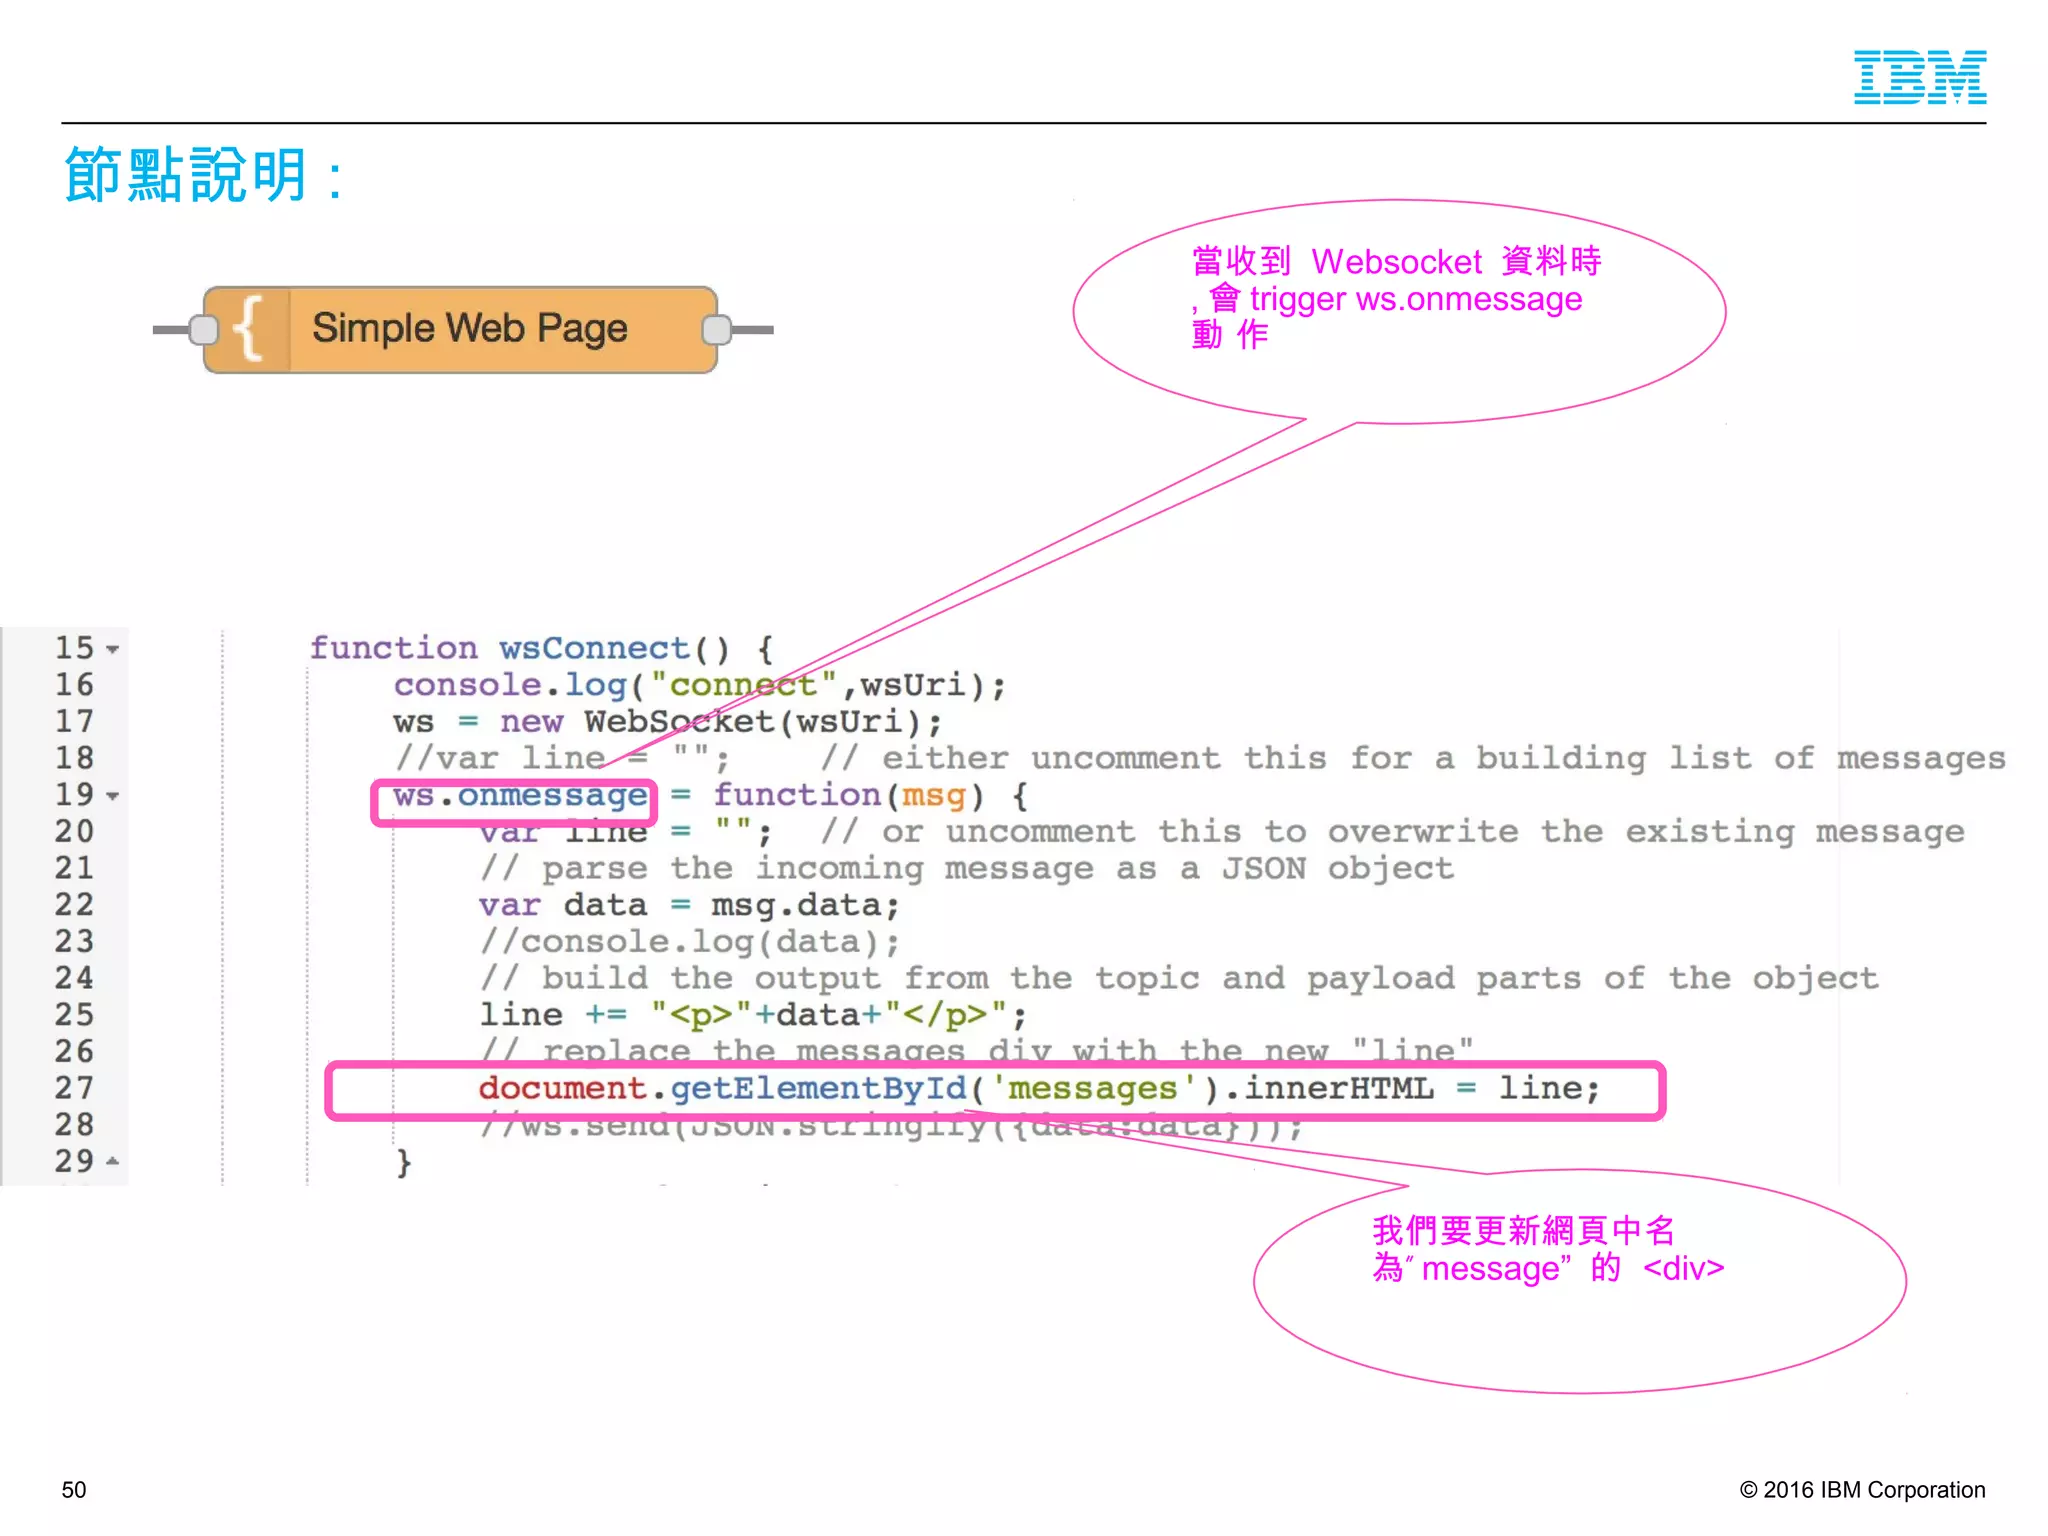
console.log("connect",wsUri);n ws = new WebSocket(wsUri);n //var line = ""; // either uncomment this for a building list of
messagesn ws.onmessage = function(msg) {n var line = ""; // or uncomment this to overwrite the existing messagen //
parse the incoming message as a JSON objectn var data = msg.data;n //console.log(data);n // build the output from the
topic and payload parts of the objectn line += "<p>"+data+"</p>";n // replace the messages div with the new "line"n
document.getElementById('messages').innerHTML = line;n //ws.send(JSON.stringify({data:data}));n }n ws.onopen = function()
{n // update the status div with the connection statusn document.getElementById('status').innerHTML = "connected";n
//ws.send("Open for data");n console.log("connected");n }n ws.onclose = function() {n // update the status div with
the connection statusn document.getElementById('status').innerHTML = "not connected";n // in case of lost connection tries to
reconnect every 3 secsn setTimeout(wsConnect,3000);n }n }n n function doit(m) {n if (ws)
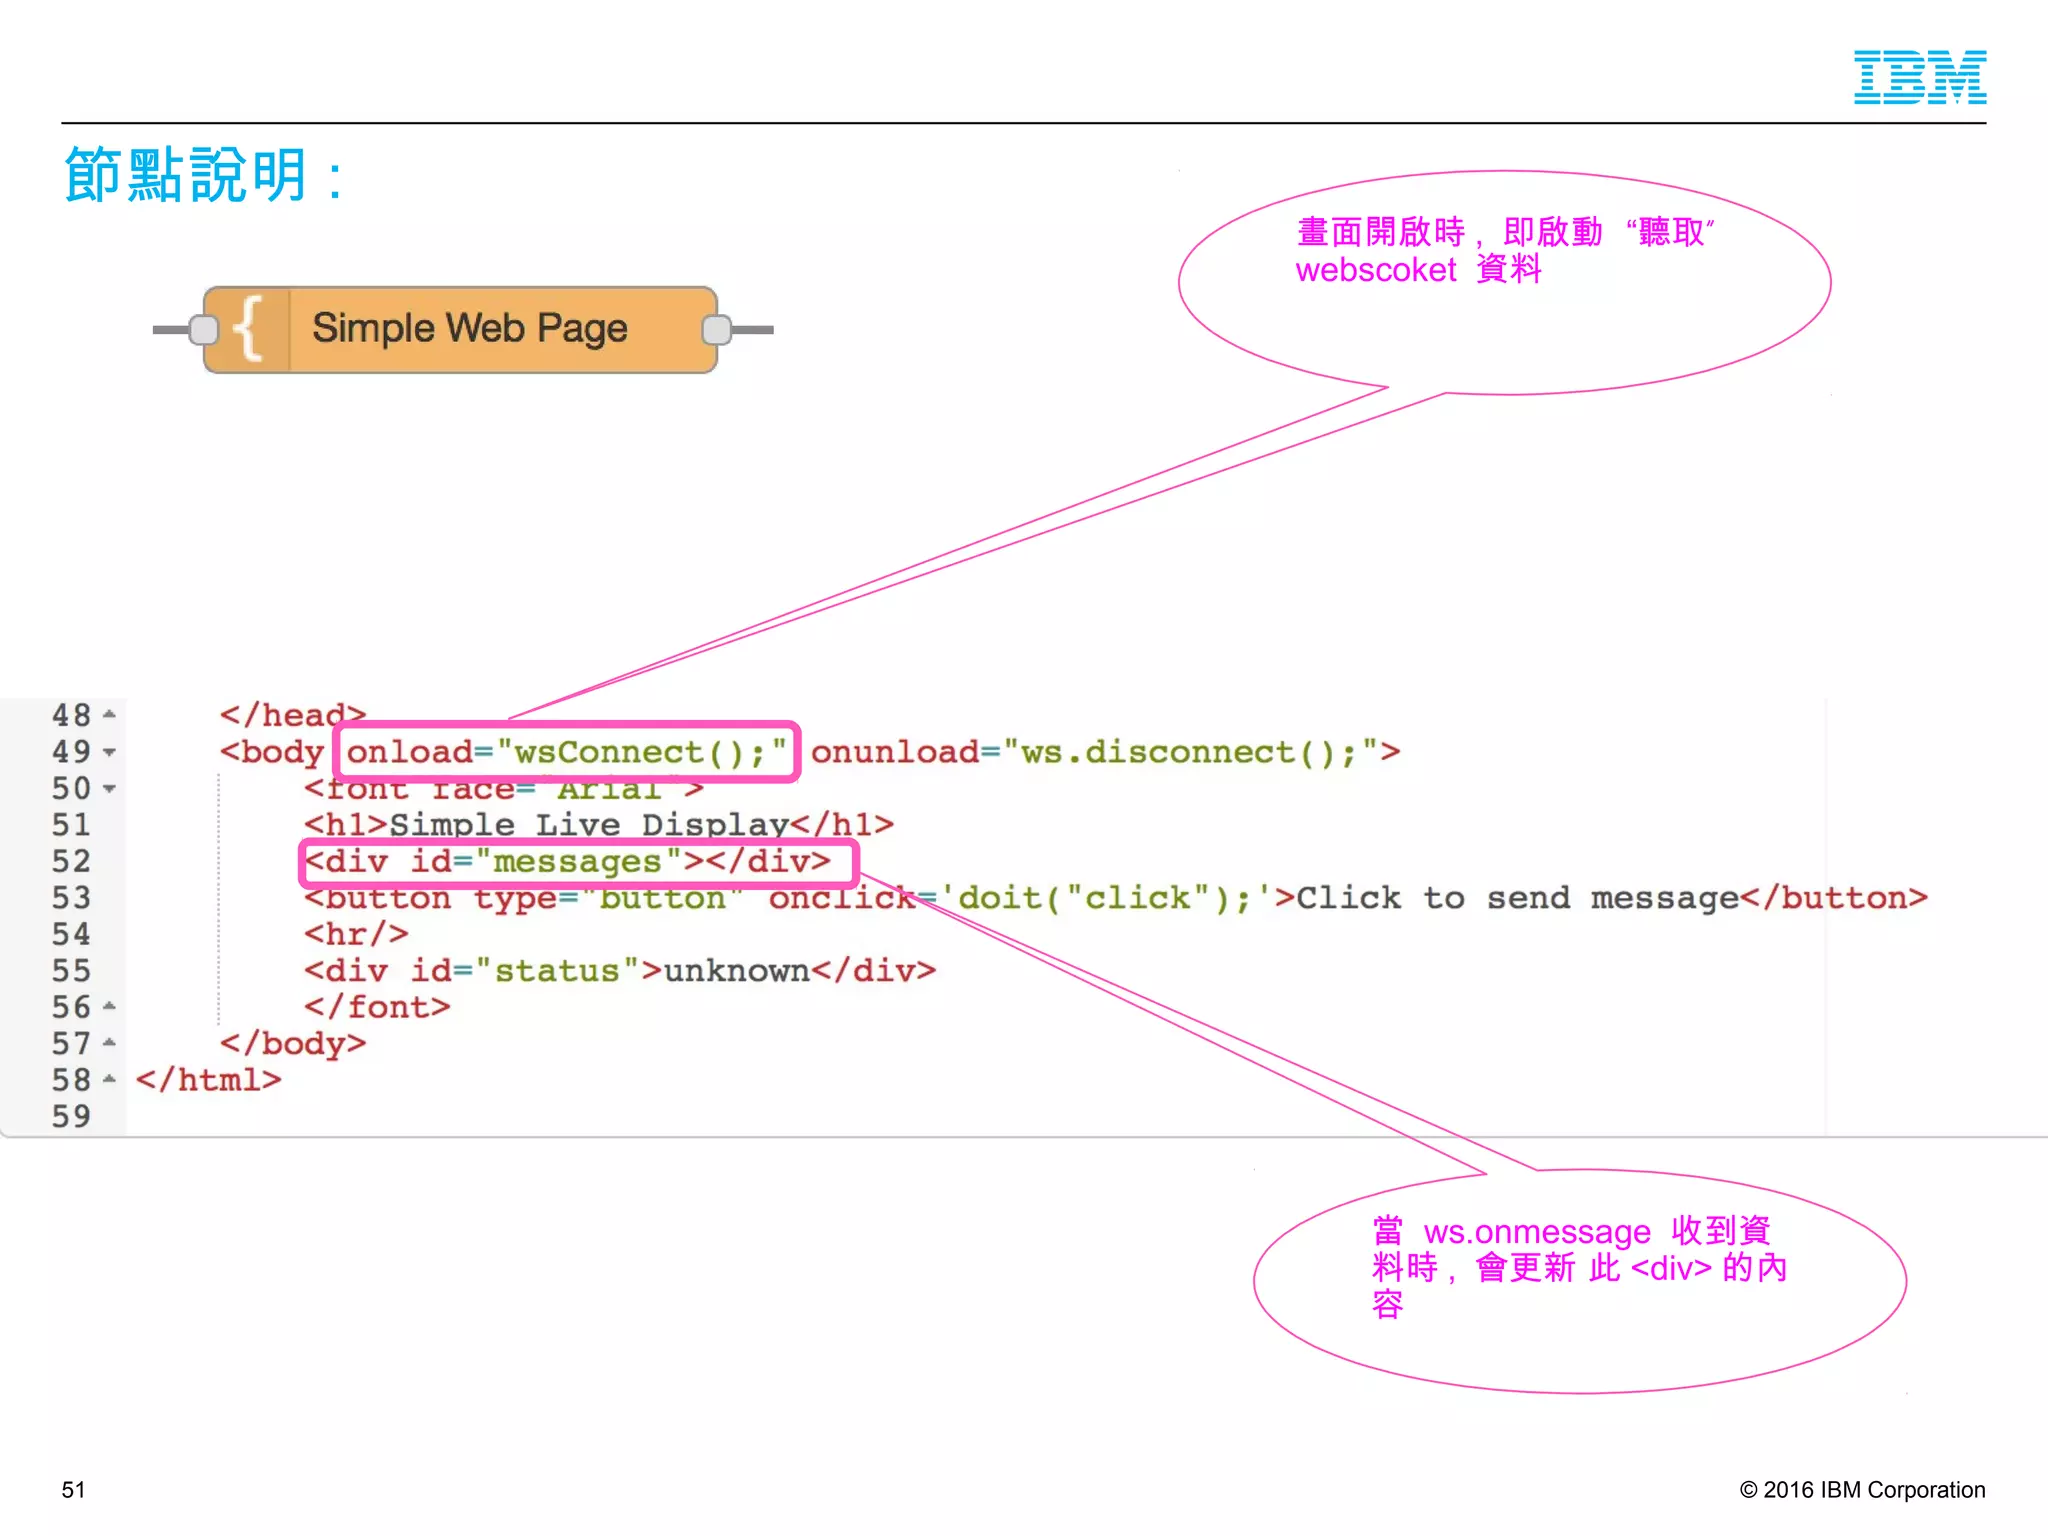
{ ws.send(m); }n }n </script>n </head>n <body onload="wsConnect();" onunload="ws.disconnect();">n <font face="Arial">n
<h1>Simple Live Display</h1>n <div id="messages"></div>n <button type="button" onclick='doit("click");'>Click to send
message</button>n <hr/>n <div id="status">unknown</div>n </font>n </body>n</html>n","x":462,"y":146,"wires":
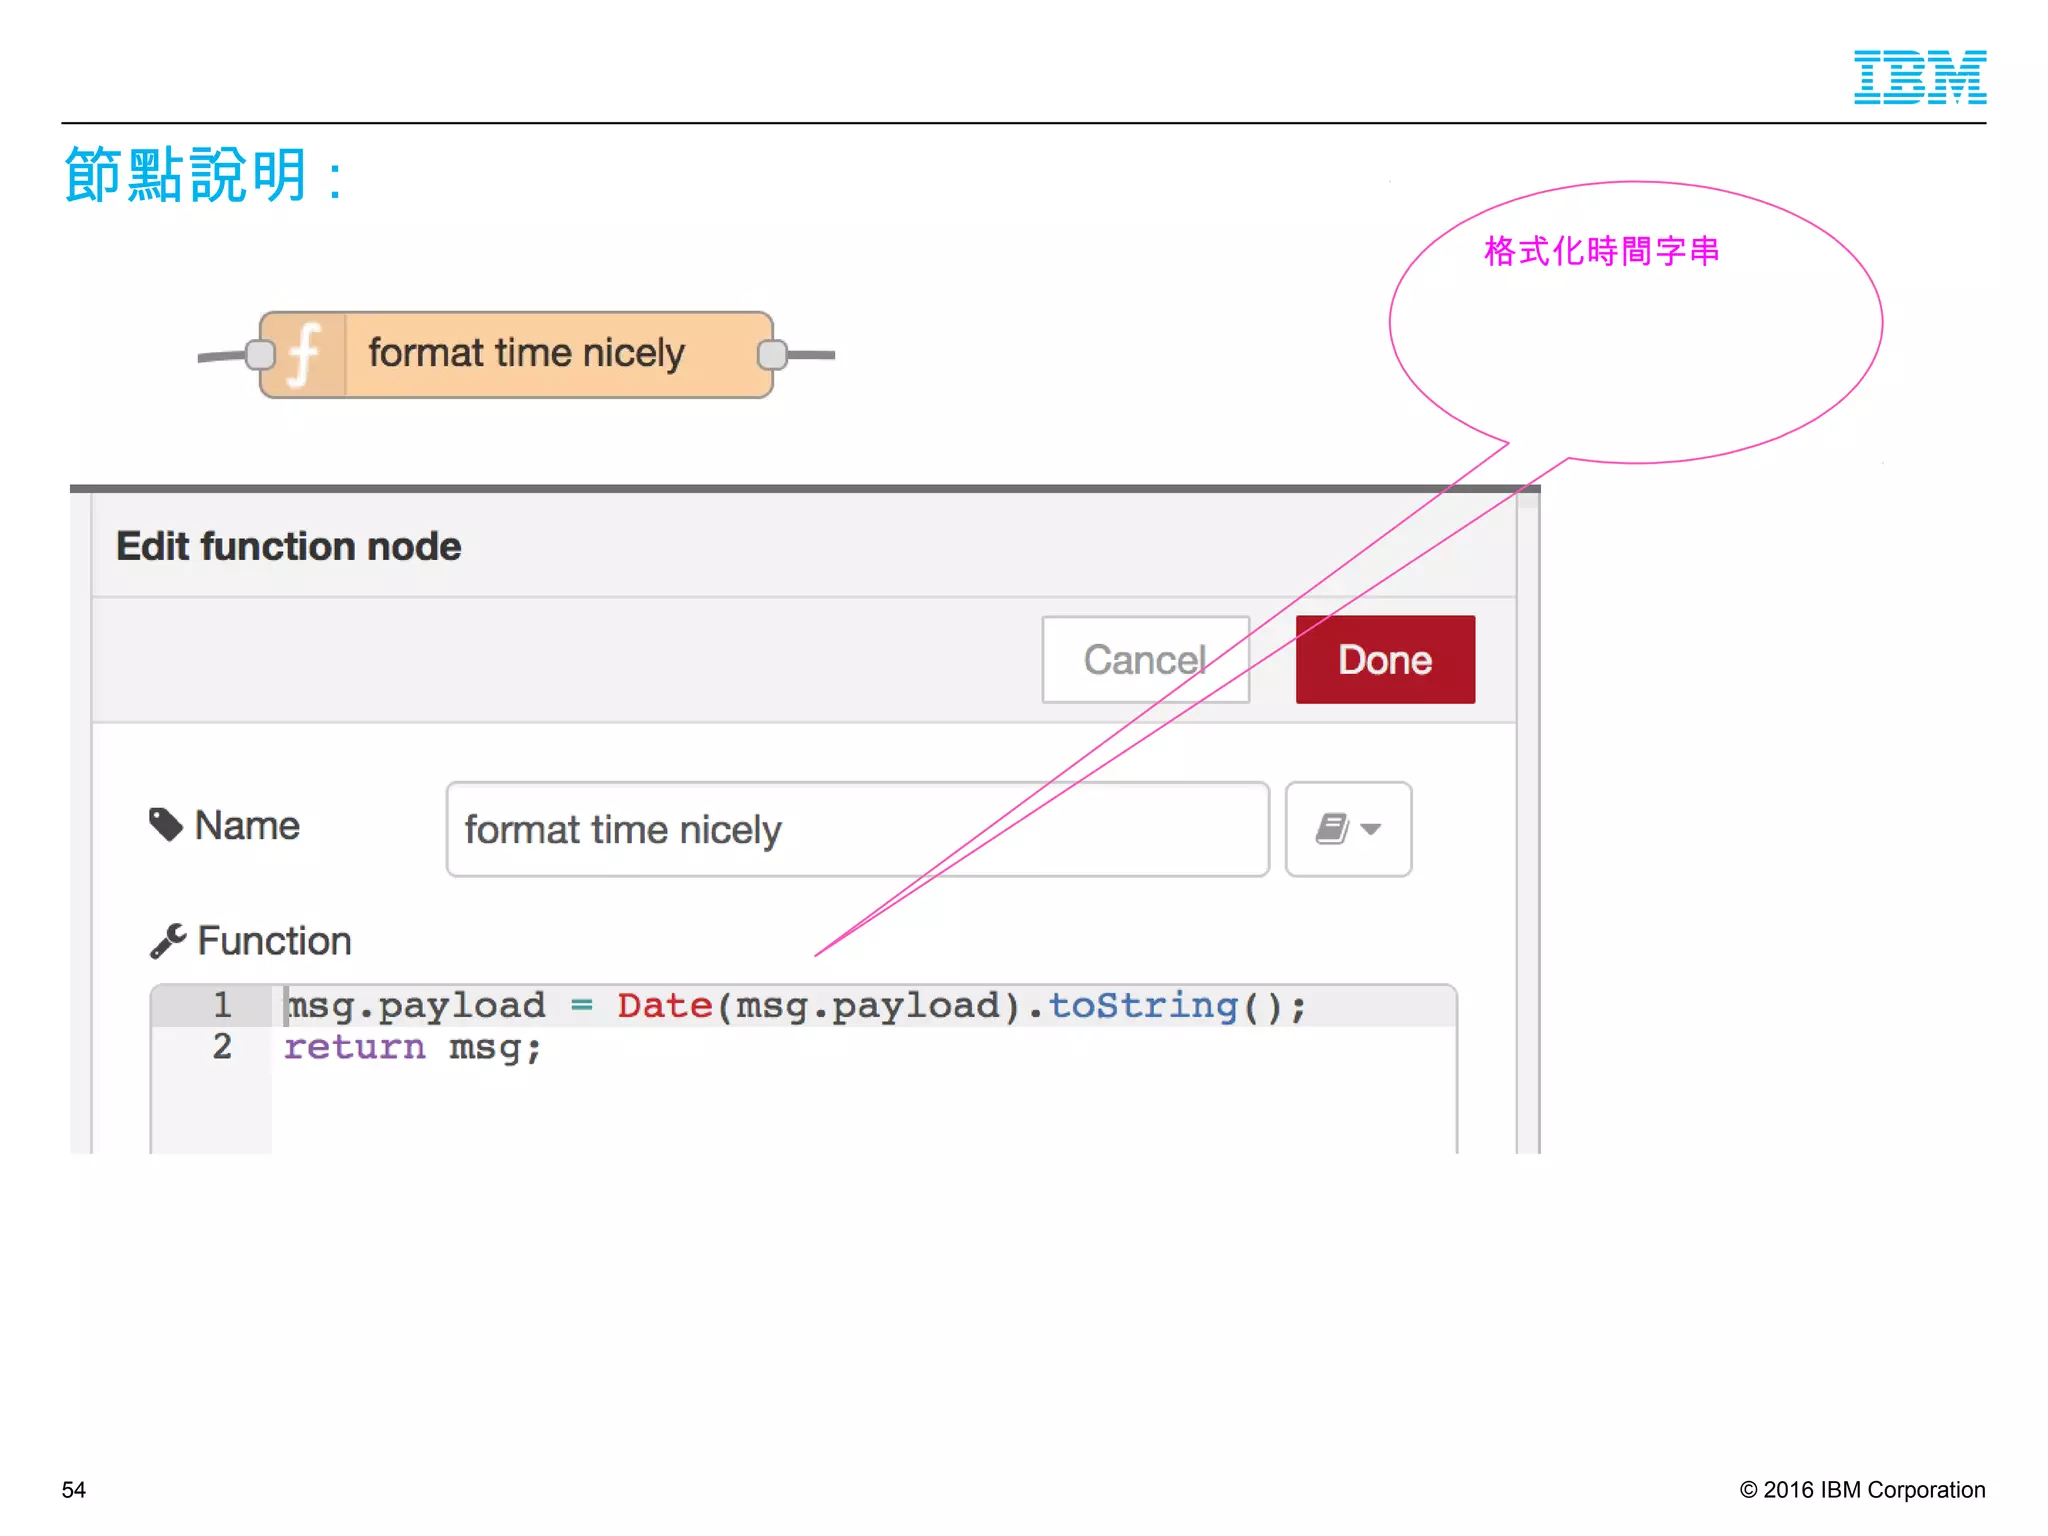
[["3754bfea.ee9c38"]]},{"id":"6e1c0c9b.d96554","type":"function","z":"55fcf298.0cc50c","name":"format time nicely","func":"msg.payload =
Date(msg.payload).toString();nreturn msg;","outputs":1,"noerr":0,"x":443,"y":247,"wires":[["9ee75a8e.3fc23"]]},{"id":"5dd67905.c96da","type":"websocket
in","z":"55fcf298.0cc50c","name":"","server":"10c785bd.09c96a","client":"","x":432,"y":369,"wires":[["a2da50ee.cab7e8"]]},
{"id":"a2da50ee.cab7e8","type":"debug","z":"55fcf298.0cc50c","name":"","active":true,"console":"false","complete":"false","x":648,"y":364,"wires":[]},
{"id":"10c785bd.09c96a","type":"websocket-listener","z":"55fcf298.0cc50c","path":"/ws/simple","wholemsg":"false"}]
47](https://image.slidesharecdn.com/bluemixnode-red-parti-160118082617/75/Bluemix-Node-Red-Part-I-47-2048.jpg)