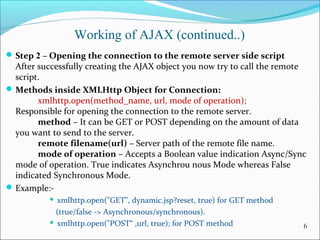
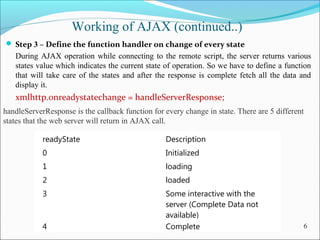
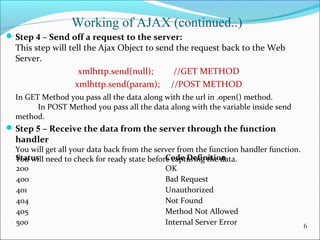
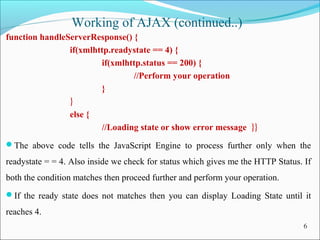
Downloaded 101 times
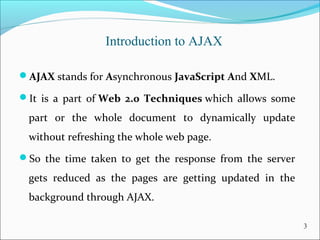


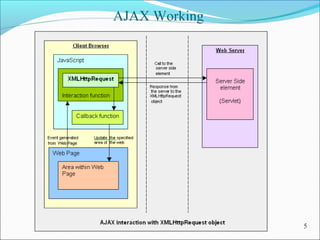


This document provides an overview of AJAX (Asynchronous JavaScript and XML). It begins with defining AJAX and its advantages over traditional web applications. It then discusses the AJAX acronym in more detail. Next, it compares the traditional web application model to the AJAX model. It explains how AJAX uses asynchronous requests to update parts of a web page without reloading the entire page. The document then covers the basic working of AJAX, including initializing the XMLHttpRequest object, opening a connection, defining handlers, sending requests, and receiving responses. It provides an example of asynchronous data transfer using AJAX with client-side and server-side code. Finally, it lists some references for further information on AJAX.