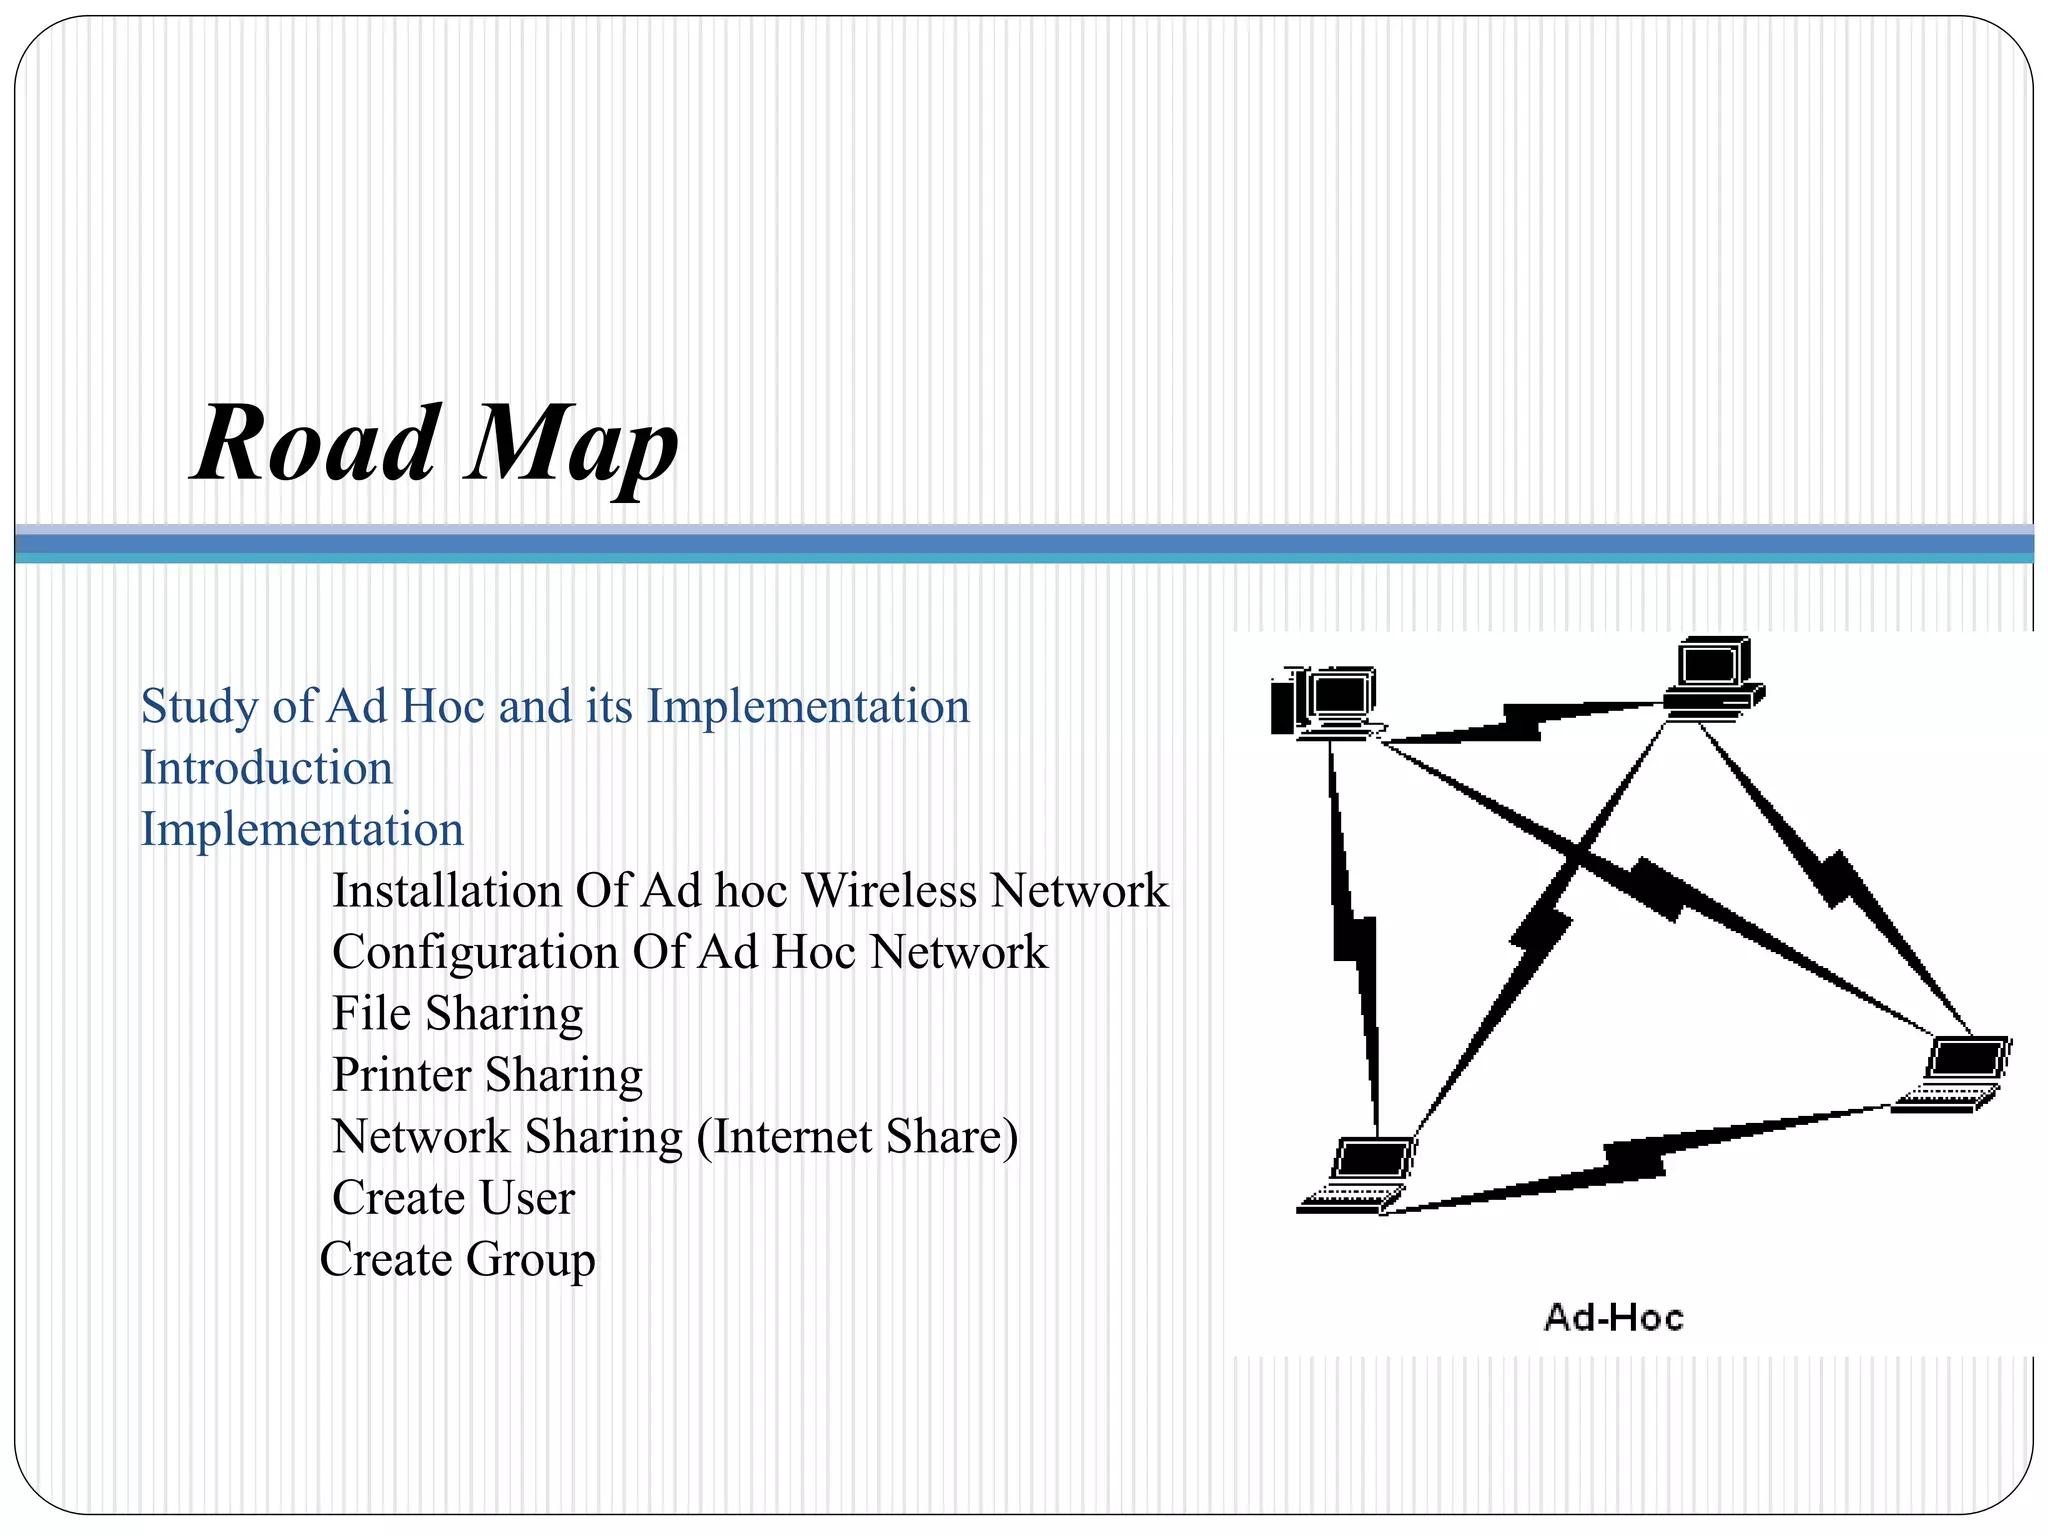
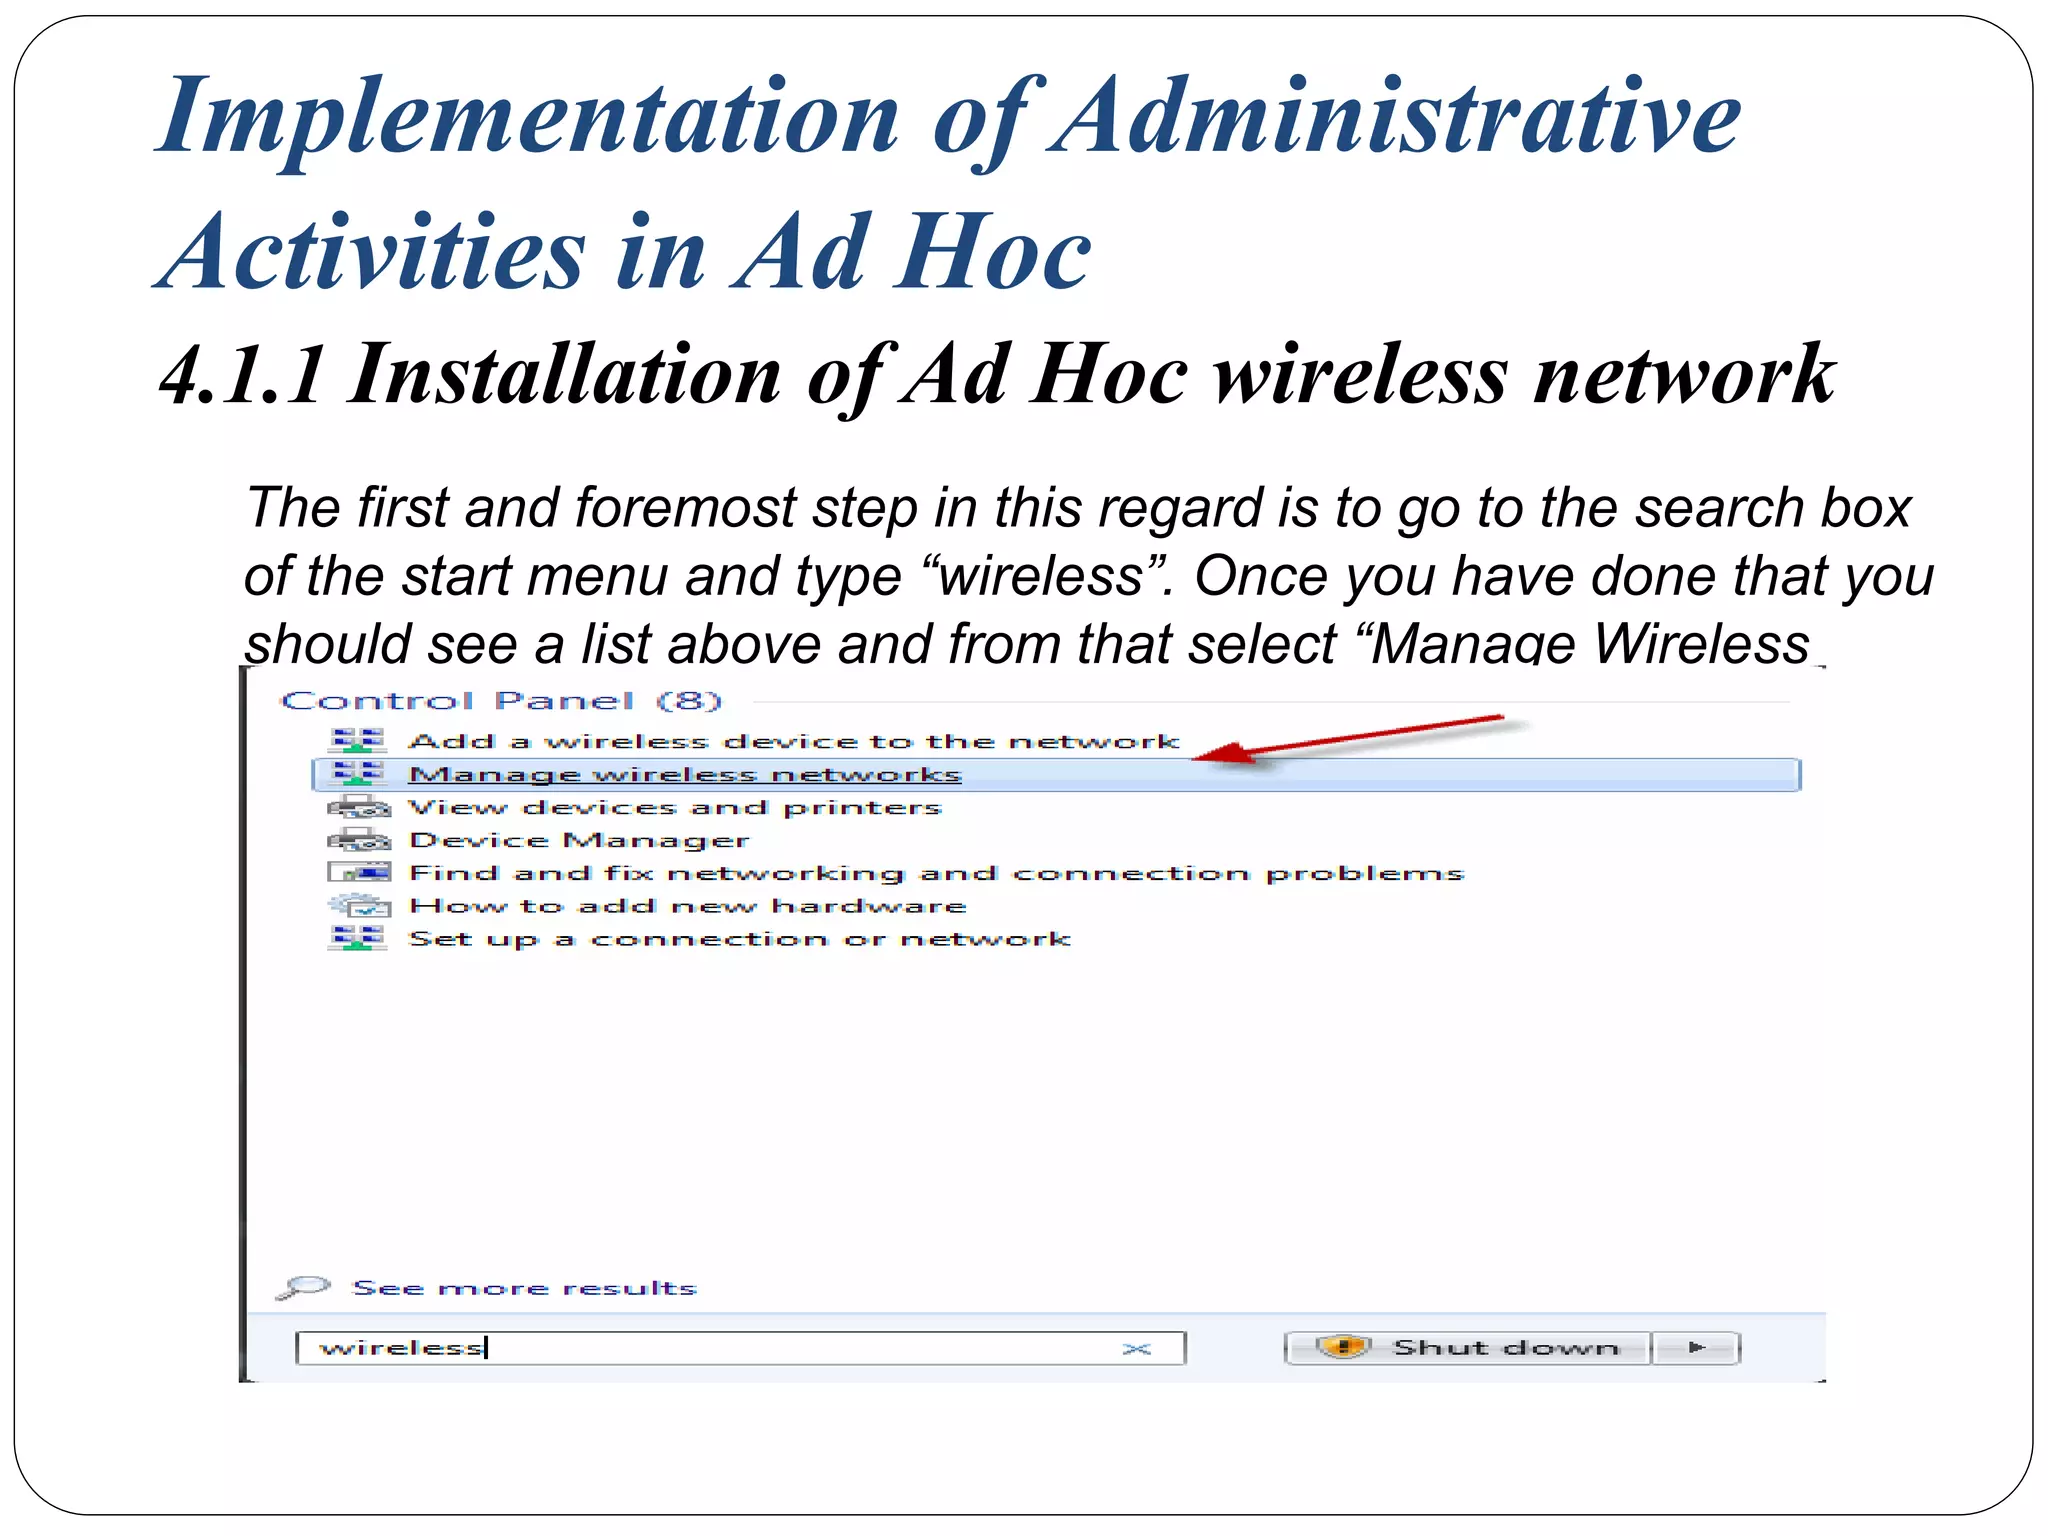
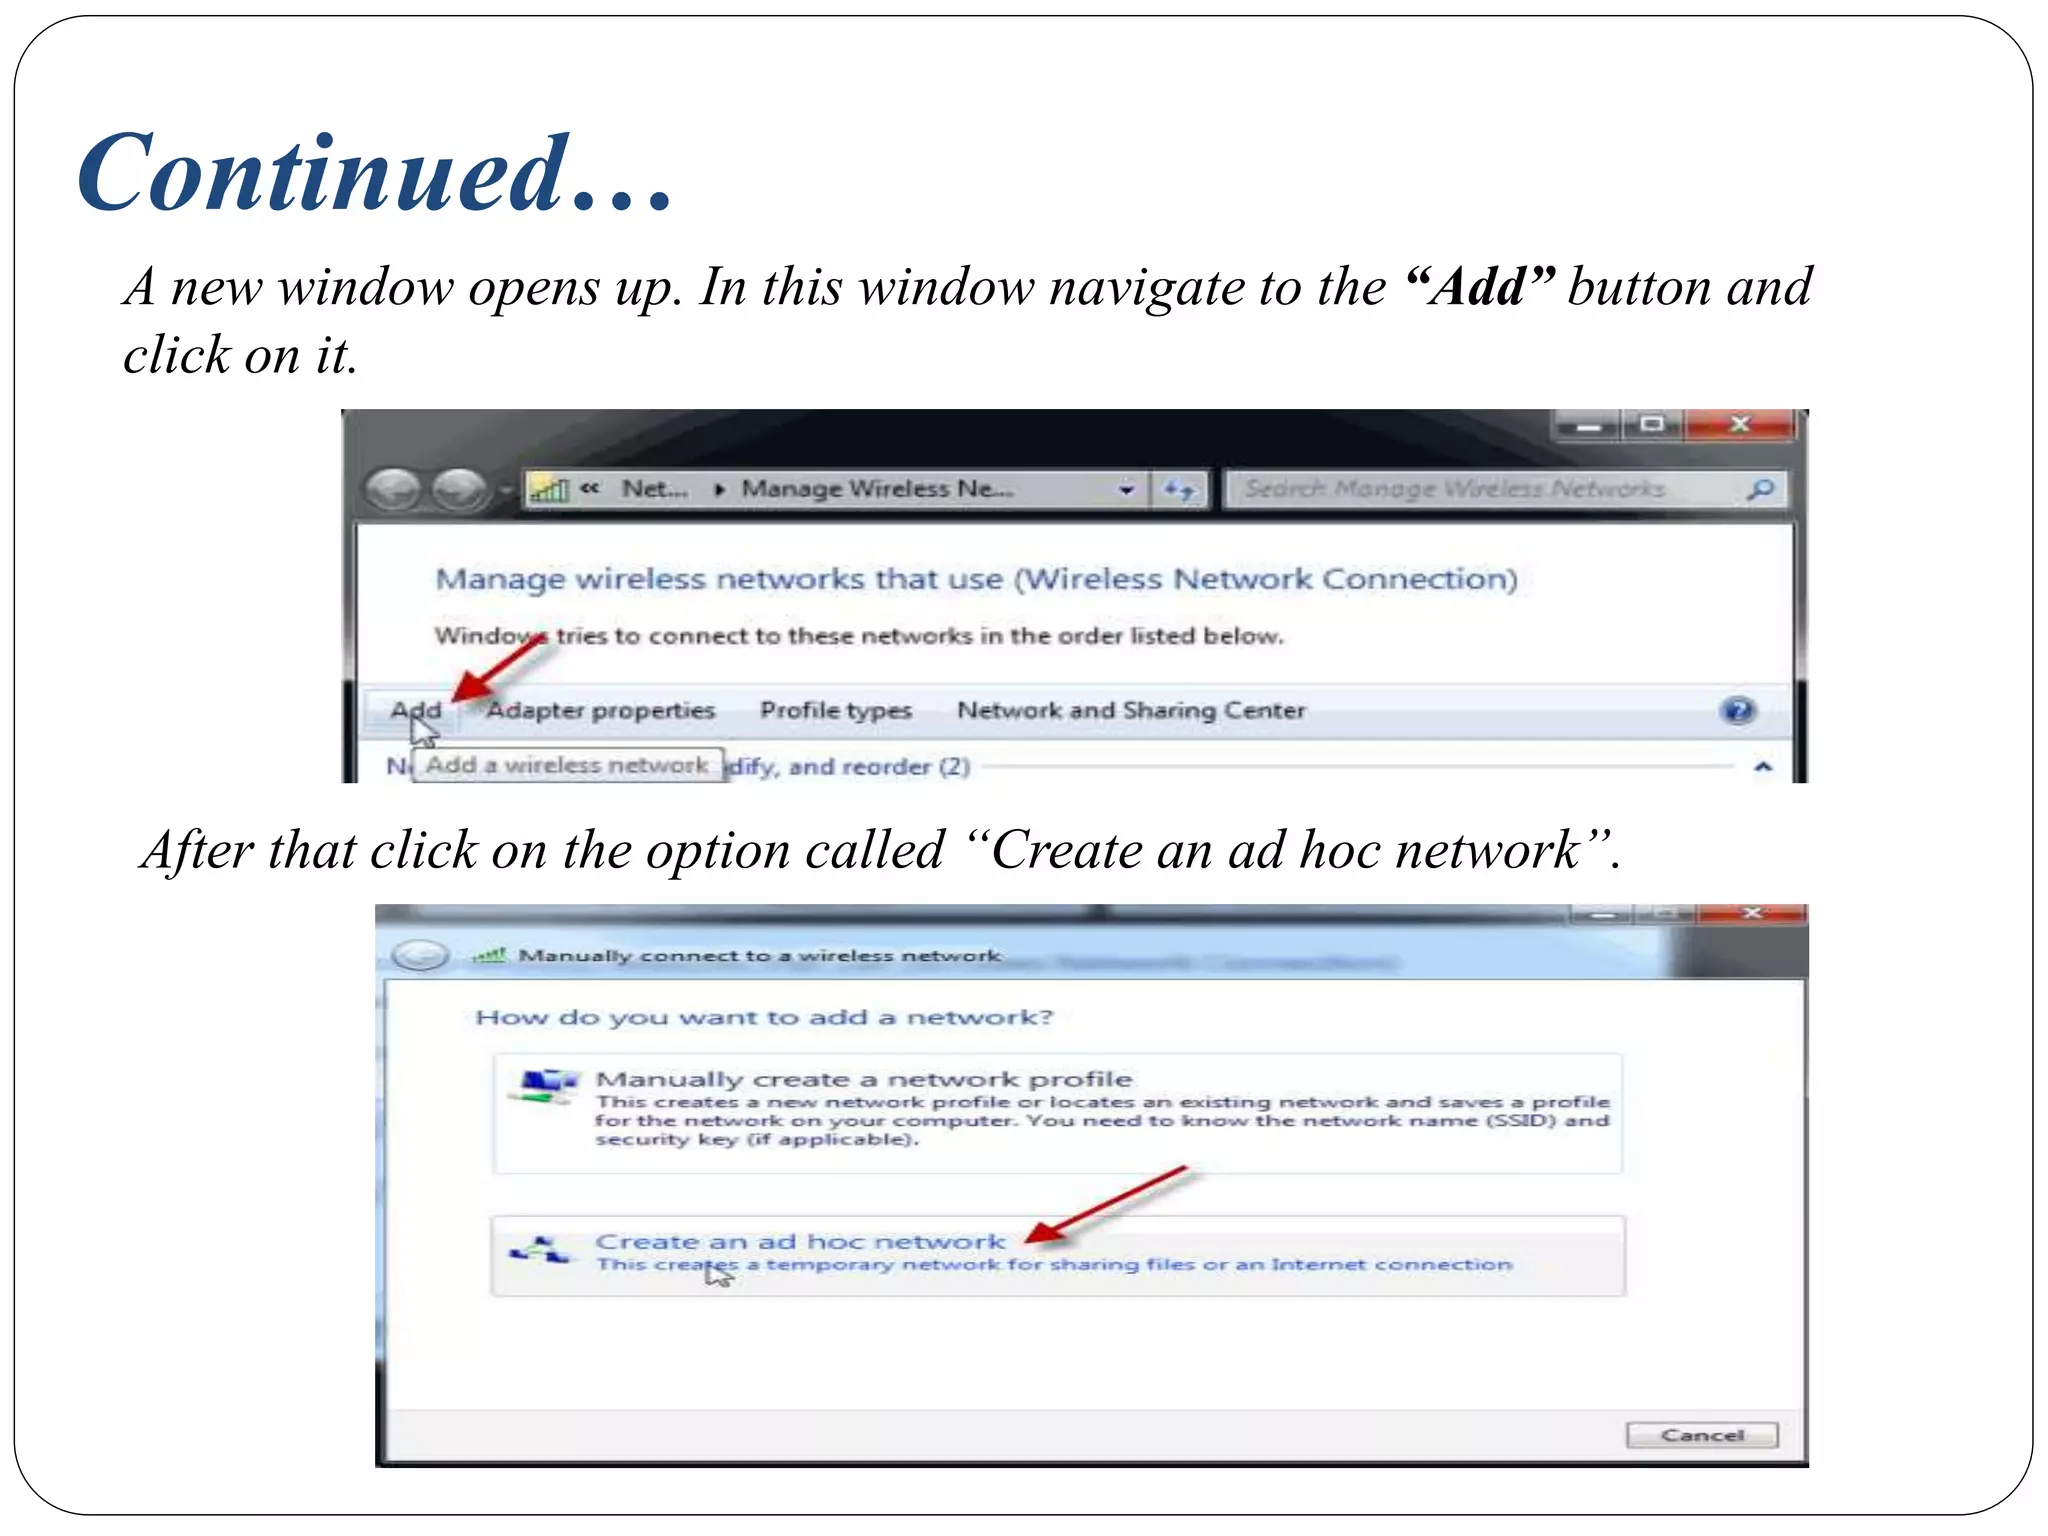
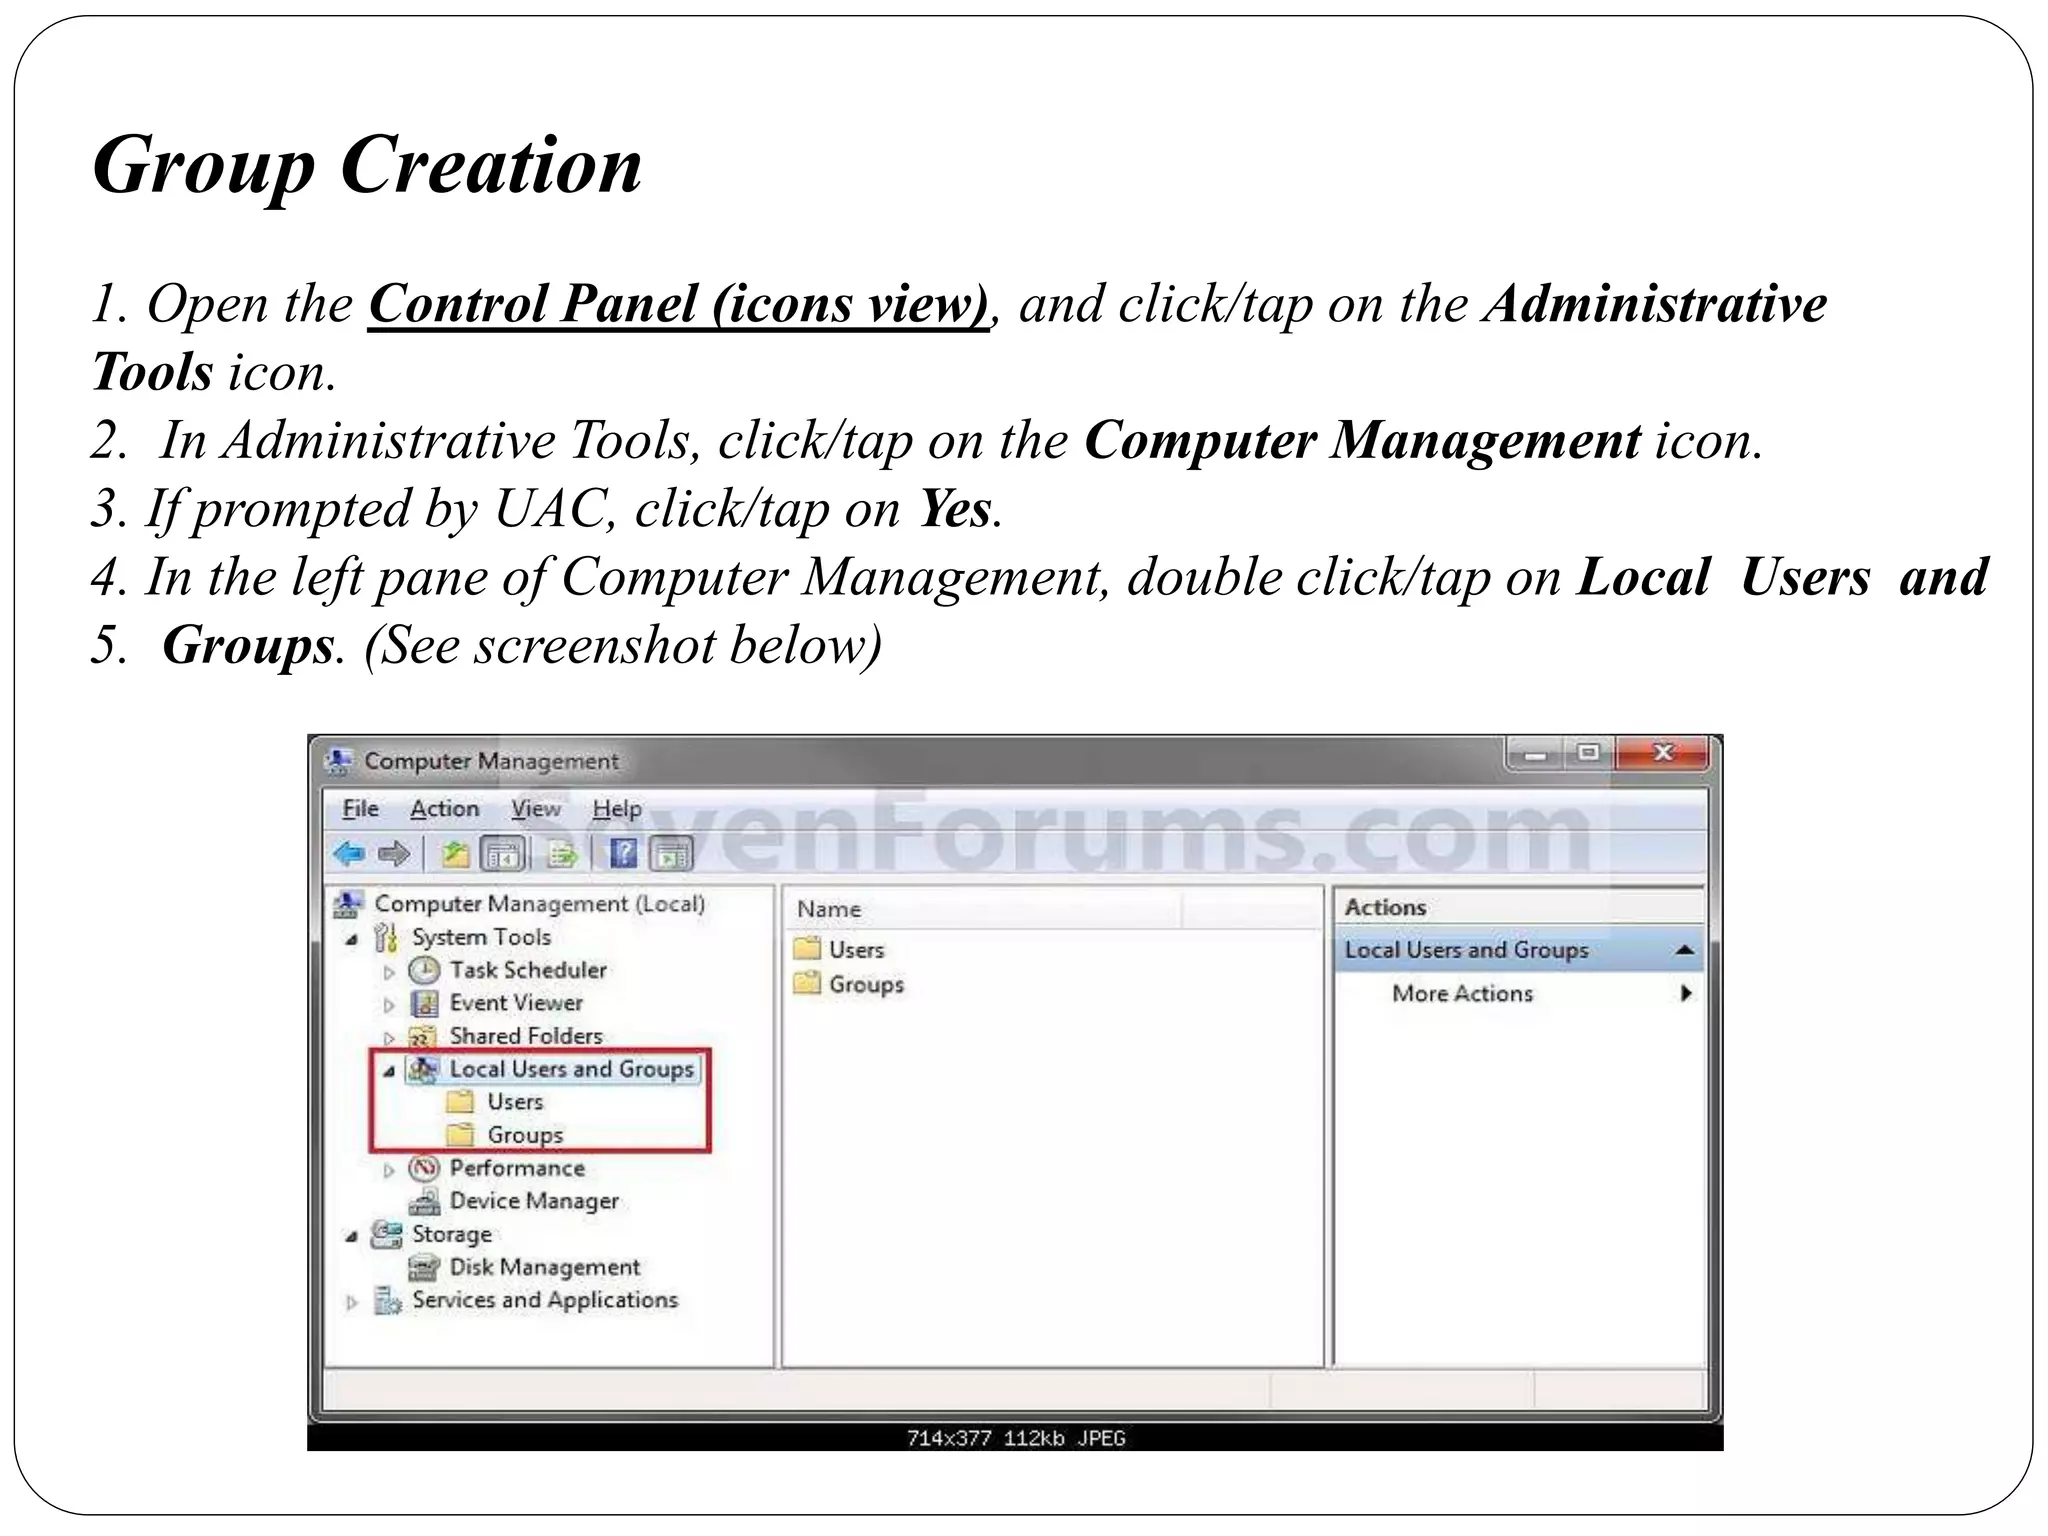
GROUP MEMBER’S:
Shiza Kokab 57248
Ahsan Ilyas 56802
Iqra Saleem 57268
Ad Hoc Wireless Network
Project Evaluation Presentation
A study of Ad Hoc Wireless Network & its
Implementation
Study of Ad Hoc and its Implementation
Introduction
Implementation
Installation Of Ad hoc Wireless Network
Configuration Of Ad Hoc Network
File Sharing
Printer Sharing
Network Sharing (Internet Share)
Create User
Create Group
Road Map
Study About Ad Hoc Network and Its
Implementation
 An ad hoc network is a network that is composed of individual devices
communicating with each other directly.
 Many ad hoc networks are local area networks
Introduction
In an ad hoc mode WLAN (wireless local-area network), wireless
devices can communicate directly with each other. If you have a Windows
7 computer (or a Windows Vista computer, which is very similar), you will
use a process similar to the following to create and activate your ad hoc
WLAN network.
Click Start and choose Control Panel.
Select View Network Status and Tasks.
From the Network and Sharing Center window, select Set up a New
Connection or Network.
From the Set up a Connection or Network dialog box, choose Set up a
Wireless Ad Hoc (Computer-to-Computer) Network and click next; click
next again.
Introduction(Continued)
In the Set Up an Ad Hoc Network dialog box, provide the following
information:
•Add a network name for your wireless network.
•Indicate the security type as either WEP or No Authentication.
•If you chose WEP, provide the security key for the network and optionally
select the Hide Characters box.
•Select Save This Network to keep this network for longer than one session.
Introduction(Continued)
Click Next to continue.
Click Close.
After the connection is set up, it initially becomes active and remains so
until you connect to another network. If you did not choose to save the
connection, it will be removed from your wireless configuration at that
time and you will need to repeat this process to reactivate an ad hoc
network connection.
Implementation of Administrative
Activities in Ad Hoc
4.1.1 Installation of Ad Hoc wireless network
The first and foremost step in this regard is to go to the search box
of the start menu and type “wireless”. Once you have done that you
should see a list above and from that select “Manage Wireless
Networks”.
Continued…
A new window opens up. In this window navigate to the “Add” button and
click on it.
After that click on the option called “Create an ad hoc network”.
Continued…
Once finished you should see a window appearing where you will find a
message telling you about Ad Hoc network. In this window click
on “Next”.
•The window that appears next requires you to give a network name, security type
and the security key. If you wish to use this Ad Hoc network over and over again
then check the “Save Network "option.
• In general cases it is found that if you’re only using it quickly with different types of
devices it’s easier to have no security. On the other hand if you are keeping it on for
full-time use, you’ll definitely want to use security.
Continued…
After completing with the above just wait a while for the network to be
created.
Continued…
You should receive a message that the network has been created
successfully and is ready t o use.
File Share
 Right Click on the file you want to share. This will bring up the "Share
with" menu. You can choose one of 4 options in this menu.
You can decide to share it with nobody and make the file private. You
can choose to share it with everyone on your network. You can give
them a "Read" only option or a "Read/Write" option, which gives them
the ability to modify it.
You can also choose "Specific people," which will open a file sharing
wizard so you can choose individuals to share the file with.
 Turn on public sharing folders by selecting the "Control Panel" from
the "Start" menu.
 Click "Change advanced sharing settings" in the left pane and
expand the section on your network.
Printer Sharing
To turn on file and printer sharing
 Open Advanced sharing settings by clicking the Start button , and then
clicking Control Panel. In the search box, type network, click Network and
Sharing Center, and then, in the left pane, click Change advanced sharing
settings.
 Click the chevron to expand the current network profile.
 If printer sharing is off, under File and printer sharing, select turn on file and
printer sharing, and then click save changes. If you're prompted for an
administrator password or confirmation, type the password or provide
confirmation.
 Now you need to share the printer itself.
Continued…
To share your printer
 Open Devices and Printers by clicking the Start button , and then, on
the Start menu, clicking Devices and Printers.
 Right-click the printer you want to share, and then click Printer
properties.
 Click the Sharing tab, and select the Share this printer check box.
 Other people on your network can now connect to this printer. All they
need to do is add a network printer (your printer) to their computers.
To add a network printer
 Open Devices and Printers by clicking the Start button , and then, on
the Start menu, clicking Devices and Printers.
 Click Add a printer.
 Click Add a network, wireless, or Bluetooth printer, click the shared
printer, click next, and follow the instructions on the screen.
Internet Sharing
Choose Start→Control Panel→Network and Internet. Click the Network and
Sharing Center link.
In the resulting Network and Sharing Center window, click the Manage
Wireless Network's link.
Click a connection and then click the Adapter Properties link.
Click the Sharing tab.
Select the Allow Other Network Users to Connect through This Computer’s
Internet Connection check box.
You might also be able to select the Allow Other Network Users to Control or
Disable the Shared Internet Connection check box (Optional). This setting lets
other people on your network control the shared Internet connection by enabling
or disabling it.
Continued…
Click OK and then close the Manage Wireless Networks window to save
the shared connection settings.
 Before they can start using your shared connection, users on your
network need to configure their TCP/IP settings so that they get an IP
connection automatically.
User Creation
 Click the Start button , then click Control Panel
 Under the User Accounts and Family Safety category, click on Add or
remove user accounts
 The Manage Accounts window will open, where all the created
accounts are displayed, click on Create a new account
 The Create New Account window will open, here you will need to type
a name for the new user account and select a type for it, either standard
or as an administrator.
There are three types of accounts. Each type gives users a different
level of control over the computer:
 Standard accounts are for everyday computing.
 Administrator accounts provide the most control over a computer, and
should only be used when necessary.
 Guest accounts are intended primarily for people who need temporary
use of a computer.
Continued…
 After typing the new user account name and selecting his
account type, click on the Create Account button
 The Manage Accounts window will be opened again, and as you
can see now the new user account is listed along with the other
user accounts.
 Now you can logoff from the current logged in user and log in
using the new user account created.
Group Creation
1. Open the Control Panel (icons view), and click/tap on the Administrative
Tools icon.
2. In Administrative Tools, click/tap on the Computer Management icon.
3. If prompted by UAC, click/tap on Yes.
4. In the left pane of Computer Management, double click/tap on Local Users and
5. Groups. (See screenshot below)
Conclusion
Ad-Hoc wireless network is a temporary wireless network which is
created by connecting different devices(computers , laptops , smart
phones…)with each other without using wire to share different services
like printer sharing, internet sharing, documents sharing etc. to the
connected devices which lie under the range of the network.
Ad hoc wireless network final

Ad hoc wireless network final

  • 1.
    GROUP MEMBER’S: Shiza Kokab57248 Ahsan Ilyas 56802 Iqra Saleem 57268 Ad Hoc Wireless Network Project Evaluation Presentation A study of Ad Hoc Wireless Network & its Implementation
  • 2.
    Study of AdHoc and its Implementation Introduction Implementation Installation Of Ad hoc Wireless Network Configuration Of Ad Hoc Network File Sharing Printer Sharing Network Sharing (Internet Share) Create User Create Group Road Map
  • 3.
    Study About AdHoc Network and Its Implementation  An ad hoc network is a network that is composed of individual devices communicating with each other directly.  Many ad hoc networks are local area networks
  • 4.
    Introduction In an adhoc mode WLAN (wireless local-area network), wireless devices can communicate directly with each other. If you have a Windows 7 computer (or a Windows Vista computer, which is very similar), you will use a process similar to the following to create and activate your ad hoc WLAN network. Click Start and choose Control Panel. Select View Network Status and Tasks. From the Network and Sharing Center window, select Set up a New Connection or Network. From the Set up a Connection or Network dialog box, choose Set up a Wireless Ad Hoc (Computer-to-Computer) Network and click next; click next again.
  • 5.
    Introduction(Continued) In the SetUp an Ad Hoc Network dialog box, provide the following information: •Add a network name for your wireless network. •Indicate the security type as either WEP or No Authentication. •If you chose WEP, provide the security key for the network and optionally select the Hide Characters box. •Select Save This Network to keep this network for longer than one session.
  • 6.
    Introduction(Continued) Click Next tocontinue. Click Close. After the connection is set up, it initially becomes active and remains so until you connect to another network. If you did not choose to save the connection, it will be removed from your wireless configuration at that time and you will need to repeat this process to reactivate an ad hoc network connection.
  • 7.
    Implementation of Administrative Activitiesin Ad Hoc 4.1.1 Installation of Ad Hoc wireless network The first and foremost step in this regard is to go to the search box of the start menu and type “wireless”. Once you have done that you should see a list above and from that select “Manage Wireless Networks”.
  • 8.
    Continued… A new windowopens up. In this window navigate to the “Add” button and click on it. After that click on the option called “Create an ad hoc network”.
  • 9.
    Continued… Once finished youshould see a window appearing where you will find a message telling you about Ad Hoc network. In this window click on “Next”. •The window that appears next requires you to give a network name, security type and the security key. If you wish to use this Ad Hoc network over and over again then check the “Save Network "option. • In general cases it is found that if you’re only using it quickly with different types of devices it’s easier to have no security. On the other hand if you are keeping it on for full-time use, you’ll definitely want to use security.
  • 10.
    Continued… After completing withthe above just wait a while for the network to be created.
  • 11.
    Continued… You should receivea message that the network has been created successfully and is ready t o use.
  • 12.
    File Share  RightClick on the file you want to share. This will bring up the "Share with" menu. You can choose one of 4 options in this menu. You can decide to share it with nobody and make the file private. You can choose to share it with everyone on your network. You can give them a "Read" only option or a "Read/Write" option, which gives them the ability to modify it. You can also choose "Specific people," which will open a file sharing wizard so you can choose individuals to share the file with.  Turn on public sharing folders by selecting the "Control Panel" from the "Start" menu.  Click "Change advanced sharing settings" in the left pane and expand the section on your network.
  • 13.
    Printer Sharing To turnon file and printer sharing  Open Advanced sharing settings by clicking the Start button , and then clicking Control Panel. In the search box, type network, click Network and Sharing Center, and then, in the left pane, click Change advanced sharing settings.  Click the chevron to expand the current network profile.  If printer sharing is off, under File and printer sharing, select turn on file and printer sharing, and then click save changes. If you're prompted for an administrator password or confirmation, type the password or provide confirmation.  Now you need to share the printer itself.
  • 14.
    Continued… To share yourprinter  Open Devices and Printers by clicking the Start button , and then, on the Start menu, clicking Devices and Printers.  Right-click the printer you want to share, and then click Printer properties.  Click the Sharing tab, and select the Share this printer check box.  Other people on your network can now connect to this printer. All they need to do is add a network printer (your printer) to their computers. To add a network printer  Open Devices and Printers by clicking the Start button , and then, on the Start menu, clicking Devices and Printers.  Click Add a printer.  Click Add a network, wireless, or Bluetooth printer, click the shared printer, click next, and follow the instructions on the screen.
  • 15.
    Internet Sharing Choose Start→ControlPanel→Network and Internet. Click the Network and Sharing Center link. In the resulting Network and Sharing Center window, click the Manage Wireless Network's link. Click a connection and then click the Adapter Properties link. Click the Sharing tab. Select the Allow Other Network Users to Connect through This Computer’s Internet Connection check box. You might also be able to select the Allow Other Network Users to Control or Disable the Shared Internet Connection check box (Optional). This setting lets other people on your network control the shared Internet connection by enabling or disabling it.
  • 16.
    Continued… Click OK andthen close the Manage Wireless Networks window to save the shared connection settings.  Before they can start using your shared connection, users on your network need to configure their TCP/IP settings so that they get an IP connection automatically.
  • 17.
    User Creation  Clickthe Start button , then click Control Panel  Under the User Accounts and Family Safety category, click on Add or remove user accounts  The Manage Accounts window will open, where all the created accounts are displayed, click on Create a new account  The Create New Account window will open, here you will need to type a name for the new user account and select a type for it, either standard or as an administrator. There are three types of accounts. Each type gives users a different level of control over the computer:  Standard accounts are for everyday computing.  Administrator accounts provide the most control over a computer, and should only be used when necessary.  Guest accounts are intended primarily for people who need temporary use of a computer.
  • 18.
    Continued…  After typingthe new user account name and selecting his account type, click on the Create Account button  The Manage Accounts window will be opened again, and as you can see now the new user account is listed along with the other user accounts.  Now you can logoff from the current logged in user and log in using the new user account created.
  • 19.
    Group Creation 1. Openthe Control Panel (icons view), and click/tap on the Administrative Tools icon. 2. In Administrative Tools, click/tap on the Computer Management icon. 3. If prompted by UAC, click/tap on Yes. 4. In the left pane of Computer Management, double click/tap on Local Users and 5. Groups. (See screenshot below)
  • 20.
    Conclusion Ad-Hoc wireless networkis a temporary wireless network which is created by connecting different devices(computers , laptops , smart phones…)with each other without using wire to share different services like printer sharing, internet sharing, documents sharing etc. to the connected devices which lie under the range of the network.