


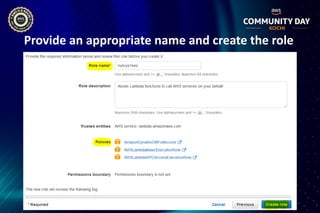
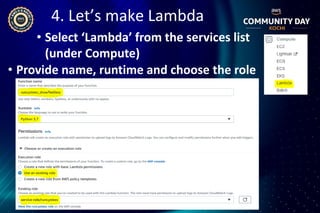


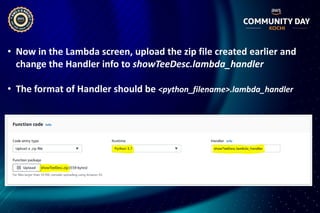
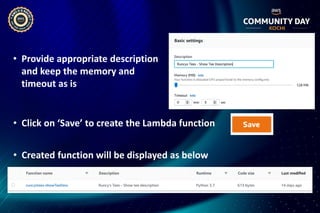


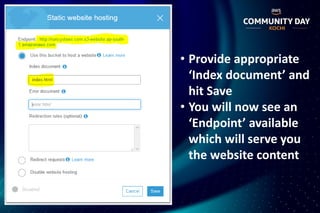
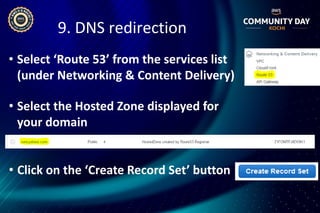
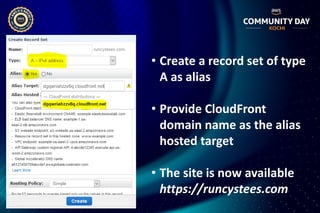
![• Select “Deploy API” from ‘Actions’
Choose [New Stage] and provide
appropriate values](https://image.slidesharecdn.com/dontplaylaptop-191019104422/85/ACDKOCHI19-Building-a-serverless-full-stack-AWS-native-website-33-320.jpg)


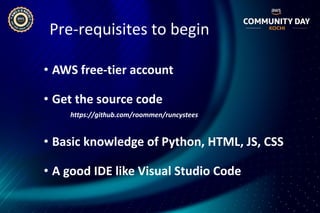
The document outlines the steps to build an AWS native serverless website, including domain registration, database setup, IAM role creation, Lambda function development, API Gateway integration, S3 hosting, certificate generation, and CloudFront distribution. It provides a detailed agenda, prerequisites, and instructions, emphasizing the serverless computing model. The final output is a live website available at the specified URL.


