Here are the key steps I took in Adobe Premier Pro to edit my footage:
1. I imported all of my raw footage into Adobe Premier Pro using the "Import" function.
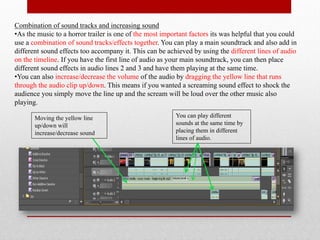
2. I used the "Razor Tool" to cut my footage into individual clips at the points I wanted.
3. I arranged the clips on the timeline in the order I wanted them to play using drag and drop.
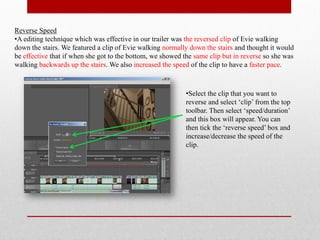
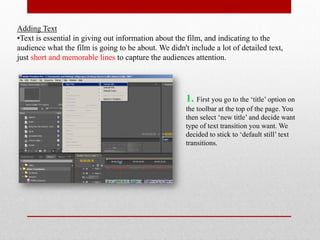
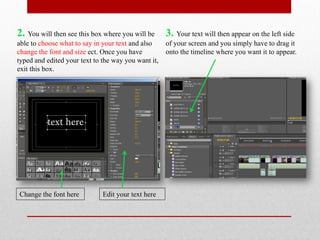
4. I applied transitions such as "fade" between clips using options in the "Effects" panel.
5. I added audio tracks including music and sound effects, adjusting the volume as needed.
6. I colour corrected clips and added other visual effects like brightness/contrast adjustments