
Recommended
Recommended
More Related Content
What's hot
Viewers also liked
Viewers also liked (20)
Similar to Q6 Evaluation
Similar to Q6 Evaluation (20)
Q6 Evaluation
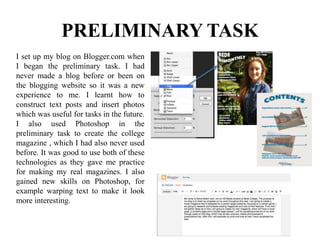
- 1. I set up my blog on Blogger.com when I began the preliminary task. I had never made a blog before or been on the blogging website so it was a new experience to me. I learnt how to construct text posts and insert photos which was useful for tasks in the future. I also used Photoshop in the preliminary task to create the college magazine , which I had also never used before. It was good to use both of these technologies as they gave me practice for making my real magazines. I also gained new skills on Photoshop, for example warping text to make it look more interesting. PRELIMINARY TASK
- 2. RESEARCH For my research I used search engines such as Google. I have used this many times before so it was easy to use and I could the sources I was looking for easily. I found examples of front covers, contents pages and double page spreads from existing magazines such as Q and NME on Google Images. From this research I made an analysis of each using Microsoft PowerPoint. This is another software I have experience with so it was easy for me to annotate m findings. I used Slideshare to upload my analysis to the internet to put on to my blog. I had never used this website before but I found it was quite simple to embed my slideshows and transfer the HTML to my blog.
- 3. PLANNING The planning stage of my magazine was quite simple because my model was my sister. I used my phone to text her to arrange the time to take the photographs. We also discussed the mise en scene of the pictures – i.e. the costume, make-up props and location etc. As well as this, I began to create a flat plan for my magazine layout. I used Microsoft PowerPoint to construct a plan for the front cover, contents page and double page spread. As this was a software I was familiar with it was easy to make, however I used tools such as copy and paste to speed up the process.
- 4. PRODUCTION All of my images were taken with a Canon camera. Using a professional camera was a new experience for me because I had to practice using it and learn how to take the images properly. This is shown by the first set of images I produced for my magazine. They are more blurry and the lighting is bad which is why I decided not to use them. I also decided to change parts of the mise en scene when taking the second set of photographs. My model wore the same costume (white shirt, black jeans) and make-up (red lipstick, natural wavy hair), however I changed the setting so that she was stood against a white background. This made the pictures brighter and more clear, as well as looking more professional. This task was useful because I learned how to take the images properly and the how different lighting etc. affects the outcome of the image. I also brought in previous knowledge I had gathered in my research when looking at different camera shots. First Final First Final
- 5. POST-PRODUCTION After I had taken my images I used Photoshop to edit them. I learned many useful skills from this, such how to remove shadows using the brush blending mode. This created a brighter, clearer background as well as making the photo appear more professional. It also helped to remove shadows on her face and clothes etc. During this stage I also used dafont.com to find different fonts for my magazine. I had to search specifically to find the fonts that would suit the style of my magazine so this involved trial and error. It helped me to gain knowledge in that I would know where to get more advanced fonts in future. When constructing my magazine I used the skills I gained from the preliminary task to make my final product look more professional.
- 6. EVALUATION I used a range of different technologies to construct my evaluation. I used Microsoft PowerPoint and Slideshare, both of which I am familiar with due to various blog posts I have made for previous tasks. I also used Prezi as an alternative way of presenting and evaluating my work. From this I have gained skills as Prezi was not something I had ever used before, so each post gave me practice as to how to work and slideshows look better. Another technology I used for evaluation was a Pixton comic. I had never used Pixton before so it was difficult at first to work out how to use it. However after I had gotten used to it became relatively easy to use and will be useful in future if I need to make a comic – it offers many different scenarios and characters etc. to fit in with the style of work you are doing. PIXTON PREZI