Schiedel Isokern Garden Fireplace Installation Guide

Brochure from Schiedel. This forms part of our flue and chimney range and can be used with acknowledgement to Schiedel Chimney Systems Ltd. as well as a link to the original source at www.schiedel.com/uk Schiedel's chimney flue range includes flue systems for residential and commercial applications. A typical flue installation includes steel chimney pipe or mineral pipe or module components from the heat source appliance (a stove, biomass or gas appliance for example) to it's termination point above the roof. Support is required for internal and external chimney systems. Schiedel specialise in wood burning appliances and flues, which are a renewable way of avoiding constant gas or electricity usage when looking at a secondary heat source. Even heat pumps are problematic with severe temperature drops, so a secondary source is always needed.

Recommended
Recommended
More Related Content
Similar to Schiedel Isokern Garden Fireplace Installation Guide
Similar to Schiedel Isokern Garden Fireplace Installation Guide (20)
More from Schiedel UK
More from Schiedel UK (20)
Recently uploaded
Recently uploaded (20)
Schiedel Isokern Garden Fireplace Installation Guide
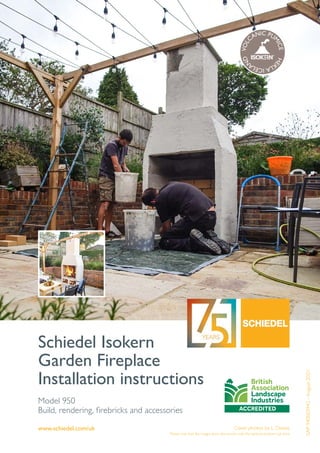
- 1. www.schiedel.com/uk Schiedel Isokern Garden Fireplace Installation instructions Cover photos by L. Davies Please note that the images show the version with the optional bottom log store V O L CANIC PU M I C E H E K L A I C E L A N D Model 950 Build, rendering, firebricks and accessories SAP 940003942 - August 2021
- 2. 2 |The latest version of this brochure is available online at www.schiedel.com/uk ± 3 mm dm² l. 6 Pumice Area: Mass: Subject: Material: Scale: Tol.: Date: Rev.: Measure in mm Drawn By: T Oliver Drawing No: www.schiedel.co.uk TEL (01202) 861650 FAX (01202) 861632 25/5/20 G1200ID ± 3 mm dm² l. 6 Pumice Area: Mass: Subject: Material: Scale: Tol.: Date: Rev.: Measure in mm Drawn By: T Oliver Drawing No: www.schiedel.co.uk TEL (01202) 861650 FAX (01202) 861632 25/5/20 Garden fire Exploded G1200ID Garden Fireplace 950 Top plate x 1 Gather front, back and sides x 4 Sides and back x 3 Sides and back x 3 Sides and back x 3 Base plate x 1 Chimney blocks x 3 Capping x 1 Area: Subject: Scale: Date: Measure in mm Drawing No: Garden fire Exploded 2 sides, 1 back and 1 central block Base plate x 1 The Garden Fire 950 comes complete with the following components: 1 bag of lip glue adhesive (for pumice components) 2 bags of render 1 log retainer kit (2 metal bars + 2 fixing brackets) 1 bag of Calderys fire brick mortar 1 set of pre-cut firebricks (see diagram below) Back View Side Base View R L M S N L R L M S N L R L M O P Q C A A C B A B C A A C B A B C A A C E D E F A A F G A A A G H A A H A A A K J J K 8 8 Back View Side Base View R L M S N L R L M S N L R L M O P Q C A A C B A B C A A C B A B C A A C E D E I I A A A A A D 8mm gap between bricks Bedded on 1-3mm Thick Firebrick Mortar F A A F G A A A G H A A H I A A A I K J J K A A A A J 8mm gap between bricks Bedded on 1-3mm Thick Firebrick Mortar View 950 Side (x 2) Base (x 1) Back (x 1) Fire brick diagram and parts for the 950 model (see page 8 for more details) Log retainer kit (see page 10 for more details) Preparation The Garden Fire needs to be built onto a firm foundation. It should not be built directly onto decking. Schiedel recommends that a minimum 100mm reinforced concrete base is used to support the structure. A distance of 75mm should be left between the Garden Fire and any wooden or other combustible material. Log store component parts (supplied only if this option has been purchased)
- 3. The latest version of this brochure is available online at www.schiedel.com/uk | 3 Create a suitable base. We recommend 100mm thick reinforced concrete. Bed the base plate using the supplied adhesive or mortar mix. Check every stage is level. Instructions - Optional log store Press one side block into place and apply lip glue into the slot as shown. Press back panel into place and then add the remaining side panel. Press the middle section down on to the adhesive and apply additional adhesive as shown. Press the base plate of the firechest down on to the log store. Keep checking all is level and remove any excess lip glue. Mix lip glue jointing adhesive as per instructions on the bag. Apply 15-20mm beads using the supplied application bag as shown in the picture above. (If this has not been purchased, go to page 4)
- 4. 4 |The latest version of this brochure is available online at www.schiedel.com/uk Bed the base plate using the supplied lip glue onto the log store or a suitable 100mm thick reinforced concrete base. Check every stage is level. Press back panel into place and the other side block. Add a further 2 layers of side blocks and back panels applying lip glue adhesive between each layer and at each joint. In total there are 3 layers on top of the base plate, as per the image. (If the log store option is not being used, then this base plate will be bedded directly on to a suitable prepared base. Press one side block into place and apply the lip glue into the slot as shown. Apply the lip glue adhesive on top of the first layer. Installation Instructions - Firechest (Step 1) Base plate Optional log store with base plate Step 1 Base, sides and back complete
- 5. The latest version of this brochure is available online at www.schiedel.com/uk | 5 Apply lip glue to the top layer and then press the front and rear sections of the gather into place. Press the side panels of the gather into place. Apply lip glue to the joints on the sides of the front and rear panels of the gather. Apply lip glue to the top of the gather unit and then press the top plate into position with the hole offset closer to the rear section of the gather. Ensure the top section is level. Clean off any excess glue Instructions - Gather unit (Step 2) At this stage the Garden Fire should resemble the image with the gather unit above the three rows of the firechest area, a base plate with the log store beneath the base plate (if the log store option is being used) Base plate Optional log store with base plate Step 2 Gather Unit section complete
- 6. 6 |The latest version of this brochure is available online at www.schiedel.com/uk Glue on the capping. Press the first chimney block into place, checking it is in the correct position above the hole in the top plate. Spread lip glue adhesive in the shape of the chimney block. Glue on the next two chimney blocks. Instructions - Chimney blocks (Step 3) Step 3 Blocks and capping complete The fireplace is now complete with chimney blocks and capping.After the glue is touch dry, the rendering stage will commence. This graphic shows a fireplace with the optional log store and base plate at the bottom.
- 7. The latest version of this brochure is available online at www.schiedel.com/uk | 7 Mix the render as per the instructions on the bag. Burn off the fibres on the external surface before rendering. Render the surface areas. Ensure the edges are smooth and wait to dry. Instructions - Rendering (Step 4) Render plaster To be mixed, adhered to the surface and smoothed over by a competent person. As this is heat resistant plaster, it requires more care and pressure to spread than traditional plaster, which is much smoother. Render plaster is designed for one coat, if you require more coats you will need to purchase more render. The finished model, prior to adding firebricks and the log retainer.
- 8. 8 |The latest version of this brochure is available online at www.schiedel.com/uk Garden Fireplace firebricks guide Note for all models 8mm gap between bricks. Bedded on 1-3mm thick firebrick mortar Firebricks to be glued on and pointed with the Calderys firebrick mortar as per enclosed instructions Brick L W D A 230 114 50 B 214 114 50 C 95 114 50 D 230 52 50 E 214 52 50 F 220 114 50 950 Side (x 2) Base (x 1) Back (x 1) Brick L W D G 71 114 50 H 160 114 50 I 15 114 50 J 230 20 50 K 102 20 50 L 230 114 25 Brick L W D M 156 114 25 N 78 114 25 O 78 52 25 P 230 52 25 Q 156 52 25 R 78 114 25 S 156 114 25 Sizes in mm 950 model
- 9. The latest version of this brochure is available online at www.schiedel.com/uk | 9 Once the bottom and rear firebricks are in place, fasten the side bricks in position using the firebrick mortar. Use a tile spacer to keep an 8mm gap. Clean off excess mortar. Use the mortar mix to point up the joints between the firebricks once they are all in position. Complete the bottom layer of firebricks, then fasten the rear firebricks in place using the firebrick mortar. Use a tile spacer to keep an 8mm gap. Bed the firebricks on to a 3mm layer of firebrick mortar. Use the tables on the previous page as a guide. Instructions - Firebricks (Step 5) Mortar bag - Used for gluing on firebricks and pointing in. Mix as per instructions on the bag
- 10. 10 |The latest version of this brochure is available online at www.schiedel.com/uk Then push fit the log retainer bars into the slots. Drill 2 x 12mm diameter holes in the front row of the firebricks. Push log retainer holders in place. Instructions - Log retainer (Step 6) Bend the steel prongs out so the top ring is a tight push fit into the concrete capping. Rain cap and top ring if purchased. Optional extras - rain cap and top ring (if purchased) Steel prongs Code Optional extras 157837 Log Storage for 950 130708 Additional height blocks for 950 135093 Top ring for 950 130732 Rain cap for all models 130771 Lip glue 5kg 135329 Render plaster 25kg bag There are a range of optional accessories available for this Garden Fireplace. Please contact us or your distributor for more details and pricing.
- 11. The latest version of this brochure is available online at www.schiedel.com/uk | 11 Once build and rendering is complete, please do not use for at least 72 hours after completion. On first use, always light a small fire first and increase the size of the fire once the firechest has fully dried out. Only use dried and seasoned wood for the fire. Do not burn plastic or waste products. Guarantee INTRODUCTION We are confident in our products and so offer you (the owner) a generous guarantee in relation to the Garden Fireplace. Provided that you comply in full with your responsibilities (below) and subject to the Small Print (below), we guarantee to you that the fireplace will be free from defects on delivery to you via pallet. Any blocks or firebricks which are cracked or damaged at the time of delivery will be replaced free of charge. This guarantee does not cover any major impact to the fireplace (such as wear and tear, wind damage) once the item has been constructed and rendered. As the fireplace is an outdoor product, standard wear and tear will occur and any structural damage would have to be investigated. In the unlikely event that the fireplace becomes defective during the guarantee period, we will provide replacement component parts and render material free of charge. YOUR RESPONSIBILITIES To benefit from our guarantee, this product will be registered to the address where we delivered it. Please inform us if the fireplace was installed elsewhere. HOW TO CLAIM UNDER YOUR GUARANTEE To claim under your guarantee, please email us at sales.uk@schiedel.com. You will be asked to provide proof that you have complied in full with the terms of usage of the fireplace and that only dried and seasoned firewood has been used as a fuel. If you are an installer / builder If you are a regular builder of our Garden Fireplaces, then please get in touch with us. We are looking for competent builders throughout the UK and Republic of Ireland to promote as "recommended builders" in certain areas. Builders are able to benefit from joining our Installer Loyalty scheme with points awarded for installations, which can then be redeemed for vouchers. Please see details at www.schiedelrewards.co.uk. After completion
- 12. Also from Schiedel: The Celsius, an all-in-one stove and volcanic chimney package Follow us on Social Media @SchiedelUK Schiedel Isokern Unit 8/9 Block A, Holton Road, Holton Health Industrial Est., Poole BH16 6LG T +44 1202 861650 sales.uk@schiedel.com www.schiedel.com/uk The same material used in the Garden Fireplace; formed from pumice from the Hekla Volcano The Celsius system is a DEFRA exempt, A+ rated system, which allows zero distance to combustibles. The ideal stove and chimney combined package for any house development, log cabin, conservatory or outhouse. Get in touch for more information.