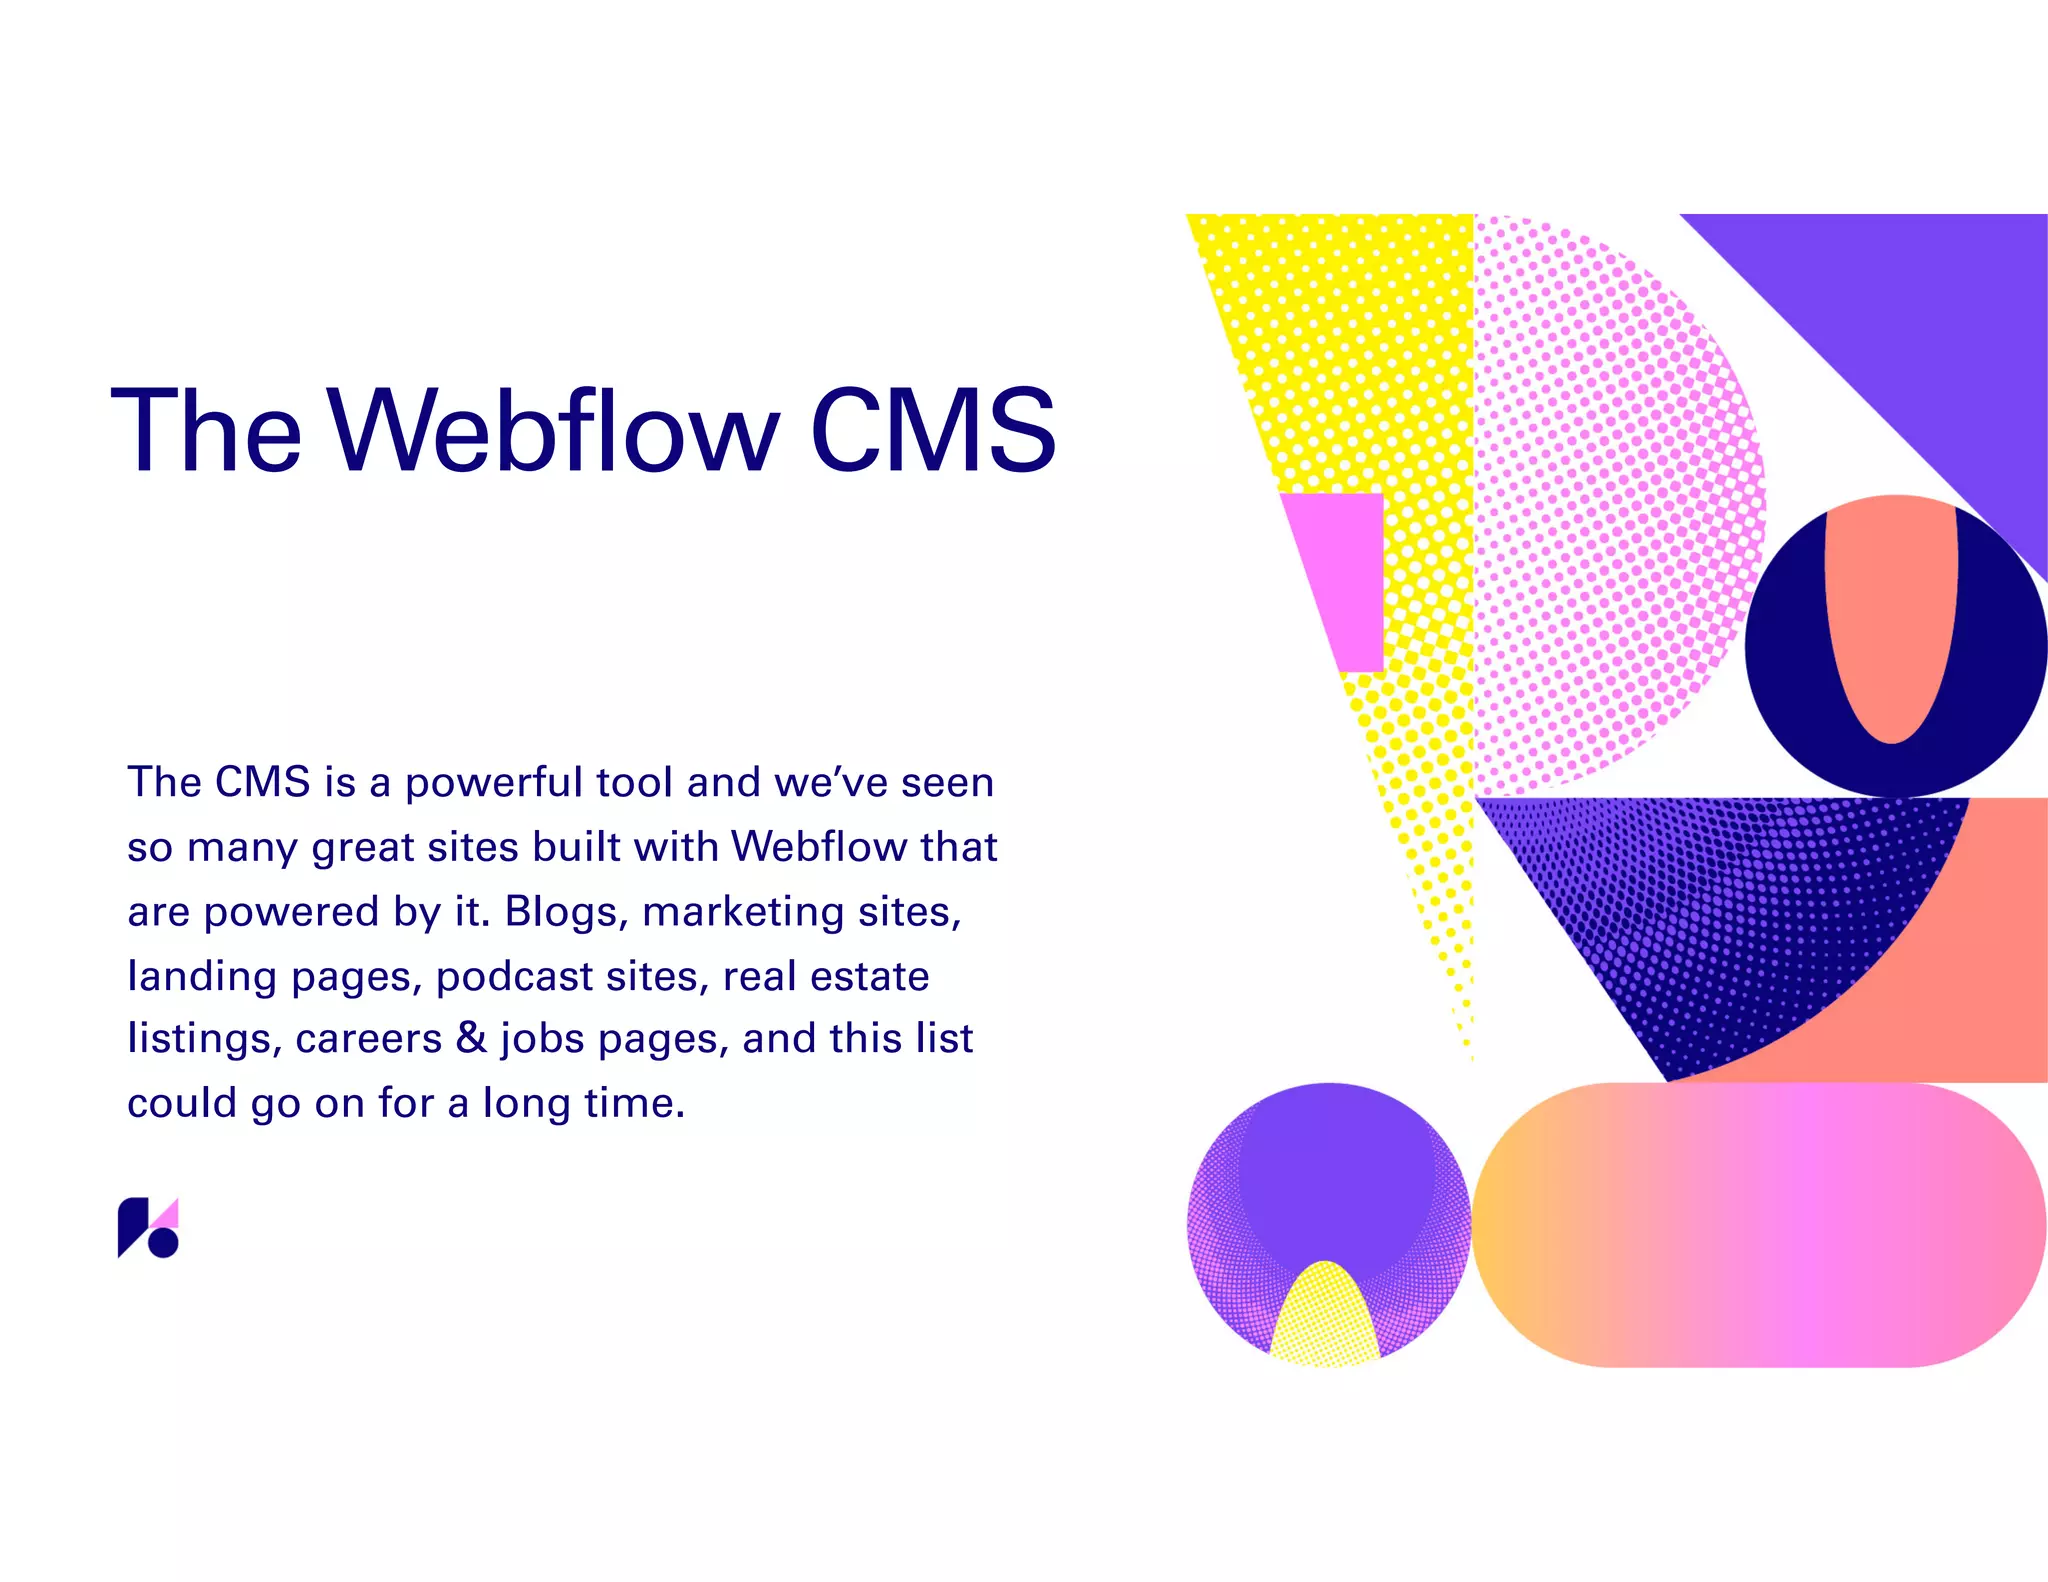
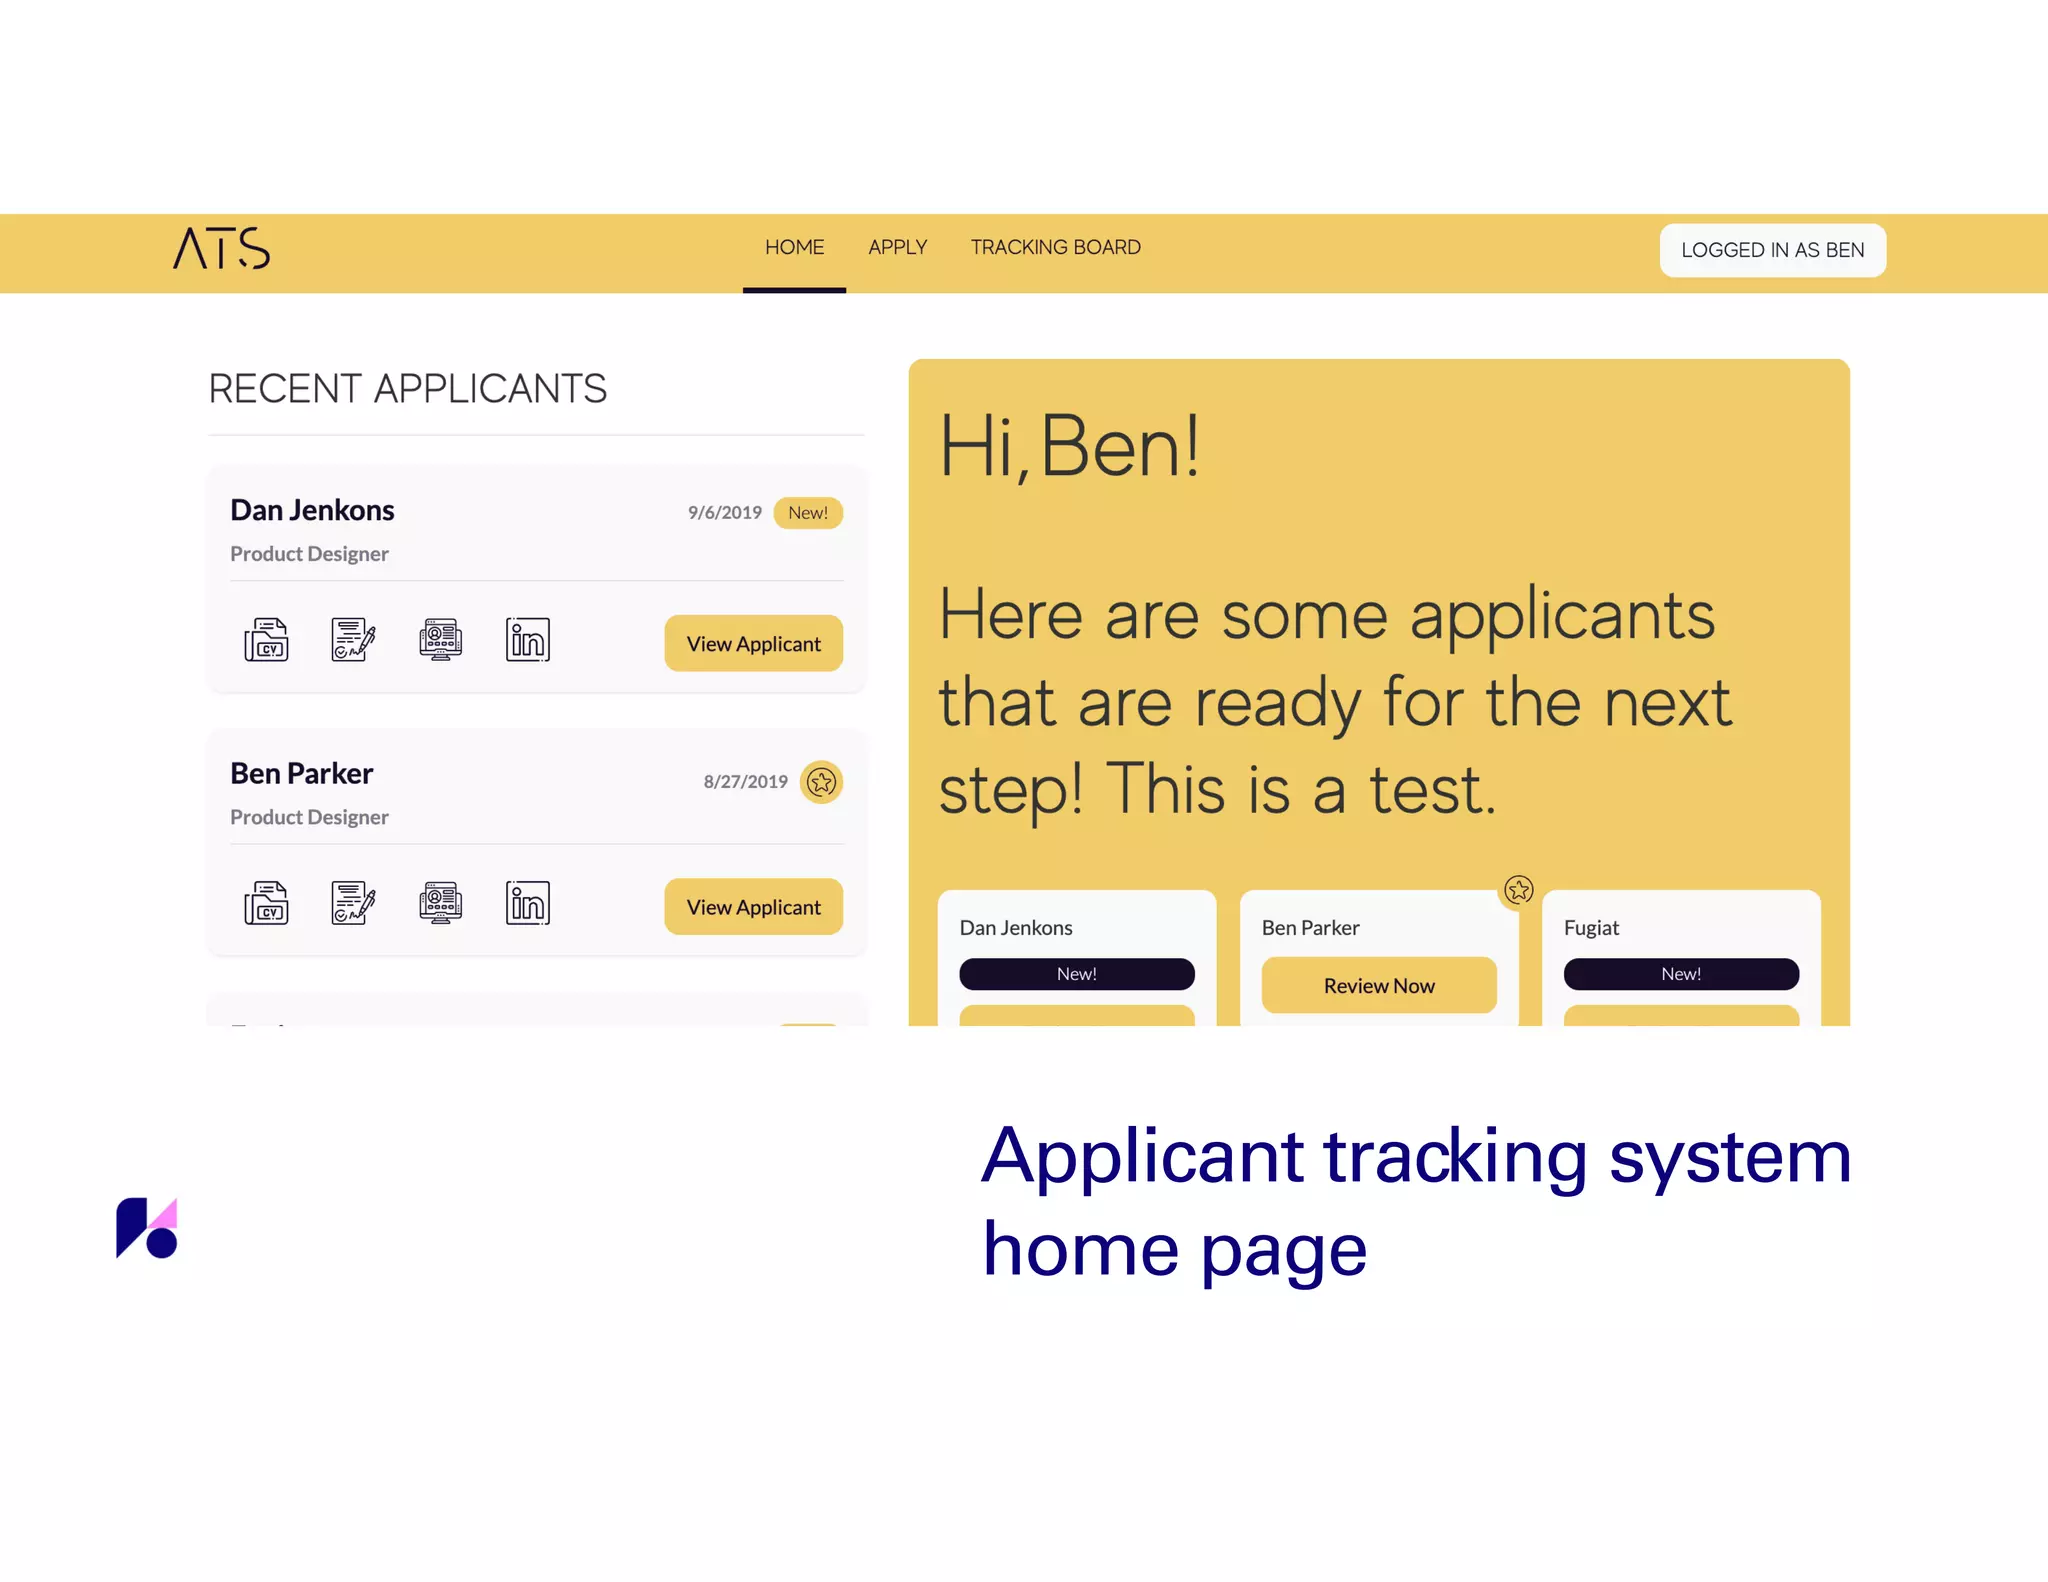
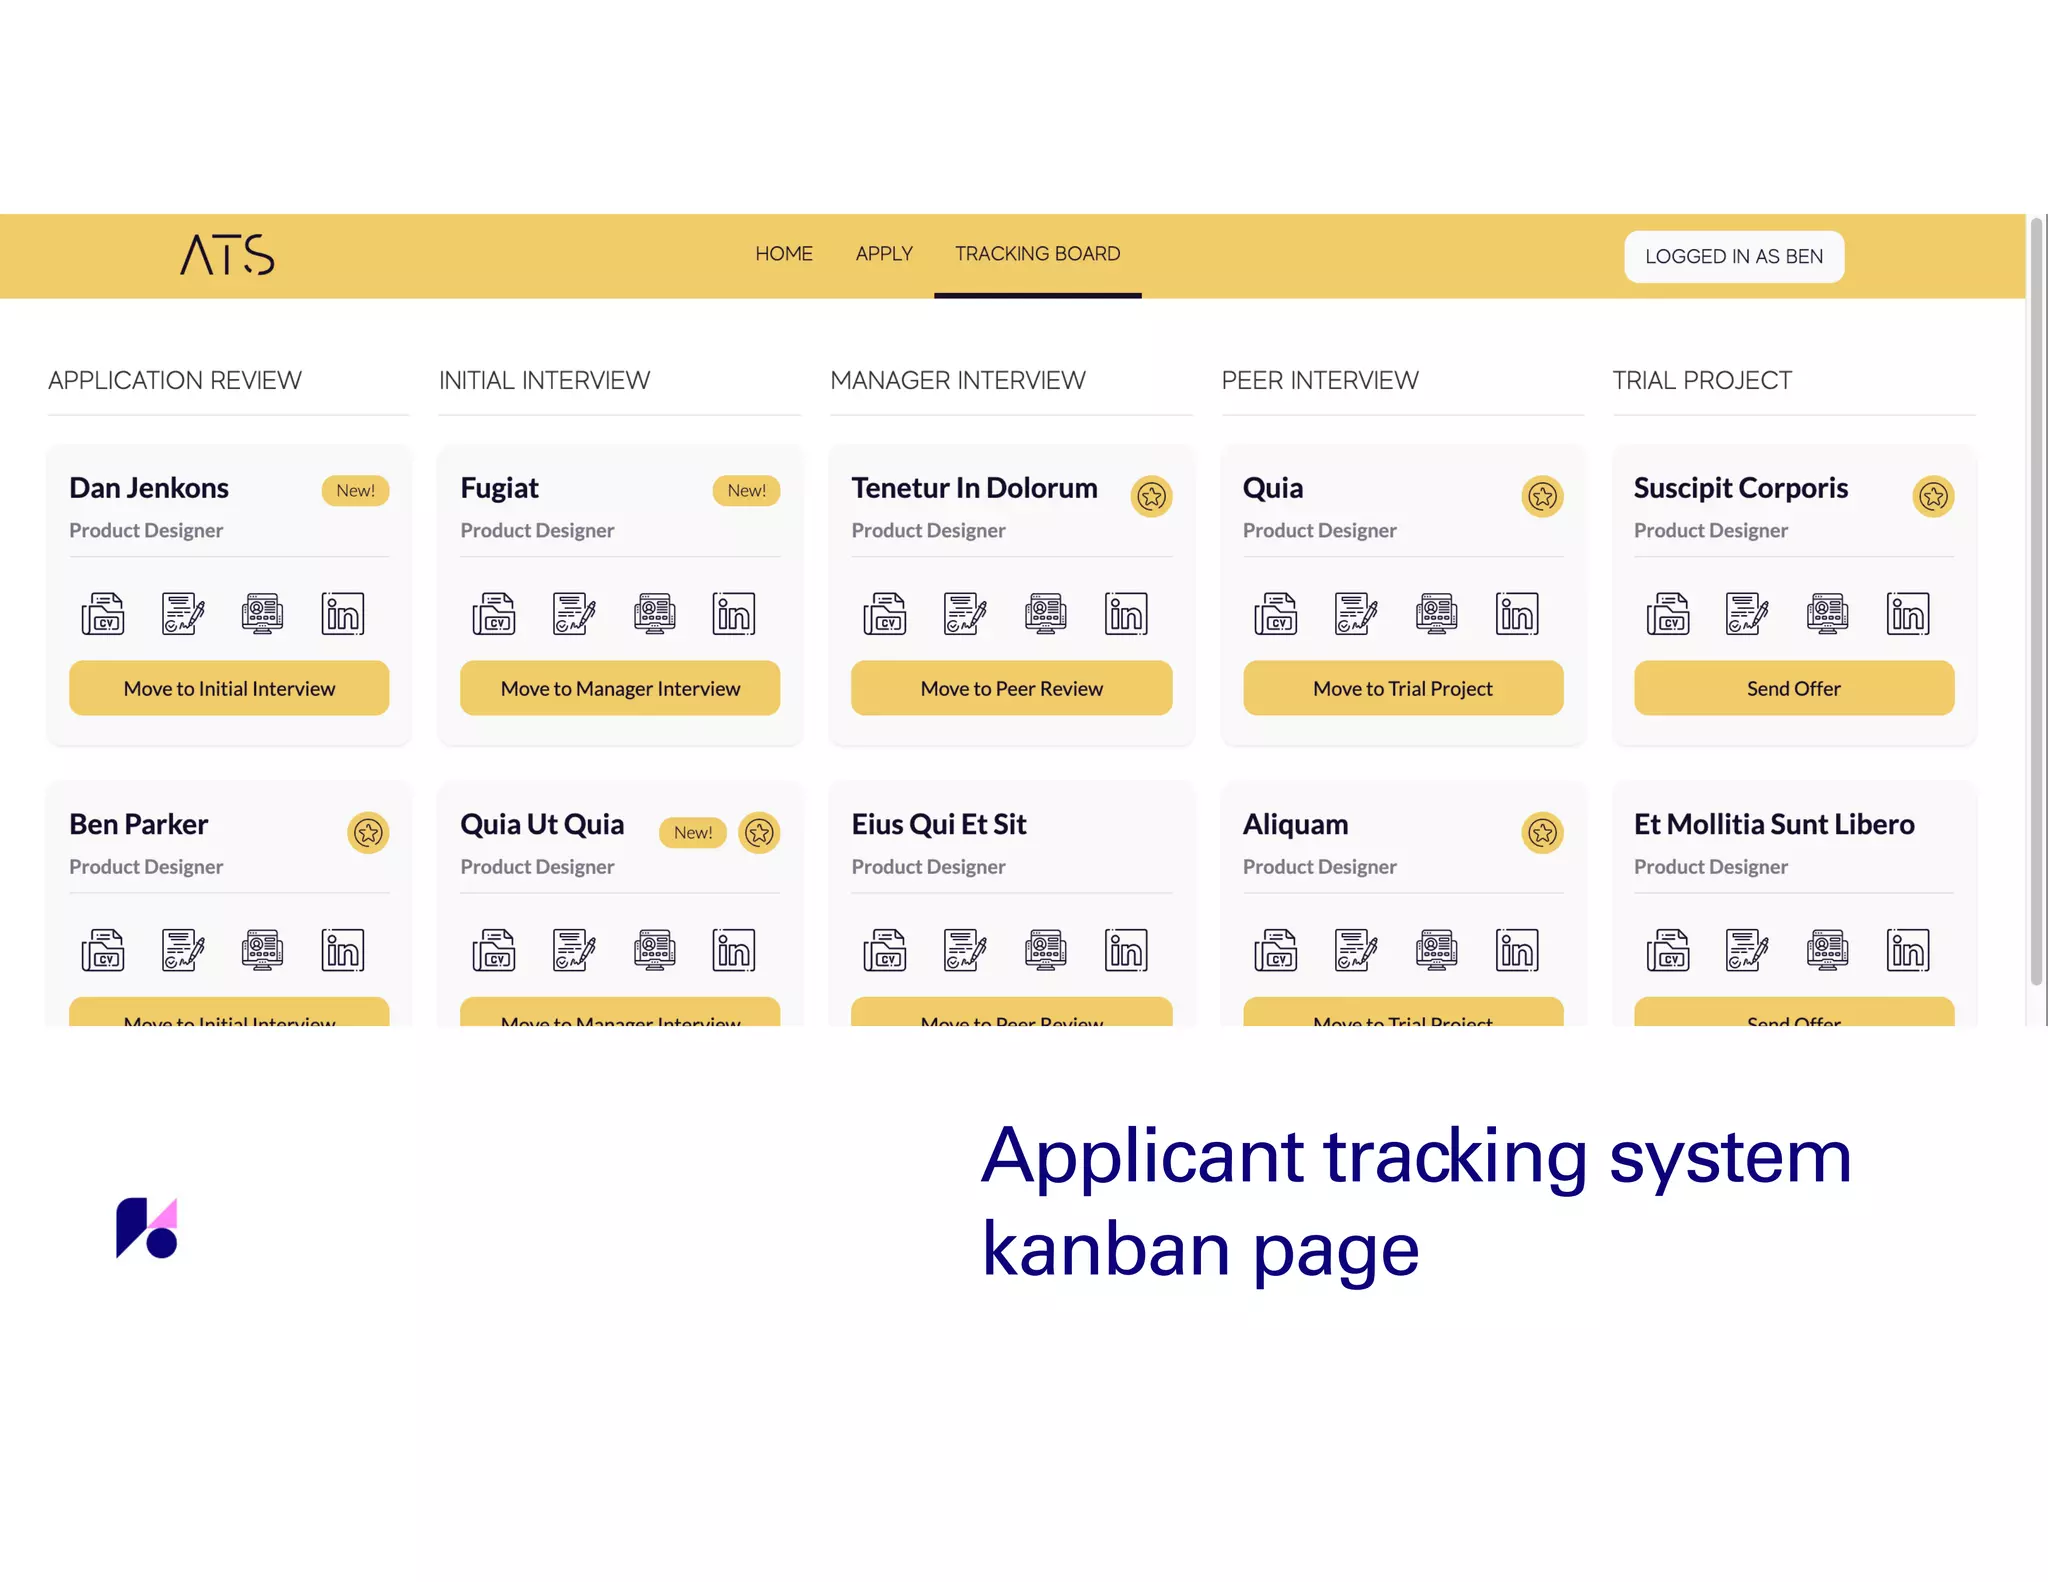
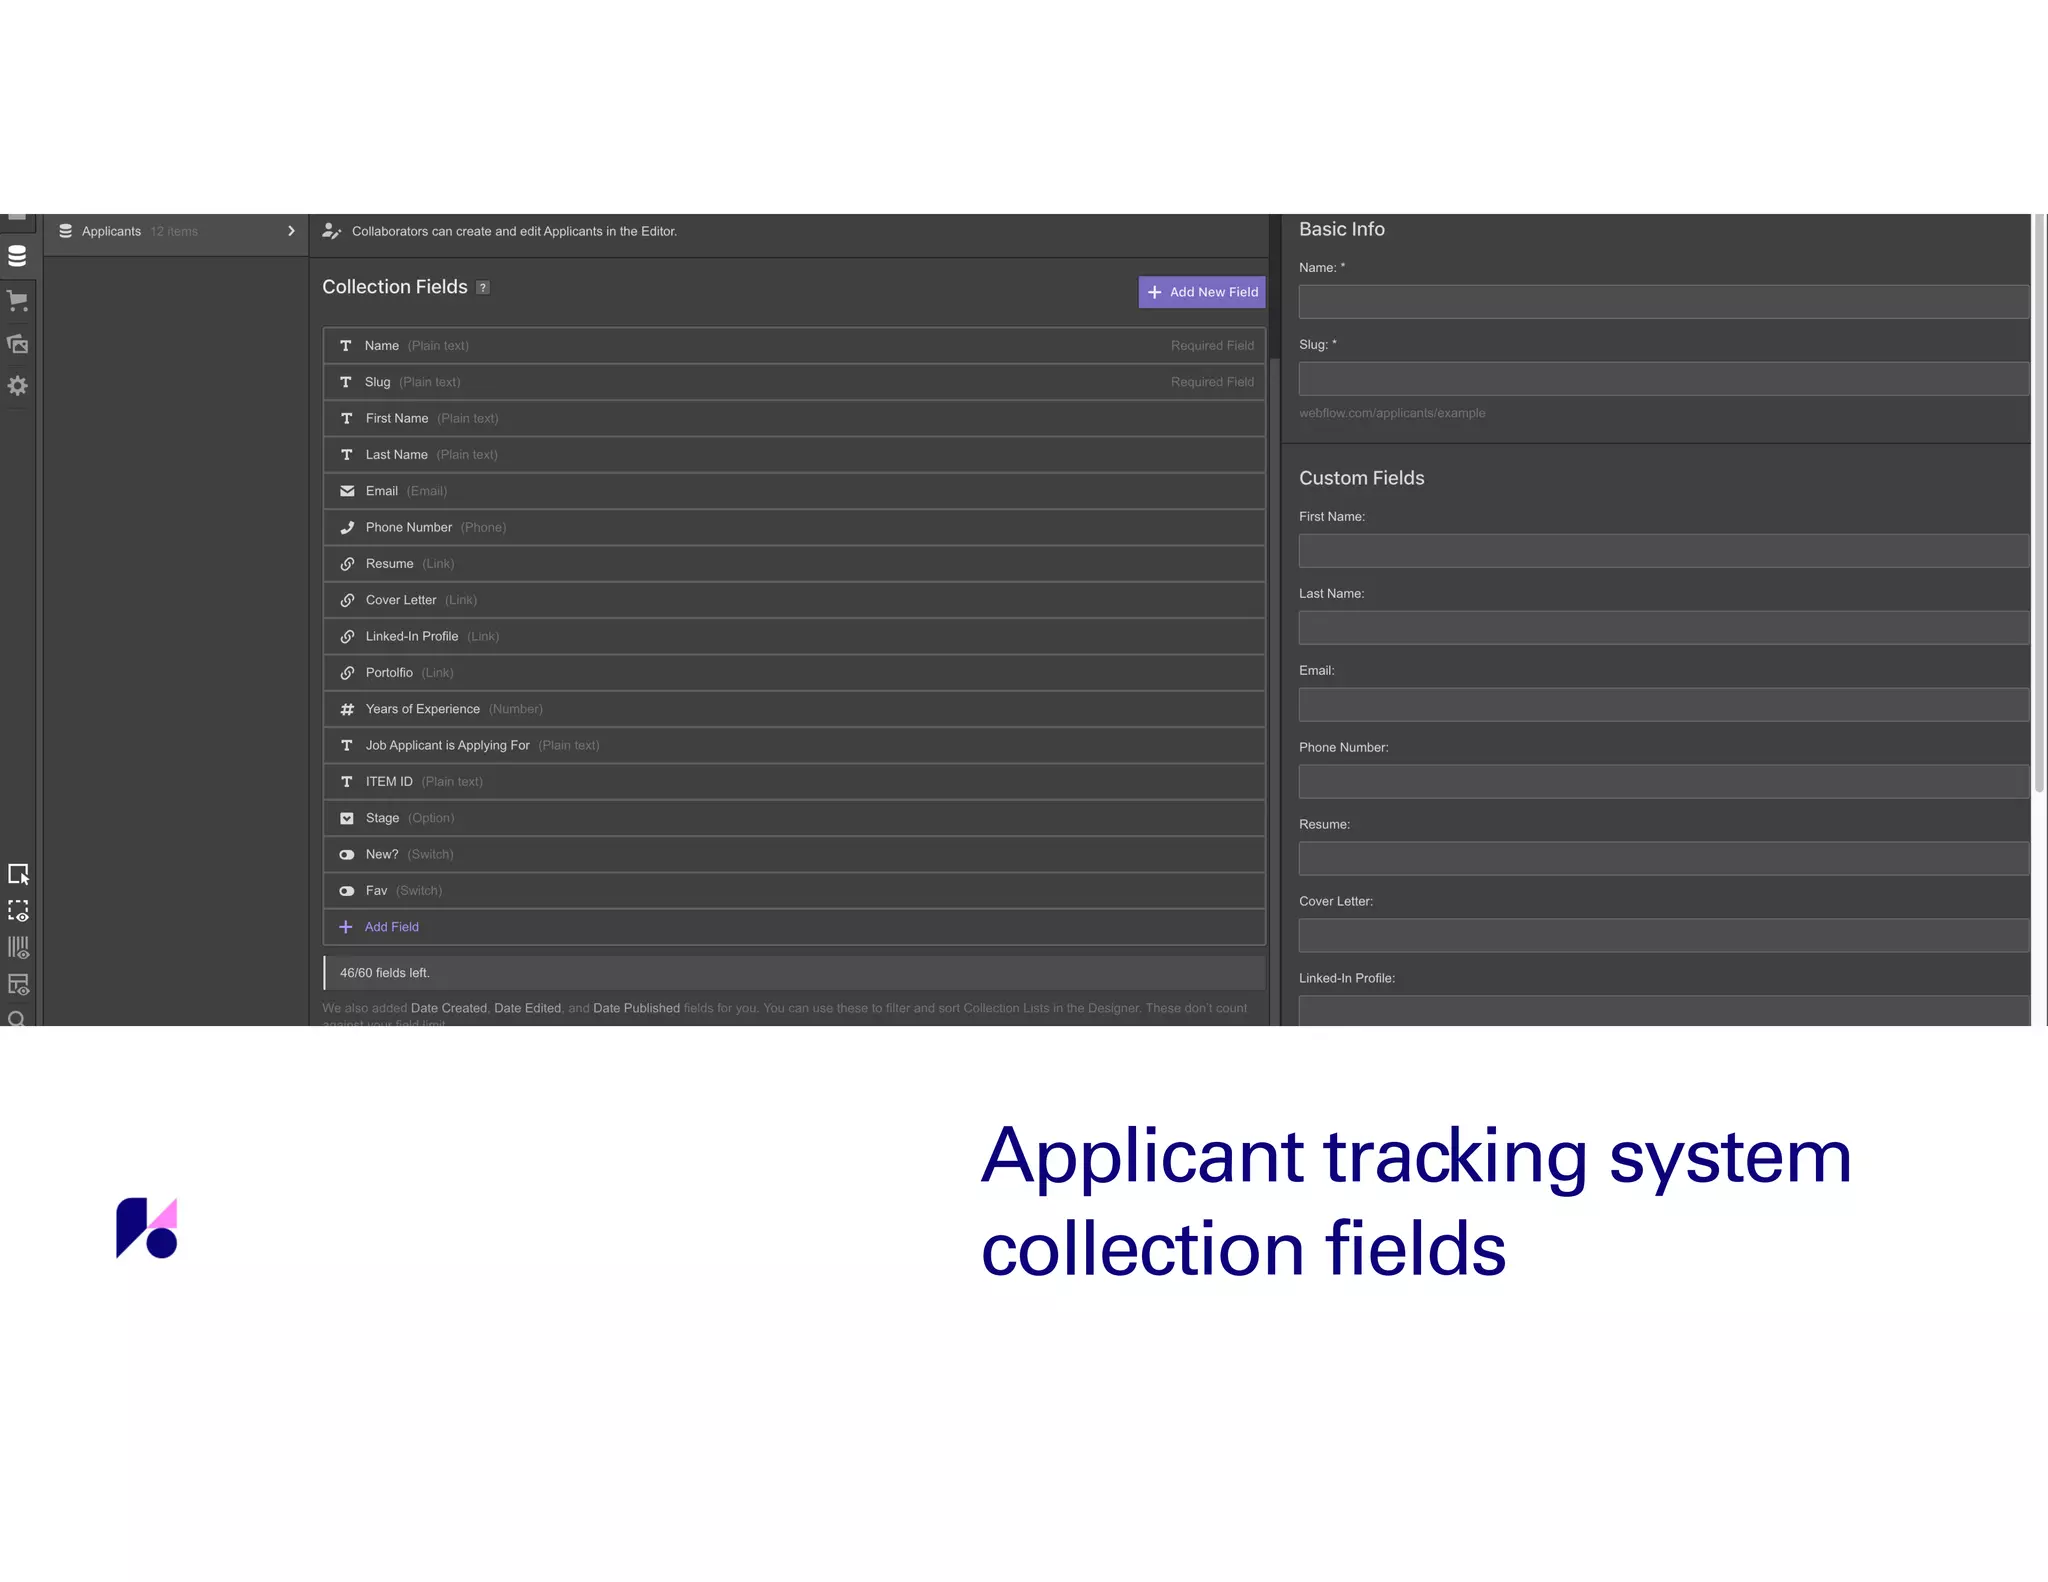
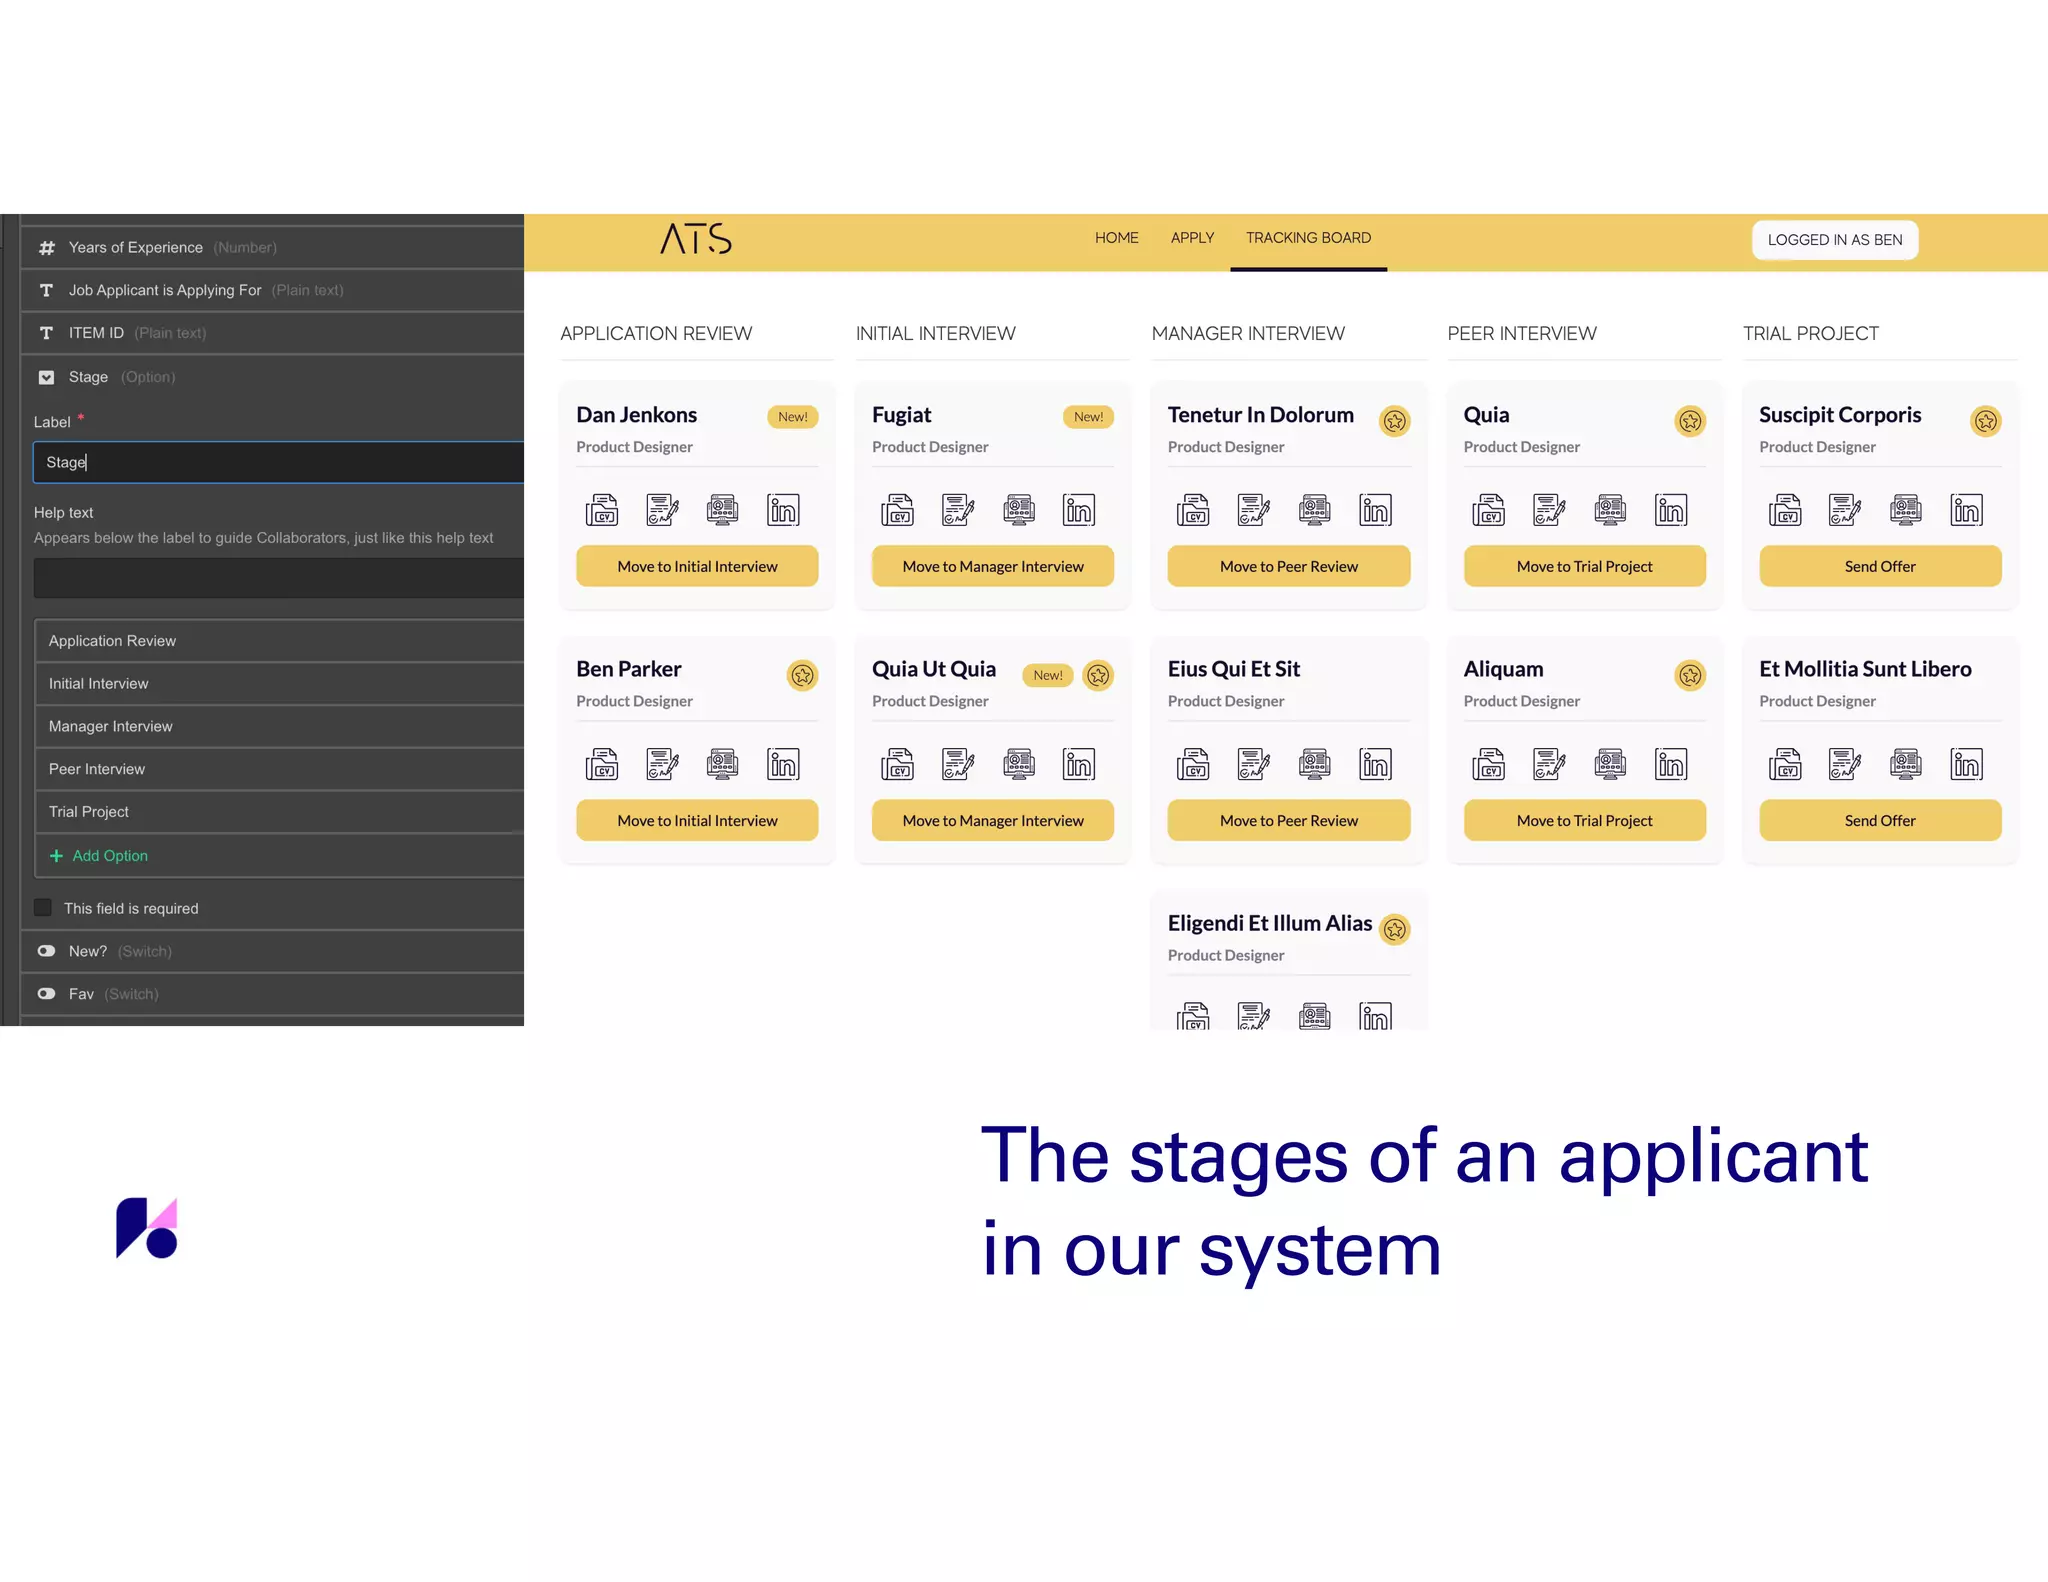
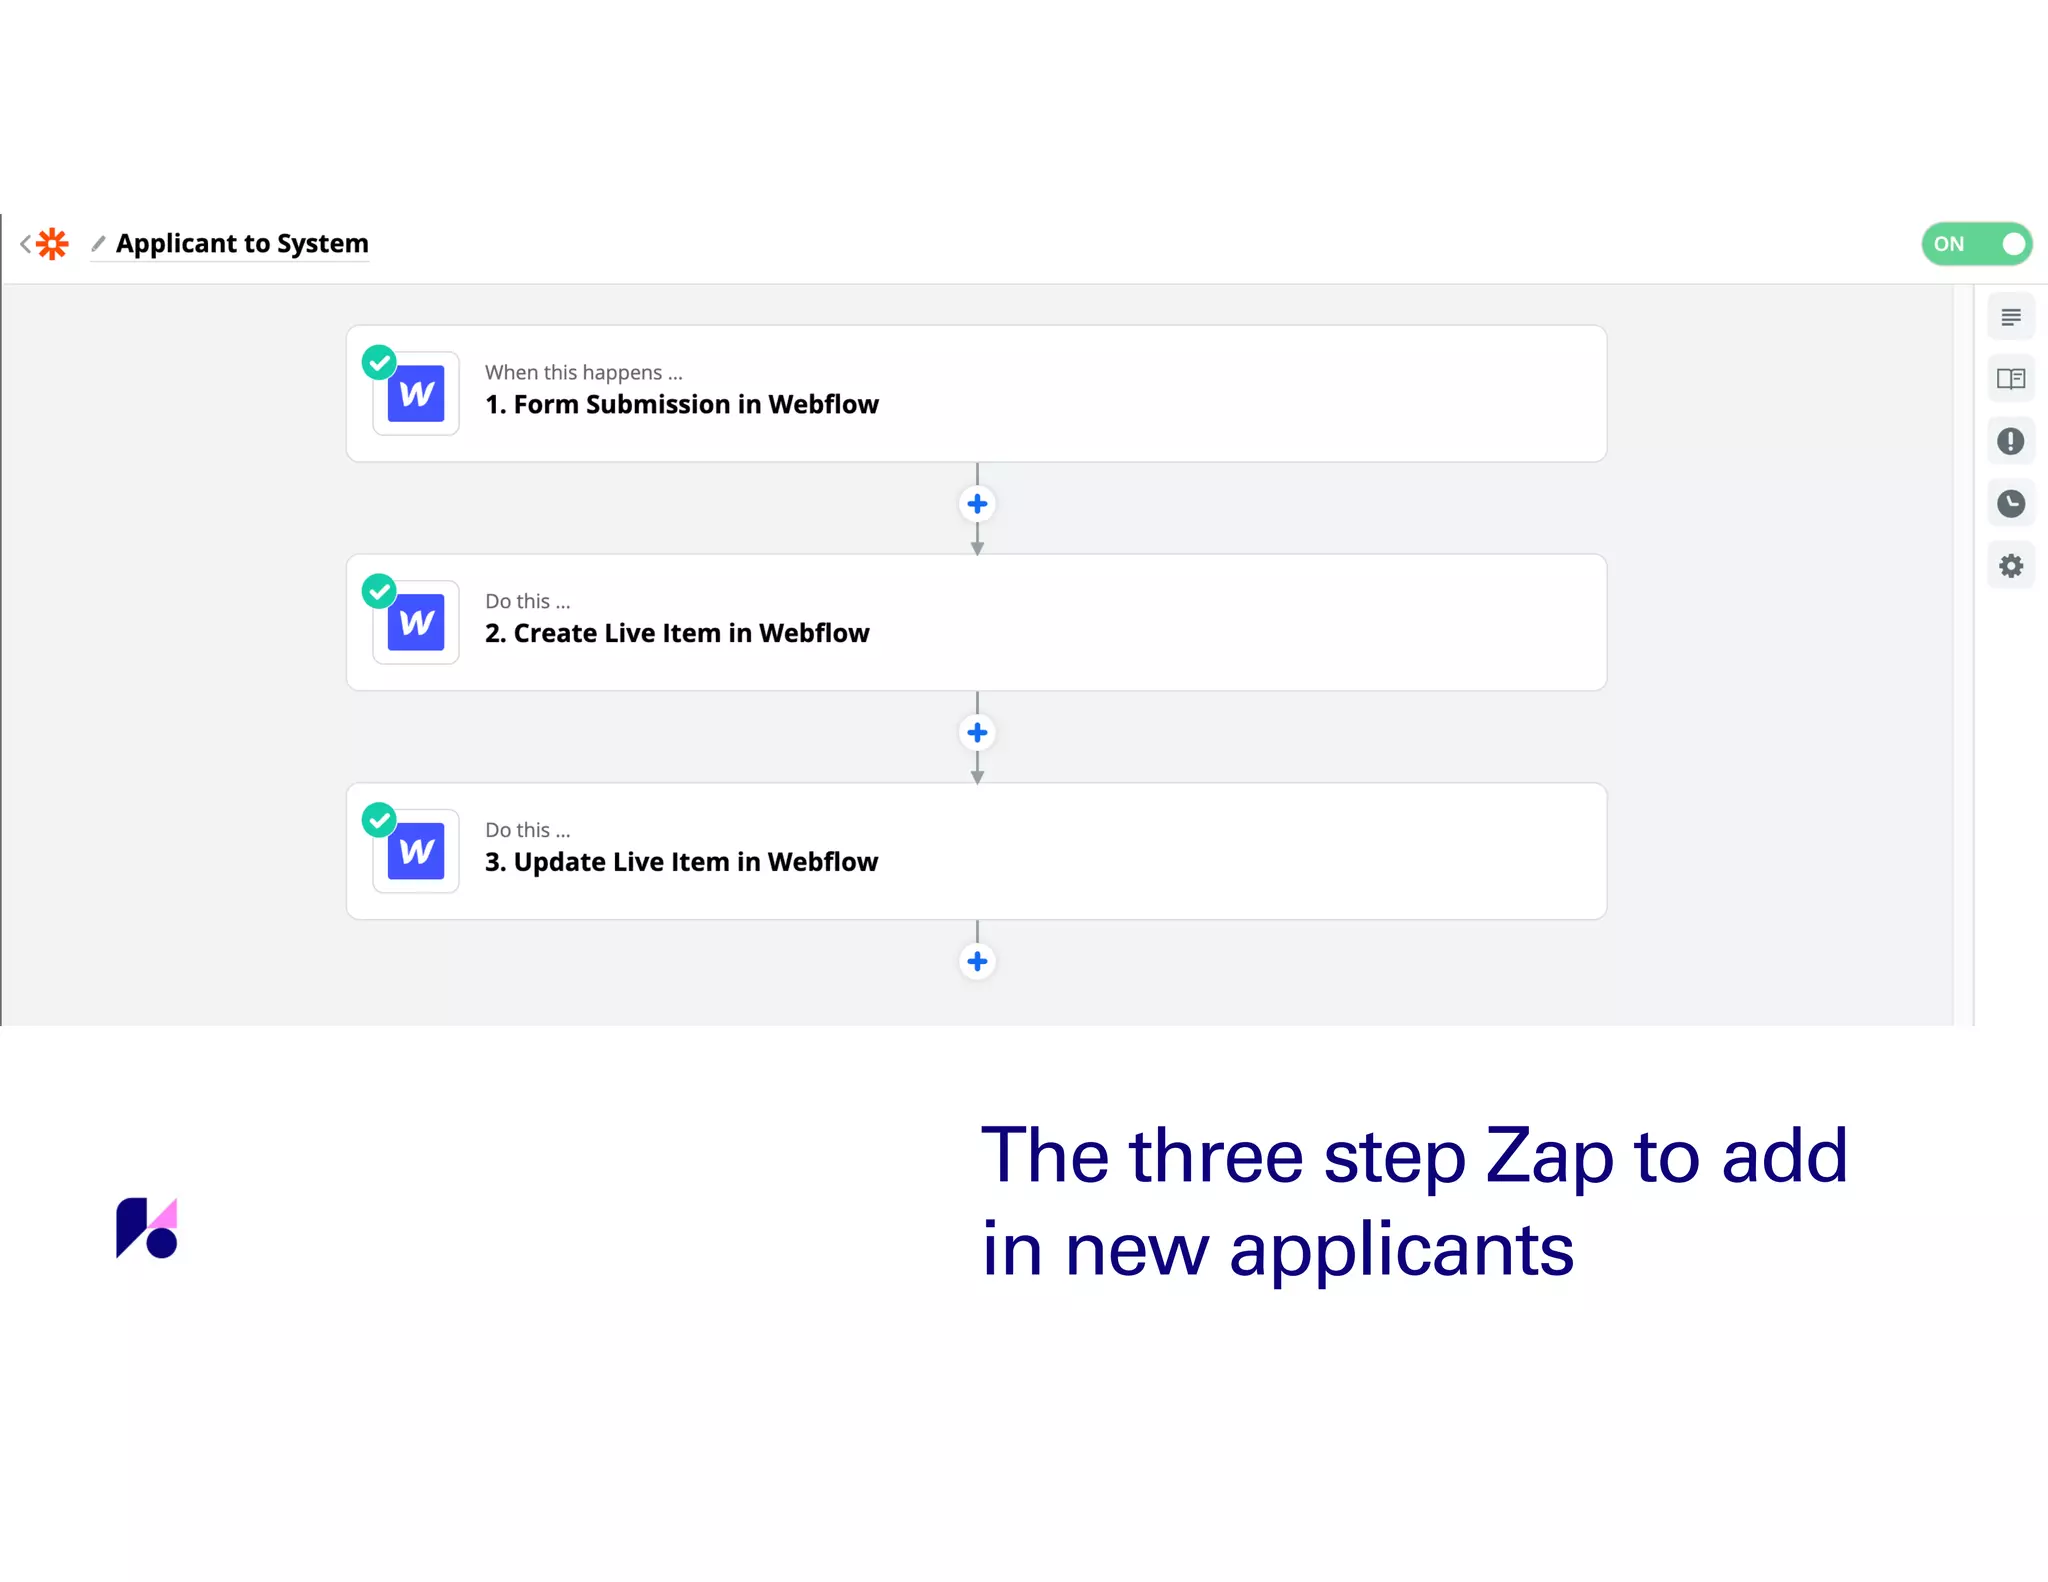
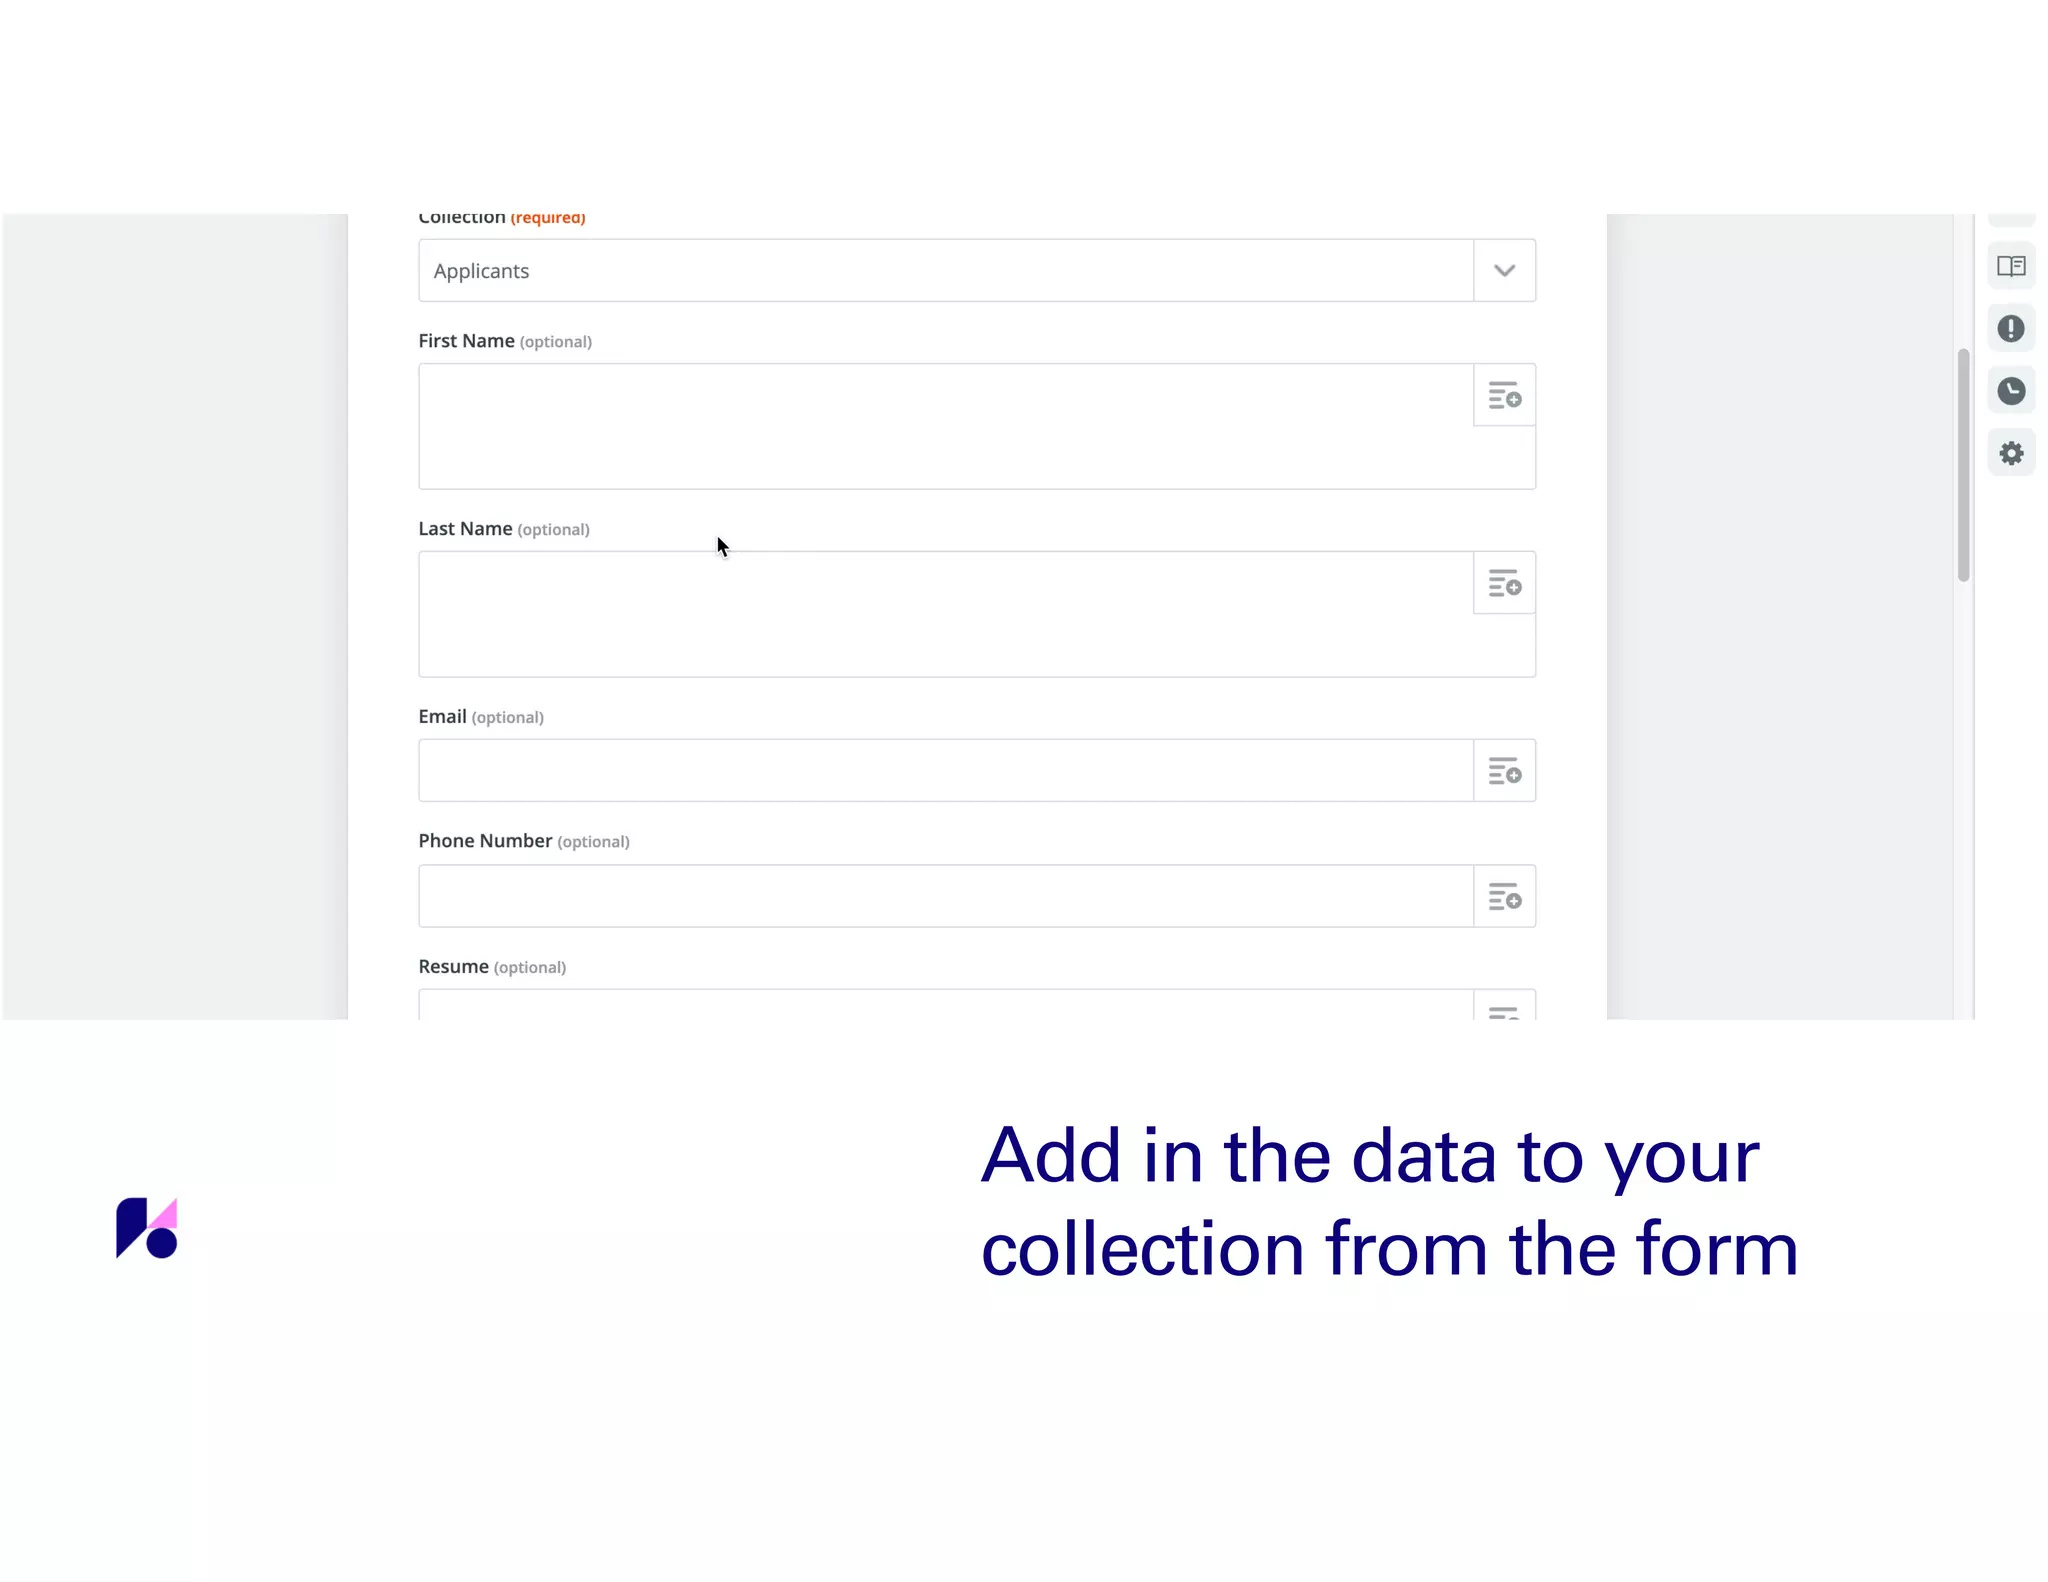
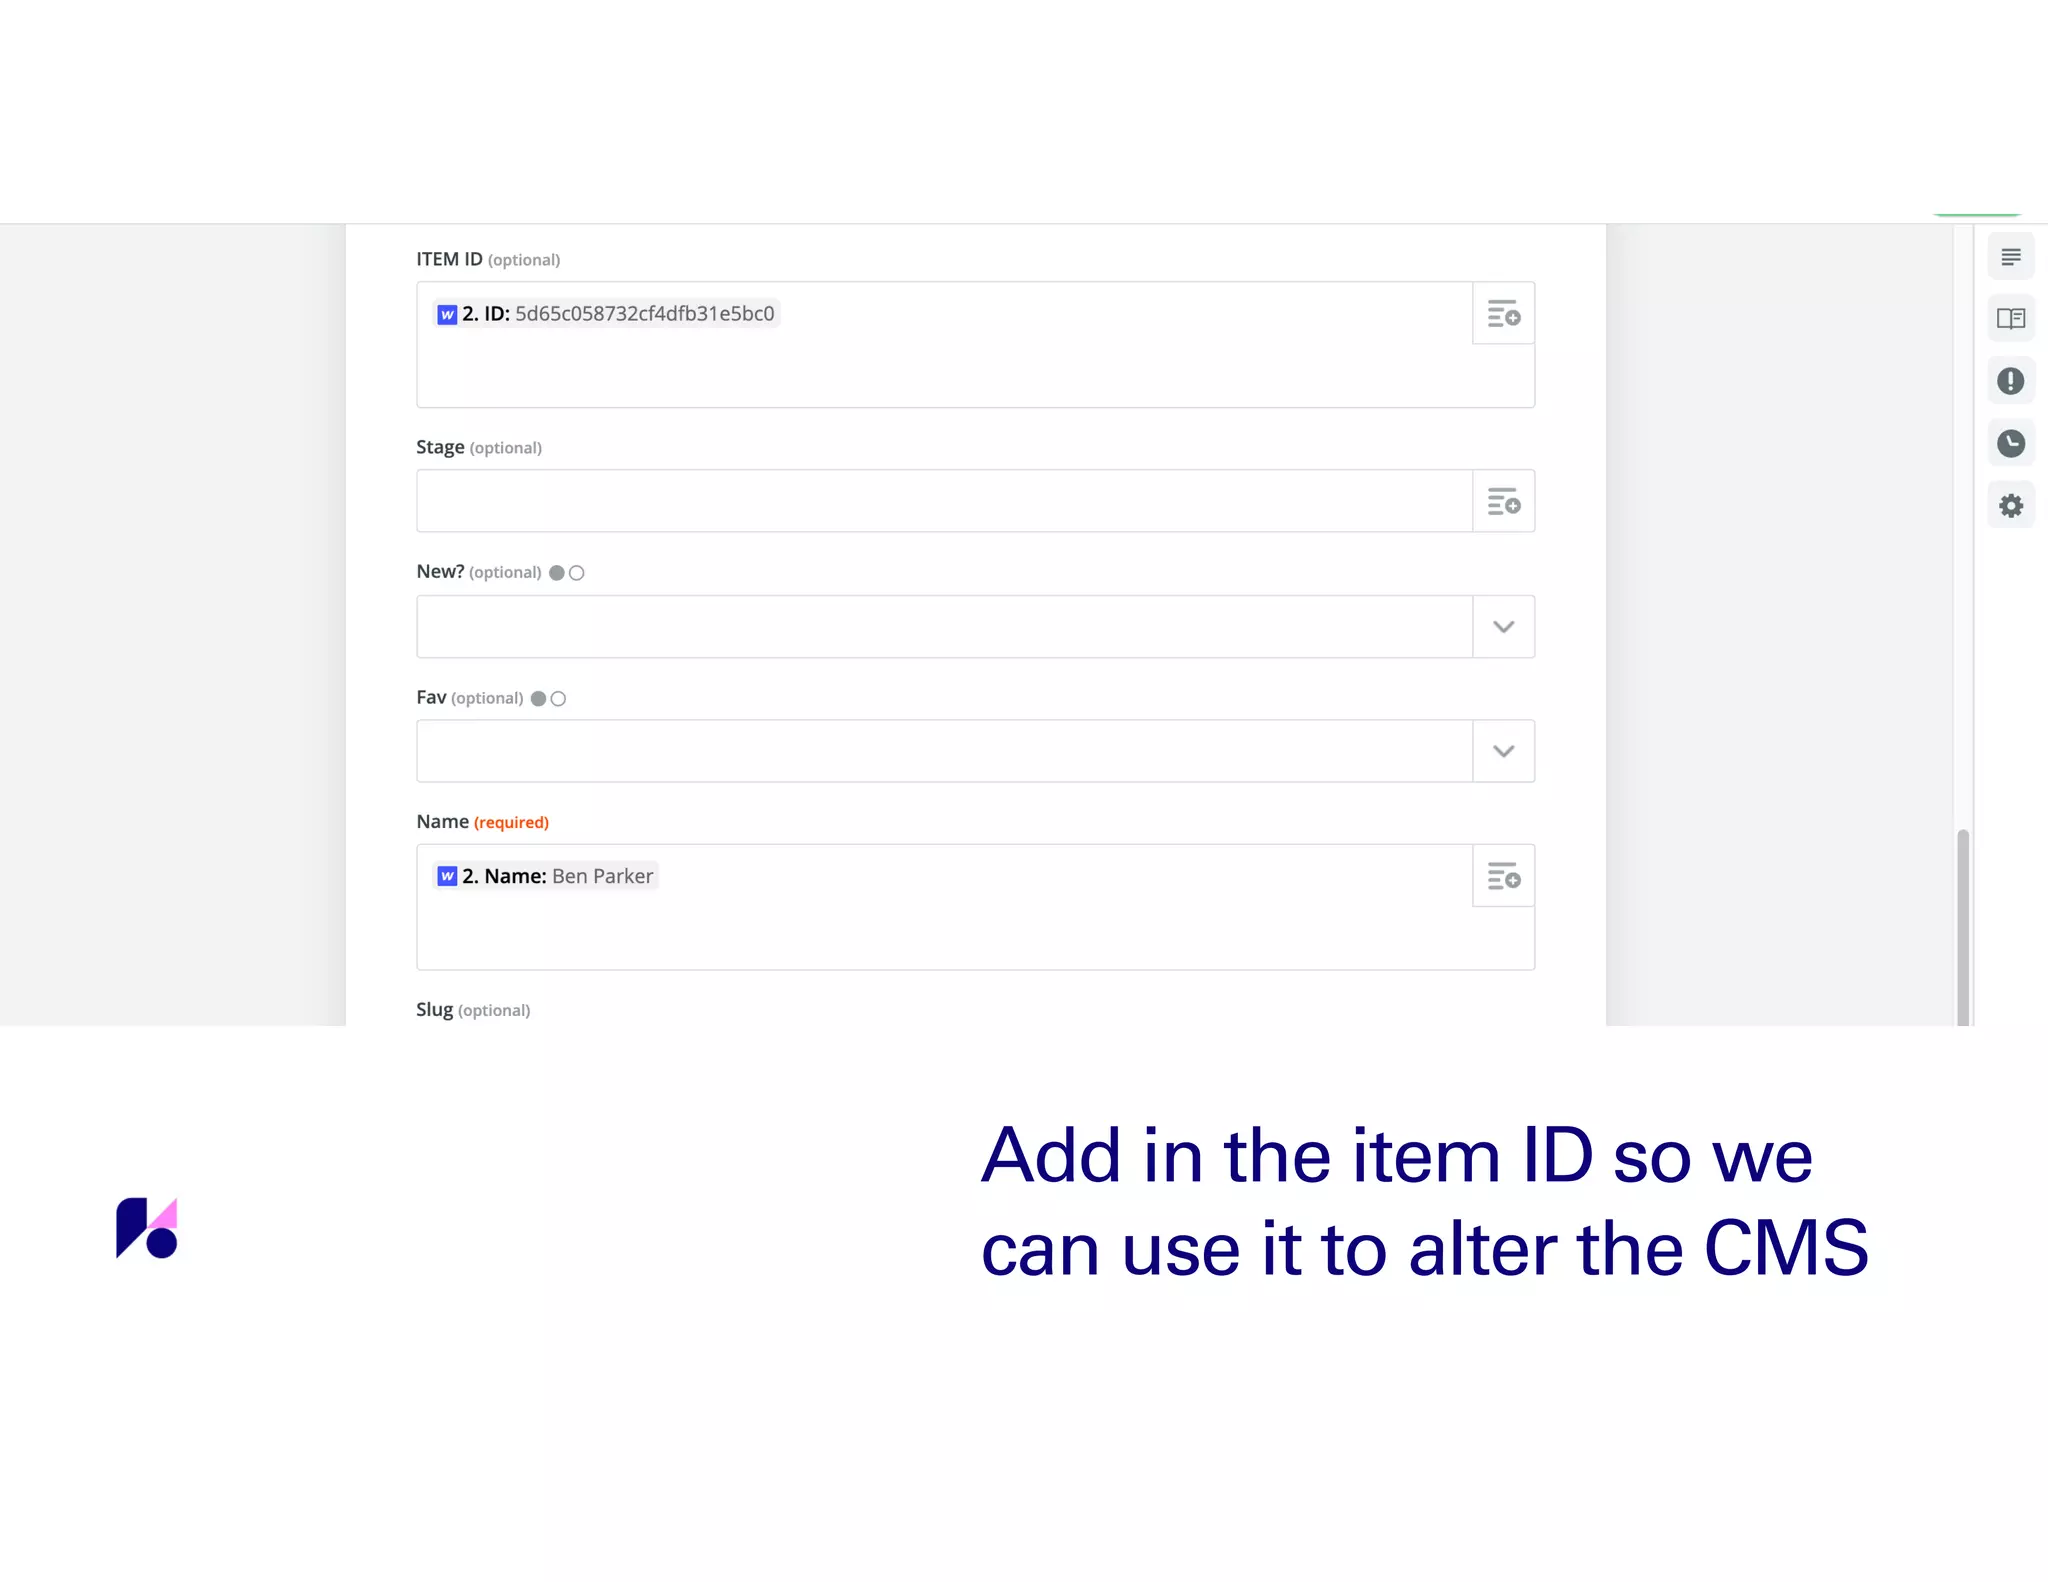
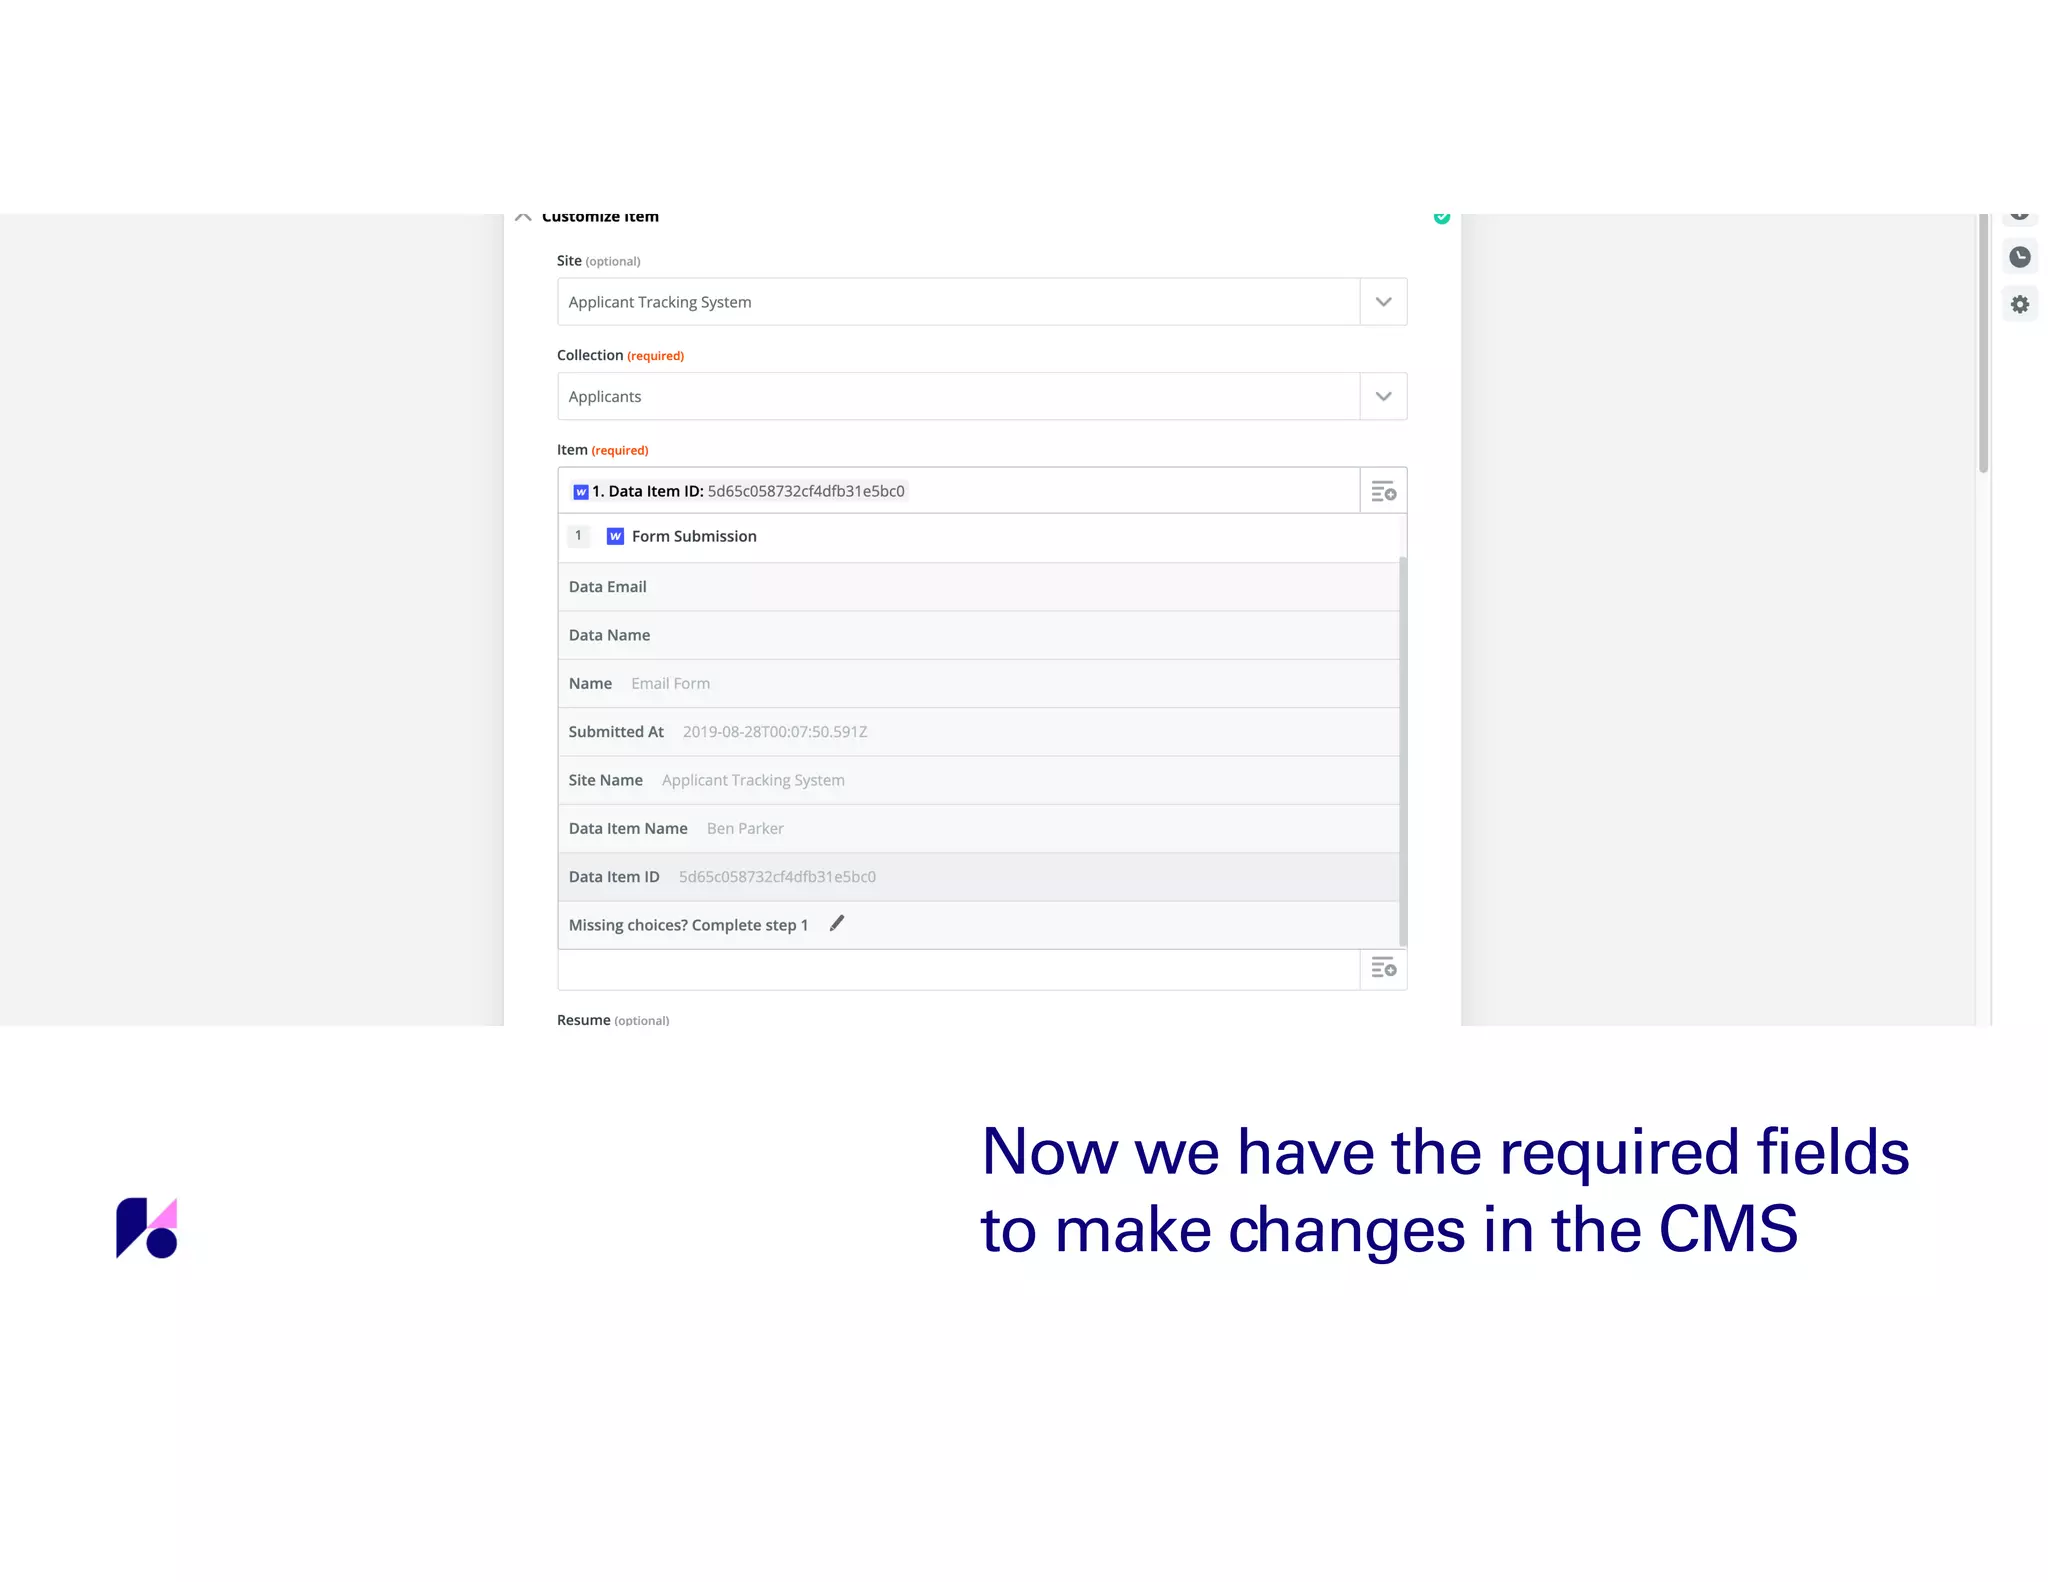
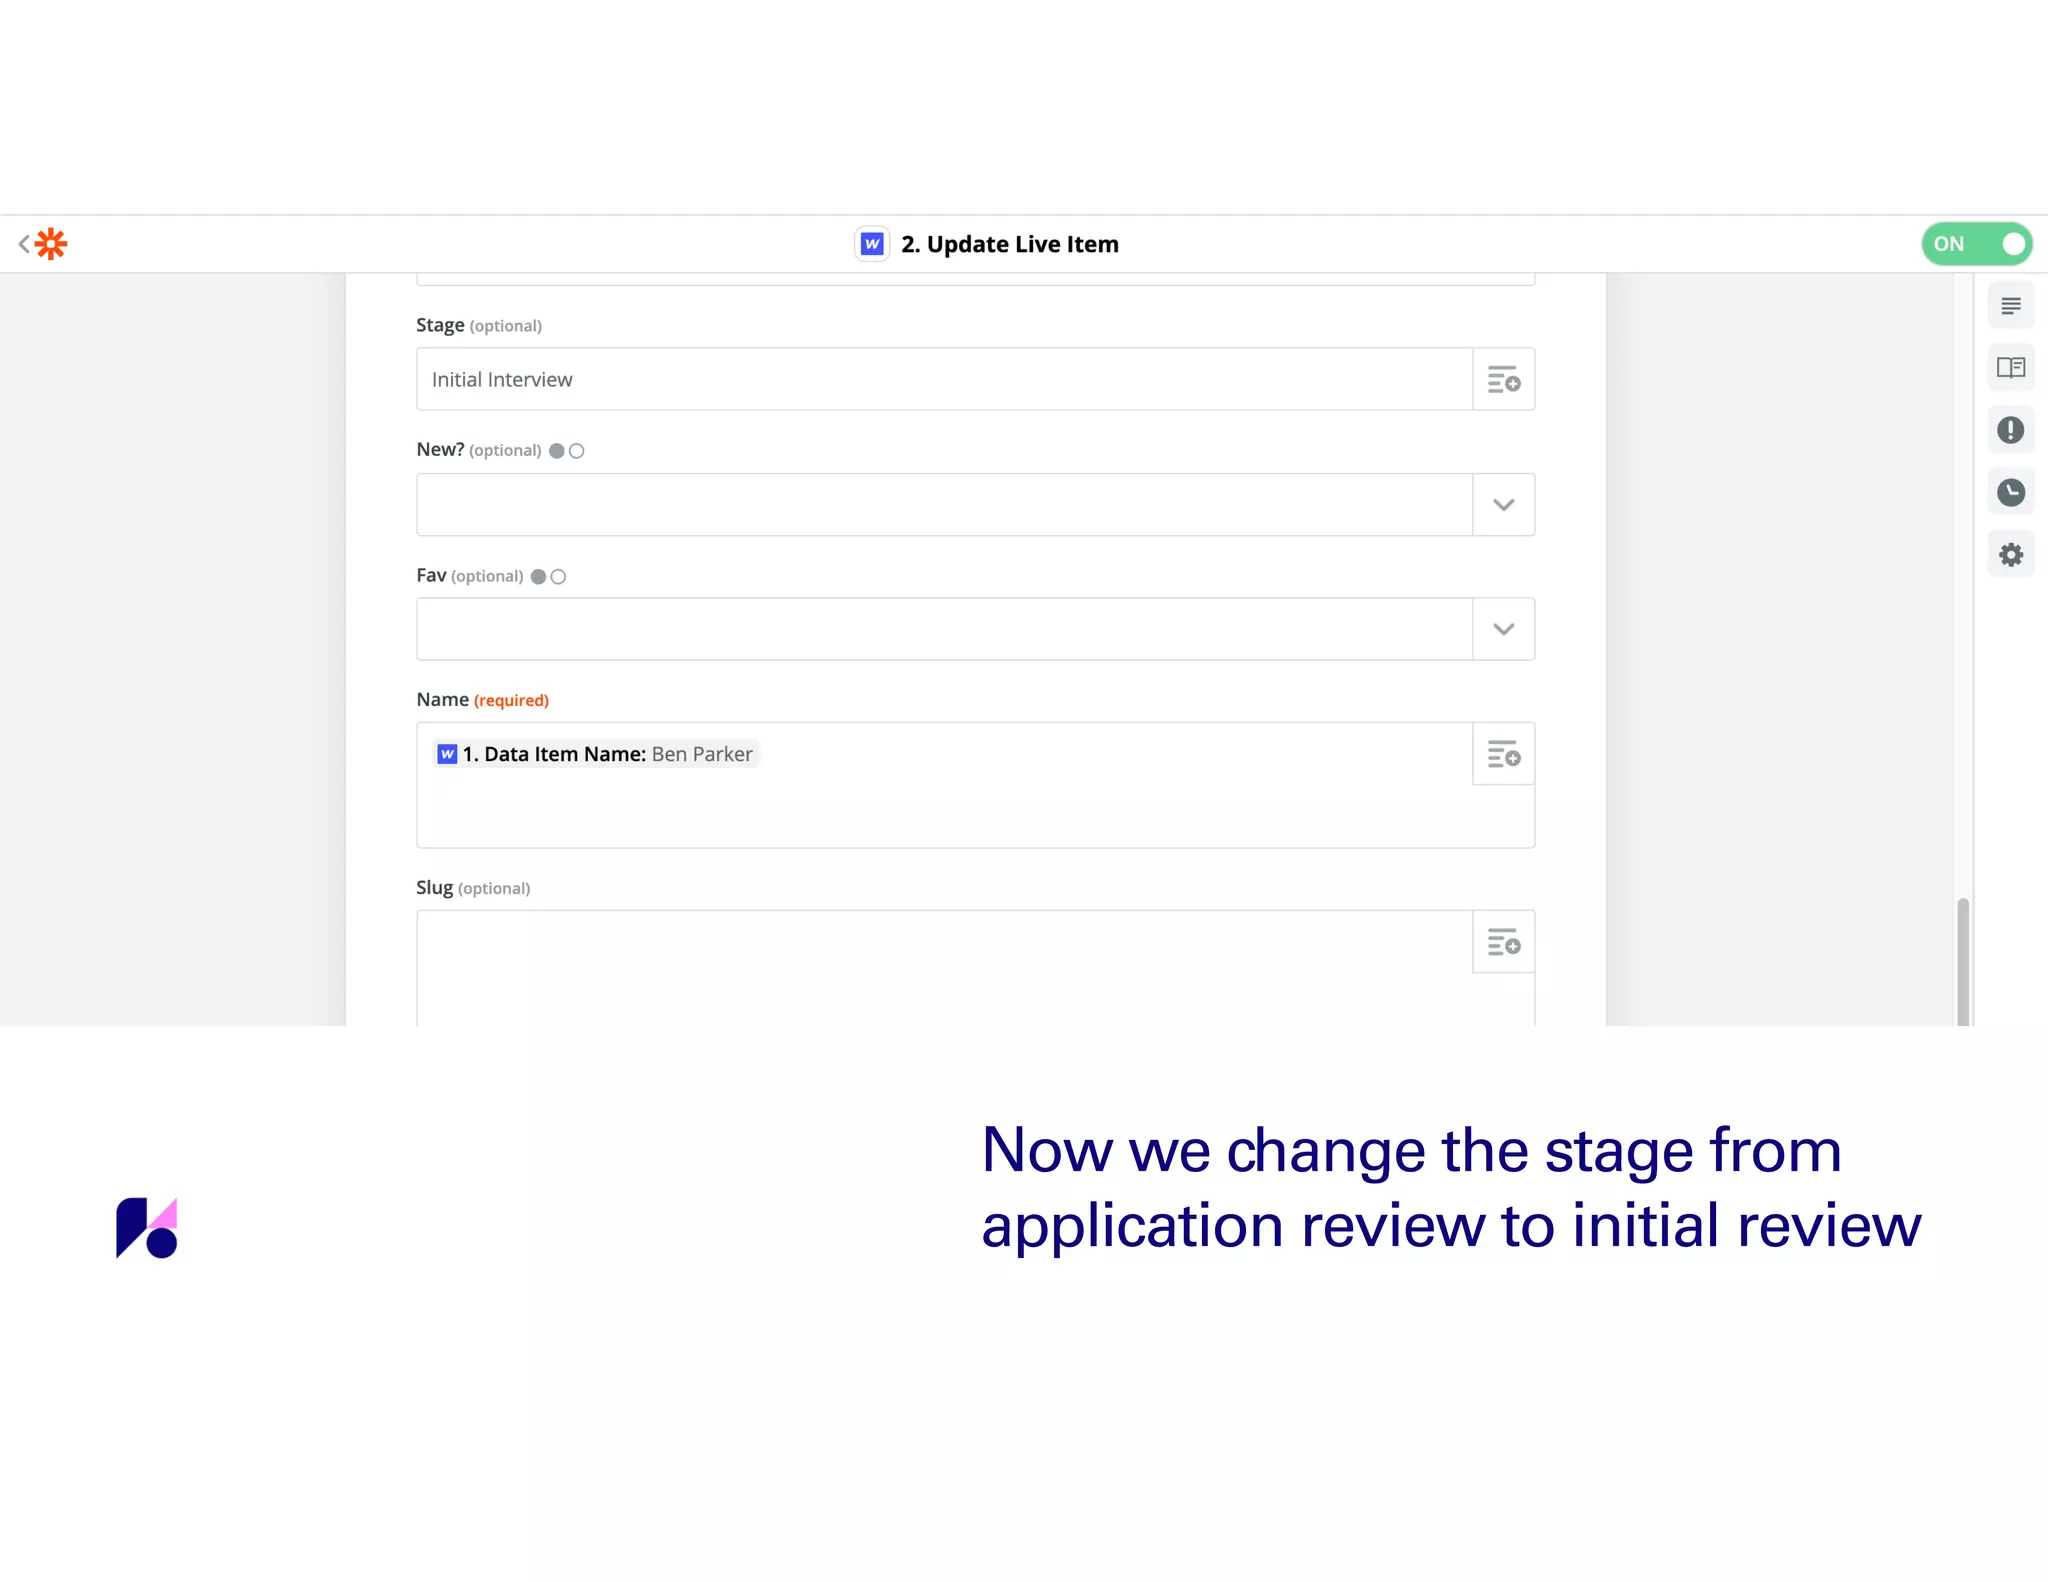
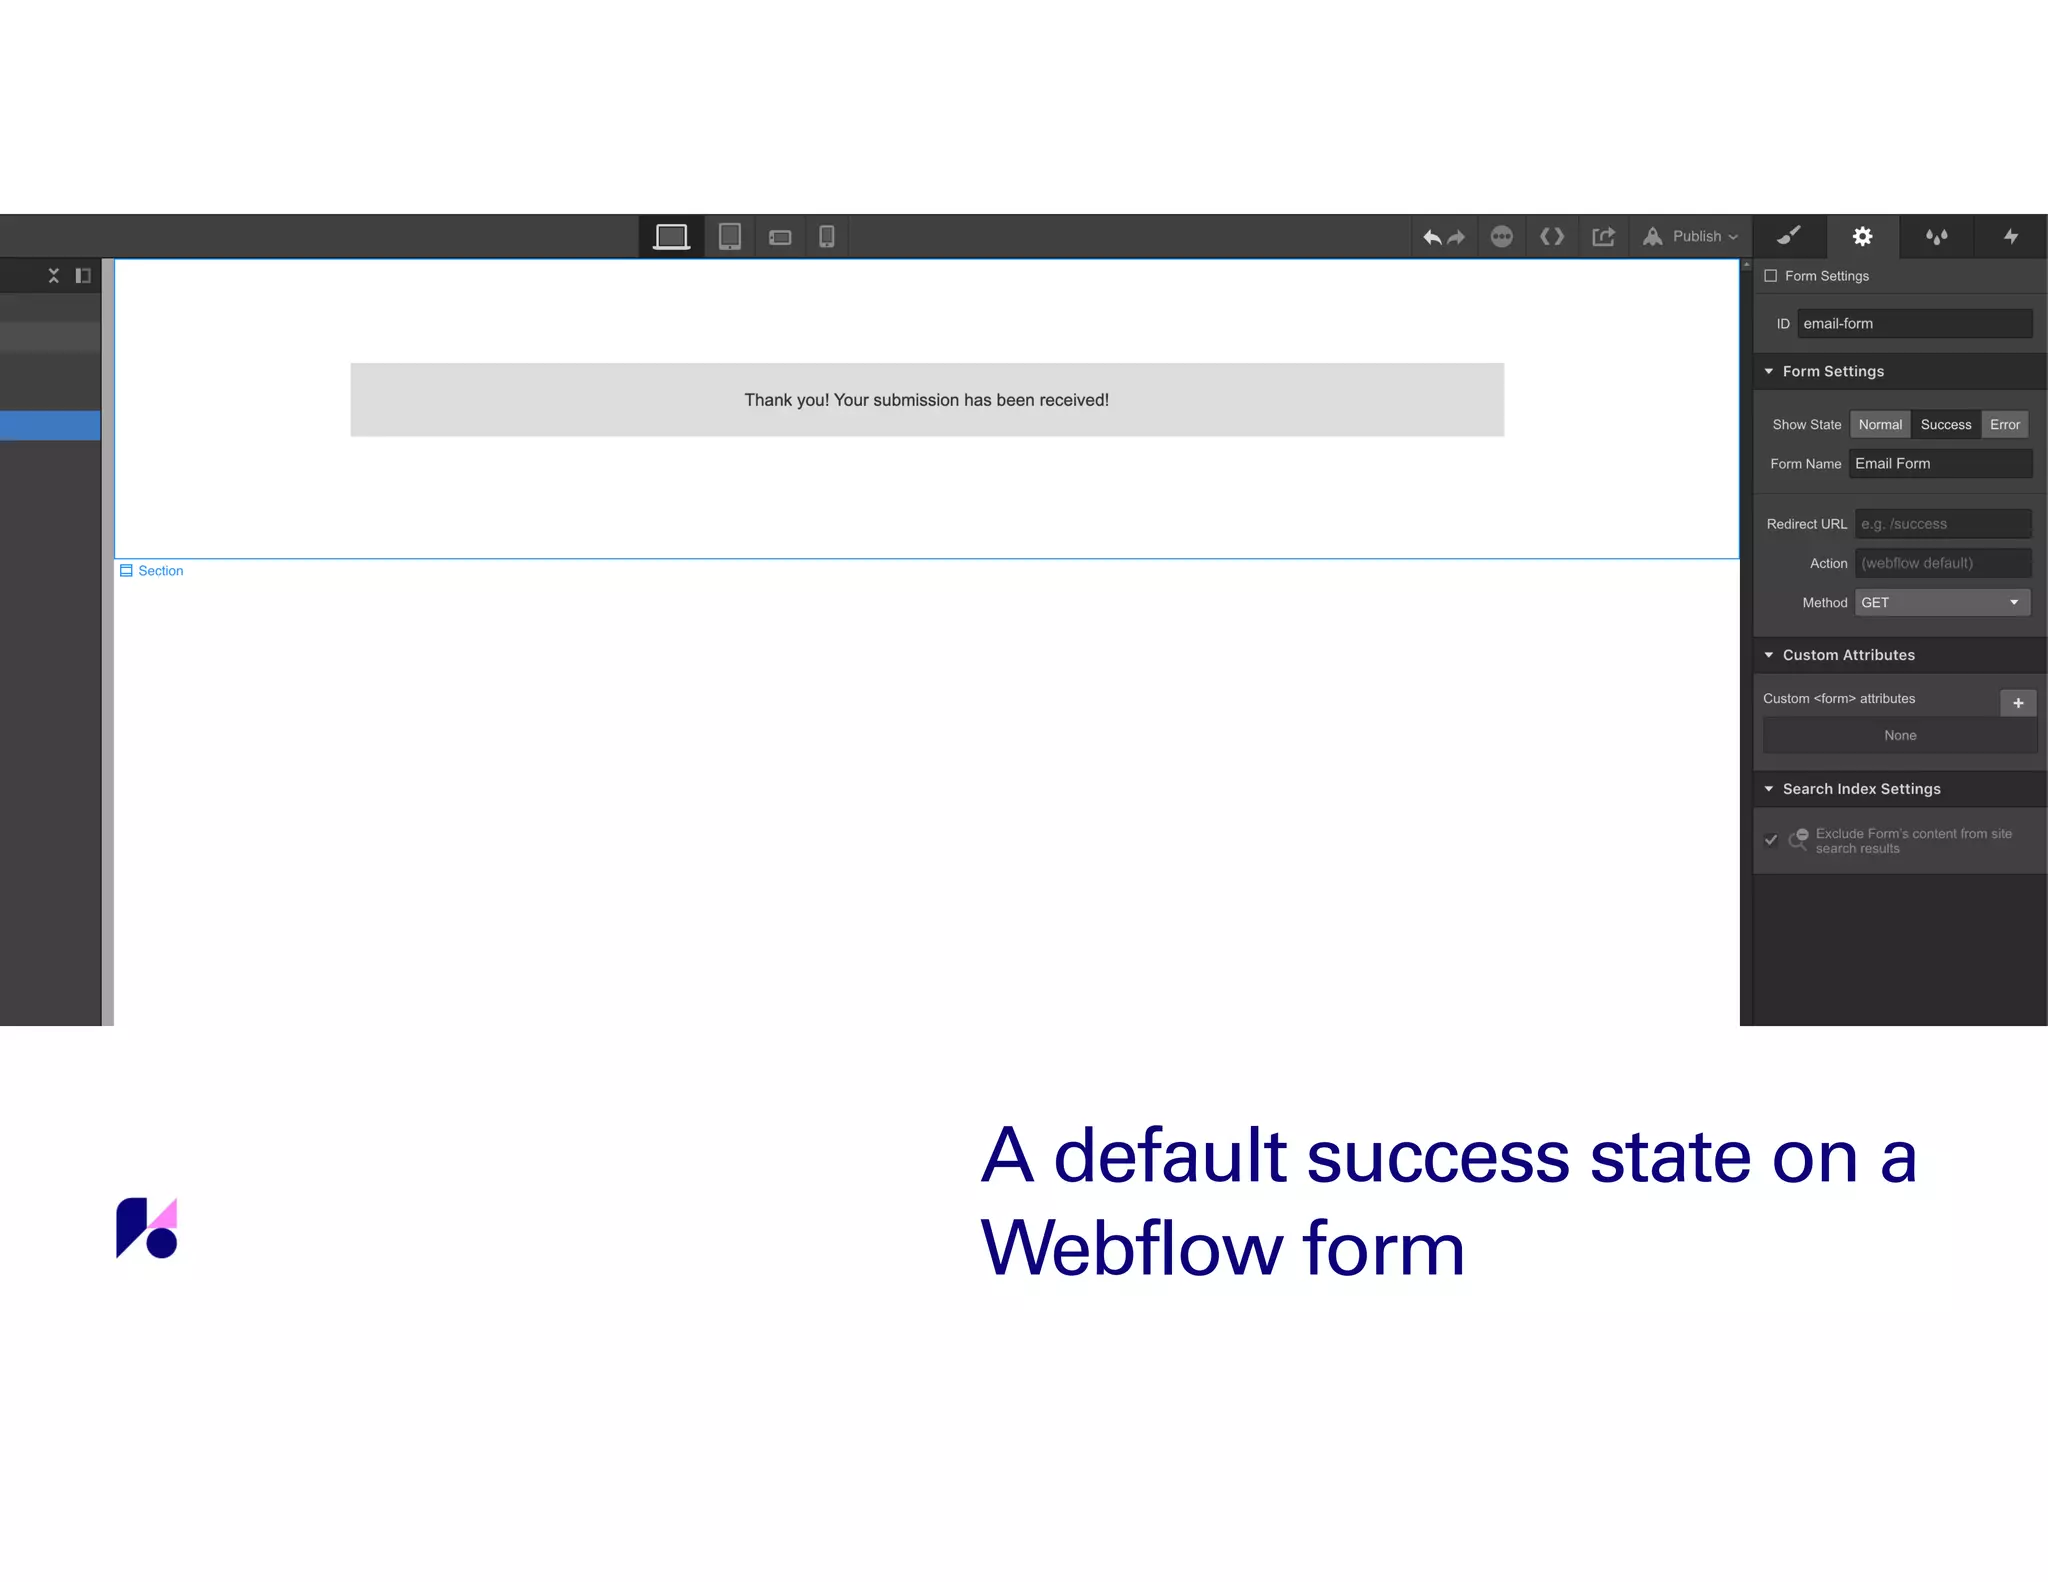
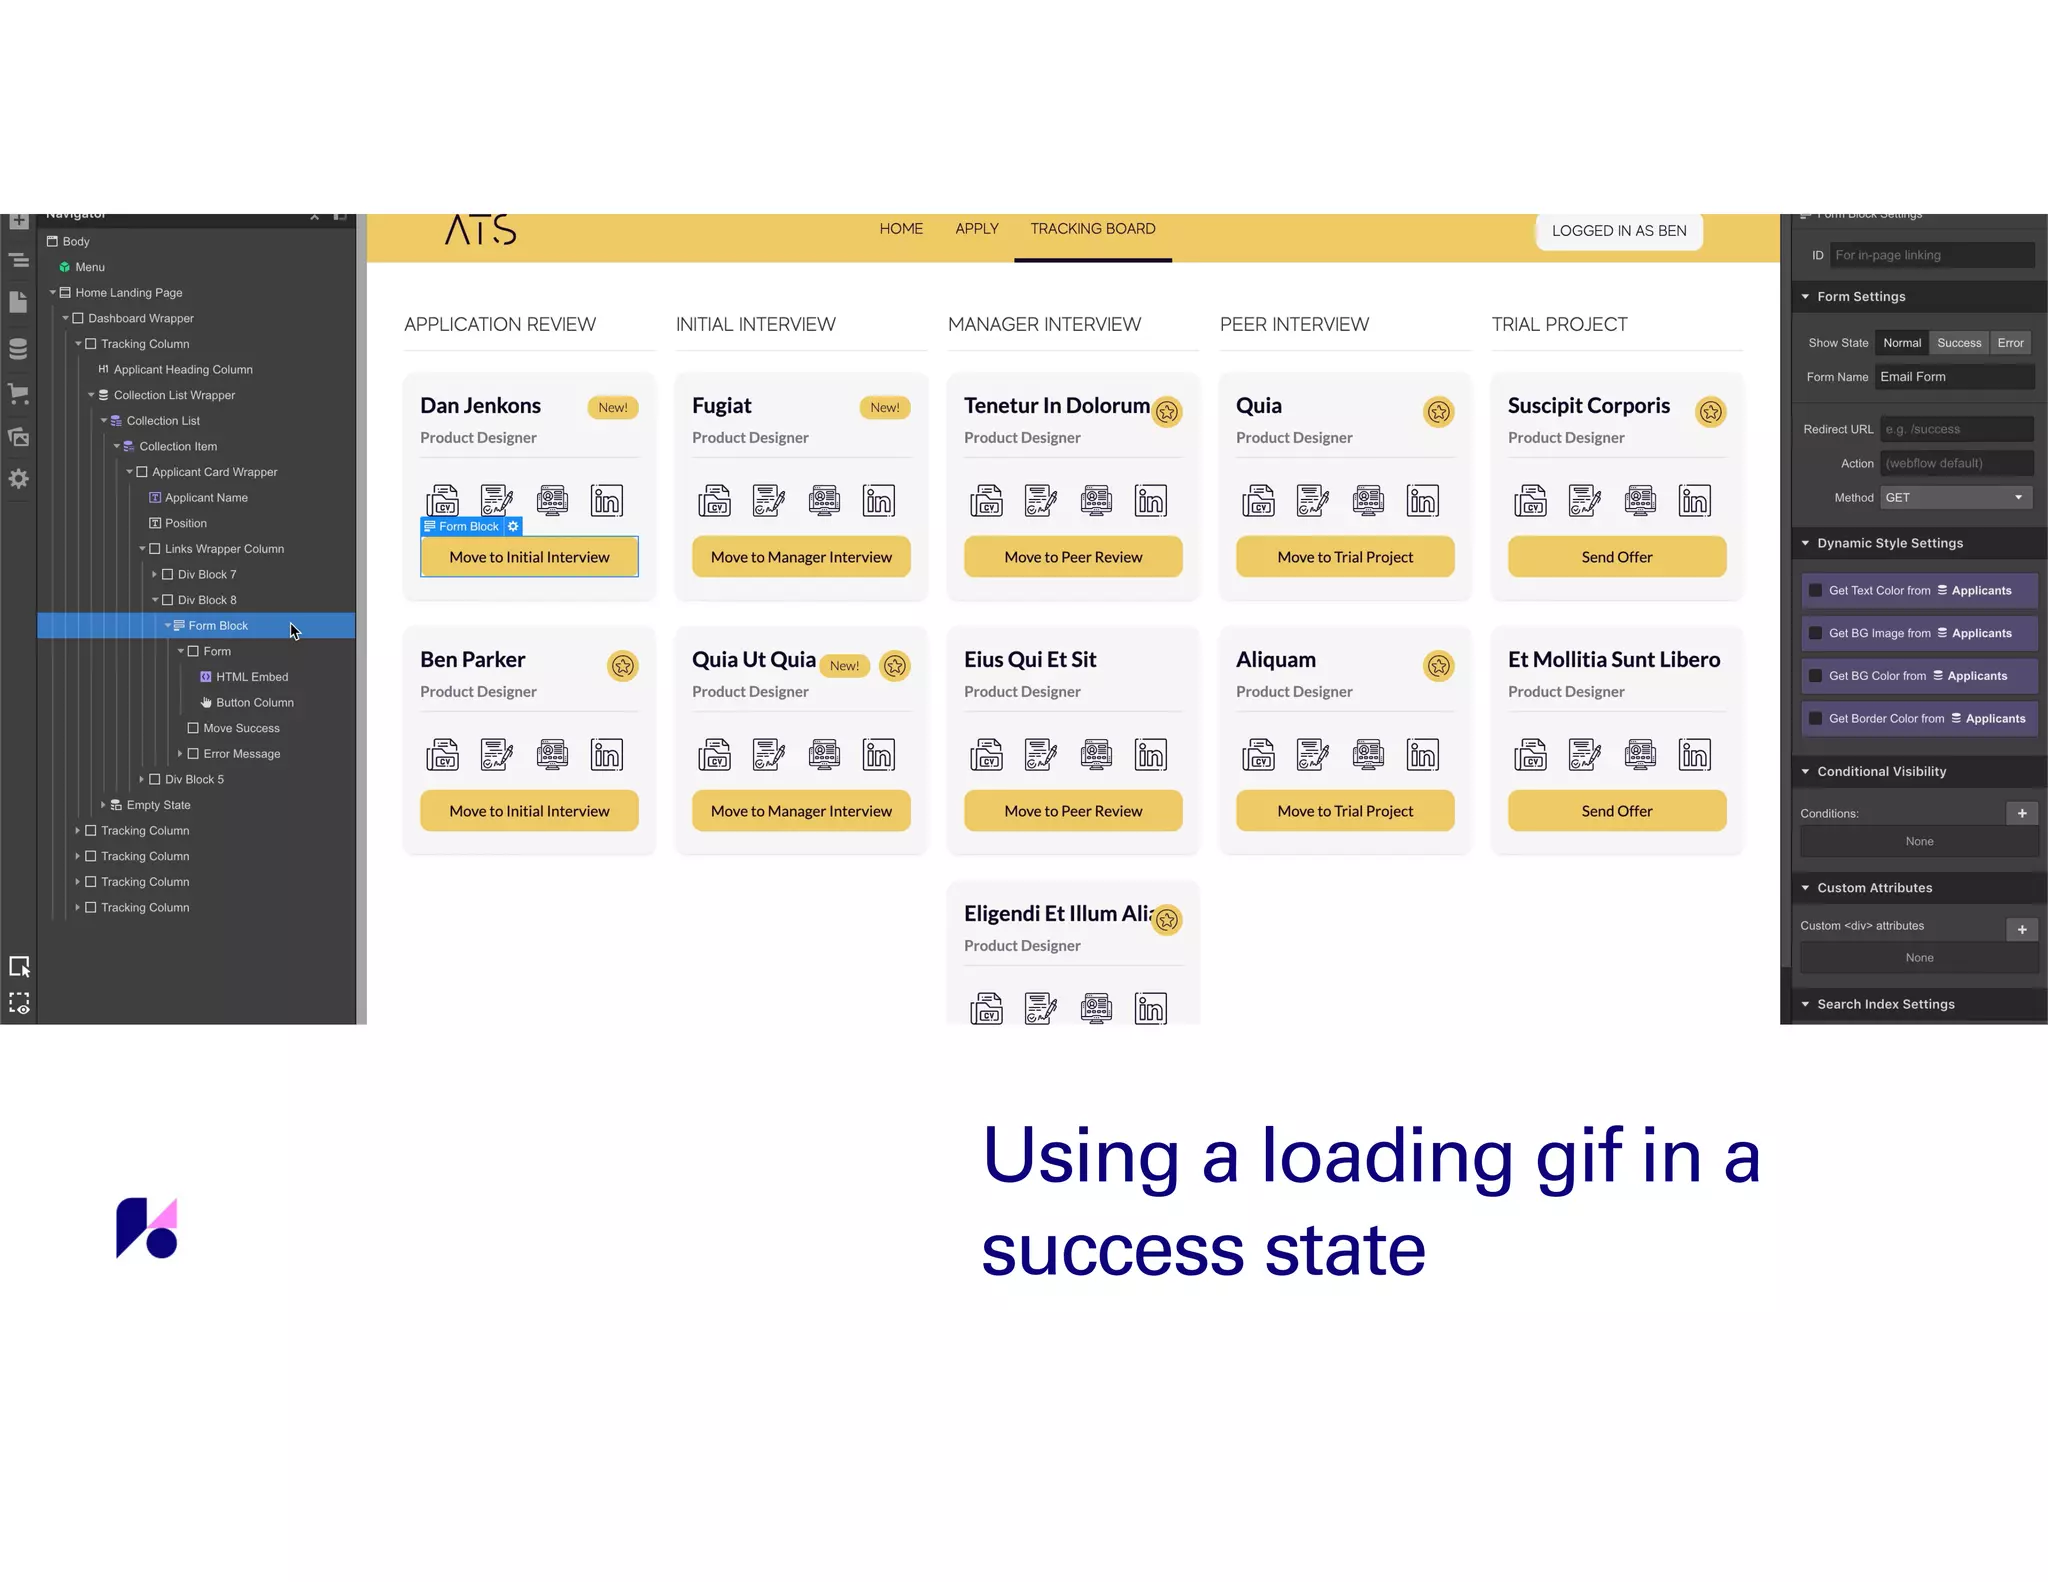
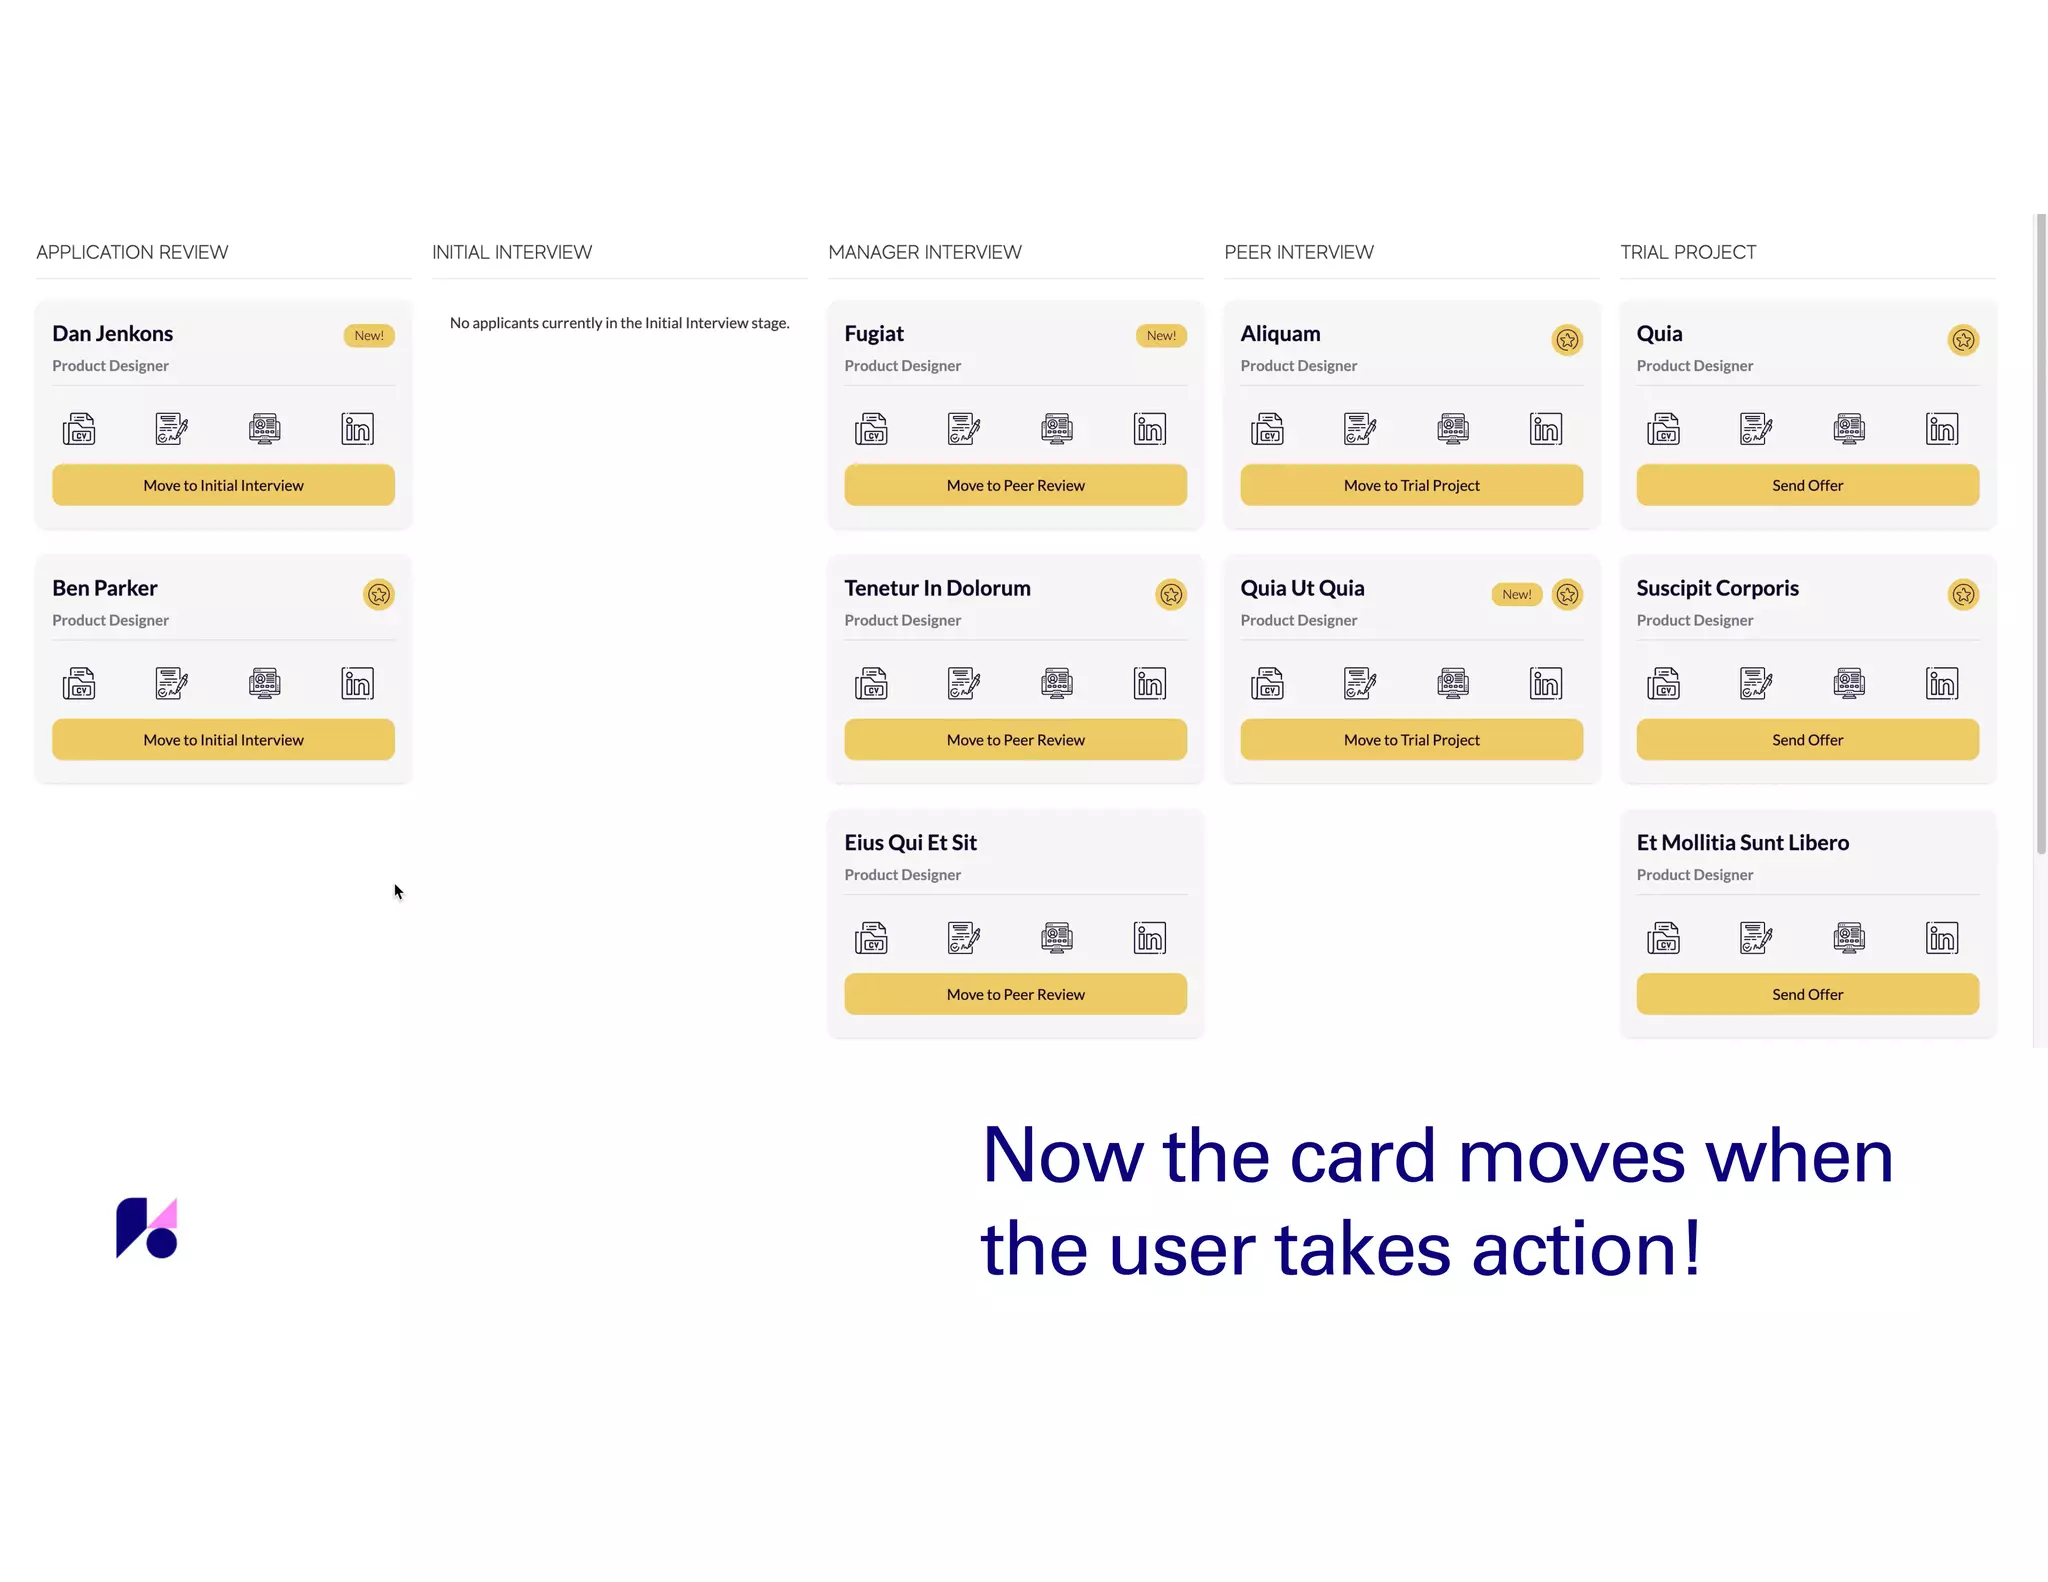
BEN PARKER
Forms + Zaps =
No Code Apps
The Webflow CMS
The CMS is a powerful tool and we’ve seen
so many great sites built with Webflow that
are powered by it. Blogs, marketing sites,
landing pages, podcast sites, real estate
listings, careers & jobs pages, and this list
could go on for a long time.
What unlocked the
power for me
A CMS-Driven site to organize issues
that customers are facing. It is
powered by the Webflow CMS, Google
Sheets, the Github API, and by Zapier!
Built for internal use at Webflow.
STABILIZER
A CMS-Driven site that helps fans
find songs and share them with radio
stations and digital service providers
via social media. A project for
Chance the Rapper’s team.
RAPPER RADIO
Applicant tracking system
home page
Applicant tracking system
kanban page
Applicant tracking system
collection fields
This is the most important
field in your collection
The stages of an applicant
in our system
The stages of an applicant
in our system
Populating the collection
using a Webflow form and a
simple three step Zap
⚠
A quick note
You will need to fill out the form
you’re working with one time and
submit it before you move into
Zapier. You’ll need to do this so
Zapier can find your form and so
that you have data to work with
when building your Zaps.
The three step Zap to add
in new applicants
Add in the data to your
collection from the form
There are
some
required
fields when
adding and
updating a
live item
You’ll want to make
sure that draft and
archived at the bottom
of the zap are set to
no.
Draft and
Archived?
When updating a live
item you are required
to add in the item ID
and the name of the
item.
Item ID &
Name
The three step Zap to add
in new applicants
Add in the item ID so we
can use it to alter the CMS
Now lets work on moving
cards in between the
columns and stages
Any place a user would click
to take action, we use a form
Dynamic embeds and
some minimal code
Now we create a zap to
update the item
Now we have the required fields
to make changes in the CMS
Now we have the required fields
to make changes in the CMS
Now we change the stage from
application review to initial review
Now we change the success
state of the form to add some
polish to the site.
A default success state on a
Webflow form
Using a loading gif in a
success state
Now we add a small
snippet of custom code
and our page refreshes on
submission and our card
moves between columns
Now the card moves when
the user takes action!
Go to the next
level
You can take this to the next level by
incorporating a tool like Memberstack. With a
user system, you can even show other users
who took the action and moved an applicant!

Forms + Zaps = No Code Apps - No Code Conf 2019 Demo Theater

  • 1.
    BEN PARKER Forms +Zaps = No Code Apps
  • 2.
    The Webflow CMS TheCMS is a powerful tool and we’ve seen so many great sites built with Webflow that are powered by it. Blogs, marketing sites, landing pages, podcast sites, real estate listings, careers & jobs pages, and this list could go on for a long time.
  • 3.
    What unlocked the powerfor me A CMS-Driven site to organize issues that customers are facing. It is powered by the Webflow CMS, Google Sheets, the Github API, and by Zapier! Built for internal use at Webflow. STABILIZER A CMS-Driven site that helps fans find songs and share them with radio stations and digital service providers via social media. A project for Chance the Rapper’s team. RAPPER RADIO
  • 4.
  • 5.
  • 6.
  • 7.
    This is themost important field in your collection
  • 8.
    The stages ofan applicant in our system
  • 9.
    The stages ofan applicant in our system
  • 10.
    Populating the collection usinga Webflow form and a simple three step Zap
  • 11.
    ⚠ A quick note Youwill need to fill out the form you’re working with one time and submit it before you move into Zapier. You’ll need to do this so Zapier can find your form and so that you have data to work with when building your Zaps.
  • 12.
    The three stepZap to add in new applicants
  • 13.
    Add in thedata to your collection from the form
  • 14.
    There are some required fields when addingand updating a live item You’ll want to make sure that draft and archived at the bottom of the zap are set to no. Draft and Archived? When updating a live item you are required to add in the item ID and the name of the item. Item ID & Name
  • 15.
    The three stepZap to add in new applicants
  • 16.
    Add in theitem ID so we can use it to alter the CMS
  • 17.
    Now lets workon moving cards in between the columns and stages
  • 18.
    Any place auser would click to take action, we use a form
  • 19.
  • 20.
    Now we createa zap to update the item
  • 21.
    Now we havethe required fields to make changes in the CMS
  • 22.
    Now we havethe required fields to make changes in the CMS
  • 23.
    Now we changethe stage from application review to initial review
  • 24.
    Now we changethe success state of the form to add some polish to the site.
  • 25.
    A default successstate on a Webflow form
  • 26.
    Using a loadinggif in a success state
  • 27.
    Now we adda small snippet of custom code and our page refreshes on submission and our card moves between columns
  • 28.
    Now the cardmoves when the user takes action!
  • 29.
    Go to thenext level You can take this to the next level by incorporating a tool like Memberstack. With a user system, you can even show other users who took the action and moved an applicant!