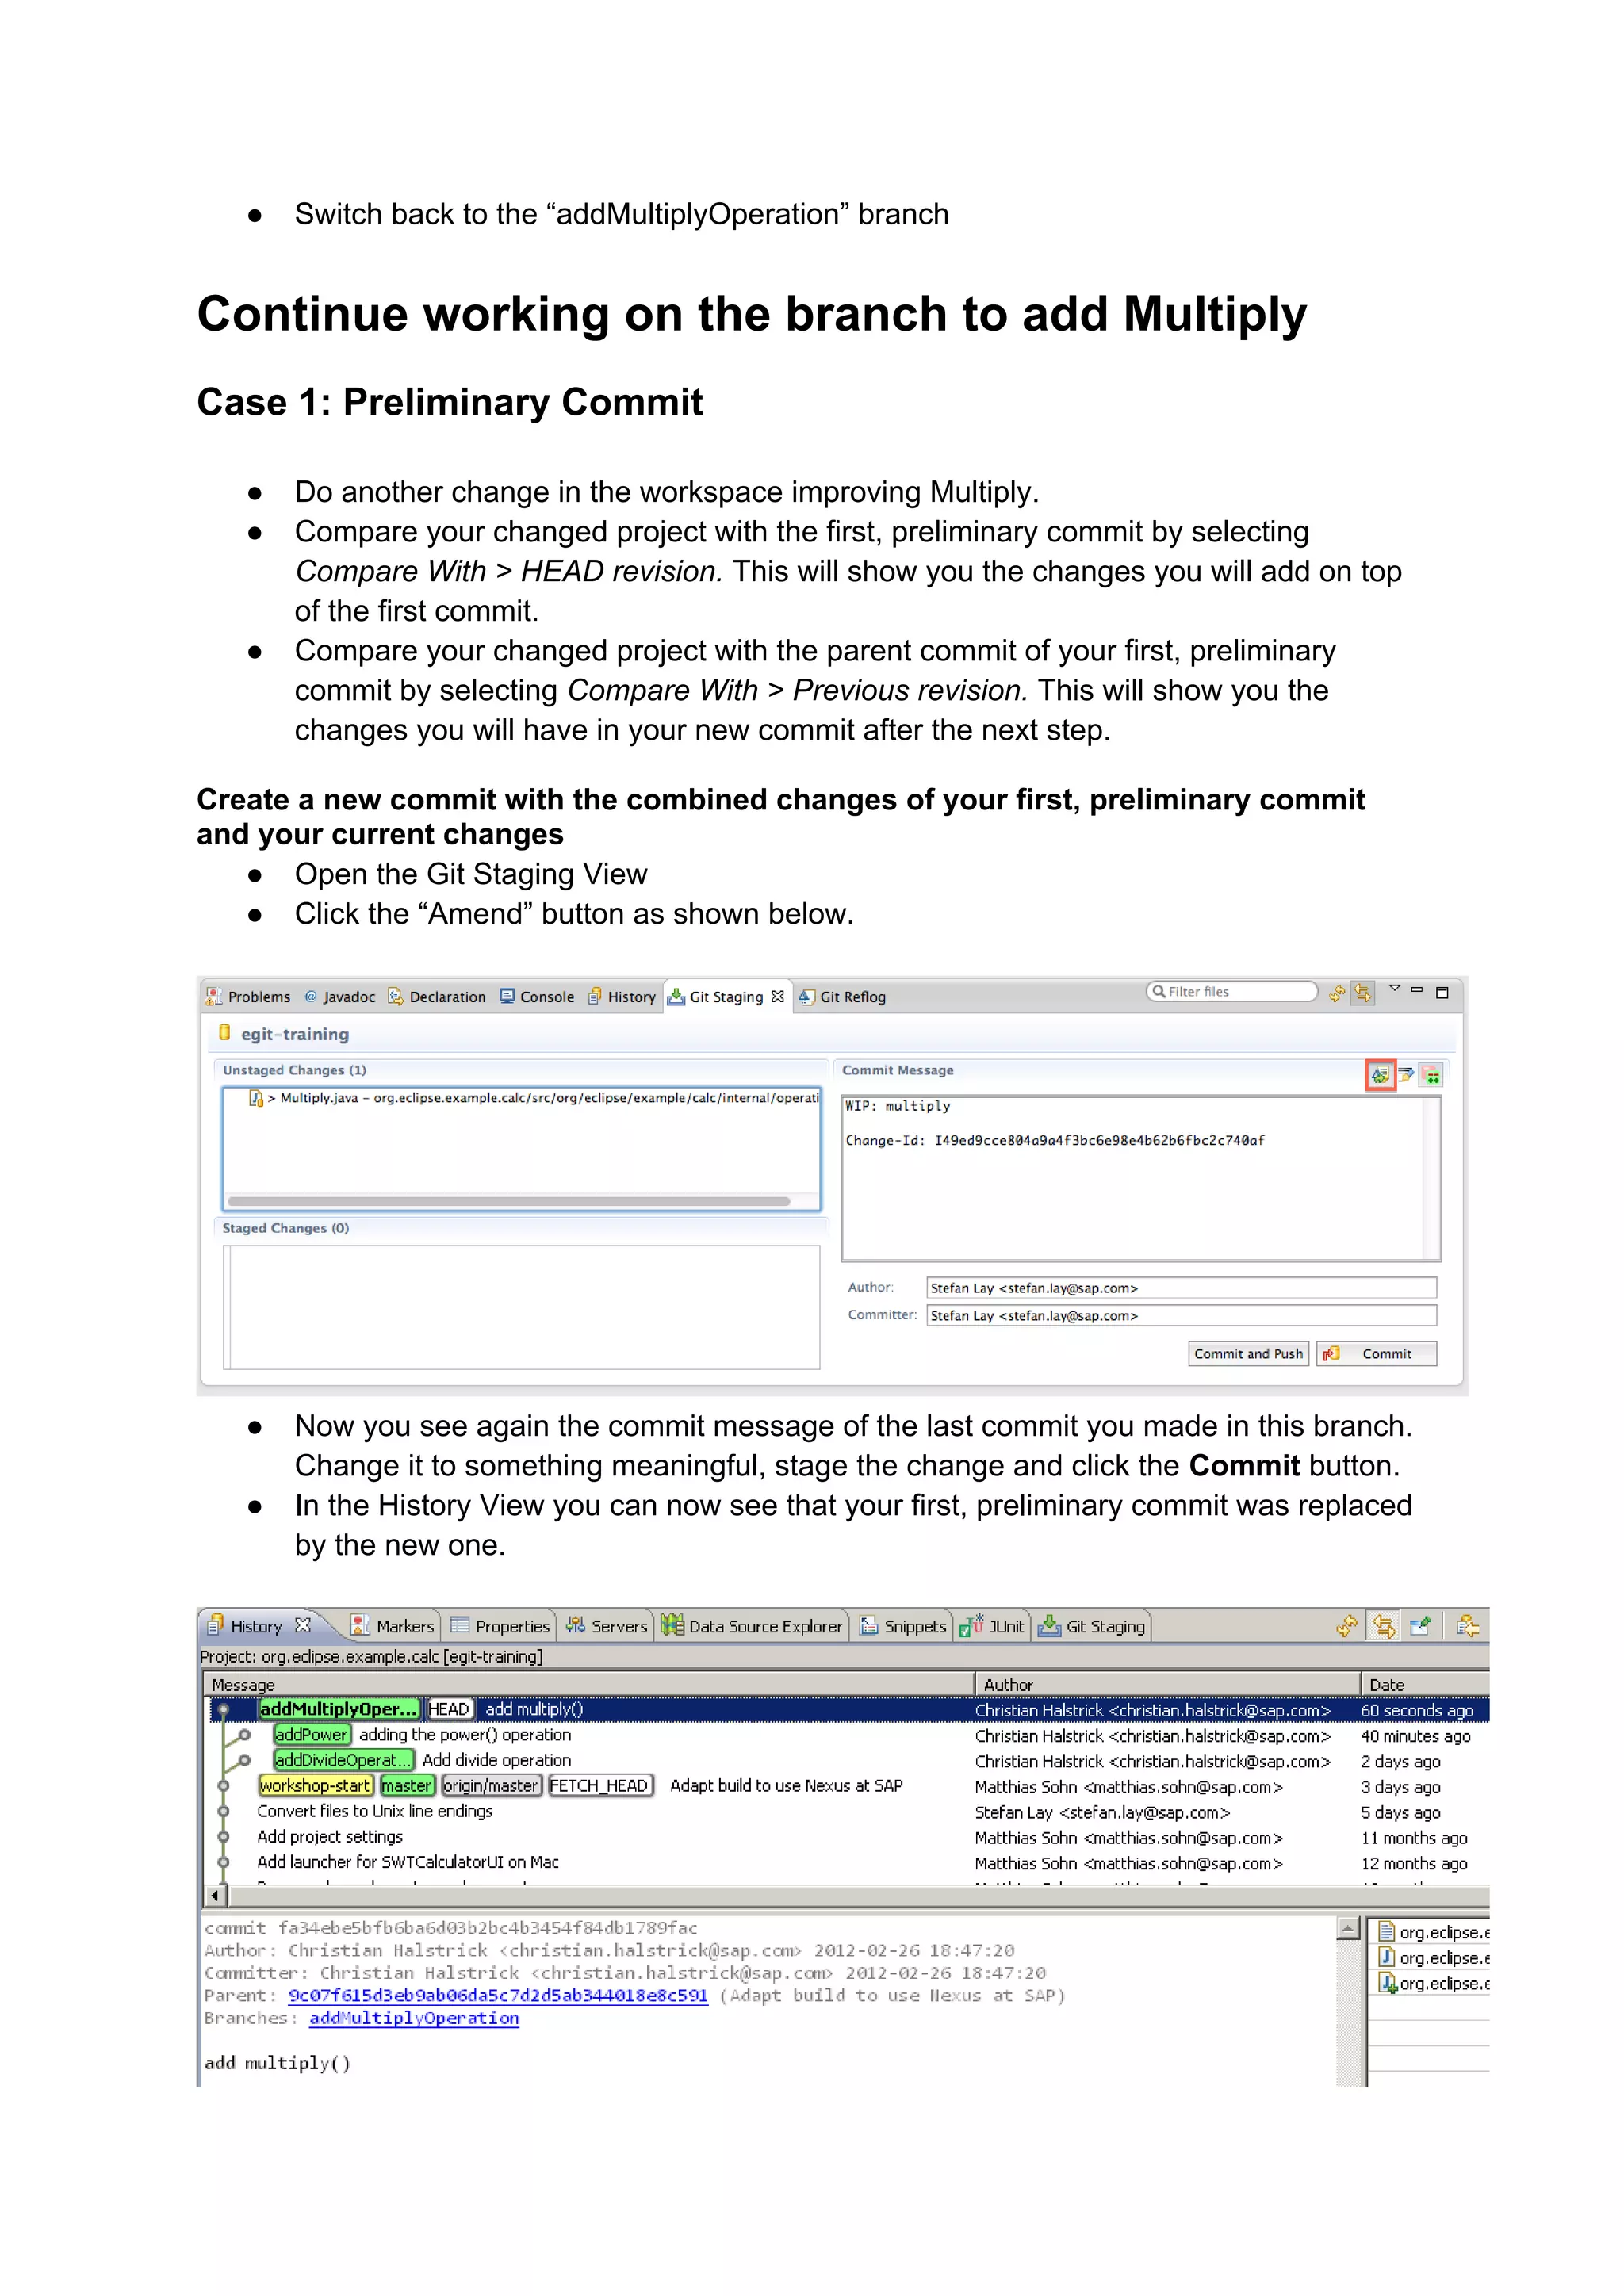
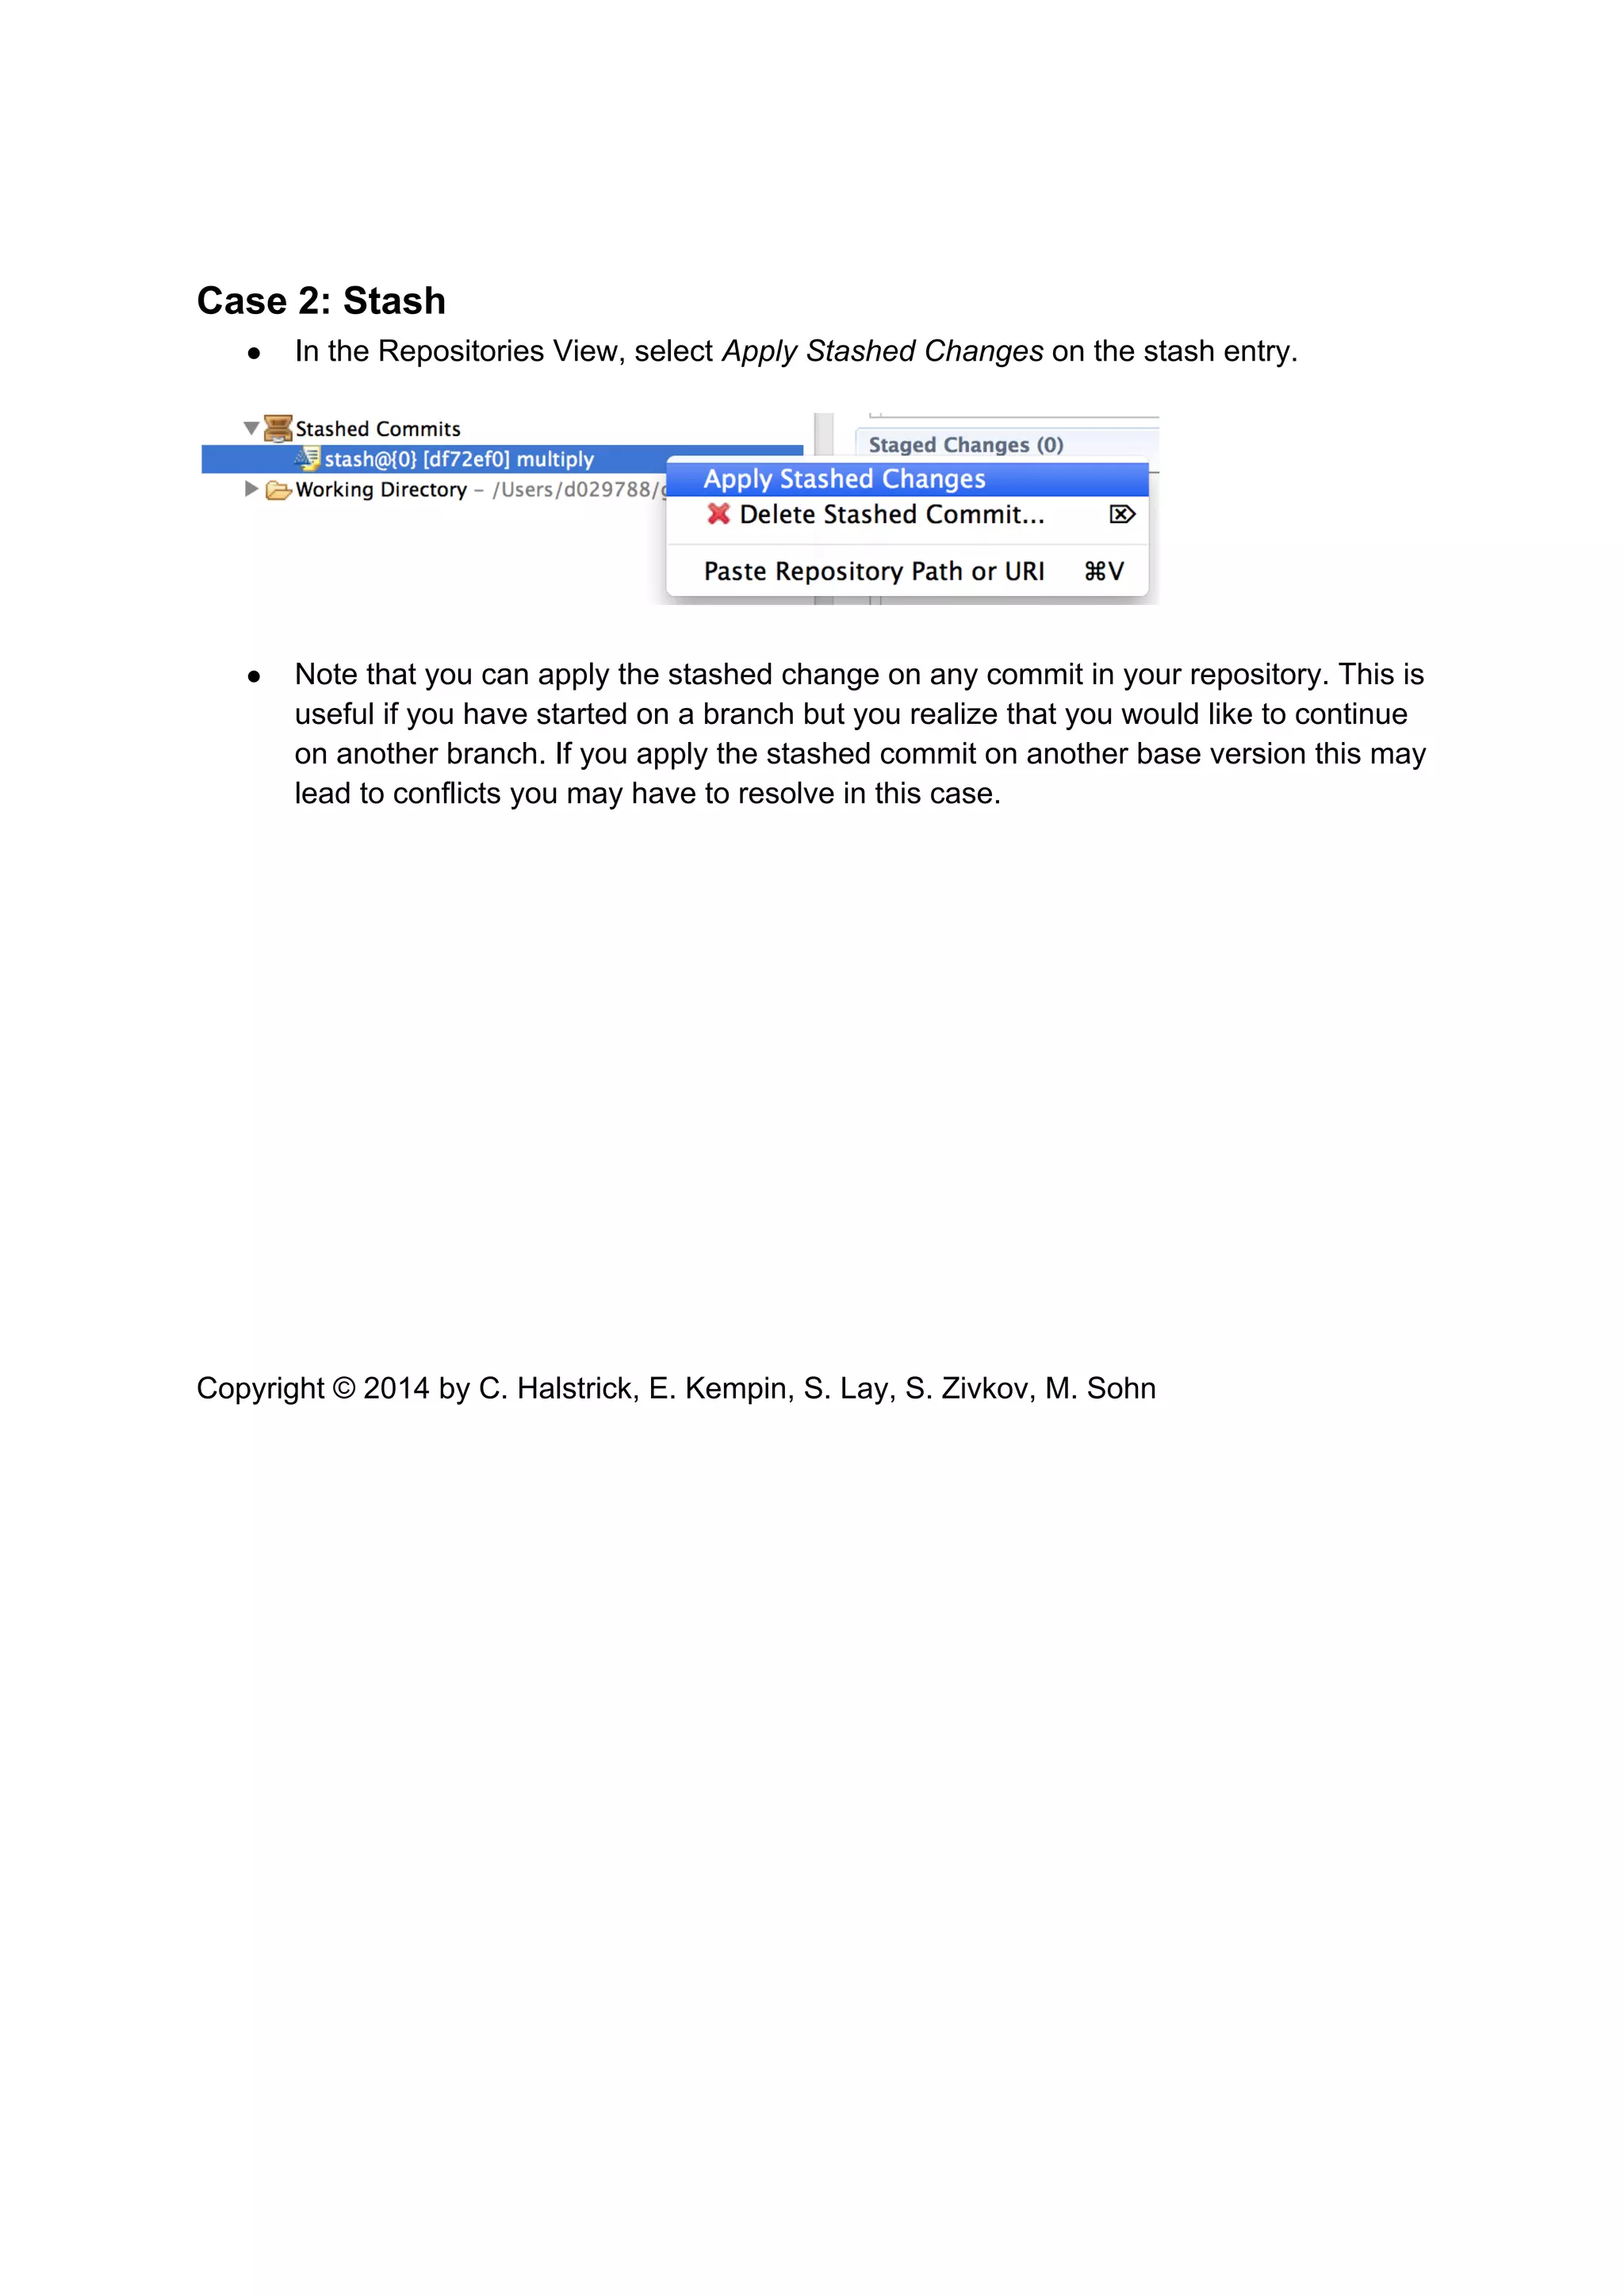
1) The document discusses how to efficiently work on multiple branches in parallel in Git. It presents two methods: using a preliminary commit that can later be amended with additional changes, or using Git's stash feature to temporarily store changes.
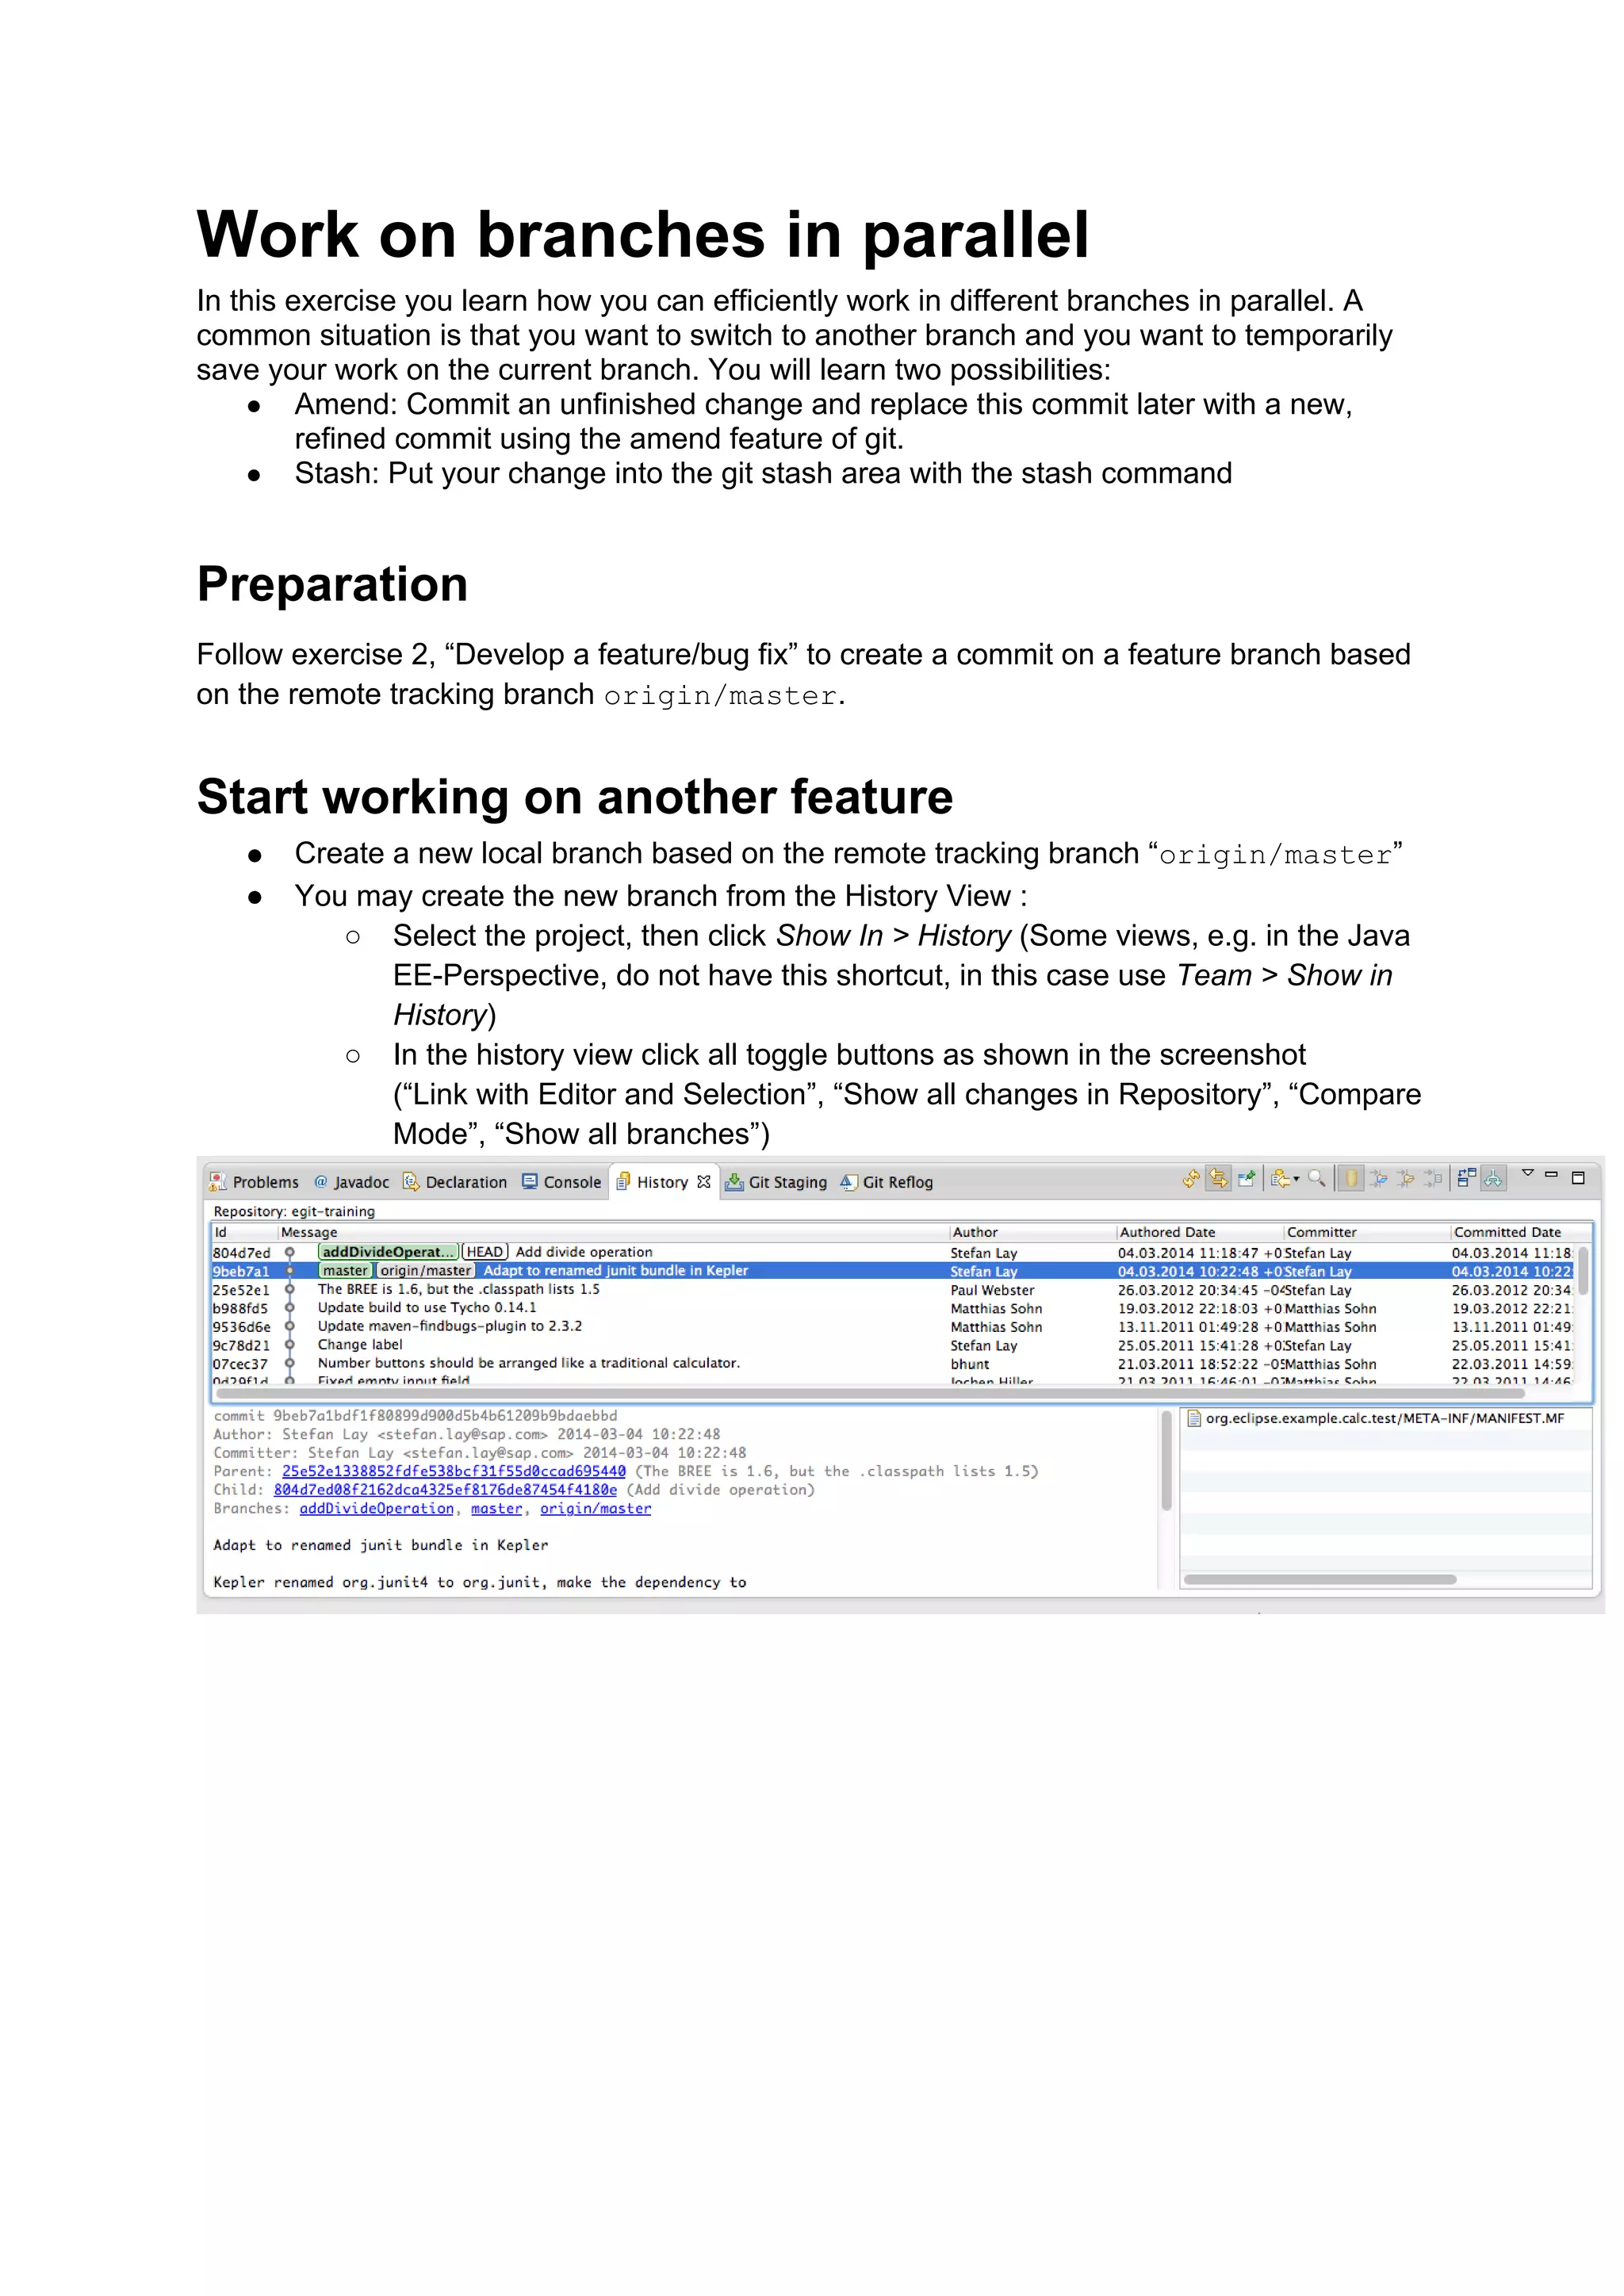
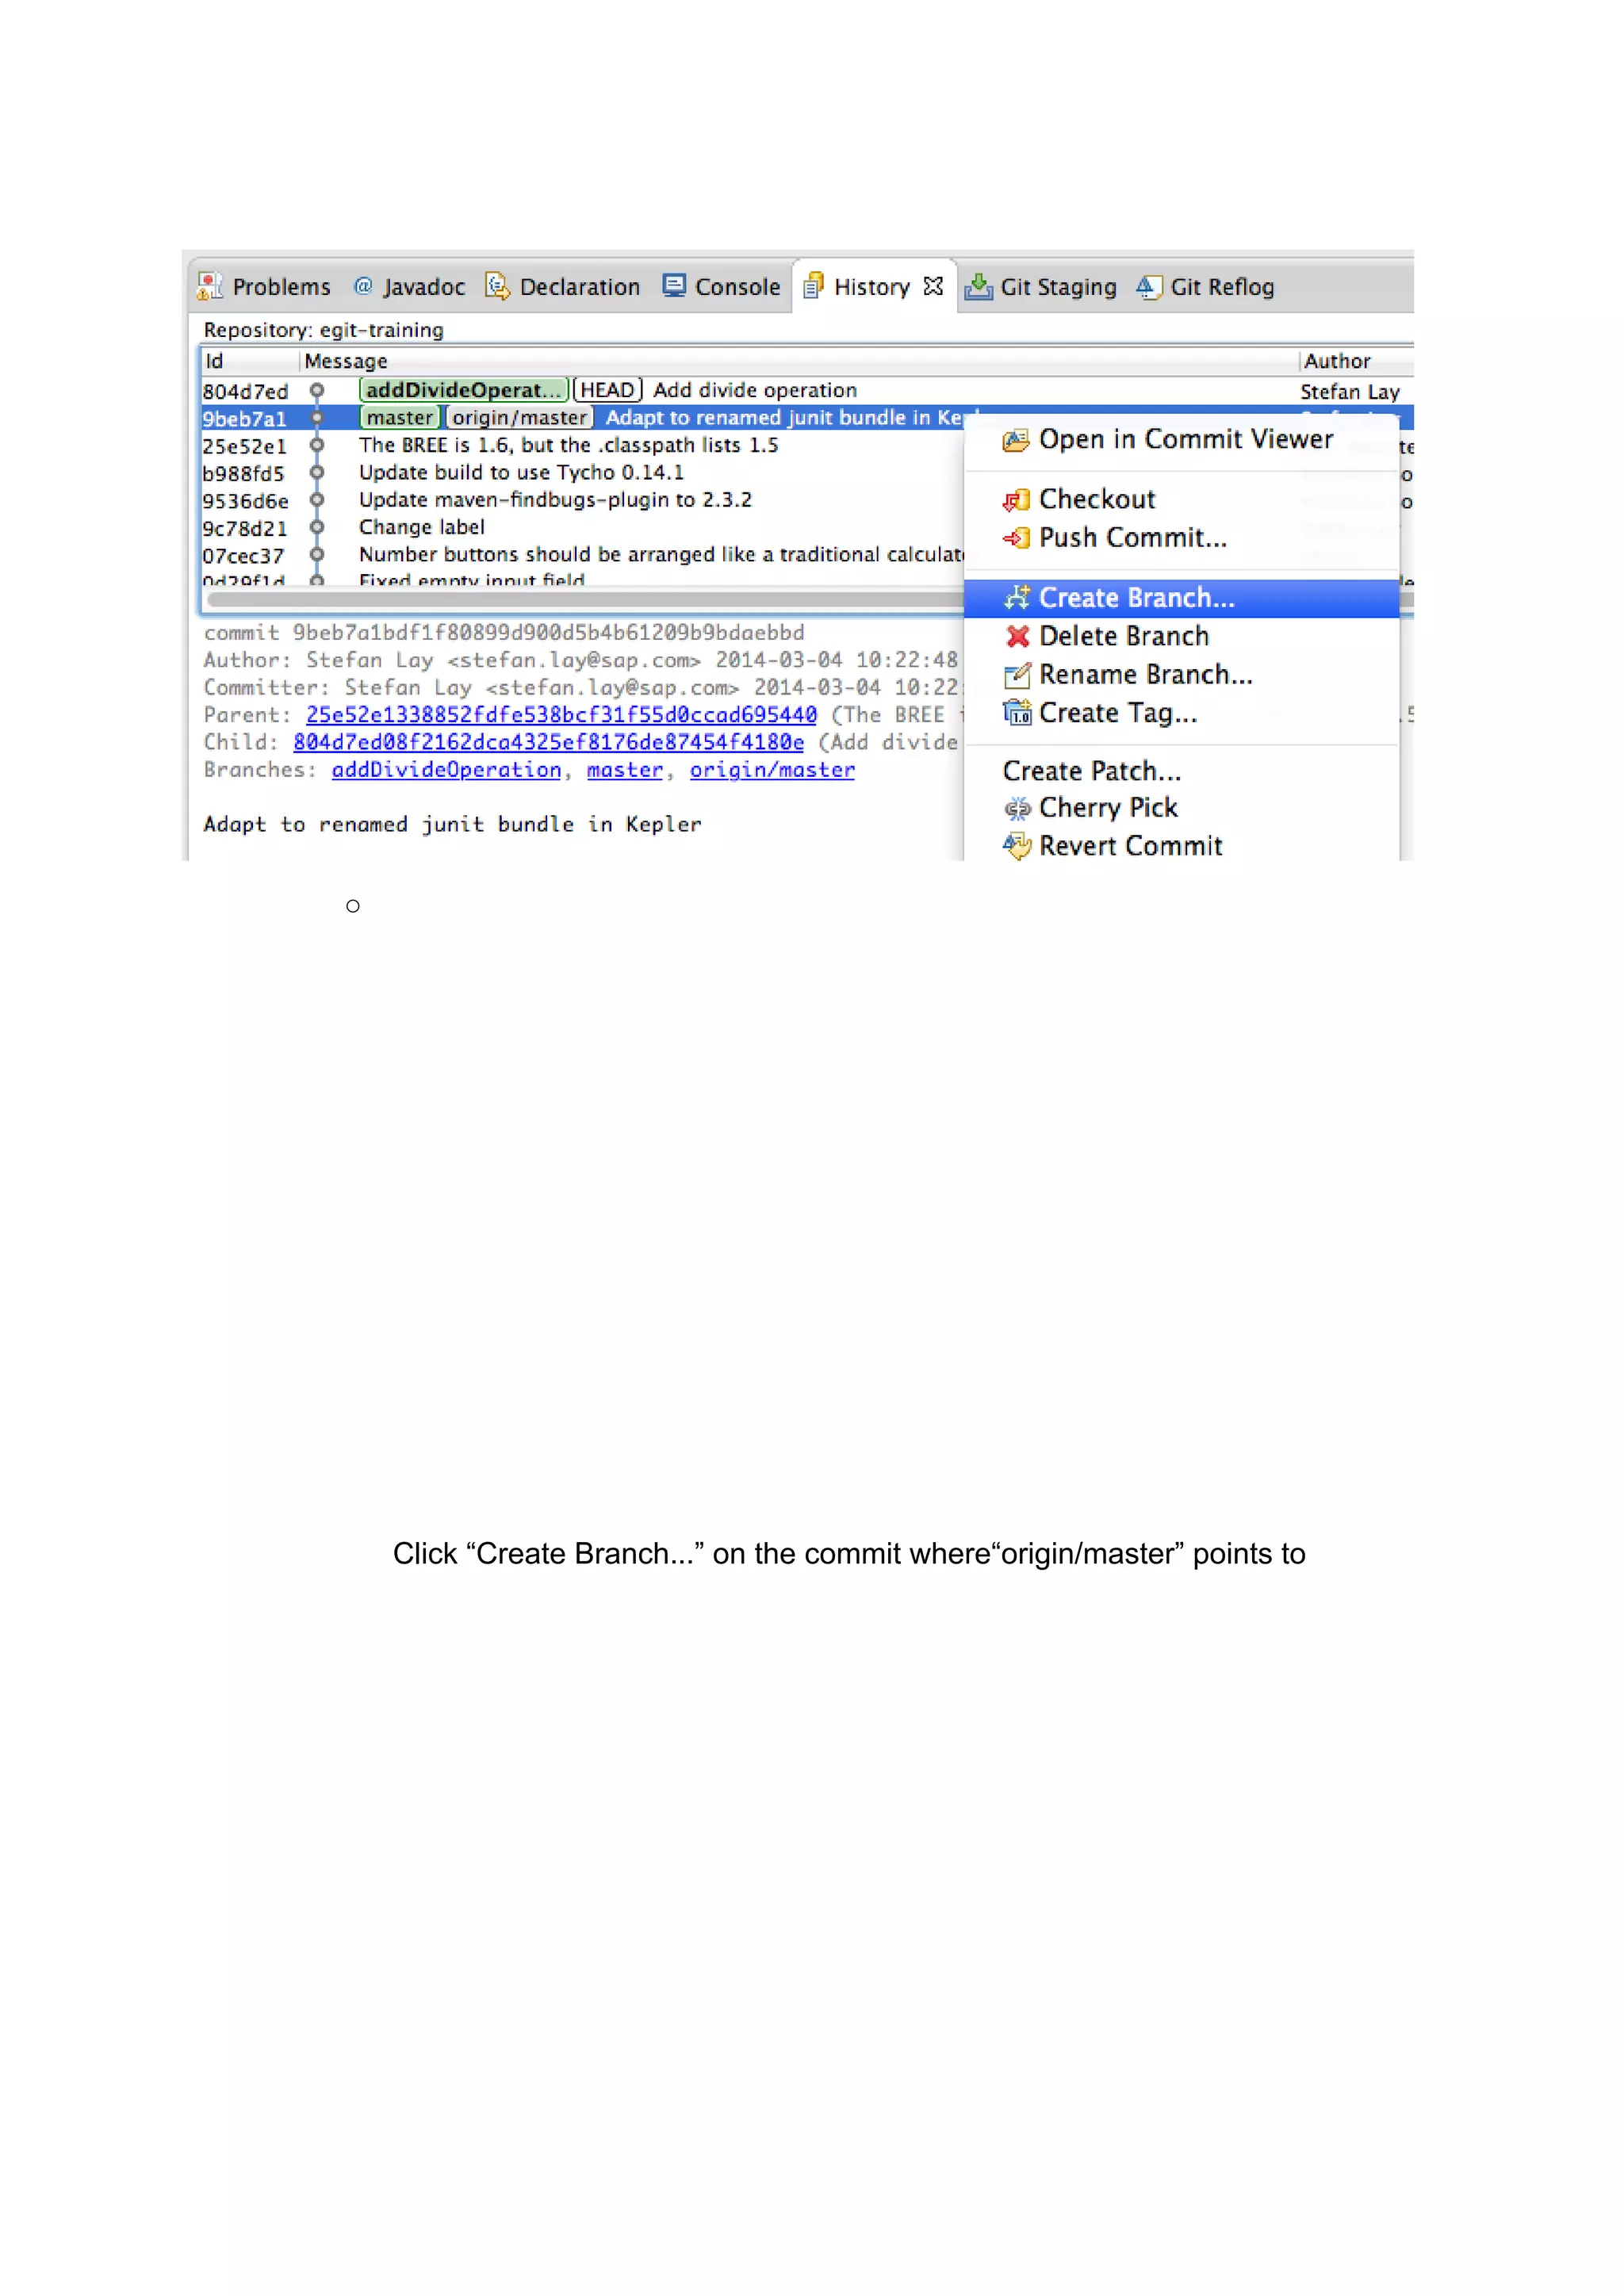
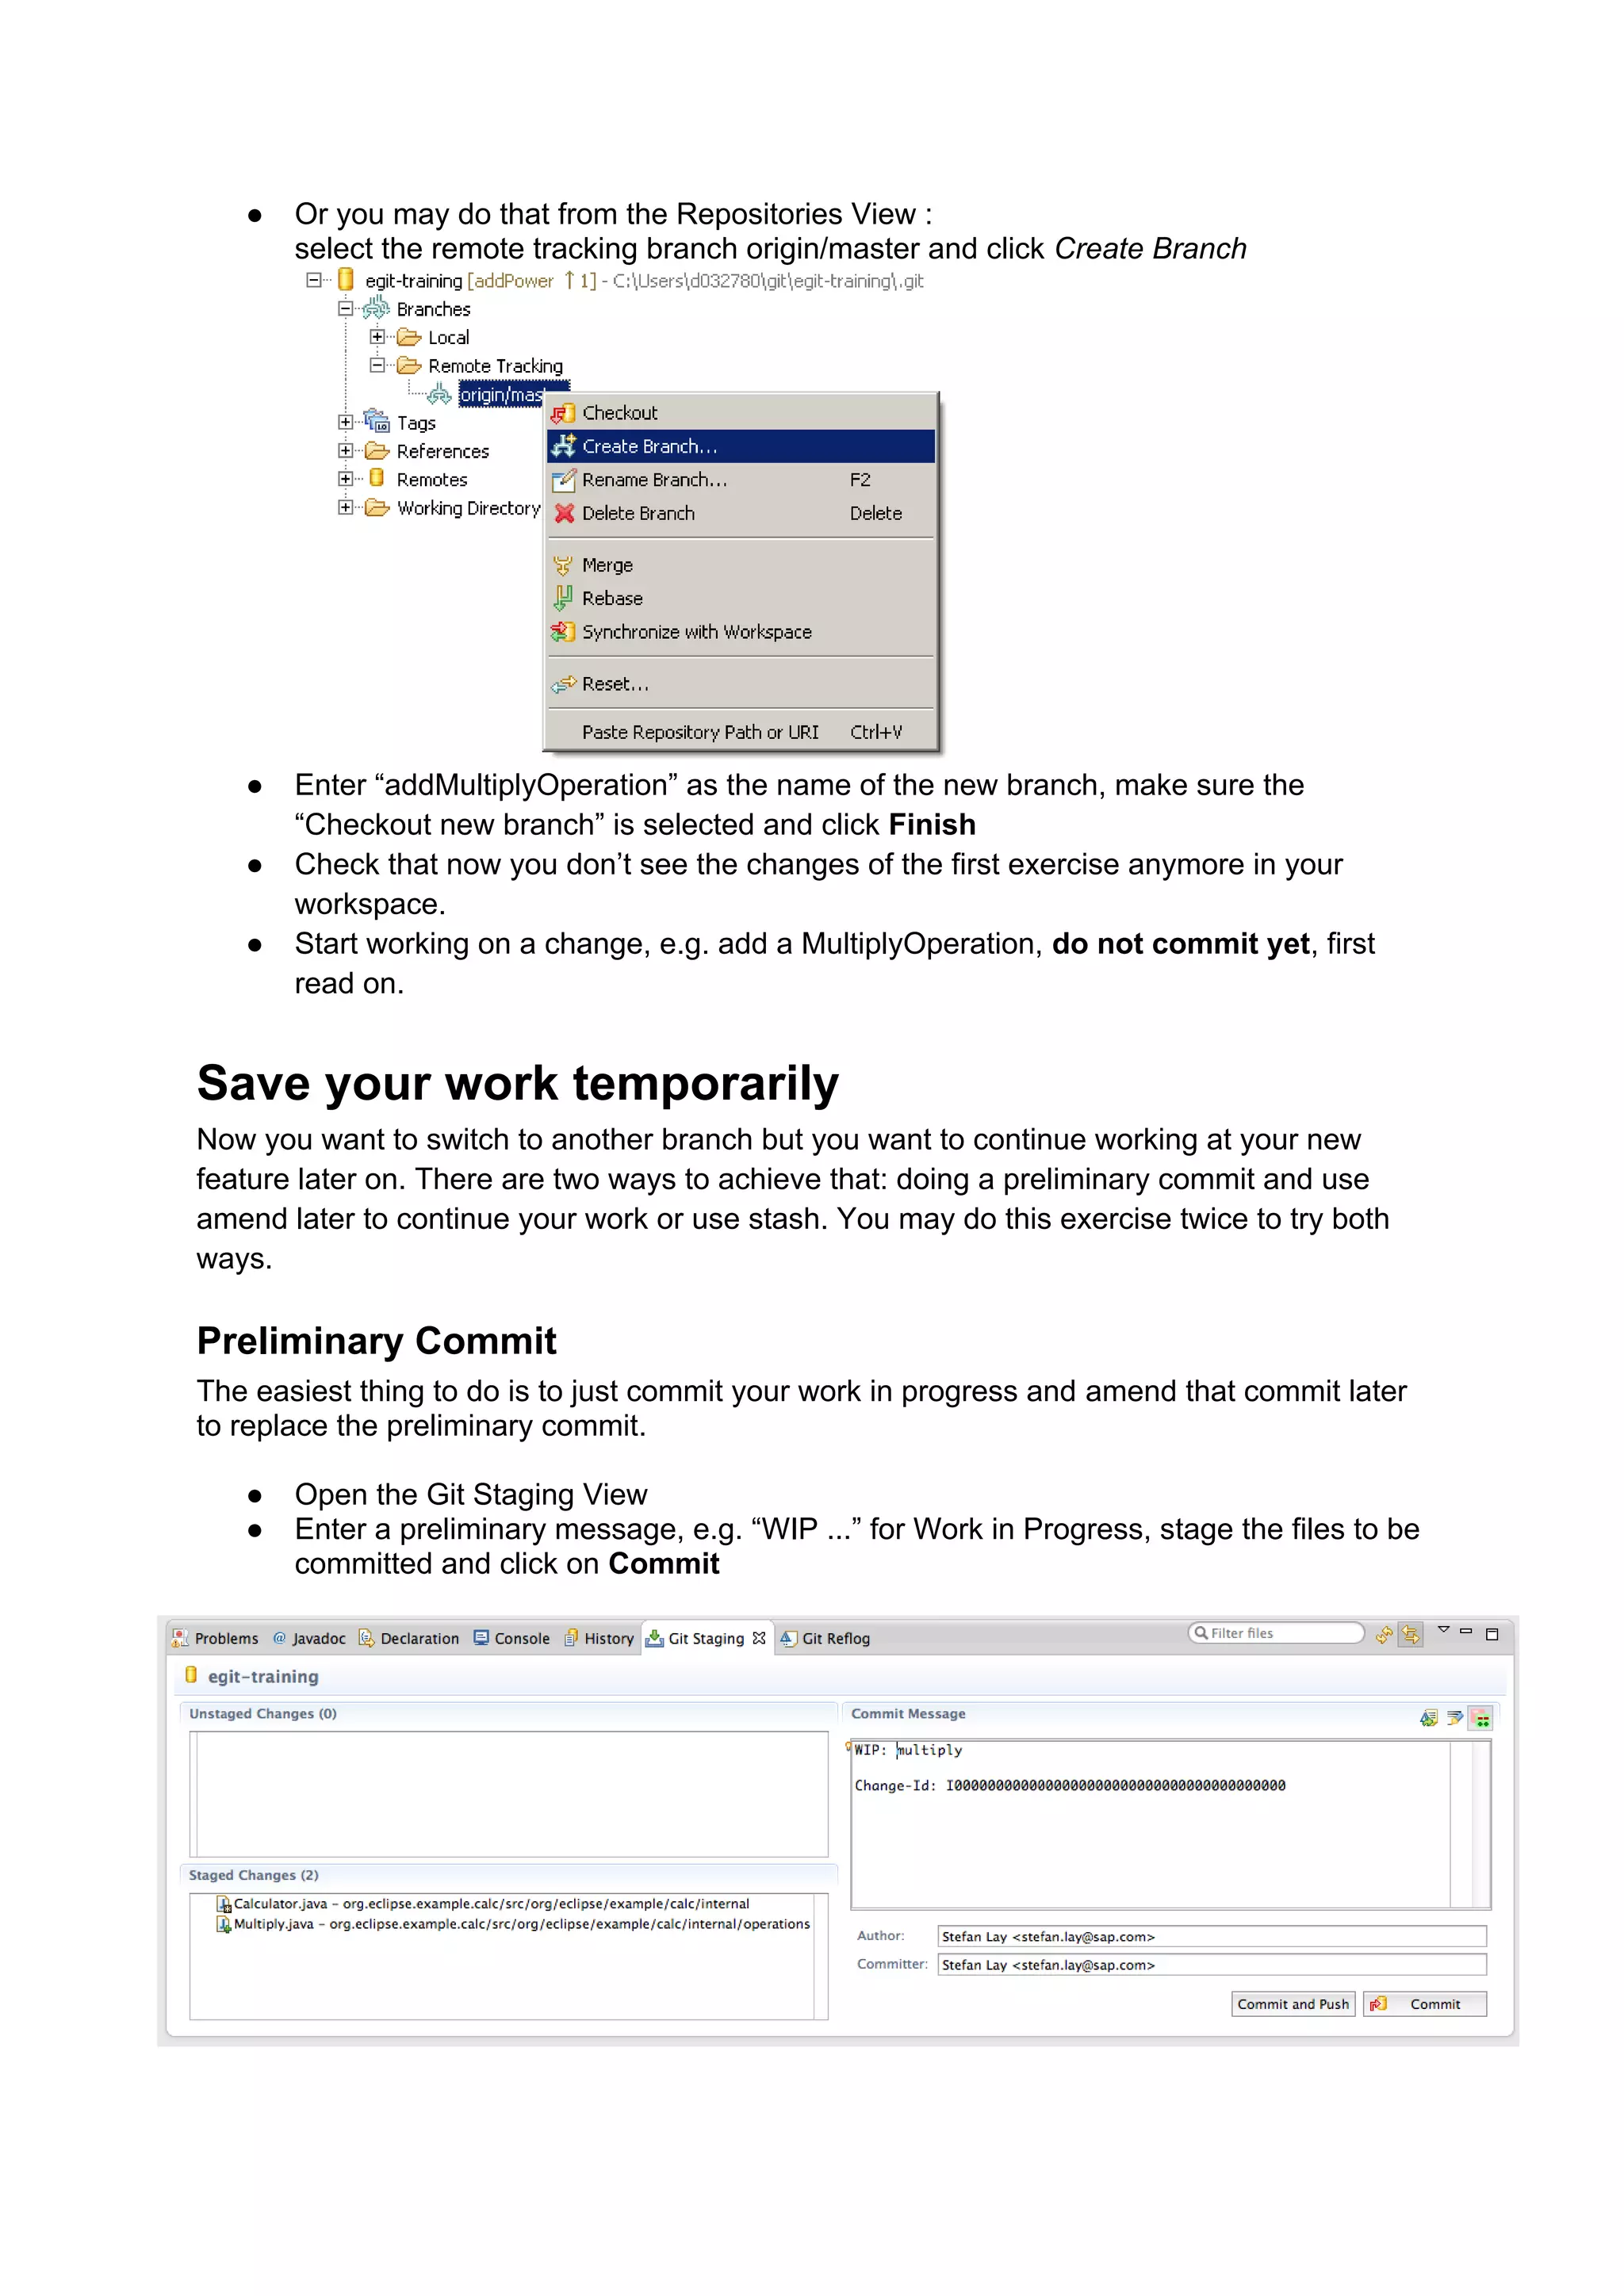
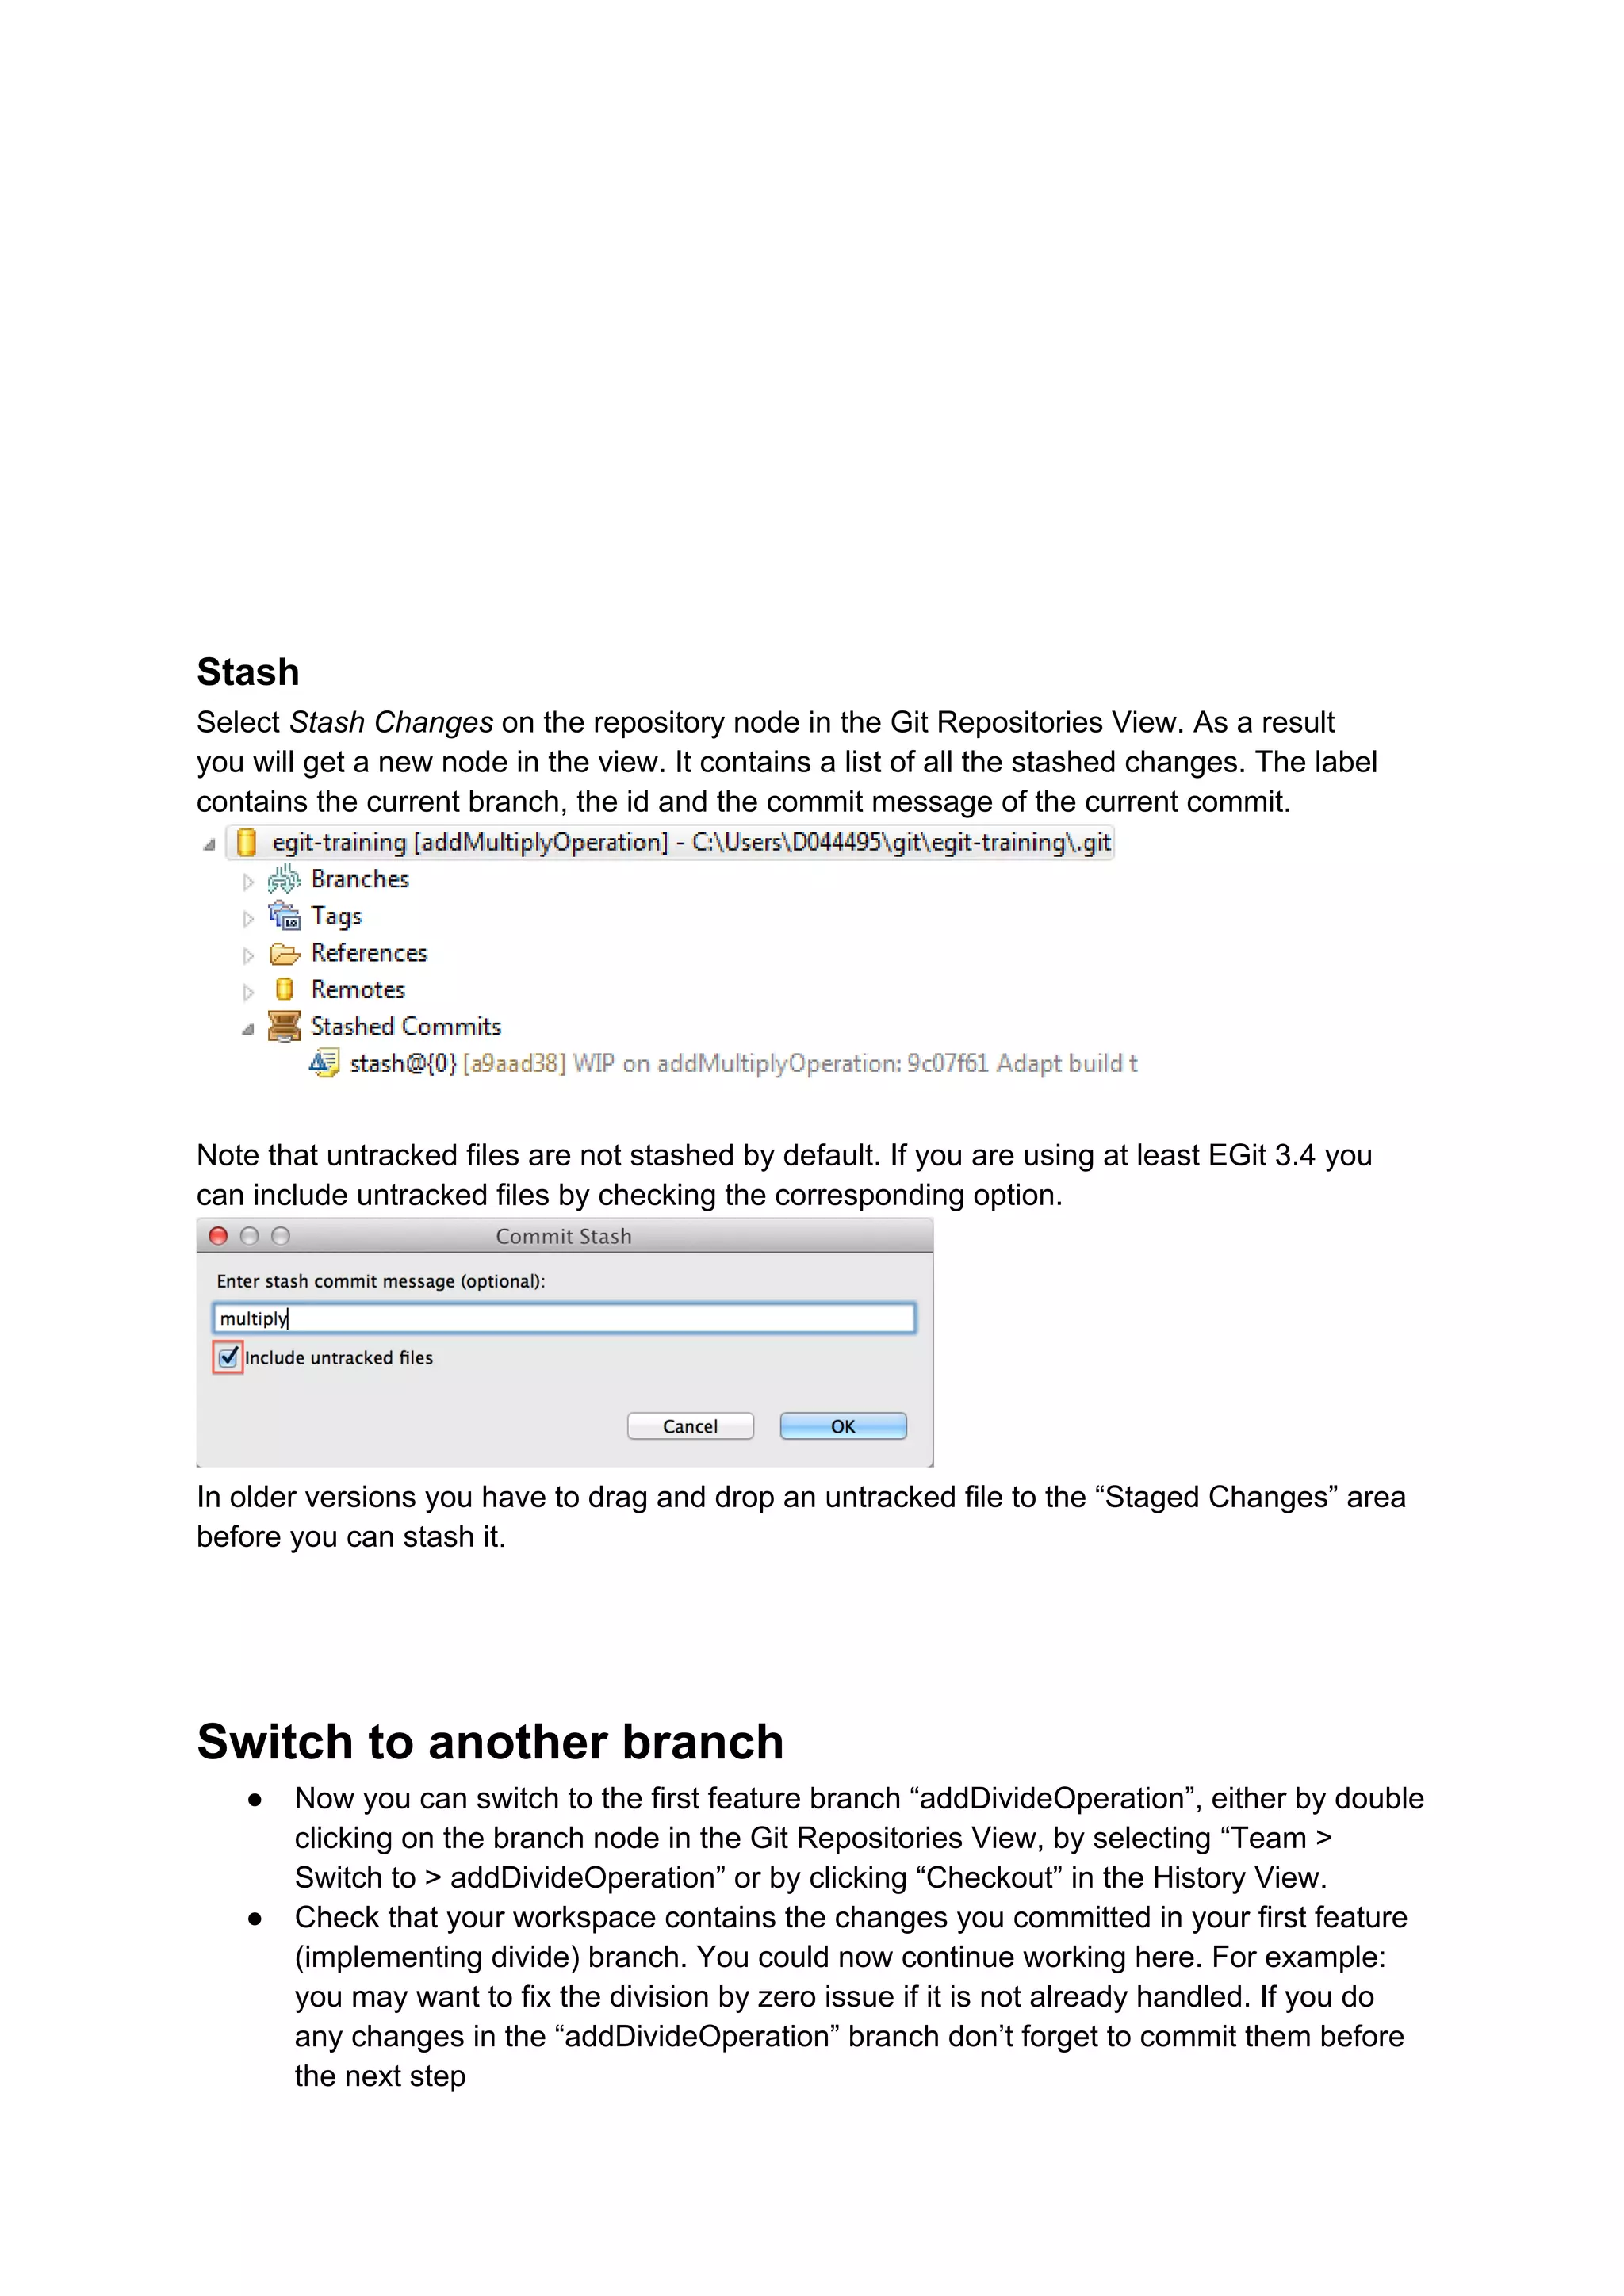
2) It walks through an example where the user starts work on a new feature branch, then switches to another branch while temporarily saving their work either by stashing or doing a preliminary commit.
3) When returning to the original branch, the user can continue working and amend their preliminary commit, or apply the stashed changes to continue where they left off.