SlideShare a Scribd company logo
1 of 16
Download to read offline
FootfallCam Portal User Manual 
How to login to FootfallCam Portal 
Go to http://controlpanel.retailcam.co.uk 
Fill in the details: Username: demo Password : demo123 
Section 1: Statistics 
Traffic patterns and the traffic counts’ changes of each counter are listed in one screen, allowing you to easily track on the traffics trend for all stores. 
1.0 How to view FootfallCam Report from the portal 
Note: 1. The Changes column refers to the changes of traffic counts by comparing the traffic counts of the current week with the previous week. 2. The Sparkline graph indicating the traffics pattern of the current week on a daily basis. 
Once login to the portal > Click on the left (1) ‘Statistics’ bar > Select the (2) branch you prefer > Report page.
There are 5 sections in this weekly report page: 1. Monthly Trend: Specifies the monthly traffic data from Jan to current month for the current year and last year. 2. Weekly Trend: Specifies the weekly traffic data from Week 1 to current week for the current year and last year. 3. Daily Trend: Specifies the traffic data for the last 30 days in daily basis for the current year and last year. 4. Last 7 days: Specifies the hourly traffic data for the last 7 days. 5. Traffic Profile: Illustrates the traffic pattern in hourly basis on weekdays and weekend for the previous week.
1.1 View Reports 
(3) In Weekly Report, choose the week you prefer > click VIEW REPORT (4) Report can be Save and Print Select the report that you prefer (5) (Quarter Hour, Hour, Day, Week, & Month) 
To choose (6) Date & Period > Click on the and select the time you prefer > Click VIEW REPORT The report (7) can be EMAIL and EXPORT as PDF or Excel file.
Section 2: Health Check 
2.0 System Health Check 
System Health Check (SHC) is a suite of tools that assesses the health status of your people counting system by checking if each store camera is working fine on a regular basis 
Click on ‘Health Check’ at the side panel. 
Note: i. The camera is working fine if the status is shown in ‘✓’. ii. The camera is having error if the status is shown in ’Failed’. 
2.1 History Log ‘History Log’ will lists down the daily health check result of the particular counter to see when the error does occurs. Click on the Camera that you wish to view the history log.
Section 3: Accuracy Report 
3.0 Accuracy verification Accuracy Verification basically is a process of ensuring the accuracy of each single people counter. Fine tuning camera parameter is vital for any single people counter as the accuracy may be affected by the different store environment. Accuracy verification act as a proof for the top management that the camera installed at the particular store has achieved the required counting accuracy to ensure the traffic data is accurate and reliable to be used for the future planning for the store. It includes a list of counters with the counting accuracy, giving you a holistic view of the counters’ accuracy. You can always fine tune the counter’s settings and conduct accuracy verification whenever needed. 
Click on Accuracy Report at the left panel 
Note: 1. For counter that has not been verified, there will be where you can click on VERIFY button to conduct accuracy verification. 2. For counter that has been verified, there will be a report LINK of under Verification. You can click on Re-verify button if verification needs to be conducted again for new counter settings. 
There will be 3 major steps in doing the verification study: 
Record Videos 
Verify Videos 
Create Report
3.1 Record Videos 
Turn on the Recording function: Click the RECORD VIDEO button to on the video record function for video verification 
Video recording is Off Video recording is On Note: Once the Recording function is turned on, videos of the counter will be recorded automatically at 11am, 2pm and 4pm (30 minutes for each recording) every day. These videos will be uploaded to the control panel at 5am every day for you to review during the verification process to find out the counter’s accuracy. 
3.2 Verify Videos 
Click on the VERIFY button to view the recorded videos of the particular counter. 
Under the list of video recordings for the specific counter, click on the VERIFY RECORDING button of video you wish to conduct accuracy verification. 
Note: 1. For video that has been verified, the counting accuracy and sample size will also be recorded next to the time. 
Click VIEW RECORDING button to see the video that you have verified. 
Click X button to delete video.
3.2.1 How to complete the verification study Step 1: Play the video Click on the Play button on the video player to play the recorded video. Note: 1. System Count: The system count represents the counting done by the camera. It will be recorded automatically when people coming in and going out. 2. Manual Count: The manual count represents the counting recorded by the verification staff from the manual observation on the recorded video. 
Step 2: Verify in and out traffic 
Click on Up arrow key or Down arrow key if you notice people passing through the IN line or OUT line in the video. 
Note: The Up and Down direction will changed depends on the direction of IN and OUT for the store. 
Remarks can be added at any point of time. Enter your comment in the Remarks textbox and click on Send Remarks. 
Note: 1. Any manual count (IN and OUT) and remarks added will be listed down with time under All Logs section. 2. To view all remarks recorded without the manual count data, click on `tab. 3. Remarks are editable. Click on Edit button next to it and edit the remarks. 
Step 3: Compare manual count and system count, save report. 
At the end of accuracy verification process, you can include a summary for the verification. Type in your comment in the Overall Comments textbox and click on Save.
3.3 Generate Accuracy Report 
Select video: Click on the checkbox to select verification video. 
Note: 1. Only completed verification videos can be selected to create verification reports. 2. Overall accuracy and sample size for IN and OUT for the selected verification videos will be counted automatically. 
Create report: Click on CREATE REPORT to create a verification report for the selected verification videos. 
Note: 1. Normally, verification report will only be created when the overall accuracy achieve over 95% with the sample size above 30 people for each verification. 2. Once the verification report is created, the counter will be marked as Completed under Status column in the Accuracy page and there will be a View button under Report column where you can click to view the verification report.
Section 4: Settings 
4.0 Configure New Counter 
1. Click on Settings at the side panel. 2. Click on (2) configure new counter under Branch list. 
3. Rename the counter name at Counter Name. 4. The counter can add to new branch or existing branch. 5. Key in your Branch name and Branch Code. 6. Click on SAVE to save the settings.
4.1 Configure Counter Operating Hours Settings 
1. Click on Settings at the side panel. 2. Click on the selected branch (1) Operating Hours settings. 
3. Adjust the selected store operating hours and Tick ✔ on the checkbox to select your operating hours. Click on SAVE to save the changes. 4. Add date for Holiday Closing date. 
Note: Counter will only counts during operating hour Full Day is default setting. 24 hours on counting activities. Custom is custom setting. Counting activities only on selected period.
4.2 Configure Counter Accuracy Settings 1. Click on Settings at the side panel, and then click on the selected branch (3) under Branch list. 2. Adjust the Basic Settings and Advanced Settings; click PERFORM ONLINE SIMULATOR to check the settings. Then click SAVE TO COUNTER to save the settings.
4.2.1 Basic Settings a) Invert 
Click on the Invert button if you wish to change the direction of IN and OUT line. 
b) IN Line Position 
When a person walk across the IN line under camera view, the camera will automatically count it as 1 people going in. Users can adjust the IN line position by adjusting the percentage (0-100). 1. When the percentage of IN line position is increased, the IN line will move downward 2. When the percentage of IN line position is decreased, the IN line will move upward. 
c) OUT Line Position 
When a person walks across the OUT line under camera view, the camera will automatically count it as 1 people going out. Users can adjust the OUT line position by adjusting the percentage (1-100). 1. When the percentage of OUT line position is increased, the OUT line will move downward. 2. When the percentage of OUT line position is decreased, the OUT line will move upward.
d) Sensitivity 
The percentage for the sensitivity is 0 - 100. The higher the sensitivity, the easier the counter to detect the people crossing. But it will be detected the noise if the sensitivity if it is too high. Therefore installer should adjust the sensitivity carefully based on the environment of counter installed. 
Increase sensitivity: If the background colour of viewing area and the object colour (e.g shirt) is too similar, this may cause undercounting. Therefore, sensitivity should adjust higher than previous setting. 
Lower sensitivity: 
If the light condition of the store is too bright, it will cause the appearance of the shadow and over count issue. Therefore, sensitivity should adjust lower than previous setting. 
Note : Decrease the sensitivity if the background detected noise until it disappeared. Noise is the particular white dots / small blob that can appear that may affect counting accuracy. Example like shadow of people or object and light condition of counter installed is too bright. 
e) Shoulder Width 
Any object detected under the camera view that matches with the pre-determined shoulder width will be identified as human. When the identified ‘human’ passing through the 2 lines under camera view, it will be counted as 1 IN or 1 OUT depending on the directions the ‘human’ is passing through. The scale for shoulder width is 0m to 10m. The higher (lower) the scale, the smaller (bigger) the shoulder width. 
1. When the scale of the shoulder width settings is increased, camera will identify the object with bigger width as human. 
2. When the scale of the shoulder width settings is decreased, camera will identify the object with smaller width as human. Note: The shoulder width is mostly depending on the ceiling height where the camera is mounted. 1. Camera is mounted on the ceiling with lower height; the human size under camera view will be bigger, so the size of shoulder width should be bigger. 2. If a camera is mounted on the ceiling with higher height, the human size under camera view will be smaller, so the size of the shoulder width should be smaller.
4.2.2 Advanced Settings Viewing Area 
This is the counter’s viewing area and the red masking areas will be removed after clicking on the PERFORM ONLINE SIMULATOR button. 
1. Increase or decrease the Zoom percentage to adjust the size of viewing area. 2. Adjust the viewing area by clicking on the ← ↑ → ↓ buttons. 
Counting Area 
The movement of any object which are identified as ‘human’ under this Counting Area will be tracked and counted when it passes the IN or OUT line. 
Exclude unwanted counting area to avoid counting the store activity by adjusting the percentage of Top, Bottom, Left and Right. 
The shaded area is to cover the undesirable area so that store activity will not be counted in the system. 
Top : increase (decrease) to shift downward (upward). Bottom : increase (decrease) to shift upward (downward). Left : increase (decrease) to shift right (left). Right : increase (decrease) to shift left (right).
White Blob 
When people passing under the counter’s view, they will be ‘seen’ as a white blob in the system. The movement of this white blob will be tracked and counted when it passes the IN or OUT line.
Section 5: Administrator 
A list of users and login details to ease manager in manage the users account. Different users and account type could have different right in access the store counter. 
5.1 How to Add New User 
1. Click on ADMINISTRATOR at the side panel. 2. Click on the User Accounts under ADMINISTRATOR. 3. Click +Add User at the top-right corner. 
4. Select Account type, key in the Name, Email, Login, and Password 
5. User can add the branch that accessible by this account just select the available branch under the Available branch list. 6. Click SAVE to save the settings.

More Related Content

Similar to FootfallCam Portal User Manual

Extech Vibration Tester
Extech Vibration TesterExtech Vibration Tester
Extech Vibration Testervideoborescope
 
PayrollAdmin - Attendance and Payroll Management ERP Software
PayrollAdmin - Attendance and Payroll Management ERP SoftwarePayrollAdmin - Attendance and Payroll Management ERP Software
PayrollAdmin - Attendance and Payroll Management ERP SoftwareRanganath Shivaram
 
Instruction Manual | InfiRay CML25 | Optics Trade
Instruction Manual | InfiRay CML25 | Optics TradeInstruction Manual | InfiRay CML25 | Optics Trade
Instruction Manual | InfiRay CML25 | Optics TradeOptics-Trade
 
Sales order-report-extension
Sales order-report-extensionSales order-report-extension
Sales order-report-extensionOscprofessionals
 
Thermolab Software New
Thermolab Software NewThermolab Software New
Thermolab Software Newarifonline
 
JPMA WIC 9 - POS Functions
JPMA WIC 9 -  POS FunctionsJPMA WIC 9 -  POS Functions
JPMA WIC 9 - POS Functionsricemg
 
TFL5785 LA County with audio
TFL5785 LA County with audioTFL5785 LA County with audio
TFL5785 LA County with audioWilliam Harding
 
Forklift weighing scales, SP1000-skid weigh-plus-installation-calibration
Forklift weighing scales, SP1000-skid weigh-plus-installation-calibrationForklift weighing scales, SP1000-skid weigh-plus-installation-calibration
Forklift weighing scales, SP1000-skid weigh-plus-installation-calibrationTed Jurca
 
Medidor digital de presion 680 UserManual.pdf
Medidor digital de presion 680 UserManual.pdfMedidor digital de presion 680 UserManual.pdf
Medidor digital de presion 680 UserManual.pdfJuanRios958368
 
Sales order report By Payment Type Extension For Magento User Guide
Sales order report By Payment Type Extension For Magento User GuideSales order report By Payment Type Extension For Magento User Guide
Sales order report By Payment Type Extension For Magento User GuideOscprofessionals
 
Eco series security dvr with stratus connectivity frequently asked questions
Eco series security dvr with stratus connectivity   frequently asked questionsEco series security dvr with stratus connectivity   frequently asked questions
Eco series security dvr with stratus connectivity frequently asked questionsintelarti9
 
Tutorial Smartcoach
Tutorial SmartcoachTutorial Smartcoach
Tutorial SmartcoachVideobserver
 
ProTrack CMMS Overview
ProTrack CMMS OverviewProTrack CMMS Overview
ProTrack CMMS Overviewnetsecrets
 
Instraction on Smart Home Software
Instraction on Smart Home SoftwareInstraction on Smart Home Software
Instraction on Smart Home SoftwareDaniel Chen
 
Customer Administration Portal User Guide
Customer Administration Portal User GuideCustomer Administration Portal User Guide
Customer Administration Portal User GuideVoyant Academy
 

Similar to FootfallCam Portal User Manual (20)

Extech Vibration Tester
Extech Vibration TesterExtech Vibration Tester
Extech Vibration Tester
 
PayrollAdmin - Attendance and Payroll Management ERP Software
PayrollAdmin - Attendance and Payroll Management ERP SoftwarePayrollAdmin - Attendance and Payroll Management ERP Software
PayrollAdmin - Attendance and Payroll Management ERP Software
 
Instruction Manual | InfiRay CML25 | Optics Trade
Instruction Manual | InfiRay CML25 | Optics TradeInstruction Manual | InfiRay CML25 | Optics Trade
Instruction Manual | InfiRay CML25 | Optics Trade
 
Sales order-report-extension
Sales order-report-extensionSales order-report-extension
Sales order-report-extension
 
Thermolab Software New
Thermolab Software NewThermolab Software New
Thermolab Software New
 
Acti Presentation-1.pptx
Acti Presentation-1.pptxActi Presentation-1.pptx
Acti Presentation-1.pptx
 
JPMA WIC 9 - POS Functions
JPMA WIC 9 -  POS FunctionsJPMA WIC 9 -  POS Functions
JPMA WIC 9 - POS Functions
 
TFL5785 LA County with audio
TFL5785 LA County with audioTFL5785 LA County with audio
TFL5785 LA County with audio
 
Rotary vortex flow meters
Rotary vortex flow metersRotary vortex flow meters
Rotary vortex flow meters
 
Forklift weighing scales, SP1000-skid weigh-plus-installation-calibration
Forklift weighing scales, SP1000-skid weigh-plus-installation-calibrationForklift weighing scales, SP1000-skid weigh-plus-installation-calibration
Forklift weighing scales, SP1000-skid weigh-plus-installation-calibration
 
Medidor digital de presion 680 UserManual.pdf
Medidor digital de presion 680 UserManual.pdfMedidor digital de presion 680 UserManual.pdf
Medidor digital de presion 680 UserManual.pdf
 
Sales order report By Payment Type Extension For Magento User Guide
Sales order report By Payment Type Extension For Magento User GuideSales order report By Payment Type Extension For Magento User Guide
Sales order report By Payment Type Extension For Magento User Guide
 
NVR3000 Quick Start Guide
NVR3000 Quick Start GuideNVR3000 Quick Start Guide
NVR3000 Quick Start Guide
 
Eco series security dvr with stratus connectivity frequently asked questions
Eco series security dvr with stratus connectivity   frequently asked questionsEco series security dvr with stratus connectivity   frequently asked questions
Eco series security dvr with stratus connectivity frequently asked questions
 
Tutorial Smartcoach
Tutorial SmartcoachTutorial Smartcoach
Tutorial Smartcoach
 
ProTrack CMMS Overview
ProTrack CMMS OverviewProTrack CMMS Overview
ProTrack CMMS Overview
 
Instraction on Smart Home Software
Instraction on Smart Home SoftwareInstraction on Smart Home Software
Instraction on Smart Home Software
 
NVR3000 Demo Guide
NVR3000 Demo GuideNVR3000 Demo Guide
NVR3000 Demo Guide
 
Cms instruction 1.0
Cms instruction 1.0Cms instruction 1.0
Cms instruction 1.0
 
Customer Administration Portal User Guide
Customer Administration Portal User GuideCustomer Administration Portal User Guide
Customer Administration Portal User Guide
 

More from FootfallCam

Magic Mirror for Retail Store
Magic Mirror for Retail StoreMagic Mirror for Retail Store
Magic Mirror for Retail StoreFootfallCam
 
Digital Signage for Airports
Digital Signage for AirportsDigital Signage for Airports
Digital Signage for AirportsFootfallCam
 
Digital Signage for Shopping Malls
Digital Signage for Shopping MallsDigital Signage for Shopping Malls
Digital Signage for Shopping MallsFootfallCam
 
Brochure of Wayfinding Kiosk
Brochure of Wayfinding KioskBrochure of Wayfinding Kiosk
Brochure of Wayfinding KioskFootfallCam
 
Magic Mirror For Retail Stores
Magic Mirror For Retail StoresMagic Mirror For Retail Stores
Magic Mirror For Retail StoresFootfallCam
 
Magic Mirror for Event Companies V2.2_Preview
Magic Mirror for Event Companies V2.2_PreviewMagic Mirror for Event Companies V2.2_Preview
Magic Mirror for Event Companies V2.2_PreviewFootfallCam
 
Footfallcam Product Info
Footfallcam Product InfoFootfallcam Product Info
Footfallcam Product InfoFootfallCam
 
Competitive Analysis of Footfallcam
Competitive Analysis of FootfallcamCompetitive Analysis of Footfallcam
Competitive Analysis of FootfallcamFootfallCam
 
Footfallcam Buying Process SME
Footfallcam Buying Process SMEFootfallcam Buying Process SME
Footfallcam Buying Process SMEFootfallCam
 
Overview of Footfallcam
Overview of FootfallcamOverview of Footfallcam
Overview of FootfallcamFootfallCam
 
Footfallcam for Museum and Libraries
Footfallcam for Museum and LibrariesFootfallcam for Museum and Libraries
Footfallcam for Museum and LibrariesFootfallCam
 
Footfallcam Analysis
Footfallcam AnalysisFootfallcam Analysis
Footfallcam AnalysisFootfallCam
 
Footfallcam for Retail Chain
Footfallcam for Retail ChainFootfallcam for Retail Chain
Footfallcam for Retail ChainFootfallCam
 
Footfallcam for Small Retailers
Footfallcam for Small RetailersFootfallcam for Small Retailers
Footfallcam for Small RetailersFootfallCam
 
Footfallcam for Shopping Centers
Footfallcam for Shopping CentersFootfallcam for Shopping Centers
Footfallcam for Shopping CentersFootfallCam
 
Magic Mirror Functions
Magic Mirror FunctionsMagic Mirror Functions
Magic Mirror FunctionsFootfallCam
 
Magic Mirror for Retail Stores
Magic Mirror for Retail StoresMagic Mirror for Retail Stores
Magic Mirror for Retail StoresFootfallCam
 
Magic Mirror for Hotels
Magic Mirror for HotelsMagic Mirror for Hotels
Magic Mirror for HotelsFootfallCam
 
Magic Mirror for Science Museum
Magic Mirror for Science MuseumMagic Mirror for Science Museum
Magic Mirror for Science MuseumFootfallCam
 
Magic Mirror for Shopping Centres
Magic Mirror for Shopping CentresMagic Mirror for Shopping Centres
Magic Mirror for Shopping CentresFootfallCam
 

More from FootfallCam (20)

Magic Mirror for Retail Store
Magic Mirror for Retail StoreMagic Mirror for Retail Store
Magic Mirror for Retail Store
 
Digital Signage for Airports
Digital Signage for AirportsDigital Signage for Airports
Digital Signage for Airports
 
Digital Signage for Shopping Malls
Digital Signage for Shopping MallsDigital Signage for Shopping Malls
Digital Signage for Shopping Malls
 
Brochure of Wayfinding Kiosk
Brochure of Wayfinding KioskBrochure of Wayfinding Kiosk
Brochure of Wayfinding Kiosk
 
Magic Mirror For Retail Stores
Magic Mirror For Retail StoresMagic Mirror For Retail Stores
Magic Mirror For Retail Stores
 
Magic Mirror for Event Companies V2.2_Preview
Magic Mirror for Event Companies V2.2_PreviewMagic Mirror for Event Companies V2.2_Preview
Magic Mirror for Event Companies V2.2_Preview
 
Footfallcam Product Info
Footfallcam Product InfoFootfallcam Product Info
Footfallcam Product Info
 
Competitive Analysis of Footfallcam
Competitive Analysis of FootfallcamCompetitive Analysis of Footfallcam
Competitive Analysis of Footfallcam
 
Footfallcam Buying Process SME
Footfallcam Buying Process SMEFootfallcam Buying Process SME
Footfallcam Buying Process SME
 
Overview of Footfallcam
Overview of FootfallcamOverview of Footfallcam
Overview of Footfallcam
 
Footfallcam for Museum and Libraries
Footfallcam for Museum and LibrariesFootfallcam for Museum and Libraries
Footfallcam for Museum and Libraries
 
Footfallcam Analysis
Footfallcam AnalysisFootfallcam Analysis
Footfallcam Analysis
 
Footfallcam for Retail Chain
Footfallcam for Retail ChainFootfallcam for Retail Chain
Footfallcam for Retail Chain
 
Footfallcam for Small Retailers
Footfallcam for Small RetailersFootfallcam for Small Retailers
Footfallcam for Small Retailers
 
Footfallcam for Shopping Centers
Footfallcam for Shopping CentersFootfallcam for Shopping Centers
Footfallcam for Shopping Centers
 
Magic Mirror Functions
Magic Mirror FunctionsMagic Mirror Functions
Magic Mirror Functions
 
Magic Mirror for Retail Stores
Magic Mirror for Retail StoresMagic Mirror for Retail Stores
Magic Mirror for Retail Stores
 
Magic Mirror for Hotels
Magic Mirror for HotelsMagic Mirror for Hotels
Magic Mirror for Hotels
 
Magic Mirror for Science Museum
Magic Mirror for Science MuseumMagic Mirror for Science Museum
Magic Mirror for Science Museum
 
Magic Mirror for Shopping Centres
Magic Mirror for Shopping CentresMagic Mirror for Shopping Centres
Magic Mirror for Shopping Centres
 

Recently uploaded

The 2024 Prime Day Panel: From Preparation to Profit
The 2024 Prime Day Panel: From Preparation to ProfitThe 2024 Prime Day Panel: From Preparation to Profit
The 2024 Prime Day Panel: From Preparation to ProfitTinuiti
 
FAQ Settings-ZenBasket Your Ecommerce Solution
FAQ Settings-ZenBasket Your Ecommerce SolutionFAQ Settings-ZenBasket Your Ecommerce Solution
FAQ Settings-ZenBasket Your Ecommerce SolutionDeborahnich
 
5CL-ADBA,5cladba, the best supplier in China
5CL-ADBA,5cladba, the best supplier in China5CL-ADBA,5cladba, the best supplier in China
5CL-ADBA,5cladba, the best supplier in Chinaamy56318795
 
Transform Your Outdoor Space: Landscaping with Plants in Singapore
Transform Your Outdoor Space: Landscaping with Plants in SingaporeTransform Your Outdoor Space: Landscaping with Plants in Singapore
Transform Your Outdoor Space: Landscaping with Plants in SingaporeThe Green Corner
 
(ANAYA)🎄Muslim Call Girls Lucknow Call Now 8630512678 Premium Collection Of H...
(ANAYA)🎄Muslim Call Girls Lucknow Call Now 8630512678 Premium Collection Of H...(ANAYA)🎄Muslim Call Girls Lucknow Call Now 8630512678 Premium Collection Of H...
(ANAYA)🎄Muslim Call Girls Lucknow Call Now 8630512678 Premium Collection Of H...aarushi sharma
 
Mira Road Comfortable Call Girls -07506202331-Terbhi Genuine Call Girl
Mira Road Comfortable Call Girls -07506202331-Terbhi Genuine Call GirlMira Road Comfortable Call Girls -07506202331-Terbhi Genuine Call Girl
Mira Road Comfortable Call Girls -07506202331-Terbhi Genuine Call GirlPriya Reddy
 
Don’t Get Showroomed- Are you frustrated with showrooming?
Don’t Get Showroomed- Are you frustrated with showrooming?Don’t Get Showroomed- Are you frustrated with showrooming?
Don’t Get Showroomed- Are you frustrated with showrooming?Jasper Colin
 
SAP Transportation Management Document reference
SAP Transportation Management Document referenceSAP Transportation Management Document reference
SAP Transportation Management Document referencemailgirish20029690
 
Hifi Agartala Escorts Service Girl ^ 9332606886, WhatsApp Anytime Agartala
Hifi Agartala Escorts Service Girl ^ 9332606886, WhatsApp Anytime AgartalaHifi Agartala Escorts Service Girl ^ 9332606886, WhatsApp Anytime Agartala
Hifi Agartala Escorts Service Girl ^ 9332606886, WhatsApp Anytime Agartalameghakumariji156
 
amil baba mashoor in karachi lahore Best-Verified Amil Baba In Pakistan Authe...
amil baba mashoor in karachi lahore Best-Verified Amil Baba In Pakistan Authe...amil baba mashoor in karachi lahore Best-Verified Amil Baba In Pakistan Authe...
amil baba mashoor in karachi lahore Best-Verified Amil Baba In Pakistan Authe...dilawarshahuk
 
Supermarket Floral Ad Roundup- Week 19 2024.pdf
Supermarket Floral Ad Roundup- Week 19 2024.pdfSupermarket Floral Ad Roundup- Week 19 2024.pdf
Supermarket Floral Ad Roundup- Week 19 2024.pdfKarliNelson4
 

Recently uploaded (11)

The 2024 Prime Day Panel: From Preparation to Profit
The 2024 Prime Day Panel: From Preparation to ProfitThe 2024 Prime Day Panel: From Preparation to Profit
The 2024 Prime Day Panel: From Preparation to Profit
 
FAQ Settings-ZenBasket Your Ecommerce Solution
FAQ Settings-ZenBasket Your Ecommerce SolutionFAQ Settings-ZenBasket Your Ecommerce Solution
FAQ Settings-ZenBasket Your Ecommerce Solution
 
5CL-ADBA,5cladba, the best supplier in China
5CL-ADBA,5cladba, the best supplier in China5CL-ADBA,5cladba, the best supplier in China
5CL-ADBA,5cladba, the best supplier in China
 
Transform Your Outdoor Space: Landscaping with Plants in Singapore
Transform Your Outdoor Space: Landscaping with Plants in SingaporeTransform Your Outdoor Space: Landscaping with Plants in Singapore
Transform Your Outdoor Space: Landscaping with Plants in Singapore
 
(ANAYA)🎄Muslim Call Girls Lucknow Call Now 8630512678 Premium Collection Of H...
(ANAYA)🎄Muslim Call Girls Lucknow Call Now 8630512678 Premium Collection Of H...(ANAYA)🎄Muslim Call Girls Lucknow Call Now 8630512678 Premium Collection Of H...
(ANAYA)🎄Muslim Call Girls Lucknow Call Now 8630512678 Premium Collection Of H...
 
Mira Road Comfortable Call Girls -07506202331-Terbhi Genuine Call Girl
Mira Road Comfortable Call Girls -07506202331-Terbhi Genuine Call GirlMira Road Comfortable Call Girls -07506202331-Terbhi Genuine Call Girl
Mira Road Comfortable Call Girls -07506202331-Terbhi Genuine Call Girl
 
Don’t Get Showroomed- Are you frustrated with showrooming?
Don’t Get Showroomed- Are you frustrated with showrooming?Don’t Get Showroomed- Are you frustrated with showrooming?
Don’t Get Showroomed- Are you frustrated with showrooming?
 
SAP Transportation Management Document reference
SAP Transportation Management Document referenceSAP Transportation Management Document reference
SAP Transportation Management Document reference
 
Hifi Agartala Escorts Service Girl ^ 9332606886, WhatsApp Anytime Agartala
Hifi Agartala Escorts Service Girl ^ 9332606886, WhatsApp Anytime AgartalaHifi Agartala Escorts Service Girl ^ 9332606886, WhatsApp Anytime Agartala
Hifi Agartala Escorts Service Girl ^ 9332606886, WhatsApp Anytime Agartala
 
amil baba mashoor in karachi lahore Best-Verified Amil Baba In Pakistan Authe...
amil baba mashoor in karachi lahore Best-Verified Amil Baba In Pakistan Authe...amil baba mashoor in karachi lahore Best-Verified Amil Baba In Pakistan Authe...
amil baba mashoor in karachi lahore Best-Verified Amil Baba In Pakistan Authe...
 
Supermarket Floral Ad Roundup- Week 19 2024.pdf
Supermarket Floral Ad Roundup- Week 19 2024.pdfSupermarket Floral Ad Roundup- Week 19 2024.pdf
Supermarket Floral Ad Roundup- Week 19 2024.pdf
 

FootfallCam Portal User Manual

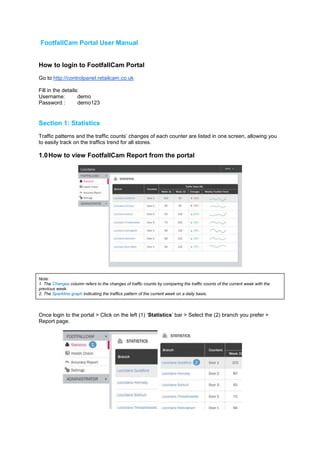
  • 1. FootfallCam Portal User Manual How to login to FootfallCam Portal Go to http://controlpanel.retailcam.co.uk Fill in the details: Username: demo Password : demo123 Section 1: Statistics Traffic patterns and the traffic counts’ changes of each counter are listed in one screen, allowing you to easily track on the traffics trend for all stores. 1.0 How to view FootfallCam Report from the portal Note: 1. The Changes column refers to the changes of traffic counts by comparing the traffic counts of the current week with the previous week. 2. The Sparkline graph indicating the traffics pattern of the current week on a daily basis. Once login to the portal > Click on the left (1) ‘Statistics’ bar > Select the (2) branch you prefer > Report page.
  • 2. There are 5 sections in this weekly report page: 1. Monthly Trend: Specifies the monthly traffic data from Jan to current month for the current year and last year. 2. Weekly Trend: Specifies the weekly traffic data from Week 1 to current week for the current year and last year. 3. Daily Trend: Specifies the traffic data for the last 30 days in daily basis for the current year and last year. 4. Last 7 days: Specifies the hourly traffic data for the last 7 days. 5. Traffic Profile: Illustrates the traffic pattern in hourly basis on weekdays and weekend for the previous week.
  • 3. 1.1 View Reports (3) In Weekly Report, choose the week you prefer > click VIEW REPORT (4) Report can be Save and Print Select the report that you prefer (5) (Quarter Hour, Hour, Day, Week, & Month) To choose (6) Date & Period > Click on the and select the time you prefer > Click VIEW REPORT The report (7) can be EMAIL and EXPORT as PDF or Excel file.
  • 4. Section 2: Health Check 2.0 System Health Check System Health Check (SHC) is a suite of tools that assesses the health status of your people counting system by checking if each store camera is working fine on a regular basis Click on ‘Health Check’ at the side panel. Note: i. The camera is working fine if the status is shown in ‘✓’. ii. The camera is having error if the status is shown in ’Failed’. 2.1 History Log ‘History Log’ will lists down the daily health check result of the particular counter to see when the error does occurs. Click on the Camera that you wish to view the history log.
  • 5. Section 3: Accuracy Report 3.0 Accuracy verification Accuracy Verification basically is a process of ensuring the accuracy of each single people counter. Fine tuning camera parameter is vital for any single people counter as the accuracy may be affected by the different store environment. Accuracy verification act as a proof for the top management that the camera installed at the particular store has achieved the required counting accuracy to ensure the traffic data is accurate and reliable to be used for the future planning for the store. It includes a list of counters with the counting accuracy, giving you a holistic view of the counters’ accuracy. You can always fine tune the counter’s settings and conduct accuracy verification whenever needed. Click on Accuracy Report at the left panel Note: 1. For counter that has not been verified, there will be where you can click on VERIFY button to conduct accuracy verification. 2. For counter that has been verified, there will be a report LINK of under Verification. You can click on Re-verify button if verification needs to be conducted again for new counter settings. There will be 3 major steps in doing the verification study: Record Videos Verify Videos Create Report
  • 6. 3.1 Record Videos Turn on the Recording function: Click the RECORD VIDEO button to on the video record function for video verification Video recording is Off Video recording is On Note: Once the Recording function is turned on, videos of the counter will be recorded automatically at 11am, 2pm and 4pm (30 minutes for each recording) every day. These videos will be uploaded to the control panel at 5am every day for you to review during the verification process to find out the counter’s accuracy. 3.2 Verify Videos Click on the VERIFY button to view the recorded videos of the particular counter. Under the list of video recordings for the specific counter, click on the VERIFY RECORDING button of video you wish to conduct accuracy verification. Note: 1. For video that has been verified, the counting accuracy and sample size will also be recorded next to the time. Click VIEW RECORDING button to see the video that you have verified. Click X button to delete video.
  • 7. 3.2.1 How to complete the verification study Step 1: Play the video Click on the Play button on the video player to play the recorded video. Note: 1. System Count: The system count represents the counting done by the camera. It will be recorded automatically when people coming in and going out. 2. Manual Count: The manual count represents the counting recorded by the verification staff from the manual observation on the recorded video. Step 2: Verify in and out traffic Click on Up arrow key or Down arrow key if you notice people passing through the IN line or OUT line in the video. Note: The Up and Down direction will changed depends on the direction of IN and OUT for the store. Remarks can be added at any point of time. Enter your comment in the Remarks textbox and click on Send Remarks. Note: 1. Any manual count (IN and OUT) and remarks added will be listed down with time under All Logs section. 2. To view all remarks recorded without the manual count data, click on `tab. 3. Remarks are editable. Click on Edit button next to it and edit the remarks. Step 3: Compare manual count and system count, save report. At the end of accuracy verification process, you can include a summary for the verification. Type in your comment in the Overall Comments textbox and click on Save.
  • 8. 3.3 Generate Accuracy Report Select video: Click on the checkbox to select verification video. Note: 1. Only completed verification videos can be selected to create verification reports. 2. Overall accuracy and sample size for IN and OUT for the selected verification videos will be counted automatically. Create report: Click on CREATE REPORT to create a verification report for the selected verification videos. Note: 1. Normally, verification report will only be created when the overall accuracy achieve over 95% with the sample size above 30 people for each verification. 2. Once the verification report is created, the counter will be marked as Completed under Status column in the Accuracy page and there will be a View button under Report column where you can click to view the verification report.
  • 9. Section 4: Settings 4.0 Configure New Counter 1. Click on Settings at the side panel. 2. Click on (2) configure new counter under Branch list. 3. Rename the counter name at Counter Name. 4. The counter can add to new branch or existing branch. 5. Key in your Branch name and Branch Code. 6. Click on SAVE to save the settings.
  • 10. 4.1 Configure Counter Operating Hours Settings 1. Click on Settings at the side panel. 2. Click on the selected branch (1) Operating Hours settings. 3. Adjust the selected store operating hours and Tick ✔ on the checkbox to select your operating hours. Click on SAVE to save the changes. 4. Add date for Holiday Closing date. Note: Counter will only counts during operating hour Full Day is default setting. 24 hours on counting activities. Custom is custom setting. Counting activities only on selected period.
  • 11. 4.2 Configure Counter Accuracy Settings 1. Click on Settings at the side panel, and then click on the selected branch (3) under Branch list. 2. Adjust the Basic Settings and Advanced Settings; click PERFORM ONLINE SIMULATOR to check the settings. Then click SAVE TO COUNTER to save the settings.
  • 12. 4.2.1 Basic Settings a) Invert Click on the Invert button if you wish to change the direction of IN and OUT line. b) IN Line Position When a person walk across the IN line under camera view, the camera will automatically count it as 1 people going in. Users can adjust the IN line position by adjusting the percentage (0-100). 1. When the percentage of IN line position is increased, the IN line will move downward 2. When the percentage of IN line position is decreased, the IN line will move upward. c) OUT Line Position When a person walks across the OUT line under camera view, the camera will automatically count it as 1 people going out. Users can adjust the OUT line position by adjusting the percentage (1-100). 1. When the percentage of OUT line position is increased, the OUT line will move downward. 2. When the percentage of OUT line position is decreased, the OUT line will move upward.
  • 13. d) Sensitivity The percentage for the sensitivity is 0 - 100. The higher the sensitivity, the easier the counter to detect the people crossing. But it will be detected the noise if the sensitivity if it is too high. Therefore installer should adjust the sensitivity carefully based on the environment of counter installed. Increase sensitivity: If the background colour of viewing area and the object colour (e.g shirt) is too similar, this may cause undercounting. Therefore, sensitivity should adjust higher than previous setting. Lower sensitivity: If the light condition of the store is too bright, it will cause the appearance of the shadow and over count issue. Therefore, sensitivity should adjust lower than previous setting. Note : Decrease the sensitivity if the background detected noise until it disappeared. Noise is the particular white dots / small blob that can appear that may affect counting accuracy. Example like shadow of people or object and light condition of counter installed is too bright. e) Shoulder Width Any object detected under the camera view that matches with the pre-determined shoulder width will be identified as human. When the identified ‘human’ passing through the 2 lines under camera view, it will be counted as 1 IN or 1 OUT depending on the directions the ‘human’ is passing through. The scale for shoulder width is 0m to 10m. The higher (lower) the scale, the smaller (bigger) the shoulder width. 1. When the scale of the shoulder width settings is increased, camera will identify the object with bigger width as human. 2. When the scale of the shoulder width settings is decreased, camera will identify the object with smaller width as human. Note: The shoulder width is mostly depending on the ceiling height where the camera is mounted. 1. Camera is mounted on the ceiling with lower height; the human size under camera view will be bigger, so the size of shoulder width should be bigger. 2. If a camera is mounted on the ceiling with higher height, the human size under camera view will be smaller, so the size of the shoulder width should be smaller.
  • 14. 4.2.2 Advanced Settings Viewing Area This is the counter’s viewing area and the red masking areas will be removed after clicking on the PERFORM ONLINE SIMULATOR button. 1. Increase or decrease the Zoom percentage to adjust the size of viewing area. 2. Adjust the viewing area by clicking on the ← ↑ → ↓ buttons. Counting Area The movement of any object which are identified as ‘human’ under this Counting Area will be tracked and counted when it passes the IN or OUT line. Exclude unwanted counting area to avoid counting the store activity by adjusting the percentage of Top, Bottom, Left and Right. The shaded area is to cover the undesirable area so that store activity will not be counted in the system. Top : increase (decrease) to shift downward (upward). Bottom : increase (decrease) to shift upward (downward). Left : increase (decrease) to shift right (left). Right : increase (decrease) to shift left (right).
  • 15. White Blob When people passing under the counter’s view, they will be ‘seen’ as a white blob in the system. The movement of this white blob will be tracked and counted when it passes the IN or OUT line.
  • 16. Section 5: Administrator A list of users and login details to ease manager in manage the users account. Different users and account type could have different right in access the store counter. 5.1 How to Add New User 1. Click on ADMINISTRATOR at the side panel. 2. Click on the User Accounts under ADMINISTRATOR. 3. Click +Add User at the top-right corner. 4. Select Account type, key in the Name, Email, Login, and Password 5. User can add the branch that accessible by this account just select the available branch under the Available branch list. 6. Click SAVE to save the settings.