1. 16/10/13
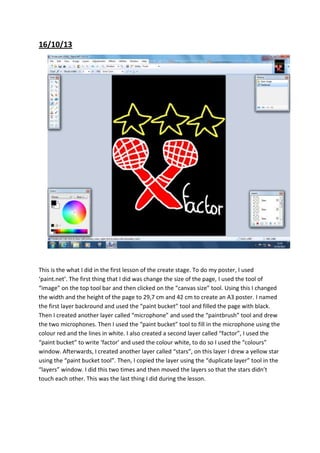
This is the what I did in the first lesson of the create stage. To do my poster, I used
‘paint.net’. The first thing that I did was change the size of the page, I used the tool of
“image” on the top tool bar and then clicked on the “canvas size” tool. Using this I changed
the width and the height of the page to 29,7 cm and 42 cm to create an A3 poster. I named
the first layer backround and used the “paint bucket” tool and filled the page with black.
Then I created another layer called “microphone” and used the “paintbrush” tool and drew
the two microphones. Then I used the “paint bucket” tool to fill in the microphone using the
colour red and the lines in white. I also created a second layer called “factor”, I used the
“paint bucket” to write ‘factor’ and used the colour white, to do so I used the “colours”
window. Afterwards, I created another layer called “stars”, on this layer I drew a yellow star
using the “paint bucket tool”. Then, I copied the layer using the “duplicate layer” tool in the
“layers” window. I did this two times and then moved the layers so that the stars didn’t
touch each other. This was the last thing I did during the lesson.
2. 23/10/13
During the lesson of today, I changed a few things and added new elements. The things I
changed were the stars, I decided that they weren’t good enough and so I decided to
change them. I used the “line/curve” tool to create the stars so that the stars were straight.
I then used the “duplicate layer” to copy the stars; I did this two times so that I had three
stars. I then added the date, time and place of the event using the “text” tool, I did the same
for the “Aperitivi served for the audience”.