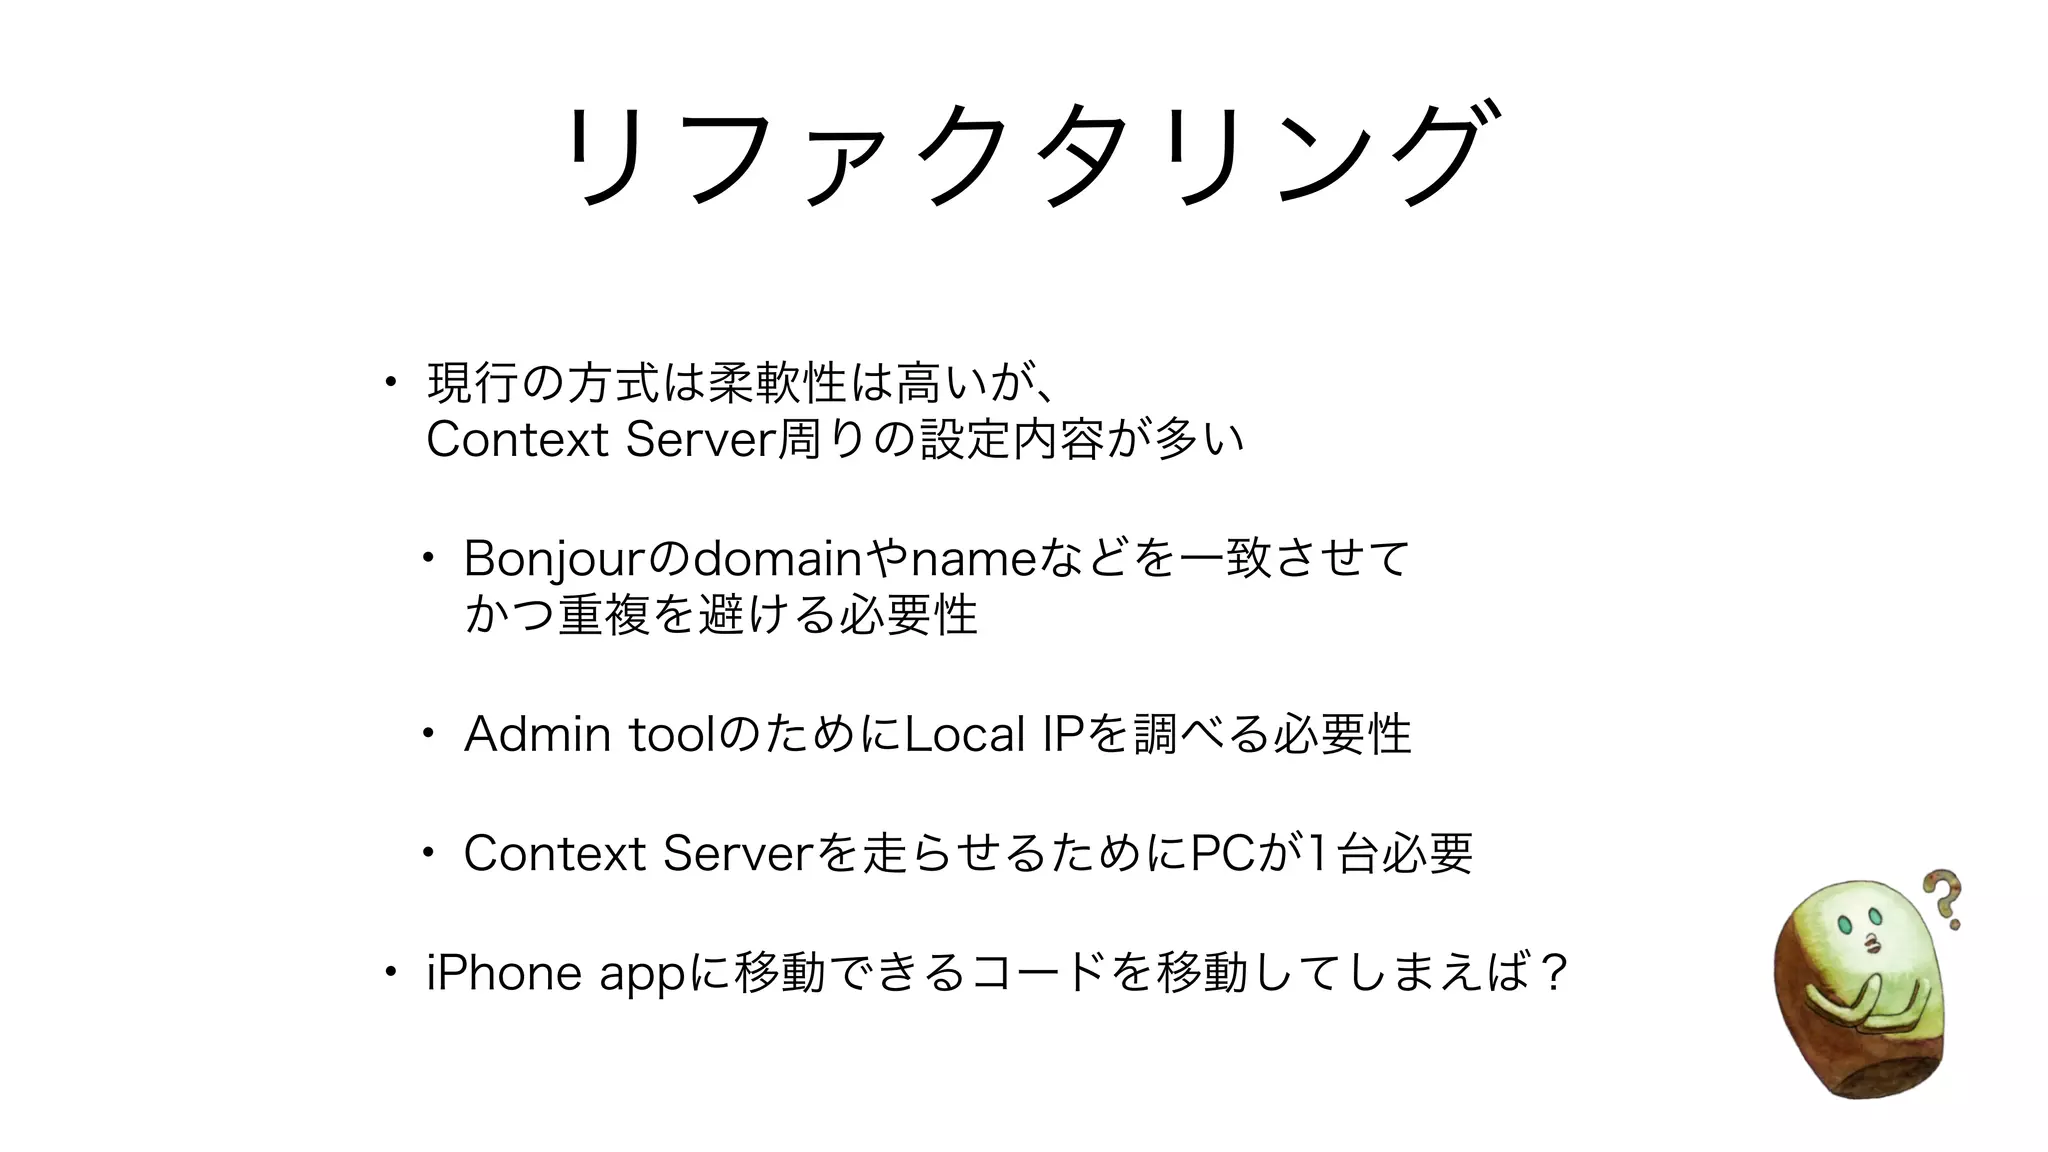
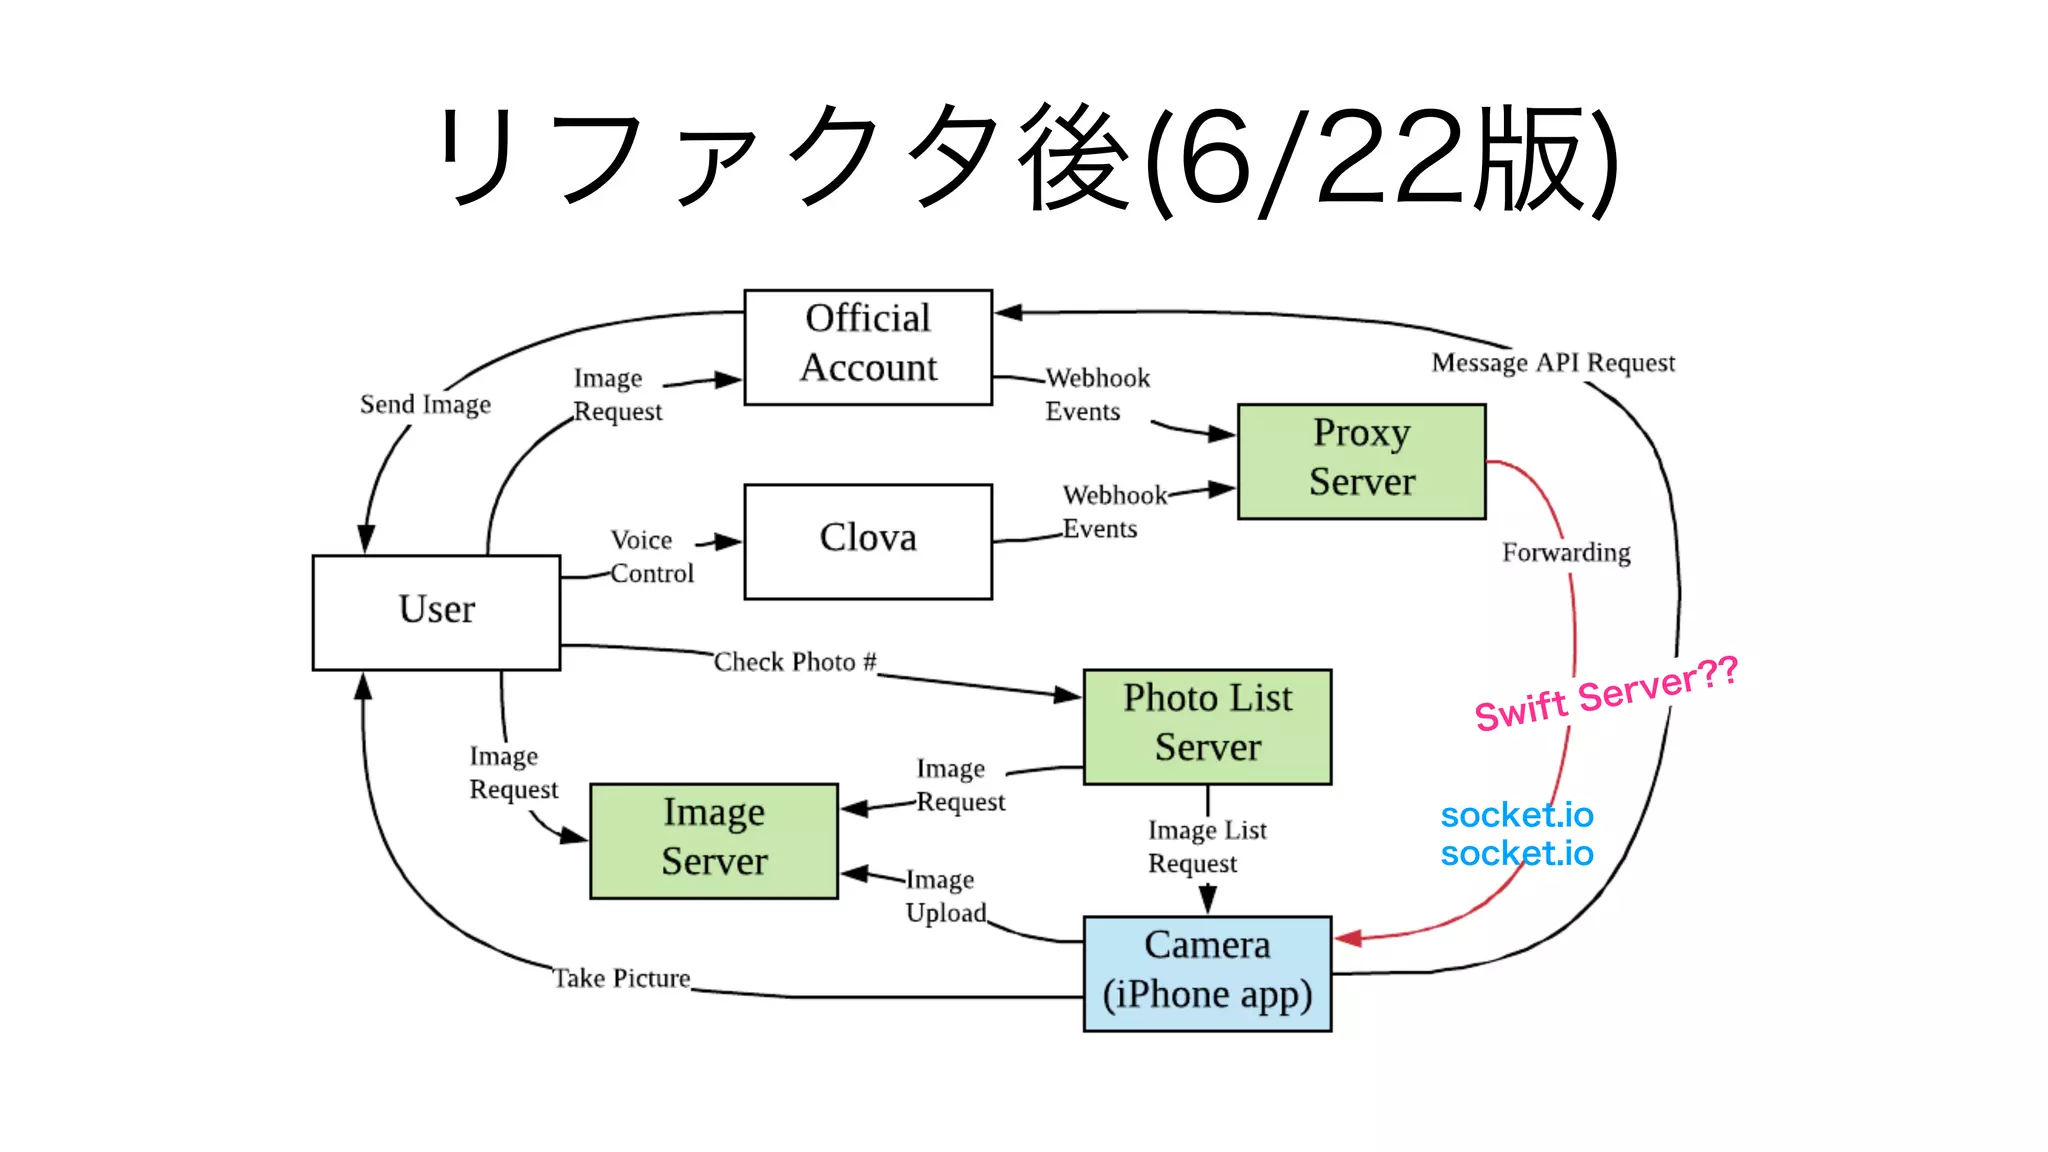
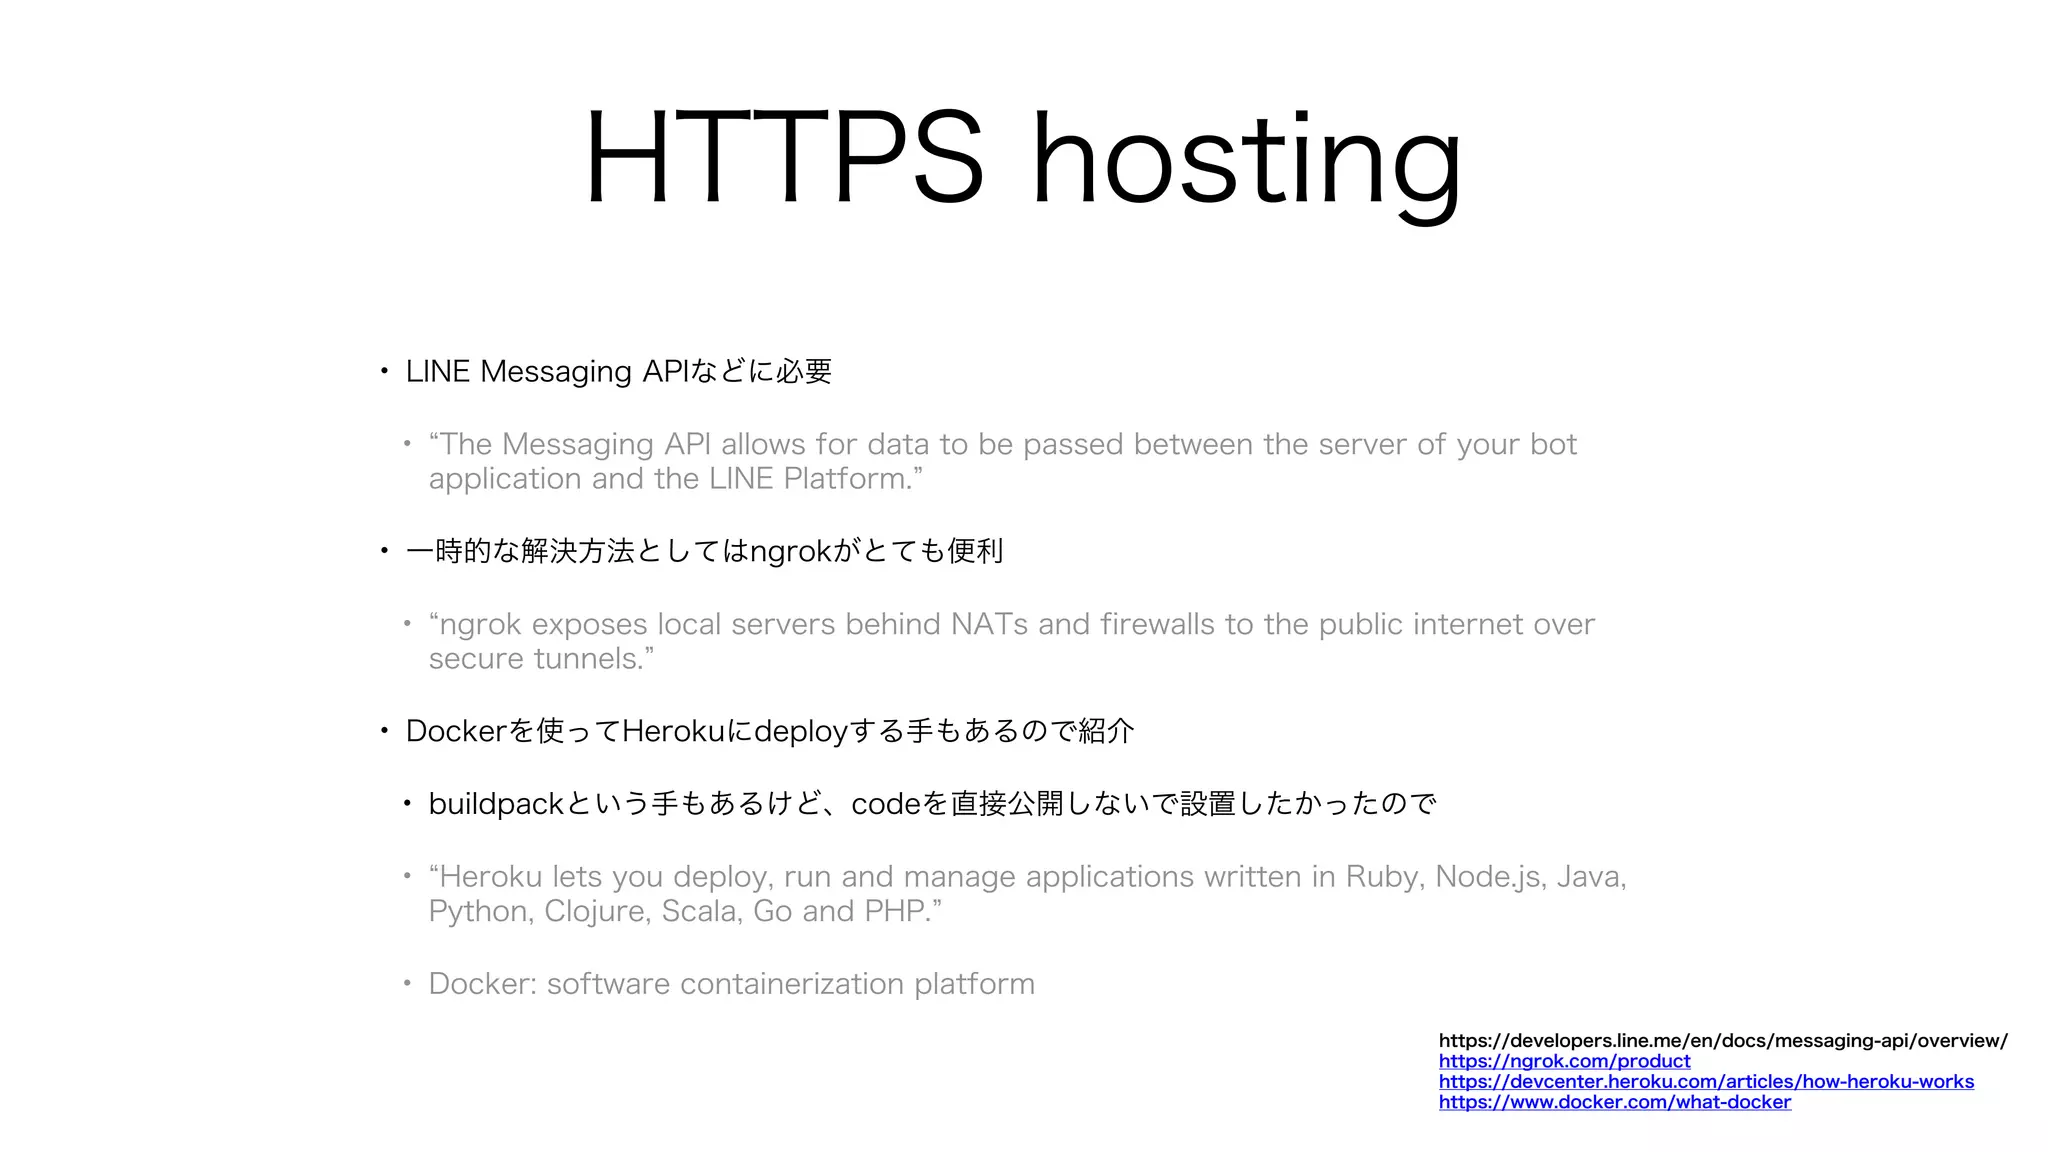
HTTPS hosting
• LINEMessaging APIなどに必要
• The Messaging API allows for data to be passed between the server of your bot
application and the LINE Platform.
• 一時的な解決方法としてはngrokがとても便利
• ngrok exposes local servers behind NATs and firewalls to the public internet over
secure tunnels.
• Dockerを使ってHerokuにdeployする手もあるので紹介
• buildpackという手もあるけど、codeを直接公開しないで設置したかったので
• Heroku lets you deploy, run and manage applications written in Ruby, Node.js, Java,
Python, Clojure, Scala, Go and PHP.
• Docker: software containerization platform
https://developers.line.me/en/docs/messaging-api/overview/
https://ngrok.com/product
https://devcenter.heroku.com/articles/how-heroku-works
https://www.docker.com/what-docker
11.
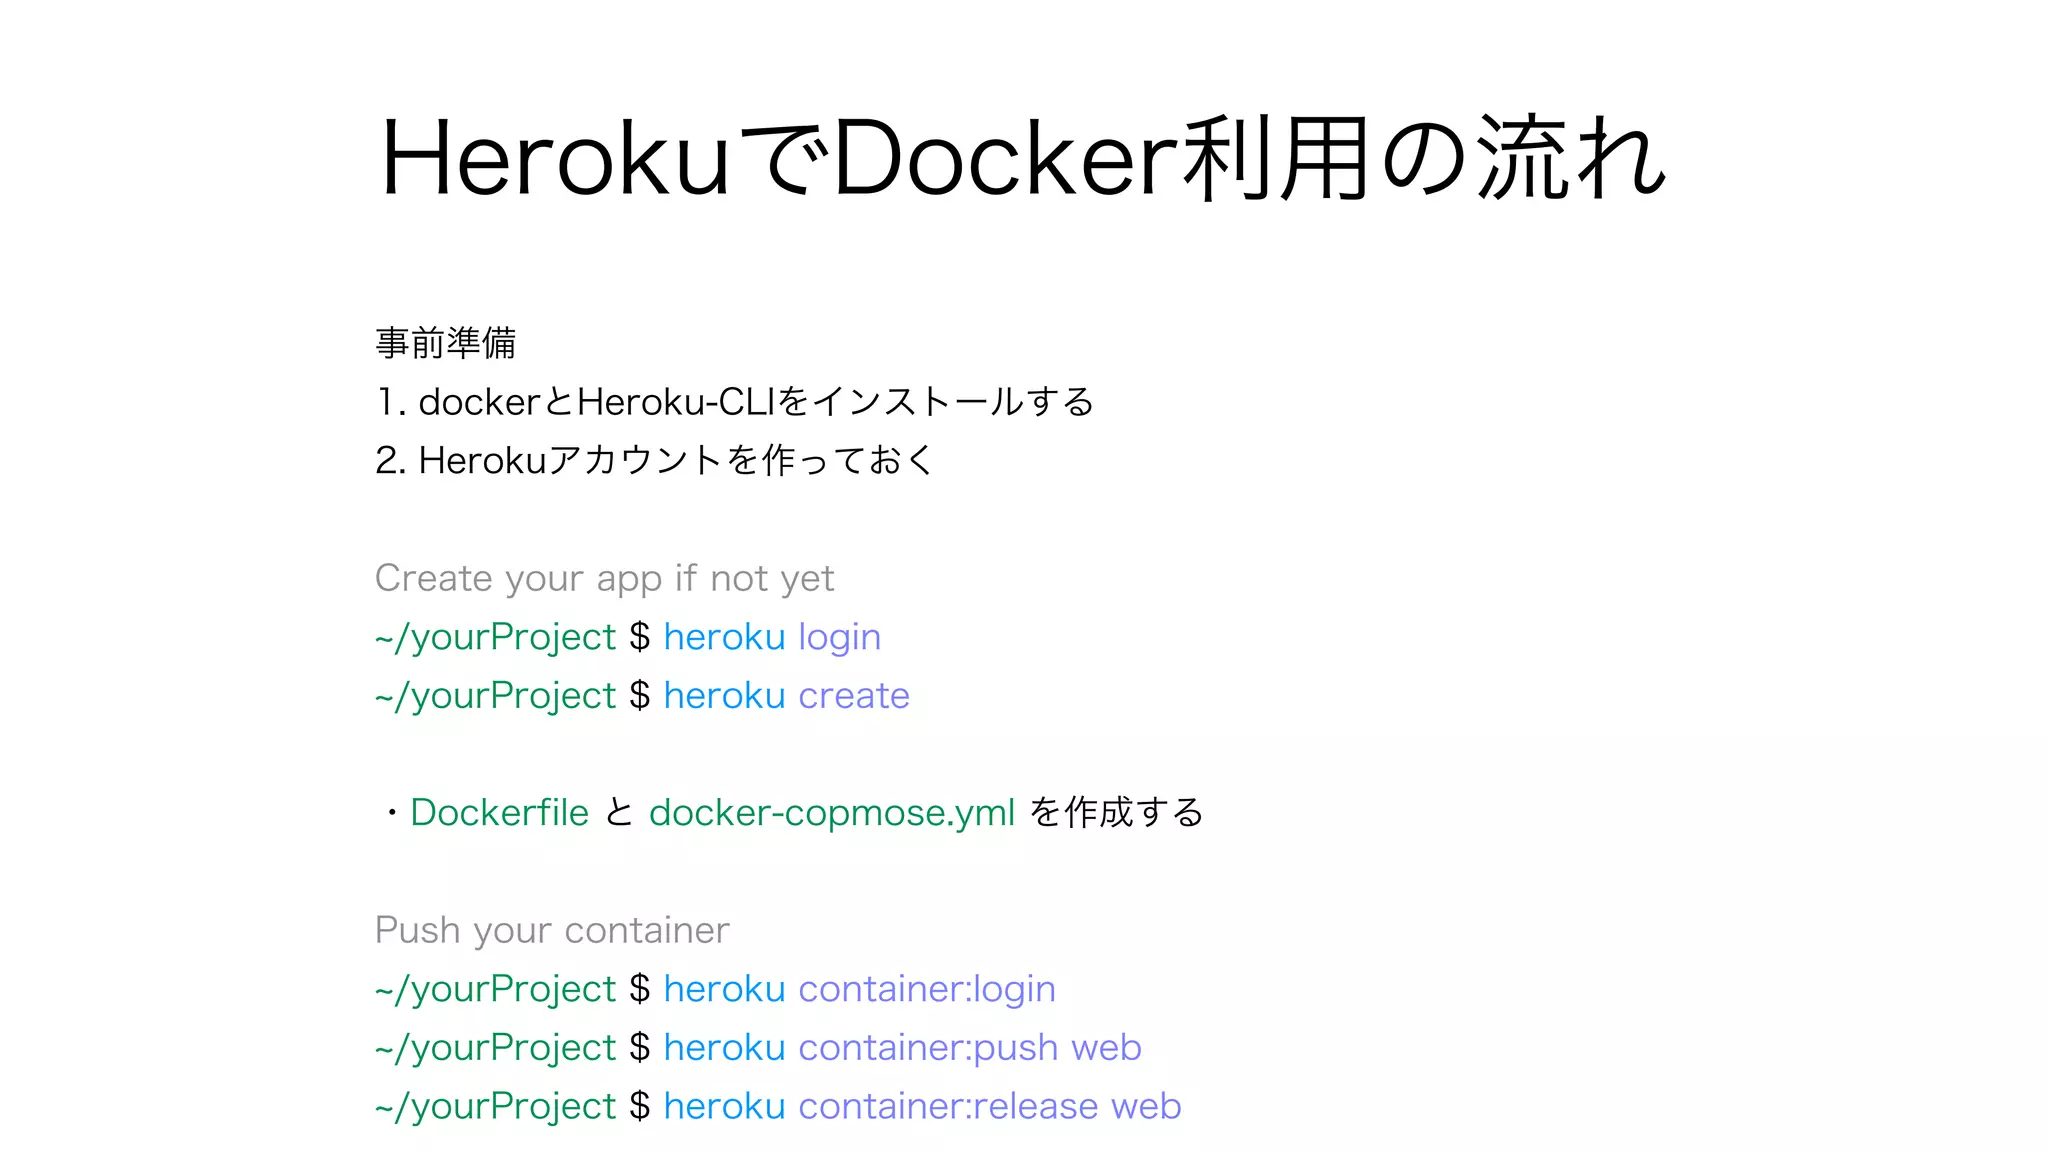
HerokuでDocker利用の流れ
事前準備
1. dockerとHeroku-CLIをインストールする
2. Herokuアカウントを作っておく
Createyour app if not yet
/yourProject $ heroku login
/yourProject $ heroku create
・Dockerfile と docker-copmose.yml を作成する
Push your container
/yourProject $ heroku container:login
/yourProject $ heroku container:push web
/yourProject $ heroku container:release web
12.
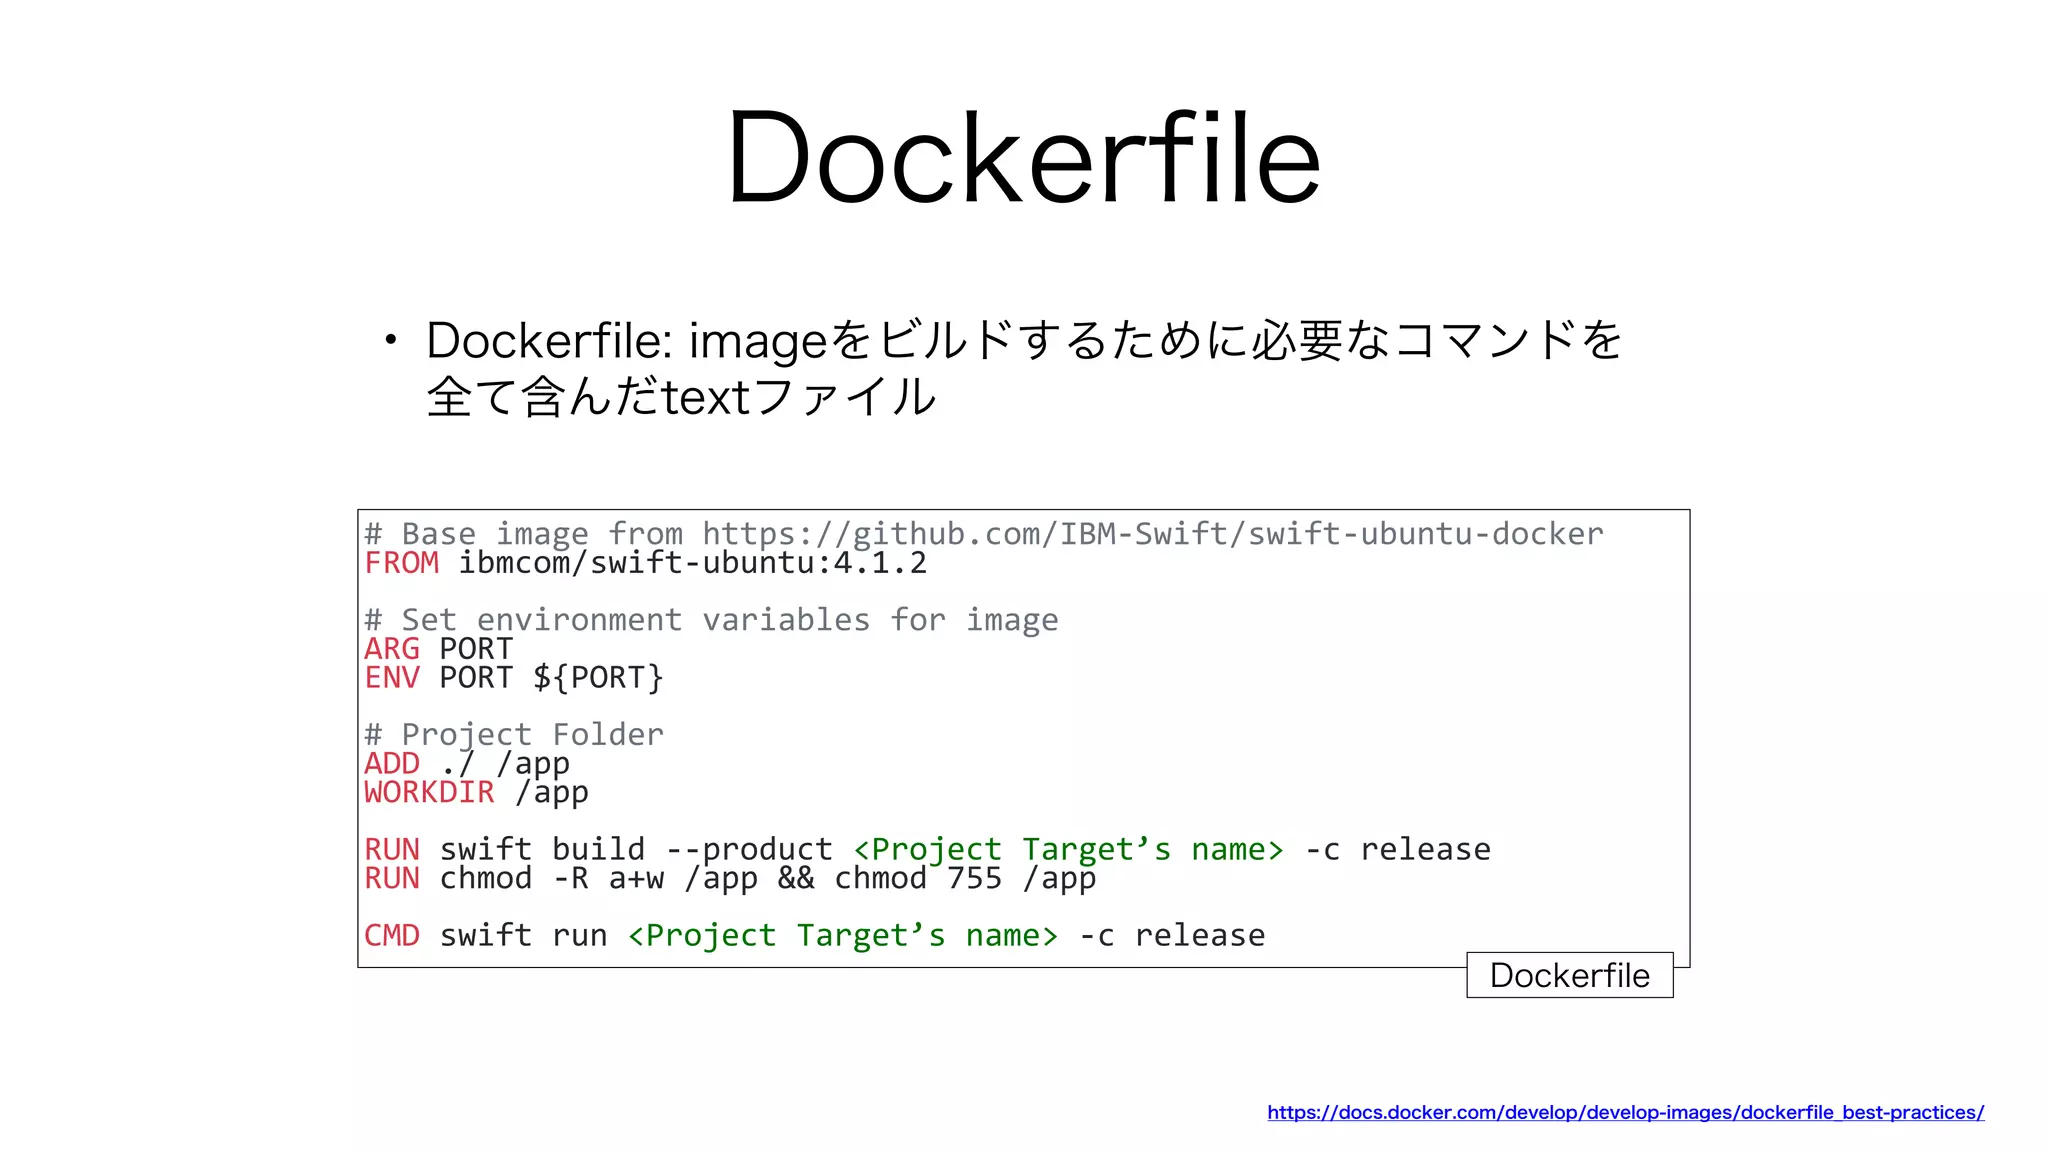
Dockerfile
• Dockerfile: imageをビルドするために必要なコマンドを
全て含んだtextファイル
#Base image from https://github.com/IBM-Swift/swift-ubuntu-docker
FROM ibmcom/swift-ubuntu:4.1.2
# Set environment variables for image
ARG PORT
ENV PORT ${PORT}
# Project Folder
ADD ./ /app
WORKDIR /app
RUN swift build --product <Project Target’s name> -c release
RUN chmod -R a+w /app && chmod 755 /app
CMD swift run <Project Target’s name> -c release
https://docs.docker.com/develop/develop-images/dockerfile_best-practices/
Dockerfile
13.
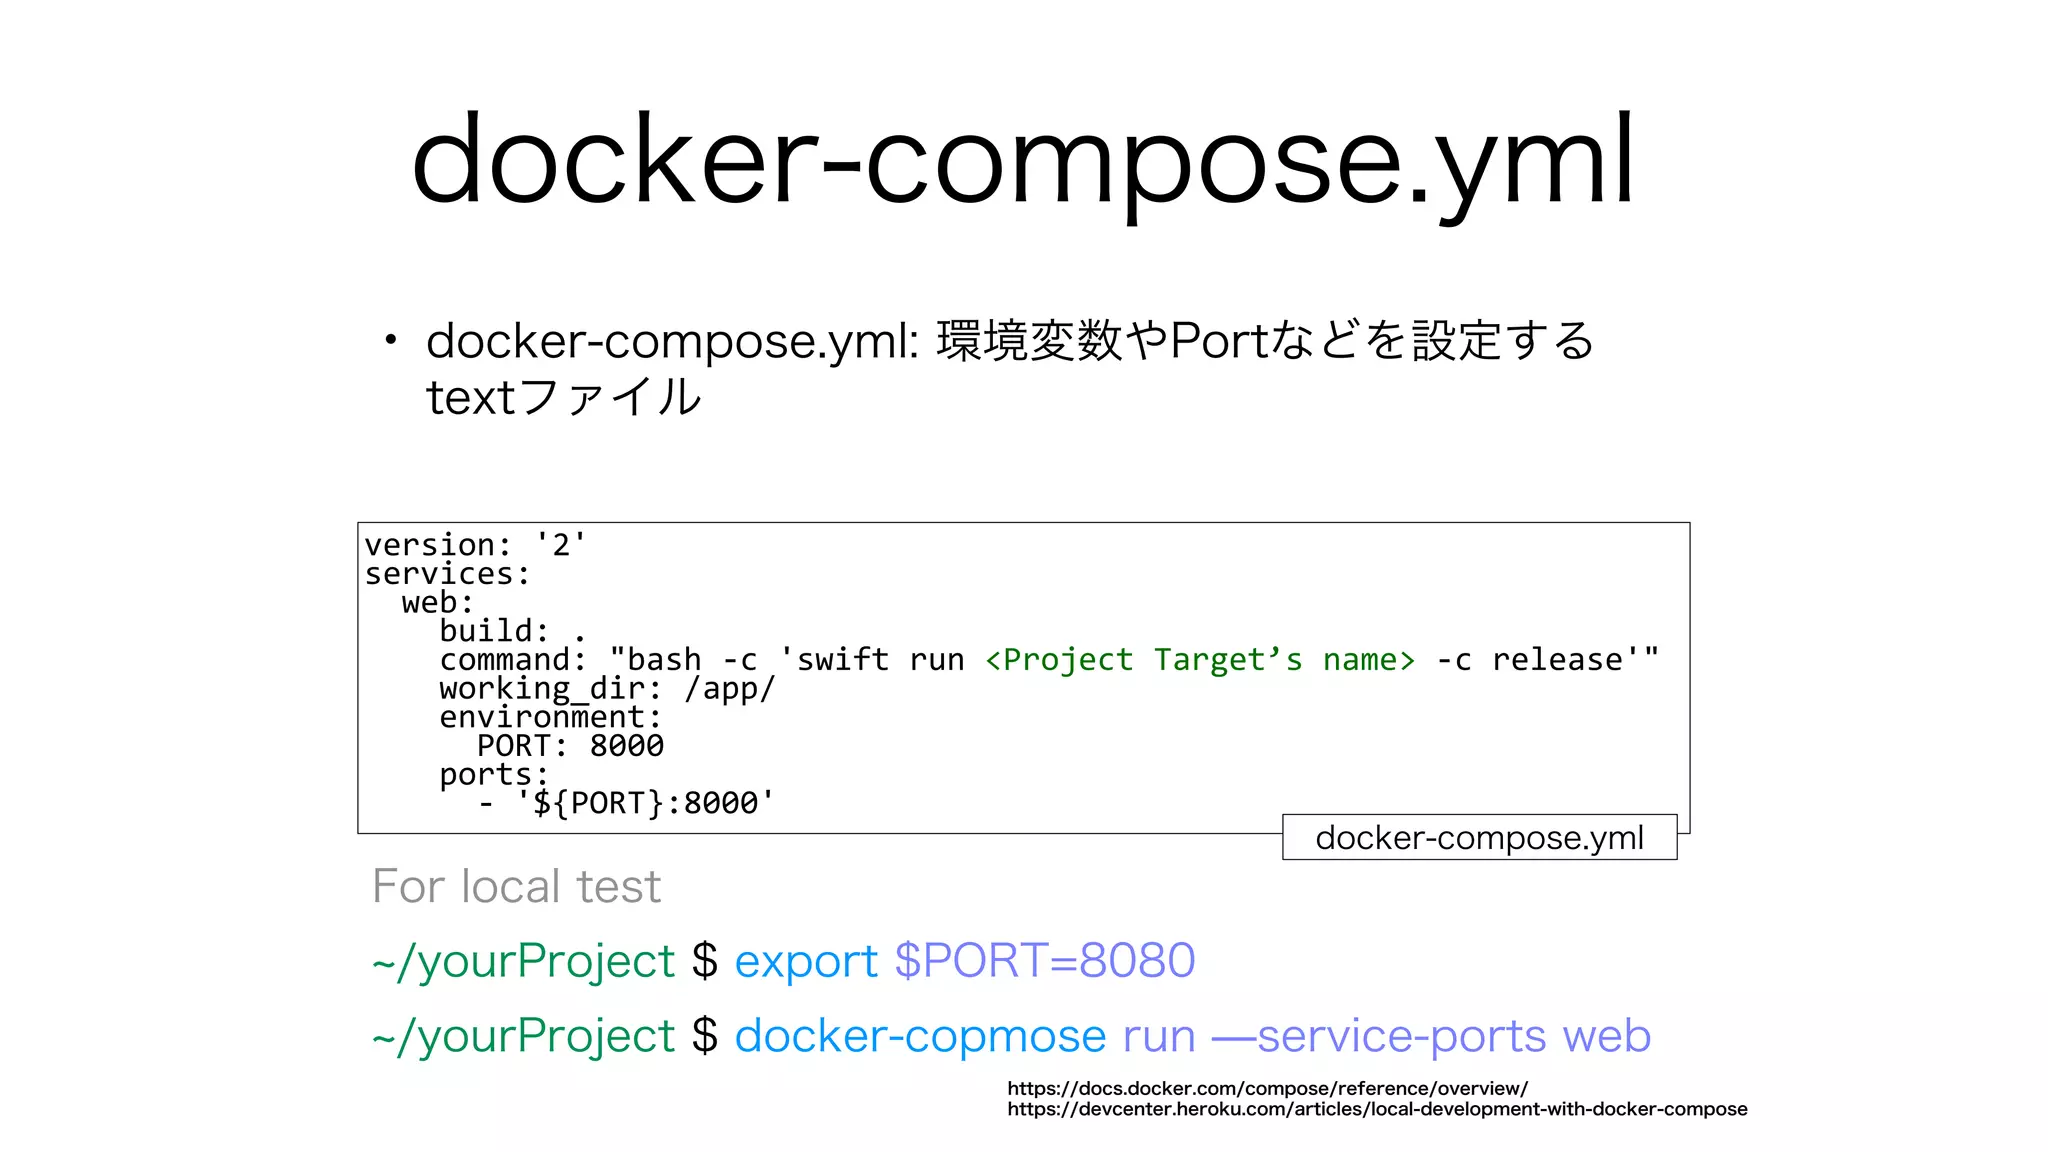
docker-compose.yml
• docker-compose.yml: 環境変数やPortなどを設定する
textファイル
version:'2'
services:
web:
build: .
command: "bash -c 'swift run <Project Target’s name> -c release'"
working_dir: /app/
environment:
PORT: 8000
ports:
- '${PORT}:8000'
docker-compose.yml
For local test
/yourProject $ export $PORT=8080
/yourProject $ docker-copmose run ̶service-ports web
https://docs.docker.com/compose/reference/overview/
https://devcenter.heroku.com/articles/local-development-with-docker-compose


![開発手順 (IBM Kituraで
)
$ swift package init ̶type executable
Edit package.swift to add dependencies
dependencies: [
.package(url: "https://github.com/IBM-Swift/Kitura", from: "2.4.0")
],
targets: [
.target(
name: "KituraServer",
dependencies: ["Kitura"])
]
$ swift package update
$ swift package generate-xcodeproj](https://image.slidesharecdn.com/server-sideswiftphotobooth-180622104641/75/Server-side-Swift-Photo-Booth-7-2048.jpg)
![Web server with Kitura
• Kituraを任意のThreadで実行する
• Pathからパラメータを受け取って任意のコマンドを実行
DispatchQueue.init(label: "Kitura").async {
Kitura.addHTTPServer(onPort: port, with: router)
Kitura.run()
RunLoop.current.run()
}
router.delete("photo/:hashString") { (req, res, next) in
if let photo = (images.filter { $0.hashString ==
req.parameters["hashString"] }.first) {
delete(photo: photo)
}
}](https://image.slidesharecdn.com/server-sideswiftphotobooth-180622104641/75/Server-side-Swift-Photo-Booth-22-2048.jpg)