SlideShare a Scribd company logo
1 of 20
Download to read offline
IntaglioPrintmaking
Joe Adams, Untitled, 2014
ART170-001
Instructor: Kevin Daly
Table of Contents
Introduction to Intaglio: Past and Present
Excerpts from F. Kiekeben, www.nontoxicprint.com
Printmaking Terms
Review of the Intaglio Process
Printing the Plate
Making a Template for Printing
Hard Ground (Acrylic, Ball, Liquid)
Soft Ground
Aquatint
Health and Safety
General Safety Guidelines
Suggested Reading
Unit 1 Assignment 3
Intaglio Printmaking
In etching a blank plate becomes the arena for creative events, for the penetration and alteration of the
surface of the metal. This is done by various means such as scoring, scratching, scraping and of course
as the term etching implies, by using corrosive chemicals to eat into the depth of the plate. The grooves,
indentations, scars and scratches produced by etching turn the once flat plane of a plate into something
resembling a landscape eroded by the elements - a structure beneath the surface commonly referred to
as intaglio.
The term intaglio is derived from the Latin in-tagliare meaning to cut into.
The term etching is often used to describe all intaglio techniques.
Strictly speaking, it should refer solely to processes that involve a corrosive action.
The more correct generic term for the broader range of incisive processes is intaglio
printmaking.
Once a plate has been worked and is ready for printing it is covered with a generous deposit of ink. After
wiping, just the deep recesses still hold significant amounts of ink. An etching is printed by laying the plate
on the bed of an etching press, covering it with a sheet of damp paper and set of felt blankets, then
running it through the two heavy steel rollers. The massive pressure exerted by the press pushes the
paper firmly into the grooves of the plate where it picks up the ink. In this way, a reverse copy of the
plate's 3D topography is produced as a two dimensional image consisting of lines, textures and tonal
areas.
The inking, wiping and printing of any intaglio plate is essentially the same, but the ways of creating the
intaglio are many and various.
Historically, etching plates have been made using three types of intaglio method:
1. The mechanical or cold techniques such as drypoint, engraving or mezzotint where
the plate is physically shaped using specially designed metalworking tools.
2. The etch, or hot techniques that include hard ground etching, aquatint or open bite
where etchant resistant grounds are applied to the plate and exposed areas of
metal are eroded by a mordant.
3. The less frequently used collagraph techniques where an intaglio plate is made by
building up a relief surface rather than eroding it.
4. And now, the new photopolymer processes represent an important extension to
this canon.
A brief historical perspective
The sculptural nature of etching finds its origins in the ornamental engraving of objects. Goldsmiths, tool
and weapons makers and other craftsmen were proficient in decorating their wares using engraving
techniques long before the age of mechanised printing. The first intaglio prints were reputed to have been
taken from such objects. By the 16th Century the invention of the intaglio printing press enabled artists
like Durer to take impressions from metal plates and intaglio work increasingly came to be seen as the
means to create a matrix for the reproduction of linear drawings.
The creation of an image on a plate using mordants and resistant grounds was well known to master
engravers of this period but another century would pass before acid etching was widely adopted as the
preferred means of producing the intaglio groove. Artists began to favour the way that etching allowed
them to work much more quickly, spontaneously and with a greater range of marks than the hand held
burin would permit. Rembrandt with his unrivalled intaglio work would firmly establish etching as a
supreme medium of artistic expression capable of conjuring up exquisite imagery full of life, depth and
vibrancy.
The artistic excellence that Rembrandt achieved should, however, be appreciated in conjunction with
his ceaseless exploration of new technical possibilities. He experimented with different mordants, etching
tools, etch resistant materials and printmaking papers; he even designed his own wooden etching press.
Any enthusiast for the art of intaglio printmaking would be well advised to visit Rembrandt's house in
Amsterdam which gives a vivid impression of the master's working practice. Although Rembrandt's
aesthetic genius has inspired generations of printmakers, his spirit of inventiveness seems to have been
somewhat less influential. Many have been content with the end result - the fluid, linear drawing - without
the urge to continue to explore the means of production.
Over time, various mechanical stippling and mezzotinting methods were devised to give a degree of tonal
quality to intaglio prints but it was not until Jean Baptiste Le Prince invented the technique of
aquatint in the middle of the 18th Century that etching acquired a much more satisfactory painterly
process. Le Prince discovered that a fine dust of rosin particles melted onto a metal plate became acid
resistant, enabling the artist to set down areas of granular dots that would appear as luminous tones on
the print. Many painters were intrigued by the new method. Francisco de Goya, in particular,
made extensive use of the technique, taking it to levels of virtuosity that have rarely been equalled. The
18th Century also brought the introduction of the soft ground or vernis mous method, first used in France
to emulate the textural qualities of crayon marks in an intaglio print. This further extension of the mark
making vocabulary was quickly embraced by artists across Europe. By now, a sufficient arsenal of
methods was available for commercial printmakers to be able to produce faithful intaglio reproductions of
paintings.
The photographic revolution
At the very beginnings of photography, in the early 19th Century, the photo sensitised etching plate was
considered a serious contender to the silver-emulsion based systems that are in use to this day. Photo
etching, commonly known as photogravure or helio gravure, as a viable artistic and industrial process
was devised by Karl Klic. His process is the foundation of rotational intaglio printing which is used for the
production of high volume print runs such as glossy magazines. Sadly, the photo-reprographic potential of
the intaglio medium was not exploited by most artists working in the first half of the 20th Century. With a
few exceptions, rather than investigate new possibilities, most seemed content with proven and tested
methods. In general intaglio printmakers were content to continue with the established methods rather
than be at the forefront of new developments. A kind of conservatism started to prevail in both technical
and pictorial terms and although many great 20th Century artists have produced interesting intaglio work,
often under the auspices of master printers, the emphasis has been on commercial reproduction. Few
artists used the medium as their main form of expression. Stanley William Hayter, with his rejuvenation of
engraving and development of intaglio color printing is perhaps the one exception. Moving in illustrious
circles that included Picasso and Miro he promoted a climate of sharing and accessible working practices
in which no trade secrets were to be kept - an approach that stands as an example of good practice for
today's printmaking community.
In the 1960s, printmaking experienced something of a renaissance, but mainly in the new medium of
screenprinting. This new method captured the spirit of the time as it offered the aesthetic of the emerging
pop and media culture with ease of execution. Warhol's soup cans were screenprints, not etchings.
Intaglio had lost touch with the avant-garde and was increasingly seen as traditionalist and craft
orientated. An increasing awareness of environmental and health related issues didn't help the popularity
of etching either. Artists and students were favouring safer, simpler, more modern-looking modes of
printmaking.
Etching today
In the eighties I was fortunate to be taught by an enthusiast of intaglio printmaking. At the time etching
was still in something of a general decline, not only in Germany but also across most of Europe. I
discovered that the medium could be contemporary and to my delight found that it continued to flourish in
the UK in an abundance of open access, editioning and college workshops. Thankfully, etching now
seems to be shaking off its old fashioned image and many artists are once again investigating the
technical possibilities and exciting new aesthetics in a new era of intaglio printmaking.
Thanks to the pioneering efforts of artist-innovators such as Keith Howard, today a new intaglio system
has become available. Acrylic Resist Etching introduces a whole new range of technical and creative
possibilities whilst being much safer and easier to practice than traditional etching. In aesthetic and
conceptual terms there is also a sense that intaglio printmaking can once again become an innovative
and relevant medium. Notions of reproduction and simulation and digital technology are defining the
current age and its image making. Printmaking has always enjoyed a natural affinity with the mechanics
of each age. Matrix, copy, reproduction, encoding, simulation are all familiar terms and any etched metal
plate is as much a repository of condensed information as a computer disk. The use of digital working
methods in conjunction with the depth, tactility and sumptuous sensuality that is the special hallmark of
intaglio printmaking offers a rich field of contemporary artistic investigation and production.
Printmaking Terms -Intaglio
print An image that has been impressed on a support, usually paper, by a process capable of being
repeated. Most printmaking techniques (a major exception being digital prints) require the previous
design and manufacture of a printing surface. The five primary types of print techniques are relief,
intaglio, planographic, screenprint, and digital.
aquatint An intaglio process by which tones may be achieved in an etching; used primarily for the
creation of large areas of tonal shading. In aquatint, small grains of resin are sprinkled on
the surface of the plate, which is then heated to affix the particles to the surface. When
the plate is immersed in the acid bath, the resin protects its surface, so that the acid only
“bites” the spaces between the grains. This leaves (depending on particle size) a fine or
coarse network of lines and crevices which hold ink, creating an area of tone. When
printed, the tonal effects are similar to a watercolor wash.
artist’s proof In printmaking, these impressions are printed especially for the artist and
excluded from the numbering of an edition, but are exactly like the
editioned prints in every other respect. Usually appears as “A.P.” or “E.A.”
bon à tirer A proof approved by the artist which establishes the standard for all other prints in the edition.
Burr In printmaking, when a drypoint needle or other engraving tool is used to draw directly into a metal
plate, small, fine pieces of metal are raised up on both sides of the scored line. This burr holds
additional ink during the printing process and gives the lines a velvety or fuzzy texture. Burr is
very delicate and consequently is easily worn down during the pressures of the printing process.
Early pulls or impressions taken from such plates are characterized by rich burr. In the case of
Old Master prints especially, the quantity and evidence of burr can sometimes be used as an aid
in determining how early the impression was pulled.
deckle edge The natural, untrimmed edge of handmade paper.
drypoint A type of intaglio print in which lines or tones are scratched into the surface of a bare metal
plate with a sharp metal point, sometimes tipped with a diamond. However, in contrast to
engraving, the displaced copper is left in narrow furrows flanking the groove. Called “burr,”
these areas catch and hold the printer’s ink, creating a halo of tone on the print. Burr wears out
very quickly in the printing process so these tonal halos are found only on the earliest
impressions.
edition A number of printed images, or impressions, from the same master plate or block using the
same ink colors and printing methods, as established by the artist and/or publisher. The
process of numbering individual impressions from an edition only became widespread in the
twentieth century. The impressions in such a “limited” edition are usually signed and numbered
progressively, for instance 1/50, 2/50, etc., for a total edition of fifty impressions; after the total
is reached, the plate or stone is destroyed. Often a few impressions will be printed outside the
regular edition for the collaborators (artist, printer, publisher). Impressions printed during the
development process to test the printing or try out color variations are called “proofs”.
embossing A printmaking process used to create a raised surface or raised element, but printed without
engraving An intaglio process in which a plate is marked or incised directly with a burin or other
metalmarking tool. No acid is used in this process since the design is dug out by hand. An
engraved line can range from very deep and wide, to lighter and thinner and is often characterized
by a pointed end signaling the exit of the “v” shaped burin from the metal. An engraved plate is
inked and printed in the same manner as other intaglio prints, in which the engraved lines are filled
with ink and the surface is usually wiped clean. When put through a roller press under great
pressure, the paper is forced into the engraved lines, transferring the ink and creating a slightly
raised line in the printed impression, along with an embossed platemark, caused by the pressure of
the edge of the metal printing plate.
etching In contrast to engraving, in this type of intaglio print the artist uses acid to cut into the plate.
Lines and/or tonal areas of an image have been corroded, or “bitten”, into the surface of a metal plate
by the action of a corrosive agent, called a mordant. Traditionally nitric acid has been used, but
increasingly less toxic materials are being introduced, such as ferric chloride. A metal plate is first
covered with an acid-resistant substance (ground) through which the image is drawn with a needle or
other tool, exposing the bare metal. When immersed in the mordant, only those exposed areas are
subject to its action. The metal plate is therefore “carved” or “etched” by the acid rather than by a tool
directly in the metal. Recently, photopolymer etching has been developed, whereby a drawing,
photograph, or digital image is transferred to a photosensitive polymer plate and processed into a
relief or intaglio printing plate.
foul-biting In printmaking, when the acid-resistant ground on a metal plate does not keep the acid
entirely out, irregularities can appear. When a plate is printed, they catch ink and appear as spots.
Impression A single printed image (usually on paper) from a printing surface. Multiple impressions may
be printed from the same etching plate, woodblock, lithographic stone, or other surface.
Intaglio (from the Italian word Intagliare, to carve or incise) A category of printmaking in which the surface
of a printing plate has been incised with a design by one or a mixture of techniques. In order to print
the image, ink is applied and wiped across the surface of the plate, filling the recessed areas. Usually
the excess ink is then cleaned off the unworked surface of the plate. When printed under great
pressure, the paper is forced into those incised marks, thus picking up the ink and often creating
ridges and raised areas in the final printed impression. Types of intaglio prints are engraving,
etching, aquatint, and mezzotint.
Monoprint – A print which has as its base an etching, lithograph or woodcut and which is then uniquely
altered by monotype coloring, unique inking, or choices in paper color.
Monotype – A type of print in which a drawing or painting executed on a flat, unworked printing plate or
other surface, sometimes glass, which is then transferred to a sheet of paper through pressure.
As most of the image is transferred to the printing process, only one strong impression can be
taken, hence the term monotype (unique, single impression). Sometimes a second, weaker
impression can also be printed from the plate. A monotype is distinct from a monoprint.
Plate Mark – The imprint in the paper resulting from the edge of a metal plate being pushed into it during
the pressure of the printing process.
Plate Tone – A veil of ink intentionally left on the surface of the plate during printing which creates
delicate areas of tone or shading.
Printer’s Proofs – Impressions printed especially for the printer(s) and excluded from the numbering of
an edition, but exactly like the editioned prints in every other respect. Usually appears as
“P.P.” (You can giggle, I’ll allow it.)
Progressive Proofs – In printmaking, a series of proofs taken to show each individual color plate and
each combination of them culminating in the final, complete version.
State – Any intermediate change made by the artist while creating an image fixed on a plate, stone, or
block, as reflected in impressions or proofs printed during the development process of a printed
image. The “final state” is the state from which editions are generally pulled, although some
artists pull several impressions in each state.
Trial Proof – An early proof in printmaking, often incorporating artist’s revisions and changes and
generally not identical to the numbered, editioned prints. Also called Working Proof.
Jessica Lanham, Photoetching, Aquatint, and White Ground, 2008
An Overview of Intaglio Processes
Etching, Drypoint, Engraving, and Aquatint are some of the more common techniques of the
Intaglio printmaking process. In each case, grooves or pits are made on a sheet of metal. These
grooves or pits are then filled with ink, and the surface of the plate is polished clean. When the
proof is pulled on an etching press, the image is transferred from the plate to a piece of paper.
Many identical proofs can be pulled from a single plate, forming an edition. Many printmakers
like to use a number of different techniques on the same plate.
In this unit, you’ll be introduced to Drypoint and Etching. Below, I’ve put together some information for you to
review regarding the intaglio printing process prior to printing.
Drypoint
Drypoint is very basic. The artist simply scratches the image onto the plate with the etching
needle or stylus. No mordant is involved. It can be difficult to control the needle on the slick
metal surface. The metal forms a ridge along one side of the scratched lines as the artist draws.
This gives a fuzzy look to the lines when the plate is printed. Going through the press many
times, the pressure of the roller on the press forces the ridgeback down into the grooves. The
result is that the image gets paler and paler.
Etching
Etching uses a mordant (such as an acid or other corrosive liquid) to create deep lines in the
sheet of metal. The artist applies a mordant resistant ground to the plate in a thin, even layer, and
then draws the image on the plate. The stylus or etching needle removes the ground wherever the
artist has drawn, exposing the metal. When the plate is immersed in the mordant, the metal is
eaten away and the lines deepen. Lines etched for a long time are deeper and hold more ink than
lines etched for a short time. This means that they print darker onto the paper. There are different
kinds of grounds, both liquid and solid. They can give different looks to the line, or be used with
different mordants.
The Mordant
Whistler used to make a little wax wall around the edge of his etching plate and pour acid
directly onto the plate to etch his lines. To avoid spilling acids and breathing harmful fumes,
stand straight up with your shoulders back when placing your plate in the acid tray. Assume the
same posture when retrieving plates.
Printing the Plate:
The paper for the print is made of cotton fibers, which give it enough strength to be forced down
onto the plate under the pressure of the press, producing a rich image. First the paper is soaked in
clean water, to give it flexibility.
All intaglio prints are printed on an etching press. The press has a bed on which the inked plate is
placed, face up. Excess water is removed from the paper, and the damp sheet is placed face down
on the plate. Etching blankets are placed on top of the paper and plate, to distribute the pressure
of the steel roller evenly. The plate is rolled through the press, at thousands of pounds of pressure
per square inch. After printing, the print is air-dried. The paper dries more quickly than the ink.
For each successive print the entire inking process has to be repeated.
General Info
This is the most basic form of Intaglio printing.
At MVCC we use zinc or steel, which is relatively inexpensive compared to Engraver’s copper.
Zinc ordered from art supply stores comes with a mirror finish and a mordant-resistant
background; Steel comes this way too, but you can buy plates from hardware stores. If you do so,
you will need to make your own acid resistant backing with contact paper. If you have the need
for a pristine polished background, you can polish your plate by hand using Putz Pomade™,
which is a buffing compound. Usually we apply it and polish it with pieces of felt cut from old
etching blankets.
If you buy sheets from the hardware store, they must be flat! …
If you have an idea for your print, you will need to remember to REVERSE the image, or it will
print the wrong way round. This not only means that any writing or numbers will be back to
front, but the visual flow of the piece will be different, and often not what you had envisioned.
The easy way to reverse an image is to put it on the copy machine and follow the directions on
the wall above the copier to make it print backwards. You can draw directly on to the plate with
a Sharpie or a grease pencil. However, the lines made by your etching needle will be VERY
much thinner than either of these.
Printing your Intaglio Plate:
1. Decide on the size paper you will be using. Generally, allow for generous margins around the
edge of the plate, usually equal on the top and sides, and approximately 1/2" greater on the
bottom margin. (A" bleed print", however, is printed on a piece of paper smaller than the plate)
2. Measure paper for your edition and tear the edges, using a straight-edge, rather than cutting
them. Initial the back of your paper so you know which is yours in the water bath!
3. Create a template by tracing around your plate on a piece of heavy paper, showing which way
is "up", and tracing around where your printing paper will be laid down in relation to the plate. If
you want accuracy this will involve measuring with a ruler. Cover this with a sheet of clear
contact paper so that ink can be wiped off it. Be careful not to get bubbles or creases in the
contact paper. Trim the template so that it will extend beyond the printing paper on all sides if
the printing paper is laid on top of the template in the correct position.
4. Soak your printing paper - at least 20 minutes. Before you start to ink your plate, put the paper
up on the plexiglass above the soaking tray and gently squeegee one time only. Leave it there
while you ink your plate and it should be the right degree of dampness when you are ready to
print (not shiny).
5. Ink the plate up making sure your ink is Etching ink. Use a "discard" to smear the ink across
the plate in all directions, being careful to fill all etched areas.
6. Take a 36" square tarlatan and "break it in" if it is new by tugging at it diagonally to the weave
in both directions. Create a large pad and gently wipe the plate as follows:
• for hard-ground and soft-ground, in a circular fashion
• for Imagon, straight across and straight up and down
Continue until the surface of the plate is fairly clean, using cleaner parts of the tarlatan as it picks
up the ink, you may want to wipe the edges of the plate with a rag. Some people like to do a final
brief and gentle wipe with telephone-book paper for a brighter background.
7. Place the template you made earlier on the center of the bed of the press. Put the plate on it,
face up. Take your paper down from the plexi. It should appear matte and not shiny with
moisture. Carefully place the paper over the plate according to the markings you have made on
your template. Cover the printing paper with another, larger, sheet of clean newsprint.
8. Position the blankets over the template, plate and paper:
Bed of Press
9. Crank the handle of the press so the roller passes over the plate and paper completely, taking
care not to stop over the plate itself.
10. Pull back the blankets and remove your print, picking it up slowly from one corner, and place
on racks to dry.
11. If you will not be printing another print immediately, clean the ink off your plate with spray
vegetable oil and a rag. Clean up ink etc. the same way. Put all paper, templates, plates etc.
away in your drawers and lockers, and keep the shop clean and tidy to maintain a good work
environment.
roller
Pusher blanket (woven)
Forming blanket
(woven)
Sizing absorber
Backing sheet
Printing paper
Plate
Plexiglass
Making a Template for use with printing your Edition:
A print is the whole piece of paper, not just the area where the image is. Most intaglio prints
show off the embossed mark that outlines the plate by having margins around the image. If you
opt for margins, take some care with them. Traditionally, the sides should be the same width, and
the bottom margin should be slightly greater than the top margin. Many printmakers opt for the
top and sides to be the same width, and the bottom margin to be one half inch greater.
To make sure your margins are all the same on your edition, and that they are straight, make a
template. First measure your plate, then figure the best size for your paper. On a piece of smooth
paper, which is larger than your printing paper, draw the outline of your plate, with an arrow
showing which way is up on the image. Then work out exactly where the paper will go in
regards to the plate, using a ruler and measuring carefully. Draw the outline of where the paper
will be placed. Then use clear contact paper to cover this, making sure there are no wrinkles or
creases in either sheet of paper, as they will emboss your print.
Trim the template down so that none of the paper is exposed, but so it is still larger than your
printing paper by at least an inch all the way around. The contact paper means that the template
can be wiped clean after each print is pulled.
For a bleed print you won't need a template, but you will need to make sure your paper is at least
one half inch shorter than the plate in each direction, as it will expand slightly when soaked. You
don't want to be able to see where the edge of the plate was on a bleed print. Sometimes this
means planning your image to make sure you won't get unintended focal points on the edge of
the image.
MinJung Kim, Hardground Etching and Chine Colle, 2007
HARD GROUND FOR ETCHING
Hard ground is a resist used when we make an etching. It is a substance which, when hard and dry, is resistant to the
mordant to be used. The coating on the plate is thin enough that it can be easily drawn through to expose the plate
wherever lines are made. The back of the plate is protected with contact paper (you may want to do this first) so that
when the plate is immersed in the mordant, only those areas where the drawing was made are exposed to the
mordant and “etch”.
All of these hard ground processes are good for linear work. For areas of solid blacks or greys, use the aquatint
technique. You may etch your image on the plate using this method to see where to put an aquatint, like using a
coloring book with outlines.
Remember that if you want to achieve the effect of tones with this technique you will need to hatch,
crosshatch or stipple. Leaving large areas of the plate open to the mordant causes “open biting”, which
produces a mottled light grey value, as the ink is wiped out of it. Aquatint works because it leaves a pitted
surface which holds the ink, unlike the uneven surface of open biting.
Type Pros Cons
Universal Etching Hard
Ground/ Shop Asphaultum
(liquid)
 Beautiful smooth surface for
drawing
 Easy to see your lines
 Keeps foul biting to a minimum
 Tricky and messy to apply
 Easy to waste the product
 Ground has to be removed
for proofing
 Asphaltum is toxic
Ball Hard Ground  Easy to see your drawing
 Easy to coat a larger plate
 Economical
 Hotplate needed to apply it
 Foul biting is typical due
to dust on the roller
 Ground has to be removed
for proofing
 Asphaltum is toxic
Z-Acryl Hard Ground
Emulsion
 Non-toxic
 Can be left on for proofing and
etching can be resumed
 Easy to take off with alcohol
 Hard to see your drawing
 After a while the mordant
eats away the ground
 Difficult to remove in
order to use additional
techniques such as
aquatint
Procedure
Etching: Using Graphic Chemical Liquid/Ball Hard Ground or Asphaltum :
1. If your plate doesn’t have a protective backing on it, cover the back of the plate with contact paper and trim
right to the edge with a sharp Xacto or spraypaint the back of your plate.
2. Deoxidize the plate with salt and vinegar
3. Degrease the plate with alcohol and a paper towel
4. Place a sheet of newsprint on the hot plate, place your zinc plate on it, then pour or dab your ground on the
zinc. Your hands will get dirty! Even though it is easy to waste, be generous enough with your ground so
you can cover the plate on the first pour. It dries quickly and can get thick easily, which will crack and
flake.
5. Prop up on a smaller object and dry horizontally
‘
General Directions for drawing and etching the image, using any kind of hard or softground
1. When the plate is thoroughly dry, make your drawing with the etching needle. Remember to reverse the
image, so that it will appear correctly when printed.
2. When finished with the drawing stage and ready to etch the plate, grab a pair of heavy duty gloves from the
yellow fire cabinet in the washout room, put on eye protection, and make sure any loose clothing is secure
behind an apron or tucked in.
3. Immerse your plate in the tray of Nitric Acid to etch it. You will probably want to make a small test plate
the first few times that you do this to see how different times affect the width and darkness of the lines you
make.
4. To create areas with more delicate lines, "stop out" lines before they have etched as deeply as lines which
you want to be darker and richer. The deeper and wider the groove in the metal, the more ink it will hold
and print, creating darker areas. Many different line weights can be obtained in your image by successive
stopping out. Alternatively, you can add lines later in the etching process so that they are bitten for a shorter
amount of time.
5. Always rinse the plate under running cool water when you take it out of the acid. Try to avoid drips.
Stopping Out:
If you have already etched the plate part way and want to prevent some areas from etching further, they can be
covered up (“stopped out”) to prevent etching deeper when the plate is returned to the nitric acid.
We’ll be stopping out our plates with the purple/blue Z-Acryl Hardground emulsion found on the main printing
counter above our storage cabinets.
1. It is important that you de-oxidize your plate by immersing it in a bath of salt and vinegar before
applying each application of stop out. Rinse off the de-oxidizing solution with water and dry your plate
with paper towels or a hair dryer before applying the stop out.
2. After rinsing your plate with water, check the depth of the etch with your fingernail, and look at it through
a magnifying glass. You can proof it without removing the hardground.
Cleaning the ground off the plate:
Asphaultum based hardground, soft ground, and oil based ink can be removed from your plate using mineral spirits.
Be sure to use gloves with it.
Acrylic grounds can usually be removed with alcohol. Screen filler aquatint can be removed with a degreaser.
Soft Ground:
Soft ground, is an acid resistant coating made of asphaltum, rosin, beeswax, and tallow. The addition of
tallow keeps the ground from drying to a hard surface. A soft ground line has the character of a pencil or
crayon drawing. Anything pressed into the soft, waxy ground--with a texture such as lace or fingerprints-
-will cause the ground to yield under pressure, removing the ground and revealing the plate for etching.
The longer the soft ground plate is exposed to the acid, the deeper and wider the line becomes.
1. Turn the hot-plate on with the temperature set at 175 degrees. If the ground and roller slide
creating pinholes and and uneven application, the plate is overheated.
2. Place a piece of newspaper on the hot-plate to keep soft ground off the surface of the hot-plate,
and to facilitate your ability to remove your copper plate easily. Place the filed plate on the hot-
plate.
3. Once the plate is warmed, use the brayer dedicated for soft ground to spread the ground over
the warmed plate. Rolling the brayer/ground in one direction initially to spread. Avoid hitting
the newspaper as you approach and leave the plate to prevent losing ground off the roller and
creating streaks in the ground on the plate.
4. Continue to spread the ground with the brayer with goal of achieving an even coat--sans
pinholes.
5. Gradually lightening pressure on the brayer will spread the ground, reducing roller marks and
pinholes.
6. Once the ground is even, set the brayer with the roller facing up back in the drawer. Grasp the
newspaper on diagonal corners and lift the copper plate from the hot plate. Temporarily set the
plate on the concrete floor, or the press to facilitate cooling prior to working on the surface.
NOTE: Store the soft ground tools so as to keep them clean. Brayers with the roller surface up
and the lid on the tin of soft ground will prevent debris from attaching to the soft ground and
creating marks when applying the ground to your plate.
Soft pencil or crayon-like lines can be created by placing paper over the surface of the soft-
ground plate, then drawing on the paper.
1. The quality of paper used between the plate and the drawing tool when has a definite
impact on the soft ground image. Using a fine grained paper gives fine lines. Using a
rough textured paper creates coarse lines.
2. Hinge the paper to the plate by initially folding a crease an inch or so from the long edge
of the paper. Apply masking tape tabs to the bottom edge of the paper fold. Supporting
the large portion of the folded paper, slide the plate into the crease. Gently lift the plate
and paper and burnish the tape to the back of the plate. Affixing the paper to the plate
permits you to lift the paper to examine the soft ground drawing progress.
3. The pressure of your drawing tool, or anything thing that comes in contact with the paper
will offset the ground on the paper, exposing the plate. Experiment with different
densities of pencils, etc. to see the quality of line you achieve. Varying the pressure on
your drawing instrument will change the amount of ground that attaches to the plate and
the weight of the line.
4. The use of a drawing bridge, a strip of wood supported by blocks on each end, can be
used for a more pristine approach to the soft ground. The bridge supports the hand so
nothing but the pencil tip will press against the paper.
To imprint textures into the surface of the soft ground you can use any thin, flat material (gauze,
dry foliage, lace, fabric). Textures can be imprinted into the soft ground by hand burnishing, by
disturbing the soft ground with fingertips, brushes, etc., or by impressing a texture across the
surface of the plate using the printing press. If using the press to transfer a texture into the soft
ground, prepare your material then use the following steps:
1. Lighten pressure on the press about 1/2 - 1 turn less (counter clockwise) than for normal
printing.
2. Set up the press as for printing.
3. Place the cooled soft ground on the press bed
4. Arrange the material you wish to imprint in the soft ground on the surface of the plate.
5. Cover the material and plate with a piece of plastic or wax paper larger than the plate.
6. Cover the above with the rubber printing blanket instead of the usual set of felts.
7. Run the plate etc. through the press. The pressure should be relatively light.
8. Remove everything and return the pressure back to normal.
9. Stop out areas of the plate which you do not wish to carry the soft ground texture with
hard ground, or an alcohol based shellac stop out. Allow the stop out to dry.
10. See above procedure for etching any ground.
TIP: Soft ground areas stopped out prior to any etching need to be carefully considered for their
shape and edge quality as they will be brighter than the etched soft ground areas of the plate.
Tonal areas can be achieved by etching the plate in stages. Immerse the plate in ferric chloride
and expose for the lightest etch. Remove the plate from the etching solution and rinse. Once the
plate is dry block out the areas you wish to preserve as etched. Immerse the plate in the ferric
chloride again and continue to etch then progressives block out areas until the entire etching
process is complete.
Aquatint
This process enables you to create a wide range of tonal areas on your plate. Depending on the way you
apply the aquatint, they may be flat tone, or graduated tone. Stencils can be used to define shapes or
mask out areas of the plate. You can also stop out area of your plate. Aquatints can be used as a sole
means of creating an intaglio print, but they are most often combined with line etchings and
softgrounds to add value and richness to an image. If your plate has already been etched, it will still
need to be de-oxidized
We’ll be using a new technique to apply our aquatints using a screen filler solution in an airbrush. The screen filler
may be diluted with water. The greater the dilution, the finer the aquatint. The force of the compressor (PSI) may
also cause grain of the aquatint to vary. A dilution to start with is 70% Screen Filler to 30% Water.
Set up a plate and a white card and spray them at the same time! Repeat the procedure each time you
do an aquatint.
1. Remove all grease and oxidation from the plates (Dawn; Salt & Vinegar), and rinse with water.
Dry the plates immediately, and cover their backs with contact paper to protect from the nitric
acid bath
2. If there is any area you wish to preserve as bright white (or paper color) this is the time to stop it
out with screen filler or Z-Acryl on your plate.
3. Using the airbrush, apply the Screen Filler (appropriately diluted) to your image on the plate,
and in equal amounts to a test plate. Remember that the screen filler is going to prevent the
plate from etching: it is the minute areas of open plate between the droplets of screen filler that
will etch and produce your tonalities. Therefore: more screen filler produces a lighter value than
less screen filler. Use a magnifying glass to check for coverage, and aim for 50% coverage of the
plate - in other words the areas between the drops of screen filler should be about the same
size as the drops themselves.
4. Stencils may be used to block out areas you wish to preserve, whether they are sprayed or open.
However, if you wish to keep some areas white you will need to cover those areas completely
with screen filler before etching the plate. Try using a litho crayon if you want a softer effect or a
crayon-like white line.
5. Screen Filler dries quickly and will clog the airbrush. If you are not actively spraying, the airbrush
should be submerged in an ammonia/water solution.
After you have finished, it needs to be cleaned out thoroughly and carefully.
If this is not done it causes problems for everyone in the studio who wants to create
an aquatint.
6. Etch the test plate, stopping out at stepped time intervals. The shorter the etch, the lighter the
value of the final tone. The longer the etch, the darker the value.** The strength of the etchant
will vary, so until you are experienced enough to judge the appearance of the printed plate by
examining the depth of the bite under a magnifying glass, this is an important step. Use screen
filler applied with a brush to stop out the action of the etch as follows:
a. remove plate from ferric chloride
b. rinse THOROUGHLY with water
c. Immerse in deoxidizing solution (salt & vinegar) for several minutes
d. rinse off salt and vinegar with water
e. dry plate with hair dryer
f. apply screen filler with a brush to stop action of ferric chloride on specific
areas of your image
g. dry plate (hair dryer) and re-etch. Repeat entire process (steps i - vii) as
many times as is necessary.
7. Remove the screen filler from the test plate with an ammonia & water solution and proof it.
Label the proof according to the total time each area has been in the etchant. Proceed to etch
the image on your other plate according to the times in the ferric chloride as necessary for each
appropriate value. Take the plate out of the ferric chloride and stop out areas as they have been
etched for the right amount of time. (You'll need to rinse off the plate, and deoxidize in SALT &
VINEGAR, dry it, apply screen filler with a brush and let that dry too before etching each step
further).
Once you are skilled with the airbrush you may be able to create an image which only requires a single
time in the etchant by varying value with the flow of screen filler from the airbrush onto the plate.
Obviously, it is helpful to know how to use an airbrush to use this technique. This does take practice.
Use water soluble ink and create images in your sketchbook for practice before you start on a plate.
Special Effects:
If you want to be an intaglio rockstar:
o Dissolve some of the sprayed screen filler with water when wet, or a water/ammonia
solution when dry.
o Use the litho crayon for stopping out over the sprayed screen filler. It gives the plate a
nice tooth to draw on.
o Draw on a copper plate with a wax crayon. Coat it with Future. When the future is dry,
run the plate under hot water and rub at the crayon until it lifts the future up. Then
spray with screen filler for a "lift ground" effect (strong black crayon-like marks).
o Experiment with other techniques and materials in combination with this process and
share the results with the class.
Health and Safety in the Printmaking Studio
We have made great progress in reducing the numbers and amount of toxic products used in printmaking
studios over the last few years. However, printmaking students should understand that there are health risks
involved in some of the materials still used and stored in the printmaking studio. Some of the toxic substances
which are used include:
acids: nitric, phosphoric, hydrochloric and acetic
solvents: paint thinner, denatured alcohol, furniture stripper, chlorine bleach
others: lye, ammonia, photoemulsion
These, as well as some other items used in the studio are harmful to the body, either in terms of the fumes they
emit or in terms of skin contact. Some are harmful in both ways. We would encourage you to buy rubber
gloves and use them. Remember that products used in one class may linger in the atmosphere of the room
while a different class is in session. Should you feel that your health is being adversely affected by proximity
to any of these substances; it would be advisable to drop the class.
Handle all chemicals and solvents with great care, including putting flammables away in the yellow fire-proof
cabinet after use. Please follow these basic shop rules:
Wipe up any spills immediately:
Flammable solvents (e.g., mineral spirits, alcohol): wipe up small quantities with paper towels and place them
in red triangular cans
Acids: wear rubber gloves
Water: Put down newspapers or corrugated cardboard. Mop up as soon as possible, or seek out custodian.
Area around screenwashing sink must not be allowed to get wet.
GENERAL SAFETY PROCEDURES
YOU MUST.......
1. WEAR acid/solvent resistant gloves like Nitrile when handling acids, cleaning
materials, all solvents, emulsion, developers, etc. Consider using disposable
surgical gloves for better dexterity. Many solvents compromise latex.
2. WEAR safety goggles when handling acids or using tools or machinery such as the
Dremel tools.
3. LABEL all bottles and cans with the names of materials to be stored in them before
they are filled.
4. NEVER attempt to smell or taste liquids. Give them to the instructor to test or discard.
5. DO NOT leave solvents in open containers.
6. DO NOT leave rags drenched with solvents or oils lying around. Throw them into the
appropriate red covered safety containers immediately after use.
7. WEAR an approved dust mask such as 3M 8710 when sanding or applying talc or
Rosin powders. Keep the container close to the surface you are going to dust; STAY
OUT of the direction of the air current, and DO NOT use around other students who
are not properly protected. INSIST they leave the area or put on their dust masks.
8. ALWAYS wash your hands or other body parts with generous amounts of water, after
coming into contact with acids, for 15 MINUTES. If you get acid or other caustic
materials in your eyes flush them with copious amounts of water for 15 MINUTES and
seek the attention of a physician immediately.
9. WASH all surfaces contaminated with acid thoroughly. ACIDS ARE VERY
CORROSIVE...USE THEM WITH EXTREME CAUTION.
10. ALWAYS thoroughly wash your hands or any part of your skin that contacts
solvents using generous amounts of soap and rinse thoroughly with lots of water.
11. ALWAYS have the general exhaust or local exhaust systems on when using acids,
using emulsion, ANY solvent or other toxic materials that emit vapors/fumes.
-Children are not allowed in the printmaking studio for their own safety.
-Shut the doors when you leave and check that they are locked. Not only will this discourage
theft, but it is a good fire and safety policy. It is not a good idea for people with no background in
printmaking to visit you while you are working in the studio. Not only may they inadvertently
interfere with equipment or other peoples’ works-in progress, but they are generally unaware of
the nature of some of the volatile substances in the studio.
-Report all accidents to lab aides, security, or I.
-Fire Extinguishers are located next to the door leading to the washout room.
Suggested Reading:
Fred Hagstrom "Has Printmaking Contributed to its Own
Isolation?", Artist's Proof (Print Consortium), Vol. 4, no. 2, 1990.
Walter Benjamin "The Work of Art in the Age of Mechanical
Reproduction", from Illuminations, 1955, pp. 219-254.
Charles Cohan "The Net of Irrationality: The Variant
Matrix and the Tyranny of the Edition," Contemporary Impressions, Fall
1993, pp. 9-11.
Ruth Weisberg "Syntax of the Print: A Search for
Aesthetic Content", Tamarind Technical Papers,
Volume 9, Fall 1986, pp. 52-60.
Ruth Weisberg "The Absent Discourse: Critical Theories
and Printmaking", Tamarind Papers,
Vol. 13, 1990, pp. 8-10.
Hugh Merrill "Post-Print: Staking Claim to the
Territory", Contemporary Impressions (American Print Alliance) Vol. I, no.
1, Spring 1993, pp.7-9.
Unit 2 Assignment 1: Drypoint
Intaglio prints are typically referred to as etchings. An ‘etching ‘is an impression of a design on a metal
plate. It is made as follows: A smooth metal plate is covered with a layer of ground - a mixture of wax,
rosin and asphalt. A design is made in the ground with a sharp needle. Where the lines are drawn the
metal is revealed. The plate is then dipped into an acid bath to allow the exposed areas to be bitten
away, or etched. This transfers the drawing into the metal. When ink is wiped over the plate, the lines
fill up. In the printing press the ink is transferred onto the paper. (definition from Rijksmuseum)
Drypoint is not an etching process, but rather an incising. The process of incising creates a burr, or a
raised rough edge to the lines on an intaglio plate. Drypoints tend to look blurrier and are more fragile
than etchings or engravings, but have a beautiful velvety texture to them.
Directions
Students must create a series of 3 editions (of 3 prints each) exhibiting an understanding of Drypoint.
Students should emphasize the buildup of value, volume, and depth through the use of line in their
prints. Note: Editions must be printed on soaked Intaglio-appropriate paper (your thicker Printmaking
pads.)
Note: In addition to printing requirements, students must meet a conceptual requirement. The print
must have some component that ties each edition to the previous one- bridge a gap between the three
to form a small and cohesive body of work. A significant portion of this grade will assess how each
student creates cohesion between his or her editions.
You can do this by making all 3 images Portraits, tell a sequential story with the images, link them
psychologically, etc.
Grading Criteria
Students will be awarded points in 3 categories, Design, Concept, and Technical. Additional points may
be awarded upon instructor discretion. In order to receive full points for this assignment, your
submissions must adhere to the following guidelines in each section
Concept Points:
 Student has designed a print that either is consistent with or that cohesively links his/her other drypoint editions with
one another
Design Points:
 Student has designed a print that works well for this media.
 Design fills picture plane and the composition is sound.
 Print makes good use of line, value, and implies depth and/or volume.
 Print was designed in stages (posted weekly updates.)
Technical Points:
 Student has created 3 editions of at least three prints
 Incisions are carefully done.
 Application of ink is even and consistent.
 Proofs were provided to document revisions
 Paper has been kept clean, free of folds, tears, or smudges.
 Margins --equal on tops and sides of print with larger margin on the bottom for signature and edition number.
Margins are clean.
 Prints are signed in pencil and include the print/edition numbers, title (optional), artist’s signature and year print was
created--elements are positioned correctly.
Grade points will be assigned somewhat accordingly to the below grade scale. Keep in mind that specific criteria will vary, but
keep the following basic considerations and my ability to use discretion in mind:
AA++ AA BB CC DD FF
110000 9900 8800 7700 6600 5500 4400 3300 2200 1100 00
Reserved for
EXCEPTIONAL work
showing insight,
innovation,
application and
originality, beyond
basic requirements.
May include
assignments revealing
pronounced growth.
Meets all
required
criteria, even
with a few
minor
mistakes.
Work is well-
executed
and cleanly
presented.
Work has one
major flaw (or
few minor ones).
Well executed,
but little
attention to
creativity or
originality.
Work has several
major flaws, i.e.
sloppy or poorly
presented, poor
quality in meeting
listed
requirements.
Failure to meet majority of listed goals
and requirements. Poorly produced
work, presented in a sloppy
manner.
Zeros are given to assignments that
are not turned in on time and for
missed critiques.
RReemmeemmbbeerr:: PPllaaggiiaarriissmm,, llaacckk ooff ttiimmeellyy ppoossttss,, aanndd ootthheerr ffaaccttoorrss mmaayy aaffffeecctt yyoouurr ggrraaddeess

More Related Content

What's hot

3 d chapter 9 forming and fabrication
3 d chapter 9 forming and fabrication3 d chapter 9 forming and fabrication
3 d chapter 9 forming and fabrication
Tracie King
 
Bauhaus art movement
Bauhaus art movementBauhaus art movement
Bauhaus art movement
LibbyAnn93
 
Print based media
Print based mediaPrint based media
Print based media
gabyrock005
 
The Origin Of Bauhaus and its influences on The Foundation Program in Arts Ed...
The Origin Of Bauhaus and its influences on The Foundation Program in Arts Ed...The Origin Of Bauhaus and its influences on The Foundation Program in Arts Ed...
The Origin Of Bauhaus and its influences on The Foundation Program in Arts Ed...
ish2009
 
Heatherwick, Innovator, May 2010 Modern Painters
Heatherwick, Innovator, May 2010 Modern PaintersHeatherwick, Innovator, May 2010 Modern Painters
Heatherwick, Innovator, May 2010 Modern Painters
guestde49df2
 

What's hot (18)

Task2
Task2Task2
Task2
 
Task 2a
Task 2aTask 2a
Task 2a
 
Modern Graphic Design
Modern Graphic DesignModern Graphic Design
Modern Graphic Design
 
History of Graphic Design
History of Graphic DesignHistory of Graphic Design
History of Graphic Design
 
3 d chapter 9 forming and fabrication
3 d chapter 9 forming and fabrication3 d chapter 9 forming and fabrication
3 d chapter 9 forming and fabrication
 
Hisstory of ink
Hisstory of inkHisstory of ink
Hisstory of ink
 
Task 2a danielle
Task 2a danielleTask 2a danielle
Task 2a danielle
 
Printing machines
Printing machinesPrinting machines
Printing machines
 
Bauhaus art movement
Bauhaus art movementBauhaus art movement
Bauhaus art movement
 
Print based media
Print based mediaPrint based media
Print based media
 
The Origin Of Bauhaus and its influences on The Foundation Program in Arts Ed...
The Origin Of Bauhaus and its influences on The Foundation Program in Arts Ed...The Origin Of Bauhaus and its influences on The Foundation Program in Arts Ed...
The Origin Of Bauhaus and its influences on The Foundation Program in Arts Ed...
 
Surrealism
SurrealismSurrealism
Surrealism
 
History ofimaging
History ofimagingHistory ofimaging
History ofimaging
 
Task 2a
Task 2aTask 2a
Task 2a
 
Sa[1]
Sa[1]Sa[1]
Sa[1]
 
Task 2a
Task 2aTask 2a
Task 2a
 
Heatherwick, Innovator, May 2010 Modern Painters
Heatherwick, Innovator, May 2010 Modern PaintersHeatherwick, Innovator, May 2010 Modern Painters
Heatherwick, Innovator, May 2010 Modern Painters
 
D.goldenberg
D.goldenbergD.goldenberg
D.goldenberg
 

Similar to Module 2- Intaglio

What Is Etching in Art.docx
What Is Etching in Art.docxWhat Is Etching in Art.docx
What Is Etching in Art.docx
KankshiMalavi
 
Art Collector.pdf Art Collector Art Collector
Art Collector.pdf Art Collector Art CollectorArt Collector.pdf Art Collector Art Collector
Art Collector.pdf Art Collector Art Collector
JohnFelix45
 
Art Collector.pdf Art Collector Art Collector
Art Collector.pdf Art Collector Art CollectorArt Collector.pdf Art Collector Art Collector
Art Collector.pdf Art Collector Art Collector
JohnFelix45
 
The different forms of print based media techniques and technologies
The different forms of print based media techniques and technologiesThe different forms of print based media techniques and technologies
The different forms of print based media techniques and technologies
Ryan McDonnell
 
KCC Art 211 Ch 8 Printmaking Ch 9 Camera Ch 10 graphic design
KCC Art 211 Ch 8 Printmaking Ch 9 Camera Ch 10 graphic designKCC Art 211 Ch 8 Printmaking Ch 9 Camera Ch 10 graphic design
KCC Art 211 Ch 8 Printmaking Ch 9 Camera Ch 10 graphic design
Kelly Parker
 
Drawing, Painting, and 2-D Art.ppt
Drawing, Painting, and 2-D Art.pptDrawing, Painting, and 2-D Art.ppt
Drawing, Painting, and 2-D Art.ppt
Uma Mahesh
 
New Media in Art Second edition 267 i l lustrations, 124.docx
New Media in Art Second edition 267 i l lustrations, 124.docxNew Media in Art Second edition 267 i l lustrations, 124.docx
New Media in Art Second edition 267 i l lustrations, 124.docx
curwenmichaela
 
Mfv intro 5
Mfv intro 5Mfv intro 5
Mfv intro 5
65swiss
 

Similar to Module 2- Intaglio (20)

What Is Etching in Art.docx
What Is Etching in Art.docxWhat Is Etching in Art.docx
What Is Etching in Art.docx
 
Art Collector.pdf Art Collector Art Collector
Art Collector.pdf Art Collector Art CollectorArt Collector.pdf Art Collector Art Collector
Art Collector.pdf Art Collector Art Collector
 
Art Collector.pdf Art Collector Art Collector
Art Collector.pdf Art Collector Art CollectorArt Collector.pdf Art Collector Art Collector
Art Collector.pdf Art Collector Art Collector
 
The different forms of print based media techniques and technologies
The different forms of print based media techniques and technologiesThe different forms of print based media techniques and technologies
The different forms of print based media techniques and technologies
 
KCC Art 211 Ch 8 Printmaking Ch 9 Camera Ch 10 graphic design
KCC Art 211 Ch 8 Printmaking Ch 9 Camera Ch 10 graphic designKCC Art 211 Ch 8 Printmaking Ch 9 Camera Ch 10 graphic design
KCC Art 211 Ch 8 Printmaking Ch 9 Camera Ch 10 graphic design
 
ART 213 Midterm Study Slidehow #1
ART 213 Midterm Study Slidehow #1ART 213 Midterm Study Slidehow #1
ART 213 Midterm Study Slidehow #1
 
Lecture #3 The Technologies of Art Production
Lecture #3 The Technologies of Art ProductionLecture #3 The Technologies of Art Production
Lecture #3 The Technologies of Art Production
 
Print making report
Print making reportPrint making report
Print making report
 
Drawing, Painting, and 2-D Art.ppt
Drawing, Painting, and 2-D Art.pptDrawing, Painting, and 2-D Art.ppt
Drawing, Painting, and 2-D Art.ppt
 
hand screen printing
hand screen printing hand screen printing
hand screen printing
 
lithography.docx
lithography.docxlithography.docx
lithography.docx
 
E:\Final Exam\Final Exam Review Condensed
E:\Final Exam\Final Exam Review CondensedE:\Final Exam\Final Exam Review Condensed
E:\Final Exam\Final Exam Review Condensed
 
Screens (Krems)
Screens (Krems)Screens (Krems)
Screens (Krems)
 
textile printing defects yogesh
textile printing defects yogeshtextile printing defects yogesh
textile printing defects yogesh
 
New Media in Art Second edition 267 i l lustrations, 124.docx
New Media in Art Second edition 267 i l lustrations, 124.docxNew Media in Art Second edition 267 i l lustrations, 124.docx
New Media in Art Second edition 267 i l lustrations, 124.docx
 
Chapter 9
Chapter 9Chapter 9
Chapter 9
 
KVB117 09 Materiality and Concept
KVB117 09 Materiality and ConceptKVB117 09 Materiality and Concept
KVB117 09 Materiality and Concept
 
Mfv intro 5
Mfv intro 5Mfv intro 5
Mfv intro 5
 
Drawing
DrawingDrawing
Drawing
 
Sayre woa ch08_lecture-243771
Sayre woa ch08_lecture-243771Sayre woa ch08_lecture-243771
Sayre woa ch08_lecture-243771
 

Recently uploaded

Call Girls In Dwarka Mor | Contact Me ☎ +91-9953040155
Call Girls In Dwarka Mor | Contact Me ☎ +91-9953040155Call Girls In Dwarka Mor | Contact Me ☎ +91-9953040155
Call Girls In Dwarka Mor | Contact Me ☎ +91-9953040155
SaketCallGirlsCallUs
 
Russian Call Girls Pilibhit Just Call 👉👉 📞 8617370543 Top Class Call Girl Ser...
Russian Call Girls Pilibhit Just Call 👉👉 📞 8617370543 Top Class Call Girl Ser...Russian Call Girls Pilibhit Just Call 👉👉 📞 8617370543 Top Class Call Girl Ser...
Russian Call Girls Pilibhit Just Call 👉👉 📞 8617370543 Top Class Call Girl Ser...
Nitya salvi
 
Call Girls In Chattarpur | Contact Me ☎ +91-9953040155
Call Girls In Chattarpur | Contact Me ☎ +91-9953040155Call Girls In Chattarpur | Contact Me ☎ +91-9953040155
Call Girls In Chattarpur | Contact Me ☎ +91-9953040155
SaketCallGirlsCallUs
 
Kathmandu Escort❤ @Daminy@💞 50+ Call Girl PRofile in @Kathmandu New Housewife...
Kathmandu Escort❤ @Daminy@💞 50+ Call Girl PRofile in @Kathmandu New Housewife...Kathmandu Escort❤ @Daminy@💞 50+ Call Girl PRofile in @Kathmandu New Housewife...
Kathmandu Escort❤ @Daminy@💞 50+ Call Girl PRofile in @Kathmandu New Housewife...
Miss Beniwal
 
Mussafah Call Girls +971525373611 Call Girls in Mussafah Abu Dhabi
Mussafah Call Girls +971525373611 Call Girls in Mussafah Abu DhabiMussafah Call Girls +971525373611 Call Girls in Mussafah Abu Dhabi
Mussafah Call Girls +971525373611 Call Girls in Mussafah Abu Dhabi
romeke1848
 
💰Call Girl In Bhubaneswar☎️9777949614💰 Call Girl service in Bhubaneswar☎️Bhub...
💰Call Girl In Bhubaneswar☎️9777949614💰 Call Girl service in Bhubaneswar☎️Bhub...💰Call Girl In Bhubaneswar☎️9777949614💰 Call Girl service in Bhubaneswar☎️Bhub...
💰Call Girl In Bhubaneswar☎️9777949614💰 Call Girl service in Bhubaneswar☎️Bhub...
Call Girls Mumbai
 
Azad Nagar Call Girls ,☎️ ((#9711106444)), 💘 Full enjoy Low rate girl💘 Genuin...
Azad Nagar Call Girls ,☎️ ((#9711106444)), 💘 Full enjoy Low rate girl💘 Genuin...Azad Nagar Call Girls ,☎️ ((#9711106444)), 💘 Full enjoy Low rate girl💘 Genuin...
Azad Nagar Call Girls ,☎️ ((#9711106444)), 💘 Full enjoy Low rate girl💘 Genuin...
delhimunirka15
 
Faridabad Call Girls 💯Call Us 🔝 +91-8168257667 🔝 💃 Top Class Russian Faridaba...
Faridabad Call Girls 💯Call Us 🔝 +91-8168257667 🔝 💃 Top Class Russian Faridaba...Faridabad Call Girls 💯Call Us 🔝 +91-8168257667 🔝 💃 Top Class Russian Faridaba...
Faridabad Call Girls 💯Call Us 🔝 +91-8168257667 🔝 💃 Top Class Russian Faridaba...
Hyderabad Escorts Agency
 

Recently uploaded (20)

Orai call girls 📞 8617370543At Low Cost Cash Payment Booking
Orai call girls 📞 8617370543At Low Cost Cash Payment BookingOrai call girls 📞 8617370543At Low Cost Cash Payment Booking
Orai call girls 📞 8617370543At Low Cost Cash Payment Booking
 
Completed Event Presentation for Huma 1305
Completed Event Presentation for Huma 1305Completed Event Presentation for Huma 1305
Completed Event Presentation for Huma 1305
 
Call Girls Veraval Just Call 8617370543Top Class Call Girl Service Available
Call Girls Veraval Just Call 8617370543Top Class Call Girl Service AvailableCall Girls Veraval Just Call 8617370543Top Class Call Girl Service Available
Call Girls Veraval Just Call 8617370543Top Class Call Girl Service Available
 
Call Girls In Dwarka Mor | Contact Me ☎ +91-9953040155
Call Girls In Dwarka Mor | Contact Me ☎ +91-9953040155Call Girls In Dwarka Mor | Contact Me ☎ +91-9953040155
Call Girls In Dwarka Mor | Contact Me ☎ +91-9953040155
 
WhatsApp Chat: 📞 8617370543 Call Girls In Siddharth Nagar At Low Cost Cash Pa...
WhatsApp Chat: 📞 8617370543 Call Girls In Siddharth Nagar At Low Cost Cash Pa...WhatsApp Chat: 📞 8617370543 Call Girls In Siddharth Nagar At Low Cost Cash Pa...
WhatsApp Chat: 📞 8617370543 Call Girls In Siddharth Nagar At Low Cost Cash Pa...
 
Russian Call Girls Pilibhit Just Call 👉👉 📞 8617370543 Top Class Call Girl Ser...
Russian Call Girls Pilibhit Just Call 👉👉 📞 8617370543 Top Class Call Girl Ser...Russian Call Girls Pilibhit Just Call 👉👉 📞 8617370543 Top Class Call Girl Ser...
Russian Call Girls Pilibhit Just Call 👉👉 📞 8617370543 Top Class Call Girl Ser...
 
Call Girls Mehsana - 📞 8617370543 Our call girls are sure to provide you with...
Call Girls Mehsana - 📞 8617370543 Our call girls are sure to provide you with...Call Girls Mehsana - 📞 8617370543 Our call girls are sure to provide you with...
Call Girls Mehsana - 📞 8617370543 Our call girls are sure to provide you with...
 
Sonbhadra Escorts 📞 8617370543 | Sonbhadra Call Girls
Sonbhadra  Escorts 📞 8617370543 | Sonbhadra Call GirlsSonbhadra  Escorts 📞 8617370543 | Sonbhadra Call Girls
Sonbhadra Escorts 📞 8617370543 | Sonbhadra Call Girls
 
Just Call Vip call girls Farrukhabad Escorts ☎️8617370543 Two shot with one g...
Just Call Vip call girls Farrukhabad Escorts ☎️8617370543 Two shot with one g...Just Call Vip call girls Farrukhabad Escorts ☎️8617370543 Two shot with one g...
Just Call Vip call girls Farrukhabad Escorts ☎️8617370543 Two shot with one g...
 
Call Girls In Chattarpur | Contact Me ☎ +91-9953040155
Call Girls In Chattarpur | Contact Me ☎ +91-9953040155Call Girls In Chattarpur | Contact Me ☎ +91-9953040155
Call Girls In Chattarpur | Contact Me ☎ +91-9953040155
 
Kathmandu Escort❤ @Daminy@💞 50+ Call Girl PRofile in @Kathmandu New Housewife...
Kathmandu Escort❤ @Daminy@💞 50+ Call Girl PRofile in @Kathmandu New Housewife...Kathmandu Escort❤ @Daminy@💞 50+ Call Girl PRofile in @Kathmandu New Housewife...
Kathmandu Escort❤ @Daminy@💞 50+ Call Girl PRofile in @Kathmandu New Housewife...
 
Mussafah Call Girls +971525373611 Call Girls in Mussafah Abu Dhabi
Mussafah Call Girls +971525373611 Call Girls in Mussafah Abu DhabiMussafah Call Girls +971525373611 Call Girls in Mussafah Abu Dhabi
Mussafah Call Girls +971525373611 Call Girls in Mussafah Abu Dhabi
 
New Call Girls In Shamli 8617370543 Shamli Escorts Service
New Call Girls In Shamli 8617370543 Shamli Escorts ServiceNew Call Girls In Shamli 8617370543 Shamli Escorts Service
New Call Girls In Shamli 8617370543 Shamli Escorts Service
 
💰Call Girl In Bhubaneswar☎️9777949614💰 Call Girl service in Bhubaneswar☎️Bhub...
💰Call Girl In Bhubaneswar☎️9777949614💰 Call Girl service in Bhubaneswar☎️Bhub...💰Call Girl In Bhubaneswar☎️9777949614💰 Call Girl service in Bhubaneswar☎️Bhub...
💰Call Girl In Bhubaneswar☎️9777949614💰 Call Girl service in Bhubaneswar☎️Bhub...
 
Azad Nagar Call Girls ,☎️ ((#9711106444)), 💘 Full enjoy Low rate girl💘 Genuin...
Azad Nagar Call Girls ,☎️ ((#9711106444)), 💘 Full enjoy Low rate girl💘 Genuin...Azad Nagar Call Girls ,☎️ ((#9711106444)), 💘 Full enjoy Low rate girl💘 Genuin...
Azad Nagar Call Girls ,☎️ ((#9711106444)), 💘 Full enjoy Low rate girl💘 Genuin...
 
Khambhalia Escorts 8617370543 Khambhalia Call Girls Service
Khambhalia Escorts 8617370543 Khambhalia Call Girls ServiceKhambhalia Escorts 8617370543 Khambhalia Call Girls Service
Khambhalia Escorts 8617370543 Khambhalia Call Girls Service
 
SB_ Scott Pilgrim_ Rough_ RiverPhan (2024)
SB_ Scott Pilgrim_ Rough_ RiverPhan (2024)SB_ Scott Pilgrim_ Rough_ RiverPhan (2024)
SB_ Scott Pilgrim_ Rough_ RiverPhan (2024)
 
Call Girls In Firozabad Escorts ☎️8617370543 🔝 💃 Enjoy 24/7 Escort Service En...
Call Girls In Firozabad Escorts ☎️8617370543 🔝 💃 Enjoy 24/7 Escort Service En...Call Girls In Firozabad Escorts ☎️8617370543 🔝 💃 Enjoy 24/7 Escort Service En...
Call Girls In Firozabad Escorts ☎️8617370543 🔝 💃 Enjoy 24/7 Escort Service En...
 
Faridabad Call Girls 💯Call Us 🔝 +91-8168257667 🔝 💃 Top Class Russian Faridaba...
Faridabad Call Girls 💯Call Us 🔝 +91-8168257667 🔝 💃 Top Class Russian Faridaba...Faridabad Call Girls 💯Call Us 🔝 +91-8168257667 🔝 💃 Top Class Russian Faridaba...
Faridabad Call Girls 💯Call Us 🔝 +91-8168257667 🔝 💃 Top Class Russian Faridaba...
 
TOP #Call Girls Kanpur└▓ Just Call 9120481797Top Class Call Girl Service Avai...
TOP #Call Girls Kanpur└▓ Just Call 9120481797Top Class Call Girl Service Avai...TOP #Call Girls Kanpur└▓ Just Call 9120481797Top Class Call Girl Service Avai...
TOP #Call Girls Kanpur└▓ Just Call 9120481797Top Class Call Girl Service Avai...
 

Module 2- Intaglio

  • 1. IntaglioPrintmaking Joe Adams, Untitled, 2014 ART170-001 Instructor: Kevin Daly
  • 2. Table of Contents Introduction to Intaglio: Past and Present Excerpts from F. Kiekeben, www.nontoxicprint.com Printmaking Terms Review of the Intaglio Process Printing the Plate Making a Template for Printing Hard Ground (Acrylic, Ball, Liquid) Soft Ground Aquatint Health and Safety General Safety Guidelines Suggested Reading Unit 1 Assignment 3
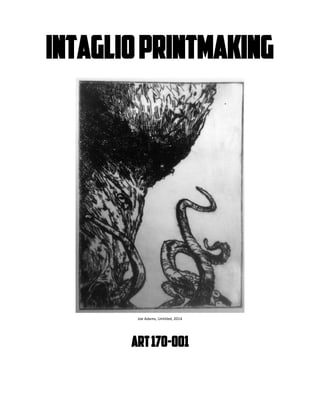
  • 3. Intaglio Printmaking In etching a blank plate becomes the arena for creative events, for the penetration and alteration of the surface of the metal. This is done by various means such as scoring, scratching, scraping and of course as the term etching implies, by using corrosive chemicals to eat into the depth of the plate. The grooves, indentations, scars and scratches produced by etching turn the once flat plane of a plate into something resembling a landscape eroded by the elements - a structure beneath the surface commonly referred to as intaglio. The term intaglio is derived from the Latin in-tagliare meaning to cut into. The term etching is often used to describe all intaglio techniques. Strictly speaking, it should refer solely to processes that involve a corrosive action. The more correct generic term for the broader range of incisive processes is intaglio printmaking. Once a plate has been worked and is ready for printing it is covered with a generous deposit of ink. After wiping, just the deep recesses still hold significant amounts of ink. An etching is printed by laying the plate on the bed of an etching press, covering it with a sheet of damp paper and set of felt blankets, then running it through the two heavy steel rollers. The massive pressure exerted by the press pushes the paper firmly into the grooves of the plate where it picks up the ink. In this way, a reverse copy of the plate's 3D topography is produced as a two dimensional image consisting of lines, textures and tonal areas. The inking, wiping and printing of any intaglio plate is essentially the same, but the ways of creating the intaglio are many and various. Historically, etching plates have been made using three types of intaglio method: 1. The mechanical or cold techniques such as drypoint, engraving or mezzotint where the plate is physically shaped using specially designed metalworking tools. 2. The etch, or hot techniques that include hard ground etching, aquatint or open bite where etchant resistant grounds are applied to the plate and exposed areas of metal are eroded by a mordant. 3. The less frequently used collagraph techniques where an intaglio plate is made by building up a relief surface rather than eroding it. 4. And now, the new photopolymer processes represent an important extension to this canon. A brief historical perspective The sculptural nature of etching finds its origins in the ornamental engraving of objects. Goldsmiths, tool and weapons makers and other craftsmen were proficient in decorating their wares using engraving techniques long before the age of mechanised printing. The first intaglio prints were reputed to have been taken from such objects. By the 16th Century the invention of the intaglio printing press enabled artists like Durer to take impressions from metal plates and intaglio work increasingly came to be seen as the means to create a matrix for the reproduction of linear drawings. The creation of an image on a plate using mordants and resistant grounds was well known to master engravers of this period but another century would pass before acid etching was widely adopted as the preferred means of producing the intaglio groove. Artists began to favour the way that etching allowed them to work much more quickly, spontaneously and with a greater range of marks than the hand held
  • 4. burin would permit. Rembrandt with his unrivalled intaglio work would firmly establish etching as a supreme medium of artistic expression capable of conjuring up exquisite imagery full of life, depth and vibrancy. The artistic excellence that Rembrandt achieved should, however, be appreciated in conjunction with his ceaseless exploration of new technical possibilities. He experimented with different mordants, etching tools, etch resistant materials and printmaking papers; he even designed his own wooden etching press. Any enthusiast for the art of intaglio printmaking would be well advised to visit Rembrandt's house in Amsterdam which gives a vivid impression of the master's working practice. Although Rembrandt's aesthetic genius has inspired generations of printmakers, his spirit of inventiveness seems to have been somewhat less influential. Many have been content with the end result - the fluid, linear drawing - without the urge to continue to explore the means of production. Over time, various mechanical stippling and mezzotinting methods were devised to give a degree of tonal quality to intaglio prints but it was not until Jean Baptiste Le Prince invented the technique of aquatint in the middle of the 18th Century that etching acquired a much more satisfactory painterly process. Le Prince discovered that a fine dust of rosin particles melted onto a metal plate became acid resistant, enabling the artist to set down areas of granular dots that would appear as luminous tones on the print. Many painters were intrigued by the new method. Francisco de Goya, in particular, made extensive use of the technique, taking it to levels of virtuosity that have rarely been equalled. The 18th Century also brought the introduction of the soft ground or vernis mous method, first used in France to emulate the textural qualities of crayon marks in an intaglio print. This further extension of the mark making vocabulary was quickly embraced by artists across Europe. By now, a sufficient arsenal of methods was available for commercial printmakers to be able to produce faithful intaglio reproductions of paintings. The photographic revolution At the very beginnings of photography, in the early 19th Century, the photo sensitised etching plate was considered a serious contender to the silver-emulsion based systems that are in use to this day. Photo etching, commonly known as photogravure or helio gravure, as a viable artistic and industrial process was devised by Karl Klic. His process is the foundation of rotational intaglio printing which is used for the production of high volume print runs such as glossy magazines. Sadly, the photo-reprographic potential of the intaglio medium was not exploited by most artists working in the first half of the 20th Century. With a few exceptions, rather than investigate new possibilities, most seemed content with proven and tested methods. In general intaglio printmakers were content to continue with the established methods rather than be at the forefront of new developments. A kind of conservatism started to prevail in both technical and pictorial terms and although many great 20th Century artists have produced interesting intaglio work, often under the auspices of master printers, the emphasis has been on commercial reproduction. Few artists used the medium as their main form of expression. Stanley William Hayter, with his rejuvenation of engraving and development of intaglio color printing is perhaps the one exception. Moving in illustrious circles that included Picasso and Miro he promoted a climate of sharing and accessible working practices in which no trade secrets were to be kept - an approach that stands as an example of good practice for today's printmaking community. In the 1960s, printmaking experienced something of a renaissance, but mainly in the new medium of screenprinting. This new method captured the spirit of the time as it offered the aesthetic of the emerging pop and media culture with ease of execution. Warhol's soup cans were screenprints, not etchings. Intaglio had lost touch with the avant-garde and was increasingly seen as traditionalist and craft orientated. An increasing awareness of environmental and health related issues didn't help the popularity of etching either. Artists and students were favouring safer, simpler, more modern-looking modes of printmaking.
  • 5. Etching today In the eighties I was fortunate to be taught by an enthusiast of intaglio printmaking. At the time etching was still in something of a general decline, not only in Germany but also across most of Europe. I discovered that the medium could be contemporary and to my delight found that it continued to flourish in the UK in an abundance of open access, editioning and college workshops. Thankfully, etching now seems to be shaking off its old fashioned image and many artists are once again investigating the technical possibilities and exciting new aesthetics in a new era of intaglio printmaking. Thanks to the pioneering efforts of artist-innovators such as Keith Howard, today a new intaglio system has become available. Acrylic Resist Etching introduces a whole new range of technical and creative possibilities whilst being much safer and easier to practice than traditional etching. In aesthetic and conceptual terms there is also a sense that intaglio printmaking can once again become an innovative and relevant medium. Notions of reproduction and simulation and digital technology are defining the current age and its image making. Printmaking has always enjoyed a natural affinity with the mechanics of each age. Matrix, copy, reproduction, encoding, simulation are all familiar terms and any etched metal plate is as much a repository of condensed information as a computer disk. The use of digital working methods in conjunction with the depth, tactility and sumptuous sensuality that is the special hallmark of intaglio printmaking offers a rich field of contemporary artistic investigation and production. Printmaking Terms -Intaglio print An image that has been impressed on a support, usually paper, by a process capable of being repeated. Most printmaking techniques (a major exception being digital prints) require the previous design and manufacture of a printing surface. The five primary types of print techniques are relief, intaglio, planographic, screenprint, and digital. aquatint An intaglio process by which tones may be achieved in an etching; used primarily for the creation of large areas of tonal shading. In aquatint, small grains of resin are sprinkled on the surface of the plate, which is then heated to affix the particles to the surface. When the plate is immersed in the acid bath, the resin protects its surface, so that the acid only “bites” the spaces between the grains. This leaves (depending on particle size) a fine or coarse network of lines and crevices which hold ink, creating an area of tone. When printed, the tonal effects are similar to a watercolor wash. artist’s proof In printmaking, these impressions are printed especially for the artist and excluded from the numbering of an edition, but are exactly like the editioned prints in every other respect. Usually appears as “A.P.” or “E.A.” bon à tirer A proof approved by the artist which establishes the standard for all other prints in the edition. Burr In printmaking, when a drypoint needle or other engraving tool is used to draw directly into a metal plate, small, fine pieces of metal are raised up on both sides of the scored line. This burr holds additional ink during the printing process and gives the lines a velvety or fuzzy texture. Burr is very delicate and consequently is easily worn down during the pressures of the printing process. Early pulls or impressions taken from such plates are characterized by rich burr. In the case of Old Master prints especially, the quantity and evidence of burr can sometimes be used as an aid in determining how early the impression was pulled. deckle edge The natural, untrimmed edge of handmade paper. drypoint A type of intaglio print in which lines or tones are scratched into the surface of a bare metal plate with a sharp metal point, sometimes tipped with a diamond. However, in contrast to engraving, the displaced copper is left in narrow furrows flanking the groove. Called “burr,” these areas catch and hold the printer’s ink, creating a halo of tone on the print. Burr wears out very quickly in the printing process so these tonal halos are found only on the earliest impressions.
  • 6. edition A number of printed images, or impressions, from the same master plate or block using the same ink colors and printing methods, as established by the artist and/or publisher. The process of numbering individual impressions from an edition only became widespread in the twentieth century. The impressions in such a “limited” edition are usually signed and numbered progressively, for instance 1/50, 2/50, etc., for a total edition of fifty impressions; after the total is reached, the plate or stone is destroyed. Often a few impressions will be printed outside the regular edition for the collaborators (artist, printer, publisher). Impressions printed during the development process to test the printing or try out color variations are called “proofs”. embossing A printmaking process used to create a raised surface or raised element, but printed without engraving An intaglio process in which a plate is marked or incised directly with a burin or other metalmarking tool. No acid is used in this process since the design is dug out by hand. An engraved line can range from very deep and wide, to lighter and thinner and is often characterized by a pointed end signaling the exit of the “v” shaped burin from the metal. An engraved plate is inked and printed in the same manner as other intaglio prints, in which the engraved lines are filled with ink and the surface is usually wiped clean. When put through a roller press under great pressure, the paper is forced into the engraved lines, transferring the ink and creating a slightly raised line in the printed impression, along with an embossed platemark, caused by the pressure of the edge of the metal printing plate. etching In contrast to engraving, in this type of intaglio print the artist uses acid to cut into the plate. Lines and/or tonal areas of an image have been corroded, or “bitten”, into the surface of a metal plate by the action of a corrosive agent, called a mordant. Traditionally nitric acid has been used, but increasingly less toxic materials are being introduced, such as ferric chloride. A metal plate is first covered with an acid-resistant substance (ground) through which the image is drawn with a needle or other tool, exposing the bare metal. When immersed in the mordant, only those exposed areas are subject to its action. The metal plate is therefore “carved” or “etched” by the acid rather than by a tool directly in the metal. Recently, photopolymer etching has been developed, whereby a drawing, photograph, or digital image is transferred to a photosensitive polymer plate and processed into a relief or intaglio printing plate. foul-biting In printmaking, when the acid-resistant ground on a metal plate does not keep the acid entirely out, irregularities can appear. When a plate is printed, they catch ink and appear as spots. Impression A single printed image (usually on paper) from a printing surface. Multiple impressions may be printed from the same etching plate, woodblock, lithographic stone, or other surface. Intaglio (from the Italian word Intagliare, to carve or incise) A category of printmaking in which the surface of a printing plate has been incised with a design by one or a mixture of techniques. In order to print the image, ink is applied and wiped across the surface of the plate, filling the recessed areas. Usually the excess ink is then cleaned off the unworked surface of the plate. When printed under great pressure, the paper is forced into those incised marks, thus picking up the ink and often creating ridges and raised areas in the final printed impression. Types of intaglio prints are engraving, etching, aquatint, and mezzotint. Monoprint – A print which has as its base an etching, lithograph or woodcut and which is then uniquely altered by monotype coloring, unique inking, or choices in paper color. Monotype – A type of print in which a drawing or painting executed on a flat, unworked printing plate or other surface, sometimes glass, which is then transferred to a sheet of paper through pressure. As most of the image is transferred to the printing process, only one strong impression can be taken, hence the term monotype (unique, single impression). Sometimes a second, weaker impression can also be printed from the plate. A monotype is distinct from a monoprint. Plate Mark – The imprint in the paper resulting from the edge of a metal plate being pushed into it during the pressure of the printing process. Plate Tone – A veil of ink intentionally left on the surface of the plate during printing which creates delicate areas of tone or shading.
  • 7. Printer’s Proofs – Impressions printed especially for the printer(s) and excluded from the numbering of an edition, but exactly like the editioned prints in every other respect. Usually appears as “P.P.” (You can giggle, I’ll allow it.) Progressive Proofs – In printmaking, a series of proofs taken to show each individual color plate and each combination of them culminating in the final, complete version. State – Any intermediate change made by the artist while creating an image fixed on a plate, stone, or block, as reflected in impressions or proofs printed during the development process of a printed image. The “final state” is the state from which editions are generally pulled, although some artists pull several impressions in each state. Trial Proof – An early proof in printmaking, often incorporating artist’s revisions and changes and generally not identical to the numbered, editioned prints. Also called Working Proof. Jessica Lanham, Photoetching, Aquatint, and White Ground, 2008
  • 8. An Overview of Intaglio Processes Etching, Drypoint, Engraving, and Aquatint are some of the more common techniques of the Intaglio printmaking process. In each case, grooves or pits are made on a sheet of metal. These grooves or pits are then filled with ink, and the surface of the plate is polished clean. When the proof is pulled on an etching press, the image is transferred from the plate to a piece of paper. Many identical proofs can be pulled from a single plate, forming an edition. Many printmakers like to use a number of different techniques on the same plate. In this unit, you’ll be introduced to Drypoint and Etching. Below, I’ve put together some information for you to review regarding the intaglio printing process prior to printing. Drypoint Drypoint is very basic. The artist simply scratches the image onto the plate with the etching needle or stylus. No mordant is involved. It can be difficult to control the needle on the slick metal surface. The metal forms a ridge along one side of the scratched lines as the artist draws. This gives a fuzzy look to the lines when the plate is printed. Going through the press many times, the pressure of the roller on the press forces the ridgeback down into the grooves. The result is that the image gets paler and paler. Etching Etching uses a mordant (such as an acid or other corrosive liquid) to create deep lines in the sheet of metal. The artist applies a mordant resistant ground to the plate in a thin, even layer, and then draws the image on the plate. The stylus or etching needle removes the ground wherever the artist has drawn, exposing the metal. When the plate is immersed in the mordant, the metal is eaten away and the lines deepen. Lines etched for a long time are deeper and hold more ink than lines etched for a short time. This means that they print darker onto the paper. There are different kinds of grounds, both liquid and solid. They can give different looks to the line, or be used with different mordants. The Mordant Whistler used to make a little wax wall around the edge of his etching plate and pour acid directly onto the plate to etch his lines. To avoid spilling acids and breathing harmful fumes, stand straight up with your shoulders back when placing your plate in the acid tray. Assume the same posture when retrieving plates. Printing the Plate: The paper for the print is made of cotton fibers, which give it enough strength to be forced down onto the plate under the pressure of the press, producing a rich image. First the paper is soaked in clean water, to give it flexibility. All intaglio prints are printed on an etching press. The press has a bed on which the inked plate is placed, face up. Excess water is removed from the paper, and the damp sheet is placed face down on the plate. Etching blankets are placed on top of the paper and plate, to distribute the pressure of the steel roller evenly. The plate is rolled through the press, at thousands of pounds of pressure per square inch. After printing, the print is air-dried. The paper dries more quickly than the ink. For each successive print the entire inking process has to be repeated.
  • 9. General Info This is the most basic form of Intaglio printing. At MVCC we use zinc or steel, which is relatively inexpensive compared to Engraver’s copper. Zinc ordered from art supply stores comes with a mirror finish and a mordant-resistant background; Steel comes this way too, but you can buy plates from hardware stores. If you do so, you will need to make your own acid resistant backing with contact paper. If you have the need for a pristine polished background, you can polish your plate by hand using Putz Pomade™, which is a buffing compound. Usually we apply it and polish it with pieces of felt cut from old etching blankets. If you buy sheets from the hardware store, they must be flat! … If you have an idea for your print, you will need to remember to REVERSE the image, or it will print the wrong way round. This not only means that any writing or numbers will be back to front, but the visual flow of the piece will be different, and often not what you had envisioned. The easy way to reverse an image is to put it on the copy machine and follow the directions on the wall above the copier to make it print backwards. You can draw directly on to the plate with a Sharpie or a grease pencil. However, the lines made by your etching needle will be VERY much thinner than either of these. Printing your Intaglio Plate: 1. Decide on the size paper you will be using. Generally, allow for generous margins around the edge of the plate, usually equal on the top and sides, and approximately 1/2" greater on the bottom margin. (A" bleed print", however, is printed on a piece of paper smaller than the plate) 2. Measure paper for your edition and tear the edges, using a straight-edge, rather than cutting them. Initial the back of your paper so you know which is yours in the water bath! 3. Create a template by tracing around your plate on a piece of heavy paper, showing which way is "up", and tracing around where your printing paper will be laid down in relation to the plate. If you want accuracy this will involve measuring with a ruler. Cover this with a sheet of clear contact paper so that ink can be wiped off it. Be careful not to get bubbles or creases in the contact paper. Trim the template so that it will extend beyond the printing paper on all sides if the printing paper is laid on top of the template in the correct position. 4. Soak your printing paper - at least 20 minutes. Before you start to ink your plate, put the paper up on the plexiglass above the soaking tray and gently squeegee one time only. Leave it there while you ink your plate and it should be the right degree of dampness when you are ready to print (not shiny). 5. Ink the plate up making sure your ink is Etching ink. Use a "discard" to smear the ink across the plate in all directions, being careful to fill all etched areas.
  • 10. 6. Take a 36" square tarlatan and "break it in" if it is new by tugging at it diagonally to the weave in both directions. Create a large pad and gently wipe the plate as follows: • for hard-ground and soft-ground, in a circular fashion • for Imagon, straight across and straight up and down Continue until the surface of the plate is fairly clean, using cleaner parts of the tarlatan as it picks up the ink, you may want to wipe the edges of the plate with a rag. Some people like to do a final brief and gentle wipe with telephone-book paper for a brighter background. 7. Place the template you made earlier on the center of the bed of the press. Put the plate on it, face up. Take your paper down from the plexi. It should appear matte and not shiny with moisture. Carefully place the paper over the plate according to the markings you have made on your template. Cover the printing paper with another, larger, sheet of clean newsprint. 8. Position the blankets over the template, plate and paper: Bed of Press 9. Crank the handle of the press so the roller passes over the plate and paper completely, taking care not to stop over the plate itself. 10. Pull back the blankets and remove your print, picking it up slowly from one corner, and place on racks to dry. 11. If you will not be printing another print immediately, clean the ink off your plate with spray vegetable oil and a rag. Clean up ink etc. the same way. Put all paper, templates, plates etc. away in your drawers and lockers, and keep the shop clean and tidy to maintain a good work environment. roller Pusher blanket (woven) Forming blanket (woven) Sizing absorber Backing sheet Printing paper Plate Plexiglass
  • 11. Making a Template for use with printing your Edition: A print is the whole piece of paper, not just the area where the image is. Most intaglio prints show off the embossed mark that outlines the plate by having margins around the image. If you opt for margins, take some care with them. Traditionally, the sides should be the same width, and the bottom margin should be slightly greater than the top margin. Many printmakers opt for the top and sides to be the same width, and the bottom margin to be one half inch greater. To make sure your margins are all the same on your edition, and that they are straight, make a template. First measure your plate, then figure the best size for your paper. On a piece of smooth paper, which is larger than your printing paper, draw the outline of your plate, with an arrow showing which way is up on the image. Then work out exactly where the paper will go in regards to the plate, using a ruler and measuring carefully. Draw the outline of where the paper will be placed. Then use clear contact paper to cover this, making sure there are no wrinkles or creases in either sheet of paper, as they will emboss your print. Trim the template down so that none of the paper is exposed, but so it is still larger than your printing paper by at least an inch all the way around. The contact paper means that the template can be wiped clean after each print is pulled. For a bleed print you won't need a template, but you will need to make sure your paper is at least one half inch shorter than the plate in each direction, as it will expand slightly when soaked. You don't want to be able to see where the edge of the plate was on a bleed print. Sometimes this means planning your image to make sure you won't get unintended focal points on the edge of the image. MinJung Kim, Hardground Etching and Chine Colle, 2007
  • 12. HARD GROUND FOR ETCHING Hard ground is a resist used when we make an etching. It is a substance which, when hard and dry, is resistant to the mordant to be used. The coating on the plate is thin enough that it can be easily drawn through to expose the plate wherever lines are made. The back of the plate is protected with contact paper (you may want to do this first) so that when the plate is immersed in the mordant, only those areas where the drawing was made are exposed to the mordant and “etch”. All of these hard ground processes are good for linear work. For areas of solid blacks or greys, use the aquatint technique. You may etch your image on the plate using this method to see where to put an aquatint, like using a coloring book with outlines. Remember that if you want to achieve the effect of tones with this technique you will need to hatch, crosshatch or stipple. Leaving large areas of the plate open to the mordant causes “open biting”, which produces a mottled light grey value, as the ink is wiped out of it. Aquatint works because it leaves a pitted surface which holds the ink, unlike the uneven surface of open biting. Type Pros Cons Universal Etching Hard Ground/ Shop Asphaultum (liquid)  Beautiful smooth surface for drawing  Easy to see your lines  Keeps foul biting to a minimum  Tricky and messy to apply  Easy to waste the product  Ground has to be removed for proofing  Asphaltum is toxic Ball Hard Ground  Easy to see your drawing  Easy to coat a larger plate  Economical  Hotplate needed to apply it  Foul biting is typical due to dust on the roller  Ground has to be removed for proofing  Asphaltum is toxic Z-Acryl Hard Ground Emulsion  Non-toxic  Can be left on for proofing and etching can be resumed  Easy to take off with alcohol  Hard to see your drawing  After a while the mordant eats away the ground  Difficult to remove in order to use additional techniques such as aquatint Procedure Etching: Using Graphic Chemical Liquid/Ball Hard Ground or Asphaltum : 1. If your plate doesn’t have a protective backing on it, cover the back of the plate with contact paper and trim right to the edge with a sharp Xacto or spraypaint the back of your plate. 2. Deoxidize the plate with salt and vinegar 3. Degrease the plate with alcohol and a paper towel 4. Place a sheet of newsprint on the hot plate, place your zinc plate on it, then pour or dab your ground on the zinc. Your hands will get dirty! Even though it is easy to waste, be generous enough with your ground so
  • 13. you can cover the plate on the first pour. It dries quickly and can get thick easily, which will crack and flake. 5. Prop up on a smaller object and dry horizontally ‘ General Directions for drawing and etching the image, using any kind of hard or softground 1. When the plate is thoroughly dry, make your drawing with the etching needle. Remember to reverse the image, so that it will appear correctly when printed. 2. When finished with the drawing stage and ready to etch the plate, grab a pair of heavy duty gloves from the yellow fire cabinet in the washout room, put on eye protection, and make sure any loose clothing is secure behind an apron or tucked in. 3. Immerse your plate in the tray of Nitric Acid to etch it. You will probably want to make a small test plate the first few times that you do this to see how different times affect the width and darkness of the lines you make. 4. To create areas with more delicate lines, "stop out" lines before they have etched as deeply as lines which you want to be darker and richer. The deeper and wider the groove in the metal, the more ink it will hold and print, creating darker areas. Many different line weights can be obtained in your image by successive stopping out. Alternatively, you can add lines later in the etching process so that they are bitten for a shorter amount of time. 5. Always rinse the plate under running cool water when you take it out of the acid. Try to avoid drips. Stopping Out: If you have already etched the plate part way and want to prevent some areas from etching further, they can be covered up (“stopped out”) to prevent etching deeper when the plate is returned to the nitric acid. We’ll be stopping out our plates with the purple/blue Z-Acryl Hardground emulsion found on the main printing counter above our storage cabinets. 1. It is important that you de-oxidize your plate by immersing it in a bath of salt and vinegar before applying each application of stop out. Rinse off the de-oxidizing solution with water and dry your plate with paper towels or a hair dryer before applying the stop out. 2. After rinsing your plate with water, check the depth of the etch with your fingernail, and look at it through a magnifying glass. You can proof it without removing the hardground. Cleaning the ground off the plate: Asphaultum based hardground, soft ground, and oil based ink can be removed from your plate using mineral spirits. Be sure to use gloves with it. Acrylic grounds can usually be removed with alcohol. Screen filler aquatint can be removed with a degreaser. Soft Ground: Soft ground, is an acid resistant coating made of asphaltum, rosin, beeswax, and tallow. The addition of tallow keeps the ground from drying to a hard surface. A soft ground line has the character of a pencil or crayon drawing. Anything pressed into the soft, waxy ground--with a texture such as lace or fingerprints- -will cause the ground to yield under pressure, removing the ground and revealing the plate for etching. The longer the soft ground plate is exposed to the acid, the deeper and wider the line becomes. 1. Turn the hot-plate on with the temperature set at 175 degrees. If the ground and roller slide creating pinholes and and uneven application, the plate is overheated.
  • 14. 2. Place a piece of newspaper on the hot-plate to keep soft ground off the surface of the hot-plate, and to facilitate your ability to remove your copper plate easily. Place the filed plate on the hot- plate. 3. Once the plate is warmed, use the brayer dedicated for soft ground to spread the ground over the warmed plate. Rolling the brayer/ground in one direction initially to spread. Avoid hitting the newspaper as you approach and leave the plate to prevent losing ground off the roller and creating streaks in the ground on the plate. 4. Continue to spread the ground with the brayer with goal of achieving an even coat--sans pinholes. 5. Gradually lightening pressure on the brayer will spread the ground, reducing roller marks and pinholes. 6. Once the ground is even, set the brayer with the roller facing up back in the drawer. Grasp the newspaper on diagonal corners and lift the copper plate from the hot plate. Temporarily set the plate on the concrete floor, or the press to facilitate cooling prior to working on the surface. NOTE: Store the soft ground tools so as to keep them clean. Brayers with the roller surface up and the lid on the tin of soft ground will prevent debris from attaching to the soft ground and creating marks when applying the ground to your plate. Soft pencil or crayon-like lines can be created by placing paper over the surface of the soft- ground plate, then drawing on the paper. 1. The quality of paper used between the plate and the drawing tool when has a definite impact on the soft ground image. Using a fine grained paper gives fine lines. Using a rough textured paper creates coarse lines. 2. Hinge the paper to the plate by initially folding a crease an inch or so from the long edge of the paper. Apply masking tape tabs to the bottom edge of the paper fold. Supporting the large portion of the folded paper, slide the plate into the crease. Gently lift the plate and paper and burnish the tape to the back of the plate. Affixing the paper to the plate permits you to lift the paper to examine the soft ground drawing progress. 3. The pressure of your drawing tool, or anything thing that comes in contact with the paper will offset the ground on the paper, exposing the plate. Experiment with different densities of pencils, etc. to see the quality of line you achieve. Varying the pressure on your drawing instrument will change the amount of ground that attaches to the plate and the weight of the line. 4. The use of a drawing bridge, a strip of wood supported by blocks on each end, can be used for a more pristine approach to the soft ground. The bridge supports the hand so nothing but the pencil tip will press against the paper. To imprint textures into the surface of the soft ground you can use any thin, flat material (gauze, dry foliage, lace, fabric). Textures can be imprinted into the soft ground by hand burnishing, by disturbing the soft ground with fingertips, brushes, etc., or by impressing a texture across the surface of the plate using the printing press. If using the press to transfer a texture into the soft ground, prepare your material then use the following steps: 1. Lighten pressure on the press about 1/2 - 1 turn less (counter clockwise) than for normal printing.
  • 15. 2. Set up the press as for printing. 3. Place the cooled soft ground on the press bed 4. Arrange the material you wish to imprint in the soft ground on the surface of the plate. 5. Cover the material and plate with a piece of plastic or wax paper larger than the plate. 6. Cover the above with the rubber printing blanket instead of the usual set of felts. 7. Run the plate etc. through the press. The pressure should be relatively light. 8. Remove everything and return the pressure back to normal. 9. Stop out areas of the plate which you do not wish to carry the soft ground texture with hard ground, or an alcohol based shellac stop out. Allow the stop out to dry. 10. See above procedure for etching any ground. TIP: Soft ground areas stopped out prior to any etching need to be carefully considered for their shape and edge quality as they will be brighter than the etched soft ground areas of the plate. Tonal areas can be achieved by etching the plate in stages. Immerse the plate in ferric chloride and expose for the lightest etch. Remove the plate from the etching solution and rinse. Once the plate is dry block out the areas you wish to preserve as etched. Immerse the plate in the ferric chloride again and continue to etch then progressives block out areas until the entire etching process is complete. Aquatint This process enables you to create a wide range of tonal areas on your plate. Depending on the way you apply the aquatint, they may be flat tone, or graduated tone. Stencils can be used to define shapes or mask out areas of the plate. You can also stop out area of your plate. Aquatints can be used as a sole means of creating an intaglio print, but they are most often combined with line etchings and softgrounds to add value and richness to an image. If your plate has already been etched, it will still need to be de-oxidized We’ll be using a new technique to apply our aquatints using a screen filler solution in an airbrush. The screen filler may be diluted with water. The greater the dilution, the finer the aquatint. The force of the compressor (PSI) may also cause grain of the aquatint to vary. A dilution to start with is 70% Screen Filler to 30% Water. Set up a plate and a white card and spray them at the same time! Repeat the procedure each time you do an aquatint. 1. Remove all grease and oxidation from the plates (Dawn; Salt & Vinegar), and rinse with water. Dry the plates immediately, and cover their backs with contact paper to protect from the nitric acid bath 2. If there is any area you wish to preserve as bright white (or paper color) this is the time to stop it out with screen filler or Z-Acryl on your plate. 3. Using the airbrush, apply the Screen Filler (appropriately diluted) to your image on the plate, and in equal amounts to a test plate. Remember that the screen filler is going to prevent the plate from etching: it is the minute areas of open plate between the droplets of screen filler that will etch and produce your tonalities. Therefore: more screen filler produces a lighter value than less screen filler. Use a magnifying glass to check for coverage, and aim for 50% coverage of the plate - in other words the areas between the drops of screen filler should be about the same size as the drops themselves.
  • 16. 4. Stencils may be used to block out areas you wish to preserve, whether they are sprayed or open. However, if you wish to keep some areas white you will need to cover those areas completely with screen filler before etching the plate. Try using a litho crayon if you want a softer effect or a crayon-like white line. 5. Screen Filler dries quickly and will clog the airbrush. If you are not actively spraying, the airbrush should be submerged in an ammonia/water solution. After you have finished, it needs to be cleaned out thoroughly and carefully. If this is not done it causes problems for everyone in the studio who wants to create an aquatint. 6. Etch the test plate, stopping out at stepped time intervals. The shorter the etch, the lighter the value of the final tone. The longer the etch, the darker the value.** The strength of the etchant will vary, so until you are experienced enough to judge the appearance of the printed plate by examining the depth of the bite under a magnifying glass, this is an important step. Use screen filler applied with a brush to stop out the action of the etch as follows: a. remove plate from ferric chloride b. rinse THOROUGHLY with water c. Immerse in deoxidizing solution (salt & vinegar) for several minutes d. rinse off salt and vinegar with water e. dry plate with hair dryer f. apply screen filler with a brush to stop action of ferric chloride on specific areas of your image g. dry plate (hair dryer) and re-etch. Repeat entire process (steps i - vii) as many times as is necessary. 7. Remove the screen filler from the test plate with an ammonia & water solution and proof it. Label the proof according to the total time each area has been in the etchant. Proceed to etch the image on your other plate according to the times in the ferric chloride as necessary for each appropriate value. Take the plate out of the ferric chloride and stop out areas as they have been etched for the right amount of time. (You'll need to rinse off the plate, and deoxidize in SALT & VINEGAR, dry it, apply screen filler with a brush and let that dry too before etching each step further). Once you are skilled with the airbrush you may be able to create an image which only requires a single time in the etchant by varying value with the flow of screen filler from the airbrush onto the plate. Obviously, it is helpful to know how to use an airbrush to use this technique. This does take practice. Use water soluble ink and create images in your sketchbook for practice before you start on a plate. Special Effects: If you want to be an intaglio rockstar: o Dissolve some of the sprayed screen filler with water when wet, or a water/ammonia solution when dry. o Use the litho crayon for stopping out over the sprayed screen filler. It gives the plate a nice tooth to draw on. o Draw on a copper plate with a wax crayon. Coat it with Future. When the future is dry, run the plate under hot water and rub at the crayon until it lifts the future up. Then spray with screen filler for a "lift ground" effect (strong black crayon-like marks). o Experiment with other techniques and materials in combination with this process and share the results with the class.
  • 17. Health and Safety in the Printmaking Studio We have made great progress in reducing the numbers and amount of toxic products used in printmaking studios over the last few years. However, printmaking students should understand that there are health risks involved in some of the materials still used and stored in the printmaking studio. Some of the toxic substances which are used include: acids: nitric, phosphoric, hydrochloric and acetic solvents: paint thinner, denatured alcohol, furniture stripper, chlorine bleach others: lye, ammonia, photoemulsion These, as well as some other items used in the studio are harmful to the body, either in terms of the fumes they emit or in terms of skin contact. Some are harmful in both ways. We would encourage you to buy rubber gloves and use them. Remember that products used in one class may linger in the atmosphere of the room while a different class is in session. Should you feel that your health is being adversely affected by proximity to any of these substances; it would be advisable to drop the class. Handle all chemicals and solvents with great care, including putting flammables away in the yellow fire-proof cabinet after use. Please follow these basic shop rules: Wipe up any spills immediately: Flammable solvents (e.g., mineral spirits, alcohol): wipe up small quantities with paper towels and place them in red triangular cans Acids: wear rubber gloves Water: Put down newspapers or corrugated cardboard. Mop up as soon as possible, or seek out custodian. Area around screenwashing sink must not be allowed to get wet. GENERAL SAFETY PROCEDURES YOU MUST....... 1. WEAR acid/solvent resistant gloves like Nitrile when handling acids, cleaning materials, all solvents, emulsion, developers, etc. Consider using disposable surgical gloves for better dexterity. Many solvents compromise latex. 2. WEAR safety goggles when handling acids or using tools or machinery such as the Dremel tools. 3. LABEL all bottles and cans with the names of materials to be stored in them before they are filled. 4. NEVER attempt to smell or taste liquids. Give them to the instructor to test or discard. 5. DO NOT leave solvents in open containers. 6. DO NOT leave rags drenched with solvents or oils lying around. Throw them into the appropriate red covered safety containers immediately after use. 7. WEAR an approved dust mask such as 3M 8710 when sanding or applying talc or Rosin powders. Keep the container close to the surface you are going to dust; STAY OUT of the direction of the air current, and DO NOT use around other students who are not properly protected. INSIST they leave the area or put on their dust masks. 8. ALWAYS wash your hands or other body parts with generous amounts of water, after
  • 18. coming into contact with acids, for 15 MINUTES. If you get acid or other caustic materials in your eyes flush them with copious amounts of water for 15 MINUTES and seek the attention of a physician immediately. 9. WASH all surfaces contaminated with acid thoroughly. ACIDS ARE VERY CORROSIVE...USE THEM WITH EXTREME CAUTION. 10. ALWAYS thoroughly wash your hands or any part of your skin that contacts solvents using generous amounts of soap and rinse thoroughly with lots of water. 11. ALWAYS have the general exhaust or local exhaust systems on when using acids, using emulsion, ANY solvent or other toxic materials that emit vapors/fumes. -Children are not allowed in the printmaking studio for their own safety. -Shut the doors when you leave and check that they are locked. Not only will this discourage theft, but it is a good fire and safety policy. It is not a good idea for people with no background in printmaking to visit you while you are working in the studio. Not only may they inadvertently interfere with equipment or other peoples’ works-in progress, but they are generally unaware of the nature of some of the volatile substances in the studio. -Report all accidents to lab aides, security, or I. -Fire Extinguishers are located next to the door leading to the washout room. Suggested Reading: Fred Hagstrom "Has Printmaking Contributed to its Own Isolation?", Artist's Proof (Print Consortium), Vol. 4, no. 2, 1990. Walter Benjamin "The Work of Art in the Age of Mechanical Reproduction", from Illuminations, 1955, pp. 219-254. Charles Cohan "The Net of Irrationality: The Variant Matrix and the Tyranny of the Edition," Contemporary Impressions, Fall 1993, pp. 9-11. Ruth Weisberg "Syntax of the Print: A Search for Aesthetic Content", Tamarind Technical Papers, Volume 9, Fall 1986, pp. 52-60. Ruth Weisberg "The Absent Discourse: Critical Theories and Printmaking", Tamarind Papers, Vol. 13, 1990, pp. 8-10. Hugh Merrill "Post-Print: Staking Claim to the Territory", Contemporary Impressions (American Print Alliance) Vol. I, no. 1, Spring 1993, pp.7-9.
  • 19. Unit 2 Assignment 1: Drypoint Intaglio prints are typically referred to as etchings. An ‘etching ‘is an impression of a design on a metal plate. It is made as follows: A smooth metal plate is covered with a layer of ground - a mixture of wax, rosin and asphalt. A design is made in the ground with a sharp needle. Where the lines are drawn the metal is revealed. The plate is then dipped into an acid bath to allow the exposed areas to be bitten away, or etched. This transfers the drawing into the metal. When ink is wiped over the plate, the lines fill up. In the printing press the ink is transferred onto the paper. (definition from Rijksmuseum) Drypoint is not an etching process, but rather an incising. The process of incising creates a burr, or a raised rough edge to the lines on an intaglio plate. Drypoints tend to look blurrier and are more fragile than etchings or engravings, but have a beautiful velvety texture to them. Directions Students must create a series of 3 editions (of 3 prints each) exhibiting an understanding of Drypoint. Students should emphasize the buildup of value, volume, and depth through the use of line in their prints. Note: Editions must be printed on soaked Intaglio-appropriate paper (your thicker Printmaking pads.) Note: In addition to printing requirements, students must meet a conceptual requirement. The print must have some component that ties each edition to the previous one- bridge a gap between the three to form a small and cohesive body of work. A significant portion of this grade will assess how each student creates cohesion between his or her editions. You can do this by making all 3 images Portraits, tell a sequential story with the images, link them psychologically, etc.
  • 20. Grading Criteria Students will be awarded points in 3 categories, Design, Concept, and Technical. Additional points may be awarded upon instructor discretion. In order to receive full points for this assignment, your submissions must adhere to the following guidelines in each section Concept Points:  Student has designed a print that either is consistent with or that cohesively links his/her other drypoint editions with one another Design Points:  Student has designed a print that works well for this media.  Design fills picture plane and the composition is sound.  Print makes good use of line, value, and implies depth and/or volume.  Print was designed in stages (posted weekly updates.) Technical Points:  Student has created 3 editions of at least three prints  Incisions are carefully done.  Application of ink is even and consistent.  Proofs were provided to document revisions  Paper has been kept clean, free of folds, tears, or smudges.  Margins --equal on tops and sides of print with larger margin on the bottom for signature and edition number. Margins are clean.  Prints are signed in pencil and include the print/edition numbers, title (optional), artist’s signature and year print was created--elements are positioned correctly. Grade points will be assigned somewhat accordingly to the below grade scale. Keep in mind that specific criteria will vary, but keep the following basic considerations and my ability to use discretion in mind: AA++ AA BB CC DD FF 110000 9900 8800 7700 6600 5500 4400 3300 2200 1100 00 Reserved for EXCEPTIONAL work showing insight, innovation, application and originality, beyond basic requirements. May include assignments revealing pronounced growth. Meets all required criteria, even with a few minor mistakes. Work is well- executed and cleanly presented. Work has one major flaw (or few minor ones). Well executed, but little attention to creativity or originality. Work has several major flaws, i.e. sloppy or poorly presented, poor quality in meeting listed requirements. Failure to meet majority of listed goals and requirements. Poorly produced work, presented in a sloppy manner. Zeros are given to assignments that are not turned in on time and for missed critiques. RReemmeemmbbeerr:: PPllaaggiiaarriissmm,, llaacckk ooff ttiimmeellyy ppoossttss,, aanndd ootthheerr ffaaccttoorrss mmaayy aaffffeecctt yyoouurr ggrraaddeess