"Lesotho Leaps Forward: A Chronicle of Transformative Developments"
Ty3531
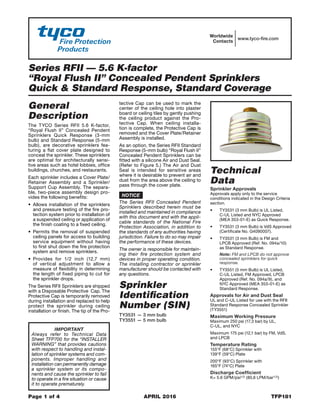
1. Series RFII — 5.6 K-factor
“Royal Flush II” Concealed Pendent Sprinklers
Quick & Standard Response, Standard Coverage
Page 1 of 4 APRIL 2016 TFP181
IMPORTANT
Always refer to Technical Data
Sheet TFP700 for the “INSTALLER
WARNING” that provides cautions
with respect to handling and instal-
lation of sprinkler systems and com-
ponents. Improper handling and
installation can permanently damage
a sprinkler system or its compo-
nents and cause the sprinkler to fail
to operate in a fire situation or cause
it to operate prematurely.
Worldwide
Contacts
www.tyco-fire.com
General
Description
The TYCO Series RFII 5.6 K-factor,
“Royal Flush II” Concealed Pendent
Sprinklers Quick Response (3-mm
bulb) and Standard Response (5-mm
bulb), are decorative sprinklers fea-
turing a flat cover plate designed to
conceal the sprinkler. These sprinklers
are optimal for architecturally sensi-
tive areas such as hotel lobbies, office
buildings, churches, and restaurants.
Each sprinkler includes a Cover Plate/
Retainer Assembly and a Sprinkler/
Support Cup Assembly. The separa-
ble, two-piece assembly design pro-
vides the following benefits:
• Allows installation of the sprinklers
and pressure testing of the fire pro-
tection system prior to installation of
a suspended ceiling or application of
the finish coating to a fixed ceiling.
• Permits the removal of suspended
ceiling panels for access to building
service equipment without having
to first shut down the fire protection
system and remove sprinklers.
• Provides for 1/2 inch (12,7 mm)
of vertical adjustment to allow a
measure of flexibility in determining
the length of fixed piping to cut for
the sprinkler drops.
The Series RFII Sprinklers are shipped
with a Disposable Protective Cap. The
Protective Cap is temporarily removed
during installation and replaced to help
protect the sprinkler during ceiling
installation or finish. The tip of the Pro-
tective Cap can be used to mark the
center of the ceiling hole into plaster
board or ceiling tiles by gently pushing
the ceiling product against the Pro-
tective Cap. When ceiling installa-
tion is complete, the Protective Cap is
removed and the Cover Plate/Retainer
Assembly is installed.
As an option, the Series RFII Standard
Response (5-mm bulb) “Royal Flush II”
Concealed Pendent Sprinklers can be
fitted with a silicone Air and Dust Seal.
(Refer to Figure 5.) The Air and Dust
Seal is intended for sensitive areas
where it is desirable to prevent air and
dust from the area above the ceiling to
pass through the cover plate.
NOTICE
The Series RFII Concealed Pendent
Sprinklers described herein must be
installed and maintained in compliance
with this document and with the appli-
cable standards of the National Fire
Protection Association, in addition to
the standards of any authorities having
jurisdiction. Failure to do so may impair
the performance of these devices.
The owner is responsible for maintain-
ing their fire protection system and
devices in proper operating condition.
The installing contractor or sprinkler
manufacturer should be contacted with
any questions.
Sprinkler
Identification
Number (SIN)
TY3531 — 3 mm bulb
TY3551 — 5 mm bulb
Technical
Data
Sprinkler Approvals
Approvals apply only to the service
conditions indicated in the Design Criteria
section.
• TY3531 (3 mm Bulb) is UL Listed,
C-UL Listed and NYC Approved
(MEA 353-01-E) as Quick Response.
• TY3531 (3 mm Bulb) is VdS Approved
(Certificate No. G4090007).
• TY3531 (3 mm Bulb) is FM and
LPCB Approved (Ref. No. 094a/10)
as Standard Response.
Note: FM and LPCB do not approve
concealed sprinklers for quick
response.
• TY3551 (5 mm Bulb) is UL Listed,
C-UL Listed, FM Approved, LPCB
Approved (Ref. No. 094a/9), and
NYC Approved (MEA 353-01-E) as
Standard Response.
Approvals for Air and Dust Seal
UL and C-UL Listed for use with the RFII
Standard Response Concealed Sprinkler
(TY3551)
Maximum Working Pressure
Maximum 250 psi (17,3 bar) by UL,
C-UL, and NYC
Maximum 175 psi (12,1 bar) by FM, VdS,
and LPCB
Temperature Rating
155°F (68°C) Sprinkler with
139°F (59°C) Plate
200°F (93°C) Sprinkler with
165°F (74°C) Plate
Discharge Coefficient
K= 5.6 GPM/psi1/2 (80,6 LPM/bar1/2)
2. TFP181
Page 2 of 4
Adjustment
1/2 inch (12,7 mm)
Finishes
See the Ordering Procedure section.
Physical Characteristics
Frame �������������������������������������������������������Bronze
Support Cup. . . . . . . . . . . . Chrome Plated Steel
Guide Pins ������������������������������������Stainless Steel
Deflector ���������������������������������������������������Bronze
Compression Screw �����������������������������������Brass
Bulb �������������������������������������������������������������Glass
Cap. . . . . . . . . . . . . . . . . . . . . Bronze or Copper
Sealing Assembly. . Beryllium Nickel w/TEFLON
Cover Plate �������������������������������������������������Brass
Retainer �������������������������������������������������������Brass
Ejection Spring ����������������������������Stainless Steel
Design
Criteria
The TYCO Series RFII 5.6 K-factor,
“Royal Flush II” Concealed Pendent
Sprinklers are intended for fire protec-
tion systems designed in accordance
with the standard installation rules
recognized by the applicable Listing
or Approval agency; for example, UL
Listing is based on NFPA 13 and VdS
Approval is based on the CEA 4001.
For more information on LPCB and VdS
Approvals, contact Tyco Fire Protection
Products at the following office:
Enschede, Netherlands
Telephone: 31-53-428-4444
Fax: 31-53-428-3377
The Series RFII Concealed Pendent
Sprinklers are only listed and approved
with the Series RFII Concealed Cover
Plates having a factory applied finish.
NOTICE
Do not use the Series RFII in applica-
tions where the air pressure above the
ceiling is greater than that below. Down
drafts through the Sprinkler/Support
Cup Assembly can delay sprinkler
operation in a fire situation.
Operation
When exposed to heat from a fire, the
Cover Plate, normally soldered to the
Retainer at three points, falls away to
expose the Sprinkler/Support Cup
Assembly.
The Deflector — supported by the
Guide Pins — then drops down to its
operational position.
The glass bulb contains a fluid that
expands when exposed to heat. When
the rated temperature is reached, the
fluid expands sufficiently to shatter the
glass bulb, activating the sprinkler and
allowing water to flow.
Installation
The TYCO Series RFII 5.6 K-factor,
“Royal Flush II” Concealed Pendent
Sprinklers must be installed in accor-
dance with this section.
General Instructions
Do not install any bulb-type sprinkler
if the bulb is cracked or there is a loss
of liquid from the bulb. With the sprin-
kler held horizontally, a small air bubble
should be present. The diameter of the
air bubble is approximately 1/16 inch
(1,6 mm) for the 155°F (68°C) and 3/32
inch (2,4 mm) for the 200°F (93°C) tem-
perature ratings.
A leak-tight 1/2 inch NPT sprinkler
joint should be obtained by applying a
minimum to maximum torque of 7 to 14
ft.-lbs. (9,5 to 19,0 Nm). Higher levels
of torque can distort the sprinkler Inlet
with consequent leakage or impairment
of the sprinkler.
Do not attempt to compensate for
insufficient adjustment in the Sprinkler
by under- or over-tightening the Sprin-
kler/Support Cup Assembly. Re-adjust
the position of the sprinkler fitting to
suit.
Step 1. Install the sprinkler only in the
pendent position with the center-line
of the sprinkler perpendicular to the
mounting surface.
Step 2. Remove the Protective Cap.
Step 3. With pipe thread sealant
applied to the pipe threads, hand-
tighten the sprinkler into the sprinkler
fitting.
Step 4. Wrench-tighten the sprinkler
using only the RFII Sprinkler Wrench.
(Refer to Figure 3.) Apply the RFII
Sprinkler Wrench to the Sprinkler as
shown in Figure 3.
SPRINKLER/SUPPORT CUP
ASSEMBLY
COVER PLATE/RETAINER
ASSEMBLY
GUIDE
PINS (2)
DEFLECTOR
(DROPPED
POSITION)
COMPRESSION
SCREW
DEFLECTOR
SUPPORT
CUP WITH
ROLL FORMED
THREADS
FRAME
1/2 NPT
CAP
BULB
SEALING
ASSEMBLY
RETAINER
WITH THREAD
DIMPLES
EJECTION
SPRING
SOLDER
TABS (3)
COVER
PLATE
THREAD INTO
SUPPORT
CUP UNTIL
MOUNTING
SURFACE IS
FLUSH WITH
CEILING
FIGURE 1
MODEL RFII CONCEALED SPRINKLER
ASSEMBLY
3. TFP181
Page 3 of 4
A: 3-1/4 inches (82,6 mm) C: 2-3/8 to 2-5/8 inches (60,3 to 66,7 mm)
B: 3/16 inches (4,8 mm) D: 1-3/4 to 2-1/4 inches (44,5 to 57,2 mm)
Step 5. Replace the Protective Cap
by pushing it upwards until it bottoms
out against the Support Cup. (Refer
to Figure 4.) The Protective Cap helps
prevent damage to the Deflector and
Arms during ceiling installation and/or
finish. You can also use the Protective
Cap to locate the center of the clear-
ance hole by gently pushing the ceiling
material up against the center point of
the Protective Cap.
NOTICE
As long as the Protective Cap remains
in place, the system is considered “Out
of Service”.
Step 6. After the ceiling has been
completed with the 2-1/2 inch (63,5
mm) diameter clearance hole and in
preparation for installing the Cover
Plate/Retainer Assembly, remove and
discard the Protective Cap. Verify that
the Deflector moves up and down
freely.
If the Sprinkler is damaged and the
Deflector does not move up and down
freely, replace the entire Sprinkler.
Do not attempt to modify or repair a
damaged sprinkler.
Step 7. When installing an Air and
Dust Seal, refer to Figure 5; otherwise,
proceed to Step 8. To attach the Air
and Dust Seal, verify the angle of the
outside edge of the seal is oriented
according to Figure 5. Start the edge of
the Retainer in the grooved slot of the
Air and Dust Seal and continue around
the retainer until the entire Air and Dust
Seal is engaged.
COVER PLATE
PROFILE DEPTH
DIMENSION B
1/2 (12,7 mm)
THREADED
ADJUSTMENT
D
FACE OF
SPRINKLER
FITTING
MANUFACTURER
PRESET GAP
3/32 (2,4 mm)
FACE
OF CEILING,
RETAINING RING
MOUNTING
SURFACE
SPRINKLER
SUPPORT CUP
ASSEMBLY
CLEARANCE HOLE
DIAMETER
DIMENSION C
DEFLECTOR
IN DROPPED
POSITION
3/16 to 11/16
(4,8 to 17,5 mm)
REFERENCE
COVER PLATE
RETAINER
ASSEMBLY
COVER PLATE
DIAMETER
DIMENSION A
CLEARANCE
HOLE
FRAME
ARM
SUPPORT
CUP
7/8 (23 mm)
SQUARE
ACCEPTS
1/2 SOCKET
DRIVE
ALIGN
ARROWS WITH
FRAME ARMS
FIGURE 2
SERIES CONCEALED SPRINKLER INSTALLATION DIMENSIONS
FIGURE 4
DISPOSABLE PROTECTIVE CAP
FIGURE 3
RFII SPRINKLER WRENCH