SlideShare a Scribd company logo
1 of 54
Download to read offline
BULDING CONSTRUCTION 1 (BLD60303)
Experiencing
Construction
Documented by:
Teoh Jun Xiang 0322099
Tan Min Chuen 0322938
Tang Ying Jien 0322357
Saw E Sean 0322003
Tang Fu Hong 0323092
Tan Yan Jie 0323906
Teh Wei Hong 0323743
Thomas Ting Shii Kai 0323962
Content page
No. Section Page
1.0 Introduction (Tang Ying Jien and Saw E Sean) 1
1.1 Introduction to Site 1 (Tang Ying Jien) 1
1.2 Introduction to Site 2 (Saw E Sean) 1
2.0 Site and safety (Tang Ying Jien) 2
2.1 Introduction to site and safety in Elmina Valley Phase EV1A
(Tang Ying Jien)
2
2.2 Safety signboards (Tang Ying Jien) 2
2.3 Bulletin board (Tang Ying Jien) 2
2.4 Safety protocols (Tang Ying Jien) 2
2.5 Personal Protective Equipment (PPE) (Tang Ying Jien) 3
2.6 Plants and machineries (Tan Min Chuen) 4-6
3.0 Preliminaries (Tan Min Chuen, Teh Wei Hong and Tang Fu Hong) 7
3.1 Site Layout (Tan Min Chuen) 7-8
3.2 Preliminary (Services connection) (Teh Wei Hong) 9
3.3 Setting out (Teh Wei Hong) 9-11
3.4 Earth work (Tang Fu Hong) 11-12
4.0 Foundation (Teoh Jun Xiang and Saw E Sean) 13
4.1 Foundation type and construction process (Site visit) (Teoh Jun
Xiang)
13-14
4.2 Foundation type and construction process (Reference) (Saw E
Sean)
15-20
5.0 Superstructure (Tan Yan Jie, Thomas Ting Shii Kai and Teoh Jun
Xiang)
21
5.1 Superstructure (Site visit) (Tan Yan Jie) 21-24
5.2 Superstructure (Reference) (Thomas Ting Shii Kai and Teoh Jun
Xiang)
25
5.2.1 Ground beams (Thomas Ting Shii Kai) 25
5.2.2 Slabs (Thomas Ting Shii Kai) 25
5.2.3 Beams and columns (Thomas Ting Shii Kai) 26-27
5.2.4 Walls (Teoh Jun Xiang) 27-36
5.2.5 Staircase (Thomas Ting Shii Kai) 36-37
6.0 Doors and Windows (Tan Yan Jie and Thomas Ting Shii Kai) 38
6.1 Doors (Tan Yan Jie and Thomas Ting Shii Kai) 38-39
6.2 Windows (Tan Yan Jie and Thomas Ting Shii Kai) 39-41
7.0 Roof (Teh Wei Hong and Tang Fu Hong) 42
7.1 Roof type and construction process (Site visit) (Tang Fu Hong) 42-45
7.2 Roof type and construction process (Reference) (Teh Wei
Hong)
45-49
8.0 Summary (Teoh Jun Xiang) 50
9.0 References (Thomas Ting Shii Kai) 51-
CONTENTS
1.0 Introduction
1.1 Elmina Valley Phase EV1A
Tang Ying Jien 0322357 Saw E Sean 0322003 1
1.2 Lot 120, Mukim Lunas, Daerah Kulim, Kedah Darulaman
The Elmina Valley Phase EV1A was
once an oil palm plantation estate
until it was transformed into a
residential area. It is located at
Petaling district which is connected
to the Guthrie Corridor Expressway,
Federal Highway, Kuala Lumpur –
Kuala Selangor Expressway and
North Klang Valley Expressway. The
strategic location of the site meant
that a shorter drive to Kota
Damansara, Shah Alam and the
Subang Airport is made possible.
The residential area consists of 157
terrace units with nature parks as its
recreational area. A man-made
lake was also built in the middle of
the residential area for aesthetic
and recreational purposes. There is
also an amphitheatre provided
within the residential area to act as
a gathering place for the residents.
The project is located at Kulim District, Kedah, Malaysia. It is the closest town to the
Greater Penang in Kedah. As there are quite a huge amount of people living in the
district, rapid development of residential areas occurs around the area to cater the
provide accommodation for the increasing number of citizens. Lot 120, Mukim Lunas,
Daerah Kulim, Kedah Darulaman is one of the residential construction projects that aims
to provide comfortable living place for the public. The project is located near a river as
well as a police and petrol station. The residential area consists of 12 units of single-storey
terrace houses, 28 units of 2-storey terrace houses, 8 units of single-storey semi-detached
houses and 20 units of semi-detached houses.
Project: Lot 120, Mukim Lunas, Daerah
Kulim, Kedah Darulaman
Project Title:
-12 units of single-storey Terrace House
-28 units of 2-Storey Terrace House
-8 units of single-storey semi-detached
house
- 20 units of semi-detached house
Project Duration: 24 months
Site Possession Date: 10 September 2016
Completion Date: 9 September 2018
Project: Elmina Valley Phase EV1A
Project Title: 157 unit, 2-Storey Terrace House
(1,709 sq. ft.)
Project Duration: 18 months
Site Possession Date: 29th of January 2016
Completion Date: 28th of July 2017
Figure 1.1 Two-storey terrace houses which were
proposed to be built at Elmina Valley Phase EV1A
Figure 1.2 Location Plan of Elmina Valley Phase EV1A Figure 1.6 Location Plan of Mukim Lunas, Daerah
Kulim, Kedah Darulaman
Figure 1.3 floor plans of a single terrace
house unit within Elmina Valley Phase EV1A.
Figure 1.4 Two-storey semi-detached houses
which were proposed to be built at Mukim
Lunas, Daerah Kulim, Kedah Darulaman
Figure 1.5 Two-Storey terrace houses which were
proposed to be built at Mukim Lunas, Daerah
Kulim, Kedah Darulaman
2.0 Site and Safety
2.1 Introduction
2.2 Signage
2.3 Bulletin Board
2.4 Safety Protocols
The safety of personnel working in the construction site of Elmina Valley is taken very
seriously and every safety measures have been carried out to ensure the workers’
safety on site at all times. The Sime Darby Development Department have designated
a green zone in every construction site to provide an area to conduct security checks
on workers as well as visitors to ensure their safety on site. Safety equipment which are
stored in the green zone are also distributed to provide protection to those at site.
Safety signboards, bulletin boards and security booths are present in the green zone.
The safety issued on workers are very strict and they were required to wear helmet, vest
safety boots for normal safety compliance. The workers need to be registered as
verified foreigners and need to have formal permits and passports. Every workers
requires to keep their ID, which is written at the back of the safety helmet for security
and safety measurements. The workers are also required to enter personal code and
hand print in the green zone when entering the construction site.
- Consist of various pinned project information for workers, visitors and other authorised
personnel to refer to.
- Articles on health and safety for construction site personnel to read.
- Posters on safety campaigns are posted on the boards to create awareness among
the construction site personnel.
- Provides emphasis on important reminders and alerts the public on the potential
dangers and risks on the construction site.
- A diagram of the Personal Protective Equipment (PPE) to remind workers of the
required safety equipment when on site.
- Signage of assembly point to indicate the location of the emergency gathering point
during any unforeseen accidents or emergencies.
Figure 2.1 Signage of the emergency assembly
point and the sign with diagrams of the Personal
Protective Equipment (PPE).
Figure 2.2 Penalty sign. Fines will be issued to those
who violate the safety rules and regulations of the
construction site.
Figure 2.3 Bulletin Board
Figure 2.4 Hand Print Scanner Figure 2.5 Safety Gate
Tang Ying Jien 0322357 2
2.5 Personal Protective Equipment (PPE)
Figure 2.6 Personal Protective
Equipment (PPE) sign within
the construction site.
Figure 2.7 Collection of Personal Protective Equipment (PPE)
- To provide protection from falling objects and to protect the
safety of workers when they are operating a construction vehicle.
- To prevent direct contact between dangerous objects and the
head which may cause injuries to the head.
i. Safety Helmet
- Providing protection to the eyes of the workers from hazardous
objects such as dust particles, molten metal as well as sparks
during construction.
ii. Eye Protection
- Protects the hands of the workers when handling sharp objects,
tools and corrosive chemicals.
iii. Protective Gloves
- To protect the workers from any direct contact to objects which
may cause harm to the physical body.
- To allow a worker to be highly visible in the construction site.
iv. Safety Clothing
- To provide protection to worker’s feet from sharp objects which
may pierce and injure the feet.
- To protect the feet against any falling objects.
v. Safety Boots
Safety Helmet
Safety Clothing
Safety Clothing
Safety Boots
Tang Ying Jien 0322357 3
2.6 Plants and Machinery
2.6.1 Earthmoving and excavating equipment
he selection of the appropriate type and size of construction equipment often affects
the required amount of time and effort and thus the job-site productivity of a project.
It is therefore important for site managers and construction planners to be familiar with
the characteristics of the major types of equipment most commonly used in
construction.
- Earthmoving and excavating equipment are heavy-duty vehicles, designed specially
to execute construction tasks, most frequently involving earthwork operations.
- As they imply the mechanical advantage of a simple machine, the ratio between
input force applied and force exerted is multiplied. Some equipment uses hydraulic
drives as a primary source of motion.
The back-hoe loader can be used for a wide variety of tasks as there are both a
bucket and a shovel attached to it. It is normally used in smaller construction works to
dig shallow excavations and trenches, general grading, mall demolitions as well as
light transportation of building materials
i. Back-hoe Loader
Used to excavate below or above natural surface of ground on which machine rests
and dig pits for basement. It can excavate close range works as they have better
bucket. Excavators can also be used for forestry work, demolition and many more.
ii. Excavator
Compactors are used for
compacting crushed rock as the
base layer underneath concrete or
stone foundations or slabs. The
function of compactors is to
produce higher density soil
mechanically. The basic forces
used in compaction are static
weight, kneading, impact and
vibration. The degree of
compaction that may be achieved
depends on the properties of soil, its
moisture content, the thickness of
the soil layer for compaction and
the method of compaction.
iii. Vibratory soil compactor
Tan Min Chuen 0322938 4
2.6.2 Lifting and erecting equipment
A crane mounted on a truck carrier provides the mobility for this type of crane, these
cranes are able to travel on highways, eliminating the need for special equipment to
transport the crane, usually used in smaller construction to dig shallow excavations
and trenches, general grading, hoist and place materials
Concrete transport trucks (in–transit mixers) are used to transport and mix concrete
while travelling to the construction site. The concrete mixing transport truck maintains
the material's liquid state through agitation, or turning of the drum, until delivery. The
interior of the drum on a concrete mixing truck is fitted with a spiral blade. In one
rotational direction, the concrete is pushed deeper into the drum. This is the direction
the drum is rotated while the concrete is being transported to the building site. This is
known as "charging" the mixer. When the drum rotates in the other direction, the
spiral blade "discharges”, forces the concrete out of the drum.
A device that homogeneously combines cement, aggregate such as sand or gravel,
and water to form concrete. The portable concrete mixer uses a small revolving
drum to mix the components. For smaller jobs, the concrete made at the
construction site has no time lost during its transportation, giving the workers ample
time to use the concrete before it hardens.
Lifting and erecting equipment are machineries that are used to deliver materials
and equipment or lift loads from a place to another vertically and horizontally.
2.6.3 Mixing and grading equipment
Mixing and grading equipment are construction equipment that mix up the materials
and are mainly used to produce concrete by mixing aggregates, water and cement.
i. Truck Mounted Moblie Crane
i. Concrete Transport Truck
ii. Portable Concrete Mixer
A tractor with a fork built in front
to lift heavy objects. It is
commonly used in construction
to move aside or load materials
into or onto another type of
machinery. Another critical
characteristic of the forklift is its
instability. The forklift and load
must be considered a unit with a
continually varying center of
gravity with every movement of
the load. A forklift must never
negotiate a turn at speed with a
raised load, it may combine to
cause a disastrous tip-over
ii. Forklift
Tan Min Chuen 0322938 5
2.6.4 Transporting vehicle
Transportation vehicles are heavy vehicles that able to transport materials and
equipment for a long distance. They are usually used to transport materials from the
base to the construction site.
2.6.5 Construction equipment
i. Dump Truck
i. Bar Bending Machine
ii. Truck
Dump trucks are used for transporting loose
material (such as sand, gravel, or dirt) for
construction. A typical dump truck is
equipped with an open-box bed, which is
hinged at the rear and equipped with
hydraulic pistons to lift the front, allowing the
material in the bed to be deposited on the
ground behind the truck at the site of
delivery.
A motor vehicle designed to transport
cargo. Trucks vary greatly in size, power,
and configuration, with the smallest being
mechanically similar to an automobile.
Trucks are usually used to transport plants
such as, generator set, portable concrete
mixer, mobile lighting tower to desire places
on site.
Bar bending machines are used for bending
reinforcement bars and various forms of
round bars.
ii. Bar Cutting Machine
Bar cutting machines are used for cutting
reinforcement bars and various forms of
round bars.
iii. Mobile lighting tower
Mobile lighting towers are used to light up
the construction site at night. And also used
to light up spaces with low light intensity.
iv. Generator Set
A generator set is an electronic device that
supplies electric energy to devices and
machineries on site.
Tan Min Chuen 0322938 6
3.0 Preliminaries i. Site Entrance ii. Signboard
Workers cabin
Shower area
Kitchen
Surau
Canteen
Carpark
Barbender’s yard
To Construction site
Storage area
Entrance
security post
green zone
site office
generator set canteen
3.1 Site Layout
Allows vehicles and machineries to get
in to the construction site.
The sign board displays information
about the construction and the various
companies involved in the construction
process.
iii. Access Road iv. Hoarding
Allows vehicles and machineries to
access the construction site from the
main road.
Erected around the of construction site
to shield it from view and prevent
unauthorised access. It is an important
component to prevent theft and
vandalism.
v. Storage
Designated places were used to store excess materials and also park unused
machineries.
Tan Min Chuen 0322938 7
vi. Site Security vii. Drainage
Hand print scanning for each worker to
identify their identity. This can prevent
unauthorized access to the site.
Temporary drainages are excavated on
site to discharge water from site during
rain and heavy downpour as well as to
prevent flooding.
viiii. Green Zone
The green zone is the area within the
yellow fencing. Within the green zone,
people are not required to put on safety
helmet and safety boots.
xiii. Barbender’s Yard xiiii. Rubbish dump
Designated places were used to store
excess materials and also park unused
machineries.
Rubbish containers that allow workers to
dispose garbage on site. It will be
transported by the dump truck when it is
full.
viii. Site Office
Construction sites will generally require office facilities to provide accommodation for
site managers, provide space for meetings and to provide storage for site
documentation. It is important that site offices are comfortable, attractive and versatile,
as well as being suitably robust and secure
xi. Canteen xii. Surau
The canteen is a place for workers to
have their meals. Kitchens are also
provided to allow the workers to cook
their own meals.
A Muslim prayer room is provided for
Muslim workers to conduct their daily
prayers.
xv. Workers’ Accomodation
The workers’ accommodation is a composition of large numbers of cabins to
accommodate the workers. The accommodation is constructed using containers
and zinc roofing, which results in the containment of hot air within the living space.
Stairs are provided to allow accessibility to the first floors. In addition to that,
balconies are also present outside of the cabins to allow the workers to hang their
shirts for drying and a car park is also provided for the workers to park their vehicles.
x. Wash Trough
The green zone is the area within the
yellow fencing. Within the green zone,
people are not required to put on safety
helmet and safety boots.
Tan Min Chuen 0322938 8
3.2 Preliminary (Service Connection)
3.3 Setting Out
3.3.1 Horizontal Control Technique
Before starting earthwork make sure there are no service lines such as electrical
connections, water supply and drainage connections, telephone lines or others
below ground.
Setting out involves working out the location and extent of the building on site. As
each site is different, contractors should start by establishing the particular
conditions. The process involves the positions and levels of building lines and road
alignments shown on the construction plans to be established on the ground by
various techniques and instruments. Setting out is usually divided into two stages
which is the first stage of setting out and the second stage.
The second stage of setting out continues from the first stage, beginning at the
ground floor slab or road sub-base level. Up to this point, all the control will be
located outside the main construction, for example the pegs defining building
corners, centre lines and so on will have been knocked out during the earth
moving work and only the original control will be undisturbed.
Horizontal control surveys are conducted to coordinate horizontal positional data.
These positions can be referenced by parallels or plane coordinate axes. Because
they are used as a framework for other surveys, these surveys must be precise and
accurate. These surveys provide a network of monuments or points on the ground
that can be used as the control for any other surveying project, such as a
boundary or construction survey. The advantages of using a horizontal control
survey is that lost monuments can be replaced accurately, surveys can be
coordinated, more than one network station can provide a check to the work,
and a reduction in the cost of the project can be achieved. Most horizontals
should (and will) be connected to the control network.
3.3.2 Vertical Control Technique
A vertical control survey determines elevation with respect to sea level. These
surveys are also used as a benchmark upon which other surveys are based and
high degree of accuracy is required. These surveys are useful for tidal boundary
surveys, route surveys, construction surveys and topographic surveys. In a vertical
control system, at least two permanent benchmarks should be used, but the
number of benchmarks required may increase depending upon the needs and
complexity of the project. These projects are needed for the construction of water
and sewer systems, highways, bridges, drains, and other major town or city
infrastructure. These surveys can be done alone, but are often done in conjunction
with a horizontal control survey.
Foundation
In practice, the first stage of setting out involves the use of
the horizontal and vertical control techniques. The purpose
of this stage is to locate boundaries of the work in their
correct position on the ground surface and to define the
major elements. In order to do this, horizontal and vertical
control points must be established on the site.
Figure beside shows the setting out process before the
foundations were constructed. Timber frames were first
fixed on site to allow strings to be tied and to determine the
location in which the walls will be erected.
i. First Stage
ii. Second Stage
Teh Wei Hong 0323743 9
3.3.3 Method used in setting out
3.3.4 Setting out of pipelines
3.3.5 Optical level, optical square and Theodolite construction
3.3.6 Sight Rails
Baselines are located by setting out their terminals. If co-ordinated they would be
set out from a traverse. The length of the baseline can be measured and
compared with its compound values. Alternatively, the baseline could be set out
with reference to other detail such as road centrelines, existing buildings, etc.
Again it is necessary to check the measured length against that given on the
drawings. Usually for the purpose of measuring angles.
Offset pegs are normally used in the form of baselines or grids or as horizontal
control points used to establish the design of the proposed structure. The offset
pegs are only used when the original pegs are unable to be installed.
A temporary benchmark (TBM) is a fixed point with a known elevation used for level
control during construction works and surveys. Nails in road seals, or marks on kerb &
channel are commonly used as temporary benchmarks
A Theodolite is an instrument for measuring both
horizontal and vertical angles, as used in triangulation
networks, and geo-location work. Other specialized
purposes make Theodolites ideal for shop and factory
floor layout of tools and fixtures. They also work well for
layout for the construction of concrete slabs,
landscaping, and road design.
A series of rails set with a surveying instrument, and used to check the vertical
alignment of a pipe in a trench.
Pipelines are to be checked on chainage, this could be every few pipes, for small
diameter and every pipe for large diameter. The pipelines must be tested in
accordance with the contract specification, any air or water testing of line should be
done by an experienced person.
Use plumb bob to get
point below if it is farther
than can be done with
a spirit level
Clearly mark what the
various nals are for. e.g.
centreline, edge,
trench, wall, plumbing
ii. Offset pegs
i. Baselines
iii. Temporary benchmark
Teh Wei Hong 0323743 10
3.3.7 Equipment used 3.4 Earth work
3.4.1 Site clearing
3.4.2 Benchmark
The purpose of this section is to establish uniform practices to be followed for
removal of trees and stumps. Where such removals are set up on a lump sum
basis, varying interpretations as to the extent of removal are possible. It is
necessary to exercise judgment in the administration of this item to accomplish
the desired results.
The desired level was marked in a permanent
place. This mark will be needed throughout the
project duration.
Figure 3.5 Excavators are used to remove the trees
There are several type of ground marking and setting out equipment including:
- Survey Flags
- Paint
- Survey Nails
- Marking Crayons
- Marking Plates (Temporary and permanent)
i. Theodolites
iii. Marking & survey points
iii. Software
Removal of trees and stumps
A surveying instrument with a
rotating telescope for
measuring horizontal and
vertical angles.
Figure 3.4 Site clearance at Lot 120, Mukim Lunas, Daerah Kulim, Kedah Darulaman
Surveying software is essential to any land
surveyor or building surveyor who
undertakes simple or complex land surveys
or measured building surveys using a total
stations.
Figure 3.1 Survey Flags Figure 3.2 Marking crayons Figure 3.3 Survey naills
Teh Wei Hong 0323743 11
3.4.3 Side-slope in excavation
During earth excavation check that
slope is maintained in side-soil.
Dump trucks are normally used instead of scrapers
when the soil is being excavated by loaders. Most
dump trucks can travel over public highways, and
move faster than scrapers.
Figure 3.6 Soil compactor are used in the compaction of soils after grading.
3.4.4 Base soil
3.4.5 Excavation area
3.4.6 Backfill
3.4.7 Compaction
Check the base soil, on which building's foundation will rest, is hard enough. You
may consult geotechnical engineer that the base soil is perfect for further work
execution.
Compaction reduces the volume of air space in the soil. This compaction
increases the dry unit weight and strength of the soil to better support structures.
This is a very important step.
- Check backfill is being done after ending the shutter removal period of footing.
- Backfilling material: Try to backfill with the excavated soil. And check the
backfilling material is free from large lumps, organic or any other foreign
materials. Check all shuttering materials are removed before backfilling.
- Backfilling should be done evenly on all sides. Check that is being done
properly.
- Backfilling should be done layer by layer. Each layer shouldn't exceed 6 inch
thickness. And each layer should be compacted to maximum dry density of soil.
Check those are being done properly.
- Ensure that the excavation area is extended beyond the foundation of
buildings for easy circulation of movement during work execution.
- Cleaning of foundation bed: Check that loose and displaced materials are
cleaned from the foundation bed.
Teh Wei Hong 0323743 12
Construction process of reinforced concrete pad footings
1. The position of footings are set out according to the plan dimensions
2. Cement powder is then used to mark the size of footings
3. The earth was excavated to the required depth and dimensions by using an excavator
4. Hardcore was then placed on top of the excavated earth and it should be used in not less than 150mm thick but no greater than 600mm in selected aggregate. The
hardcore is then compacted down in layers using a plate compactor
5. A formwork is then placed according to the set dimensions
6. Studs are then added to prevent the falling of the formwork.
7. Bracing is then used to hold the formwork in position. This is to ensure that the formwork is able to withstand the horizontal forces of the concrete when it is poured.
8. A lean concrete mixture is then added and levelled. Its purpose is to provide an even surface for the foundation concrete. It is also used to prevent direct contact of
foundation concrete with soil
9. Workers then start to arrange the reinforced concrete bars to form reinforced concrete cages
10. After the reinforced concrete cages are completed, the workers place the reinforced concrete cage into the formwork
11. The reinforced concrete cage is then placed on top of the spacer blocks. The spacer blocks are used to maintain the reinforcement in the proper position. Concrete
spacers can help prevent corrosion, protect them from fire for a certain length of time and help to provide a proper transfer of stresses from concrete to steel rebars.
12. After placing the rebar cages in the formwork, the reinforcements were erected for stump and add more ties to the formwork
13. Eventhough concrete is durable and has a very good compression strength, it has a weak tension strength. As such, reinforcements are used to carry tensile load of
structures
14. A starter bar is tied to the reinforcement to allow the reinforcement of the column to be tied onto the reinforcement steel bars.
15. The position of starter bars were fixed before the concrete was poured into the formwork.
16. Concrete is poured into the formwork and adequate compaction is ensured by using vibrators or self-compacting concrete. The concrete is allowed to cure before
proceeding to the next stage of construction
17. Set, curing and hardening and when the concrete gains sufficient strength, the formwork is dismantled, and thus the reinforced concrete pad footing is completed
Excavation Pour concrete Formwork Add spacer block
Reinforcement
for stump
Add ties for
formwork
Pour concreteSet, curing,
hardening
Add Rebar
Teoh Jun Xiang 0322099 14
4.2 Foundation type and construction process (reference)
4.2.1 Shallow foundation
i. Strip Footing
ii. Pad Footing
Types of pad foundation design
Types Of Strip Footing
The Foundation is the substructure and the bottommost section of a building. It is
constructed halfway or completely below the surface of the ground.
- They spread the load over a larger area at an equal rate so that the burden on
the foundation soil does not exceed the safe bearing capacity.
- Foundations shift the unequal load of the superstructure equally to the sub soil
hence it minimizes the differential settlement that occurs.
- Foundations offer the stability against, voids formed by scouring underground
water and the burrowing animals.
- Foundations prevent the structures from sliding above the sloping ground.
- Foundations offer a leveled and balanced surface for the construction of the
superstructure.
- Transfer load directly on to the hard layer of soil.
- Maximum depth of shallow foundations is 3 meter.
- Provides support for light loads when the soil is in stable condition and with
adequate bearing capacity
Uniformly distributes load
(Load is distributed evenly
along the entire structure)
Mass concrete
for stell columns
Reinforced concrete
with sloping upper
suface
Point loads (Load is
condense at individual
points)
- Strip footing is the most common and
widely used foundation; it is basically a
strip of concrete placed in a long
narrow ditch.
- It usually supports the load bearing
structure or wall without columns and
beams. (e.g.: Brick wall)
- The depth of the foundation is
roughly 1 meter, while the width of the
foundation depends on the condition
of soil and the load. As an example,
the weaker soil requires a wider strip
foundation.
- The thickness of the strips must be at
least 150mm.
- Pad footings are individual or isolated
foundations to support the columns of the
building.
- Pad footings are a form of disseminate
foundation, which is made up by rectangular,
square, or sometimes circular concrete ‘pads’
that support localized single-point loads like
structural columns, groups of columns or framed
structures.
- Pad footings are usually used when the load of
the building is carried by the columns.
- It uses concrete pad at the base with concrete
columns or steel columns attach by captive
bolts.
Mansonry or
concrete wall
R e i n f o r c e d
concrete strip
footing
Function of foundation
P l a i n
reinforced
concrete
S t e p p e d
reinforced
concrete
Saw E Sean 032003 15
ii. Raft Footing iv. Cantilever/ Strap footing
Types Of Raft Footing
Types of cantilever (plan to elevation)
- Raft footing are similar to slab floating on top
of the soil.
- It is usually used on soft natural ground
- It used to cover the whole base area of a
building and extend beyond it; this is to
prevent differential settlement which can
cause foundation failure on a building.
- It supports the walls and acts as floor slab
- The detail of edge of the foundation is
decided by the nature of the load applied on
it.
- A form of concrete apron will extend from
the edge of the foundation to act as
protection from erosion
- Independent footings of two columns are connected by a beam.
- The beam is used to help transfer the weight of the loaded column footing to
adjacent footing.
- The strap beam is not in contact with the soil, and thus does not transfer any pressure
to the soil.
Light load and point loads
Adjoining
wall
Column A
Column B
Column B
Column A
Footing of
wall
Strap
Beam
Strap
Beam
Footing of
Column A
1 2
4 5
3
6
Footing of
Column B
Light loads
Heavy uniform load Heavy loads and heavy
isolated point loads
Saw E Sean 032003 16
i. Pier Foundation (Caisson)
ii. Pile Foundation
End Bearing Pile Friction Pile
- Deep foundations function to transfer the load of the building to a deeper layer of
dense sand and gravel below the soil.
- The depth of the foundation is more than 3 meters
- Deep foundations are used for heavy load when the soil is unstable and
inadequate bearing capacity.
- A pile is fundamentally a long piece of a strong material penetrating into the
ground to act as a steady support for structures built above the ground.
- Piles are used when the soil strata could not handle the heavy load from the
structure.
- Pile foundations may be classified as either End bearing or Friction piles, according
to the manner in which the pile loads are resisted.
- The shafts of the piles act as
columns carrying the loads
through the covering inferior
subsoils to firm strata into which
the pile toe has penetrated.
- This can be rock strata or a layer
of firm sand or crushed stone
which has been compress by the
displacement and vibration
encountered during the driving.
- Any foundation imposed on the ground will
form a pressure which spreads out to form a
pressure bulb.
- If a suitable load bearing strata cannot be
discover at a fitting level, especially in stiff clay
soils, it is possible to use a pile to carry this
pressure bulb to a bottom level where a higher
bearing capacity is found.
- The friction or floating pile is mainly supported
by adhesion or friction action of the soil around
the perimeter of the pile shaft.
- Consists of a cylindrical column of large diameter to sustain and transmit large
super-imposed loads to the firm strata below.
- Often used in the construction of bridge piers & other structures that requires
foundation beneath rivers & other bodies of water.
- Preferred in a location where the top strata consists of decomposed rock overlying
a strata of sound rock.
4.2.2 Deep Foundation
Axial load
Lateral load
Concrete- mis design
can vary based on
several factor
Diameter can vary
widely
Reinforcing Steel
(typically required
by design)
Bell- May be used
or amitted as
desired
Depth can
vary widely
Side
resistance
Bell size varies- No
larger than 3 times
the shaft diameter
at base
Base Resistance
End Bearing Pile Friction Pile
Weak soil
Strong soil or rock
Saw E Sean 032003 17
Types of pile
Displacement piles
Large displacement pile
Precast reinforced concrete piles
The large displacement pile is the pile which is solid and with large x-section area
and hence compress bigger amount of soil under the ground.
For non-displacement pile, a void is form on the ground by excavation. The void is
then filled with concrete. The side of the void can be supported or unsupported
depend on the situation.
Small displacement pile
non- displacement pile
The small displacement pile is the pile with less x-section area and compress or
displaces less amount of soil under the ground.
Eg. RC pile
Eg. Bore pile
Eg. H-pile
- The precast reinforced concrete piles are piles which were
moulded in circular, square, triangular or octagonal form.
- They are casted and cured in a casting yard and then
transported to the site for installation
- They provide high strength and resistance to decay.
- They are heavy, and because of their brittleness and low
tensile strength, extra care in handling and driving is required.
- Cutting of the precast reinforced concrete piles requires the
use of concrete cutter, pneumatic hammers, cutting torches,
etc
Saw E Sean 032003 18
Steel preformed piles
Composite piles
Driven in situ/ Cast-in-Place piles
Type of Steel preformed piles
Piling proccess
For non-displacement pile, a void is form on the ground by excavation. The void is
then filled with concrete. The side of the void can be supported or unsupported
depend on the situation.
- Driven in situ piles are those piles which are cast in place inside the ground.
- The pile shaft is formed by using a steel tube which is either top driven or driven
with an internal drop hammer working on a plug of dry concrete/gravel as in
Frankipiles.
- This method can be used to build the piles up to 610mm.
- Since the cast-in-situ piles is not subjected to handling or driving pressure, it is not
essential to reinforce the pile in ordinary cases or in places where the pile is
completely flooded in the soil. Reinforcements are only provided when the pile
acts as a column and is subjected to inclined forces.
- Cast- in-situ piles can be differentiated into two types. In one the metal shell of
the pile is permanently left in place lining the ground along with the core while in
the other type, the outer shell is withdrawn.
- Composite piles are piles which are made from two different materials that are
driven one over the other, so as to allow them to act together to perform the
function of a single pile.
- One advantage of this type of pile is the ability to adopt of the fine qualities of
both the materials
- They are economical as they utilize the great erosion resistance characteristics of
one material with the cheapness or strength of the other.
H-piles pipe piles screw piles
Saw E Sean 032003 19
Drop Weight
Bore Pile
Step 1
- The crane is used to transport the piles to a particular area that has been
excavated.
- The piles are all delivered cautiously as they are fragile.
Step 2
- The pile is tied up to its lifting lug and is prepared for hammering.
Step 3
- Before the hammering procedure begins, they are all located accordingly to
be driven into the ground
Step 4
- Hammering process started
- The drop hammer is used to drive the pile
- The subsoil around the pile shaft is displaced
- The pile driving to its maximum depth until it cannot be driven
- Bored pile is a cast in situ concrete pile which has to be casted on the
construction site. Contrary to displacement piles, the soil has to be excavated and
the resulting hole will be filled with concrete or a precast concrete pile which will
be dropped into the hole and grouted in. As such, no displacement of soil will
occur.
- Bored piling machine which was used to cast the bored pile has specifically
designed drilling tools, buckets and grabs and the machines are used to remove
the soil and rock.
- Casting of bored piles have to be done by specialised bored piling contractors
- The length, width, depth and style of bored pile foundations depends on the
type of the project and the surrounding environment.
- It produces less vibration and reduces the noise level compare to other piling
system.
- It causes less disruption to adjacent soil
- Bored piles are usually used for tall buildings or huge industrial complexes, in
which a foundation that can carry thousand tons of loads is needed, most
probably in unstable or difficult soil conditions.
1. Dropping weight
2. Explosion
3. Vibration
4. Jacking
Pile driving methods (displacement piles) Non-displacement piles
Crane
Notes :
1. Installation of optional swivels
convert fixed leads to
Cardonic Leads.
2. Semi fixed leads have the
ability to move in the up-down
direction
Mat
Optional 3-ways swivel
Hammer
Drive cap
Lead
pile
Saw E Sean 032003 20
4.0 Foundation
4.1 Foundation type and construction process (from site visit)
Residential houses constructed at Elmina Valley Phase EV1A are 2-storey terrace houses. After conducting our site visit, we’ve learnt that the type of foundation used to
construct the houses are classified as reinforced concrete pad foundations. Pad foundations are individual or isolated foundations which are used to support localised loads
such as columns.
Pad footings are one of the most simple and common types of foundations and they are used when the load of the building is carried by columns which sit on top of square
or rectangular pads of concrete.
1. Photo shows shows the conditions of the earth after
excavation and site formworks were placed
according to the set dimensions
2. Photo indicates that the formwork is
readily constructed and reinforced
concrete cages can be inserted into it.
Studs and bracings which were used to
prevent the falling of the formwork and to
hold the formwork in position can be seen.
3. Photo shows that the reinforced
concrete cages are being inserted
into the formworks.
4. Photo shows that a layer of lean concrete mixture is
added and levelled underneath the reinforced con-
crete cages. Spacer blocks are also visible under-
neath the reinforced concrete cages. Reinforcements
were added on top of the reinforced concrete cages
to create stumps.
Photo shows that the position of the starter bars and
reinforcements were maintained by connecting
additional ties to the formwork.
Photo shows the conditions of the earth after
excavation and site formworks were placed
according to the set dimensions
Photo shows that the foundation is completed and
the formwork is removed. The excavated earth is
awaiting bed fill.
Teoh Jun Xiang 0322099 13
5.0 Super Structure
5.1 Super Structure (from site visit)
5.1.1 Ground Beam
5.1.2 Slabs
- Ground beams are reinforced concrete beams which support walls, joists and other structures near ground level.
- Ground beams are either standing directly upon the ground or supported at both ends by piers.
Ground floor slabs are reinforced concrete blockworks situated on the ground which supports walls. These concrete slabs are a common structural element of modern
buildings. It is normally horizontal and has a smaller thickness if compared to its span. It is usually furnished using a flat and strong surface in reinforced concrete construction.
1. The props/supports are
being erected. The soffit of
beams are being fixed
1. Preparing the site 2. Improve the soil support system
3. Building formwork
4. Install reinforce bar
5. Pouring concrete
6. Consolidation.
7. Finishing.
8. Curing
2. Formwork for the side of
beam are being constructed
3. Steel reinforcements are
placed into the formworks.
4. The formwork was erected
to the side of the beam
complete with struts
The photo shows the ground floor slabs present on site.
Construction process of ground beam on site
Construction process of ground floor slabs on site
Ground floor slab
Tan Yan Jie 033906 21
5.1.3 Beams and columns
Photos above shows the fisrt floor slab in our site
Similar to ground floor slabs, first floor slabs are reinforced concrete blockworks
supporting walls of the first floor of the building. However, they are not
constructed on the ground, but are supported by a series of columns and walls.
The types of first floor slabs found at Elmina Valley Phase EV1A are two way slabs
with beams.
Continuous beams are supported on more than two supports. It is more economical
for any span lengths and they are several beam supports at the bottom.
Simply supported beams are supported freely at the two ends on walls / columns.
Most of the construction process of first floor slabs are the same as ground floor
slabs, which include:
1. Building formwork.
2. Install reinforce bar.
3. Pouring concrete.
4. Consolidation. (Process of uniting)
5. Finishing.
6. Curing
Beams are structures which are rectangular in cross-section that carry the
weight of the floor slab or the roof slab and they transfer all the loads including
its self-weight to the columns or walls.
There are two types of beams found on the 2-storey link houses of Elmina Valley
Phase EV 1A, namely continuous beams and simply supported beams.
Most of the construction process of beams is similar to ground beams.
1. The props/supports are erected.
2. The soffit of beams are fixed.
3. The formwork for the side of beams are constructed
4. Steel reinforcements are placed inside the formworks.
5. The formwork, which is completed with struts, are constructed to the side of beams
6. The concrete was then poured into the formwork.
First floor slab i. Continuous beam
ii. Simply supported beam
The ffigureshows the simply supported beams located at the front façade of the terrace houses.
The areas marked blue are the beams and the areas marked red indicate the location.
The image shows the continuous beam found on site. The horizontal beams (blue) are supported
by a series of columns (red).
Construction process of beams
Beams
Tan Yan Jie 033906 22
Columns
A columns is a vertical structural member that functions to transmit the load from
ceiling/roof slabs and beams, including its self-weight to the foundation. Columns
situated on the ground floor are a continuation of foundations, and, in the case of
Elmina Valley Phase EV 1A, the columns are a continuation of the reinforced
concrete pad footings.
1. During the construction of the reinforced concrete pad footings, reinforcements
were added on top of the reinforced concrete cages to create stumps. Concrete
will be poured into the formwork and the formwork will be removed once the
foundation is completed.
2. Once the ground beams and ground floor slabs are completed, the
reinforcements will be extended to construct the columns.
3. The formworks for the concrete columns are then fixed and concrete will be
poured into the formworks. The formworks will be removed after the concrete has
cured.
5. Concrete will then be poured into the fixed formworks to construct the columns.
Concrete buckets as well as triangular-shaped wooden planes were used to pour
small volumes of concrete into the wooden frames when constructing the
columns.
6. Once the concrete has cured, the formworks will be removed and the columns
are completed.
4. A similar process will take place after the columns on the first floor is completed.
The reinforcements will be extended, and after the beams and first floor slab are
completed, formworks will then be fixed.
The image shows the columns found on site.
Completed columns on the ground floor support
the first floor slab, and the formwork of the
columns on the first floor are also visible.
The image shows the completed ground floor
slab, with the reinforcements before their
extension.
The image shows the extended
reinforcements for the construction of columns
on the first floor. The ground floor columns,
beams and first floor slab are completed.
The image shows the columns found on site.
Completed columns on the ground floor
support the first floor slab, and the formwork
of the columns on the first floor are also
visible.
The image shows workers using
triangular-shaped wooden planes to pour
concrete into the formworks.
The image shows the reinforcements after their
extension.
Tan Yan Jie 033906 22
Walls found in the 2-storey terrace houses of Elmina Valley Phase EV1A can be
categorized as masonry walls, and in specific, brick walls. There are two types of
bricks which are used for the construction of the houses in Elmina Valley Phase
EV1A, namely red clay brick and cement sand bricks.
- Sime Darby Development’s rules and regulations states that the party walls of
residential houses are to be constructed out of red clay bricks. As such, party walls
of the 2-storey terrace houses were built using red clay bricks.
- The bricks were laid using the English Bond method.
- Cement sand brick is used to construct both internal and external walls of the
2-storey terrace houses of Elmina Valley Phase EV 1A.
- Red clay bricks provide thermal & acoustic insulation .
- Red clay bricks do not require any maintenance cost.
- The high compressive strength of fired clay bricks has been exploited for millennia
to build structures ranging from single-storey huts to massive public buildings and
enormous bridges and viaducts.
- The cost of red clay bricks brick is higher compare to other bricks like cement sand
brick or concrete brick.
The photo shows the red clay brick wall found on site.
The photo shows the cement sand brick wall found on site.
Advantages of Red clay brick wall
- The cost of cement sand bricks are lower compared to red clay bricks as they can
be easily made in a short period of time.
- Cement sand bricks provide good sound insulation.
Advantages of Cement sand brick wall
Disadvantages of Red clay brick wall
- Cement sand bricks are not fire proof bricks and it cannot withstand high
temperature. The bricks will crack if they come in contact with high temperature
like fire.
- Cement sand bricks are also much heavier than red clay brick.
Disadvantages of Red clay brick wall
5.1.4 Wall
i. Red clay brick wall
ii. Cement sand brick wall
Tan Yan Jie 033906 22
The staircase found at the 2-storey terrace houses of Elmina Valley Phase EV 1A
can be classified as concrete straight staircase.
- The run of the steps was then measured by finding the distance between the
frontmost and backmost part of the stairs.
- The width of the stairs was measured by calculating the distance between the
leftmost and rightmost bounds of the planned steps of the stairs.
2. Building and Assembling Formwork:
- The formwork was made by using plywood or framing timber. The side forms are
cut according to the tread and riser calculations.
3. Reinforcement
- Reinforcement bars are carefully bent at the necessary height and length and
positioned into the formwork.
4. Preparing Concrete:
- Sufficient and well mixed mortar was prepared using portable cement mixer.
5. Pouring concrete:
- The process started from the bottom and the concrete was poured one step at
a time. The mortars are spreaded evenly and spade was used to remove the
trapped air bubbles.
1. Measure the dimensions of your stairs:
- Firstly, the total rise of the stairs, which can be found
by measuring the total height from the planned
base to the higher level/floor, was measured.
The images above shows the timber formworks which were fixed for the construction of the staircase.
5.1.5 Staircase
Construction process of staircase on site
Joiats
Decking
Wall
string
Riser board
Riser cleat
Tan Yan Jie 033906 23
6. Add finishing:
- A simple wood float was used to clean and smoothen the surface of the mortar.
7. Curing:
- The steps were sprayed with curing compound and covered with burlap. Once
the concrete has hardened for a week, the plywood formwork was then be
removed.
1. Ground Beam 2. Ground Floor Slab
3. Column 4. First Floor Beam
5. First Floor Slab 6. First Floor Columns
7. Roof Beams 8. Walls
9. Staircase
8. Installing the handrails:
- The stair railings were positioned onto the staircase at the location in which they
will be installed.
- The position of the railings were marked
- Pilot holes were drilled into the staircase on the marks made.
- The railings were placed into the pilot holes.
- Cement was then poured into the holes to fix the handrails.
The image shows the staircase handrails which were installed on site.
5.1.6 Process of superstructure construction on site:
Tan Yan Jie 033906 24
5.2 Super Structure (References)
5.2.2 Ground Beam
5.2.2 Slabs
- Ground beams are reinforced concrete beams which support walls, joists and
other structures near ground level.
- Ground beams are either standing directly upon the ground or supported at
both ends by piers.
Concrete slabs are a common structural element of modern buildings. It is
normally horizontal and has a smaller thickness if compared to its span. It is usually
furnished using a flat and strong surface in reinforced concrete construction.
1. Erect the props/supports
2. Fix the soffit of beam
3. Construct formwork for the side of beam
4. Place the steel reinforcement
5. Erect the formwork to side of beam complete with struts
6. Pour the concrete into the formwork.
1. One-way slab with beams
Drop Panel
Column
Column
Capital
2. Two-way slab with beams
The image shows the reinforcement
bars used to construct ground beams
The image shows completed ground beams
at a construction site
Types of concrete slabs
Flat plate slabs are basically slabs supported by the columns without
the help of beams or capitals or drop panels.
Advantages of flat plate slabs
- Can be constructed quickly.
- It is flexible in arranging the columns and
partitions.
- Provide little obstruction to light.
- High resistance of fire.
- Use in multi-storey reinforced concrete
Classification of Two way slabs:
1. Addition of beams between columns to make two way slabs stronger.
2. Thickening the slabs around the columns.
3. Flaring the columns under the slabs.
Construction process of slab:
1. Preparing the site.
2. Improve the soil support system.
3. Building formwork.
4. Install reinforce bar.
5. Pouring concrete.
6. Consolidation.
7. Finishing.
8. Curing
Flat slab with
column capital
Plain flat plate slab
Flat slab with
column capital
and drop panel
3. Flat Plate Slab
Flat plate slab with column
capital and drop panel
5.2.3 Beams and columns
Beams
Types of beams
- Beam are the horizontal members of structure and they function to carry loads.
- Beams are rectangular in cross-section.
- Beams carry the floor slabs or the roof slabs and they transfer all the loads
including its self-weight to the columns or walls.
Construction process of beam
1. Fix the reinforcement bar for concrete beam.
i. Simply Supported Beam: It is
supported freely at the two ends on
walls / columns
i. Steel columns ii. Timber columns iii. Concrete columns
iv. Cantilever Beam: It is fixed in a wall
or column at one end and the other
end is free. It has tension zone at the
top side and compression zone at the
bottom side.
iii. Continuous Beam: It is supported
on more than two supports. It is more
economical for any span lengths
v. Overhanging Beam: Its end extends beyond the wall or column support
ii. Fixed Beam: Both ends of the beam
are rigidly fixed into the supports
Wall
Wall
Wall Overhang
Cantilever Beam
Overhanging Beam
Tension Side
Compression Side
Wall
Wall
Stirrups
Fixed Beam
Effective Span
Continuous Beam
Clear Span
2. Fix the formwork for the concrete beam
3. Pour concrete and wait it to be cured then remove the formwork
Columns
A vertical structural member that functions to transmit the load from ceiling/roof
slabs and beams, including its self-weight to the foundation.
Types of fail modes of columns
- A wall is a structure that defines an area, carries a load, or provides shelter or
security.
- They are part of the 3 planes in architecture (along with 2 other planes, which
are the overhead (roof) plane and the base (floor) plane that defines the 3
dimensional volume of mass and space.
- The purpose of walls in buildings are to support roofs, floors and ceilings, enclose
a space as part of the building envelope, to give buildings their form along with
roofs and to provide shelter and security.
Function of walls
- Thermal Insulation
- To provide protection from natural elements such as weather and animal threats
- To divide and separate the areas within the building to create interior spaces.
- Act as sound barriers
- As fire walls to attenuate the spread of fire from one building unit to another.
- To improve the building appearance.
- To provide privacy
Strength and stability of walls
Resistance to:
- Stresses set up by its own weight
- Superimposed loads
- Lateral pressure (for example, wind)
- Overturning by lateral force
- Buckling caused by excessive slenderness
i. Long Column or Slender:
Type of column that fails
by elastic buckling,
where it occurs at
compressive stresses
within the elastic ranges
called long column.
ii. Short Column: A
very stocky column
which will not fail by
elastic buckling. It will
crush and squash due
to general yielding
and compressive
stresses
Intermediate columns:
It will fail by inelastic
buckling when a
localized yielding
occurs. This will be
initiated at some point
of weakness and
crookedness.
Construction process of concrete columns
1. Fix the reinforcement
bar for the concrete
column.
2. Fix the formwork
for the concrete
column.
3. Pour concrete
and wait for it to be
cured then remove
the formwork.
5.2.3 Walls
Types of walls
- Load bearing / Non Load Bearing
- External / Internal
Materials of walls
A. Concrete Walls
B. Masonry Walls
C. Dry Walls
D. Glass Walls
E. Curtain Wall SystemLoad bearing walls carry and distribute the load of a building from roof and floor
from above (and lateral load) to the structures or foundations situated below the
building.
A load bearing wall is part of the structure of the building as it holds the building
up. They are usually made of concrete, brick or block, hard materials which have
to stand the test of time and heavy weights.
- Pre Cast Concrete Wall
- Retaining Wall
- Masonry Wall
- Pre Panelized Load Bearing Metal Stud Walls
- Engineering Brick Wall (115mm, 225mm)
- Stone Wall
As the height of the building increases, required thickness of walls and resulting
stress on foundation will also increase and cause it to be uneconomical.
Buildings with cast-in-situ reinforced concrete shear walls are widespread in
many earthquake-prone countries and regions. Shear wall buildings are
usually regular in plan and in elevation and shear walls are the main vertical
structural elements of the buildings with a dual role of resisting both the gravity
and lateral loads. Wall thickness varies from 140 mm to 500 mm, depending on
the number of stories, building age, and thermal insulation.
Reinforcement requirements are based on building code requirements
specific for each country. In general, the wall reinforcement consists of two
layers of distributed reinforce requirements.
Characteristics
- Usually used as load bearing walls
- Texture and appearance can be controlled by the use of formworks admixtures
and additives formworks, admixtures and additives
- Often used in high-rise buildings in Malaysia
- Often used in government projects in Malaysia, as part of the industrialized
building system (IBS)
- Offers greater speed of construction and control of quality
i. Cast in-situ reinforced concrete shear wall systems
ii. Pre-cast concrete wall systems
A non-load bearing wall is only a partition that divides the various spaces of a
building to create rooms. These walls do not carry any structural load except for
their self-weights and wind load which acts on the structure (for example,
column, slab or beam).
- Hollow Concrete Block Wall
- Façade Brick Wall
- Hollow Brick Wall
- Brick Wall (115mm, 225mm)
Load bearing wall
A. Concrete walls
i. Cast in-situ shear wall systemsNon-Load bearing wall
Load Bearing WallsLoad Bearing Walls
Non-Load
Bearing Walls
Non-Load
Bearing Walls
Precast concrete wall systems can be comprised of a variety of shapes, and wall
types. Typically, precast concrete wall systems fall into three basic categories:
solid, sandwich and thin-shell. These can be penalized and erected in either a
horizontal or vertical position and used on all types of structures from residential to
commercial, institutional to industrial. Wall panels can be designed as
nonloadbearing or loadbearing, carrying floor and roof loads, as well as lateral
loads.
Construction process of cast in-situ reinforced concrete shear wall systems using
timber formworks
Advantage of using shear wall method of construction
- Speed in erecting and dismantling forms
- Good appearance
- Greater control of accuracy and workmanship
- Creates a smooth, high quality finish capable of receiving direct decoration
with the minimum of preparation
- Tornadoes, hurricanes and earthquake resistance
Solid Walls
Solid wall panel simply refers to walls being made of solid concrete as opposed to
including integral insulation. These wall systems require some form of insulation
and an interior wall/finishing system to complete the building enclosures.
Sandwich Walls
Insulated sandwich wall panels can be strictly
architectural, strictly structural, or a combination of
both. The difference between typical panels and
insulated sandwich wall panels is that the latter are cast
with rigid insulation "sandwiched" between two layers, or
wythes, of concrete. The insulation thickness can vary to
create the desired thermal insulating property ("R"
value) for the wall.
The structural behavior is either:
- Composite in which the wythes are connected using ties through the insulation
that fully transfer loads. The structural performance is then based on the full
thickness of the panel
- Non-Composite in which the wythes are connected using ties through the
insulation, which limits performance to the individual capacities of each wythe.
Thin-Shell and GFRC
Thin-shell wall panels consist of a thin, outer-wythe of
concrete typically ranging between 1.5 and 3 inches in
thickness. This is connected to a "back-up" system, usually
constructed of steel framing or studs, or sometimes
concrete. The back-up system is what connects the wall
panel to the structural system of the building and often
provides the furring for interior finishes, such as drywall to
be attached. Many of these systems can also
incorporate a layer of rigid insulation between the
exterior wythe of concrete and the back-up system.
Benefits of Precast Concrete Wall Panels
- The sandwich construction technique used with the precast concrete walls
provides increased stability and improved sound insulation, as well as greater
protection from potential hazards such as fires.
- Precast concrete panels also provide energy-saving advantages. Because the
concrete wall panels are separated by a layer of thermal insulation, the precast
concrete wall panel system results in enhanced energy performance, which can
help to lower overall costs.
- Superior strength and durability
- Provides excellent protection against impacts from explosions, vehicles and
projectiles
- Ease of installation
1. Preparation of
timber formwork
2. Completion of
steel bars and
erection of formwork
to required size
3. Closing of formwork,
concrete is poured
and left to cure
4. Completion
ii. Pre-cast concrete wall systems
1. Weld Plates
The most common method of
attachment of precast members is by
use of steel weld plates. Typically, the
precast members have embedded
plates that can be used as welding
surfaces for loose connecting plates
or angles
2. Rebar and Grout
Used typically with slabs, reinforcing
bars are spliced into slabs and grouted
in place.
B. Mansory Walls
- Stone masonry
- Clay/cement brick walls
- Concrete/ cement block walls
Characteristics
- One of the oldest materials, and the most common material for walls
construction in Malaysia
- Durable, good sound and fire insulation properties as well as thermal insulation
- Offers great flexibility in form and appearance.
Non- Modular bricks- actual dimensions
Modular bricks- Nominal dimensions
Common types of bricks/ blocks:
Types of bricks
Methods of Attachment of Precast Concrete Members:
Three-inch
Standard Modular Engineer
Double
Economy 12 or
Jumbo utility
Triple SCR
6’’ Norwegian 6’’ Jumbo 8’’ Jumbo
Roman Norman Norwegian
Economy 8 or
Jumbo closure
Standard Oversize
Embedded plate
Embedded plate
Loose plat field-welded to Em
Grout fill
Rebar
Precent Slab
Beam or Wall
Clay Brick Smooth surface
facing brick Cement sand brick
Calcium silicate brick Concrete block
Autoclaved aerated
concrete block
Terminology and bonds Brick jointings
Construction of bricks wall
Brick on edge (shiner, bull stretcher)
Soldier- A brick laid vertically with the long narrow side of the brick exposed.
Sailor- A brick laid vertically with the broad face of the brick exposed
Step 1: Preparing the Wall
1. Purchase the right amount of bricks.
Step 2: Building The First Row
1. Lay your first row of bricks in the
foundation for a dry run
2. Dig out a trench for your foundation.
Flush Bucket Handle Weather Struck Recessed Weather Struck
and cut
3. Drive level wooden stakes into your
trench.
5. Make your guideposts, or gauging
rods
2. Clamp a string on your first guideline.
4. Mix and pour concrete up to the top
of the guideposts.
3. Lay the first 1/2 inch of mortar along
the base of the foundation.
4. Press the first brick into the mortar 5. Lay mortar down for the next 2-3
bricks.
9. Keep adding bricks until the row is
finished.
Step 3: Building Additional Rows
1. Move your guideline up to the next
marker.
Step 4: Finishing the Wall
1. Fill in any missing patches of mortar
along the wall.
2. Cut a brick in half with a firm tap
from the pointed end of a hammer
3. Start the second row with 1/2 a brick
on both ends.
4. Mortar and place one full brick on top
of your ends.
8. Scrape away any excess mortar as
your work
7. Press the brick lightly into the 1/2" of mortar you've laid down so that it is level with
the first brick
6. Butter the end of the next brick with
mortar and press it into place.
5. Fill in the entire bottom row. 6. Continue building your wall from
the ends inward.
2. Use a brick jointer to indent the mortar
professionally
Plaster and skim coat
- Skim coating is the process of applying a layer of muddy plaster compound to
rough or damaged ceilings and walls to either smooth or repair them.
- Plastering should be done after curing on the brick masonry.
- Cement and fine aggregate mix ratio should be 1:6 (1 Cement: 6 fine
aggregate) for internal plastering,1:4 for externa lplastering.
- Never do a plastering beyond 12 or 15mm thickness on a brickwall.
Stiffeners
- Stiffeners are used to provide lateral support to masonry walls.
- Vertical stiffener- per 3 m height.
- Horizontal stiffener- per 4m length/ width
phase 1
Diagonal
view Cross walls
Measuring
T-square Keyhole saw
Sequential core filling with reinforcing
phase 2 phase 3
Stiffener can be
connected to
the floor above
or stand alone
Wall stiffener- Open-ended blocks used to build around stiffener
C. Dry wall/ stud framing system
Partition board wall system
Drywall is a construction material used to create walls and ceilings. It's also used to
create many design features, including eaves, arches and other architectural
specialties. It's quick and easy to install, incredibly durable, and requires only
simple repairs when damaged. In the commercial building world, drywall is used
to wrap columns to conceal steel beams and is an easy and inexpensive way to
top off masonry walls above ceilings. Drywall is also used to add fire resistance at
walls and ceilings, containing the spread of fire so people can evacuate safely
during an emergency.
Characteristics
1. Non-load bearing
2. Relatively simple and easy to be installed
3. Good light and fire insulating properties as it is an ablative material
4. Good sound and thermal insulation properties. The sound and thermal
insulation properties can be improved by the addition of mineral fibre insulation
5. Type of partition board and stud backing system can be varied to suit
different requirements
6. Susceptible to water damage and moulding
7. Susceptible to damage by external forces as it is hollow
Installation process of drywall
1. Estimate the number of drywall sheets required to cover the wall.
2. Cutting
Screw
5. Wait for 24 hours for the mud to dry to begin sanding.
6. Use a pole sander and 120-grit sandpaper to lightly sand the mud you applied
earlier. You've finished sanding when you can't see any tape or mud bulges on
the walls' surface, and when a level applied to the wall shows it is smooth and
even. Wear a mask and goggles while sanding to prevent damage to eyes and
lungs.
3. Hanging
4. Finishing
Framing system of drywall
Start attaching your drywall sheets to the wood or
metal studs used to frame your space. You should
hang sheets horizontally when working with wood
studs, while metal studs work better with vertical
installations. This is because wood studs are more
likely to warp and deflect over time. Hanging the
sheet horizontally allows each sheet to be in
contact with more studs and helps minimize
deflection. Generally speaking, it can be more
difficult to screw into metal studs. When using
wood studs, you should also apply a drywall
adhesive to the face of the studs before hanging
your drywall in order to further minimize
deflection. To attach the drywall to the studs, use
a screw gun and drywall screws, making sure you
hit the studs. Screws should be placed about
every four inches.
Finally, you'll tape, sand and finish the drywall. This
involves applying three layers of mud, one layer
of drywall tape, and a whole lot of sandpaper.
First, use a 6-inch finishing knife to spread joint
compound along each seam. This first layer is
called the tape coat, and should be about four
inches wide, centered on the joints in your drywall
sheets. Next, apply drywall tape along the joints.
The mud you applied will hold it in place. Your
second coat of mud is called your block coat.
Use your 6-inch finish knife to apply a second coat
of mud on top of your drywall tape. Use just
enough to seal the drywall tape in place. The final
coat is called the skim coat. A 10-or 12-inch knife
should be used to apply a third coat of mud. Take
your time on this coat to spread the mud thinly
away from the seams to provide a smooth, level
surface.
Field
Double or single
op plate
Wood studs
Bottom plate
Vertical kneel
Horizontal
kneel
Floor kneel
Roof kneel
Skirting line
Perimeter of gypsum board
Horizontally applied gypsum
board shows paper bound
edges at right angles to
framing members. field,
perimeter, edged, ends and
joints are indicated
Insallation of partition
A structural glass wall is made up of tempered glass
sheets suspended from special clamps, or spider
fittings. These fittings are stabilized against wind
pressure by perpendicular stiffeners and/ or cables
and carry the loads of the glass. Structural glass walls
overcome the restrictions of conventional frames to
provide the ultimate all glass façade.
Structural Glass Walls
Unitized curtain wall systems
Spider fittings
Structural glass assemblies Glass Fin
D. Glass wall
Characteristics
1. Allows transparency yet retains the strengths of typical walls
2. Able to act as walls for large spans of façade areas
3. High cost compared to other traditional materials
4. Requires specialist consultants and contractors
5. Durable to weathering conditions
6. Strong but brittle surface
E. Glass curtain walling
Curtain walls are classified by their method of fabrication and installation in two
categories: stick built and unitized systems.
Cantilever
top and
bottom
Movement due to wind load
Cantilever
top only
Propped
Cantilever
Pinjointed
stabalizer
Balance
beam
Stick systems consist of the vertical curtain wall frame
(mullions), horizontal curtain wall frames (transoms),
glass or opaque panels that are installed and
connected piece by piece. These parts are usually
fabricated and shipped to the job site for installation.
It has the advantage that it is economical and the
construction sequence is flexible. Disadvantages are
the lengthy installation time and high dependence
on site workmanship to ensure acceptable quality.
Composite panel walling system
There are a wide range of possible infill panels for curtain wall systems, including:
- Vision glass (which may be double or triple glazed, may include low-e coatings,
reflective coatings and so on).
- Spandrel (non-vision) glass.
- Aluminium or other metals.
- Stone veneer.
- Fibre-reinforced plastic (FRP).
- Louvres or vents.
Stick systems
1. Straight staircase
Composite panel walling system
Panels are often composites, with the facing materials bonded to, or 'sandwiching'
insulation. Frame and panel designs are very complex, as they need to perform
multiple functions, such as:
- Transferring loads back to the primary structure of the building.
- Providing thermal insulation and avoiding cold bridging and condensation.
- Providing fire, smoke and acoustic separation. This is particularly difficult at joints
between the curtain wall system and interior walls and floors.
- Creating a barrier to water penetration.
- Accommodating differential movement and deflection.
- Preventing panels from falling out of the frame.
- Allowing for opening windows.
- Preventing the accumulation of dirt.
Construction process of concrete straight staircase:
1. Measure the dimensions of your stairs:
- Firstly, the total rise of the stairs, which can be found by measuring the total height
from the planned base to the higher level/floor, has to be measured
- The run of the steps was then measured by finding the distance between the
frontmost and backmost part of the stairs.
- The width of the stairs was measured by calculating the distance between the
leftmost and rightmost bounds of the planned steps of the stairs.
Aluminium framing
Aluminium framing is used for the vast majority of
curtain walling applications, primarily for its excellent
strength to weight ratio and its ability to be extruded
in complex shapes. Aluminium is 66% lighter than
steel, as such, it is also far less susceptible to brittle
fractures.
Types of staircase
A staircase is a system of steps by which people and objects may pass from one
level of a building to another.
5.2.4 Staircase
4. Double quarter
landing staircase
2. Quarter landing staircase 3. Half landing staircase
5. Winder landing staircase 6. Double winder
landing staircase
7. Spiral sraircase 5. Circular staircase
2. Building and Assembling Formwork:
- The formwork can be made by using plywood or framing timber. The side forms
are cut according to the tread and riser calculations.
3. Reinforcement
- Reinforcement bars are carefully bent at the necessary height and length and
positioned into the formwork.
4. Preparing Concrete:
- Produce sufficient and well mixed mortar with portable cement mixer.
5. Pouring concrete:
• Start from the bottom and pour one step at a time. Make sure the mortars are
spreaded evenly. A spade should be used to remove the trapped air bubbles.
6. Add finishing:
- Use a simple wood float to clean and smooth the surface of the mortar.
7. Curing:
- Spray the steps with curing compound and cover it with burlap. Once the
concrete has hardened for a week, the plywood formwork can then be removed.
8. Installing the handrails:
- The stair railings were positioned onto the staircase at the location in which they
will be installed.
- The position of the railings were marked
- Pilot holes were drilled into the staircase on the marks made.
- The railings were placed into the pilot holes.
- Cement was then poured into the holes to fix the handrails.
Joiats
Decking
Wall
string
Riser board
Riser cleat
6.0 Doors and Windows
6.1 Doors
- Doors and doorways provide access from the outside into the interior of a
building as well as to act as a passage between interior spaces.
- Doorways should be large enough for ease of movement and to accommodate
movement of furnishings and equipment.
- All doors should be evaluated for their ease of operation, durability under
anticipated frequency of use, security provisions as well as light, ventilation and
views that are offered by them.
- Door frames used in the construction of the 2-storey terrace houses of Elmina
Valley Phase EV1A are generally aluminium door frames
The photo shows the aluminium door frames which were used during the construction of the
2-storey terrace houses of Elmina Valley Phase EV1A.
Types of doors
Trim/Casing
Jamb
Weather Strip
Lock Site
Mid Rail
Center Stile
Strike Plate
Lock Set
Threshold
Top Rail
Six Panels
Single Side Panel
Right-Hand Swing
Single Side Panel
Left-Hand Swing Two Side Panels Double Door
One side Fixed
Flush Four Panels
Half Moon
Two Panels
Half Lite
Two Panel
2/3 Lite Full Lite
Hinge Stile
Panel
Lock Rail
Bottom Rail
Sill
Door Bottom Shoe
Figure above shows components of door
Figure above shows components of door knob
Doorjamb
Door-
jambShims
Shims
Frame
Weather Seal
Locker Rolleer
Receiver
Closing Side
Sash
Pane
Handle
Bottom Bead
Slider
Double Hung Twin Double Hung Picture with Double hung
Hinge
Hing Side
Glazing Gasket
Head
Advantages of aluminium door frames
- Slim profile
- Durable
- Narrow sight lines
- Low maintenance
- Light yet strong
- Compared with vinyl, fiberglass and wood frames, aluminium conducts heat
and cold the least well
- Windows are key architectural elements that provide a bridge
between the inside and the outside by:
i. Admitting light
ii. Controlling ventilation
iii. Influencing thermal comfort.
- As such, the form and position of windows are key aspects of internal
design.
1. The location of the
doors are measured
and marked. A few
layers of bricks are then
placed beside the
markings.
4. For timber door frame: The
wall is plastered and the main
frame is installed. For aluminum
door frame: Mortar is filled in the
space between the gap and
masonry wall before the wall is
plastered.
2. The door frame is inserted
into the marked position.
The jamb of the door is
nailed into the masonry
wall for support. Bricks are
then continued to be laid.
3. Pre-cast concrete
lintel is bind with mortar
and placed on top of
the door head. Lintel is
constructed so that no
extra vertical force is
exerted on the door
frame.
6. Casing is installed to ensure cracks and flaws in the joining are hidden.
Construction process of aluminium door frames
Trimmer
stud
Trimmer
stud
5. Shims are places on the hinges' side to form a
continuous gap in between. The hinge is then
nailed into the side door jamb.
6.2 Windows
Figure above shows components of Windows
Types of Windows
Bay Liftout Slider 2 Lite Casement
Casement
Fixed window
over awning
Hopper Awning
Fixed Over Awning
i. Up hang windows
3 Liftout Slider with colonial Inserts
There are two types of windows available in the 2-storey terrace
houses of Elmina Valley Phase EV 1A, namely up hang windows and
casement windows.
- Up hang windows are hinged at the top and swing
outward from the bottom. They glide open and shut with
the turn of one easy-to-reach handle.
- Up hang windows are often placed above or below
other windows to add architectural interest, light and
ventilation to a room while keeping the rain out.
- Up hang windows are often used in combination with
large stationary windows to provide a constant views and
air flow.
Advantages of up hang windows:
- Versatility: Due to the variety of styling options and the
ability to be installed higher than other types of windows,
up hang windows provide greater flexibility in designing
the décor of a building.
- Weather-proof: Up hang windows open out from the top
and provide protection from the rain when opened. They
allows little to no leakage from rain when the windows are
opened, and as such the user can enjoy fresh air even
when the weather is bad.
- Privacy: Up hang windows can be installed higher than
various types of windows. As such, they are able to
provide natural light and ventilation without
compromising the user’s privacy.
Types of Windows
Bow
Garden
Eyebrow Circletop Quater Arch
Octagon Full Circle
1. Position the
sub-frame using the
aluminium plate
2. Check the
alignment of the
sub-frame
3. Anchor the
sub-frame into the
rough opening using
nail
4. Seal the anchor head
and the joints with the wall
with protection tape on the
frame
5. Placing main frame
on the sub-frame. Use
millet to knock the
finishing frame
6. Finish the wall with
sealant.
Construction process of windows
Casement windows are windows that are hinged on the side and the sash opens horizontally opposite the hinge. This type of
window allows for full ventilation from top to bottom of the window opening and the extended sash can catch the breeze and
direct it into the house for better air flow.
Advantages:
- Wide openings: Casement windows open completely, allowing a nice breeze into your home
- Superior Security: Locks on casement windows are embedded into the frame. This provides enhanced safety and security.
-Easy operation: Casement windows open easily with a crank, making them ideal for hard to reach areas.
ii. Casement windows
Photo above shows the location of casement windows on siteFigure above show ilustration of casement windows
Summary
In conclusion, this project really played its part in allowing students to experience,
document and analyse the construction process through their own eyes. Through
this project, students were able to conduct their own site visit to their chosen
construction site and to fully understand the sequence and coordination of
construction at site. The site visit conducted proved to be an important learning
process for architecture students as practical site visits conducted were able to
allow students to have a clearer understanding of the topics which were covered in
lectures. The exposure of students to construction methods and technologies in
relation to their respective site contexts were able to allow students to broaden their
horizons and to demonstrate their understanding and knowledge of the construction
process in a systematic and professional manner.
For our group, we conducted two site visits respectively. We conducted our first site
visit to Elmina Valley Phase EV1A. Residential buildings built on site are 2-storey
terrace houses and we were able to observe, experience and document several
aspects of the construction process on site, namely site and safety, plants and
machineries, site layout, foundation, superstructures, doors and windows as well as
roofs. Through our site visit, we’ve learnt that site and safety plays a huge role in the
construction site as every safety measures were carried out to ensure the workers’
safety on site at all times. Moreover, we were able to personally observe and
document the different plants and machineries used to construct the 2 storey
terrace houses on site. Plants and machineries were further divided into various
categories, namely earthmoving and excavating equipment, lifting and erecting
equipment, mixing and grading equipment, transporting vehicles, construction
equipment and many more. Moreover, we’ve also learned that a well-planned site
layout is able to increase the productivity of the construction process. A well
planned and organised construction site like Elmina Valley Phase EV1A is able to
ensure a smooth transition from one location to another within the site, avoiding
unnecessary injuries and directing workers to their respective working zones
efficiently. The type of foundation available on site is shallow foundation, and
specifically reinforced concrete pad footings. In addition to that, after conducting
our site visit, we were able to understand the complete construction process for the
superstructures. After the foundations were constructed, the reinforcements will be
extended for the construction of columns. Ground beams will be constructed on top
of foundations and this process will be flowed by the construction of ground floor
slabs. Columns and beams will later be constructed and after the framework of the
entire building is completed, walls will be erected to enclose the spaces. The walls
found on site are masonry walls, namely red clay brick walls and cement sand brick
walls. Roofs present on site are generally gable roofs and they are easily recognized
by their triangular shapes.
In addition to that, we’ve conducted our second site visit to Lot 120, Mukim Lunas,
Daerah Kulim, Kedah Darulaman to obtain an understanding of the process of
setting out and earth works. As Lot 120, Mukim Lunas, Daerah Kulim, Kedah
Darulaman is a newly developed construction process, we had the privilege of
accessing the site to document the process of setting out and earth works.
References:
Books:
Allen, E., & Allen, E. (1985). Instructor's manual and slide script to accompany Fundamentals of building construction: Materials and methods. New York: Wiley.
Allen, E., & Iano, J. (1985). The professional handbook of building construction. New York: Wiley.
Allen, E., & Iano, J. (2004). Fundamentals of building construction: Materials and methods. Hoboken, NJ: J. Wiley & Sons.
Allen, E., Iano, J., & Allen, E. (2004). Exercises in building construction: Forty-five homework and laboratory assignments to accompany Fundamentals of building construction. Hoboken, NJ:
John Wiley & Sons.
Allen, E., Thallon, R., & Iano, J. (2002). Fundamentals of residential construction. New York: J. Wiley.
Barry, R. (1970). The construction of buildings. Vol. 2. Crosby Lockwood.
Barry, R. (1981). The construction of buildings Vol. 3: Single storey frames, shells and lightweight coverings. London: Granada.
Barry, R. (1996). The Construction of buildings. Vol. 4. London: Blackwell.
Barry, R. (n.d.). The construction of buildings: Volume 1. London : Granada, 1980.
Best, R., & Valence, G. D. (2002). Design and construction: Building in value. Oxford: Butterworth-Heinemann.
Bisharat, K. A. (2004). Construction graphics: A practical guide to interpreting working drawings. Hoboken, NJ: J. Wiley & Sons.
Bulkeley, B., & Hart, B. (2005). Basic building & construction skills. Frenchs Forest, N.S.W.: Pearson Education Australia.
Chew, M. Y. (2001). Construction technology for tall buildings. Singapore: Singapore University Press, National University of Singapore.
Ching, F. D., & Adams, C. (2001). Building construction illustrated. New York: Wiley.
Chudley, R., & Greeno, R. (1999). Construction technology. Harlow: Longman.
Chudley, R., & Greeno, R. (2001). Building construction handbook. Woburn, MA: Butterworth Architecture.
Chudley, R., & Greeno, R. (2008). Building construction handbook. Oxford: Butterworth-Heinemann.
Chudley, R., Greeno, R., & Chudley, R. (1999). Advanced construction technology. Harlow: Longman.
Construction technology. (1999). Alva: Northwest Technology Center.
Cooke, B. (2011). Construction practice. Chichester, West Sussex: Wiley-Blackwell.
Cooke, R. (2007). Building in the 21st century. Oxford, UK: Blackwell Pub.
Emmitt, S., & Gorse, C. A. (2010). Barry's introduction to construction of buildings. Chichester, U.K.: Wiley-Blackwell Pub.
Emmitt, S., Gorse, C. A., & Barry, R. (2005). Barry's introduction to construction of buildings. Oxford: Blackwell Pub.
Greeno, R. (2007). Introduction to building. Harlow: Pearson Prentice Hall.
Greeno, R. (2007). Mitchell's introduction to building.
Grundy, J. T. (n.d.). Construction technology. London: Edward Arnold.
Heavy equipment operations. (2005). Upper Saddle River, NJ.: Pearson Prentice Hall.
Heavy equipment operations. (2012). Upper Saddle River, NJ: Pearson Prentice Hall.
Levy, S. M. (2010). Construction process planning and management: An owner's guide to successful projects. Amsterdam: Butterworth-Heinemann.
Mehta, M. (1997). The principles of building construction. Upper Saddle River, NJ: Prentice Hall.
Millais, M. (2005). Building structures: From concepts to design. London: Spon Press.
Plank, R., Blanc, A., & McEvoy, M. (1993). Architecture and construction in steel. London : Ascot: Spon ; Steel construction institute.
Riley, M., & Cotgrave, A. (2004). Construction technology. Basingstoke: Palgrave Macmillan.
Rounds, J. L., & Segner, R. O. (2011). Construction supervision. Hoboken, NJ: Wiley.
Sarkar, S. K., & Saraswati, S. (2008). Construction technology. New Delhi: Oxford University Press.
Schittich, C., Helfrich, E., Green, P., Söffker, G., & Thrift, P. (1999). Glass construction manual. Basel: Birkhäuser.
Spence, W. P., Kultermann, E., & Spence, W. P. (2011). Construction materials, methods and techniques: Building for a sustainable future. Australia: Delmar, Cengage Learning.
Taranath, B. S. (1988). Structural analysis and design of tall buildings. New York: McGraw-Hill.
Online sources (Websites)
2016. (2014, August 14). Window parts & diagrams. Retrieved October 16, 2016, from http://www.hometips.com/how-it-works/window-parts.html
666, admin_. (2013, July 29). Concrete slab floors. Retrieved October 16, 2016, from http://www.yourhome.gov.au/materials/concrete-slab-floors
A. (2015). Construction process of Pad Footing. Retrieved October 16, 2016, from https://www.youtube.com/watch?v=kMvKAdALKFU
Advantages and Disadvantages of a Flat Concrete Roof | DoItYourself.com. (2012). Retrieved October 16, 2016, from http://www.doityourself.com/stry/advantages-and-disadvantag-
es-of-a-flat-concrete-roof
Application, B. (n.d.). Enclosure. Retrieved October 16, 2016, from http://www.highconcrete.com/products/systems/enclosure/
Building construction details. (2015, December 3). Retrieved October 16, 2016, from http://www.slideshare.net/cocongkening/building-construction-details
By clipping, or turning the point down, the roof becomes more resistant to wind damage. They also provide more space than a traditional hip roof. The higher pitch offers more living space,
while providing better reinforcement. Jerkinhead roofs give architectural interest to any home. (2016). Top 15 Roof Types & Their Pros & Cons - Read Before you Build! - RoofCalc.net - Roofing
Cost Calculator. Retrieved October 16, 2016, from http://www.roofcalc.net/top-15-roof-types-and-their-pros-cons/
By excavating underneath a structure short lengths of pile can be inserted and jacked into the ground using the underside of the existing structure as a reaction. (n.d.). Foundations. Retrieved
October 16, 2016, from http://environment.uwe.ac.uk/geocal/foundations/Fountype.htm
By placing piles directly adjacent to one another, a permanent or temporary retaining wall can be created. These can be closely-spaced contiguous pile walls, or interlocking secant walls,
which depending on the composition of the secondary intermediate piles can be hard/soft, hard/firm or hard/hard secant walls. (n.d.). Designing Buildings Wiki The construction industry knowl-
edge base. Retrieved October 16, 2016, from http://www.designingbuildings.co.uk/wiki/Building_foundations
By Professor Chris Gorse & Ian Dickinson – licensed under the Creative Commons Attribution – Non- Commercial – Share Alike. - ppt download. (n.d.). Advanced Construction Technology By
Professor Chris Gorse & Ian Dickinson – licensed under the Creative Commons Attribution – Non- Commercial – Share. Retrieved October 16, 2016, from http://slideplayer.com/slide/1567015/
Carter, T. (2014, December 5). Column and beam construction. Retrieved October 16, 2016, from http://www.askthebuilder.com/column-and-beam-construction/
Centre for Window and Cladding Technology. (n.d.). Retrieved October 16, 2016, from http://www.cwct.co.uk/design/options.htm
Charlie Robinson, Carpentry Lecturer Follow. (2014). Power point foundations L1. Retrieved October 16, 2016, from http://www.slideshare.net/fccarpentry/power-point-foundations-42264768
Ching, F. D., Mulville, M., & Ching, F. D. (n.d.). European building construction illustrated.
Civil Engineering (Beams,Columns). (2011, June 2). Retrieved October 16, 2016, from http://www.slideshare.net/mbrsalman/civil-engineering-beamscolumns
Clay Tile Roofing. (n.d.). Retrieved October 16, 2016, from http://www.selfhelpandmore.com/building/roofing/types/clay-tile.php
CONCRETE SHEAR WALL CONSTRUCTION. (n.d.). Retrieved October 16, 2016, from http://mitigation.eeri.org/files/concrete_shear_wall.pdf
Concrete slabs. (n.d.). Retrieved October 16, 2016, from https://www.dlsweb.rmit.edu.au/toolbox/buildright/content/bcgbc4010a/04_struct_members/06_concrete_slabs/page_001.htm
Curtain Wall Fundamentals. (2014, December 3). Retrieved October 16, 2016, from http://glassmagazine.com/article/commercial/curtain-wall-fundamentals-1413202
Darshan Bavadiya, Architect Follow. (2015). Foundation. Retrieved October 16, 2016, from http://www.slideshare.net/darshanbavadiya/foundation-51424024
Deakin, E. (n.d.). Underpinning and Pad Foundations - folio. Retrieved October 16, 2016, from https://folio.brighton.ac.uk/user/ed145/technology-report-1
do-it-yourself-help. (2006). How to build a frame for a new window. Retrieved October 16, 2016, from http://www.do-it-yourself-help.com/framing_a_window.html
Floor System. (n.d.). Retrieved October 16, 2016, from https://times.taylors.edu.my/pluginfile.php/2364497/mod_resource/content/1/FLOOR SYSTEM.pdf
Foundations Explained - Homebuilding & Renovating. (2016). Retrieved October 16, 2016, from https://www.homebuilding.co.uk/foundations-explained/
Friedman, D. (n.d.). Building Structural ProblemsInspection, Diagnosis, & Repair of Structural Damage to Buildings. Retrieved October 16, 2016, from http://inspectapedia.com/structure/Building_-
Structures.php
Functional Requirements of Building Elements: WALLS. (n.d.). Retrieved October 16, 2016, from http://www.cityu.edu.hk/CIVCAL/design/frobe/submenus/walls.html
Functions of Slab and Design of Slab. (n.d.). Retrieved October 04, 2016, from http://www.aboutcivil.org/slab-definition-functions-design.html
GEM Building Taxonomy. (n.d.). Retrieved October 16, 2016, from https://www.nexus.globalquakemodel.org/gem-building-taxonomy/overview/glossary/precast-concrete--pc
Ground Beams, Ground works, Foundations, The Micropiling Group, Micropiling Southern, Micro Piling Herts Hertfordshire London. (n.d.). Retrieved October 16, 2016, from http://www.micropiling-
group.com/ground_beams.php
Gutter Protection. (n.d.). Retrieved October 16, 2016, from http://www.gutter-protection.com/gutter-materials.html
H. (2007). How Drywall Works. Retrieved October 16, 2016, from http://home.howstuffworks.com/drywall4.htm
H. (2008). How Concrete Roofs Work. Retrieved September 30, 2016, from http:// home.howstuffworks.com/home-improvement/construction/materials/concreteroofs1.htm
Healy, T. How to build stairs. Retrieved October 16, 2016, from http://www.wikihow.com/Build-Stairs
J. (n.d.). Build a Brick Wall. Retrieved October 16, 2016, from http://www.wikihow.com/Build-a-Brick-Wall
liwei, & profile, V. my complete. (2014, October 1). Beam and slab. Retrieved October 16, 2016, from http://construction-greatopportunity.blogspot.my/2012/03/beam-and-slab.html
Load Bearing Wall: Determining and Removing One. (2016). Retrieved October 16, 2016, from http://www.explodedhome.com/just-taken-load-bearing-wall/
Ltd, P. E. (n.d.). Metro GlassTech - Great ideas in glass. Retrieved October 16, 2016, from http://www.metroglass.co.nz/catalogue/139.aspx
MASONRY WALL SAFETY DURING CONSTRUCTION WORK GUIDE. (n.d.). Retrieved October 16, 2016, from https://www.commerce.wa.gov.au/sites/default/files/atoms/-
files/masonry_wall_safety.pdf
Mohdasrimohdhasim Follow. (2013). Chapter 10 structure construction. Retrieved October 16, 2016, from http://www.slideshare.net/mohdasrimohdhasim/chapter-10-structure-construction
Ochshorn, J. (n.d.). ARCH 2614/5614 Lecture notes. Retrieved October 16, 2016, from https://courses.cit.cornell.edu/arch262/notes/11b.html
OriginalsByEva, B. (2014). Stick Curtain Wall Facade System - Comfortable Home. Retrieved October 16, 2016, from http://comfortablehome.info/1788-stick-curtain-wall-sys-
tem-sanxin-facade-technology-limited
Precast Concrete Methods. (2016). Retrieved October 16, 2016, from http://theconstructor.org/concrete/precast-concrete-methods/422/
PRECAST CONCRETE WALL PANELS. (n.d.). Retrieved October 16, 2016, from http://precast.org/wp-content/uploads/2014/08/Precast-Concrete-Wall-Panel-Presentation.pdf
Precast Construction | FDArchitects. (n.d.). Retrieved October 16, 2016, from http://frontdesk.co.in/precast.html#.V-FU4TUqbWw
PUBLICATIONS, H. S. (2010, March 28). Form and pour a concrete slab. Retrieved October 16, 2016, from http://www.familyhandyman.com/masonry/pouring-concrete/-
form-and-pour-a-concrete-slab/view-all
Rain gutter. (n.d.). Retrieved October 16, 2016, from https://en.wikipedia.org/wiki/Rain_gutter
Roof Shapes. (2016). Retrieved October 16, 2016, from https://www.thisoldhouse.com/ideas/roof-shapes
Shanasri4 Follow. (2012). Foundation design part_1. Retrieved October 16, 2016, from http://www.slideshare.net/shanasri4/foundation-design-part1
Steel design pre 1. (2013, September 13). Retrieved October 16, 2016, from http://www.slideshare.net/5006/steel-design-pre-1
Steel Frame Vs. Timber Frame. (n.d.). Retrieved October 16, 2016, from http://ownerbuilderadvice.com/steel-frame-vs-timber-fram
The advantage of using shear wall method of construction. (n.d.). Retrieved October 16, 2016, from http://www.pcg-group.com.my/index.asp?p=/static/the-advan-
tage-of-using-shear-wall-method-of-construction.html
The Advantages of Steel Decking as provided by Metaldeck. (2016). Retrieved October 16, 2016, from https://www.raisedfloor.co.uk/the-advantages-of-steel-decking/
Truini, J. (2015, September 19). Stairs design: How to build stairs. Retrieved October 16, 2016, from Projects and Plans, http://www.popularmechan-
ics.com/home/how-to-plans/how-to/a2145/4224738/
TYPES OF FOUNDATION. (n.d.). Retrieved October 16, 2016, from http://slideplayer.com/slide/5683042/
Types of Foundations in Building Construction. (n.d.). Retrieved October 16, 2016, from http://www.understandconstruction.com/types-of-foundations.html
Types of Walls. (n.d.). Retrieved October 16, 2016, from http://www.understandconstruction.com/walls.html
Unitized Curtain Walls and Their Limitations. (2015, February 9). Retrieved October 16, 2016, from http://glassmagazine.com/article/commercial/unitized-curtain-walls-and-their-limitations-1513403
Vijay1230 Follow. (2012). 04 masonry. Retrieved October 16, 2016, from http://www.slideshare.net/vijay1230/04-masonry
Wall System. (n.d.). Retrieved October 16, 2016, from https://times.taylors.edu.my/pluginfile.php/2364521/mod_resource/content/1/WALL SYSTEM.pdf
Wall. (n.d.). Retrieved October 16, 2016, from https://en.wikipedia.org/wiki/Wall
WALLS- TYPES, FEATURES AND DESIGN CONCEPT. (2016). Retrieved October 16, 2016, from http://theconstructor.org/building/buildings/walls-types-features-and-design-concept/819/
Walls. (n.d.). Retrieved October 16, 2016, from http://www.pci.org/design_resources/about_precast/walls/
What are the pros and cons of timber roof trusses? | DoItYourself.com. (2012). Retrieved October 16, 2016, from http://www.doityourself.com/stry/what-are-the-pros-and-cons-of-timber-roof-truss
What is slab?. (2014, August 29). Retrieved October 16, 2016, from http://www.iamcivilengineer.com/2014/08/what-is-concrete-slab-classification-of_51.html
Why Choose Concrete Roof Tile? | Enlighten Me. (2014). Retrieved October 16, 2016, from https://enlightenme.com/concrete-roof-tile/
Wilden How, Shop Assistant at F.O.S Follow. (2014, July 11). Building Construction. Retrieved October 16, 2016, from http://www.slideshare.net/Welltan/building-construction-36880123
Wood, J. L. (n.d.). Advantages & Disadvantages of a Shed-Style Roof. Retrieved October 16, 2016, from http://www.ehow.com/info_12112556_advantages-disadvantages-shedstyle-roof.html
Wylie, N. How to build a brick wall. Retrieved October 16, 2016, from http://www.wikihow.com/Build-a-Brick-Wall
building construction

More Related Content

Similar to building construction

Sem 2 Building Construction Project 1
Sem 2 Building Construction Project 1 Sem 2 Building Construction Project 1
Sem 2 Building Construction Project 1 Jervain Ng
 
BUILDING CONSTRUCTION REPORT
BUILDING CONSTRUCTION REPORTBUILDING CONSTRUCTION REPORT
BUILDING CONSTRUCTION REPORTemily9199
 
Bcon Report
Bcon Report Bcon Report
Bcon Report En Huey
 
Bcon report final 4.0
Bcon report final 4.0Bcon report final 4.0
Bcon report final 4.0Yu Xian Liew
 
Building Construction Project 01 Final Report
Building Construction Project 01 Final ReportBuilding Construction Project 01 Final Report
Building Construction Project 01 Final ReportjolynnTJL
 
BUILDING CONSTRUCTION
BUILDING CONSTRUCTIONBUILDING CONSTRUCTION
BUILDING CONSTRUCTIONYen Min Khor
 
Building Construction 1 - Report
Building Construction 1 - Report Building Construction 1 - Report
Building Construction 1 - Report Jannah Jailani
 
Building construction-report (1)
Building construction-report (1)Building construction-report (1)
Building construction-report (1)Soh Shing
 
Building Construction 1: Project 1
Building Construction 1: Project 1Building Construction 1: Project 1
Building Construction 1: Project 1KohSungJie
 
Building Construction I Project 1 Compilation
Building Construction I Project 1 CompilationBuilding Construction I Project 1 Compilation
Building Construction I Project 1 CompilationNatalie Yunxian
 
BUILDING CONSTRUCTION 1
BUILDING CONSTRUCTION 1BUILDING CONSTRUCTION 1
BUILDING CONSTRUCTION 1Alexis Wei
 
Building Industrial Training report for CIVIL ENGINEERING
Building Industrial Training report for CIVIL ENGINEERINGBuilding Industrial Training report for CIVIL ENGINEERING
Building Industrial Training report for CIVIL ENGINEERINGCESatvirSingh1
 
Industrial trainning project report for Civil Engineering
Industrial trainning project report for Civil EngineeringIndustrial trainning project report for Civil Engineering
Industrial trainning project report for Civil EngineeringPrakash Kumar Jha
 
Project 01 - Experiencing Construction
Project 01 - Experiencing ConstructionProject 01 - Experiencing Construction
Project 01 - Experiencing ConstructionLek Yuen
 
BUILDING CONSTRUCTION
BUILDING CONSTRUCTIONBUILDING CONSTRUCTION
BUILDING CONSTRUCTIONJordanTok
 
building construction documentation
building construction documentation building construction documentation
building construction documentation Weng Chuan
 
Final BUILDING CONSTRUCTION 1
Final BUILDING CONSTRUCTION 1 Final BUILDING CONSTRUCTION 1
Final BUILDING CONSTRUCTION 1 Dexter Ng
 
Building Construction Assignment1
Building Construction Assignment1Building Construction Assignment1
Building Construction Assignment1Jerrie Kee
 

Similar to building construction (20)

Sem 2 Building Construction Project 1
Sem 2 Building Construction Project 1 Sem 2 Building Construction Project 1
Sem 2 Building Construction Project 1
 
BUILDING CONSTRUCTION REPORT
BUILDING CONSTRUCTION REPORTBUILDING CONSTRUCTION REPORT
BUILDING CONSTRUCTION REPORT
 
Bcon Report
Bcon Report Bcon Report
Bcon Report
 
Bcon report final 4.0
Bcon report final 4.0Bcon report final 4.0
Bcon report final 4.0
 
Building Construction Project 01 Final Report
Building Construction Project 01 Final ReportBuilding Construction Project 01 Final Report
Building Construction Project 01 Final Report
 
BUILDING CONSTRUCTION
BUILDING CONSTRUCTIONBUILDING CONSTRUCTION
BUILDING CONSTRUCTION
 
Building Construction 1 - Report
Building Construction 1 - Report Building Construction 1 - Report
Building Construction 1 - Report
 
Building construction-report (1)
Building construction-report (1)Building construction-report (1)
Building construction-report (1)
 
Building Construction 1: Project 1
Building Construction 1: Project 1Building Construction 1: Project 1
Building Construction 1: Project 1
 
Building Construction I Project 1 Compilation
Building Construction I Project 1 CompilationBuilding Construction I Project 1 Compilation
Building Construction I Project 1 Compilation
 
BUILDING CONSTRUCTION 1
BUILDING CONSTRUCTION 1BUILDING CONSTRUCTION 1
BUILDING CONSTRUCTION 1
 
Building Industrial Training report for CIVIL ENGINEERING
Building Industrial Training report for CIVIL ENGINEERINGBuilding Industrial Training report for CIVIL ENGINEERING
Building Industrial Training report for CIVIL ENGINEERING
 
Industrial trainning project report for Civil Engineering
Industrial trainning project report for Civil EngineeringIndustrial trainning project report for Civil Engineering
Industrial trainning project report for Civil Engineering
 
Project 01 - Experiencing Construction
Project 01 - Experiencing ConstructionProject 01 - Experiencing Construction
Project 01 - Experiencing Construction
 
Final
FinalFinal
Final
 
BUILDING CONSTRUCTION
BUILDING CONSTRUCTIONBUILDING CONSTRUCTION
BUILDING CONSTRUCTION
 
building construction documentation
building construction documentation building construction documentation
building construction documentation
 
BCON
BCONBCON
BCON
 
Final BUILDING CONSTRUCTION 1
Final BUILDING CONSTRUCTION 1 Final BUILDING CONSTRUCTION 1
Final BUILDING CONSTRUCTION 1
 
Building Construction Assignment1
Building Construction Assignment1Building Construction Assignment1
Building Construction Assignment1
 

Recently uploaded

Computed Fields and api Depends in the Odoo 17
Computed Fields and api Depends in the Odoo 17Computed Fields and api Depends in the Odoo 17
Computed Fields and api Depends in the Odoo 17Celine George
 
Sanyam Choudhary Chemistry practical.pdf
Sanyam Choudhary Chemistry practical.pdfSanyam Choudhary Chemistry practical.pdf
Sanyam Choudhary Chemistry practical.pdfsanyamsingh5019
 
A Critique of the Proposed National Education Policy Reform
A Critique of the Proposed National Education Policy ReformA Critique of the Proposed National Education Policy Reform
A Critique of the Proposed National Education Policy ReformChameera Dedduwage
 
Crayon Activity Handout For the Crayon A
Crayon Activity Handout For the Crayon ACrayon Activity Handout For the Crayon A
Crayon Activity Handout For the Crayon AUnboundStockton
 
Hybridoma Technology ( Production , Purification , and Application )
Hybridoma Technology  ( Production , Purification , and Application  ) Hybridoma Technology  ( Production , Purification , and Application  )
Hybridoma Technology ( Production , Purification , and Application ) Sakshi Ghasle
 
CARE OF CHILD IN INCUBATOR..........pptx
CARE OF CHILD IN INCUBATOR..........pptxCARE OF CHILD IN INCUBATOR..........pptx
CARE OF CHILD IN INCUBATOR..........pptxGaneshChakor2
 
Enzyme, Pharmaceutical Aids, Miscellaneous Last Part of Chapter no 5th.pdf
Enzyme, Pharmaceutical Aids, Miscellaneous Last Part of Chapter no 5th.pdfEnzyme, Pharmaceutical Aids, Miscellaneous Last Part of Chapter no 5th.pdf
Enzyme, Pharmaceutical Aids, Miscellaneous Last Part of Chapter no 5th.pdfSumit Tiwari
 
Pharmacognosy Flower 3. Compositae 2023.pdf
Pharmacognosy Flower 3. Compositae 2023.pdfPharmacognosy Flower 3. Compositae 2023.pdf
Pharmacognosy Flower 3. Compositae 2023.pdfMahmoud M. Sallam
 
Presiding Officer Training module 2024 lok sabha elections
Presiding Officer Training module 2024 lok sabha electionsPresiding Officer Training module 2024 lok sabha elections
Presiding Officer Training module 2024 lok sabha electionsanshu789521
 
internship ppt on smartinternz platform as salesforce developer
internship ppt on smartinternz platform as salesforce developerinternship ppt on smartinternz platform as salesforce developer
internship ppt on smartinternz platform as salesforce developerunnathinaik
 
Blooming Together_ Growing a Community Garden Worksheet.docx
Blooming Together_ Growing a Community Garden Worksheet.docxBlooming Together_ Growing a Community Garden Worksheet.docx
Blooming Together_ Growing a Community Garden Worksheet.docxUnboundStockton
 
Software Engineering Methodologies (overview)
Software Engineering Methodologies (overview)Software Engineering Methodologies (overview)
Software Engineering Methodologies (overview)eniolaolutunde
 
Alper Gobel In Media Res Media Component
Alper Gobel In Media Res Media ComponentAlper Gobel In Media Res Media Component
Alper Gobel In Media Res Media ComponentInMediaRes1
 
SOCIAL AND HISTORICAL CONTEXT - LFTVD.pptx
SOCIAL AND HISTORICAL CONTEXT - LFTVD.pptxSOCIAL AND HISTORICAL CONTEXT - LFTVD.pptx
SOCIAL AND HISTORICAL CONTEXT - LFTVD.pptxiammrhaywood
 
The Most Excellent Way | 1 Corinthians 13
The Most Excellent Way | 1 Corinthians 13The Most Excellent Way | 1 Corinthians 13
The Most Excellent Way | 1 Corinthians 13Steve Thomason
 
Proudly South Africa powerpoint Thorisha.pptx
Proudly South Africa powerpoint Thorisha.pptxProudly South Africa powerpoint Thorisha.pptx
Proudly South Africa powerpoint Thorisha.pptxthorishapillay1
 
BASLIQ CURRENT LOOKBOOK LOOKBOOK(1) (1).pdf
BASLIQ CURRENT LOOKBOOK  LOOKBOOK(1) (1).pdfBASLIQ CURRENT LOOKBOOK  LOOKBOOK(1) (1).pdf
BASLIQ CURRENT LOOKBOOK LOOKBOOK(1) (1).pdfSoniaTolstoy
 
Introduction to AI in Higher Education_draft.pptx
Introduction to AI in Higher Education_draft.pptxIntroduction to AI in Higher Education_draft.pptx
Introduction to AI in Higher Education_draft.pptxpboyjonauth
 

Recently uploaded (20)

Computed Fields and api Depends in the Odoo 17
Computed Fields and api Depends in the Odoo 17Computed Fields and api Depends in the Odoo 17
Computed Fields and api Depends in the Odoo 17
 
Sanyam Choudhary Chemistry practical.pdf
Sanyam Choudhary Chemistry practical.pdfSanyam Choudhary Chemistry practical.pdf
Sanyam Choudhary Chemistry practical.pdf
 
A Critique of the Proposed National Education Policy Reform
A Critique of the Proposed National Education Policy ReformA Critique of the Proposed National Education Policy Reform
A Critique of the Proposed National Education Policy Reform
 
Crayon Activity Handout For the Crayon A
Crayon Activity Handout For the Crayon ACrayon Activity Handout For the Crayon A
Crayon Activity Handout For the Crayon A
 
Hybridoma Technology ( Production , Purification , and Application )
Hybridoma Technology  ( Production , Purification , and Application  ) Hybridoma Technology  ( Production , Purification , and Application  )
Hybridoma Technology ( Production , Purification , and Application )
 
CARE OF CHILD IN INCUBATOR..........pptx
CARE OF CHILD IN INCUBATOR..........pptxCARE OF CHILD IN INCUBATOR..........pptx
CARE OF CHILD IN INCUBATOR..........pptx
 
Enzyme, Pharmaceutical Aids, Miscellaneous Last Part of Chapter no 5th.pdf
Enzyme, Pharmaceutical Aids, Miscellaneous Last Part of Chapter no 5th.pdfEnzyme, Pharmaceutical Aids, Miscellaneous Last Part of Chapter no 5th.pdf
Enzyme, Pharmaceutical Aids, Miscellaneous Last Part of Chapter no 5th.pdf
 
Staff of Color (SOC) Retention Efforts DDSD
Staff of Color (SOC) Retention Efforts DDSDStaff of Color (SOC) Retention Efforts DDSD
Staff of Color (SOC) Retention Efforts DDSD
 
Pharmacognosy Flower 3. Compositae 2023.pdf
Pharmacognosy Flower 3. Compositae 2023.pdfPharmacognosy Flower 3. Compositae 2023.pdf
Pharmacognosy Flower 3. Compositae 2023.pdf
 
Presiding Officer Training module 2024 lok sabha elections
Presiding Officer Training module 2024 lok sabha electionsPresiding Officer Training module 2024 lok sabha elections
Presiding Officer Training module 2024 lok sabha elections
 
internship ppt on smartinternz platform as salesforce developer
internship ppt on smartinternz platform as salesforce developerinternship ppt on smartinternz platform as salesforce developer
internship ppt on smartinternz platform as salesforce developer
 
9953330565 Low Rate Call Girls In Rohini Delhi NCR
9953330565 Low Rate Call Girls In Rohini  Delhi NCR9953330565 Low Rate Call Girls In Rohini  Delhi NCR
9953330565 Low Rate Call Girls In Rohini Delhi NCR
 
Blooming Together_ Growing a Community Garden Worksheet.docx
Blooming Together_ Growing a Community Garden Worksheet.docxBlooming Together_ Growing a Community Garden Worksheet.docx
Blooming Together_ Growing a Community Garden Worksheet.docx
 
Software Engineering Methodologies (overview)
Software Engineering Methodologies (overview)Software Engineering Methodologies (overview)
Software Engineering Methodologies (overview)
 
Alper Gobel In Media Res Media Component
Alper Gobel In Media Res Media ComponentAlper Gobel In Media Res Media Component
Alper Gobel In Media Res Media Component
 
SOCIAL AND HISTORICAL CONTEXT - LFTVD.pptx
SOCIAL AND HISTORICAL CONTEXT - LFTVD.pptxSOCIAL AND HISTORICAL CONTEXT - LFTVD.pptx
SOCIAL AND HISTORICAL CONTEXT - LFTVD.pptx
 
The Most Excellent Way | 1 Corinthians 13
The Most Excellent Way | 1 Corinthians 13The Most Excellent Way | 1 Corinthians 13
The Most Excellent Way | 1 Corinthians 13
 
Proudly South Africa powerpoint Thorisha.pptx
Proudly South Africa powerpoint Thorisha.pptxProudly South Africa powerpoint Thorisha.pptx
Proudly South Africa powerpoint Thorisha.pptx
 
BASLIQ CURRENT LOOKBOOK LOOKBOOK(1) (1).pdf
BASLIQ CURRENT LOOKBOOK  LOOKBOOK(1) (1).pdfBASLIQ CURRENT LOOKBOOK  LOOKBOOK(1) (1).pdf
BASLIQ CURRENT LOOKBOOK LOOKBOOK(1) (1).pdf
 
Introduction to AI in Higher Education_draft.pptx
Introduction to AI in Higher Education_draft.pptxIntroduction to AI in Higher Education_draft.pptx
Introduction to AI in Higher Education_draft.pptx
 

building construction

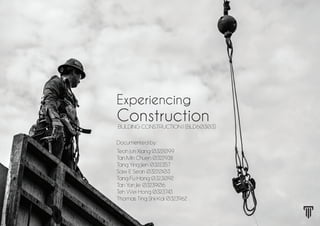
  • 1. BULDING CONSTRUCTION 1 (BLD60303) Experiencing Construction Documented by: Teoh Jun Xiang 0322099 Tan Min Chuen 0322938 Tang Ying Jien 0322357 Saw E Sean 0322003 Tang Fu Hong 0323092 Tan Yan Jie 0323906 Teh Wei Hong 0323743 Thomas Ting Shii Kai 0323962
  • 2.
  • 3.
  • 4. Content page No. Section Page 1.0 Introduction (Tang Ying Jien and Saw E Sean) 1 1.1 Introduction to Site 1 (Tang Ying Jien) 1 1.2 Introduction to Site 2 (Saw E Sean) 1 2.0 Site and safety (Tang Ying Jien) 2 2.1 Introduction to site and safety in Elmina Valley Phase EV1A (Tang Ying Jien) 2 2.2 Safety signboards (Tang Ying Jien) 2 2.3 Bulletin board (Tang Ying Jien) 2 2.4 Safety protocols (Tang Ying Jien) 2 2.5 Personal Protective Equipment (PPE) (Tang Ying Jien) 3 2.6 Plants and machineries (Tan Min Chuen) 4-6 3.0 Preliminaries (Tan Min Chuen, Teh Wei Hong and Tang Fu Hong) 7 3.1 Site Layout (Tan Min Chuen) 7-8 3.2 Preliminary (Services connection) (Teh Wei Hong) 9 3.3 Setting out (Teh Wei Hong) 9-11 3.4 Earth work (Tang Fu Hong) 11-12 4.0 Foundation (Teoh Jun Xiang and Saw E Sean) 13 4.1 Foundation type and construction process (Site visit) (Teoh Jun Xiang) 13-14 4.2 Foundation type and construction process (Reference) (Saw E Sean) 15-20 5.0 Superstructure (Tan Yan Jie, Thomas Ting Shii Kai and Teoh Jun Xiang) 21 5.1 Superstructure (Site visit) (Tan Yan Jie) 21-24 5.2 Superstructure (Reference) (Thomas Ting Shii Kai and Teoh Jun Xiang) 25 5.2.1 Ground beams (Thomas Ting Shii Kai) 25 5.2.2 Slabs (Thomas Ting Shii Kai) 25 5.2.3 Beams and columns (Thomas Ting Shii Kai) 26-27 5.2.4 Walls (Teoh Jun Xiang) 27-36 5.2.5 Staircase (Thomas Ting Shii Kai) 36-37 6.0 Doors and Windows (Tan Yan Jie and Thomas Ting Shii Kai) 38 6.1 Doors (Tan Yan Jie and Thomas Ting Shii Kai) 38-39 6.2 Windows (Tan Yan Jie and Thomas Ting Shii Kai) 39-41 7.0 Roof (Teh Wei Hong and Tang Fu Hong) 42 7.1 Roof type and construction process (Site visit) (Tang Fu Hong) 42-45 7.2 Roof type and construction process (Reference) (Teh Wei Hong) 45-49 8.0 Summary (Teoh Jun Xiang) 50 9.0 References (Thomas Ting Shii Kai) 51- CONTENTS
  • 5. 1.0 Introduction 1.1 Elmina Valley Phase EV1A Tang Ying Jien 0322357 Saw E Sean 0322003 1 1.2 Lot 120, Mukim Lunas, Daerah Kulim, Kedah Darulaman The Elmina Valley Phase EV1A was once an oil palm plantation estate until it was transformed into a residential area. It is located at Petaling district which is connected to the Guthrie Corridor Expressway, Federal Highway, Kuala Lumpur – Kuala Selangor Expressway and North Klang Valley Expressway. The strategic location of the site meant that a shorter drive to Kota Damansara, Shah Alam and the Subang Airport is made possible. The residential area consists of 157 terrace units with nature parks as its recreational area. A man-made lake was also built in the middle of the residential area for aesthetic and recreational purposes. There is also an amphitheatre provided within the residential area to act as a gathering place for the residents. The project is located at Kulim District, Kedah, Malaysia. It is the closest town to the Greater Penang in Kedah. As there are quite a huge amount of people living in the district, rapid development of residential areas occurs around the area to cater the provide accommodation for the increasing number of citizens. Lot 120, Mukim Lunas, Daerah Kulim, Kedah Darulaman is one of the residential construction projects that aims to provide comfortable living place for the public. The project is located near a river as well as a police and petrol station. The residential area consists of 12 units of single-storey terrace houses, 28 units of 2-storey terrace houses, 8 units of single-storey semi-detached houses and 20 units of semi-detached houses. Project: Lot 120, Mukim Lunas, Daerah Kulim, Kedah Darulaman Project Title: -12 units of single-storey Terrace House -28 units of 2-Storey Terrace House -8 units of single-storey semi-detached house - 20 units of semi-detached house Project Duration: 24 months Site Possession Date: 10 September 2016 Completion Date: 9 September 2018 Project: Elmina Valley Phase EV1A Project Title: 157 unit, 2-Storey Terrace House (1,709 sq. ft.) Project Duration: 18 months Site Possession Date: 29th of January 2016 Completion Date: 28th of July 2017 Figure 1.1 Two-storey terrace houses which were proposed to be built at Elmina Valley Phase EV1A Figure 1.2 Location Plan of Elmina Valley Phase EV1A Figure 1.6 Location Plan of Mukim Lunas, Daerah Kulim, Kedah Darulaman Figure 1.3 floor plans of a single terrace house unit within Elmina Valley Phase EV1A. Figure 1.4 Two-storey semi-detached houses which were proposed to be built at Mukim Lunas, Daerah Kulim, Kedah Darulaman Figure 1.5 Two-Storey terrace houses which were proposed to be built at Mukim Lunas, Daerah Kulim, Kedah Darulaman
  • 6. 2.0 Site and Safety 2.1 Introduction 2.2 Signage 2.3 Bulletin Board 2.4 Safety Protocols The safety of personnel working in the construction site of Elmina Valley is taken very seriously and every safety measures have been carried out to ensure the workers’ safety on site at all times. The Sime Darby Development Department have designated a green zone in every construction site to provide an area to conduct security checks on workers as well as visitors to ensure their safety on site. Safety equipment which are stored in the green zone are also distributed to provide protection to those at site. Safety signboards, bulletin boards and security booths are present in the green zone. The safety issued on workers are very strict and they were required to wear helmet, vest safety boots for normal safety compliance. The workers need to be registered as verified foreigners and need to have formal permits and passports. Every workers requires to keep their ID, which is written at the back of the safety helmet for security and safety measurements. The workers are also required to enter personal code and hand print in the green zone when entering the construction site. - Consist of various pinned project information for workers, visitors and other authorised personnel to refer to. - Articles on health and safety for construction site personnel to read. - Posters on safety campaigns are posted on the boards to create awareness among the construction site personnel. - Provides emphasis on important reminders and alerts the public on the potential dangers and risks on the construction site. - A diagram of the Personal Protective Equipment (PPE) to remind workers of the required safety equipment when on site. - Signage of assembly point to indicate the location of the emergency gathering point during any unforeseen accidents or emergencies. Figure 2.1 Signage of the emergency assembly point and the sign with diagrams of the Personal Protective Equipment (PPE). Figure 2.2 Penalty sign. Fines will be issued to those who violate the safety rules and regulations of the construction site. Figure 2.3 Bulletin Board Figure 2.4 Hand Print Scanner Figure 2.5 Safety Gate Tang Ying Jien 0322357 2
  • 7. 2.5 Personal Protective Equipment (PPE) Figure 2.6 Personal Protective Equipment (PPE) sign within the construction site. Figure 2.7 Collection of Personal Protective Equipment (PPE) - To provide protection from falling objects and to protect the safety of workers when they are operating a construction vehicle. - To prevent direct contact between dangerous objects and the head which may cause injuries to the head. i. Safety Helmet - Providing protection to the eyes of the workers from hazardous objects such as dust particles, molten metal as well as sparks during construction. ii. Eye Protection - Protects the hands of the workers when handling sharp objects, tools and corrosive chemicals. iii. Protective Gloves - To protect the workers from any direct contact to objects which may cause harm to the physical body. - To allow a worker to be highly visible in the construction site. iv. Safety Clothing - To provide protection to worker’s feet from sharp objects which may pierce and injure the feet. - To protect the feet against any falling objects. v. Safety Boots Safety Helmet Safety Clothing Safety Clothing Safety Boots Tang Ying Jien 0322357 3
  • 8. 2.6 Plants and Machinery 2.6.1 Earthmoving and excavating equipment he selection of the appropriate type and size of construction equipment often affects the required amount of time and effort and thus the job-site productivity of a project. It is therefore important for site managers and construction planners to be familiar with the characteristics of the major types of equipment most commonly used in construction. - Earthmoving and excavating equipment are heavy-duty vehicles, designed specially to execute construction tasks, most frequently involving earthwork operations. - As they imply the mechanical advantage of a simple machine, the ratio between input force applied and force exerted is multiplied. Some equipment uses hydraulic drives as a primary source of motion. The back-hoe loader can be used for a wide variety of tasks as there are both a bucket and a shovel attached to it. It is normally used in smaller construction works to dig shallow excavations and trenches, general grading, mall demolitions as well as light transportation of building materials i. Back-hoe Loader Used to excavate below or above natural surface of ground on which machine rests and dig pits for basement. It can excavate close range works as they have better bucket. Excavators can also be used for forestry work, demolition and many more. ii. Excavator Compactors are used for compacting crushed rock as the base layer underneath concrete or stone foundations or slabs. The function of compactors is to produce higher density soil mechanically. The basic forces used in compaction are static weight, kneading, impact and vibration. The degree of compaction that may be achieved depends on the properties of soil, its moisture content, the thickness of the soil layer for compaction and the method of compaction. iii. Vibratory soil compactor Tan Min Chuen 0322938 4
  • 9. 2.6.2 Lifting and erecting equipment A crane mounted on a truck carrier provides the mobility for this type of crane, these cranes are able to travel on highways, eliminating the need for special equipment to transport the crane, usually used in smaller construction to dig shallow excavations and trenches, general grading, hoist and place materials Concrete transport trucks (in–transit mixers) are used to transport and mix concrete while travelling to the construction site. The concrete mixing transport truck maintains the material's liquid state through agitation, or turning of the drum, until delivery. The interior of the drum on a concrete mixing truck is fitted with a spiral blade. In one rotational direction, the concrete is pushed deeper into the drum. This is the direction the drum is rotated while the concrete is being transported to the building site. This is known as "charging" the mixer. When the drum rotates in the other direction, the spiral blade "discharges”, forces the concrete out of the drum. A device that homogeneously combines cement, aggregate such as sand or gravel, and water to form concrete. The portable concrete mixer uses a small revolving drum to mix the components. For smaller jobs, the concrete made at the construction site has no time lost during its transportation, giving the workers ample time to use the concrete before it hardens. Lifting and erecting equipment are machineries that are used to deliver materials and equipment or lift loads from a place to another vertically and horizontally. 2.6.3 Mixing and grading equipment Mixing and grading equipment are construction equipment that mix up the materials and are mainly used to produce concrete by mixing aggregates, water and cement. i. Truck Mounted Moblie Crane i. Concrete Transport Truck ii. Portable Concrete Mixer A tractor with a fork built in front to lift heavy objects. It is commonly used in construction to move aside or load materials into or onto another type of machinery. Another critical characteristic of the forklift is its instability. The forklift and load must be considered a unit with a continually varying center of gravity with every movement of the load. A forklift must never negotiate a turn at speed with a raised load, it may combine to cause a disastrous tip-over ii. Forklift Tan Min Chuen 0322938 5
  • 10. 2.6.4 Transporting vehicle Transportation vehicles are heavy vehicles that able to transport materials and equipment for a long distance. They are usually used to transport materials from the base to the construction site. 2.6.5 Construction equipment i. Dump Truck i. Bar Bending Machine ii. Truck Dump trucks are used for transporting loose material (such as sand, gravel, or dirt) for construction. A typical dump truck is equipped with an open-box bed, which is hinged at the rear and equipped with hydraulic pistons to lift the front, allowing the material in the bed to be deposited on the ground behind the truck at the site of delivery. A motor vehicle designed to transport cargo. Trucks vary greatly in size, power, and configuration, with the smallest being mechanically similar to an automobile. Trucks are usually used to transport plants such as, generator set, portable concrete mixer, mobile lighting tower to desire places on site. Bar bending machines are used for bending reinforcement bars and various forms of round bars. ii. Bar Cutting Machine Bar cutting machines are used for cutting reinforcement bars and various forms of round bars. iii. Mobile lighting tower Mobile lighting towers are used to light up the construction site at night. And also used to light up spaces with low light intensity. iv. Generator Set A generator set is an electronic device that supplies electric energy to devices and machineries on site. Tan Min Chuen 0322938 6
  • 11. 3.0 Preliminaries i. Site Entrance ii. Signboard Workers cabin Shower area Kitchen Surau Canteen Carpark Barbender’s yard To Construction site Storage area Entrance security post green zone site office generator set canteen 3.1 Site Layout Allows vehicles and machineries to get in to the construction site. The sign board displays information about the construction and the various companies involved in the construction process. iii. Access Road iv. Hoarding Allows vehicles and machineries to access the construction site from the main road. Erected around the of construction site to shield it from view and prevent unauthorised access. It is an important component to prevent theft and vandalism. v. Storage Designated places were used to store excess materials and also park unused machineries. Tan Min Chuen 0322938 7
  • 12. vi. Site Security vii. Drainage Hand print scanning for each worker to identify their identity. This can prevent unauthorized access to the site. Temporary drainages are excavated on site to discharge water from site during rain and heavy downpour as well as to prevent flooding. viiii. Green Zone The green zone is the area within the yellow fencing. Within the green zone, people are not required to put on safety helmet and safety boots. xiii. Barbender’s Yard xiiii. Rubbish dump Designated places were used to store excess materials and also park unused machineries. Rubbish containers that allow workers to dispose garbage on site. It will be transported by the dump truck when it is full. viii. Site Office Construction sites will generally require office facilities to provide accommodation for site managers, provide space for meetings and to provide storage for site documentation. It is important that site offices are comfortable, attractive and versatile, as well as being suitably robust and secure xi. Canteen xii. Surau The canteen is a place for workers to have their meals. Kitchens are also provided to allow the workers to cook their own meals. A Muslim prayer room is provided for Muslim workers to conduct their daily prayers. xv. Workers’ Accomodation The workers’ accommodation is a composition of large numbers of cabins to accommodate the workers. The accommodation is constructed using containers and zinc roofing, which results in the containment of hot air within the living space. Stairs are provided to allow accessibility to the first floors. In addition to that, balconies are also present outside of the cabins to allow the workers to hang their shirts for drying and a car park is also provided for the workers to park their vehicles. x. Wash Trough The green zone is the area within the yellow fencing. Within the green zone, people are not required to put on safety helmet and safety boots. Tan Min Chuen 0322938 8
  • 13. 3.2 Preliminary (Service Connection) 3.3 Setting Out 3.3.1 Horizontal Control Technique Before starting earthwork make sure there are no service lines such as electrical connections, water supply and drainage connections, telephone lines or others below ground. Setting out involves working out the location and extent of the building on site. As each site is different, contractors should start by establishing the particular conditions. The process involves the positions and levels of building lines and road alignments shown on the construction plans to be established on the ground by various techniques and instruments. Setting out is usually divided into two stages which is the first stage of setting out and the second stage. The second stage of setting out continues from the first stage, beginning at the ground floor slab or road sub-base level. Up to this point, all the control will be located outside the main construction, for example the pegs defining building corners, centre lines and so on will have been knocked out during the earth moving work and only the original control will be undisturbed. Horizontal control surveys are conducted to coordinate horizontal positional data. These positions can be referenced by parallels or plane coordinate axes. Because they are used as a framework for other surveys, these surveys must be precise and accurate. These surveys provide a network of monuments or points on the ground that can be used as the control for any other surveying project, such as a boundary or construction survey. The advantages of using a horizontal control survey is that lost monuments can be replaced accurately, surveys can be coordinated, more than one network station can provide a check to the work, and a reduction in the cost of the project can be achieved. Most horizontals should (and will) be connected to the control network. 3.3.2 Vertical Control Technique A vertical control survey determines elevation with respect to sea level. These surveys are also used as a benchmark upon which other surveys are based and high degree of accuracy is required. These surveys are useful for tidal boundary surveys, route surveys, construction surveys and topographic surveys. In a vertical control system, at least two permanent benchmarks should be used, but the number of benchmarks required may increase depending upon the needs and complexity of the project. These projects are needed for the construction of water and sewer systems, highways, bridges, drains, and other major town or city infrastructure. These surveys can be done alone, but are often done in conjunction with a horizontal control survey. Foundation In practice, the first stage of setting out involves the use of the horizontal and vertical control techniques. The purpose of this stage is to locate boundaries of the work in their correct position on the ground surface and to define the major elements. In order to do this, horizontal and vertical control points must be established on the site. Figure beside shows the setting out process before the foundations were constructed. Timber frames were first fixed on site to allow strings to be tied and to determine the location in which the walls will be erected. i. First Stage ii. Second Stage Teh Wei Hong 0323743 9
  • 14. 3.3.3 Method used in setting out 3.3.4 Setting out of pipelines 3.3.5 Optical level, optical square and Theodolite construction 3.3.6 Sight Rails Baselines are located by setting out their terminals. If co-ordinated they would be set out from a traverse. The length of the baseline can be measured and compared with its compound values. Alternatively, the baseline could be set out with reference to other detail such as road centrelines, existing buildings, etc. Again it is necessary to check the measured length against that given on the drawings. Usually for the purpose of measuring angles. Offset pegs are normally used in the form of baselines or grids or as horizontal control points used to establish the design of the proposed structure. The offset pegs are only used when the original pegs are unable to be installed. A temporary benchmark (TBM) is a fixed point with a known elevation used for level control during construction works and surveys. Nails in road seals, or marks on kerb & channel are commonly used as temporary benchmarks A Theodolite is an instrument for measuring both horizontal and vertical angles, as used in triangulation networks, and geo-location work. Other specialized purposes make Theodolites ideal for shop and factory floor layout of tools and fixtures. They also work well for layout for the construction of concrete slabs, landscaping, and road design. A series of rails set with a surveying instrument, and used to check the vertical alignment of a pipe in a trench. Pipelines are to be checked on chainage, this could be every few pipes, for small diameter and every pipe for large diameter. The pipelines must be tested in accordance with the contract specification, any air or water testing of line should be done by an experienced person. Use plumb bob to get point below if it is farther than can be done with a spirit level Clearly mark what the various nals are for. e.g. centreline, edge, trench, wall, plumbing ii. Offset pegs i. Baselines iii. Temporary benchmark Teh Wei Hong 0323743 10
  • 15. 3.3.7 Equipment used 3.4 Earth work 3.4.1 Site clearing 3.4.2 Benchmark The purpose of this section is to establish uniform practices to be followed for removal of trees and stumps. Where such removals are set up on a lump sum basis, varying interpretations as to the extent of removal are possible. It is necessary to exercise judgment in the administration of this item to accomplish the desired results. The desired level was marked in a permanent place. This mark will be needed throughout the project duration. Figure 3.5 Excavators are used to remove the trees There are several type of ground marking and setting out equipment including: - Survey Flags - Paint - Survey Nails - Marking Crayons - Marking Plates (Temporary and permanent) i. Theodolites iii. Marking & survey points iii. Software Removal of trees and stumps A surveying instrument with a rotating telescope for measuring horizontal and vertical angles. Figure 3.4 Site clearance at Lot 120, Mukim Lunas, Daerah Kulim, Kedah Darulaman Surveying software is essential to any land surveyor or building surveyor who undertakes simple or complex land surveys or measured building surveys using a total stations. Figure 3.1 Survey Flags Figure 3.2 Marking crayons Figure 3.3 Survey naills Teh Wei Hong 0323743 11
  • 16. 3.4.3 Side-slope in excavation During earth excavation check that slope is maintained in side-soil. Dump trucks are normally used instead of scrapers when the soil is being excavated by loaders. Most dump trucks can travel over public highways, and move faster than scrapers. Figure 3.6 Soil compactor are used in the compaction of soils after grading. 3.4.4 Base soil 3.4.5 Excavation area 3.4.6 Backfill 3.4.7 Compaction Check the base soil, on which building's foundation will rest, is hard enough. You may consult geotechnical engineer that the base soil is perfect for further work execution. Compaction reduces the volume of air space in the soil. This compaction increases the dry unit weight and strength of the soil to better support structures. This is a very important step. - Check backfill is being done after ending the shutter removal period of footing. - Backfilling material: Try to backfill with the excavated soil. And check the backfilling material is free from large lumps, organic or any other foreign materials. Check all shuttering materials are removed before backfilling. - Backfilling should be done evenly on all sides. Check that is being done properly. - Backfilling should be done layer by layer. Each layer shouldn't exceed 6 inch thickness. And each layer should be compacted to maximum dry density of soil. Check those are being done properly. - Ensure that the excavation area is extended beyond the foundation of buildings for easy circulation of movement during work execution. - Cleaning of foundation bed: Check that loose and displaced materials are cleaned from the foundation bed. Teh Wei Hong 0323743 12
  • 17. Construction process of reinforced concrete pad footings 1. The position of footings are set out according to the plan dimensions 2. Cement powder is then used to mark the size of footings 3. The earth was excavated to the required depth and dimensions by using an excavator 4. Hardcore was then placed on top of the excavated earth and it should be used in not less than 150mm thick but no greater than 600mm in selected aggregate. The hardcore is then compacted down in layers using a plate compactor 5. A formwork is then placed according to the set dimensions 6. Studs are then added to prevent the falling of the formwork. 7. Bracing is then used to hold the formwork in position. This is to ensure that the formwork is able to withstand the horizontal forces of the concrete when it is poured. 8. A lean concrete mixture is then added and levelled. Its purpose is to provide an even surface for the foundation concrete. It is also used to prevent direct contact of foundation concrete with soil 9. Workers then start to arrange the reinforced concrete bars to form reinforced concrete cages 10. After the reinforced concrete cages are completed, the workers place the reinforced concrete cage into the formwork 11. The reinforced concrete cage is then placed on top of the spacer blocks. The spacer blocks are used to maintain the reinforcement in the proper position. Concrete spacers can help prevent corrosion, protect them from fire for a certain length of time and help to provide a proper transfer of stresses from concrete to steel rebars. 12. After placing the rebar cages in the formwork, the reinforcements were erected for stump and add more ties to the formwork 13. Eventhough concrete is durable and has a very good compression strength, it has a weak tension strength. As such, reinforcements are used to carry tensile load of structures 14. A starter bar is tied to the reinforcement to allow the reinforcement of the column to be tied onto the reinforcement steel bars. 15. The position of starter bars were fixed before the concrete was poured into the formwork. 16. Concrete is poured into the formwork and adequate compaction is ensured by using vibrators or self-compacting concrete. The concrete is allowed to cure before proceeding to the next stage of construction 17. Set, curing and hardening and when the concrete gains sufficient strength, the formwork is dismantled, and thus the reinforced concrete pad footing is completed Excavation Pour concrete Formwork Add spacer block Reinforcement for stump Add ties for formwork Pour concreteSet, curing, hardening Add Rebar Teoh Jun Xiang 0322099 14
  • 18. 4.2 Foundation type and construction process (reference) 4.2.1 Shallow foundation i. Strip Footing ii. Pad Footing Types of pad foundation design Types Of Strip Footing The Foundation is the substructure and the bottommost section of a building. It is constructed halfway or completely below the surface of the ground. - They spread the load over a larger area at an equal rate so that the burden on the foundation soil does not exceed the safe bearing capacity. - Foundations shift the unequal load of the superstructure equally to the sub soil hence it minimizes the differential settlement that occurs. - Foundations offer the stability against, voids formed by scouring underground water and the burrowing animals. - Foundations prevent the structures from sliding above the sloping ground. - Foundations offer a leveled and balanced surface for the construction of the superstructure. - Transfer load directly on to the hard layer of soil. - Maximum depth of shallow foundations is 3 meter. - Provides support for light loads when the soil is in stable condition and with adequate bearing capacity Uniformly distributes load (Load is distributed evenly along the entire structure) Mass concrete for stell columns Reinforced concrete with sloping upper suface Point loads (Load is condense at individual points) - Strip footing is the most common and widely used foundation; it is basically a strip of concrete placed in a long narrow ditch. - It usually supports the load bearing structure or wall without columns and beams. (e.g.: Brick wall) - The depth of the foundation is roughly 1 meter, while the width of the foundation depends on the condition of soil and the load. As an example, the weaker soil requires a wider strip foundation. - The thickness of the strips must be at least 150mm. - Pad footings are individual or isolated foundations to support the columns of the building. - Pad footings are a form of disseminate foundation, which is made up by rectangular, square, or sometimes circular concrete ‘pads’ that support localized single-point loads like structural columns, groups of columns or framed structures. - Pad footings are usually used when the load of the building is carried by the columns. - It uses concrete pad at the base with concrete columns or steel columns attach by captive bolts. Mansonry or concrete wall R e i n f o r c e d concrete strip footing Function of foundation P l a i n reinforced concrete S t e p p e d reinforced concrete Saw E Sean 032003 15
  • 19. ii. Raft Footing iv. Cantilever/ Strap footing Types Of Raft Footing Types of cantilever (plan to elevation) - Raft footing are similar to slab floating on top of the soil. - It is usually used on soft natural ground - It used to cover the whole base area of a building and extend beyond it; this is to prevent differential settlement which can cause foundation failure on a building. - It supports the walls and acts as floor slab - The detail of edge of the foundation is decided by the nature of the load applied on it. - A form of concrete apron will extend from the edge of the foundation to act as protection from erosion - Independent footings of two columns are connected by a beam. - The beam is used to help transfer the weight of the loaded column footing to adjacent footing. - The strap beam is not in contact with the soil, and thus does not transfer any pressure to the soil. Light load and point loads Adjoining wall Column A Column B Column B Column A Footing of wall Strap Beam Strap Beam Footing of Column A 1 2 4 5 3 6 Footing of Column B Light loads Heavy uniform load Heavy loads and heavy isolated point loads Saw E Sean 032003 16
  • 20. i. Pier Foundation (Caisson) ii. Pile Foundation End Bearing Pile Friction Pile - Deep foundations function to transfer the load of the building to a deeper layer of dense sand and gravel below the soil. - The depth of the foundation is more than 3 meters - Deep foundations are used for heavy load when the soil is unstable and inadequate bearing capacity. - A pile is fundamentally a long piece of a strong material penetrating into the ground to act as a steady support for structures built above the ground. - Piles are used when the soil strata could not handle the heavy load from the structure. - Pile foundations may be classified as either End bearing or Friction piles, according to the manner in which the pile loads are resisted. - The shafts of the piles act as columns carrying the loads through the covering inferior subsoils to firm strata into which the pile toe has penetrated. - This can be rock strata or a layer of firm sand or crushed stone which has been compress by the displacement and vibration encountered during the driving. - Any foundation imposed on the ground will form a pressure which spreads out to form a pressure bulb. - If a suitable load bearing strata cannot be discover at a fitting level, especially in stiff clay soils, it is possible to use a pile to carry this pressure bulb to a bottom level where a higher bearing capacity is found. - The friction or floating pile is mainly supported by adhesion or friction action of the soil around the perimeter of the pile shaft. - Consists of a cylindrical column of large diameter to sustain and transmit large super-imposed loads to the firm strata below. - Often used in the construction of bridge piers & other structures that requires foundation beneath rivers & other bodies of water. - Preferred in a location where the top strata consists of decomposed rock overlying a strata of sound rock. 4.2.2 Deep Foundation Axial load Lateral load Concrete- mis design can vary based on several factor Diameter can vary widely Reinforcing Steel (typically required by design) Bell- May be used or amitted as desired Depth can vary widely Side resistance Bell size varies- No larger than 3 times the shaft diameter at base Base Resistance End Bearing Pile Friction Pile Weak soil Strong soil or rock Saw E Sean 032003 17
  • 21. Types of pile Displacement piles Large displacement pile Precast reinforced concrete piles The large displacement pile is the pile which is solid and with large x-section area and hence compress bigger amount of soil under the ground. For non-displacement pile, a void is form on the ground by excavation. The void is then filled with concrete. The side of the void can be supported or unsupported depend on the situation. Small displacement pile non- displacement pile The small displacement pile is the pile with less x-section area and compress or displaces less amount of soil under the ground. Eg. RC pile Eg. Bore pile Eg. H-pile - The precast reinforced concrete piles are piles which were moulded in circular, square, triangular or octagonal form. - They are casted and cured in a casting yard and then transported to the site for installation - They provide high strength and resistance to decay. - They are heavy, and because of their brittleness and low tensile strength, extra care in handling and driving is required. - Cutting of the precast reinforced concrete piles requires the use of concrete cutter, pneumatic hammers, cutting torches, etc Saw E Sean 032003 18
  • 22. Steel preformed piles Composite piles Driven in situ/ Cast-in-Place piles Type of Steel preformed piles Piling proccess For non-displacement pile, a void is form on the ground by excavation. The void is then filled with concrete. The side of the void can be supported or unsupported depend on the situation. - Driven in situ piles are those piles which are cast in place inside the ground. - The pile shaft is formed by using a steel tube which is either top driven or driven with an internal drop hammer working on a plug of dry concrete/gravel as in Frankipiles. - This method can be used to build the piles up to 610mm. - Since the cast-in-situ piles is not subjected to handling or driving pressure, it is not essential to reinforce the pile in ordinary cases or in places where the pile is completely flooded in the soil. Reinforcements are only provided when the pile acts as a column and is subjected to inclined forces. - Cast- in-situ piles can be differentiated into two types. In one the metal shell of the pile is permanently left in place lining the ground along with the core while in the other type, the outer shell is withdrawn. - Composite piles are piles which are made from two different materials that are driven one over the other, so as to allow them to act together to perform the function of a single pile. - One advantage of this type of pile is the ability to adopt of the fine qualities of both the materials - They are economical as they utilize the great erosion resistance characteristics of one material with the cheapness or strength of the other. H-piles pipe piles screw piles Saw E Sean 032003 19
  • 23. Drop Weight Bore Pile Step 1 - The crane is used to transport the piles to a particular area that has been excavated. - The piles are all delivered cautiously as they are fragile. Step 2 - The pile is tied up to its lifting lug and is prepared for hammering. Step 3 - Before the hammering procedure begins, they are all located accordingly to be driven into the ground Step 4 - Hammering process started - The drop hammer is used to drive the pile - The subsoil around the pile shaft is displaced - The pile driving to its maximum depth until it cannot be driven - Bored pile is a cast in situ concrete pile which has to be casted on the construction site. Contrary to displacement piles, the soil has to be excavated and the resulting hole will be filled with concrete or a precast concrete pile which will be dropped into the hole and grouted in. As such, no displacement of soil will occur. - Bored piling machine which was used to cast the bored pile has specifically designed drilling tools, buckets and grabs and the machines are used to remove the soil and rock. - Casting of bored piles have to be done by specialised bored piling contractors - The length, width, depth and style of bored pile foundations depends on the type of the project and the surrounding environment. - It produces less vibration and reduces the noise level compare to other piling system. - It causes less disruption to adjacent soil - Bored piles are usually used for tall buildings or huge industrial complexes, in which a foundation that can carry thousand tons of loads is needed, most probably in unstable or difficult soil conditions. 1. Dropping weight 2. Explosion 3. Vibration 4. Jacking Pile driving methods (displacement piles) Non-displacement piles Crane Notes : 1. Installation of optional swivels convert fixed leads to Cardonic Leads. 2. Semi fixed leads have the ability to move in the up-down direction Mat Optional 3-ways swivel Hammer Drive cap Lead pile Saw E Sean 032003 20
  • 24. 4.0 Foundation 4.1 Foundation type and construction process (from site visit) Residential houses constructed at Elmina Valley Phase EV1A are 2-storey terrace houses. After conducting our site visit, we’ve learnt that the type of foundation used to construct the houses are classified as reinforced concrete pad foundations. Pad foundations are individual or isolated foundations which are used to support localised loads such as columns. Pad footings are one of the most simple and common types of foundations and they are used when the load of the building is carried by columns which sit on top of square or rectangular pads of concrete. 1. Photo shows shows the conditions of the earth after excavation and site formworks were placed according to the set dimensions 2. Photo indicates that the formwork is readily constructed and reinforced concrete cages can be inserted into it. Studs and bracings which were used to prevent the falling of the formwork and to hold the formwork in position can be seen. 3. Photo shows that the reinforced concrete cages are being inserted into the formworks. 4. Photo shows that a layer of lean concrete mixture is added and levelled underneath the reinforced con- crete cages. Spacer blocks are also visible under- neath the reinforced concrete cages. Reinforcements were added on top of the reinforced concrete cages to create stumps. Photo shows that the position of the starter bars and reinforcements were maintained by connecting additional ties to the formwork. Photo shows the conditions of the earth after excavation and site formworks were placed according to the set dimensions Photo shows that the foundation is completed and the formwork is removed. The excavated earth is awaiting bed fill. Teoh Jun Xiang 0322099 13
  • 25. 5.0 Super Structure 5.1 Super Structure (from site visit) 5.1.1 Ground Beam 5.1.2 Slabs - Ground beams are reinforced concrete beams which support walls, joists and other structures near ground level. - Ground beams are either standing directly upon the ground or supported at both ends by piers. Ground floor slabs are reinforced concrete blockworks situated on the ground which supports walls. These concrete slabs are a common structural element of modern buildings. It is normally horizontal and has a smaller thickness if compared to its span. It is usually furnished using a flat and strong surface in reinforced concrete construction. 1. The props/supports are being erected. The soffit of beams are being fixed 1. Preparing the site 2. Improve the soil support system 3. Building formwork 4. Install reinforce bar 5. Pouring concrete 6. Consolidation. 7. Finishing. 8. Curing 2. Formwork for the side of beam are being constructed 3. Steel reinforcements are placed into the formworks. 4. The formwork was erected to the side of the beam complete with struts The photo shows the ground floor slabs present on site. Construction process of ground beam on site Construction process of ground floor slabs on site Ground floor slab Tan Yan Jie 033906 21
  • 26. 5.1.3 Beams and columns Photos above shows the fisrt floor slab in our site Similar to ground floor slabs, first floor slabs are reinforced concrete blockworks supporting walls of the first floor of the building. However, they are not constructed on the ground, but are supported by a series of columns and walls. The types of first floor slabs found at Elmina Valley Phase EV1A are two way slabs with beams. Continuous beams are supported on more than two supports. It is more economical for any span lengths and they are several beam supports at the bottom. Simply supported beams are supported freely at the two ends on walls / columns. Most of the construction process of first floor slabs are the same as ground floor slabs, which include: 1. Building formwork. 2. Install reinforce bar. 3. Pouring concrete. 4. Consolidation. (Process of uniting) 5. Finishing. 6. Curing Beams are structures which are rectangular in cross-section that carry the weight of the floor slab or the roof slab and they transfer all the loads including its self-weight to the columns or walls. There are two types of beams found on the 2-storey link houses of Elmina Valley Phase EV 1A, namely continuous beams and simply supported beams. Most of the construction process of beams is similar to ground beams. 1. The props/supports are erected. 2. The soffit of beams are fixed. 3. The formwork for the side of beams are constructed 4. Steel reinforcements are placed inside the formworks. 5. The formwork, which is completed with struts, are constructed to the side of beams 6. The concrete was then poured into the formwork. First floor slab i. Continuous beam ii. Simply supported beam The ffigureshows the simply supported beams located at the front façade of the terrace houses. The areas marked blue are the beams and the areas marked red indicate the location. The image shows the continuous beam found on site. The horizontal beams (blue) are supported by a series of columns (red). Construction process of beams Beams Tan Yan Jie 033906 22
  • 27. Columns A columns is a vertical structural member that functions to transmit the load from ceiling/roof slabs and beams, including its self-weight to the foundation. Columns situated on the ground floor are a continuation of foundations, and, in the case of Elmina Valley Phase EV 1A, the columns are a continuation of the reinforced concrete pad footings. 1. During the construction of the reinforced concrete pad footings, reinforcements were added on top of the reinforced concrete cages to create stumps. Concrete will be poured into the formwork and the formwork will be removed once the foundation is completed. 2. Once the ground beams and ground floor slabs are completed, the reinforcements will be extended to construct the columns. 3. The formworks for the concrete columns are then fixed and concrete will be poured into the formworks. The formworks will be removed after the concrete has cured. 5. Concrete will then be poured into the fixed formworks to construct the columns. Concrete buckets as well as triangular-shaped wooden planes were used to pour small volumes of concrete into the wooden frames when constructing the columns. 6. Once the concrete has cured, the formworks will be removed and the columns are completed. 4. A similar process will take place after the columns on the first floor is completed. The reinforcements will be extended, and after the beams and first floor slab are completed, formworks will then be fixed. The image shows the columns found on site. Completed columns on the ground floor support the first floor slab, and the formwork of the columns on the first floor are also visible. The image shows the completed ground floor slab, with the reinforcements before their extension. The image shows the extended reinforcements for the construction of columns on the first floor. The ground floor columns, beams and first floor slab are completed. The image shows the columns found on site. Completed columns on the ground floor support the first floor slab, and the formwork of the columns on the first floor are also visible. The image shows workers using triangular-shaped wooden planes to pour concrete into the formworks. The image shows the reinforcements after their extension. Tan Yan Jie 033906 22
  • 28. Walls found in the 2-storey terrace houses of Elmina Valley Phase EV1A can be categorized as masonry walls, and in specific, brick walls. There are two types of bricks which are used for the construction of the houses in Elmina Valley Phase EV1A, namely red clay brick and cement sand bricks. - Sime Darby Development’s rules and regulations states that the party walls of residential houses are to be constructed out of red clay bricks. As such, party walls of the 2-storey terrace houses were built using red clay bricks. - The bricks were laid using the English Bond method. - Cement sand brick is used to construct both internal and external walls of the 2-storey terrace houses of Elmina Valley Phase EV 1A. - Red clay bricks provide thermal & acoustic insulation . - Red clay bricks do not require any maintenance cost. - The high compressive strength of fired clay bricks has been exploited for millennia to build structures ranging from single-storey huts to massive public buildings and enormous bridges and viaducts. - The cost of red clay bricks brick is higher compare to other bricks like cement sand brick or concrete brick. The photo shows the red clay brick wall found on site. The photo shows the cement sand brick wall found on site. Advantages of Red clay brick wall - The cost of cement sand bricks are lower compared to red clay bricks as they can be easily made in a short period of time. - Cement sand bricks provide good sound insulation. Advantages of Cement sand brick wall Disadvantages of Red clay brick wall - Cement sand bricks are not fire proof bricks and it cannot withstand high temperature. The bricks will crack if they come in contact with high temperature like fire. - Cement sand bricks are also much heavier than red clay brick. Disadvantages of Red clay brick wall 5.1.4 Wall i. Red clay brick wall ii. Cement sand brick wall Tan Yan Jie 033906 22
  • 29. The staircase found at the 2-storey terrace houses of Elmina Valley Phase EV 1A can be classified as concrete straight staircase. - The run of the steps was then measured by finding the distance between the frontmost and backmost part of the stairs. - The width of the stairs was measured by calculating the distance between the leftmost and rightmost bounds of the planned steps of the stairs. 2. Building and Assembling Formwork: - The formwork was made by using plywood or framing timber. The side forms are cut according to the tread and riser calculations. 3. Reinforcement - Reinforcement bars are carefully bent at the necessary height and length and positioned into the formwork. 4. Preparing Concrete: - Sufficient and well mixed mortar was prepared using portable cement mixer. 5. Pouring concrete: - The process started from the bottom and the concrete was poured one step at a time. The mortars are spreaded evenly and spade was used to remove the trapped air bubbles. 1. Measure the dimensions of your stairs: - Firstly, the total rise of the stairs, which can be found by measuring the total height from the planned base to the higher level/floor, was measured. The images above shows the timber formworks which were fixed for the construction of the staircase. 5.1.5 Staircase Construction process of staircase on site Joiats Decking Wall string Riser board Riser cleat Tan Yan Jie 033906 23
  • 30. 6. Add finishing: - A simple wood float was used to clean and smoothen the surface of the mortar. 7. Curing: - The steps were sprayed with curing compound and covered with burlap. Once the concrete has hardened for a week, the plywood formwork was then be removed. 1. Ground Beam 2. Ground Floor Slab 3. Column 4. First Floor Beam 5. First Floor Slab 6. First Floor Columns 7. Roof Beams 8. Walls 9. Staircase 8. Installing the handrails: - The stair railings were positioned onto the staircase at the location in which they will be installed. - The position of the railings were marked - Pilot holes were drilled into the staircase on the marks made. - The railings were placed into the pilot holes. - Cement was then poured into the holes to fix the handrails. The image shows the staircase handrails which were installed on site. 5.1.6 Process of superstructure construction on site: Tan Yan Jie 033906 24
  • 31. 5.2 Super Structure (References) 5.2.2 Ground Beam 5.2.2 Slabs - Ground beams are reinforced concrete beams which support walls, joists and other structures near ground level. - Ground beams are either standing directly upon the ground or supported at both ends by piers. Concrete slabs are a common structural element of modern buildings. It is normally horizontal and has a smaller thickness if compared to its span. It is usually furnished using a flat and strong surface in reinforced concrete construction. 1. Erect the props/supports 2. Fix the soffit of beam 3. Construct formwork for the side of beam 4. Place the steel reinforcement 5. Erect the formwork to side of beam complete with struts 6. Pour the concrete into the formwork. 1. One-way slab with beams Drop Panel Column Column Capital 2. Two-way slab with beams The image shows the reinforcement bars used to construct ground beams The image shows completed ground beams at a construction site Types of concrete slabs Flat plate slabs are basically slabs supported by the columns without the help of beams or capitals or drop panels. Advantages of flat plate slabs - Can be constructed quickly. - It is flexible in arranging the columns and partitions. - Provide little obstruction to light. - High resistance of fire. - Use in multi-storey reinforced concrete Classification of Two way slabs: 1. Addition of beams between columns to make two way slabs stronger. 2. Thickening the slabs around the columns. 3. Flaring the columns under the slabs. Construction process of slab: 1. Preparing the site. 2. Improve the soil support system. 3. Building formwork. 4. Install reinforce bar. 5. Pouring concrete. 6. Consolidation. 7. Finishing. 8. Curing Flat slab with column capital Plain flat plate slab Flat slab with column capital and drop panel 3. Flat Plate Slab Flat plate slab with column capital and drop panel
  • 32. 5.2.3 Beams and columns Beams Types of beams - Beam are the horizontal members of structure and they function to carry loads. - Beams are rectangular in cross-section. - Beams carry the floor slabs or the roof slabs and they transfer all the loads including its self-weight to the columns or walls. Construction process of beam 1. Fix the reinforcement bar for concrete beam. i. Simply Supported Beam: It is supported freely at the two ends on walls / columns i. Steel columns ii. Timber columns iii. Concrete columns iv. Cantilever Beam: It is fixed in a wall or column at one end and the other end is free. It has tension zone at the top side and compression zone at the bottom side. iii. Continuous Beam: It is supported on more than two supports. It is more economical for any span lengths v. Overhanging Beam: Its end extends beyond the wall or column support ii. Fixed Beam: Both ends of the beam are rigidly fixed into the supports Wall Wall Wall Overhang Cantilever Beam Overhanging Beam Tension Side Compression Side Wall Wall Stirrups Fixed Beam Effective Span Continuous Beam Clear Span 2. Fix the formwork for the concrete beam 3. Pour concrete and wait it to be cured then remove the formwork Columns A vertical structural member that functions to transmit the load from ceiling/roof slabs and beams, including its self-weight to the foundation.
  • 33. Types of fail modes of columns - A wall is a structure that defines an area, carries a load, or provides shelter or security. - They are part of the 3 planes in architecture (along with 2 other planes, which are the overhead (roof) plane and the base (floor) plane that defines the 3 dimensional volume of mass and space. - The purpose of walls in buildings are to support roofs, floors and ceilings, enclose a space as part of the building envelope, to give buildings their form along with roofs and to provide shelter and security. Function of walls - Thermal Insulation - To provide protection from natural elements such as weather and animal threats - To divide and separate the areas within the building to create interior spaces. - Act as sound barriers - As fire walls to attenuate the spread of fire from one building unit to another. - To improve the building appearance. - To provide privacy Strength and stability of walls Resistance to: - Stresses set up by its own weight - Superimposed loads - Lateral pressure (for example, wind) - Overturning by lateral force - Buckling caused by excessive slenderness i. Long Column or Slender: Type of column that fails by elastic buckling, where it occurs at compressive stresses within the elastic ranges called long column. ii. Short Column: A very stocky column which will not fail by elastic buckling. It will crush and squash due to general yielding and compressive stresses Intermediate columns: It will fail by inelastic buckling when a localized yielding occurs. This will be initiated at some point of weakness and crookedness. Construction process of concrete columns 1. Fix the reinforcement bar for the concrete column. 2. Fix the formwork for the concrete column. 3. Pour concrete and wait for it to be cured then remove the formwork. 5.2.3 Walls
  • 34. Types of walls - Load bearing / Non Load Bearing - External / Internal Materials of walls A. Concrete Walls B. Masonry Walls C. Dry Walls D. Glass Walls E. Curtain Wall SystemLoad bearing walls carry and distribute the load of a building from roof and floor from above (and lateral load) to the structures or foundations situated below the building. A load bearing wall is part of the structure of the building as it holds the building up. They are usually made of concrete, brick or block, hard materials which have to stand the test of time and heavy weights. - Pre Cast Concrete Wall - Retaining Wall - Masonry Wall - Pre Panelized Load Bearing Metal Stud Walls - Engineering Brick Wall (115mm, 225mm) - Stone Wall As the height of the building increases, required thickness of walls and resulting stress on foundation will also increase and cause it to be uneconomical. Buildings with cast-in-situ reinforced concrete shear walls are widespread in many earthquake-prone countries and regions. Shear wall buildings are usually regular in plan and in elevation and shear walls are the main vertical structural elements of the buildings with a dual role of resisting both the gravity and lateral loads. Wall thickness varies from 140 mm to 500 mm, depending on the number of stories, building age, and thermal insulation. Reinforcement requirements are based on building code requirements specific for each country. In general, the wall reinforcement consists of two layers of distributed reinforce requirements. Characteristics - Usually used as load bearing walls - Texture and appearance can be controlled by the use of formworks admixtures and additives formworks, admixtures and additives - Often used in high-rise buildings in Malaysia - Often used in government projects in Malaysia, as part of the industrialized building system (IBS) - Offers greater speed of construction and control of quality i. Cast in-situ reinforced concrete shear wall systems ii. Pre-cast concrete wall systems A non-load bearing wall is only a partition that divides the various spaces of a building to create rooms. These walls do not carry any structural load except for their self-weights and wind load which acts on the structure (for example, column, slab or beam). - Hollow Concrete Block Wall - Façade Brick Wall - Hollow Brick Wall - Brick Wall (115mm, 225mm) Load bearing wall A. Concrete walls i. Cast in-situ shear wall systemsNon-Load bearing wall Load Bearing WallsLoad Bearing Walls Non-Load Bearing Walls Non-Load Bearing Walls
  • 35. Precast concrete wall systems can be comprised of a variety of shapes, and wall types. Typically, precast concrete wall systems fall into three basic categories: solid, sandwich and thin-shell. These can be penalized and erected in either a horizontal or vertical position and used on all types of structures from residential to commercial, institutional to industrial. Wall panels can be designed as nonloadbearing or loadbearing, carrying floor and roof loads, as well as lateral loads. Construction process of cast in-situ reinforced concrete shear wall systems using timber formworks Advantage of using shear wall method of construction - Speed in erecting and dismantling forms - Good appearance - Greater control of accuracy and workmanship - Creates a smooth, high quality finish capable of receiving direct decoration with the minimum of preparation - Tornadoes, hurricanes and earthquake resistance Solid Walls Solid wall panel simply refers to walls being made of solid concrete as opposed to including integral insulation. These wall systems require some form of insulation and an interior wall/finishing system to complete the building enclosures. Sandwich Walls Insulated sandwich wall panels can be strictly architectural, strictly structural, or a combination of both. The difference between typical panels and insulated sandwich wall panels is that the latter are cast with rigid insulation "sandwiched" between two layers, or wythes, of concrete. The insulation thickness can vary to create the desired thermal insulating property ("R" value) for the wall. The structural behavior is either: - Composite in which the wythes are connected using ties through the insulation that fully transfer loads. The structural performance is then based on the full thickness of the panel - Non-Composite in which the wythes are connected using ties through the insulation, which limits performance to the individual capacities of each wythe. Thin-Shell and GFRC Thin-shell wall panels consist of a thin, outer-wythe of concrete typically ranging between 1.5 and 3 inches in thickness. This is connected to a "back-up" system, usually constructed of steel framing or studs, or sometimes concrete. The back-up system is what connects the wall panel to the structural system of the building and often provides the furring for interior finishes, such as drywall to be attached. Many of these systems can also incorporate a layer of rigid insulation between the exterior wythe of concrete and the back-up system. Benefits of Precast Concrete Wall Panels - The sandwich construction technique used with the precast concrete walls provides increased stability and improved sound insulation, as well as greater protection from potential hazards such as fires. - Precast concrete panels also provide energy-saving advantages. Because the concrete wall panels are separated by a layer of thermal insulation, the precast concrete wall panel system results in enhanced energy performance, which can help to lower overall costs. - Superior strength and durability - Provides excellent protection against impacts from explosions, vehicles and projectiles - Ease of installation 1. Preparation of timber formwork 2. Completion of steel bars and erection of formwork to required size 3. Closing of formwork, concrete is poured and left to cure 4. Completion ii. Pre-cast concrete wall systems
  • 36. 1. Weld Plates The most common method of attachment of precast members is by use of steel weld plates. Typically, the precast members have embedded plates that can be used as welding surfaces for loose connecting plates or angles 2. Rebar and Grout Used typically with slabs, reinforcing bars are spliced into slabs and grouted in place. B. Mansory Walls - Stone masonry - Clay/cement brick walls - Concrete/ cement block walls Characteristics - One of the oldest materials, and the most common material for walls construction in Malaysia - Durable, good sound and fire insulation properties as well as thermal insulation - Offers great flexibility in form and appearance. Non- Modular bricks- actual dimensions Modular bricks- Nominal dimensions Common types of bricks/ blocks: Types of bricks Methods of Attachment of Precast Concrete Members: Three-inch Standard Modular Engineer Double Economy 12 or Jumbo utility Triple SCR 6’’ Norwegian 6’’ Jumbo 8’’ Jumbo Roman Norman Norwegian Economy 8 or Jumbo closure Standard Oversize Embedded plate Embedded plate Loose plat field-welded to Em Grout fill Rebar Precent Slab Beam or Wall Clay Brick Smooth surface facing brick Cement sand brick Calcium silicate brick Concrete block Autoclaved aerated concrete block
  • 37. Terminology and bonds Brick jointings Construction of bricks wall Brick on edge (shiner, bull stretcher) Soldier- A brick laid vertically with the long narrow side of the brick exposed. Sailor- A brick laid vertically with the broad face of the brick exposed Step 1: Preparing the Wall 1. Purchase the right amount of bricks. Step 2: Building The First Row 1. Lay your first row of bricks in the foundation for a dry run 2. Dig out a trench for your foundation. Flush Bucket Handle Weather Struck Recessed Weather Struck and cut 3. Drive level wooden stakes into your trench. 5. Make your guideposts, or gauging rods 2. Clamp a string on your first guideline. 4. Mix and pour concrete up to the top of the guideposts.
  • 38. 3. Lay the first 1/2 inch of mortar along the base of the foundation. 4. Press the first brick into the mortar 5. Lay mortar down for the next 2-3 bricks. 9. Keep adding bricks until the row is finished. Step 3: Building Additional Rows 1. Move your guideline up to the next marker. Step 4: Finishing the Wall 1. Fill in any missing patches of mortar along the wall. 2. Cut a brick in half with a firm tap from the pointed end of a hammer 3. Start the second row with 1/2 a brick on both ends. 4. Mortar and place one full brick on top of your ends. 8. Scrape away any excess mortar as your work 7. Press the brick lightly into the 1/2" of mortar you've laid down so that it is level with the first brick 6. Butter the end of the next brick with mortar and press it into place. 5. Fill in the entire bottom row. 6. Continue building your wall from the ends inward. 2. Use a brick jointer to indent the mortar professionally
  • 39. Plaster and skim coat - Skim coating is the process of applying a layer of muddy plaster compound to rough or damaged ceilings and walls to either smooth or repair them. - Plastering should be done after curing on the brick masonry. - Cement and fine aggregate mix ratio should be 1:6 (1 Cement: 6 fine aggregate) for internal plastering,1:4 for externa lplastering. - Never do a plastering beyond 12 or 15mm thickness on a brickwall. Stiffeners - Stiffeners are used to provide lateral support to masonry walls. - Vertical stiffener- per 3 m height. - Horizontal stiffener- per 4m length/ width phase 1 Diagonal view Cross walls Measuring T-square Keyhole saw Sequential core filling with reinforcing phase 2 phase 3 Stiffener can be connected to the floor above or stand alone Wall stiffener- Open-ended blocks used to build around stiffener C. Dry wall/ stud framing system Partition board wall system Drywall is a construction material used to create walls and ceilings. It's also used to create many design features, including eaves, arches and other architectural specialties. It's quick and easy to install, incredibly durable, and requires only simple repairs when damaged. In the commercial building world, drywall is used to wrap columns to conceal steel beams and is an easy and inexpensive way to top off masonry walls above ceilings. Drywall is also used to add fire resistance at walls and ceilings, containing the spread of fire so people can evacuate safely during an emergency. Characteristics 1. Non-load bearing 2. Relatively simple and easy to be installed 3. Good light and fire insulating properties as it is an ablative material 4. Good sound and thermal insulation properties. The sound and thermal insulation properties can be improved by the addition of mineral fibre insulation 5. Type of partition board and stud backing system can be varied to suit different requirements 6. Susceptible to water damage and moulding 7. Susceptible to damage by external forces as it is hollow Installation process of drywall 1. Estimate the number of drywall sheets required to cover the wall. 2. Cutting
  • 40. Screw 5. Wait for 24 hours for the mud to dry to begin sanding. 6. Use a pole sander and 120-grit sandpaper to lightly sand the mud you applied earlier. You've finished sanding when you can't see any tape or mud bulges on the walls' surface, and when a level applied to the wall shows it is smooth and even. Wear a mask and goggles while sanding to prevent damage to eyes and lungs. 3. Hanging 4. Finishing Framing system of drywall Start attaching your drywall sheets to the wood or metal studs used to frame your space. You should hang sheets horizontally when working with wood studs, while metal studs work better with vertical installations. This is because wood studs are more likely to warp and deflect over time. Hanging the sheet horizontally allows each sheet to be in contact with more studs and helps minimize deflection. Generally speaking, it can be more difficult to screw into metal studs. When using wood studs, you should also apply a drywall adhesive to the face of the studs before hanging your drywall in order to further minimize deflection. To attach the drywall to the studs, use a screw gun and drywall screws, making sure you hit the studs. Screws should be placed about every four inches. Finally, you'll tape, sand and finish the drywall. This involves applying three layers of mud, one layer of drywall tape, and a whole lot of sandpaper. First, use a 6-inch finishing knife to spread joint compound along each seam. This first layer is called the tape coat, and should be about four inches wide, centered on the joints in your drywall sheets. Next, apply drywall tape along the joints. The mud you applied will hold it in place. Your second coat of mud is called your block coat. Use your 6-inch finish knife to apply a second coat of mud on top of your drywall tape. Use just enough to seal the drywall tape in place. The final coat is called the skim coat. A 10-or 12-inch knife should be used to apply a third coat of mud. Take your time on this coat to spread the mud thinly away from the seams to provide a smooth, level surface. Field Double or single op plate Wood studs Bottom plate Vertical kneel Horizontal kneel Floor kneel Roof kneel Skirting line Perimeter of gypsum board Horizontally applied gypsum board shows paper bound edges at right angles to framing members. field, perimeter, edged, ends and joints are indicated Insallation of partition
  • 41. A structural glass wall is made up of tempered glass sheets suspended from special clamps, or spider fittings. These fittings are stabilized against wind pressure by perpendicular stiffeners and/ or cables and carry the loads of the glass. Structural glass walls overcome the restrictions of conventional frames to provide the ultimate all glass façade. A structural glass wall is made up of tempered glass sheets suspended from special clamps, or spider fittings. These fittings are stabilized against wind pressure by perpendicular stiffeners and/ or cables and carry the loads of the glass. Structural glass walls overcome the restrictions of conventional frames to provide the ultimate all glass façade. Structural Glass Walls Unitized curtain wall systems Spider fittings Structural glass assemblies Glass Fin D. Glass wall Characteristics 1. Allows transparency yet retains the strengths of typical walls 2. Able to act as walls for large spans of façade areas 3. High cost compared to other traditional materials 4. Requires specialist consultants and contractors 5. Durable to weathering conditions 6. Strong but brittle surface E. Glass curtain walling Curtain walls are classified by their method of fabrication and installation in two categories: stick built and unitized systems. Cantilever top and bottom Movement due to wind load Cantilever top only Propped Cantilever Pinjointed stabalizer Balance beam Stick systems consist of the vertical curtain wall frame (mullions), horizontal curtain wall frames (transoms), glass or opaque panels that are installed and connected piece by piece. These parts are usually fabricated and shipped to the job site for installation. It has the advantage that it is economical and the construction sequence is flexible. Disadvantages are the lengthy installation time and high dependence on site workmanship to ensure acceptable quality. Composite panel walling system There are a wide range of possible infill panels for curtain wall systems, including: - Vision glass (which may be double or triple glazed, may include low-e coatings, reflective coatings and so on). - Spandrel (non-vision) glass. - Aluminium or other metals. - Stone veneer. - Fibre-reinforced plastic (FRP). - Louvres or vents. Stick systems
  • 42. 1. Straight staircase Composite panel walling system Panels are often composites, with the facing materials bonded to, or 'sandwiching' insulation. Frame and panel designs are very complex, as they need to perform multiple functions, such as: - Transferring loads back to the primary structure of the building. - Providing thermal insulation and avoiding cold bridging and condensation. - Providing fire, smoke and acoustic separation. This is particularly difficult at joints between the curtain wall system and interior walls and floors. - Creating a barrier to water penetration. - Accommodating differential movement and deflection. - Preventing panels from falling out of the frame. - Allowing for opening windows. - Preventing the accumulation of dirt. Construction process of concrete straight staircase: 1. Measure the dimensions of your stairs: - Firstly, the total rise of the stairs, which can be found by measuring the total height from the planned base to the higher level/floor, has to be measured - The run of the steps was then measured by finding the distance between the frontmost and backmost part of the stairs. - The width of the stairs was measured by calculating the distance between the leftmost and rightmost bounds of the planned steps of the stairs. Aluminium framing Aluminium framing is used for the vast majority of curtain walling applications, primarily for its excellent strength to weight ratio and its ability to be extruded in complex shapes. Aluminium is 66% lighter than steel, as such, it is also far less susceptible to brittle fractures. Types of staircase A staircase is a system of steps by which people and objects may pass from one level of a building to another. 5.2.4 Staircase 4. Double quarter landing staircase 2. Quarter landing staircase 3. Half landing staircase 5. Winder landing staircase 6. Double winder landing staircase 7. Spiral sraircase 5. Circular staircase
  • 43. 2. Building and Assembling Formwork: - The formwork can be made by using plywood or framing timber. The side forms are cut according to the tread and riser calculations. 3. Reinforcement - Reinforcement bars are carefully bent at the necessary height and length and positioned into the formwork. 4. Preparing Concrete: - Produce sufficient and well mixed mortar with portable cement mixer. 5. Pouring concrete: • Start from the bottom and pour one step at a time. Make sure the mortars are spreaded evenly. A spade should be used to remove the trapped air bubbles. 6. Add finishing: - Use a simple wood float to clean and smooth the surface of the mortar. 7. Curing: - Spray the steps with curing compound and cover it with burlap. Once the concrete has hardened for a week, the plywood formwork can then be removed. 8. Installing the handrails: - The stair railings were positioned onto the staircase at the location in which they will be installed. - The position of the railings were marked - Pilot holes were drilled into the staircase on the marks made. - The railings were placed into the pilot holes. - Cement was then poured into the holes to fix the handrails. Joiats Decking Wall string Riser board Riser cleat
  • 44. 6.0 Doors and Windows 6.1 Doors - Doors and doorways provide access from the outside into the interior of a building as well as to act as a passage between interior spaces. - Doorways should be large enough for ease of movement and to accommodate movement of furnishings and equipment. - All doors should be evaluated for their ease of operation, durability under anticipated frequency of use, security provisions as well as light, ventilation and views that are offered by them. - Door frames used in the construction of the 2-storey terrace houses of Elmina Valley Phase EV1A are generally aluminium door frames The photo shows the aluminium door frames which were used during the construction of the 2-storey terrace houses of Elmina Valley Phase EV1A. Types of doors Trim/Casing Jamb Weather Strip Lock Site Mid Rail Center Stile Strike Plate Lock Set Threshold Top Rail Six Panels Single Side Panel Right-Hand Swing Single Side Panel Left-Hand Swing Two Side Panels Double Door One side Fixed Flush Four Panels Half Moon Two Panels Half Lite Two Panel 2/3 Lite Full Lite Hinge Stile Panel Lock Rail Bottom Rail Sill Door Bottom Shoe Figure above shows components of door Figure above shows components of door knob
  • 45. Doorjamb Door- jambShims Shims Frame Weather Seal Locker Rolleer Receiver Closing Side Sash Pane Handle Bottom Bead Slider Double Hung Twin Double Hung Picture with Double hung Hinge Hing Side Glazing Gasket Head Advantages of aluminium door frames - Slim profile - Durable - Narrow sight lines - Low maintenance - Light yet strong - Compared with vinyl, fiberglass and wood frames, aluminium conducts heat and cold the least well - Windows are key architectural elements that provide a bridge between the inside and the outside by: i. Admitting light ii. Controlling ventilation iii. Influencing thermal comfort. - As such, the form and position of windows are key aspects of internal design. 1. The location of the doors are measured and marked. A few layers of bricks are then placed beside the markings. 4. For timber door frame: The wall is plastered and the main frame is installed. For aluminum door frame: Mortar is filled in the space between the gap and masonry wall before the wall is plastered. 2. The door frame is inserted into the marked position. The jamb of the door is nailed into the masonry wall for support. Bricks are then continued to be laid. 3. Pre-cast concrete lintel is bind with mortar and placed on top of the door head. Lintel is constructed so that no extra vertical force is exerted on the door frame. 6. Casing is installed to ensure cracks and flaws in the joining are hidden. Construction process of aluminium door frames Trimmer stud Trimmer stud 5. Shims are places on the hinges' side to form a continuous gap in between. The hinge is then nailed into the side door jamb. 6.2 Windows Figure above shows components of Windows Types of Windows
  • 46. Bay Liftout Slider 2 Lite Casement Casement Fixed window over awning Hopper Awning Fixed Over Awning i. Up hang windows 3 Liftout Slider with colonial Inserts There are two types of windows available in the 2-storey terrace houses of Elmina Valley Phase EV 1A, namely up hang windows and casement windows. - Up hang windows are hinged at the top and swing outward from the bottom. They glide open and shut with the turn of one easy-to-reach handle. - Up hang windows are often placed above or below other windows to add architectural interest, light and ventilation to a room while keeping the rain out. - Up hang windows are often used in combination with large stationary windows to provide a constant views and air flow. Advantages of up hang windows: - Versatility: Due to the variety of styling options and the ability to be installed higher than other types of windows, up hang windows provide greater flexibility in designing the décor of a building. - Weather-proof: Up hang windows open out from the top and provide protection from the rain when opened. They allows little to no leakage from rain when the windows are opened, and as such the user can enjoy fresh air even when the weather is bad. - Privacy: Up hang windows can be installed higher than various types of windows. As such, they are able to provide natural light and ventilation without compromising the user’s privacy. Types of Windows Bow Garden Eyebrow Circletop Quater Arch Octagon Full Circle 1. Position the sub-frame using the aluminium plate 2. Check the alignment of the sub-frame 3. Anchor the sub-frame into the rough opening using nail 4. Seal the anchor head and the joints with the wall with protection tape on the frame 5. Placing main frame on the sub-frame. Use millet to knock the finishing frame 6. Finish the wall with sealant. Construction process of windows
  • 47. Casement windows are windows that are hinged on the side and the sash opens horizontally opposite the hinge. This type of window allows for full ventilation from top to bottom of the window opening and the extended sash can catch the breeze and direct it into the house for better air flow. Advantages: - Wide openings: Casement windows open completely, allowing a nice breeze into your home - Superior Security: Locks on casement windows are embedded into the frame. This provides enhanced safety and security. -Easy operation: Casement windows open easily with a crank, making them ideal for hard to reach areas. ii. Casement windows Photo above shows the location of casement windows on siteFigure above show ilustration of casement windows
  • 48.
  • 49.
  • 50. Summary In conclusion, this project really played its part in allowing students to experience, document and analyse the construction process through their own eyes. Through this project, students were able to conduct their own site visit to their chosen construction site and to fully understand the sequence and coordination of construction at site. The site visit conducted proved to be an important learning process for architecture students as practical site visits conducted were able to allow students to have a clearer understanding of the topics which were covered in lectures. The exposure of students to construction methods and technologies in relation to their respective site contexts were able to allow students to broaden their horizons and to demonstrate their understanding and knowledge of the construction process in a systematic and professional manner. For our group, we conducted two site visits respectively. We conducted our first site visit to Elmina Valley Phase EV1A. Residential buildings built on site are 2-storey terrace houses and we were able to observe, experience and document several aspects of the construction process on site, namely site and safety, plants and machineries, site layout, foundation, superstructures, doors and windows as well as roofs. Through our site visit, we’ve learnt that site and safety plays a huge role in the construction site as every safety measures were carried out to ensure the workers’ safety on site at all times. Moreover, we were able to personally observe and document the different plants and machineries used to construct the 2 storey terrace houses on site. Plants and machineries were further divided into various categories, namely earthmoving and excavating equipment, lifting and erecting equipment, mixing and grading equipment, transporting vehicles, construction equipment and many more. Moreover, we’ve also learned that a well-planned site layout is able to increase the productivity of the construction process. A well planned and organised construction site like Elmina Valley Phase EV1A is able to ensure a smooth transition from one location to another within the site, avoiding unnecessary injuries and directing workers to their respective working zones efficiently. The type of foundation available on site is shallow foundation, and specifically reinforced concrete pad footings. In addition to that, after conducting our site visit, we were able to understand the complete construction process for the superstructures. After the foundations were constructed, the reinforcements will be extended for the construction of columns. Ground beams will be constructed on top of foundations and this process will be flowed by the construction of ground floor slabs. Columns and beams will later be constructed and after the framework of the entire building is completed, walls will be erected to enclose the spaces. The walls found on site are masonry walls, namely red clay brick walls and cement sand brick walls. Roofs present on site are generally gable roofs and they are easily recognized by their triangular shapes. In addition to that, we’ve conducted our second site visit to Lot 120, Mukim Lunas, Daerah Kulim, Kedah Darulaman to obtain an understanding of the process of setting out and earth works. As Lot 120, Mukim Lunas, Daerah Kulim, Kedah Darulaman is a newly developed construction process, we had the privilege of accessing the site to document the process of setting out and earth works.
  • 51. References: Books: Allen, E., & Allen, E. (1985). Instructor's manual and slide script to accompany Fundamentals of building construction: Materials and methods. New York: Wiley. Allen, E., & Iano, J. (1985). The professional handbook of building construction. New York: Wiley. Allen, E., & Iano, J. (2004). Fundamentals of building construction: Materials and methods. Hoboken, NJ: J. Wiley & Sons. Allen, E., Iano, J., & Allen, E. (2004). Exercises in building construction: Forty-five homework and laboratory assignments to accompany Fundamentals of building construction. Hoboken, NJ: John Wiley & Sons. Allen, E., Thallon, R., & Iano, J. (2002). Fundamentals of residential construction. New York: J. Wiley. Barry, R. (1970). The construction of buildings. Vol. 2. Crosby Lockwood. Barry, R. (1981). The construction of buildings Vol. 3: Single storey frames, shells and lightweight coverings. London: Granada. Barry, R. (1996). The Construction of buildings. Vol. 4. London: Blackwell. Barry, R. (n.d.). The construction of buildings: Volume 1. London : Granada, 1980. Best, R., & Valence, G. D. (2002). Design and construction: Building in value. Oxford: Butterworth-Heinemann. Bisharat, K. A. (2004). Construction graphics: A practical guide to interpreting working drawings. Hoboken, NJ: J. Wiley & Sons. Bulkeley, B., & Hart, B. (2005). Basic building & construction skills. Frenchs Forest, N.S.W.: Pearson Education Australia. Chew, M. Y. (2001). Construction technology for tall buildings. Singapore: Singapore University Press, National University of Singapore. Ching, F. D., & Adams, C. (2001). Building construction illustrated. New York: Wiley. Chudley, R., & Greeno, R. (1999). Construction technology. Harlow: Longman. Chudley, R., & Greeno, R. (2001). Building construction handbook. Woburn, MA: Butterworth Architecture. Chudley, R., & Greeno, R. (2008). Building construction handbook. Oxford: Butterworth-Heinemann. Chudley, R., Greeno, R., & Chudley, R. (1999). Advanced construction technology. Harlow: Longman. Construction technology. (1999). Alva: Northwest Technology Center. Cooke, B. (2011). Construction practice. Chichester, West Sussex: Wiley-Blackwell. Cooke, R. (2007). Building in the 21st century. Oxford, UK: Blackwell Pub. Emmitt, S., & Gorse, C. A. (2010). Barry's introduction to construction of buildings. Chichester, U.K.: Wiley-Blackwell Pub. Emmitt, S., Gorse, C. A., & Barry, R. (2005). Barry's introduction to construction of buildings. Oxford: Blackwell Pub. Greeno, R. (2007). Introduction to building. Harlow: Pearson Prentice Hall. Greeno, R. (2007). Mitchell's introduction to building. Grundy, J. T. (n.d.). Construction technology. London: Edward Arnold. Heavy equipment operations. (2005). Upper Saddle River, NJ.: Pearson Prentice Hall. Heavy equipment operations. (2012). Upper Saddle River, NJ: Pearson Prentice Hall. Levy, S. M. (2010). Construction process planning and management: An owner's guide to successful projects. Amsterdam: Butterworth-Heinemann. Mehta, M. (1997). The principles of building construction. Upper Saddle River, NJ: Prentice Hall. Millais, M. (2005). Building structures: From concepts to design. London: Spon Press. Plank, R., Blanc, A., & McEvoy, M. (1993). Architecture and construction in steel. London : Ascot: Spon ; Steel construction institute. Riley, M., & Cotgrave, A. (2004). Construction technology. Basingstoke: Palgrave Macmillan. Rounds, J. L., & Segner, R. O. (2011). Construction supervision. Hoboken, NJ: Wiley. Sarkar, S. K., & Saraswati, S. (2008). Construction technology. New Delhi: Oxford University Press. Schittich, C., Helfrich, E., Green, P., Söffker, G., & Thrift, P. (1999). Glass construction manual. Basel: Birkhäuser. Spence, W. P., Kultermann, E., & Spence, W. P. (2011). Construction materials, methods and techniques: Building for a sustainable future. Australia: Delmar, Cengage Learning. Taranath, B. S. (1988). Structural analysis and design of tall buildings. New York: McGraw-Hill. Online sources (Websites) 2016. (2014, August 14). Window parts & diagrams. Retrieved October 16, 2016, from http://www.hometips.com/how-it-works/window-parts.html 666, admin_. (2013, July 29). Concrete slab floors. Retrieved October 16, 2016, from http://www.yourhome.gov.au/materials/concrete-slab-floors A. (2015). Construction process of Pad Footing. Retrieved October 16, 2016, from https://www.youtube.com/watch?v=kMvKAdALKFU Advantages and Disadvantages of a Flat Concrete Roof | DoItYourself.com. (2012). Retrieved October 16, 2016, from http://www.doityourself.com/stry/advantages-and-disadvantag- es-of-a-flat-concrete-roof
  • 52. Application, B. (n.d.). Enclosure. Retrieved October 16, 2016, from http://www.highconcrete.com/products/systems/enclosure/ Building construction details. (2015, December 3). Retrieved October 16, 2016, from http://www.slideshare.net/cocongkening/building-construction-details By clipping, or turning the point down, the roof becomes more resistant to wind damage. They also provide more space than a traditional hip roof. The higher pitch offers more living space, while providing better reinforcement. Jerkinhead roofs give architectural interest to any home. (2016). Top 15 Roof Types & Their Pros & Cons - Read Before you Build! - RoofCalc.net - Roofing Cost Calculator. Retrieved October 16, 2016, from http://www.roofcalc.net/top-15-roof-types-and-their-pros-cons/ By excavating underneath a structure short lengths of pile can be inserted and jacked into the ground using the underside of the existing structure as a reaction. (n.d.). Foundations. Retrieved October 16, 2016, from http://environment.uwe.ac.uk/geocal/foundations/Fountype.htm By placing piles directly adjacent to one another, a permanent or temporary retaining wall can be created. These can be closely-spaced contiguous pile walls, or interlocking secant walls, which depending on the composition of the secondary intermediate piles can be hard/soft, hard/firm or hard/hard secant walls. (n.d.). Designing Buildings Wiki The construction industry knowl- edge base. Retrieved October 16, 2016, from http://www.designingbuildings.co.uk/wiki/Building_foundations By Professor Chris Gorse & Ian Dickinson – licensed under the Creative Commons Attribution – Non- Commercial – Share Alike. - ppt download. (n.d.). Advanced Construction Technology By Professor Chris Gorse & Ian Dickinson – licensed under the Creative Commons Attribution – Non- Commercial – Share. Retrieved October 16, 2016, from http://slideplayer.com/slide/1567015/ Carter, T. (2014, December 5). Column and beam construction. Retrieved October 16, 2016, from http://www.askthebuilder.com/column-and-beam-construction/ Centre for Window and Cladding Technology. (n.d.). Retrieved October 16, 2016, from http://www.cwct.co.uk/design/options.htm Charlie Robinson, Carpentry Lecturer Follow. (2014). Power point foundations L1. Retrieved October 16, 2016, from http://www.slideshare.net/fccarpentry/power-point-foundations-42264768 Ching, F. D., Mulville, M., & Ching, F. D. (n.d.). European building construction illustrated. Civil Engineering (Beams,Columns). (2011, June 2). Retrieved October 16, 2016, from http://www.slideshare.net/mbrsalman/civil-engineering-beamscolumns Clay Tile Roofing. (n.d.). Retrieved October 16, 2016, from http://www.selfhelpandmore.com/building/roofing/types/clay-tile.php CONCRETE SHEAR WALL CONSTRUCTION. (n.d.). Retrieved October 16, 2016, from http://mitigation.eeri.org/files/concrete_shear_wall.pdf Concrete slabs. (n.d.). Retrieved October 16, 2016, from https://www.dlsweb.rmit.edu.au/toolbox/buildright/content/bcgbc4010a/04_struct_members/06_concrete_slabs/page_001.htm Curtain Wall Fundamentals. (2014, December 3). Retrieved October 16, 2016, from http://glassmagazine.com/article/commercial/curtain-wall-fundamentals-1413202 Darshan Bavadiya, Architect Follow. (2015). Foundation. Retrieved October 16, 2016, from http://www.slideshare.net/darshanbavadiya/foundation-51424024 Deakin, E. (n.d.). Underpinning and Pad Foundations - folio. Retrieved October 16, 2016, from https://folio.brighton.ac.uk/user/ed145/technology-report-1 do-it-yourself-help. (2006). How to build a frame for a new window. Retrieved October 16, 2016, from http://www.do-it-yourself-help.com/framing_a_window.html Floor System. (n.d.). Retrieved October 16, 2016, from https://times.taylors.edu.my/pluginfile.php/2364497/mod_resource/content/1/FLOOR SYSTEM.pdf Foundations Explained - Homebuilding & Renovating. (2016). Retrieved October 16, 2016, from https://www.homebuilding.co.uk/foundations-explained/ Friedman, D. (n.d.). Building Structural ProblemsInspection, Diagnosis, & Repair of Structural Damage to Buildings. Retrieved October 16, 2016, from http://inspectapedia.com/structure/Building_- Structures.php Functional Requirements of Building Elements: WALLS. (n.d.). Retrieved October 16, 2016, from http://www.cityu.edu.hk/CIVCAL/design/frobe/submenus/walls.html Functional Requirements of Building Elements: WALLS. (n.d.). Retrieved October 16, 2016, from http://www.cityu.edu.hk/CIVCAL/design/frobe/submenus/walls.html Functions of Slab and Design of Slab. (n.d.). Retrieved October 04, 2016, from http://www.aboutcivil.org/slab-definition-functions-design.html GEM Building Taxonomy. (n.d.). Retrieved October 16, 2016, from https://www.nexus.globalquakemodel.org/gem-building-taxonomy/overview/glossary/precast-concrete--pc Ground Beams, Ground works, Foundations, The Micropiling Group, Micropiling Southern, Micro Piling Herts Hertfordshire London. (n.d.). Retrieved October 16, 2016, from http://www.micropiling- group.com/ground_beams.php Gutter Protection. (n.d.). Retrieved October 16, 2016, from http://www.gutter-protection.com/gutter-materials.html H. (2007). How Drywall Works. Retrieved October 16, 2016, from http://home.howstuffworks.com/drywall4.htm H. (2008). How Concrete Roofs Work. Retrieved September 30, 2016, from http:// home.howstuffworks.com/home-improvement/construction/materials/concreteroofs1.htm Healy, T. How to build stairs. Retrieved October 16, 2016, from http://www.wikihow.com/Build-Stairs J. (n.d.). Build a Brick Wall. Retrieved October 16, 2016, from http://www.wikihow.com/Build-a-Brick-Wall liwei, & profile, V. my complete. (2014, October 1). Beam and slab. Retrieved October 16, 2016, from http://construction-greatopportunity.blogspot.my/2012/03/beam-and-slab.html Load Bearing Wall: Determining and Removing One. (2016). Retrieved October 16, 2016, from http://www.explodedhome.com/just-taken-load-bearing-wall/ Ltd, P. E. (n.d.). Metro GlassTech - Great ideas in glass. Retrieved October 16, 2016, from http://www.metroglass.co.nz/catalogue/139.aspx MASONRY WALL SAFETY DURING CONSTRUCTION WORK GUIDE. (n.d.). Retrieved October 16, 2016, from https://www.commerce.wa.gov.au/sites/default/files/atoms/- files/masonry_wall_safety.pdf Mohdasrimohdhasim Follow. (2013). Chapter 10 structure construction. Retrieved October 16, 2016, from http://www.slideshare.net/mohdasrimohdhasim/chapter-10-structure-construction Ochshorn, J. (n.d.). ARCH 2614/5614 Lecture notes. Retrieved October 16, 2016, from https://courses.cit.cornell.edu/arch262/notes/11b.html OriginalsByEva, B. (2014). Stick Curtain Wall Facade System - Comfortable Home. Retrieved October 16, 2016, from http://comfortablehome.info/1788-stick-curtain-wall-sys- tem-sanxin-facade-technology-limited Precast Concrete Methods. (2016). Retrieved October 16, 2016, from http://theconstructor.org/concrete/precast-concrete-methods/422/ PRECAST CONCRETE WALL PANELS. (n.d.). Retrieved October 16, 2016, from http://precast.org/wp-content/uploads/2014/08/Precast-Concrete-Wall-Panel-Presentation.pdf Precast Construction | FDArchitects. (n.d.). Retrieved October 16, 2016, from http://frontdesk.co.in/precast.html#.V-FU4TUqbWw PUBLICATIONS, H. S. (2010, March 28). Form and pour a concrete slab. Retrieved October 16, 2016, from http://www.familyhandyman.com/masonry/pouring-concrete/- form-and-pour-a-concrete-slab/view-all
  • 53. Rain gutter. (n.d.). Retrieved October 16, 2016, from https://en.wikipedia.org/wiki/Rain_gutter Roof Shapes. (2016). Retrieved October 16, 2016, from https://www.thisoldhouse.com/ideas/roof-shapes Shanasri4 Follow. (2012). Foundation design part_1. Retrieved October 16, 2016, from http://www.slideshare.net/shanasri4/foundation-design-part1 Steel design pre 1. (2013, September 13). Retrieved October 16, 2016, from http://www.slideshare.net/5006/steel-design-pre-1 Steel Frame Vs. Timber Frame. (n.d.). Retrieved October 16, 2016, from http://ownerbuilderadvice.com/steel-frame-vs-timber-fram The advantage of using shear wall method of construction. (n.d.). Retrieved October 16, 2016, from http://www.pcg-group.com.my/index.asp?p=/static/the-advan- tage-of-using-shear-wall-method-of-construction.html The Advantages of Steel Decking as provided by Metaldeck. (2016). Retrieved October 16, 2016, from https://www.raisedfloor.co.uk/the-advantages-of-steel-decking/ Truini, J. (2015, September 19). Stairs design: How to build stairs. Retrieved October 16, 2016, from Projects and Plans, http://www.popularmechan- ics.com/home/how-to-plans/how-to/a2145/4224738/ TYPES OF FOUNDATION. (n.d.). Retrieved October 16, 2016, from http://slideplayer.com/slide/5683042/ Types of Foundations in Building Construction. (n.d.). Retrieved October 16, 2016, from http://www.understandconstruction.com/types-of-foundations.html Types of Walls. (n.d.). Retrieved October 16, 2016, from http://www.understandconstruction.com/walls.html Types of Walls. (n.d.). Retrieved October 16, 2016, from http://www.understandconstruction.com/walls.html Unitized Curtain Walls and Their Limitations. (2015, February 9). Retrieved October 16, 2016, from http://glassmagazine.com/article/commercial/unitized-curtain-walls-and-their-limitations-1513403 Vijay1230 Follow. (2012). 04 masonry. Retrieved October 16, 2016, from http://www.slideshare.net/vijay1230/04-masonry Wall System. (n.d.). Retrieved October 16, 2016, from https://times.taylors.edu.my/pluginfile.php/2364521/mod_resource/content/1/WALL SYSTEM.pdf Wall. (n.d.). Retrieved October 16, 2016, from https://en.wikipedia.org/wiki/Wall WALLS- TYPES, FEATURES AND DESIGN CONCEPT. (2016). Retrieved October 16, 2016, from http://theconstructor.org/building/buildings/walls-types-features-and-design-concept/819/ WALLS- TYPES, FEATURES AND DESIGN CONCEPT. (2016). Retrieved October 16, 2016, from http://theconstructor.org/building/buildings/walls-types-features-and-design-concept/819/ Walls. (n.d.). Retrieved October 16, 2016, from http://www.pci.org/design_resources/about_precast/walls/ What are the pros and cons of timber roof trusses? | DoItYourself.com. (2012). Retrieved October 16, 2016, from http://www.doityourself.com/stry/what-are-the-pros-and-cons-of-timber-roof-truss What is slab?. (2014, August 29). Retrieved October 16, 2016, from http://www.iamcivilengineer.com/2014/08/what-is-concrete-slab-classification-of_51.html Why Choose Concrete Roof Tile? | Enlighten Me. (2014). Retrieved October 16, 2016, from https://enlightenme.com/concrete-roof-tile/ Wilden How, Shop Assistant at F.O.S Follow. (2014, July 11). Building Construction. Retrieved October 16, 2016, from http://www.slideshare.net/Welltan/building-construction-36880123 Wood, J. L. (n.d.). Advantages & Disadvantages of a Shed-Style Roof. Retrieved October 16, 2016, from http://www.ehow.com/info_12112556_advantages-disadvantages-shedstyle-roof.html Wylie, N. How to build a brick wall. Retrieved October 16, 2016, from http://www.wikihow.com/Build-a-Brick-Wall Wylie, N. How to build a brick wall. Retrieved October 16, 2016, from http://www.wikihow.com/Build-a-Brick-Wall