2. 1
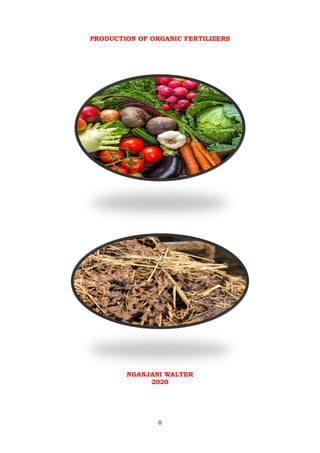
Organic fertilizers/ manures
These are derived from decayed plant and animal’s residues. Examples include, farm
yard manure, compost manure, green manure and organic mulches.
Advantages of organic fertilizers
They improve soil structure by binding soil particles together
They act as food for microorganisms in the soil.
They improve on water infiltration therefore conserving soil moisture.
They give soil dark colour and this increases soil temperature.
They increase soil aeration.
They are readily available.
They release nutrients slowly for plant use therefore have a long lasting effect in
the soil.
They reduce leaching and improve on the cation exchange capacity of the soil.
FARM YARD MANURE
This is made from a mixture of animal waste and crop residues used as beddings in
animal houses.
Preparation of FYM
Provide beddings of good absorption in the animal’s quarters/ house so that
animals can deposit dung and urine it.
Leave beddings in animals' house until it’s completely mixed up as the animals
continue to pass out excreta over it.
Prepare a site on well drained ground where water will not seep into the manure.
Remove bedding with excreta from animals' house and deposit it on the prepared
site.
Cover material with a 5 cm layer of soil to protect it against drying.
Build a shade over it to reduce nutrient loss to sunshine, wind and rain.
Allow the material to decompose completely, thereafter take it to the field.
3. 2
COMPOST MANURE
This is manure made of partially decaying organic materials such as crop residues,
weeds kitchen refuse etc.
Methods of making compost manure
Indore method
1. Five pits each measuring 1.2m wide, 1.2m long and 0.6m deep are dug.
2. The materials to make the manure are packed in the first pit in the following
order.
A foundation layer of dry straw or maize stalks to trap nutrients and allow
aeration are put first.
A layer of composting materials which include grass and kitchen refuse is added.
A layer of well decomposed farm yard manure is added to provide microorganisms
which start off the decomposition process.
Wood ash or phosphatic fertilizer is added to increase the nutrient content of the
manure.
A layer of top soil is added to provide more organisms. Lime is also added to adjust
the pH of the material.
3. If the pit is not full, the above order is repeated up to when the pit fills.
4. When the pit is full, it is covered with dry leaves.
5. After 3-4 weeks, the materials in the pit 1 are transferred to the pit 2 and covered
with dry leaves. More fresh material are put in pit 1.
6. After 3-4 weeks’ materials in the pit 2 are transferred to pit 3 and material in pit 1
to pit 2.
7. After one month, the material in pit 3 are transferred to pit 4 where it stays for
another month.
8. From pit 4, it is transferred to pit 5 where it stays for another month. By this time
the manure is ready for use in the garden.
4. 3
ORGANIC LIQUID FERTILIZER
HOW TO MAKE ORGANIC LIQUID FERTILIZER
To make or prepare the organic liquid fertilizer, it takes a container, the ingredients, and
a stick to mix the solution.
Regarding the container, it should not have leaks or traces of oil or petroleum products
or other toxic products. Otherwise, these products can kill the good bacteria and other
microorganisms responsible for the organic decomposition of organic matter into organic
liquid fertilizer.
As for the ingredients, the organic liquid fertilizer is very economical in ingredients. The
ingredients used are: manure of any animal species, green matter, living earth, ash, and
water.
These ingredients add up according to defined proportions and objectives below:
The manure, a source of nitrogen, occupies 1/3 of the contents of the receptacle
chosen for the manufacture of the liquid fertilizer. If possible, combine different
types of animal manure to achieve the best results.
The green matter is green grass or green leaves. Green matter is a source of sugars
and minerals. It occupies 1/3 of the contents of the container.
The living earth and ash 2 to 3 shovelfuls of each. The living earth, helps to
increase the varieties of useful microorganisms.
For ash, it brings minerals and potassium to the fertilizer which regulates its pH.
Water completes the last third of the contents of the container. It reaches the edge
of the container so that, when stirring, the solution does not spill out.
Note that in addition to these ingredients, other ingredients can be added in order to
increase the nutrient value of organic liquid fertilizer. These other ingredients can
include: mud from fish ponds, remains of fish, carcasses or remains of (unpoisoned)
small animals (eg. rats, chicks).
Concerning the stick, it is used to mix the different ingredients together in order to
have a solution similar to a "sauce". After this first mixing, it is necessary to mix
the liquid fertilizer with the stick every day for 5-10 minutes for 2 weeks: on the
one hand, it allows the mixture to oxygenate and on the other hand, the more you
5. 4
stir, the quicker the decomposition process and the better the quality of the
fertilizer will be.
How to use liquid fertilizer?
After 14 days, the liquid fertilizer is ready to use.
Liquid fertilizer can be used for nurseries, gardens, fruit trees, and other large crops.
Before using it, it is necessary to extract the liquid portion out of the mixture. This is the
liquid fertilizer.
Dilute a volume of this liquid in fifteen to twenty volumes of water (1 for 15 to 20) and
finally to use this diluted solution by spraying the base of the plants once or twice a
week. It is strongly advised to mulch the plant base before using the liquid fertilizer.
Note:
• When mature, undiluted liquid fertilizer can be stored in a container of any size for a
long time.
• Undiluted liquid fertilizer can burn plants.
• Even if diluted, if applied directly to plant leaves, liquid fertilizer can burn plants.
• Liquid fertilizer can be applied 7 to 10 days after germination of the plants and is
continued if necessary.
HOW TO MAKE YOUR OWN LIQUID FERTILIZER FROM URINE?
You can make your own fertilizer using the available resources with you.
Did you know that your self-move with a fertilizer?
Below are some of the steps to follow while making your liquid fertilizer locally.
1. Collect urine in your home say a bucket afterwards cover the bucket with a lid
such that there is no evaporation.
2. Keep that urine for 21 days under a shade so that it is well fermented. Urine alone
contains NPK (Nitrogen Phosphorus and Potassium) it even works as a pesticide to
kill some insects.
How to use liquid fertilizer?
After 21 days, the liquid fertilizer is ready to use.
Liquid fertilizer can be used for nurseries, gardens, fruit trees, and other large crops.
Before using it, it is necessary to extract the liquid portion out of the mixture. This is
the liquid fertilizer.
Dilute a volume of this liquid in fifteen to twenty volumes of water (1 for 15 to 20)
and finally to use this diluted solution by spraying the base of the plants once or
twice a week.
It is strongly advised to mulch the plant base before using the liquid fertilizer.
Note:
• Undiluted liquid fertilizer can burn plants.
• Even if diluted, if applied directly to plant leaves, liquid fertilizer can burn plants.
6. 5
Organic mulches
These are the materials used for mulching. Mulching is the covering of the soil surface
with a layer of plant materials. When plant materials are used for mulching we refer to
these materials as organic mulches. However, in organic materials like polythene paper
may also be used in mulching. Materials that are used in mulching are collectively called
mulches.
Advantages of mulching
Mulching improves on water infiltration into the soil.
Mulching controls weeds. This is done by leaving no space for weed growth and
also cutting off light for their growth.
Mulching control soil erosion by intercepting rain drops and reducing the speed of
running water.
Mulching conserves soil moisture and this improves crop yields.
The mulch also adds organic matter into the soil, especially organic mulch after
decaying.
Mulching maintains soil temperature. This favors microbial activity and also crop
root development and growth.
Green manure
This is manure made by ploughing vigorously growing plants or crops into the soil. The
crop should be ploughed into the soil before flowering. Preference is given to legumes
because they have nodules.
Qualities of a good green manure plant
It should have a fast growth rate.
It should be highly vegetative/ leaf.
It should be leguminous in nature I.e. have a high nitrogen content.
It should be free from pests and diseases.
It should be drought resistant.
It should be able to multiply and establish.
It should be ever green in color.
It should not act as a competitor to the main crop.
It should be able to grow on less fertile soil.
It should be easy to plough into the soil.
It should be able to decompose readily.
How to Make Fermented Fruit Juice or FFJ
Fermented Fruit Juice or FFJ is made from sweet ripe fruits, fruit vegetables and root
crops. Thoroughly blended with crude sugar or molasses and stored for a short period of
time, the fermented extract is applied to the plants to promote flowering and fruit
setting.
Choosing the materials for Fermented Fruit Juice
You must choose materials that are:
locally produced
free from insect pests and diseases
not fit for human consumption
Materials needed in making Fermented Fruit Juice
7. 6
Locally produced sweet ripe fruits like mango, banana, papaya, strawberry and
ripe squash fruit and matured carrot; and root crops particularly camote, cassava
and Gabi. Citrus fruits are not recommended. You can make Fermented Fruit
Juice from single material or a combination of materials. The extract from the
combination of banana, papaya, and squash have been proven to be effective in
flower induction and fruit setting by many organic farmers.
You can use either crude sugar or molasses or whichever is available or can be
purchased at lower cost.
You will also need ceramic pots or plastic pail, basin, net bag or cloth bag, paper
or cloth for cover, string, stone as weight, bolo, chopping board, marking pen, and
glass jars for storage.
Steps in Making Fermented Fruit Juice
1. Collect ripe fruits or vegetables that are already available or in season, for example, if
squash is available, then make fermented squash juice. There are plenty of materials to
be used so you can make different kinds of Fermented Fruit Juice. Use any materials
that are free from insect pests and diseases.
2. Chop the materials into small pieces so that the juice can be easily extracted.
3. Put 1 kg chopped materials in a basin, add 1 kg crude sugar or molasses, and then
mix thoroughly with your bare hands. You must make sure that all chopped materials
are coated with sugar or molasses so that the juice can be extracted easily.
4. Put the mixture in a net bag or cloth bag. This is done so that the extracted juice will
ooze from all sides of the bag. Put the bagged mixture in a ceramic pot or plastic pail,
and put weight to compress the mixture. Stone is a good material used to weigh down
the mixture.
5. Cover the pot or pail with paper or cloth and secure with a string or rubber band.
Paper or cloth is used as cover to allow some air to get inside the pot or pail and for the
gas that is being produced during the fermentation process to escape. On the cover,
write the date of processing and the expected date of harvest.
6. Store the container with the bagged mixture for 7 days in a cool dry shady place.
Make sure that the storage area is not infested with cockroaches or mice, because they
might feed on the mixture and contaminate the extract. In 7 days, plant juice is
extracted and fermented. The fruit extract will change its colour from yellow orange to
brown, and will smell sweet and alcoholic. After 7 days, lift the bagged mixture and
squeeze hard to get the remaining extracts.
7. Collect the fermented extracts and preserve in dark coloured glass jar. To cover the
jar, use paper or cloth to allow the gas to escape during further fermentation, then, store
in a cool, shady place. You may add the fruit residue to compost pile to hasten
decomposition or you can apply it to the garden plots as source of organic matter. You
8. 7
can use your Fermented Fruit Juice more effectively if it is stored for another one week
after completion.
Uses and rates of application of Fermented Fruit Juice
* As flower inducer and fruit setter – Fermented Fruit Juice made from a combination of
ripe fruits of banana, papaya and squash have been proven by many organic farmers to
be effective when sprayed on the leaves at the rate of 2 to 4 tbsp/gallon of water at the
onset of flowering up to fruit setting. These ripe fruits contain phosphorous and
potassium which are necessary during the flowering and fruit setting stage.
* As soil microorganism activity accelerator – Fermented Fruit Juice is applied directly to
the soil at the rate of 1tsp/liter of water. The carbohydrates and sugar content of
Fermented Fruit Juice serve as source of energy of soil microorganism, thereby,
accelerating their activity. Increased microbial activities result to the availability of
nutrients for plant’s uptake.
* As spray to animal beddings to hasten manure decomposition – Fermented Fruit Juice
contains beneficial microorganisms that help in the decomposition process.
* As a nutritious drink – a 20% Fermented Fruit Juice solution makes an excellent drink
for both human and livestock.
How to Make Fermented Plant Juice or FPJ
Fermented Plant Juice or FPJ is made from axillary buds and young fruits, fast growing
plants, young leaves of plants and grasses. Mixed with crude sugar or molasses, the
juice is extracted and fermented after storing for a period of time. The liquid is applied to
plant’s leaves and growing points, soil around the plant, compost heap and animal
beddings to fortify microbial activities.
Choosing the raw materials for Fermented Plant Juice
You choose materials that are:
Young and fresh
Free from insect pests and diseases
Abundant in the production area
Free from chemical containments
Materials needed in making Fermented Plant Juice
* Local plants that are fast growing like legumes and grasses. You can also use bamboo
shoots, asparagus shoots, actively growing plant parts and young fruits of cucumber,
squash, melon, watermelon, and other cucurbits.
* Weed species that are found growing in the production area, young leaves of trees,
banana trunks, young leaves and fruits of stress tolerant crops are also good materials
for Fermented Plant Juice.
* You can use either crude sugar or molasses or whichever is available and can be
bought at a lower price.
* You will need basin, ceramic pot or plastic pail, net bag or cloth bag, paper or cloth for
9. 8
cover, string, stone as weight, bolo, chopping board, marking pen and glass jars.
Steps in Making Fermented Plant Juice
1. Collect the plant materials early in the morning while they are fresh and the
microorganisms are still present. Do not wash the plant materials.
2. Cut the plant materials into small pieces so that the juice can be easily extracted.
3. Put 3 kg chopped plant materials in a basin, add 1 kg crude sugar or molasses, then
mix thoroughly with your hands. Make sure that all plant materials are mixed with
sugar so that the juice can be extracted easily.
4. Put the mixture in a net bag or cloth bag. This is done so that the extracted juice will
ooze from all sides of the bag.
5. Put the bagged mixture in a ceramic pot or plastic pail, and put weight to compress
the mixture. Stone is a good material used to weigh down the mixture.
6. Cover the pot or pail with paper or cloth, and secure with a string or rubber band.
Paper or cloth is used as cover to allow some air to get inside the pot and for the gas that
is being produced during the fermentation process to escape. On the cover, write the
date of processing and the expected date of harvest
7. Store the container with the bagged mixture in a cool dry shady place. Make sure that
the storage area is not infested with cockroaches or mice, because they might feed on
the mixture and contaminate the extract. In 7 days, plant juice is extracted and
fermented. The plant extract will change its color from green to yellow, then to brown
and will smell sweet and alcoholic.
8. After 7 days, lift the bagged mixture and squeeze hard to get the remaining extracts
9. Collect the fermented extracts and preserve in dark colored glass jar. To cover the jar,
use paper or cloth to allow the gas to escape during further fermentation, then, store in
a cool, shady place. You may add the plant residue to the compost pile to hasten
decomposition or you can apply it to the garden plots as source of organic matter. Use
your Fermented Plant Juice more effectively if it is stored for another one week after
completion.
Uses and rates of application of Fermented Plant Juice
* As seed treatment before sowing – soak the seeds in 0.2 % solution for 4 to 5 hours to
facilitate germination and as a start-up solution to germinating seeds.
* As a natural growth enhancer – Fermented Plant Juice made from actively growing
plant parts and fast growing plants may contain natural growth hormones and
mineralized nitrogen that promotes plant growth. Mix 1 teaspoon of Fermented Plant
Juice per liter of water and spray on the leaves or apply directly to the soil around the
plants from seedling stage up to pre-flowering stage. You can apply weekly or depending
10. 9
on plant vigor. Please note that with the use of Fermented Plant Juice, there is no
overdose; you may use it liberally. However, the soil must be watered first before
applying Fermented Plant Juice to avoid scorching of the roots.
* Apply Fermented Plant Juice to the soil to serve as source of energy to accelerate
activities of soil microorganism. This activity will make the nutrients available to the
plants.
* Give Fermented Plant Juice, as drink, to livestock at 1 tbsp/liter to increase microbial
activities in gastrointestinal tracts. This would result to better absorption of nutrients.
* Spray to animal beddings to hasten manure decomposition.
Fish Amino Acid (FAA) is a liquid made from fish waste. FAA is a great fertilizer for soil
and plant leaves because it is rich in nitrogen which helps improve the growth of the
crops during their vegetation period. This biofertilizer reduces the feeding cost of farmers
since main ingredients, like fish waste, are usually free or can be purchased at low cost.
Any species of fish can be used, but blue back fish contains more amounts of proteins,
amino acids, fatty acids that are recognized as healthy food. Examples of blueback fish
are mackerel, salmon, tuna, and anchovy.
Materials:
1 kg. Fish waste like gills, scales, and/or offals of big fish (internal organs of
animals used for food);
1 kg Molasses
Nylon screen
Empty container (20 litres capacity)
25 to 50 grams of stones (5 to 8 pieces)
Porous paper (newspaper, cardboard or manila paper)
Empty plastic container with lid
Procedure:
1. Collect fish waste. Clean and wash them, then drain for 5 minutes.
2. Slice the materials to an inch size then mix all parts thoroughly in a plastic pail with 20
litre capacity.
3. Add 1 kg of molasses then mix. Make sure that all parts are coated with sugar so that
the juice can be extracted easily.
4. Cover the top of the mixture with a nylon screen then put heavy weights on top.
5. Cover the mixture with two layers of porous paper then tie with a rubber band.
6. Label the mixture bearing the name and date of fermentation then keep it in a dark, cool
room for 15 days.
7. Open the mixture and extract the liquid.
11. 10
8. Filter the liquid and transfer it to an empty plastic container with a lid but do not close it
tightly. Loosen the cap to approximately one complete twist so fermentation can
continue.
9. Completely close cap after a week or when the mixture has stopped bubbling.
10. The concoction is ready to use after extraction.
Dosage:
Mix 2 tablespoons of FAA with 1 liter of clean water. In severe cases, double the dosage if
needed.
Application:
For plants, prepare the same dosage; spray it on the soil, flowers, and fruits of the
plants 1 to 2 times a week.
For animals, mix it with their drinking water using the same dosage above, 2
times a week. It can also be mixed with their feed at the same frequency.