
Recommended
More Related Content
What's hot
What's hot (13)
Viewers also liked
Viewers also liked (20)
Similar to Question Four
Similar to Question Four (20)
More from Tyrrell
More from Tyrrell (20)
Recently uploaded
Recently uploaded (20)
Question Four
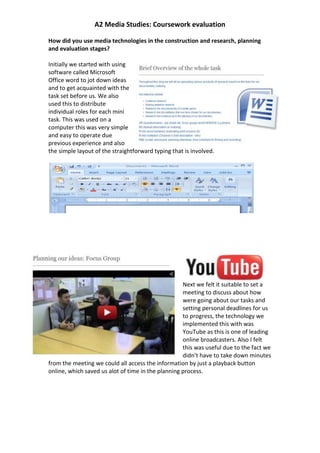
- 1. A2 Media Studies: Coursework evaluation How did you use media technologies in the construction and research, planning and evaluation stages? Initially we started with using software called Microsoft Office word to jot down ideas and to get acquainted with the task set before us. We also used this to distribute individual roles for each mini task. This was used on a computer this was very simple and easy to operate due previous experience and also the simple layout of the straightforward typing that is involved. Next we felt it suitable to set a meeting to discuss about how were going about our tasks and setting personal deadlines for us to progress, the technology we implemented this with was YouTube as this is one of leading online broadcasters. Also I felt this was useful due to the fact we didn’t have to take down minutes from the meeting we could all access the information by just a playback button online, which saved us alot of time in the planning process.
- 2. To begin our market research we decided to go back to Microsoft word as it is easy to replicate a similar conventional questionnaire that audiences are used to filling out as you are able to see the clear layout. By using Microsoft Word we were able to print and distribute a vast amount of questionnaires to our target audience. To make our gatherings appear more attractive to the eye we decided to use a spread sheet based document called Microsoft Excel this was simple to use as the instructions were straightforward to help us produce graphs like shown below
- 3. Next we thought it would benefit it us to watch documentaries as it was vital that we chose a relevant institution for our documentary, this would be useful to have as a base to follow similar conventions that they use. We dominantly used Youtube for this task as this gives us a wider range whereas you are restricted to what you can access on TV catch-up players even though they were used such as BBC, ITV and channel four. To watch the documentaries this was online players Then choosing a relevant institutionto broadcast our documentary was implemented using Prezi which is a presentation tool that helps organise ideas. This is similar however more advanced than Microsoft Powerpoint, furthermore this is more beneficial due to the layout and the ‘paths’ you can set to make the presentation more appealing to the eye. Additionally this is good due to the mobility you are able to save this to a memory stick this could be emailed to other members of the team for additional input.
- 4. For the student risk assessment and the storyboard I went with the pen and paper method to get down the ideas this was successful as we could draw exactly what we wanted whereas as we may have been limited using media technology to draw specific elements and this was uploaded onto a computer via a scanner. I then uploaded this to a basic site called slideshare along with the student risk assessment. This is the storyboard I drew as you can see no technologies were involved apart from uploading this to Scribd which is another online sight which allows you to view documents and images.
- 5. During the process we utilized a number of equipment such as a microphone, headphones, cameras and also tripods. We felt utilizing all of the equipment would help us create a professional and conventional documentary that will help the audience engaged for the whole five minutes of the documentary. The camera we used was very simple to use as this was not a high tech camera it was very basic. One of main objectives was to get numerous manual focus shots for our documentary as watching similar and previous documentaries this is used widely and this camera was able to capture a good standard of manual focus shots. For recording and filming interviews we used both the microphone and headphones in most cases to find the correct environment to record in. We used the tripod to get a professional look whether filming establishing shots, interviews or panning whereas hand held would look very shabby. Wherever possible we felt it vital to use the tripod for the majority of our shots.
- 6. For the editing process I used Final Cut Express, the first step was to import all of the raw clips so they were ready to Unedited clips edit. Time Editing Tools Using Final Cut Express I was able to implement cuts, trims, transitions and special effects to our documentary when necessary an example of this is the beginning intro was various clips overlapping each other whilst the opacity was alternating, although I did find Final Cut quite daunting when I initially started using the program due to the layout. But I believe as time progressed my abilities grew and I was able to create a reasonable documentary. I felt the zoom option was vital during the editing process in Visual footage order to get specific cuts and trims for the documentary, failing this the documentary Audio clips would have blackspots and would look unprofessional. Zoom
- 7. To complete the Radio trailer I used Garageband this is acknowledged worldwide as one of the leading audio editing software’s. Similar to Final Cut Express I felt Garageband daunting initially due to no previous experience and also the layout was not very revealing in the case of knowing how to operate it. Here I have deleted tracks that we felt were not good enough to be considered. As you can see here I am editing the radio trailer and the bottom track is the pre-set sounds that we will use a background music, I felt that this is very Tracks useful as there is such a wide variety of sounds that can be suitable for the mood I wanted to create for the documentary. Time soun ds Pre-set sounds
- 8. All of the research that we constructed during the whole task was uploaded to our own group on blogger.com This shows the hurdles we had face during the process and also how we have develop both individually and as a group furthermore Blogger was very advantageous for us as a group, as it meant we could put all of our ideas together.