Phillips - Atomic Layer Deposition of NbN Thin Films for Superconducting Radi...
MOSFET Fabrication
1. MOSFET LAB 2
Robert Leonard
I. INTRODUCTION
The purpose of this lab is to become familiar with the
process flow of a MOSFET. The steps used in making this
device are simplified versions of the process that go into
fabricating devices with hundreds of steps. In this lab
we also obtain data and compare the measured results vs
the theory behind the MOS capacitor and MOSFET. The
difference between this lab and last lab is the difficulty
that arose from photo-lithography steps that had very
little room for error
II. PROCESSING AND PHYSICAL DEVICE
CHARACTERIZATION
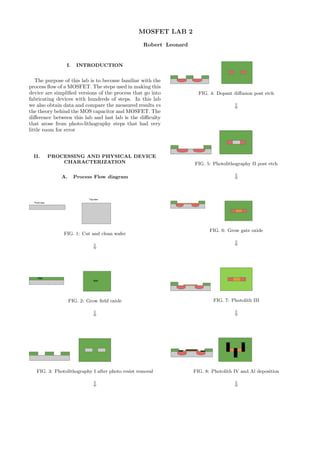
A. Process Flow diagram
FIG. 1: Cut and clean wafer
FIG. 2: Grow field oxide
FIG. 3: Photolithography I after photo resist removal
FIG. 4: Dopant diffusion post etch
FIG. 5: Photolithography II post etch
FIG. 6: Grow gate oxide
FIG. 7: Photolith III
FIG. 8: Photolith IV and Al deposition
2. 2
FIG. 9: Deposit gold, liftoff and back contact
B. Process description
Two batches of wafers were processed in order to op-
timize the steps required to fabricate a MOSFET. The
tables in the Appendix are labeled using the scheme # L,
were # will correspond to the batch the wafer belonged
to and L corresponds to the ID of the wafer.
Cut and clean: Cut 12 1.2cm by 1.2cm wafers using a
diamond scribe. Placed wafer in SC-1 50ml:10ml:10ml
of H2O:H2O2:NH4OH at 70o
C for 10 minutes. HF
etch (20:1 Buffered) for 15 seconds, then placed in SC-
2,60ml:10ml:10ml ofH2O:H2O2:HCl at 70o
C, for 10 min-
utes. Wiped surface with khemwipe after cleaning. Mea-
sured sheet resistance of another silicon wafer that was
RCA cleaned.Measured the sheet resistance of wafer to
be 40.5Ω
(used a correction factor in 4.45 in calculation)
using the 4-point probe and the thickness of the wafer is
650µm giving a resistivity of
ρ = 40.5 ∗ .0650 = 2Ωcm
.
Field oxide growth: Placed wafer along with 5 other
wafers into a tube furnace for wet oxide growth. The
temperature was set to 1100o
C for 21 minutes with .13
H2O liquid flow rate. Used filmetrics and measured an
oxide thickness of 3916 nm.
FIG. 10: Wafer after FOX growth
Photolith I: Placed wafer on hot plates at 200o
C for
10 minutes for dehydration. Wiped wafer with khemwipe
and blew nitrogen gun across the surface of the wafer.
Placed 3 drops of AZ1512 photoresist onto surface of
wafer then immediately spun at 3000rpm for 30 seconds.
Put wafer on a hot plate at 90o
C-100o
C for 90 seconds.
Exposed wafer for 7.74 seconds under a lamp emitting
10.98 mJ
cm2 . Immersed wafer in AZ-400 developer for 1
minute and rinsed with water and dried with nitrogen
gun.
(a)Large feature after devel-
opment
(b)Small feature after devel-
opment
The features are a couple of microns smaller than the
mask. Baked wafer at 120o
C for 5 minutes.
(c)Large feature after hard-
bake
(d)Small feature after hard-
bake
Etched wafer for 15 minutes and 40 seconds to remove
the field oxide(IMAGE). Etch rate of 250
˚A
min was
determined using a test wafer.
Dopant diffusion Placed wafer in acetone bath and
ultrasonicated container for 3 minutes,then placed wafer
in piranha solution (7:3 Sulfuric acid:peroxide) for 30 sec-
onds(IMAGE). Rinsed in DI water and dried with nitro-
gen gun. The piranha clean was to ensure no photo-resist
remained on the wafer. The wafer was then dehydrated
on a hot plate for 5 minutes at 300o
C. 2 drops of P505
dopant were spread over surface of wafer. The wafer
was then spun at 5000rpm for 20 seconds. After micro-
scope imaging to ensure dopant film was properly applied
the wafer was baked for 10 minutes at 100o
C and then
ramped to 130o
C for 5 minutes. The dopant was then
driven in using a tube furnace at 1100o
C for 1 hour. A
test wafer with no field oxide was also doped in order to
determine the time we needed to etch the dopant film,
and to measure the sheet resistance of the devices. The
wafer was etched by submerging in HF (20:1 buffered)
for 4 minutes and 30 seconds.
3. 3
(e)Large feature on wafer af-
ter doping
(f)Small feature on wafer after
doping
Photolith II Placed wafer on hot plates at 350o
C for
10 minutes for dehydration. Wiped wafer with khemwipe
and blew nitrogen gun across the surface of the wafer.
Placed 3 drops of AZ1512 photoresist onto surface of
wafer then immediately spun at 3000rpm for 30 seconds.
Put wafer on a hot plate at 90o
C-100o
C for 90 seconds.
Exposed wafer for 7.5 seconds under a lamp emitting
11.33 mJ
cm2 . Immersed wafer in AZ-400 developer for 1
minute and rinsed with water and dried with nitrogen
gun.
(g)Large feature on wafer af-
ter photolithII
(h)Small feature on wafer af-
ter photolithII
Baked wafer at 100o
C for 10 minutes.
(i)Large feature on wafer af-
ter bake
(j)Small feature on wafer after
bake
Etched wafer for 14 minutes and 30 seconds to remove
the field oxide.
(k)Large feature on wafer af-
ter dopant etching
(l)Small feature on wafer after
dopant etching
The etch time was reduced due to the fact that a thin
layer of oxide was etched during the etching of the dopant
film. The photoresist was then lifted off by ultrasonica-
tion in acetone, followed by a piranha rinse.
Gate oxide growth Wafer was put in tube furnace for
dry oxide growth for 13 minutes and 42 at 1000o
C floowed
by a 5 minute nitrogen anneal. A wafer was cut and
cleaned (piranha and ultrasonication) then placed into
the tube furnace with batch 1. Used filometrics and el-
lipsometer to measure gate oxide thickness of 436˚A.
FIG. 11: Wafer after GOX growth
Photolith III: Placed wafer on hot plates at 350o
C for
10 minutes for dehydration. Wiped wafer with khemwipe
and blew nitrogen gun across the surface of the wafer.
Placed 3 drops of AZ1512 photoresist onto surface of
wafer then immediately spun at 3000rpm for 30 seconds.
Put wafer on a hot plate at 90o
C-100o
C for 90 seconds.
Exposed wafer for 7.74 seconds under a lamp emitting
10.98 mJ
cm2 . Immersed wafer in AZ-400 developer for 1
minute and rinsed with water and dried with nitrogen
gun.
(a)Large feature on wafer af-
ter PLIII develop
(b)Small feature on wafer af-
ter PLIII develop
Hard baked for 5 minutes.
(c)Large feature on wafer af-
ter PLIII hardbake
(d)Small feature on wafer af-
ter PLIII hardbake
Etched gate oxide for 3 minutes and 30 seconds. Used
test wafer to determine time for etching. After etching
4. 4
there is a thin 50˚A oxide layer left over that was measured
using the ellipsometer. Wafer was then ultrasonicated in
acetone and rinsed in pirhana for 2 minutes to remove
photoresist.
Photolith IV Placed wafer on hot plates at 350o
C for
10 minutes for dehydration. Wiped wafer with khemwipe
and blew nitrogen gun across the surface of the wafer.
Placed 3 drops of AZ1512 photoresist onto surface of
wafer then immediately spun at 3000rpm for 30 seconds.
Put wafer on a hot plate at 90o
C-100o
C for 90 seconds.
Exposed wafer for 7.74 seconds under a lamp emitting
10.98 mJ
cm2 . Immersed wafer in AZ-400 developer for 1
minute and rinsed with water and dried with nitrogen
gun.
(e)Large feature on wafer af-
ter PLIV dev
(f)Small feature on wafer after
PLIV dev
Hard baked for 5 minutes.
(g)Large feature on wafer af-
ter PLIV hard bake
(h)Small feature on wafer af-
ter PLIV dev
Aluminum deposition Deposited 500˚A layer of Al
onto features and then lifted off with ultrasonication (ace-
tone bath) for 3 minutes.
FIG. 12: Wafer after aluminum lift off
Gold deposition Deposited 250˚A gold layer onto back-
side of wafer.
Final contact Coiled copper wire into a spiral and
placed on gold surface of wafer. Coated the wire/gold
interface with silver paint and baked in furnace for 10
minutes at 80o
C. Apoxy was then applied between the
copper wire and a glass slide so that the wafer could be
easily manipulated. The wafer was then baked again for
10 minutes at 90o
.
FIG. 13: Final device
Process changes/ things we noticed: During photolith
I many of the groups reduced their development time
to 20 seconds. We experiments with the development
time by processing 6 wafers in the exact same way except
3 were developed for 20 seconds and 3 were developed
for 60 seconds. The development of 20 seconds would
have been chosen if we had to redo the experiment due
to some undercutting that was observed after multiple
photo-liths.
During photolith II we noted how hydrophylic the
dopant film was. 5 minutes of the wafer sitting out was
enough time for water to condense onto its surface and
form a thin layer. This caused us to increase our de-
hydration time both before applying dopant, and during
photolith II in order to ensure there was no water on the
wafer. During liftoff of one of our batches we used the
smaller ultrasonicator and noted poorer adhesion than
with the larger ultrasonication which could be an expla-
nation for some of the trends in our data. If we had a
chance to redo the lab we would experiment with differ-
ent methods of ultrasonication to assure good adhesion.
We started with 12 total wafers and only ended up with
6 that became finished device. The yield of our process
could definitely have been improved by being more care-
ful with handling the wafers.
5. 5
MOSFET Characterization
The micro-probing station was used to character-
ize this device. To insure the device is functioning a
impedance vs theta plot is taken over the MOS capacitor
using an LCR at multiple frequencies. An IV curve of
the MOS capacitor was then taken. The quality of the n-
type regions were measured by taking IV data from each
n-type region individually. The drain current vs drain
voltage curve of the MOSFET is then taken for multiple
gate voltages.
CV Characterization
The area of the MOSCAP is .0003cm2
. In order to find
the capacitance the impedance at each frequency over
a voltage range was taken. Assuming a large parallel
resistance the impedance can be found from:
Zim =
R2
p
R2
pωC + 1
ωC
≈
1
ωC
the capacitance is then
C =
1
Zsin(θ)ω
F
cm2
Below the capacitance is plotted for three different fre-
quencies:
(a)Capacitance vs Gate voltage at 1MHz
(b)Capacitance vs Gate voltage at 500kHz
(c)Capacitance vs Gate voltage at 100kHz
The range of gate voltages was barley enough to see
the MOSCAP behavior in the three operating regimes.
For all data analysis I will be using the 1Mhz data.
The oxide thickness can be found by using the expression:
Caccumilation =
l
where Caccumilation can be read of the CV curve in ac-
cumulation and = 3.9 o = 3.9 * 8.854 * 10−14 F
cm =
3.45*10−13 F
m . Looking at the 1Mhz plot at -4V the de-
vice is reaching accumulation and Cacc = 200 nF
cm2 result-
ing in an oxide thickness of:
3.9 ∗ 8.854 ∗ 10−14 F
cm
200 ∗ 10−9 F
cm2
giving a calculated oxide thickness of 200˚A compared
to the measured 460 µm.
In order to find the dopant density I look at the capaci-
tance in inversion and use the expression:
C
Co
=
1
1 +
2 2
oxV
qNA sd2
(Sze 5.16) which can be rearranged to:
NA =
2 2
oxV
(
C2
o
C2 − 1)q sd2
where Co is the capacitance in accumulation (ie ca-
pacitance of the oxide), C is the capacitance value
at a certain point in inversion, and d is the ox-
ide thickness. Solving for NA using o = 3.9 ∗
8.854 ∗ 10−14 F
cm , V = -3V, Co = 200nF, C =
110nF (inversion), s = 11.68 ∗ 8.854 ∗ 10−14 F
cm , d =
200*10−8
cm gives: NA = 4.682 ∗ 1017 atoms
cm−3
. If in-
stead I used the measured oxide thickness (d = 460˚A)
NA = 8.85 ∗ 1016 atoms
cm−3
The maximum depletion region can me found using the
expression:
Wm = 2
skTln(NA
ni
)
q2NA
(Sze 5.11b) where ni ≈ 1010
for silicon, T = 300K and k
= 1.38*10−23 J
K . Plugging in the values gives a maximum
depletion width of: Wmax = 5.01µm .
The thresh hold voltage can be found using:
VT =
qNAWm
Co
+
2kT
q
ln(
NA
ni
)
(Sze 5.10 and 5.17) plugging in the values listed above:
VT = −2.79V , I added the minus sign because the equa-
tion used does not take into account the sign of thresh
6. 6
hold voltage. Looking at the 1Mhz capacitance vs gate
voltage the thresh hold voltage on the graph reads around
-2.8V. The capacitance of the MOSCAP can be drawn as
two capacitors in series Cox and Cs where Cs is the ca-
pacitance of the semiconductor. At equilibrium:
1
Ceq
=
1
Cox
+
1
Cdep
=
1
Cox
+
W
s
resulting in
W = (
1
Ceq
−
1
Cox
) s
Where Ceq is the capacitance at zero volts on the gate.
I arrive at W = .39 *10−7
µm. Now (Sze 5.9)
Ψs =
qNAW2
2 s
= .104V
IV Characterization
The IV data only spans -2V to 4V for two reasons.
Firstly this voltage range was sufficient for the impedance
data so we assumed it would work for the IV data. Lastly
beyond the extremes of the voltage the SMU was hit-
ting a compliance voltage of 1mA and we didn’t want to
break the device by applying more than 1mA across the
channel. Below is the IDvs.VD data for multiple gate
voltages:
FIG. 14: IDvs.VG for multiple gate voltages
The saturation voltage is never reached either because
the drain voltage was never turned high enough or there
is some small parallel resistance the leaks current. The
linear channel conductance was taken to be the slope of
the IDvs.VG from 0V to 1V.
FIG. 15: IDvs.VD in the linear regime
FIG. 16: IDvs.VG in the linear regime
The channel conductance of 5 different gate voltages
in the linear regime is listed below.
Vg(V) gm(Ω−1
)
0 .0003
1 .0003
-1 .0002
2 .0004
-2 .0002
Saturation channel conductance could not be found from
the data we have collected due to not going to a high
enough drain voltage. There is possibly a shunting path
in the channel that has a small impedance because at 2V
the device is in strong inversion so any small impedance
is due to some parallel resistance. In the ideal MOSFET
the channel conductance in this region should be zero.
ID vs VG in ”saturation” is plotted below.
FIG. 17: IDvs.VG in the ”saturation” regime
Making a linear fit to the IDvs.VG in the ”saturation”
regime I found gm = 1*10−4
Ω−1
with an R2
=.90 at VD
7. 7
= 4 and gmΩ−1
= 9*10−5
with an R2
= .91 at VD = 3.5
. The drain current in saturation is given by:
IDsat
=
ZµCo
2L
(Vg − VT )2
(Sze 5.41)rearrange to find:
VG = IDsat
2L
ZµCo
+ VT
where L is the oxide thickness, Co is the capacitance in
the oxide, Z is the charge of the carriers and µ is the mo-
bility of the carriers (electrons in this case). The thresh
hold voltage is therefore y-intercept of the VG vs IDsat
.
I attempted to plot VG vs IDsat
but due to not reaching
saturation the thresh hold voltage that is found doesn’t
come close to what is found form the CV data and is
not accurate. A drain voltage of 4V was used and the
calculated y-intercept is -13V.
FIG. 18: VG vs IDsat in the ”saturation” regime
Using the thresh hold voltage calculated from the CV
data (VT = 2.79V) at ID = 6.42 ∗ 10−4
and VG = -1V
then:
µn =
ZCo
2LIDsat
(VG − VT )2
= 1008
cm2
V − s
As the depletion region gets larger the electron mobility
should increase until the depletion region reaches a max-
imum value and the electron mobility becomes constant.
Appendices
FIG. 20: Sheet resistance of batched