What are blog surveys and why are they important
•Download as PPTX, PDF•
0 likes•24 views

Quiz and Survey Master is the Best WordPress Quiz/Survey Plugins with thousands of downloads. It is specially crafted for extensive quiz creation and is backed by a 24/7 Support Team if you need any help. It has 15+ Question Types that let you create exciting and engaging surveys to collect the data you need.

Recommended
Recommended
More Related Content
More from RakeshSharma1159
More from RakeshSharma1159 (8)
Recently uploaded
Recently uploaded (20)
What are blog surveys and why are they important
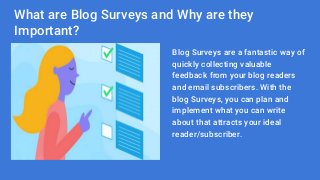
- 1. What are Blog Surveys and Why are they Important? Blog Surveys are a fantastic way of quickly collecting valuable feedback from your blog readers and email subscribers. With the blog Surveys, you can plan and implement what you can write about that attracts your ideal reader/subscriber.
- 2. How to Create a Survey for Your Blog Readers Creating a Survey for Your Blog Readers is quite simple and easy with WordPress Plugins. Here were are going to make use of Quiz and Survey Master – The Best Quiz, Exam, and Survey Plugin on WordPress. With Quiz and Survey Master you can easily create survey for your blog readers and interesting quizzes all for Free with no cap on the number of responses/entries.
- 3. #1 Download and Install the Plugin Download the Free Plugin to your WordPress blog, Install and Activate It.
- 4. #2 Select a Template
- 5. Once the Plugin is installed, go to the Quiz and Survey Master Dashboard and Press Create a New Survey Button.
- 6. Select the Survey Template, Enter the Quiz Name, and Hit the Create Quiz Button.
- 7. Enter the Question Title and the Question along with the answers in the Questions Tab. Choose between various Question Types. You can create unlimited Questions and add multiple pages. #3 Create Questions and Answers
- 8. #4 Create User Form In the Contact Tab, you can create a Form to ask for details like Name, Email ID, Business, Phone, etc. of the respondent and can store them in the database for later use.
- 9. #5 Display a Message In the Text Tab, you can display a welcome note to the User before beginning the Survey and an Appreciation Message at the end of the Survey and much more.
- 10. #6 Configure the Working In the Options Tab, you can show a Progress bar, Limit the number of Questions displayed on a page, Set a Time Limit, Limit the number of Attempts by a user, Limit the total number of Entries, and much more.
- 11. #7 Sending Emails In the Emails Tab, you can configure When and How the email needs to be sent to the respondent and to the Quiz Admin. With the help of Template Variables, you can add details like Time taken to complete the Quiz, points scored, questions answered, and much more…
- 12. #8 Displaying Results In the Results Tab, you can set how the results will be displayed to the user. You can customize the content and add more things with the help of Template variables.
- 13. #9 Style Tab In Style Tab, you can set various styles to the Survey, or you can set your custom CSS Style by adding the code in the blank field.
- 14. #10 Make the Survey Live After you’ve done setting up the Survey, its now time to make it live. You can press the Open Link Icon beside the Survey Name at the top. Or you can Open the Quizzes/Surveys menu from the admin sidebar. And Copy-Paste the shortcode on the Post/Page of your blog. Here is a Sample Survey.
- 15. THANK YOU