Fuel level sensor installation guide
•
0 likes•896 views

Made by Mechatronics, innovative fuel level sensor with modular design. Easy to install and use.

Recommended
More Related Content
What's hot
What's hot (20)
Viewers also liked
Viewers also liked (20)
Similar to Fuel level sensor installation guide
Similar to Fuel level sensor installation guide (20)
More from Pawel Elenski
More from Pawel Elenski (20)
Recently uploaded
Recently uploaded (20)
Fuel level sensor installation guide
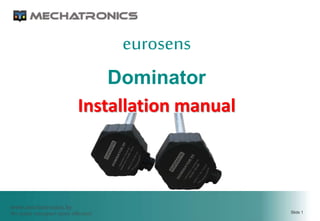
- 1. Fuel level sensors eurosens Dominator
- 2. The devices are used in vehicle tanks and stationary capacities for fuel level measurement. The sensors are used in vehicle tracking systems to control fuelling and fuel drain as well as for fuel consumption control. Application
- 3. Solutions that require high-precision fuel measurement and fuel management. Application: • Transport companies • Building and construction machinery • Public transport • Agricultural vehicles • Mining companies Target market
- 4. Versions Output signals: • Analog, V • Frequency, Hz • RS-232 • RS-485 • CAN
- 5. Design IP67 ingress protection rating against environmental exposure under GOST 14254-96. (for versions with display – IP54). The electronic board of the sensor is filled in with a compound that provides protection and safe operation of sensors even in extreme service conditions. The hermetic automobile connector is fixed on the body.
- 6. Dominator Mini version For installation in compartments of limited height. Degree of protection from exposure Environment IP67. The sealed automotive connector is mounted on the cable outlet. Mini version of Eurosens Dominator have absolutely same features, connector , wiring and firmware. Sensors are cross-compatible by mounting place and cable.
- 7. Modular build! The connector location on the sensor body conforms to automobile requirements. Bayonet fastening significantly simplifies sensor installation. The convenient placement of openings on the sensor body simplifies sealing. Great internal space of electrodes reduces risk of pollution. . Design features
- 8. AF Technical data Power voltage, V 9 - 32 Reverse polarity protection Yes Measuring accuracy ±1% Temperature range,°C -40 - +85 Output voltage, V 0,5 – 9,5 Output frequency, Hz 500 – 1500 Configuration interface K-Line Protection rating IP 67
- 9. RS Technical data Power voltage, V 10 -60 Reverse polarity protection Yes Measuring accuracy ±1% Temperature range,°C -40 - +85 Output interfaces RS-232 и RS-485 Configuration interface K-Line Protection rating IP67 (IP54) eurosens Dominator RS-I has 9-digit display
- 10. It prevents sensor vibration when in service in severe conditions. It increases attachment rigidity. Spring element
- 11. Measuring electrodes are supplied separately that simplifies management of stock reserve of fuel sensors by length. The electrodes differ by the number of sleeves (1 or 2). Standard length of electrodes – 700 mm. It is possible to produce electrodes for water (on order). Configuration change
- 12. It is often necessary to meet the fact that a company servicing installed fuel level sensors has to leave to study the causes of incorrect fuel volume readings in the control system. Modular design will reduce the number of trips to a minimum due to rapid diagnosis and localization of the problem. 1. Remove the sensor from the tank (quick release) 2. Unscrew the electrodes from the electronic module. These actions can be performed by a specialist of the customer, and will help you to localize the problem: the electronic module - the electrodes - the fuel. Then everything is collected in the reverse order for 10 minutes. Simplify technical support
- 13. The replacement of the Eurosens Dominator is as simple as possible. Thus, it becomes possible to shift part of the system maintenance work to its owner (from the service provider company). This is significantly cheaper, since it allows you to reduce the number of trips. To do this, you need the following: 1. After installing each new sensor, its settings and calibration must be saved to a file with the vehicle identification number. 2. The owner of the monitoring system should appoint a person responsible for the replacement and sealing of the sensors. 3. To replace the electronic sensor module, it is necessary to save the saved settings and calibrations (for this vehicle) to the new module. 4. Attach the old electrodes to the new electronic module, install the sensor in the bayonet mount and seal it. Simplify technical support
- 14. Measuring the capacitance of the capacitor that forms the rod and tube. The capacitance varies linearly with the depth of immersion of the measuring electrodes in the liquid (fuel). The capacitance is converted into a frequency by a measuring oscillator. The calculated value is compared to relative number from the range of the output data (from 0 to 4095) or to volume in the tenth of liter (only for RS). Built-in filtration algorithms remove "spikes" of indications in case of fuel fluctuations. Thermal correction compensates changes of a construction and properties of liquid depending on temperature. Working principle
- 15. Thermal correction The external temperature affects the design of the sensors and the measured liquid. In our sensor built-in algorithms for thermal correction of both. Since the characteristics of the liquid being measured are not known in advance, the correction of the expansion coefficients of the liquid (fuel) is available to the user in the service software. Correction of changes in sensor design is provided technologically in the entire range of operational temperatures (from -40 to +85 degrees).
- 16. Under actual operating conditions there are always fuel fluctuations. To get correct level value it is necessary to calculate (to filter) it for some period. Necessary level of a filtration (measurement period) of output data can be set in service software. The greater is measurement period the greater is delay to give out the measurement result. Necessary level of filtration should be selected depending on sensor service conditions. If the filtration of the output data is made by the external device the level of filtration can be set to the minimum. Filtration
- 17. Voltage level changes depending on level (volume) of fuel in a capacity. After sensor calibration, voltage level linearly changes depending on fuel level. After tank calibration, voltage level linearly changes depending on fuel volume. Range of output voltage is selected in service software during sensor setting up. Analog output
- 18. Frequency changes depending on fuel level or volume in a capacity. After sensor calibration frequency linearly changes depending on fuel level. After tank calibration frequency linearly changes depending on fuel volume. Range of frequencies is selected during device setting up. Possible range – from 100 to 3000 Hz. Frequency output
- 19. Electrical specifications conform to requirements of RS-232 and RS-485. Electrical specifications of the configuration interface conform to requirements of ISO 9141 (K-Line). Interfaces are brought to different contacts of the connector. The interface required for work is selected in service software. The communications protocol is compatible with LLS, MODBUS. Digital interfaces
- 20. Tools: 1. Hacksaw 2. Tape measure 3. Bench work tool 4. Drill 5. Boring head Ø 38 mm 6. Service kit Eurosens Destination Extra: 1. Measuring tank 2. Calibration pipe 3. Additional rubber gasket (for convex tank) 4. Silicone sealer 5. Cloth Installation and connection
- 21. All the things needed for installation are supplied in Dominator mounting set. Check before travel to the installation site. Mounting set
- 22. Completeness check Make sure that all necessary parts of the sensor and all tools for installation are available and in good order. Minimum requirements: 1. Eurosens Dominator 2. Dominator Electrode 3. Dominator mounting set 4. Eurosens Cable
- 23. 38 mm eurosens Dominator Drill hole 38 mm in the center of tank
- 24. eurosens Dominator 30 mm (with bottom stop) H + 30 мм If the initial length of the measuring electrodes of the sensor is more than necessary for installation in the fuel tank, they must be cut to the required length. Trimming part is Dominator Electrode 1. When installing the bottom stop, the distance from the bottom end of the electrodes to the bottom of the tank should be approximately 30 mm. In the absence of a bottom stop: 10- 15mm.
- 25. Installation of the bottom stop
- 26. When the bottom stop is installed, the sensor should protrude 15 mm from the top of the tank after immersion in the tank. In the absence of the bottom stop, the sensor must be completely lowered onto the bayonet plate without touching the bottom of the tank. Cutting of the electrodes
- 27. Electronic modules are pre-calibrated for the initial length of 700 mm, based on the fact that the measured fuel will be diesel fuel. Dominator AF: configured for analog output 2.5-10V, with averaging of 30 seconds. Dominator RS (RS-I): configured for RS485 interface, data is available on request from any address to any address. Averaging 30 seconds. Default settings of the sensor In the case of measuring the level of other petroleum products (not diesel fuel), the range of output data may be different, therefore, in this case, it is recommended to recalibrate exactly in the liquid whose level the level sensor is intended to use.
- 28. For Dominator AF: allowable cutting without calibration - 30% (with default settings). With a larger cutting value, a dead band will appear at small level values. For Dominator RS: Calibration is needed (with default settings). Do I need to calibrate the sensor after cutting ? Do I need to calibrate the sensor after extending ? Yes!
- 29. Request our technical support or download the Excel file from our forum - Approximate calculation of the detector How to calibrate the sensor after cutting without fuel? The obtained data can be written into the calibration table of the sensor manually, without immersion into the fuel. Use this method in desperate situations.
- 30. Calibrate the sensor in sequence: - connect the sensor to the PC and run the Eurosens Dominator configurator - completely immerse the sensor in the fuel and on the Calibration tab, click the "Full" button. - then remove it from the fuel, wait for the fuel to flow out of the electrodes and click on the "Empty" button on the Calibration tab. Calibration
- 32. Calibration Fuel
- 33. Mounting 1. Mark 5 holes for self-drillings screws . Usual screws (also included) can be recommended for installation on containers with a thickness of metal from 3 mm (with threading in the thread holes), or when installed in standard holes. 2. Between the tank and the bayonet plate, install a flat rubber gasket. If self-tapping screws are used - it is recommended that the gasket be turned so that the screws do NOT fall into the gasket holes.
- 34. Mounting 3. Secure the bayonet plate with screws or screws. 4. Lubricate with silicone and install a gasket ring. 5. Place the fuel level sensor with the bottom stop installed in the bayonet hole as far as it will go. 6. Turn the sensor till the stop.
- 36. Dominator AF section 1. Select the type of output - Analog or Frequency. 2. Select output range (for analog output at 12V on-board power supply it is not recommended to set a maximum voltage of more than 7V.) 3. Set the averaging value to 1 second (for faster calibration). 4. Switch pulling the output to the power for frequency output, if required for compatibility with the data acquisition device (GPS terminal). This is enough for successful work. The rest of the settings are described in the user manual for the configuration software.
- 37. Секция настроек Dominator RS 1. Select the type of interface - RS232 or RS485 switch. 2. For RS485 - set the sensor address (the FLS address) in the network (uncheck the "Ignore" option). If there is one data collector (GPS-terminal) in the network, the option "Ignore" for the SMT address is left. 3. Set the averaging value to 1 second (for faster calibration). 4. Set the output mode (some data collection devices require automatic data output from the sensor). This is enough for successful work. The rest of the settings are described in the user manual for the configuration software.
- 38. The output of the calibrated sensor is directly proportional to the level of the measured fuel. In order for the data in the fuel level monitoring system to be directly proportional to (or consistent with) the fuel volume, it is necessary to carry out the tank calibration procedure. The calibration table is a characteristic of the tank and not of the sensor. The calibration table can be stored in the sensor or on the side of the data acquisition software. Use the option of storing the calibration table in the sensor if you want to connect a local display to display the fuel volume and connect additional sensors to calculate the total volume in several tanks. Tank calibration
- 39. 1. Calibration by filling the tank (or drain) with measured portions with the fuel level sensor installed. At the same time, the output signal from the sensor and the corresponding value of the fuel volume in the tank are fixed. 2. Analytical calculation of the calibration table based on the geometric shape of the container. Usually used for large tanks - where filling from empty to full is very difficult and costly. The process of creating a calibration table is described in the Eurosens Dominator User Configurator. Tank calibration methods
- 42. To connect Eurosens sensors to the network, you can use special cables and splitters (T-cable).
- 44. Sealing
- 45. Use of sensors is allowed only in the range of working temperatures specified in the Technical characteristics. Operation of sensors at damaged body or cable isn't allowed. Operation of sensors isn't allowed at voltage and current parameters exceeding the ranges specified in the Technical characteristics. Restriction
- 46. Use of sensors for measurement of level or volume of liquids changing physical state in the range of working temperatures isn't allowed. Use of the device for measurement of level or volume of liquids with changeable dielectric capacity leads to increases in measurement error. At product installation in capacity it is necessary to leave some space between a measuring tube and the bottom of capacity. Restrictions
- 47. Thank you for your time