
Recommended
More Related Content
What's hot
What's hot (20)
Similar to Production diary
Similar to Production diary (20)
More from OliverKeppie
Recently uploaded
Recently uploaded (20)
Production diary
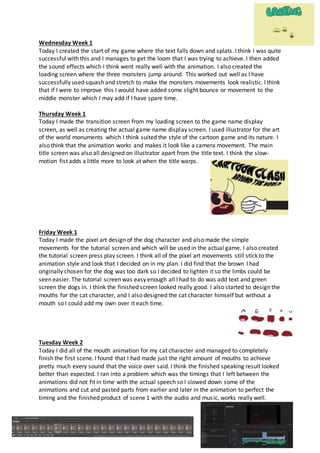
- 1. Wednesday Week 1 Today I created the start of my game where the text falls down and splats. I think I was quite successful with this and I manages to get the loom that I was trying to achieve. I then added the sound effects which I think went really well with the animation. I also created the loading screen where the three monsters jump around. This worked out well as I have successfully used squash and stretch to make the monsters movements look realistic. I think that if I were to improve this I would have added some slight bounce or movement to the middle monster which I may add if I have spare time. Thursday Week 1 Today I made the transition screen from my loading screen to the game name display screen, as well as creating the actual game name display screen. I used illustrator for the art of the world monuments which I think suited the style of the cartoon game and its nature. I also think that the animation works and makes it look like a camera movement. The main title screen was also all designed on illustrator apart from the title text. I think the slow- motion fist adds a little more to look at when the title warps. Friday Week 1 Today I made the pixel art design of the dog character and also made the simple movements for the tutorial screen and which will be used in the actual game. I also created the tutorial screen press play screen. I think all of the pixel art movements still stick to the animation style and look that I decided on in my plan. I did find that the brown I had originally chosen for the dog was too dark so I decided to lighten it so the limbs could be seen easier. The tutorial screen was easy enough all I had to do was add text and green screen the dogs in. I think the finished screen looked really good. I also started to design the mouths for the cat character, and I also designed the cat character himself but without a mouth so I could add my own over it each time. Tuesday Week 2 Today I did all of the mouth animation for my cat character and managed to completely finish the first scene. I found that I had made just the right amount of mouths to achieve pretty much every sound that the voice over said. I think the finished speaking result looked better than expected. I ran into a problem which was the timings that I left between the animations did not fit in time with the actual speech so I slowed down some of the animations and cut and pasted parts from earlier and later in the animation to perfect the timing and the finished product of scene 1 with the audio and music, works really well.
- 2. Wednesday Week 2 Today I started working on scene 2. I created the monkey character and all of the mouth positions and I also did the same for the bee. One problem I found whilst creating the background for my first part of scene 2, was trying to keep everything on the same angle so it made a realistic room effect. Although I do think I managed to achieve that. I also made some green screen text for the location of the areas. I was going to use several fonts but I decided to stick to just the spy one as it suits the style of the cut scene a lot better. I then started on the animation of the monkey in part one of the second scene and thought it would look good if I added a blue tint shining from the computer. I experimented with it and ended up getting the result I wanted. Thursday and Friday Week 2 Over the course of these two days I completed the second and third scene. The only problem that I ran into was the way that my fades were working in Premiere although it only took a few minutes to sort those out. Another thing I had to think about was the text that appears at the bottom of each scene at the beginning. I knew I wouldn’t be able to go back and add it to the original clips so I created it on a green screen layer and added it over the top of the scene. Wednesday Week 3 Today I started working on scene four. As I missed Tuesday I started to create the background at home. I also made an extra scene at the start of the animation with a rotating earth. I ran into a problem which was that I couldn’t open my Photoshop documents from home onto the college computers so I had to make another green screen character and place it in front of the background which couldn’t be open. I think that the effect still looks good and it was probably a little quicker than if I started to add it to the original scene. I also created the bear character. Thursday Week 3 I finished the fourth scene and I created a few different shots and effects. I made the part of the animation where the bear falls down and I found it hard at first to make it look like he achieved a great speed whilst falling. I then found a way to use the background scrolling to
- 3. show a fast fall effect. I also created the bear vs dog scene where the characters are introduced to fight which I thought was perfect at the time with the sounds and effects although I went back later and added a sad dog sound as I thought it seemed quite weird being quiet. Friday Week 3 I created the characters of the bear doing the punches and walk in pixel art form which I managed to complete quite quickly. I then started creating a green screen fight scene so that I could later add a background. Although my character had green on him so I had to change the background to pink to make the background disappear. I started moving the animations I made to make it look as if the two characters were fighting. I also added a small health and power bar. Tuesday Week 4 Today I finished the fight scene and I created a closer x-ray scene by creating 3 different images on illustrator and editing them on Photoshop. I also added a blood dripping effect to transition from the zoomed-out fight to the close-up neck snap, and back out again. I then added this scene to the Premiere file and added the sounds and removed the green screens. I found a slight problem which was that my characters were a little bit higher after the x-ray. I just duplicated the layer and cropped the characters from the health and power bars and I lowered the characters. Wednesday Week 4 Today I created an item bar which rolled around to select an item, a screen to display what the item did, a quick view of how the character would move around the map when selecting levels and also how purchases are made. The only slight problem that I ran into is when I had created and exported the rolling item bar I found out that the color purple I used was quite similar to the pink I used in the background so as I removed the background the purple slightly faded but it’s not 100% noticeable and I was running out of time so couldn’t fix it. I think overall the parts that I created today work well with the rest of the video and are up to the same standard. Thursday Week 4
- 4. Today I finished adding and compiling the sound and clips together and exported my video. After this I started to create some advertisements in the form of posters and merchandise for the game. I created a poster using some of the character drawings from the game and some I didn’t use in the finished game. I then added the appropriate text to make it look like an actual game poster. For the t-shirt design, I created a totally new drawing of the main character and added some simple effects to make the t-shirt look less boring. I also created more layers of the t-shirt and applied the color burn filter to them so that you could still see the creases in the finished design. Friday Week 4 Today I created my final piece for this project which was an Xbox game case. I started by creating a piece of art for my cover on Illustrator but I didn’t think it worked as well as I wanted for this type of game. I kept that one but created a better one and added more detail in Photoshop. I finished the front cover and decided to put the original image I created on the back of the box so that it still had some use to it. I then added some text which is believable for the back of a game box and I had finished my product. Overall it think it looks quite realistic as I based it off the box for the Tekken 7 game on Xbox, and this can be clearly be seen.