
Recommended
Recommended
More Related Content
Similar to how to remove graphics card.pdf
Similar to how to remove graphics card.pdf (20)
Recently uploaded
Recently uploaded (20)
how to remove graphics card.pdf
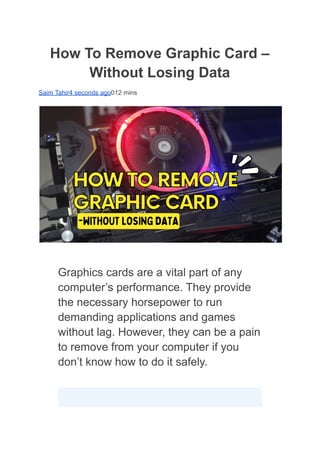
- 1. How To Remove Graphic Card – Without Losing Data Saim Tahir4 seconds ago012 mins Graphics cards are a vital part of any computer’s performance. They provide the necessary horsepower to run demanding applications and games without lag. However, they can be a pain to remove from your computer if you don’t know how to do it safely.
- 2. Table of Contents ● Why need a Graphics card from the computer? ● How To Remove Graphic Card – Without Losing Data ○ Two methods Of Removing ○ 1. Using a Screwdriver ○ 2. PCI Express card removal ● Let’s Discussed Step – By – Step ● Step 01 ● Step 02 ● Step 03 ● Step 04 ● Step 05 ● Step 06 ● Step 07 ● Step 08 ● Conclusion:
- 3. How To Remove Graphic Card – Without Losing Data Computers play an essential role in the overall performance of a device. Over time, graphic cards can become defective and may need to be removed for various reasons. In this article, we will discuss how to remove a graphics card from a computer without losing data. If you are experiencing issues with your graphics card, be sure to first verify which type of card it is and whether or not it is supported by your computer. Next, search for instructions on how to remove the graphic card from your motherboard.
- 4. Why need a Graphics card from the computer? How To Remove Graphic Card – Without Losing Data A Graphics card is a specialized component of your computer that helps it render graphics on the screen. Without a graphics card, you may be unable to use your computer to view graphics-heavy websites or to play games. A Graphics card is a specialized component found in computer systems that perform graphics processing functions. Graphics cards can be categorized into three types: dedicated graphics cards, integrated graphics, and mobile graphics. Dedicated graphics cards are designed to provide the best graphic performance for gaming, while integrated graphics cards and mobile graphics cards are usually found in laptops and notebooks.
- 5. How To Remove Graphic Card – Without Losing Data Two methods Of Removing Generally speaking, graphic cards can be removed from computers using either of two methods: 1. Using a Screwdriver If you are using a screwdriver, ensure that you have a Phillips-head Screwdriver and remove the screws that secure the graphic card to the motherboard. Be sure to disconnect all cables attached to the graphics card before removing it. After removing the graphics card, be sure to clean all dust and debris from the motherboard before reinstalling the graphics card. Finally, plug in your computer and test for proper functionality.
- 6. 2. PCI Express card removal If you are using an installation tool, be sure to follow the manufacturer’s instructions carefully. Otherwise, you may damage your computer. The first is to use a PCI Express card removal tool. The second is to remove the graphics card from the motherboard using screws or an Allen wrench. REMOVE THE GRAPHIC CARD USING THE PCI EXPRESS CARD REMOVAL TOOL 1. Locate the PCI Express card removal tool that came with your computer. This tool will help you remove the graphics card without damaging it. 2. Carefully insert the PCI Express card removal tool into the graphics card’s slot and twist it until it clicks into place.
- 7. 3. Push down on the handles of the PCI Express card removal tool, then pull out the graphics card until it comes out of the computer. Let’s Discussed Step – By – Step Step 01 ● Remove the back cover of the computer Remove two screws securing the graphics card to the motherboard. Gently pull the graphics card out of the computer. Carefully place the graphics card onto a clean cloth to avoid any dust and dirt from getting on it. Replace the back cover of the computer and secure two screws.
- 8. Step 02 ● Remove the graphic card From the computer If you want to remove the graphic card from your computer, there are a few different ways to do it. You can remove the graphic card from the motherboard of your computer. This is usually the easiest way to remove a graphics card, but it can also be the most difficult.
- 9. You can also remove the graphics card from a desktop or laptop computer. This method is usually less difficult than removing the graphics card from a motherboard, but it may require some additional steps. Finally, you can also remove a graphics card from a gigabyte motherboard. This method is usually more difficult than removing the graphics card from a desktop or laptop computer, but it may be necessary in some cases.
- 10. Step 03 ● Disconnected all power codes Removed the 6 screws holding the card in place. Pulled the card out of the case. Removed any extra cables and connectors.
- 11. Cleaned off any residual adhesive or residue from the card and motherboard. Reinstalled the card into the case and screwed it in place with 6 screws. Power on your computer and enjoy your new, disconnected graphics card! Step 04 ● Remove Graphic cards From slots
- 12. the graphic card is attached to the motherboard via a PCI Express slot, remove the card by prying it loose with a thin screwdriver. If the graphics card is attached to the motherboard via an AGP or PCI slot, disconnect the cables from the graphics card. Then use a thin screwdriver to pry it loose from the motherboard. If the graphics card is attached using screws, carefully unscrew them and then remove the graphics card.
- 13. Step 05 ● unscrew the screw the secure graphics card in place with a Phillips head screwdriver remove the graphics card from the motherboard and replace the graphics card with a compatible one.
- 14. Step 06 ● lift out graphics card from slots On most motherboards, the graphics card slots are located in an area near the rear of the computer. Once you have located the slot, use a screwdriver to lift out the graphics card. Be sure to take note of the orientation of the graphics card and motherboard before removing it so that you can properly re-install it when you are finished.
- 15. Step 07 ● Clean Off Any Dust or Debris that May Be Attached to the GPU with a Microfiber Cloth or Cotton Swab Remove any connectors, fans, or cables attached to the card Place the card in Vice Grips or equivalent and use a sharp object to pry off the card cover If necessary use a vacuum cleaner to remove dust and debris
- 16. Once the cover is off clean all surfaces of the graphics card with a cloth dampened with rubbing alcohol. Wipe any residues away with a dry cloth. Reattach the cover and install the graphics card into the motherboard. Step 08 ● Reinstall The Graphics Card Into Its Slot In Your Computer
- 17. on the motherboard. Be sure to connect the power supply first, then plug in the video cable(s) and finally plug in the computer’s power. Turn on your computer and check to see if the graphics card is detected. If it isn’t, you may need to reinstall the driver for your graphics card. Conclusion: Removing a graphics card from your computer is not always easy, but it is definitely worth it in the end. With these steps Without Losing Data.