SlideShare a Scribd company logo
1 of 6
TURN FIVE IMAGES BLACK & WHITE
TURNING AN IMAGE TO SEPIA TONE
always start with a black & white image ļƒ  make sure you are also in RGB mode
before you proceed

Tutorial 1 ā€“ USING PHOTO FILTER: IMAGE ļƒ  ADJUSTMENTS ļƒ 
PHOTO FILTER ļƒ  choose from the pull down menu either a WARMING
FILTER or PHOTO FILTER and then change the DENSITY
Tutorial 2 ā€“ USING COLOR BALANCE: IMAGE ļƒ  ADJUSTMENTS ļƒ 
COLOR BALANCE, use the RED & YELLOW settings in Shadow, Midtone
and Highlight to create brown tones (settings to taste)
Tutorial 3 ā€“ USING HUE/SATURATION: IMAGE ļƒ  ADJUSTMENTS ļƒ 
HUE/SATURATION, check COLORIZE in the corner and slide the HUE
settings
Tutorial 4 ā€“ USING LAYER STYLES 1: SELECT ALL ļƒ  EDIT CUT, EDIT
PASTE, then WINDOW ļƒ  STYLES ļƒ  Choose the SEPIA TONE or SUN
FADED preset
Tutorial 5 ā€“ USING LAYER STYLES 2: SELECT ALL ļƒ  EDIT CUT, EDIT
PASTE ļƒ  LAYER MENU ļƒ  LAYER STYLES ļƒ  COLOR OVERLAY ļƒ 
CHANGE COLOR from DEFAULT color (usually red or black) to a BROWN
color, then change OPACITY or BLEND MODE to merge color layer with
original image

great for mimicking
cameron, stieglitz, and brady
ā€œUsing Blurā€
1.
Open an image with a clear center of interest
2.
Turn B&W
3.
CROP and EDIT photo using standard editing tools
ā€¢
Crop 11x14
ā€¢
Levels & Curves
ā€¢
Brightness & Contrast
ā€¢
Burn & Dodge
4.
DUPLICATE LAYER
5.
FILTER ļƒ  BLUR ļƒ  GAUSSIAN BLUR (to taste)
6.
Change LAYER BLENDING MODE TO MULTIPLY
7.
Use the ERASER TOOL set to a SOFT BLURRY BRUSH
8.
Erase areas of the image
ā€¢
The areas I chose to erase were parts that I
wanted more detail or to be brighter. For instance
I erased the eyes, the teeth and parts of the hair
in order to bring back those highlights, details and
textures.
ā€¢
Whatever you erase will be emphasized and
become the dominant part of the photo.
9.
FLATTEN IMAGE
10.
REPEAT STEPS 4 ā€“ 6, except change the BLENDING MODE
to SCREEN
11.
REPEAT STEP 7 & 8, except this time erase areas that you
want to make darker
12.
Experiment with different OPACITY LEVELS for your
ERASER-BRUSH

great for mimicking
cameron, stieglitz and leibovitz
ā€œUsing Double-Exposure and Blurā€
1.
Open a landscape image with a clear horizon line
2.
Turn B&W
3.
CROP and EDIT photo using standard editing tools
ā€¢
Crop 11x14
ā€¢
Levels & Curves
ā€¢
Brightness & Contrast
ā€¢
Burn & Dodge
4.
DUPLICATE LAYER
5.
Use the MOVE TOOL and NUDGE the DUPLICATE LAYER to
the right or left about TEN CLICKS
6.
FILTER ļƒ  BLUR ļƒ  MOTION BLUR -12 | 10
7.
Change LAYER BLENDING MODE to MULTIPLY and
OPACITY 50% or to taste
8.
Use the ERASER SOFT BLURRY BRUSH OPACITY 50% or
lower to erase the blurriness of the image, but leave areas
around clouds, mountains, buildings, trees etc.
9.
FLATTEN IMAGE
10.
REPEAT STEPS 4 ā€“ 8, EXCEPT
ā€¢
Like in the last tutorial you are going to repeat this
technique for the highlights as well.
ā€¢
This time NUDGE the opposite direction about 20
CLICKS
ā€¢
Set the LAYER MODE to SCREEN
ā€¢
Erase for shadows and details
11.
BURN & DODGE to taste

great for mimicking
cameron and stieglitz
ā€œUsing Thresholdā€
1.
Open an image with geometric shapes and/or leading
lines, as well as organic subject matter
2.
CROP and EDIT photo using standard editing tools
ā€¢
Crop 11x14
ā€¢
Levels & Curves
ā€¢
Brightness & Contrast
ā€¢
Burn & Dodge
3.
DUPLICATE LAYER
4.
IMAGE ļƒ  ADJUSTMENTS ļƒ  THRESHOLD
ā€¢
Use THRESHOLD to remove the gray
information, so that the image is only made up of
black areas and white areas.
ā€¢
Try to preserve as much detail as possible.
5.
FILTER ļƒ  STYLIZE ļƒ  DIFFUSE | ANISOPTROPIC
6.
Change LAYER BLENDING MODE to MULTIPLY
7.
Use the ERASER TOOL set to a SOFT BLURRY BRUSH
8.
Erase areas of the image
ā€¢
The areas I chose to erase were parts that I
wanted more detail or to be brighter. For instance
I erased the sky to bring back some of the
clouds, and some of the details in the people.

great for mimicking
rodchenko or smith
ā€œCreating a Negative Borderā€
1.
Open an image with a white background
2.
CROP and EDIT photo using standard editing tools
ā€¢
Crop 11x14
ā€¢
Levels & Curves
ā€¢
Brightness & Contrast
ā€¢
Burn & Dodge
3.
BLANK NEW LAYER ļƒ  FILL BUCKET WHITE
4.
PRESS D on the keyboard to reset your colors
5.
Use the CUSTOM SHAPE TOOL and draw a FRAME 7
graphic across the screen
6.
Then FILL BUCKET the inside with BLACK
7.
CTRL ā€“I (INVERSE)
8.
Change LAYER BLENDING MODE to MULTIPLY
9.
FILTER ļƒ  BLUR ļƒ  GAUSSIAN BLUR to taste
10.
Experiment with the LAYERā€™s OPACITY
11.
BLANK NEW LAYER
12.
Use the RECTANGULAR MARQUEE and draw a border
about an Ā½ inch in from the outside edge
13.
RIGHT CLICK and STROKE 10, then CTRL-D
14.
Use the RECTANGULAR MARQUEE and set the FEATHER to
15, then select small sections of the black border
15.
COPY and PASTE and use the MOVE TOOL to place this
section of the border as seen to the right

16.

REPEAT steps 14 & 15 several times
ā€¢
Make sure to keep clicking on the BLACK
BORDER LAYER when copying

great for mimicking
avedon and cameron
Digital Imaging ā€“ Tutorial 10
1.
2.
3.
4.
5.
6.
7.
8.
9.
10.
11.
12.
13.
14.

Open two photos, preferably focusing on a single subject matter
Turn both photos B&W using IMAGE ļƒ  ADJUST ļƒ  GRAYSCALE or you can use
the new CS3 tool: IMAGE ļƒ  ADJUST ļƒ  Black & White
Choose the image that you want to be the ā€œbackgroundā€ and the image you
want to be the ā€œmerging-inā€ image
SELECT ļƒ  SELECT ALL on the ā€œmerging-inā€ image, then EDIT ļƒ  COPY
(SHORTCUTS: CTRL A, CTRL C)
PASTE this image onto the ā€œbackground imageā€ file using CTRL V
RESIZE if needs be using EDIT ļƒ  TRANSFORM ļƒ  SCALE
Click on the ERASER TOOL and then go to your BRUSH SETTINGS and RESET
YOUR BRUSHES using this dialogue window
Choose a SOFT ROUND BRUSH
Change brush opacity to 50% and begin erasing the excess parts of the
ā€œmerging-inā€ image (the parts you do not want to see!)
Go over the areas several times until the two photos start to ā€œmergeā€ ļƒ  its
okay if you get a ā€œhaloā€ effect
ZOOM IN and clean up the edges with the eraser
When you are satisfied go to LAYER ļƒ  FLATTEN IMAGE
Use the BURN & DODGE TOOLS to get rid of ā€œhaloesā€ and alter the image so
that they use a similar light source
Use the CROP tool to improve your composition

Digital Imaging ā€“ Tutorial 11
Start with steps 1 ā€“ 3 from above
4.
If you are more comfortable using the QUICK MASK rather than
the ERASER TOOL there is an alternate method. Start from Step 3
Above.
5.
Instead of SELECTING ALL, on the ā€œmerging-inā€ image hit QUICK
MASK and then paint out the area of the photo you wish to copy
(for the example to the right I would paint out the elephant red)
6.
Once done, exit QUICK MASK and everything BUT your subject
matter should be selected, go to SELECT ļƒ  INVERSE
7.
Then EDIT ļƒ  COPY and then go to your ā€œbackground imageā€
8.
EDIT ļƒ  PASTE (CTRL V)
9.
Again, use the ERASER and BURN & TOOL to clean up the image

More Related Content

What's hot

Unit 2 Tutorials Part B
Unit 2 Tutorials Part BUnit 2 Tutorials Part B
Unit 2 Tutorials Part BMrLawler
Ā 
Photo Editing: A Little Goes A Long Way
Photo Editing: A Little Goes A Long WayPhoto Editing: A Little Goes A Long Way
Photo Editing: A Little Goes A Long WayTREND MLS
Ā 
Photography post processing examples
Photography post processing examplesPhotography post processing examples
Photography post processing examplesbenrodol
Ā 
How to Edit in Photoshop (Part 2): Adding Background and Using Adjustment Tools
How to Edit in Photoshop (Part 2): Adding Background and Using Adjustment ToolsHow to Edit in Photoshop (Part 2): Adding Background and Using Adjustment Tools
How to Edit in Photoshop (Part 2): Adding Background and Using Adjustment ToolsMaria Eloisa Blanza
Ā 
Double Exposure Skills Development
Double Exposure Skills DevelopmentDouble Exposure Skills Development
Double Exposure Skills DevelopmentHayleyMcCarthy
Ā 
Cartooning yourself using photoshop
Cartooning yourself using photoshopCartooning yourself using photoshop
Cartooning yourself using photoshopcristy nazareno
Ā 
Post Processing A 3 D Render
Post Processing A 3 D RenderPost Processing A 3 D Render
Post Processing A 3 D RenderDaniel Kreimer
Ā 
Do not open your computers! part 2
Do not open your computers! part 2Do not open your computers! part 2
Do not open your computers! part 2Jenina Romulo
Ā 
How to Edit in Photoshop (Part 1): Inserting, Cropping, and Fixing Images
How to Edit in Photoshop (Part 1): Inserting, Cropping, and Fixing ImagesHow to Edit in Photoshop (Part 1): Inserting, Cropping, and Fixing Images
How to Edit in Photoshop (Part 1): Inserting, Cropping, and Fixing ImagesMaria Eloisa Blanza
Ā 
Lighting plan
Lighting planLighting plan
Lighting planiamshahzeb
Ā 
Photography
Photography Photography
Photography OnaFontanet
Ā 
Photo shop cs5-watercolor-painting-effect-tutorial
Photo shop cs5-watercolor-painting-effect-tutorialPhoto shop cs5-watercolor-painting-effect-tutorial
Photo shop cs5-watercolor-painting-effect-tutorialMenSagam Technologies
Ā 
P 13 Spolight
P 13 SpolightP 13 Spolight
P 13 Spolightsumidahilo
Ā 
MTM3 Leo Valenzuela
MTM3 Leo ValenzuelaMTM3 Leo Valenzuela
MTM3 Leo ValenzuelaNomer Adona
Ā 
Double Exposure Skills Development
Double Exposure Skills DevelopmentDouble Exposure Skills Development
Double Exposure Skills DevelopmentHayleyMcCarthy
Ā 

What's hot (18)

Photography
PhotographyPhotography
Photography
Ā 
Chap32
Chap32Chap32
Chap32
Ā 
Unit 2 Tutorials Part B
Unit 2 Tutorials Part BUnit 2 Tutorials Part B
Unit 2 Tutorials Part B
Ā 
Photo Editing: A Little Goes A Long Way
Photo Editing: A Little Goes A Long WayPhoto Editing: A Little Goes A Long Way
Photo Editing: A Little Goes A Long Way
Ā 
Photography post processing examples
Photography post processing examplesPhotography post processing examples
Photography post processing examples
Ā 
How to Edit in Photoshop (Part 2): Adding Background and Using Adjustment Tools
How to Edit in Photoshop (Part 2): Adding Background and Using Adjustment ToolsHow to Edit in Photoshop (Part 2): Adding Background and Using Adjustment Tools
How to Edit in Photoshop (Part 2): Adding Background and Using Adjustment Tools
Ā 
Double Exposure Skills Development
Double Exposure Skills DevelopmentDouble Exposure Skills Development
Double Exposure Skills Development
Ā 
Cartooning yourself using photoshop
Cartooning yourself using photoshopCartooning yourself using photoshop
Cartooning yourself using photoshop
Ā 
Post Processing A 3 D Render
Post Processing A 3 D RenderPost Processing A 3 D Render
Post Processing A 3 D Render
Ā 
Do not open your computers! part 2
Do not open your computers! part 2Do not open your computers! part 2
Do not open your computers! part 2
Ā 
How to Edit in Photoshop (Part 1): Inserting, Cropping, and Fixing Images
How to Edit in Photoshop (Part 1): Inserting, Cropping, and Fixing ImagesHow to Edit in Photoshop (Part 1): Inserting, Cropping, and Fixing Images
How to Edit in Photoshop (Part 1): Inserting, Cropping, and Fixing Images
Ā 
Salford quays edits
Salford quays editsSalford quays edits
Salford quays edits
Ā 
Lighting plan
Lighting planLighting plan
Lighting plan
Ā 
Photography
Photography Photography
Photography
Ā 
Photo shop cs5-watercolor-painting-effect-tutorial
Photo shop cs5-watercolor-painting-effect-tutorialPhoto shop cs5-watercolor-painting-effect-tutorial
Photo shop cs5-watercolor-painting-effect-tutorial
Ā 
P 13 Spolight
P 13 SpolightP 13 Spolight
P 13 Spolight
Ā 
MTM3 Leo Valenzuela
MTM3 Leo ValenzuelaMTM3 Leo Valenzuela
MTM3 Leo Valenzuela
Ā 
Double Exposure Skills Development
Double Exposure Skills DevelopmentDouble Exposure Skills Development
Double Exposure Skills Development
Ā 

Similar to Unit 6 - Masters Tutorials (11)

Unit 7 - Case Study/Tutorials
Unit 7 - Case Study/TutorialsUnit 7 - Case Study/Tutorials
Unit 7 - Case Study/TutorialsMrLawler
Ā 
Artwork tutorial 2 making it look like banksy
Artwork tutorial 2   making it look like banksyArtwork tutorial 2   making it look like banksy
Artwork tutorial 2 making it look like banksyXP School
Ā 
Post processing and sequencing by Victoria Elliott
Post processing and sequencing by Victoria ElliottPost processing and sequencing by Victoria Elliott
Post processing and sequencing by Victoria ElliottVictoria Elliott
Ā 
Adobe Photoshop I Primer
Adobe Photoshop I PrimerAdobe Photoshop I Primer
Adobe Photoshop I PrimerNYCCTfab
Ā 
quicktip_scanphotoshop
quicktip_scanphotoshopquicktip_scanphotoshop
quicktip_scanphotoshoptutorialsruby
Ā 
quicktip_scanphotoshop
quicktip_scanphotoshopquicktip_scanphotoshop
quicktip_scanphotoshoptutorialsruby
Ā 
Information Communication Technology
Information Communication TechnologyInformation Communication Technology
Information Communication TechnologyNancyDaro
Ā 
How to-edit-in-photoshop-part-2
How to-edit-in-photoshop-part-2How to-edit-in-photoshop-part-2
How to-edit-in-photoshop-part-2victorlansang
Ā 
Advanced Digital Photography
Advanced Digital PhotographyAdvanced Digital Photography
Advanced Digital PhotographyDianne Smith-Harper
Ā 
Photoshop editing booklet 2019
Photoshop editing booklet 2019Photoshop editing booklet 2019
Photoshop editing booklet 2019missfcmay
Ā 
Using Adjustment Layers and Lighting in Photoshop
Using Adjustment Layers and Lighting in PhotoshopUsing Adjustment Layers and Lighting in Photoshop
Using Adjustment Layers and Lighting in Photoshopnombre thera
Ā 
The 8 Basic Steps Elements 6
The 8 Basic Steps  Elements 6The 8 Basic Steps  Elements 6
The 8 Basic Steps Elements 6joelk
Ā 
The 8 Basic Steps Elements 6
The 8 Basic Steps  Elements 6The 8 Basic Steps  Elements 6
The 8 Basic Steps Elements 6joelk
Ā 
Editing with PIXLR
Editing with PIXLREditing with PIXLR
Editing with PIXLRAnna Polud
Ā 
Editing Your Photos
Editing Your PhotosEditing Your Photos
Editing Your Photosaquariancic
Ā 
Crazy Photos: An Introduction to GIMP
Crazy Photos: An Introduction to GIMPCrazy Photos: An Introduction to GIMP
Crazy Photos: An Introduction to GIMPRino Landa
Ā 
Applying color effect in photoshop
Applying color effect in photoshopApplying color effect in photoshop
Applying color effect in photoshopsujon hasan
Ā 
Cut out image with hard hair mask
Cut out image with hard hair maskCut out image with hard hair mask
Cut out image with hard hair masksujon hasan
Ā 

Similar to Unit 6 - Masters Tutorials (11) (20)

Unit 7 - Case Study/Tutorials
Unit 7 - Case Study/TutorialsUnit 7 - Case Study/Tutorials
Unit 7 - Case Study/Tutorials
Ā 
Artwork tutorial 2 making it look like banksy
Artwork tutorial 2   making it look like banksyArtwork tutorial 2   making it look like banksy
Artwork tutorial 2 making it look like banksy
Ā 
Post processing and sequencing by Victoria Elliott
Post processing and sequencing by Victoria ElliottPost processing and sequencing by Victoria Elliott
Post processing and sequencing by Victoria Elliott
Ā 
Adobe Photoshop I Primer
Adobe Photoshop I PrimerAdobe Photoshop I Primer
Adobe Photoshop I Primer
Ā 
Lec 3
Lec 3Lec 3
Lec 3
Ā 
Photoshop basics
Photoshop basicsPhotoshop basics
Photoshop basics
Ā 
quicktip_scanphotoshop
quicktip_scanphotoshopquicktip_scanphotoshop
quicktip_scanphotoshop
Ā 
quicktip_scanphotoshop
quicktip_scanphotoshopquicktip_scanphotoshop
quicktip_scanphotoshop
Ā 
Information Communication Technology
Information Communication TechnologyInformation Communication Technology
Information Communication Technology
Ā 
How to-edit-in-photoshop-part-2
How to-edit-in-photoshop-part-2How to-edit-in-photoshop-part-2
How to-edit-in-photoshop-part-2
Ā 
Advanced Digital Photography
Advanced Digital PhotographyAdvanced Digital Photography
Advanced Digital Photography
Ā 
Photoshop editing booklet 2019
Photoshop editing booklet 2019Photoshop editing booklet 2019
Photoshop editing booklet 2019
Ā 
Using Adjustment Layers and Lighting in Photoshop
Using Adjustment Layers and Lighting in PhotoshopUsing Adjustment Layers and Lighting in Photoshop
Using Adjustment Layers and Lighting in Photoshop
Ā 
The 8 Basic Steps Elements 6
The 8 Basic Steps  Elements 6The 8 Basic Steps  Elements 6
The 8 Basic Steps Elements 6
Ā 
The 8 Basic Steps Elements 6
The 8 Basic Steps  Elements 6The 8 Basic Steps  Elements 6
The 8 Basic Steps Elements 6
Ā 
Editing with PIXLR
Editing with PIXLREditing with PIXLR
Editing with PIXLR
Ā 
Editing Your Photos
Editing Your PhotosEditing Your Photos
Editing Your Photos
Ā 
Crazy Photos: An Introduction to GIMP
Crazy Photos: An Introduction to GIMPCrazy Photos: An Introduction to GIMP
Crazy Photos: An Introduction to GIMP
Ā 
Applying color effect in photoshop
Applying color effect in photoshopApplying color effect in photoshop
Applying color effect in photoshop
Ā 
Cut out image with hard hair mask
Cut out image with hard hair maskCut out image with hard hair mask
Cut out image with hard hair mask
Ā 

More from MrLawler

Final project (pbl)
Final project (pbl)Final project (pbl)
Final project (pbl)MrLawler
Ā 
Hum 201 microlesson mod 2
Hum 201 microlesson mod 2Hum 201 microlesson mod 2
Hum 201 microlesson mod 2MrLawler
Ā 
Hum 201 microlesson mod 1
Hum 201 microlesson mod 1Hum 201 microlesson mod 1
Hum 201 microlesson mod 1MrLawler
Ā 
History of Animation
History of AnimationHistory of Animation
History of AnimationMrLawler
Ā 
Final Review
Final ReviewFinal Review
Final ReviewMrLawler
Ā 
Cultural study
Cultural studyCultural study
Cultural studyMrLawler
Ā 
Tips on taking good photos
Tips on taking good photosTips on taking good photos
Tips on taking good photosMrLawler
Ā 
Alyson Martinez
Alyson MartinezAlyson Martinez
Alyson MartinezMrLawler
Ā 
DID/COMM: URBAN TOY
DID/COMM: URBAN TOYDID/COMM: URBAN TOY
DID/COMM: URBAN TOYMrLawler
Ā 
DID/COMM: URBAN TOY
DID/COMM: URBAN TOYDID/COMM: URBAN TOY
DID/COMM: URBAN TOYMrLawler
Ā 
You Pick-Three Part 2
You Pick-Three Part 2You Pick-Three Part 2
You Pick-Three Part 2MrLawler
Ā 
YOU PICK THREE
YOU PICK THREEYOU PICK THREE
YOU PICK THREEMrLawler
Ā 
DPI 1 and DPI 2 Texture Mapping
DPI 1 and DPI 2 Texture MappingDPI 1 and DPI 2 Texture Mapping
DPI 1 and DPI 2 Texture MappingMrLawler
Ā 
DID Children's Book
DID Children's BookDID Children's Book
DID Children's BookMrLawler
Ā 
Origins of photography
Origins of photographyOrigins of photography
Origins of photographyMrLawler
Ā 
DPI 2: Final
DPI 2: FinalDPI 2: Final
DPI 2: FinalMrLawler
Ā 
DPI Final Instructions
DPI Final InstructionsDPI Final Instructions
DPI Final InstructionsMrLawler
Ā 
Digital illustration final
Digital illustration finalDigital illustration final
Digital illustration finalMrLawler
Ā 
Masters search requirements
Masters search requirementsMasters search requirements
Masters search requirementsMrLawler
Ā 
Unit 4 Photo Check
Unit 4 Photo CheckUnit 4 Photo Check
Unit 4 Photo CheckMrLawler
Ā 

More from MrLawler (20)

Final project (pbl)
Final project (pbl)Final project (pbl)
Final project (pbl)
Ā 
Hum 201 microlesson mod 2
Hum 201 microlesson mod 2Hum 201 microlesson mod 2
Hum 201 microlesson mod 2
Ā 
Hum 201 microlesson mod 1
Hum 201 microlesson mod 1Hum 201 microlesson mod 1
Hum 201 microlesson mod 1
Ā 
History of Animation
History of AnimationHistory of Animation
History of Animation
Ā 
Final Review
Final ReviewFinal Review
Final Review
Ā 
Cultural study
Cultural studyCultural study
Cultural study
Ā 
Tips on taking good photos
Tips on taking good photosTips on taking good photos
Tips on taking good photos
Ā 
Alyson Martinez
Alyson MartinezAlyson Martinez
Alyson Martinez
Ā 
DID/COMM: URBAN TOY
DID/COMM: URBAN TOYDID/COMM: URBAN TOY
DID/COMM: URBAN TOY
Ā 
DID/COMM: URBAN TOY
DID/COMM: URBAN TOYDID/COMM: URBAN TOY
DID/COMM: URBAN TOY
Ā 
You Pick-Three Part 2
You Pick-Three Part 2You Pick-Three Part 2
You Pick-Three Part 2
Ā 
YOU PICK THREE
YOU PICK THREEYOU PICK THREE
YOU PICK THREE
Ā 
DPI 1 and DPI 2 Texture Mapping
DPI 1 and DPI 2 Texture MappingDPI 1 and DPI 2 Texture Mapping
DPI 1 and DPI 2 Texture Mapping
Ā 
DID Children's Book
DID Children's BookDID Children's Book
DID Children's Book
Ā 
Origins of photography
Origins of photographyOrigins of photography
Origins of photography
Ā 
DPI 2: Final
DPI 2: FinalDPI 2: Final
DPI 2: Final
Ā 
DPI Final Instructions
DPI Final InstructionsDPI Final Instructions
DPI Final Instructions
Ā 
Digital illustration final
Digital illustration finalDigital illustration final
Digital illustration final
Ā 
Masters search requirements
Masters search requirementsMasters search requirements
Masters search requirements
Ā 
Unit 4 Photo Check
Unit 4 Photo CheckUnit 4 Photo Check
Unit 4 Photo Check
Ā 

Recently uploaded

Bluetooth Controlled Car with Arduino.pdf
Bluetooth Controlled Car with Arduino.pdfBluetooth Controlled Car with Arduino.pdf
Bluetooth Controlled Car with Arduino.pdfngoud9212
Ā 
Vertex AI Gemini Prompt Engineering Tips
Vertex AI Gemini Prompt Engineering TipsVertex AI Gemini Prompt Engineering Tips
Vertex AI Gemini Prompt Engineering TipsMiki Katsuragi
Ā 
Streamlining Python Development: A Guide to a Modern Project Setup
Streamlining Python Development: A Guide to a Modern Project SetupStreamlining Python Development: A Guide to a Modern Project Setup
Streamlining Python Development: A Guide to a Modern Project SetupFlorian Wilhelm
Ā 
"Federated learning: out of reach no matter how close",Oleksandr Lapshyn
"Federated learning: out of reach no matter how close",Oleksandr Lapshyn"Federated learning: out of reach no matter how close",Oleksandr Lapshyn
"Federated learning: out of reach no matter how close",Oleksandr LapshynFwdays
Ā 
Automating Business Process via MuleSoft Composer | Bangalore MuleSoft Meetup...
Automating Business Process via MuleSoft Composer | Bangalore MuleSoft Meetup...Automating Business Process via MuleSoft Composer | Bangalore MuleSoft Meetup...
Automating Business Process via MuleSoft Composer | Bangalore MuleSoft Meetup...shyamraj55
Ā 
My INSURER PTE LTD - Insurtech Innovation Award 2024
My INSURER PTE LTD - Insurtech Innovation Award 2024My INSURER PTE LTD - Insurtech Innovation Award 2024
My INSURER PTE LTD - Insurtech Innovation Award 2024The Digital Insurer
Ā 
New from BookNet Canada for 2024: BNC BiblioShare - Tech Forum 2024
New from BookNet Canada for 2024: BNC BiblioShare - Tech Forum 2024New from BookNet Canada for 2024: BNC BiblioShare - Tech Forum 2024
New from BookNet Canada for 2024: BNC BiblioShare - Tech Forum 2024BookNet Canada
Ā 
Unleash Your Potential - Namagunga Girls Coding Club
Unleash Your Potential - Namagunga Girls Coding ClubUnleash Your Potential - Namagunga Girls Coding Club
Unleash Your Potential - Namagunga Girls Coding ClubKalema Edgar
Ā 
AI as an Interface for Commercial Buildings
AI as an Interface for Commercial BuildingsAI as an Interface for Commercial Buildings
AI as an Interface for Commercial BuildingsMemoori
Ā 
My Hashitalk Indonesia April 2024 Presentation
My Hashitalk Indonesia April 2024 PresentationMy Hashitalk Indonesia April 2024 Presentation
My Hashitalk Indonesia April 2024 PresentationRidwan Fadjar
Ā 
Are Multi-Cloud and Serverless Good or Bad?
Are Multi-Cloud and Serverless Good or Bad?Are Multi-Cloud and Serverless Good or Bad?
Are Multi-Cloud and Serverless Good or Bad?Mattias Andersson
Ā 
Unblocking The Main Thread Solving ANRs and Frozen Frames
Unblocking The Main Thread Solving ANRs and Frozen FramesUnblocking The Main Thread Solving ANRs and Frozen Frames
Unblocking The Main Thread Solving ANRs and Frozen FramesSinan KOZAK
Ā 
Tech-Forward - Achieving Business Readiness For Copilot in Microsoft 365
Tech-Forward - Achieving Business Readiness For Copilot in Microsoft 365Tech-Forward - Achieving Business Readiness For Copilot in Microsoft 365
Tech-Forward - Achieving Business Readiness For Copilot in Microsoft 3652toLead Limited
Ā 
Dev Dives: Streamline document processing with UiPath Studio Web
Dev Dives: Streamline document processing with UiPath Studio WebDev Dives: Streamline document processing with UiPath Studio Web
Dev Dives: Streamline document processing with UiPath Studio WebUiPathCommunity
Ā 
Install Stable Diffusion in windows machine
Install Stable Diffusion in windows machineInstall Stable Diffusion in windows machine
Install Stable Diffusion in windows machinePadma Pradeep
Ā 
Artificial intelligence in the post-deep learning era
Artificial intelligence in the post-deep learning eraArtificial intelligence in the post-deep learning era
Artificial intelligence in the post-deep learning eraDeakin University
Ā 
Unraveling Multimodality with Large Language Models.pdf
Unraveling Multimodality with Large Language Models.pdfUnraveling Multimodality with Large Language Models.pdf
Unraveling Multimodality with Large Language Models.pdfAlex Barbosa Coqueiro
Ā 
Bun (KitWorks Team Study ė…øė³„ė§ˆė£Ø ė°œķ‘œ 2024.4.22)
Bun (KitWorks Team Study ė…øė³„ė§ˆė£Ø ė°œķ‘œ 2024.4.22)Bun (KitWorks Team Study ė…øė³„ė§ˆė£Ø ė°œķ‘œ 2024.4.22)
Bun (KitWorks Team Study ė…øė³„ė§ˆė£Ø ė°œķ‘œ 2024.4.22)Wonjun Hwang
Ā 

Recently uploaded (20)

DMCC Future of Trade Web3 - Special Edition
DMCC Future of Trade Web3 - Special EditionDMCC Future of Trade Web3 - Special Edition
DMCC Future of Trade Web3 - Special Edition
Ā 
Bluetooth Controlled Car with Arduino.pdf
Bluetooth Controlled Car with Arduino.pdfBluetooth Controlled Car with Arduino.pdf
Bluetooth Controlled Car with Arduino.pdf
Ā 
Vertex AI Gemini Prompt Engineering Tips
Vertex AI Gemini Prompt Engineering TipsVertex AI Gemini Prompt Engineering Tips
Vertex AI Gemini Prompt Engineering Tips
Ā 
Hot Sexy call girls in Panjabi Bagh šŸ” 9953056974 šŸ” Delhi escort Service
Hot Sexy call girls in Panjabi Bagh šŸ” 9953056974 šŸ” Delhi escort ServiceHot Sexy call girls in Panjabi Bagh šŸ” 9953056974 šŸ” Delhi escort Service
Hot Sexy call girls in Panjabi Bagh šŸ” 9953056974 šŸ” Delhi escort Service
Ā 
Streamlining Python Development: A Guide to a Modern Project Setup
Streamlining Python Development: A Guide to a Modern Project SetupStreamlining Python Development: A Guide to a Modern Project Setup
Streamlining Python Development: A Guide to a Modern Project Setup
Ā 
"Federated learning: out of reach no matter how close",Oleksandr Lapshyn
"Federated learning: out of reach no matter how close",Oleksandr Lapshyn"Federated learning: out of reach no matter how close",Oleksandr Lapshyn
"Federated learning: out of reach no matter how close",Oleksandr Lapshyn
Ā 
Automating Business Process via MuleSoft Composer | Bangalore MuleSoft Meetup...
Automating Business Process via MuleSoft Composer | Bangalore MuleSoft Meetup...Automating Business Process via MuleSoft Composer | Bangalore MuleSoft Meetup...
Automating Business Process via MuleSoft Composer | Bangalore MuleSoft Meetup...
Ā 
My INSURER PTE LTD - Insurtech Innovation Award 2024
My INSURER PTE LTD - Insurtech Innovation Award 2024My INSURER PTE LTD - Insurtech Innovation Award 2024
My INSURER PTE LTD - Insurtech Innovation Award 2024
Ā 
New from BookNet Canada for 2024: BNC BiblioShare - Tech Forum 2024
New from BookNet Canada for 2024: BNC BiblioShare - Tech Forum 2024New from BookNet Canada for 2024: BNC BiblioShare - Tech Forum 2024
New from BookNet Canada for 2024: BNC BiblioShare - Tech Forum 2024
Ā 
Unleash Your Potential - Namagunga Girls Coding Club
Unleash Your Potential - Namagunga Girls Coding ClubUnleash Your Potential - Namagunga Girls Coding Club
Unleash Your Potential - Namagunga Girls Coding Club
Ā 
AI as an Interface for Commercial Buildings
AI as an Interface for Commercial BuildingsAI as an Interface for Commercial Buildings
AI as an Interface for Commercial Buildings
Ā 
My Hashitalk Indonesia April 2024 Presentation
My Hashitalk Indonesia April 2024 PresentationMy Hashitalk Indonesia April 2024 Presentation
My Hashitalk Indonesia April 2024 Presentation
Ā 
Are Multi-Cloud and Serverless Good or Bad?
Are Multi-Cloud and Serverless Good or Bad?Are Multi-Cloud and Serverless Good or Bad?
Are Multi-Cloud and Serverless Good or Bad?
Ā 
Unblocking The Main Thread Solving ANRs and Frozen Frames
Unblocking The Main Thread Solving ANRs and Frozen FramesUnblocking The Main Thread Solving ANRs and Frozen Frames
Unblocking The Main Thread Solving ANRs and Frozen Frames
Ā 
Tech-Forward - Achieving Business Readiness For Copilot in Microsoft 365
Tech-Forward - Achieving Business Readiness For Copilot in Microsoft 365Tech-Forward - Achieving Business Readiness For Copilot in Microsoft 365
Tech-Forward - Achieving Business Readiness For Copilot in Microsoft 365
Ā 
Dev Dives: Streamline document processing with UiPath Studio Web
Dev Dives: Streamline document processing with UiPath Studio WebDev Dives: Streamline document processing with UiPath Studio Web
Dev Dives: Streamline document processing with UiPath Studio Web
Ā 
Install Stable Diffusion in windows machine
Install Stable Diffusion in windows machineInstall Stable Diffusion in windows machine
Install Stable Diffusion in windows machine
Ā 
Artificial intelligence in the post-deep learning era
Artificial intelligence in the post-deep learning eraArtificial intelligence in the post-deep learning era
Artificial intelligence in the post-deep learning era
Ā 
Unraveling Multimodality with Large Language Models.pdf
Unraveling Multimodality with Large Language Models.pdfUnraveling Multimodality with Large Language Models.pdf
Unraveling Multimodality with Large Language Models.pdf
Ā 
Bun (KitWorks Team Study ė…øė³„ė§ˆė£Ø ė°œķ‘œ 2024.4.22)
Bun (KitWorks Team Study ė…øė³„ė§ˆė£Ø ė°œķ‘œ 2024.4.22)Bun (KitWorks Team Study ė…øė³„ė§ˆė£Ø ė°œķ‘œ 2024.4.22)
Bun (KitWorks Team Study ė…øė³„ė§ˆė£Ø ė°œķ‘œ 2024.4.22)
Ā 

Unit 6 - Masters Tutorials (11)

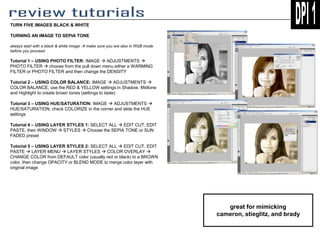
  • 1. TURN FIVE IMAGES BLACK & WHITE TURNING AN IMAGE TO SEPIA TONE always start with a black & white image ļƒ  make sure you are also in RGB mode before you proceed Tutorial 1 ā€“ USING PHOTO FILTER: IMAGE ļƒ  ADJUSTMENTS ļƒ  PHOTO FILTER ļƒ  choose from the pull down menu either a WARMING FILTER or PHOTO FILTER and then change the DENSITY Tutorial 2 ā€“ USING COLOR BALANCE: IMAGE ļƒ  ADJUSTMENTS ļƒ  COLOR BALANCE, use the RED & YELLOW settings in Shadow, Midtone and Highlight to create brown tones (settings to taste) Tutorial 3 ā€“ USING HUE/SATURATION: IMAGE ļƒ  ADJUSTMENTS ļƒ  HUE/SATURATION, check COLORIZE in the corner and slide the HUE settings Tutorial 4 ā€“ USING LAYER STYLES 1: SELECT ALL ļƒ  EDIT CUT, EDIT PASTE, then WINDOW ļƒ  STYLES ļƒ  Choose the SEPIA TONE or SUN FADED preset Tutorial 5 ā€“ USING LAYER STYLES 2: SELECT ALL ļƒ  EDIT CUT, EDIT PASTE ļƒ  LAYER MENU ļƒ  LAYER STYLES ļƒ  COLOR OVERLAY ļƒ  CHANGE COLOR from DEFAULT color (usually red or black) to a BROWN color, then change OPACITY or BLEND MODE to merge color layer with original image great for mimicking cameron, stieglitz, and brady
  • 2. ā€œUsing Blurā€ 1. Open an image with a clear center of interest 2. Turn B&W 3. CROP and EDIT photo using standard editing tools ā€¢ Crop 11x14 ā€¢ Levels & Curves ā€¢ Brightness & Contrast ā€¢ Burn & Dodge 4. DUPLICATE LAYER 5. FILTER ļƒ  BLUR ļƒ  GAUSSIAN BLUR (to taste) 6. Change LAYER BLENDING MODE TO MULTIPLY 7. Use the ERASER TOOL set to a SOFT BLURRY BRUSH 8. Erase areas of the image ā€¢ The areas I chose to erase were parts that I wanted more detail or to be brighter. For instance I erased the eyes, the teeth and parts of the hair in order to bring back those highlights, details and textures. ā€¢ Whatever you erase will be emphasized and become the dominant part of the photo. 9. FLATTEN IMAGE 10. REPEAT STEPS 4 ā€“ 6, except change the BLENDING MODE to SCREEN 11. REPEAT STEP 7 & 8, except this time erase areas that you want to make darker 12. Experiment with different OPACITY LEVELS for your ERASER-BRUSH great for mimicking cameron, stieglitz and leibovitz
  • 3. ā€œUsing Double-Exposure and Blurā€ 1. Open a landscape image with a clear horizon line 2. Turn B&W 3. CROP and EDIT photo using standard editing tools ā€¢ Crop 11x14 ā€¢ Levels & Curves ā€¢ Brightness & Contrast ā€¢ Burn & Dodge 4. DUPLICATE LAYER 5. Use the MOVE TOOL and NUDGE the DUPLICATE LAYER to the right or left about TEN CLICKS 6. FILTER ļƒ  BLUR ļƒ  MOTION BLUR -12 | 10 7. Change LAYER BLENDING MODE to MULTIPLY and OPACITY 50% or to taste 8. Use the ERASER SOFT BLURRY BRUSH OPACITY 50% or lower to erase the blurriness of the image, but leave areas around clouds, mountains, buildings, trees etc. 9. FLATTEN IMAGE 10. REPEAT STEPS 4 ā€“ 8, EXCEPT ā€¢ Like in the last tutorial you are going to repeat this technique for the highlights as well. ā€¢ This time NUDGE the opposite direction about 20 CLICKS ā€¢ Set the LAYER MODE to SCREEN ā€¢ Erase for shadows and details 11. BURN & DODGE to taste great for mimicking cameron and stieglitz
  • 4. ā€œUsing Thresholdā€ 1. Open an image with geometric shapes and/or leading lines, as well as organic subject matter 2. CROP and EDIT photo using standard editing tools ā€¢ Crop 11x14 ā€¢ Levels & Curves ā€¢ Brightness & Contrast ā€¢ Burn & Dodge 3. DUPLICATE LAYER 4. IMAGE ļƒ  ADJUSTMENTS ļƒ  THRESHOLD ā€¢ Use THRESHOLD to remove the gray information, so that the image is only made up of black areas and white areas. ā€¢ Try to preserve as much detail as possible. 5. FILTER ļƒ  STYLIZE ļƒ  DIFFUSE | ANISOPTROPIC 6. Change LAYER BLENDING MODE to MULTIPLY 7. Use the ERASER TOOL set to a SOFT BLURRY BRUSH 8. Erase areas of the image ā€¢ The areas I chose to erase were parts that I wanted more detail or to be brighter. For instance I erased the sky to bring back some of the clouds, and some of the details in the people. great for mimicking rodchenko or smith
  • 5. ā€œCreating a Negative Borderā€ 1. Open an image with a white background 2. CROP and EDIT photo using standard editing tools ā€¢ Crop 11x14 ā€¢ Levels & Curves ā€¢ Brightness & Contrast ā€¢ Burn & Dodge 3. BLANK NEW LAYER ļƒ  FILL BUCKET WHITE 4. PRESS D on the keyboard to reset your colors 5. Use the CUSTOM SHAPE TOOL and draw a FRAME 7 graphic across the screen 6. Then FILL BUCKET the inside with BLACK 7. CTRL ā€“I (INVERSE) 8. Change LAYER BLENDING MODE to MULTIPLY 9. FILTER ļƒ  BLUR ļƒ  GAUSSIAN BLUR to taste 10. Experiment with the LAYERā€™s OPACITY 11. BLANK NEW LAYER 12. Use the RECTANGULAR MARQUEE and draw a border about an Ā½ inch in from the outside edge 13. RIGHT CLICK and STROKE 10, then CTRL-D 14. Use the RECTANGULAR MARQUEE and set the FEATHER to 15, then select small sections of the black border 15. COPY and PASTE and use the MOVE TOOL to place this section of the border as seen to the right 16. REPEAT steps 14 & 15 several times ā€¢ Make sure to keep clicking on the BLACK BORDER LAYER when copying great for mimicking avedon and cameron
  • 6. Digital Imaging ā€“ Tutorial 10 1. 2. 3. 4. 5. 6. 7. 8. 9. 10. 11. 12. 13. 14. Open two photos, preferably focusing on a single subject matter Turn both photos B&W using IMAGE ļƒ  ADJUST ļƒ  GRAYSCALE or you can use the new CS3 tool: IMAGE ļƒ  ADJUST ļƒ  Black & White Choose the image that you want to be the ā€œbackgroundā€ and the image you want to be the ā€œmerging-inā€ image SELECT ļƒ  SELECT ALL on the ā€œmerging-inā€ image, then EDIT ļƒ  COPY (SHORTCUTS: CTRL A, CTRL C) PASTE this image onto the ā€œbackground imageā€ file using CTRL V RESIZE if needs be using EDIT ļƒ  TRANSFORM ļƒ  SCALE Click on the ERASER TOOL and then go to your BRUSH SETTINGS and RESET YOUR BRUSHES using this dialogue window Choose a SOFT ROUND BRUSH Change brush opacity to 50% and begin erasing the excess parts of the ā€œmerging-inā€ image (the parts you do not want to see!) Go over the areas several times until the two photos start to ā€œmergeā€ ļƒ  its okay if you get a ā€œhaloā€ effect ZOOM IN and clean up the edges with the eraser When you are satisfied go to LAYER ļƒ  FLATTEN IMAGE Use the BURN & DODGE TOOLS to get rid of ā€œhaloesā€ and alter the image so that they use a similar light source Use the CROP tool to improve your composition Digital Imaging ā€“ Tutorial 11 Start with steps 1 ā€“ 3 from above 4. If you are more comfortable using the QUICK MASK rather than the ERASER TOOL there is an alternate method. Start from Step 3 Above. 5. Instead of SELECTING ALL, on the ā€œmerging-inā€ image hit QUICK MASK and then paint out the area of the photo you wish to copy (for the example to the right I would paint out the elephant red) 6. Once done, exit QUICK MASK and everything BUT your subject matter should be selected, go to SELECT ļƒ  INVERSE 7. Then EDIT ļƒ  COPY and then go to your ā€œbackground imageā€ 8. EDIT ļƒ  PASTE (CTRL V) 9. Again, use the ERASER and BURN & TOOL to clean up the image