Resize bientanfuji-dienhathe.com
•
0 likes•392 views

Catalog Biến Tần Fuji Xem thêm tại https://dienhathe.com

Recommended
Recommended
More Related Content
What's hot
What's hot (19)
Similar to Resize bientanfuji-dienhathe.com
Similar to Resize bientanfuji-dienhathe.com (20)
More from Dien Ha The
More from Dien Ha The (20)
Recently uploaded
Recently uploaded (20)
Resize bientanfuji-dienhathe.com
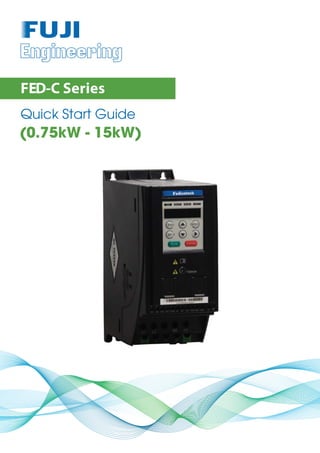
- 1. FED-C Series Quick Start Guide
- 2. Contents Safety Information and Precautions .......................................................................................................2 1. Product Information ............................................................................................................................3 1.1 Nameplate and Designation Rule......................................................................................................................3 1.2 eneral Speci cations.......................................................................................................................................4 1.3 Environment.......................................................................................................................................................5 2 Wiring ..................................................................................................................................................6 2.1 Typical System Connection ...............................................................................................................................6 2.2 Terminal Description ..........................................................................................................................................7 2.3 Remove the EMC and VDR Screws.................................................................................................................8 3 Operating Panel...................................................................................................................................9 3.1 Get Familiar with Operating Panel.....................................................................................................................9 4 Quick Setup.......................................................................................................................................11 4.1 Setup Flowchart............................................................................................................................................... 11 5. Parameter Table ...............................................................................................................................17 5.1 Introduction......................................................................................................................................................17 5.2 Standard Parameters.......................................................................................................................................17 5.3 Monitoring Function Code................................................................................................................................30 6. Troubleshooting................................................................................................................................31 6.1 AC Drive Performance Fine Tuning .................................................................................................................31 6.2 Fault Codes and Troubleshooting....................................................................................................................32 6.3 Symptoms and Diagnostics .............................................................................................................................35 Revision History.....................................................................................................................................36
- 3. Safety Information and Precautions - 2 - Safety Information and Precautions This guide is packaged together with the product for AC Drive. It contains basic information for quick start of the drive. For safety and more information, please refer to the AC Drive User Manual, which can be downloaded on website: http://www. Engineering.com. Electrical Safety Extreme care must be taken at all times when working with the AC Drive or within the area of the AC Drive. The voltages used in the AC Drive can cause severe electrical shock or burns and is potentially lethal. Only authori ed and quali ed personnel should be allowed to work on AC Drives. Machine/System Design and Safety of Personnel Machine/system design, installation, commissioning startups and maintenance must be carried out by personnel who have the necessary training and experience. They must read this safety information and the contents of this manual. If incorrectly installed, the AC Drive may present a safety hazard. The AC Drive uses high voltages and currents (including DC), carries a high level of stored electrical energy in the DC bus capacitors even after power OFF. These high voltages are potentially lethal. The AC Drive is NOT intended to be used for safety related applications/functions. The electronic “STOP &START” control circuits within the AC Drive must not be relied upon for the safety of personnel. Such control circuits do not isolate mains power voltages from the output of the AC Drive. The mains power supply must be disconnected by an electrical safety isolation device before accessing the internal parts of the AC Drive. Safety risk assessments of the machine or process system which uses an AC Drive must be undertaken by the user and or by their systems integrator/designer. In particular the safety assessment/design must take into consideration the consequences of the AC Drive failing or tripping out during normal operation and whether this leads to a safe stop position without damaging machine, adjacent equipment and machine operators/users. This responsibility lies with the user or their machine/process system integrator. The system integrator/designer must ensure the complete system is safe and designed according to the relevant safety standards. Technology and Authorized Distributors can provide recommendations related to the AC drive to ensure long term safe operation. Electrical Installation - Safety Electrical shock risk is always present within an AC Drive including the output cable leading to the motor terminals. Where dynamic brake resistors are tted external to the AC Drive, care must be taken with regards to live contact with the brake resistors, terminals which are at high DC voltage and potentially lethal. Cables from the AC Drive to the dynamic brake resistors should be double insulated as DC voltages are typically 300 to 400 VDC. Mains power supply isolation switch should be tted to the AC Drive. The mains power supply must be disconnected via the isolation switch before any cover of the AC Drive can be removed or before any servicing work is undertaken stored charge in the DC bus capacitors of the PWM inverter is potentially lethal after the AC supply has been disconnected. The AC supply must be isolated at least 10 minutes before any work can be undertaken as the stored charge will have been discharged through the internal bleed resistor tted across the DC bus capacitors. Whenever possible, it is good practice to check the DC bus voltage with a VDC meter before accessing the inverter bridge. Where the AC Drive input is connected to the mains supply with a plug and socket, then upon disconnecting the plug and socket, be aware that the plug pins may be exposed and internally connected to the DC bus capacitors (via the internal bridge recti er in reversed bias). Wait 10 minutes to allow stored charge in the DC bus capacitors to be dissipated by the bleed resistors before commencing work on the AC Drive. Electrical Shock Hazard Ensure the protective earthing conductor complies with technical standards and local safety regulations. Because the leakage current exceeds 3.5 mA in all models, IEC 61800-5-1 states that either the power supply must be automatically disconnected in case of discontinuity of the protective earthing conductor or a protective earthing conductor with across-section of at least 10 mm2 (Cu) or 16 mm2 (Al) must be used. Or use two PE wires and each wire must satisfy the IEC requirements independently. Failure to comply may result in death or serious injury. When using an earth leakage circuit breaker, use a residual current operated protective device (RCD) of type B (breaker which can detect both AC and DC). Leakage current can cause unprotected components to operate incorrectly. If this is a problem, lower the carrier frequency, replace the components in question with parts protected against harmonic current, or increase the sensitivity amperage of the leakage breaker to at least 100 mA per drive. Factors in determining leakage current: Size of the AC drive AC drive carrier frequency Motor cable type and length EMI/RFI lter
- 4. 1 Product Information - 3 - 1. Product Information 1.1 Nameplate and Designation Rule MODEL: FED1.5C1-SB INPUT: 1PH AC 200-240V 27.0A 50Hz/60Hz OUTPUT: 3PH AC 0-240V 11.0A 0-500Hz 2.2kW S : Serial Number AC drive model Rated input Rated output S/N code Nameplate Manufacturer PRG MF.K ENTER RUN STOP/RES Fuji Engineering Drive FED S Voltage Class S 2 4 1.5 C 1 Mark C Mark 1PH 200 to 240 V 3PH 200 to 240 V 3PH 380 to 480 V Series Mark 0.4 0.75 1.5 2.2 Applicable Motor (kW) 3.7 5.5 7.5 11 15 0.4 0.75 1.5 2.2 3.7 5.5 7.5 11 15 E G B Mark B Yes Built-in Braking Unit Null No Compact Heavy Duty Multi Version
- 5. 1 Product Information - 4 - 1.2 General Speci cations Voltage class 200 to 240VAC Model: C1-xB(1) 0.4 0.75 1.5 2.2 Dimension(2) Height Width Depth [H ]: 180 mm [W]: 75 mm [D]: 145 mm Mounting Hole, [mm] 5.0 Drive Input Rated Input voltage 1 PH, 200 to 240 VAC , -15% to +10% Rated input current, [A] 6.5 11.0 18.0 27.0 Rated input frequency 50/60 Hz, 5% Power capacity, [kVA] 1.7 3.0 4.8 7.1 Drive Output Applicable motor [kW] 0.4 0.75 1.5 2.2 [HP] 0.5 1 2 3 Output current, [A] 2.6 4.6 8.0 11.0 Default carrier frequency, [kHz] 6 6 6 6 Overload capacity 150% for 60 Sec Max. output voltage 3 PH, 0 to 240 VAC Max. output frequency 50 to 500 Hz Braking Resistor Recommended power, [W] 80 80 100 100 Recommended resistance, min. [ ] 200 150 100 70 Weight, [kg] 1.1 Note (1): "B" denotes build-in brake function. (2): The dimensions are shown as below:
- 6. 1 Product Information - 5 - H H1 W A B PRG MF.K ENTER RUN STOP/RES D 1.3 Environment Altitude Below 1000 m, 1% derating current per 100 m at 1000 to 3000 m. Max. 3000 m. Storage Temperature -20°C to +60°C Operating Temperature 10°C to +40°C. 1.5% derating current per 1°C at 40°C to 50°C. Max. 50°C. Max. Humidity 95% RH, no-condensing Vibration 5.9 g/s2 (0.6 g) Running Environment PD2 Power Supply System TT/TN IT (Remove the screws of VDR and EMC lter according to section 2.3.) Enclosure IP20
- 7. 2 Wiring - 6 - 2 Wiring 2.1 Typical System Connection L1 L2 U V W DI1 DI2 DI3 DI4 COM +10V GND 485+ 485- GND AI T/C T/A AO1 GND L1 L2 M AM A + BR Forward run F4-00 = 1 Forward jog F4-01 = 4 Fault reset F4-02 = 9 F4-03 = 12 1 to 5 k 0 to 10 V or 0 to 20 mA Modbus-RTU (max.: 115200 bps) STP cable External operating panel (keypad & display) Analog Voltage Output: 0 to 10V Relay output Normally-open contact Load: 3 A/250 AC, 3 A/30 VDC FuseBreaker PE PE PE Multi-Reference 1 DI4 supports 20 kHz pulse input. Default value 1: OFF, 2: OFF, 3: OFF ON 1 2 3 ON 1 2 3 ON 1 2 3 ON 1 2 3 ON 1 2 3 Current input Voltage input Matching RS485 terminal resistor Not matching RS485 terminal resistor Voltage or current input selected via DIP switch (voltage input by default) Note For the DI terminals, low level is valid and valid level is 5 V, input resistance is 3.6 , DI1 to DI3 satis es 100 Hz frequency input, and DI4 satis es 20 kHz frequency input. The requirement of pulse duty cycle is 30% to 70%.
- 8. 2 Wiring - 7 - 2.2 Terminal Description Terminals of Main Circuit L1 WVU L2 BR (+) Terminal Terminal Name Description L1, L2 Single-phase supply input Connect to the single-phase AC power supply. BR, (+) Braking resistor connection Connected to external braking resistor. U, V, W Output terminals Connect to a three-phase motor. Ground (PE) Grounding connection. Terminals of Main Control Board ON 1 2 3 DI1 DI2 DI3 DI4 COM AI AO 10V GND 485+ TCTA485- DIP switch Default value:1: OFF, 2: OFF, 3: OFF ON 1 2 3 ON 1 2 3 ON 1 2 3 ON 1 2 3 Current input Voltage input Matching RS485 terminal resistor Not matching RS485 terminal resistor
- 9. 2 Wiring - 8 - Terminal Terminal Name Description +10V-GND +10 VDC power supply Provides +10V power supply to an external unit. Generally used to supply an external potentiometer of 1 to 5 k . Max. output current: 10 mA. AI-GND Analog input Either a voltage or a current input, determined by jumper J9; Input voltage range: 0 to 10 VDC; Input current range: 0 to 20 mA; Resolution: 12 bits Correction accuracy: 0.5% Response time: < 8 ms DI1-COM Digital input Low level valid; Valid level < 5 V; Frequency < 100 HZ Input resistance: 4 k DI2-COM DI3-COM DI4-COM High-speed pulse input High-speed pulse input, supporting a maximum of 20 kHz Input resistance: 4 k AO-GND Analog output 1 0 to 10 V Correction accuracy: 100 mV Resolution: 10 bits Correction accuracy: 1% T/A-T/C Normally open terminal Contact driving capacity: 250 VAC, 3 A, Cos f = 0.4, 30 VDC, 3 A. Applies to overvoltage Category II circuit 485+ - 485- RS485 communication Half-duplex RS485 communication Max. baud rate: 115200 Supporting a maximum of 64 nodes 2.3 Remove the EMC and VDR screws If the drive is applied in an IT system, remove the EMC and VDR screws as shown in the following gures. VDR Jumper screw EMC Jumper screw
- 10. 3 Operating Panel (Keypad & Display) - 9 - 3 Operating Panel 3.1 Get Familiar with Operating Panel Overview L1 WVU 10min PRG MF.K ENTER RUN REMOTE TUNE / TC/FWD REV RUN STOP/RE S LED display Interface of external operating panel Status Indicators RUN REMOTE FWD/REV TUNE/TC DIP switch Control terminals L2 BR (+) ON 1 2 3 Keys PRG MF.K ENTER RUN STOP/RES i DI1 DI2 DI3 DI4 COM AI AO 10V GND 485+ TCTA485- i Read the user manual of the AC drive carefully before installation or operation. 10min Do not remove the front cover while the power is on or within10 minutes after the power is turned off. Keys on operation panel Key Key Name Function PRG Programming Enter or exit Level I menu. Return to the previous menu. ENTER Con rm Enter each level of menu interface. Con rm displayed parameter setting. Increment When navigating a menu, it moves the selection up through the screens available. When editing a parameter value, it increases the displayed value. When the AC drive is in RUN mode, it increases the speed. Decrement When navigating a menu, it moves the selection down through the screens available. When editing a parameter value, it decreases the displayed value. When the AC drive is in RUNNING mode, it decreases the speed. Shift Select the displayed parameter in the STOP or RUNNING status. Select the digit to be modi ed when modifying a parameter value RUN RUN Start the AC drive when using the operating panel control mode. It is inactive when using the terminal or communication control mode. STOP/RES Stop/Reset Stop the AC drive when the drive is in the RUNNING status. Perform a reset operation when the drive is in the FAULT status. Note: The functions of this key can be restricted by using function F7-02. MF.K Multifunction Perform a function switchover as de ned by the setting of F7-01, for example to quickly switch command source or direction.
- 11. 3 Operating Panel (Keypad & Display) - 10 - Status Indicators There are four red LED status indicators at the top of the operating panel. Indicator Indication RUN ON indicates the RUNNING status. FLASHING indicates power dip ride-through. OFF indicates the STOP status. REMOTE ON indicates under terminal control. FLASHING indicates under remote control. OFF indicates under operating panel control. FWD/REV ON indicates reverse motor rotation. OFF indicates forward motor rotation. TUNE/TC FLASHING indicates a fault condition on AC drive. OFF indicates a normal condition on AC drive. Operations of Parameters 50.00 F0 F0 F1 FP ... A1 U0 AC ... FP A1 .. . F0 F1 F0 02 F0 03 F0 26 ... F0 02 F0 26 ... 1 2 0 F0 03 ENTER PRG PRG PRG PRG PRG ENTER ENTER ENTER PRG AC U0 F0 ... Parameter Arrangement Function Code Group Description Remark F0 to FF Standard function code group Standard function parameters A1 to AC Advanced function code group AI/AO correction U0 RUNNING status function code group Display of basic parameters
- 12. 4 Quick Setup - 11 - 4 Quick Setup 4.1 Setup Flowchart START Para. Parameter name Default Commission Before power on Install and wire the drive Install and wire the drive as explained in chapters 1 to 3 of the AC Drives User Manual. Check wirings - of power supply and AC drive outputs Restore parameters FP-01 Parameter initialization 0 0: No operation 01: Restore default settings except motor parameters 02: Clear records including errors 03: Reserved 04: Back up parameters 05 to 19: Reserved 20: Mechanical movement industry (conveying belt) 21: Inertia industry (fan) 22 to 500: Reserved 501: Restore user’s backup parameters NOTE: It is recommended to "Restore default settings" prior to commissioning the AC drive. CONTINUE Para. Parameter name Default Commission
- 13. 4 Quick Setup - 12 - START Para. Parameter name Default Commission Set motor parameters Motor Nameplate F1-01 Rated motor power model dependent 1.5 Unit: kW F1-02 Rated motor voltage model dependent 380 Unit: V F1-03 Rated motor current model dependent 3.4 Unit: A F1-04 Rated motor frequency model dependent 50 Unit: Hz F1-05 Rated motor speed model dependent 2800 Unit: rpm. Perform motor auto-tuning F1-37 Auto-tuning selection 0 1 0: No auto-tuning 1: Static auto-tuning Steps of auto-tuning: 1. Ensure the UVW connection between inverter and motor is not cut off by output contactor; if it is cut off, then manually handle with the output contactor. 2. Set F0-02 = 0 (operating panel), so that the key RUN can start the tuning procedure. 3. Set F1-37 = 1, press ENTER , then LED on panel will display letters "TUNE". 4. Press the key RUN on panel, then motor starts auto-tuning, it usually takes about 30 seconds to nish this auto-tuning, wait until LED stops displaying "TUNE" Select command source. F0-02 Command source selection 1 0: Operating panel (keypad & display) 1: Terminal I/O control 2: Serial comms. Select frequency reference setting channel F0-03 Main frequency reference setting channel selection 0 0: Digital setting F0-08 (pressing or can revise F0-08 easily, and the revised value won’t be cleared even after power off) 1: Digital setting F0-08 (pressing or can change F0-08 easily, but the revised value would be cleared after power off) 2: AI 5: Pulse setting (DI4) 6: Multi-reference setting 7: Simple PLC 8: PID 9: Communication setting CONTINUE Para. Parameter name Default Commission
- 14. 4 Quick Setup - 13 - CONTINUE Para. Parameter name Default Commission If F0-08 is frequency reference Set F0-08 F0-08 Preset frequency 50.00 If AI is fequency reference 0 Hz to F0-10 Set AI F4-13 AI curve minimum input 0.00 If multi-reference is frequency reference 0 V to F4-15; F4-14 Corresponding percentage of AI minimum input 0.0 -100.0% to 100.0% F4-15 AI maximum input 10.00 F4-13 to 10.00 V F4-16 Corresponding percentage of AI maximum input 100.0 -100.0% to 100.0% Set multi-reference values FC-00 Reference 0 0.0 If any digital input is used 0.0% to 100.0% FC-01 to FC-07 Reference 1o reference 7 0.0 0.0% to 100.0% Set DI function F4-00 DI1 function selection 1 0: No function 1: Forward run (FWD) 2: Reverser run (REV) 3: Three-wire control 4: Forward jog (FJOG) 5: Reverse jog (RJOG) 6: Terminal UP 7: Terminal DOWN 8: Coast to stop 9: Fault reset (RESET) 10: RUN disabled 11: External fault normally-open input 12: Multi-reference terminal 1 13: Multi-reference terminal 2 14: Multi-reference terminal 3 15: Multi-reference terminal 4 16: Terminal 1 for acceleration/deceleration time selection 18: Frequency reference setting channel switchover 19: UP and DOWN setting clear (terminal, operation panel) 20: Command source switchover 21: Acceleration/Deceleration prohibited 22: PID disabled 23: PLC state reset CONTINUE Para. Parameter name Default Commission
- 15. 4 Quick Setup - 14 - CONTINUE Para. Parameter name Default Commission F4-00 DI1 function selection 1 30: Pulse input as frequency reference (valid only for DI4) 32: Immediate DC injection braking 33: External fault normally-closed input 34: Frequency modi cation enabled 35: PID operation direction reverse 36: External stop 1 37: Command source switchover 2 38: PID integral disabled 39: Switchover between main frequency reference and preset frequency 40: Switchover between auxiliary frequency reference and preset frequency 43: PID parameter switchover 47: Emergency stop (ES) 48: External stop 2 49: Deceleration DC injection braking 50: Clear running time this time 51: Two-wire control/ Three-wire control 52: Reverse running prohibited F4-01 DI2 function selection 4 Setting range same as DI1. F4-02 DI3 function selection 9 Setting range same as DI1. F4-03 DI4 function selection 12 If any digital output is used Setting range same as DI1. Set DO function F5-02 Relay function selection(T/A-T/C) 0 0: No output 1: AC drive running 2: Fault output 3: Frequency level detection 1 output 4: Frequency reached 5: Zero-speed running (no output at stop) 6: Motor overload pending 7: AC drive overload pending 11: PLC cycle completed 12: Accumulative running time reached 13: Frequency limited 15: Ready for RUN 17: Frequency upper limit reached 18: Frequency lower limit reached (no output at stop) 19: Undervoltage 20: Communication setting 24: Accumulative power-on time reached 26: Frequency 1 reached 28: Current 1 reached 30: Timing reached CONTINUE Para. Parameter name Default Commission
- 16. 4 Quick Setup - 15 - CONTINUE Para. Parameter name Default Commission Set DO function F5-02 Relay function selection(T/A-T/C) 0 If an analog output is used 31: AI input exceeding limit 32: Load lost 33: Reverse running 34: Zero current 36: Output current exceeding limit 37: Frequency lower limit reached (having output at stop) 38: Alarm output 40: Current running time reached 41: Fault output Set AO function F5-07 AO function selection 0 0: Running frequency 1: Set frequency 2: Output current 3: Output torque 4: Output power 5: Output voltage 6: Pulse input (100% corresponding to 20 kHz) 7: AI 12: Communication setting 13: Motor rotational speed 14: Output current (100% corresponding to 100 A) 15: Output voltage (100% corresponding to 1000 V) Set accel. /decel. time F0-17 Acceleration time 1 Model dependent If smooth accel./decel. is requested 0.0s to 6500.0s F0-18 Deceleration time 1 Model dependent 0.0s to 6500.0s Set S-curve F6-07 Acceleration/Deceleration mode 0 0: Linear acceleration/deceleration 1: Static S-curve acceleration/deceleration 2: Dynamic S-curve acceleration/deceleration F6-08 Time proportion of S-curve at Accel. start 30.0 0.0% to (100.0% - F6-09) F6-09 Time proportion of S-curve at Accel. end 30.0 0.0% to (100.0% - F6-08) CONTINUE Para. Parameter name Default Commission
- 17. 4 Quick Setup - 16 - CONTINUE Para. Parameter name Default Commission Set VF parameters F3-00 V/F curve selection 0 0: Linear V/F 1: Multi-point V/F F3-01 Torque boost 0.0 0.0 to 30.0 %; NOTE: if it is 0, then auto torque boost is activated, and it is recommended to use auto torque boost. F3-02 Frequency limit of torque boost 50.00 0.00 Hz to maximum output frequency F3-03 Multi-point V/F frequency 1 0.00 0.00 Hz to F3-05 F3-04 Multi-point V/F voltage 1 0.0 0.0 to 100.0 V F3-05 Multi-point V/F frequency 2 0.00 F3-03 to F3-07, Hz F3-06 Multi-point V/F voltage 2 0.0 0.0 to 100.0 V F3-07 Multi-point V/F frequency 3 0.00 F3-05 to rated motor frequency F1-04, Hz F3-08 Multi-point V/F voltage 3 0.0 0.0 to 100.0 V Trial RUN Use operating panel, or digital input terminal, or serial communication control, to start inverter, check if the running performance satis es your application. If yes, then go forward to next step, if NO, then go back to check. Finish
- 18. 5 Parameter Table - 17 - 5. Parameter Table 5.1 Introduction Groups F and A include standard function parameters. Group U includes the monitoring function parameters and extension card communication parameters. 5.2 Standard Parameters Para. No. Para. Name Setting Range Default Comms. Address Group F0: Standard Parameters F0-02 Command source selection 0: Operating panel 1: Terminal I/O control 2: Serial comms. 0 0xF002/0x0002 F0-03 Main frequency reference setting channel selection 0: Digital setting (non-retentive at power down) 1: Digital setting (retentive at power down) 2: AI 5: Pulse reference(DI4) 6: Multi-reference 7: Simple PLC 8: PID reference 9: Serial comms. 0 0xF003/0x0003 F0-04 Auxiliary frequency reference setting channel selection Same with F0-03 0 0xF004/0x0004 F0-05 Base value of range of auxiliary frequency reference for main and auxiliary calculation 0: Relative to maximum frequency 1: Relative to main frequency reference 0 0xF005/0x0005 F0-06 Range of auxiliary frequency reference for main and auxiliary calculation 0% to 150% 100% 0xF006/0x0006 F0-07 Final Frequency reference setting selection 00 to 34 00 0xF007/0x0007 F0-08 Preset frequency 0.00 to max. frequency (F0-10) 50.00 Hz 0xF008/0x0008 F0-09 Running direction 0: Run in the default direction 1: Run in the direction reverse to the default direction 0 0xF009/0x0009 F0-10 Max. frequency 50.00 to 500.00 Hz 50.00 Hz 0xF00A/0x000A F0-11 Setting channel of frequency upper limit 0: Set by F0-12 1: AI 4: Pulse reference (DI4) 5: Communication reference 0 0xF00B/0x000B F0-12 Frequency reference upper limit F0-14 to F0-10 50.00 Hz 0xF00C/0x000C F0-14 Frequency reference lower limit 0.00 Hz to frequency upper limit (F0-12) 0.00 Hz 0xF00E/0x000E F0-15 Carrier frequency 0.8 to 11 kHz Model dependent 0xF00F/0x000F F0-16 Carrier frequency adjusted with temperature 0: Disabled 1: Enabled 1 0xF010/0x0010 F0-17 Accelerationtime1 0.0s to 6500.0s Model dependent 0xF011/0x0011 F0-18 Decelerationtime1 0.0s to 6500.0s Model dependent 0xF012/0x0012 F0-23 Retentive of digital setting frequency upon stop 0: Not retentive 1: Retentive 0 0xF017/0x0017
- 19. 5 Parameter Table - 18 - Para. No. Para. Name Setting Range Default Comms. Address F0-25 Acceleration/Deceleration time base frequency 0: Maximum frequency (F0-10) 1: Frequency reference 2: 100 Hz 0 0xF019/0x0019 F0-26 Base frequency for UP/DOWN modi cation during running 0: Running frequency 1: Frequency Reference 0 0xF01A/0x001A Group F1: Motor 1 Parameters F1-01 Rated motor power 0.1 to 3.7 kW Model dependent 0xF101/0x0101 F1-02 Rated motor voltage 1 to 600 V Model dependent 0xF102/0x0102 F1-03 Rated motor current 0.01 to 15 A Model dependent 0xF103/0x0103 F1-04 Rated motor frequency 0.01 Hz to max. frequency Model dependent 0xF104/0x0104 F1-05 Rated motor speed 1 to 65535 rpm Model dependent 0xF105/0x0105 F1-06 Stator resistance 0.001 to 65.535 Auto-tuning dependent 0xF106/0x0106 F1-37 Motor auto-tuning method selection 0: No auto-tuning 1: Static auto-tuning 1 0 0xF125/0x0125 GroupF3: V/F Control Parameters F3-00 V/F curve setting 0: Linear V/F 1: Multi-point V/F 0 0xF305/0x0305 F3-01 Torque boost 0.0%: automatic boost 0.1% to 30% Model dependent 0xF301/0x0301 F3-02 Cut-off frequency of torque boost 0.00 Hz to max. frequency 50.00Hz 0xF302/0x0302 F3-03 Multi-point V/F frequency 1 0.00 Hz to F3-05 0.00 Hz 0xF303/0x0303 F3-04 Multi-point V/F voltage 1 0.0% to 100.0% 0.0% 0xF304/0x0304 F3-05 Multi-point V/F frequency 2 F3-03 to F3-07 0.00Hz 0xF305/0x0305 F3-06 Multi-point V/F voltage 2 0.0% to 100.0% 0.0% 0xF306/0x0306 F3-07 Multi-point V/F frequency 3 F3-05 to rated motor frequency(F1-04) 0.00 Hz 0xF307/0x0307 F3-08 Multi-point V/F voltage 3 0.0% to 100.0% 0.0% 0xF308/0x0308 F3-09 Slip compensation gain 0.0% to 200.0% 0.0% 0xF309/0x0309 F3-10 V/F over-excitation gain 0 to 200 64 0xF30A/0x030A F3-18 Current limit level 50% to 200% 150% 0xF312/0x0312 F3-19 Current limit selection 0: Disabled 1: Enabled 1 0xF313/0x0313 F3-20 Current limit gain 0 to 100 20 0xF314/0x0314 F3-21 Compensation factor of speed multiplying current limit level 0 to 200% 50% 0xF315/0x0315 F3-22 Voltage limit 330 to 390 V 390 V 0xF316/0x0316 F3-23 Voltage limit selection 0: Disabled 1: Enabled 1 0xF318/0x0317 F3-24 Frequency gain for voltage limit 0 to 100 30 0xF318/0x0318 F3-25 Voltage gain for voltage limit 0 to 100 30 0xF319/0x0319 F3-26 Frequency rise threshold during voltage limit 0 to 50 Hz 5Hz 0xF31A/0x031A
- 20. 5 Parameter Table - 19 - Para. No. Para. Name Setting Range Default Comms. Address Group F4: Input Terminals F4-00 DI1 function selection 0: No function 1: Forward run (FWD) 2: Reverser run (REV) 3: Three-wire control 4: Forward jog (FJOG) 5: Reverse jog (RJOG) 6: Terminal UP 7: Terminal DOWN 8: Coast to stop 9: Fault reset (RESET) 10: RUN disabled 11: External fault normally-open input 12: Multi-reference terminal 1 13: Multi-reference terminal 2 14: Multi-reference terminal 3 15: Multi-reference terminal 4 16: Terminal 1 for acceleration/deceleration time selection 18: Frequency reference setting channel switchover 19: UP and DOWN setting clear (terminal, operation panel) 20: Command source switchover 21: Acceleration/Deceleration prohibited 22: PID disabled 23: PLC state reset 30: Pulse input as frequency reference (valid only for DI4) 32: Immediate DC injection braking 33: External fault normally-closed input 34: Frequency modi cation enabled 35: PID operation direction reverse 36: External stop 1 37: Command source switchover 2 38: PID integral disabled 39: Switchover between main frequency reference and preset frequency 40: Switchover between auxiliary frequency reference and preset frequency 43: PID parameter switchover 47: Emergency stop (ES) 48: External stop 2 49: Deceleration DC injection braking 50: Clear running time this time 51: Two-wire control/ Three-wire control 52: Reverse running prohibited 1 0xF400/0x0400 F4-01 DI2 function selection 4 0xF401/0x0401 F4-02 DI3 function selection 9 0xF402/0x0402 F4-03 DI4 function selection 12 0xF403/0x0403 F4-10 DI lter time 0.000s to 1.000s 0.010s 0xF40A/0x040A F4-11 Terminal I/O control mode 0: Two-wire control mode 1 1: Two-wire control mode 2 2: Three-wire control mode 1 3: Three-wire control mode 2 0 0xF40B/0x040B F4-12 Terminal UP/DOWN rate 0.001 to 65.535 Hz/s 1.000 Hz/s 0xF40C/0x040C
- 21. 5 Parameter Table - 20 - Para. No. Para. Name Setting Range Default Comms. Address F4-13 AI curve1 min. input 0.00 V to F4-15 0.00 V 0xF40D/0x040D F4-14 Corresponding percentage of AI curve 1 min. input -100.00% to 100.0% 0.0% 0xF40E/0x040E F4-15 AI curve 1 max. input F4-13 to 10.00 V 10.00 V 0xF40F/0x040F F4-16 Corresponding percentage of AIcurve1 max. input -100.00% to 100.0% 100.0% 0xF410/0x0410 F4-17 AI1 ltertime 0.00s to 10.00s 0.10s 0xF411/0x0411 F4-28 Pulse min. input 0.00 kHz to F4-30 0.00 kHz 0xF41C/0x041C F4-29 Corresponding percentage of pulse min. input -100.00% to 100.0% 0.0% 0xF41D/0x041D F4-30 Pulse max. input F4-28 to 20.00 kHz 50.00 kHz 0xF41E/0x041E F4-31 Corresponding percentage of pulse max. input -100.00% to 100.0% 100.0% 0xF41F/0x041F F4-32 Pulse lter time 0.00s to 10.00s 0.10s 0xF420/0x0420 F4-38 DI active mode selection1 00000 to 11111 00000 0xF426/0x0426 Group F5: Output Terminals F5-02 Relay (T/A-T/B-T/C) function selection 0: No output 1: AC drive running 2: Fault output 3: Frequency level detection 1 output 4: Frequency reached 5: Zero-speed running (no output at stop) 6: Motor overload pending 7: AC drive overload pending 11: PLC cycle completed 12: Accumulative running time reached 13: Frequency limited 15: Ready for RUN 17: Frequency upper limit reached 18: Frequency lower limit reached (no output at stop) 19: Undervoltage 20: Communication setting 24: Accumulative power-on time reached 26: Frequency 1 reached 28: Current 1 reached 30: Timing reached 31: AI input exceeding limit 32: Load lost 33: Reverse running 34: Zero current 36: Output current exceeding limit 37: Frequency lower limit reached (having output at stop) 38: Alarm output 40: Current running time reached 41: Fault output 2 0xF502/0x0502 F5-02 Relay (T/A-T/B-T/C) function selection 2 0xF502/0x0502
- 22. 5 Parameter Table - 21 - Para. No. Para. Name Setting Range Default Comms. Address F5-07 AO1functionselection 0: Running frequency 1: Frequency reference 2: Output current 3: Output torque 4: Output power 5: Output voltage 6: Pulse input 7: AI 12: Communication reference 13: Motor speed 14: Output current 15: Output voltage 0 0xF507/0x0507 F5-10 AO zero offset coef cient -100.0% to 100.0% 0.0% 0xF50A/0x050A F5-11 AO gain -10.00 to 10.00 1.00 0xF50B/0x050B F5-18 Relay1outputdelay 0.0s to 3600.0s 0.0s 0xF512/0x0512 F5-22 DO active mode selection 1 00000 to 11111 00000 0xF516/0x0516 Group F6: Start/Stop Control F6-00 Start mode 0:Direct start 1:Catching a spinning motor 0 0xF600/0x0600 F6-01 Mode of catching a spinning motor 0: From stop frequency 1: From zero speed 2: From max. frequency 4: Catching a spinning motor in eld-orientated control (requiring static auto-tuning, F1-37 = 1) 4 0xF601/0x0601 F6-03 Start frequency 0.00to10.00Hz 0.00 Hz 0xF603/0x0603 F6-04 Start frequency holding time 0.0s to 100.0s 0.0s 0xF604/0x0604 F6-07 Acceleration/Deceleration mode 0: Linear acceleration/deceleration 1: Static S-curve acceleration/deceleration 2: Dynamic S-curve acceleration/deceleration 0 0xF607/0x0607 F6-08 Time proportion of S-curve start segment 0.0% to (100.0% –F6-09) 30.0% 0xF608/0x0608 F6-09 Time proportion of S-curve end segment 0.0% to (100.0% –F6-08) 30.0% 0xF609/0x0609 F6-10 Stop mode 0:Decelerate to stop 1:Coast to stop 0 0xF60A/0x060A F6-11 DC injection braking 2 start frequency 0.00 Hz to maximum frequency 0.00 Hz 0xF60B/0x060B F6-12 DC injection braking 2 delay time 0.0 to 100.0s 0.0s 0xF60C/0x060C F6-13 DC injection braking 2 level 0% to 100% 50% 0xF60D/0x060D F6-14 DC injection braking 2 active time 0.0s to 100.0s 0.0s 0xF60E/0x060E F6-21 Demagnetization time 0.00s to 5.00s 0.5s 0xF615/0x0615 F6-22 Min. output frequency 0.00 Hz to F6-11 0.00 Hz 0xF616/0x0616
- 23. 5 Parameter Table - 22 - Para. No. Para. Name Setting Range Default Comms. Address Group F7: Keypad Operation and LED Display F7-00 LED default display check 0: Disabled 1: Enabled 0 0xF700/0x0700 F7-01 MF.K key function selection 0: MF.K key disabled 1: Switchover from remote control (terminal or communication) to keypad control 2: Switchover between forward rotation and reverse rotation 3: Forward jog 4: Reverse jog 5: Parameter display mode switchover 0 0xF701/0x0701 F7-06 Load speed display coef cient 0.0001 to 6.5000 1.0000 0xF706/0x0706 F7-07 Heatsink temperature of IGBT 0°C to 100°C - 0xF707/0x0707 F7-08 Product series 200 - 0xF708/0x0708 F7-09 Accumulative running time 0 to 65535h - 0xF709/0x0709 F7-10 Performance software version - - 0xF70A/0x070A F7-11 Function software version - - 0xF70B/0x070B F7-12 Number of decimal places for load speed display 10 to 23 21 0xF70C/0x070C F7-13 Accumulative power-on time 0 to 65535 h - 0xF70D/0x070D F7-14 Accumulative power consumption 0 to 65535 kWh - 0xF70E/0x070E Group F8: Auxiliary Functions F8-00 Jog frequency reference 0.00 Hz to max. frequency 2.00Hz 0xF800/0x0800 F8-01 Jog acceleration time 0.0s to 6500.0s 20.0s 0xF801/0x0801 F8-02 Jog deceleration time 0.0s to 6500.0s 20.0s 0xF802/0x0802 F8-03 Acceleration time 2 0.0s to 6500.0s Model dependent 0xF803/0x0803 F8-04 Deceleration time 2 0.0s to 6500.0s Model dependent 0xF804/0x0804 F8-12 Forward/Reverse run switchover dead-zone time 0.0s to 3000.0s 0.0s 0xF80C/0x080C F8-13 Reverse RUN selection 0: Disabled 1: Enabled 0 0xF80D/0x080D F8-14 Running mode when frequency reference lower than frequency lower limit 0: Run at frequency reference lower limit 1: Stop 2: Run at zero speed 0 0xF80E/0x080E F8-16 Accumulative power-on time threshold 0 to 65000 h 0h 0xF810/0x0810 F8-17 Accumulative running time threshold 0 to 65000 h 0h 0xF811/0x0811 F8-18 Startup protection selection 0: Disabled 1: Enabled 0 0xF812/0x0812 F8-19 Frequency detection value 1 0.00 Hz to max. frequency 50.00 Hz 0xF813/0x0813 F8-20 Frequency detection hysteresis 1 0.0% to 100.0% 5.0% 0xF814/0x0814 F8-21 Detection width of target frequency reached 0.0% to 100.0% 0.0% 0xF815/0x0815 F8-25 Switchover frequency of accel. time 1 and accel. time 2 0.00 Hz to max. frequency 0.00 Hz 0xF819/0x0819
- 24. 5 Parameter Table - 23 - Para. No. Para. Name Setting Range Default Comms. Address F8-26 Switchover frequency of decel. time 1 and decel. time 2 0.00 Hz to max. frequency 0.00 Hz 0xF81A/0x081A F8-27 Set highest priority to terminal JOG function 0: Disabled 1: Enabled 0 0xF81B/0x081B F8-30 Detection of frequency1 0.00 Hz to max. frequency 50.00 Hz 0xF81E/0x081E F8-31 Detection width of frequency1 0.0% to 100.0% (max. frequency) 0.0% 0xF81F/0x081F F8-34 Zero current detection level 0.0% to 300.0% (rated motor current) 5.0% 0xF822/0x0822 F8-35 Zero current detection delay 0.01s to 600.00s 0.10s 0xF823/0x0823 F8-36 Output overcurrent threshold 0.0% (no detection) 0.1% to 300.0% (rated motor current) 200.0% 0xF824/0x0824 F8-37 Output overcurrent detection delay 0.00s to 600.00s 0.00s 0xF825/0x0825 F8-38 Detection level of current1 0.0% to 300.0% (rated motor current) 100.0% 0xF826/0x0826 F8-39 Detection width of current1 0.0% to 300.0% (rated motor current) 0.0% 0xF827/0x0827 F8-42 Timing function 0: Disabled 1: Enabled 0 0xF82A/0x082A F8-43 Running time setting channel 0: Set by F8-44 1: AI 0 0xF82B/0x082B F8-44 Running time 0.0 to 6500.0 min 0.0 min 0xF82C/0x082C F8-45 AI input voltage lower limit 0.00 V to F8-46 3.10 V 0xF82D/0x082D F8-46 AI input voltage upper limit F8-45 to 10.00 V 6.80 V 0xF82E/0x082E F8-53 Running time threshold this time 0.0 to 6500.0 min 0.0 min 0xF835/0x0835 F8-54 Output power correction coef cient 0.0% to 200.0% 100.0% 0xF836/0x0836 F8-55 Emergency deceleration time 0.0s to 6500.0s 0.1s 0xF837/0x0837 F8-57 Speed synchronous control selection 0: Disabled 1: Enabled 0 0xF839/0x0839 It selects whether to enable the speed synchronous control function. This function means direction data communication between two or more AC drives via CANlink, implementing target frequency of one or more slaves to be synchronized to that of the master. When this function is enabled, CANlink communication addresses of the master and slaves are matched automatically. The baud rate in speed synchronous control is set in Fd-00. F8-58 Master and slave selection in synchronous control 0: Master 1: Slave 0 0xF83A/0x083A It is used to select whether the AC drive is master or slave. When the AC drive is slave, set F0-03 = 9 to set frequency reference via communication. Group F9: Fault and Protection F9-00 Motor overload protection 0: Disabled 1: Enabled 1 0xF900/0x0900 F9-01 Motor overload protection gain 0.20 to 10.00 0.20 0xF901/0x0901 F9-02 Motor overload pre-warning coef cient 50% to 100% 80% 0xF902/0x0902 F9-07 Detection of short-circuit to ground upon power-on 0: Disabled 1: Enabled 1 0xF907/0x0907 F9-08 Braking unit applied voltage 310 to 400 V 378 V 0xF908/0x0908 F9-09 Auto reset times 0 to 20 0 0xF909/0x0909
- 25. 5 Parameter Table - 24 - Para. No. Para. Name Setting Range Default Comms. Address F9-10 Selection of DO action during auto reset 0: Not act 1: Act 0 0xF90A/0x090A F9-11 Delay of auto reset 0.1s to 100.0s 1.0s 0xF90B/0x090B F9-13 Output phase loss protection 0: Disabled 1: Enabled 1 0xF90D/0x090D F9-14 1st fault type 0: No fault 1: Reserved 2: Overcurrent during acceleration 3: Overcurrent during deceleration 4: Overcurrent at constant speed 5: Overvoltage during acceleration 6: Overvoltage during deceleration 7: Overvoltage at constant speed 8: Pre-charge resistor overloaded 9: Undervoltage 10: AC drive overloaded 11: Motor overloaded 12: Input phase loss 13: Output phase loss 14: IGBT overheat 15: External fault 16: Communication abnormal 17: Reserved 18: Current detection abnormal 19: Motor auto-tuning abnormal 20: Reserved 21: Parameter read-write abnormal 22: Reserved 23: Motor short circuited to ground 24: Reserved 25: Reserved 26: Accumulative running time reached 29: Accumulative power-on time reached 30: Load lost 31: PID feedback lost during running 40: Overcurrent fast prevention timeout 41: Reserved 42: Reserved 43: Reserved 45: Reserved 51: Reserved 55: Slave fault in speed synchronous - 0xF90E/0x090E F9-15 2nd fault type - 0xF90F/0x090F F9-16 3rd (latest) fault type - 0xF910/0x0910 F9-17 Frequency upon 3rd fault - - 0xF911/0x0911 F9-18 Current upon 3rd fault - - 0xF912/0x0912 F9-19 Bus voltage upon 3rd fault - - 0xF913/0x0913 F9-20 DI state upon 3rd fault - - 0xF914/0x0914 F9-21 DO state upon 3rd fault - - 0xF915/0x0915 F9-22 AC drive state upon 3rd fault - - 0xF916/0x0916 F9-23 Power-on time upon 3rdfault - - 0xF917/0x0917 F9-24 Running time upon 3rd fault - - 0xF918/0x0918
- 26. 5 Parameter Table - 25 - Para. No. Para. Name Setting Range Default Comms. Address F9-27 Frequency upon 2nd fault - - 0xF91B/0x081B F9-28 Current upon 2nd fault - - 0xF91C/0x091C F9-29 Bus voltage upon 2nd fault - - 0xF91D/0x091D F9-30 DI state upon 2nd fault - - 0xF91E/0x091E F9-31 DO state upon 2nd fault - - 0xF91F/0x091F F9-32 AC drive state upon 2nd fault - - 0xF920/0x0920 F9-33 Power-on time upon 2nd fault - - 0xF921/0x0921 F9-34 Running time upon 2nd fault - - 0xF922/0x0922 F9-37 Frequency upon 1st fault - - 0xF925/0x0925 F9-38 Current upon 1st fault - - 0xF926/0x0926 F9-39 Bus voltage upon1st fault - - 0xF927/0x0927 F9-40 DI state upon 1st fault - - 0xF928/0x0928 F9-41 DO state upon 1st fault - - 0xF929/0x0929 F9-42 AC drive state upon 1st fault - - 0xF92A/0x092A F9-43 Power-on time upon 1st fault - - 0xF92B/0x092B F9-44 Running time upon 1st fault - - 0xF92C/0x092C F9-47 Fault protection action selection 1 00000 to 22222 00000 0xF92F/0x092F F9-48 Fault protection action selection 2 00000 to 11111 00000 0xF930/0x0930 F9-49 Fault protection action selection 3 00000 to 22222 00000 0xF931/0x0931 F9-54 Frequency selection for continuing to run upon fault 0: Current running frequency 1: Frequency reference 2: Frequency upper limit 3: Frequency lower limit 4: Backup frequency upon abnormality 0 0xF936/0x0936 F9-55 Backup frequency upon fault 0.0% to 100.0% (max. frequency) 100.0% 0xF937/0x0937 F9-59 Power dip ride-through function selection 0: Disabled 1: Bus voltage constant control 2: Decelerate to stop 0 0xF93B/0x093B F9-60 Threshold of power dip ride- through function disabled 80% to F9-60 85% 0xF93C/0x093C F9-61 Judging time of bus voltage recovering from power dip 0.0s to 100.0s 0.5s 0xF93D/0x093D F9-62 Threshold of power dip ride- through function enabled 60% to 100% 80% 0xF93E/0x093E F9-63 Load lost protection 0: Disabled 1: Enabled 0 0xF93F/0x093F F9-64 Load lost detection level 0.0% to 100.0% 10.0% 0xF940/0x0940 F9-65 Load lost detection time 0.0s to 60.0s 1.0s 0xF941/0x0941 F9-71 Power dip ride-through gain Kp 0 to 100 40 0xF947/0x0947 F9-72 Power dip ride-through integral coef cient 0 to 100 30 0xF948/0x0948 F9-73 Deceleration time of power dip ride-through 0.0s to 300.0s 20.0s 0xF949/0x0949 F9-74 Restart mode after fault reset 0: Normal 1: Catching a spinning motor 0 0xF94A/0x094A
- 27. 5 Parameter Table - 26 - Para. No. Para. Name Setting Range Default Comms. Address Group FA: PID Function FA-00 PID reference setting channel 0: Set by FA-01 1: AI 4: Pulse reference (DI4) 5: Via communication 6: Multi-reference 0 0xFA00/0x0A00 FA-01 PID digital setting 0.0% to 100.0% 50.0% 0xFA01/0x0A01 FA-02 PID feedback setting channel 0: AI 4: PULSE reference (DI4) 5: Via communication 0 0xFA02/0x0A02 FA-03 PID operation direction 0: Forward 1: Reverse 0 0xFA03/0x0A03 FA-04 PID reference and feedback range 0 to 65535 1000 0xFA04/0x0A04 FA-05 ProportionalgainKp1 0.0 to 1000.0 20.0 0xFA05/0x0A05 FA-06 Integral timeTi1 0.01s to 10.00s 2.00s 0xFA06/0x0A06 FA-07 DifferentialtimeTd1 0.000s to 10.000s 0.000s 0xFA07/0x0A07 FA-08 PID output limit in reverse direction 0.00 Hz to max. frequency 0.00Hz 0xFA08/0x0A08 FA-09 PID error limit 0.0% to 100.0% 0.0% 0xFA09/0x0A09 FA-10 PID differential limit 0.00% to 100.00% 0.10% 0xFA0A/0x0A0A FA-11 PID reference change time 0.00s to 650.00s 0.00s 0xFA0B/0x0A0B FA-12 PID feedback lter time 0.00s to 60.00s 0.00s 0xFA0C/0x0A0C FA-13 PID output lter time 0.00s to 60.00s 0.00s 0xFA0D/0x0A0D FA-15 Proportional gain Kp2 0.0 to 1000.0 20.0 0xFA0F/0x0A0F FA-16 Integral time Ti2 0.01s to 10.00s 2.00s 0xFA10/0x0A10 FA-17 Differential time Td2 0.000s to 10.000s 0.000s 0xFA11/0x0A11 FA-18 PID parameter switchover condition 0: Not switched over 1: Switched over via DI 2: Switched over automatically according to error 3: Switched over automatically according to running frequency 0 0xFA12/0x0A12 FA-19 PID error 1 for auto switchover 0.0% to FA-20 20.0% 0xFA13/0x0A13 FA-20 PID error 2 for auto switchover FA-19 to 100.0% 80.0% 0xFA14/0x0A14 FA-21 PID initial value 0.0% to 100.0% 0.0% 0xFA15/0x0A15 FA-22 PID initial value active time 0.00s to 650.00s 0.00s 0xFA16/0x0A16 FA-23 Max. value of two outputs error in forward direction 0.00% to 100.00% 1.00% 0xFA17/0x0A17 FA-24 Max. value of two outputs error in reverse direction 0.00% to 100.00% 1.00% 0xFA18/0x0A18 FA-25 PID integral property 00 to 11 00 0xFA19/0x0A19 FA-26 Detection level of PID feedback loss 0%: No detection 0.1% to 100.0% 0.0% 0xFA1A/0x0A1A FA-27 Detection time of PID feedback loss 0.0s to 20.0s 0.0s 0xFA1B/0x0A1B FA-28 Selection of PID operation at stop 0: Disabled 1: Enabled 0 0xFA1C/0x0A1C
- 28. 5 Parameter Table - 27 - Para. No. Para. Name Setting Range Default Comms. Address Group FC: Multi-Reference and Simple PLC Function FC-00 Reference0 -100.0% to 100.0% 0.0% 0xFC00/0x0C00 FC-01 Reference1 -100.0% to 100.0% 0.0% 0xFC01/0x0C01 FC-02 Reference2 -100.0% to 100.0% 0.0% 0xFC02/0x0C02 FC-03 Reference3 -100.0% to 100.0% 0.0% 0xFC03/0x0C03 FC-04 Reference4 -100.0% to 100.0% 0.0% 0xFC04/0x0C04 FC-05 Reference5 -100.0% to 100.0% 0.0% 0xFC05/0x0C05 FC-06 Reference6 -100.0% to 100.0% 0.0% 0xFC06/0x0C06 FC-07 Reference7 -100.0% to 100.0% 0.0% 0xFC07/0x0C07 FC-16 Simple PLC running mode 0: Stop after running one cycle 1: Keep nal values after running one cycle 2: Repeat after running one cycle 0 0xFC10/0x0C10 FC-17 Simple PLC retentive selection 0: Not retentive 1: Retentive Retentive selection at stop 0: Not retentive 1: Retentive Retentive selection at power down 00 0xFC11/0x0C11 FC-18 Running time of simple PLC reference 0 0.0s (h) to 6500.0s (h) 0.0s (h) 0xFC12/0x0C12 FC-19 Acceleration/deceleration time of simple PLC reference 0 0 to 1 0 0xFC13/0x0C13 FC-20 Running time of simple PLC reference1 0.0s (h) to 6500.0s (h) 0.0s (h) 0xFC14/0x0C14 FC-21 Acceleration/deceleration time of simple PLC reference 1 0 to 1 0 0xFC15/0x0C15 FC-22 Running time of simple PLC reference 2 0.0s (h) to 6500.0s (h) 0.0s (h) 0xFC16/0x0C16 FC-23 Acceleration/deceleration time of simple PLC reference 2 0 to 1 0 0xFC17/0x0C17 FC-24 Running time of simple PLC reference 3 0.0s (h) to 6500.0s (h) 0.0s (h) 0xFC18/0x0C18 FC-25 Acceleration/deceleration time of simple PLC reference 3 0 to 1 0 0xFC19/0x0C19 FC-26 Running time of simple PLC reference 4 0.0s (h) to 6500.0s (h) 0.0s (h) 0xFC1A/0x0C1A FC-27 Acceleration/deceleration time of simple PLC reference 4 0 to 1 0 0xFC1B/0x0C1B FC-28 Running time of simple PLC reference 5 0.0s (h) to 6500.0s (h) 0.0s (h) 0xFC1C/0x0C1C FC-29 Acceleration/deceleration time of simple PLC reference 5 0 to1 0 0xFC1D/0x0C1D FC-30 Running time of simple PLC reference 6 0.0s (h) to 6500.0s (h) 0.0s (h) 0xFC1E/0x0C1E FC-31 Acceleration/deceleration time of simple PLC reference 6 0 to 1 0 0xFC1F/0x0C1F FC-32 Running time of simple PLC reference 7 0.0s (h) to 6500.0s (h) 0.0s (h) 0xFC20/0x0C20
- 29. 5 Parameter Table - 28 - Para. No. Para. Name Setting Range Default Comms. Address FC-33 Acceleration/deceleration time of simple PLC reference 7 0 to 1 0 0xFC21/0x0C21 FC-50 Time unit of simple PLC running 0: s 1: h 0 0xFC32/0x0C32 FC-51 Reference 0 source 0: Set by FC-00 1: AI 4: PULSE reference 5: PID 6: Set by F0-08 and modi ed via UP/DOWN 0 0xFC33/0x0C33 Group Fd: Communication Fd-00 Baud rate 0000 to 5009 5005 0xFD00/0x0D00 Fd-01 Data format symbol 0: No check (8-N-2) 1: Even parity check (8-E-1) 2: Odd parity check (8-O-1) 3: No check (8-N-1) (Valid for Modbus) 0 0xFD01/0x0D01 Fd-02 Local address 0: Broadcast address 1 to 247 1 0xFD02/0x0D02 Fd-03 Response delay 0 to 20ms 2 0xFD03/0x0D03 Fd-04 Communication timeout 0.0: invalid 0.1s to 60.0s 0.0s 0xFD04/0x0D04 Fd-05 Modbus protocol selection and PROFIBUS-DP data frame 0: Non-standard Modbus protocol 1: Standard Modbus protocol 1 0xFD05/0x0D05 Fd-07 PC software selection 0: Disabled 1: Enabled 1 0xFD07/0x0D07 Group FF: Manufacturer Parameters, Access Denied Group FP: Function Parameter Management FP-00 User password 0 to 65535 0 0x1F00 FP-01 Industry macro 0: No operation 01: Restore factory parameters except motor parameters 02: Clear records 03: Reserved 04: Back up current user parameters 05 to 19: Reserved 20: Mechanical movement industry (conveying belt) 21: Inertia industry (fan) 22 to 500: Reserved 501: Restore user backup parameters 0 0x1F01 FP-02 Parameter display property Group A display selection 0: Not displayed 1: Displayed Group U display selection 0: Not displayed 1: Displayed 11 0x1F02 FP-04 Parameter modi cation property 0: Modi able 1: Unmodi able 0 0x1F04
- 30. 5 Parameter Table - 29 - Para. No. Para. Name Setting Range Default Comms. Address Group A1: Virtual DI/DO A1-07 Function selection for AI used as DI Same as F4-00 0 0xA107/0x4107 A1-10 Active state selection for AI used as DI AI 0: High level valid 1: Low level valid 0 0xA10A/0x410A GroupA5: Control Optimization A5-00 DPWM switchover frequency upper limit 5.00 Hz to max. frequency 8.00Hz 0xA500/0x4500 A5-03 Random PWM depth 0 to 10 0 0xA503/0x4503 A5-04 Overcurrent fast prevention 0: Disabled 1: Enabled 1 0xA504/0x4504 A5-05 Max. output voltage coef cient 100% to 110% 103% 0xA505/0x4505 A5-06 Undervoltage threshold 140 to 280 V 200V 0xA600/0x4600 Group AC: AI/AO Correction AC-00 AI measured voltage 1 -10.00 to 10.000 V Factory- corrected 0xAC00/0x4C00 AC-01 AI displayed voltage 1 -10.00 to 10.000 V Factory- corrected 0xAC01/0x4C01 AC-02 AI measured voltage 2 -10.00 to 10.000 V Factory- corrected 0xAC02/0x4C02 AC-03 AI displayed voltage 2 -10.00 to 10.000 V Factory- corrected 0xAC03/0x4C03 AC-12 AO target voltage 1 -10.00 to 10.000 V Factory- corrected 0xAC0C/0x4C0C AC-13 AO measured voltage 1 -10.00 to 10.000 V Factory- corrected 0xAC0D/0x4C0D AC-14 AO target voltage 2 -10.00 to 10.000 V Factory- corrected 0xAC0E/0x4C0E AC-15 AO measured voltage 2 -10.00 to 10.000 V Factory- corrected 0xAC0F/0x4C0F Note: Parameters in groups A1 and A5 are not displayed by default. They can be displayed by setting FP-02.
- 31. 5 Parameter Table - 30 - 5.3 Monitoring Function Code Para. No. Para. Name Comms. Address Group U0: Monitoring Parameters U0-00 Running frequency 0x7000 U0-01 Frequency reference 0x7001 U0-02 Bus voltage 0x7002 U0-03 Output voltage 0x7003 U0-04 Output current 0x7004 U0-05 Output power 0x7005 U0-07 DI state 0x7007 U0-08 DO state 0x7008 U0-09 AI voltage 0x7009 U0-10 Communication protocol 0x700A U0-14 Load speed display 0x700E U0-15 PID reference 0x700F U0-16 PID feedback 0x7010 U0-17 PLC stage 0x7011 U0-18 Pulse reference 0x7012 U0-19 Feedback speed 0x7013 U0-20 Remaining running time 0x7014 U0-21 AI voltage before correction 0x7015 U0-24 Motor speed 0x7018 U0-25 Accumulative power-on time 0x7019 U0-26 Accumulative running time 0x701A U0-27 Pulse reference 0x701B U0-28 Communication reference 0x701C U0-30 Main frequency reference 0x701E U0-31 Auxiliary frequency reference 0x701F U0-32 Viewing any register address value 0x7020 U0-37 Power factor angle 0x7025 U0-41 DI state display 0x7029 U0-42 DO state display 0x702A U0-45 Fault information 0x702D U0-59 Frequency Reference 0x703B U0-60 Running frequency 0x703C U0-61 AC drive state 0x703D U0-62 Current fault code 0x703E U0-64 Number of slaves 0x7040
- 32. 6 Troubleshooting - 31 - 6. Troubleshooting 6.1 AC Drive Performance Fine Tuning Time Start Acceleration Nominal speed Deceleration Stop Frequency Demand Stage Symptom Diagnostics Remedies Start Rollback Start frequency is too low Increase F6-03, ranging 0 to10 Hz Torque output is insuf cient Make sure F3-00 = 0, F3-01 = 0 Starting jerk Start frequency is too high Decrease F6-03, ranging 0 to 10 Hz Acceleration Jerk when acceleration starts Too fast acceleration at this section Increase F6-08, ranging 0 to (100-(F6-09))% Or increase F0-17, ranging 0 to 6500s Jerk when acceleration end Too fast acceleration at this section Increase F6-09, ranging 0 to (100-(F6-08))% Or increase F0-17, ranging 0 to 6500s Vibration Overcurrent stall prevention occurs It reaches current limit Nominal speed Vibration Too big current loop PI gains Double check the motor parameters and then perform motor auto-tuning once more Deceleration Vibration Overcurrent stall prevention occurs it reaches current limit Stop Jerk Too strong DC injection at stop Decrease F6-13, ranging 0 to 100% Slip Too short DC injection active time at stop Increase F6-14,ranging 0 to 100s Too weak DC injection at stop Increase F6-13, ranging 0 to 100% Braking device applies too late check the timing of braking device
- 33. 6 Troubleshooting - 32 - 6.2 Fault Codes and Troubleshooting Display Fault Name Possible Causes Solutions Overcurrent during acceleration Ground fault or short circuit exists in the output circuit. Check whether short-circuit occurs on the motor, the motor cable or contactor. Acceleration time is too short. Increase acceleration time. Customized torque boost or V/F curve is not appropriate. Adjust the customized torque boost or V/F curve. The voltage is too low. Adjust the voltage to normal range. The spinning motor is started. Enable the catching a spinning motor function or start the motor after it stops. A load is added suddenly during acceleration. Cancel the suddenly added load. The AC drive power class is small. Replace a drive of larger power class. The braking resistor resistance is small. The braking resistor is short circuited. Replace a new braking resistor. Overcurrent during deceleration Ground fault or short circuit exists in the output circuit. Check whether short-circuit occurs on motor, motor cable or contactor. Acceleration time is too short. Increase acceleration time. The voltage is too low. Adjust the voltage to normal range. A load is added suddenly during deceleration. Cancel the suddenly added load. Braking unit and braking resistor are not installed. Install braking unit and braking resistor. The braking resistor resistance is small. The braking resistor is short circuited. Replace a new braking resistor. Overcurrent at constant speed Ground fault or short circuit exists in the output circuit. Check whether short-circuit occurs on the motor, motor cable or contactor. The voltage is too low. Adjust the voltage to normal range. A load is added suddenly during running. Cancel the suddenly added load. The AC drive power class is small. Replace a drive of larger power class. The braking resistor resistance is small. The braking resistor is short circuited. Replace a new braking resistor. Overvoltage during acceleration Input voltage is too high. Adjust input voltage to normal range. An external force drives motor during acceleration. Cancel the external force. Braking unit and braking resistor are not installed. Install braking unit and braking resistor. Acceleration time is too short. Increase acceleration time. Overvoltage during deceleration Input voltage is too high. Adjust input voltage to normal range. An external force drives motor during deceleration. Cancel the external force or install braking resistor. Deceleration time is too short. Increase deceleration time. Braking unit and braking resistor are not installed. Install braking unit and braking resistor. Overvoltage at constant speed Input voltage is too high. Adjust input voltage to normal range. An external force drives motor during running. Cancel the external force or install a braking resistor Control power fault Input voltage is not within the permissible range. Adjust the input voltage in the permissible range.
- 34. 6 Troubleshooting - 33 - Display Fault Name Possible Causes Solutions Undervoltage Instantaneous power failure occurs Reset the fault. The AC drive's input voltage is not within the permissible range. Adjust the voltage to normal range. The bus voltage is abnormal. Replace the AC drive. The recti er bridge, the pre-charge resistor, the drive board or the control board are abnormal. Replace the AC drive. Drive overload Load is too heavy or locked-rotor occurs on motor. Reduce load or check motor and mechanical conditions. The AC drive power class is small. Replace a drive of larger power class. Motor overload F9-01 (Motor overload protection gain) is set improperly. Set F9-01 correctly. Load is too heavy or locked-rotor occurs on motor. Reduce load or check motor and mechanical conditions. The AC drive power class is small. Replace a drive of larger power class. Output phase loss Motor winding is damaged. Check resistance between motor wires. Replace motor is winding is damaged. The cable connecting the AC drive and the motor is abnormal. Check for wiring errors and ensure the output cable is connected properly. The AC drive's three-phase outputs are unbalanced when the motor is running. Check whether the motor three-phase winding is normal. The drive board or the IGBT is abnormal. Replace the AC drive. IGBT overheat The ambient temperature is too high. Lower the ambient temperature. The ventilation is clogged. Clean the ventilation. The fan is damaged. Replace the cooling fan. Thermally sensitive resistor of IGBT is damaged. Replace the AC drive. The inverter IGBT is damaged. Replace the AC drive. External equipment fault External fault signal is input via DI. Con rm that the mechanical condition allows restart (F8-18) and reset the operation. External fault signal is input via virtual I/O. Con rm that the virtual I/O parameters in group A1 are set correctly and reset the operation. Communication fault Host computer is in abnormal state. Check the cable of host computer. Communication cable is abnormal. Check the communication cables. Communication parameters in group Fd are set improperly. Set communication parameters in group Fd properly. After all the preceding checkings are done but the fault still exists, restore the default settings. Current detection fault The drive board is abnormal. Replace the AC drive. EEPROM read- write fault EEPROM chip is damaged Replace the AC drive.
- 35. 6 Troubleshooting - 34 - Display Fault Name Possible Causes Solutions Short circuit to ground Motor is short circuited to the ground. Replace cable or motor. Top tube of the inverter is damaged. Ask professional to check. Replace the AC drive. Accumulative running time reached Accumulative running time reaches the setting value. Clear the record through parameter initialization. User-de ned fault 1 User-de ned fault 1 is input via DI. Reset the operation. User-de ned fault 1 is input via virtual I/O. User-de ned fault 2 User-de ned fault 2 is input via DI. Reset the operation. User-de ned fault 2 is input via virtual I/O. Accumulative power-on time reached Accumulative power-on time reaches the setting value. Clear the record through parameter initialization. Off load fault The output current of AC drive is smaller than F9-64 (load loss detection level). Check whether load is disconnected or the setting of F9-64 and F9-65 (load lost detection time) satis es actual running condition. PID feedback lost during running PID feedback is smaller than the setting value of FA-26 (detection level of PID feedback loss). Check PID feedback or set FA-26 properly. Quick current limit Load is too heavy or locked-rotor occurs on motor. Reduce load or check motor and mechanical conditions. The AC drive power class is small. Replace a drive of larger power class. Slave faulty in speed synchronous When speed synchronous is enabled, the master receives CAN communication data but does not detect the salve. Then Err55 is reported. 1. Check the slave CAN communication cable connection. 2. Check whether CAN communication of the slave is normal.
- 36. 6 Troubleshooting 6.3 Symptoms and Diagnostics Fault Name Possible Causes Solutions There is no display at power-on. The mains voltage is not input or too low. Check the power supply. The AC Drive is damaged. Replace the AC drive. is dis- played at power-on. Wire between drive board and control board is in poor contact. Re-connect the 4-pin wire and 28-pin wire. Control board is damaged Replace the AC drive. The motor or motor cable is short circuited to ground. Check whether short-circuit occurs on motor, motor cable or contactor. The mains voltage is too low. Check the power supply. The mains voltage is too low. ( I G B T overheat) is detected frequently. The setting of carrier frequency is too high. Reduce carrier frequency (F0-15). The cooling fan is damaged, or ventilation is clogged. Replace the fan or clean the ventilation. Components inside the AC drive are damaged (thermistor or others). Replace the AC drive. The motor does not rotate after the AC drive runs. It is motor or motor cable problem. Check that wiring between AC drive and motor is normal. Related AC drive and motor parameters are set improperly. Restore the factory parameters and re-set the motor parameters properly. The drive board is faulty. Replace the AC drive. The DI terminals are disabled. Related parameters are set incorrectly. Check and set parameters in group F4 again. External signals are incorrect. Re-connect external signal cables. The control board is damaged. Replace the AC drive. The AC drive detects overcurrent and overvoltage frequently. Motor parameters are set improperly. Set motor parameters or perform motor auto- tuning again. Acceleration/deceleration time is improper. Set proper acceleration/deceleration time. Contact the agent or Fuji-Engineering. Revision History Revision Date Description V0.0 January 24, 2016 A01 March 22, 2016 FUJI ENGINEERING (THAILAND) CO., LTD 98/6 Sethsiri Rd, T. Tanoon nakornchaisri, A.Dusit, Bangkok, 10300 Tel: 662 102-0599 Fax: 662 102-0598 Website: www.Fuji-Engineering.com