How to Remove Document Management Hurdles with X-Docs?
A3 Production log
1. Name Joshua Gillespie
Date Comments Screenshots
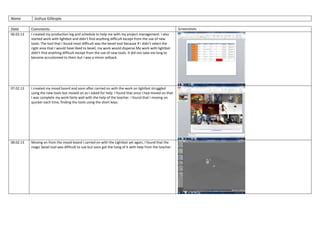
06.02.13 I created my production log and schedule to help me with my project management. I also
started work with lightbot and didn’t find anything difficult except from the use of new
tools. The tool that I found most difficult was the bevel tool because If I didn’t select the
right area that I would have liked to bevel, my work would disperse.My work with lightbot
didn’t find anything difficult except from the use of new tools. It did not take me long to
become accustomed to them but I was a minor setback.
07.02.13 I created my mood board and soon after carried on with the work on lightbot struggled
using the new tools but moved on as I asked for help. I found that once I had moved on that
I was complete my work fairly well with the help of the teacher. I found that I moving on
quicker each time, finding the tools using the short keys.
08.02.13 Moving on from the mood board I carried on with the Lightbot yet again, I found that the
magic bevel tool was difficult to use but soon got the hang of it with help from the teacher.
2. 15.02.13 Once that I had used the magic bevel I did find it helpful in creating the lamp, It made me do
it quicker and better than bevel.
16.02.13 From Lightbot I used some of the same tools from the previous days and felt that I had got
the hang of what I was doing, Due to the previous work I was finding the short keys much
quicker and got most of my work done.
17.02.13 As I was watching more on the Lightbot videos I did learn some new tools, such as the magic
bevel. I found this tool very useful in creating pipes.
3. 22.02.13 I have finished my Lightbot today with the help of the videos; I found that the most useful
tool was he bevel as it would help me create a range of objects. I have now started to draw
what my character will look like from the help from my mood board.
23.02.13 After I finished creating pipes and creating the body, I moved on to the upper side of my
robot, creating a shoulder and arms, using the tools and techniques that I have learnt
through the videos. I have decided to give the robot only one arm as It gives the it more
personality.
24.02.13
4. 01.03.13 It took me a reasonable amount of time to get the hang of making my own sidekick, I felt
that I was going back on myself because I had control of what I was making.
02.03.13 Because I already know all the tools that I have used for the previous work It was not
difficult to start making my own robot, I found That overall I was using the bevel tool the
most and I found it to be very effective in creating my work. I started from bottom to top,
and with a better pace.
03.03.13 As I was creating my robot sidekick, I was making sure that I added a surface to each art.
This was to make sure that It would be easier to skin and texture in the next process.
5. 10.03.13 It didn’t take me long to find the right skins to make my sidekick look realistic, I found that
some of the surfaces that I wanted were not metals but were rocks.
11.03.13 After I had done the surfaces to my robot, I had to take screenshots in order to have the
evidence. This only took half an hour including adding them onto a PowerPoint.
12.03.13 Once I did this I had to produce my project charter which I should have done first, but had
forgotten. It did not take me long as I had already done the work.
6. 19.03.13 And then once that I had done the project charter I started on evaluation my work, Which
proved to be difficult.
20.03.13 I carried on with evaluating my work but this did take me a while because I could not put
into words what I had done.
21.03.13 I am starting to upload my work to blogger.
7. 22.03.13 Uploading work to blogger. Didn’t take too much time but because there was so much I had
to do some more next lesson. Finished uploading tasks on blogger.